Top

Author Archive | Rasa Pelham

Easy salmon and nettle quiche + dairy free version too!

Easy salmon and nettle quiche recipe + dairy free version So finally I made something using stinging nettles. I’ve wanted to do this for so long because in spring time we have plenty of them in the garden. I heard that you can use this “weed” in place of spinach, so I was eager to try it out. I instinctively thought quiche is where it could work best. I usually match salmon with broccoli, but nettle seems to work really well too.

Generally I like foraging and sometimes taste different plants if I am not sure if they are what I think they are(I don’t recommend doing it though as you might consume poisonous plants by accident). However I rarely bring it home and make something out of it. While in Devon I found some wild garlic leaves, which was really exciting, and I wish I had brought some of that  home.

One more thing I would like to add is that I recently started trying out recipes dairy free. We currently testing whether Tomas eczema is related to a possible milk allergy and while I hope he isn’t allergic I am secretly enjoying the challenge. So I also made the quiche in a dairy free version too! It turned out very close to regular quiche, yey! If you would like to try these quiches then scroll down for the recipe.Easy salmon and nettle quiche recipe + dairy free version EASY SALMON AND NETTLE QUICHE

Its easy because you don’t need to blind bake the pastry ;-)
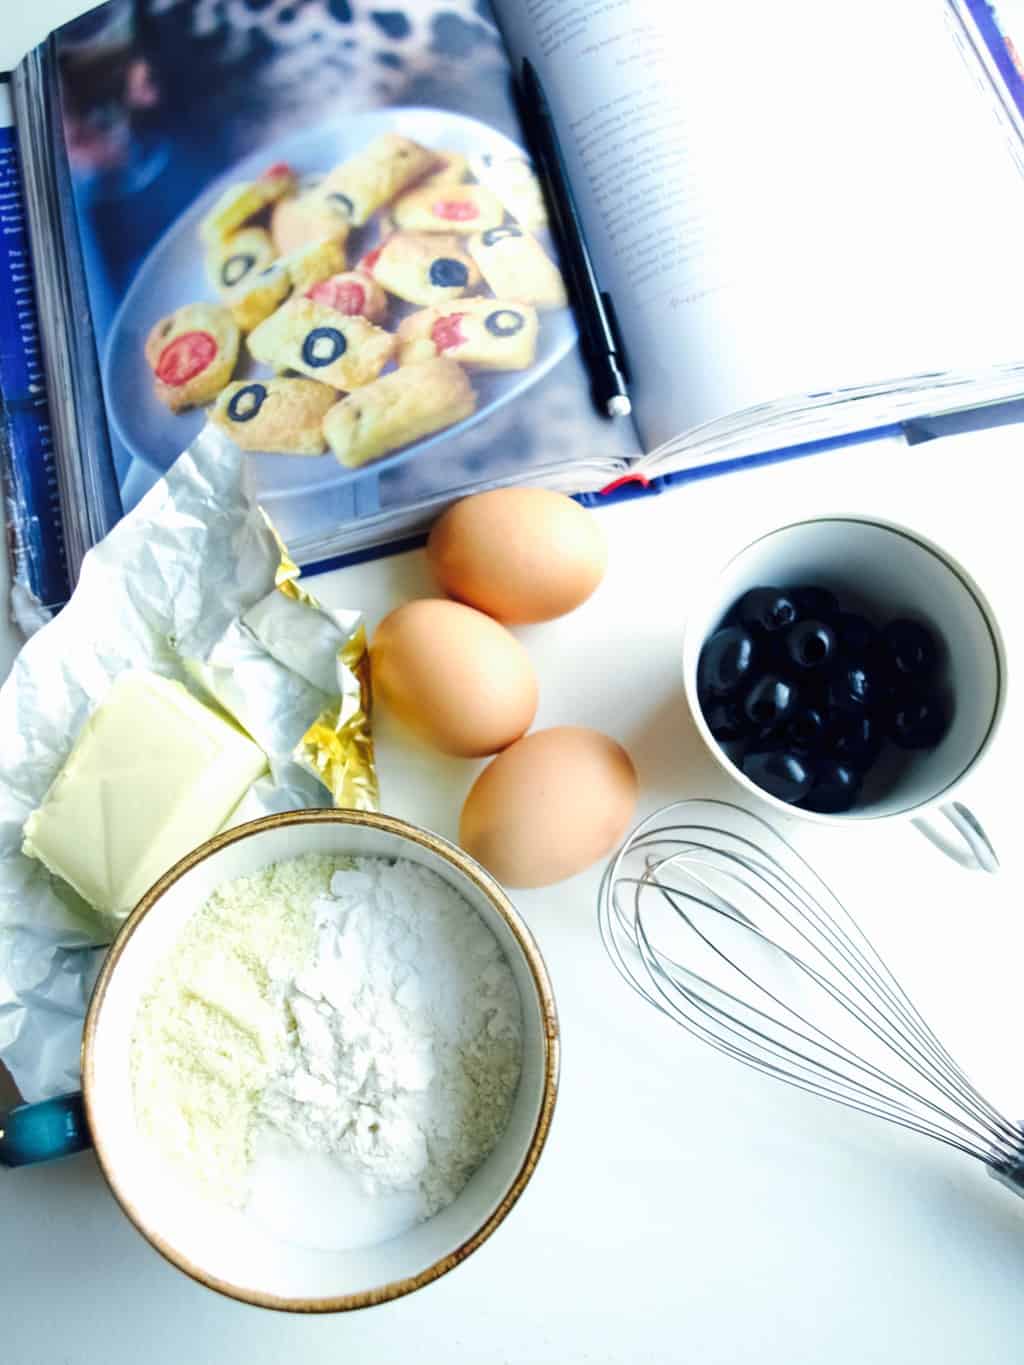
(for the pastry)

  • 90g softened butter (replace it with sunflower spread for dairy free version)
  • 1tsp sugar
  • a pinch of salt
  • 180g plain flour
  • 2 egg yolks
  • ice-cold water (you will find you don’t need this for dairy free version)

(for the filling)

  • 180g hot-smoked salmon fillets, flaked
  • a handful of stinging nettle leaves (pick young leaves from the plant that’s not flowering yet)
  • 4 eggs plus 2 egg yolk (save the whites to brush the pastry)
  • 300g creme fraiche (I used oatly creme fraiche and single cream mix for dairy free version)
  • 1 tsp salt
  • pepper

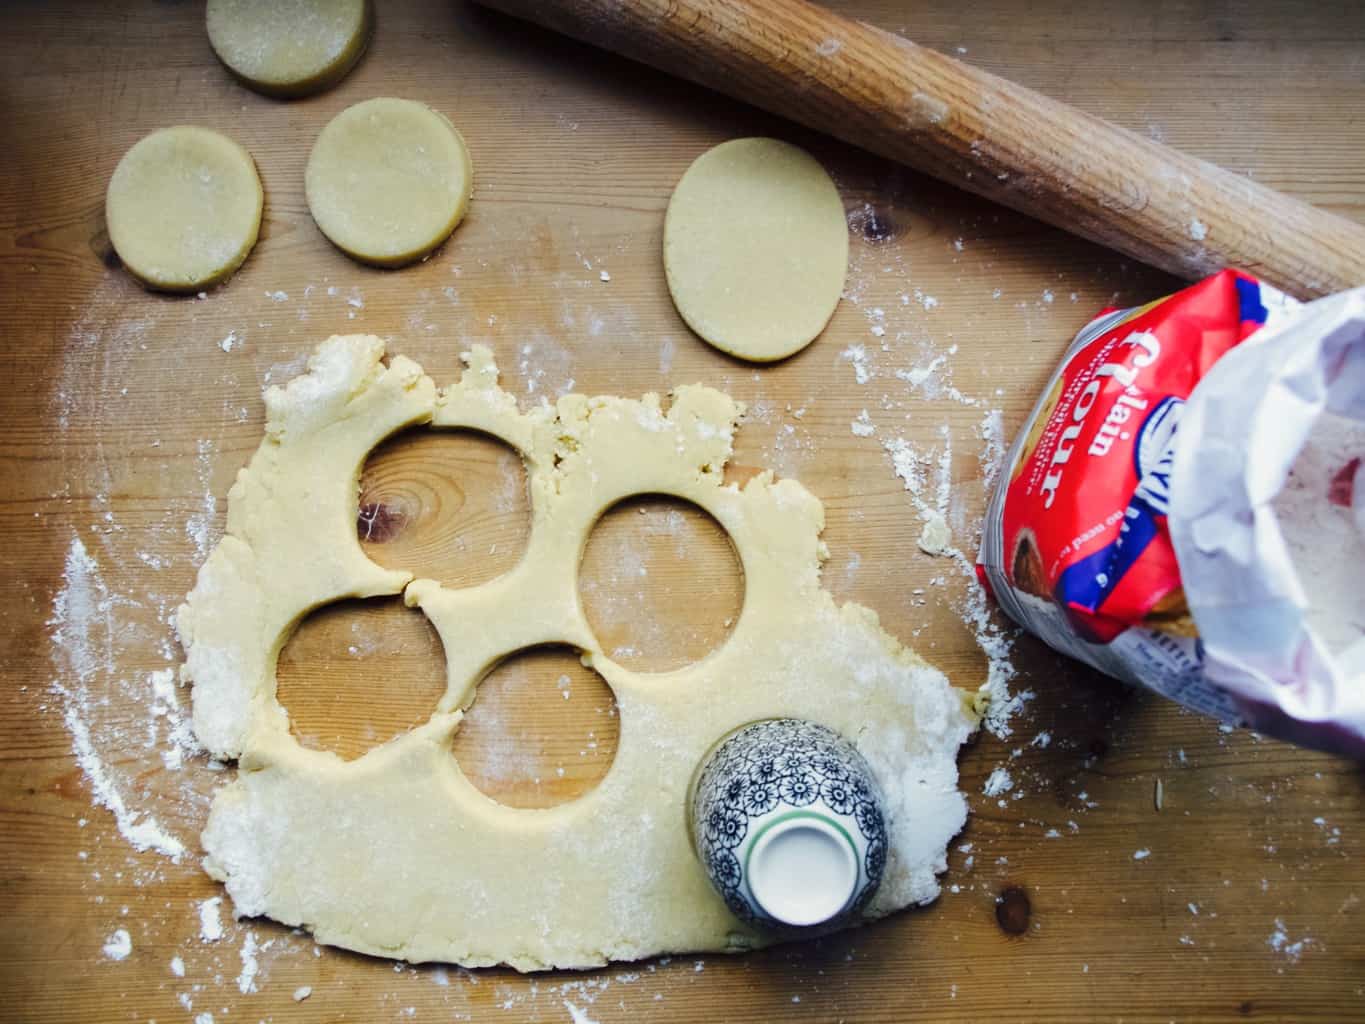
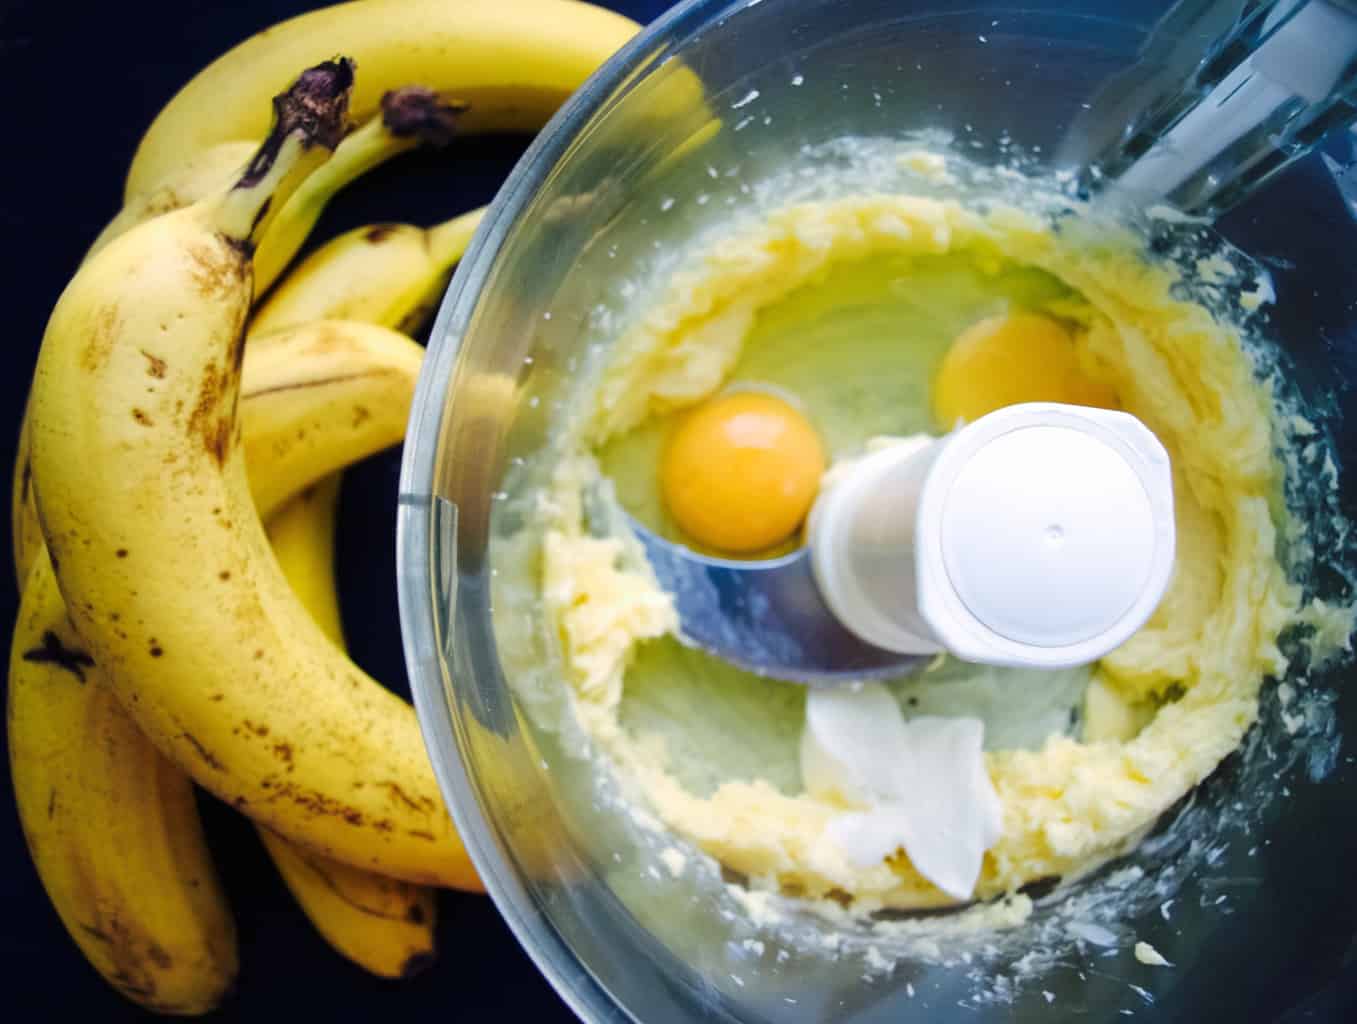
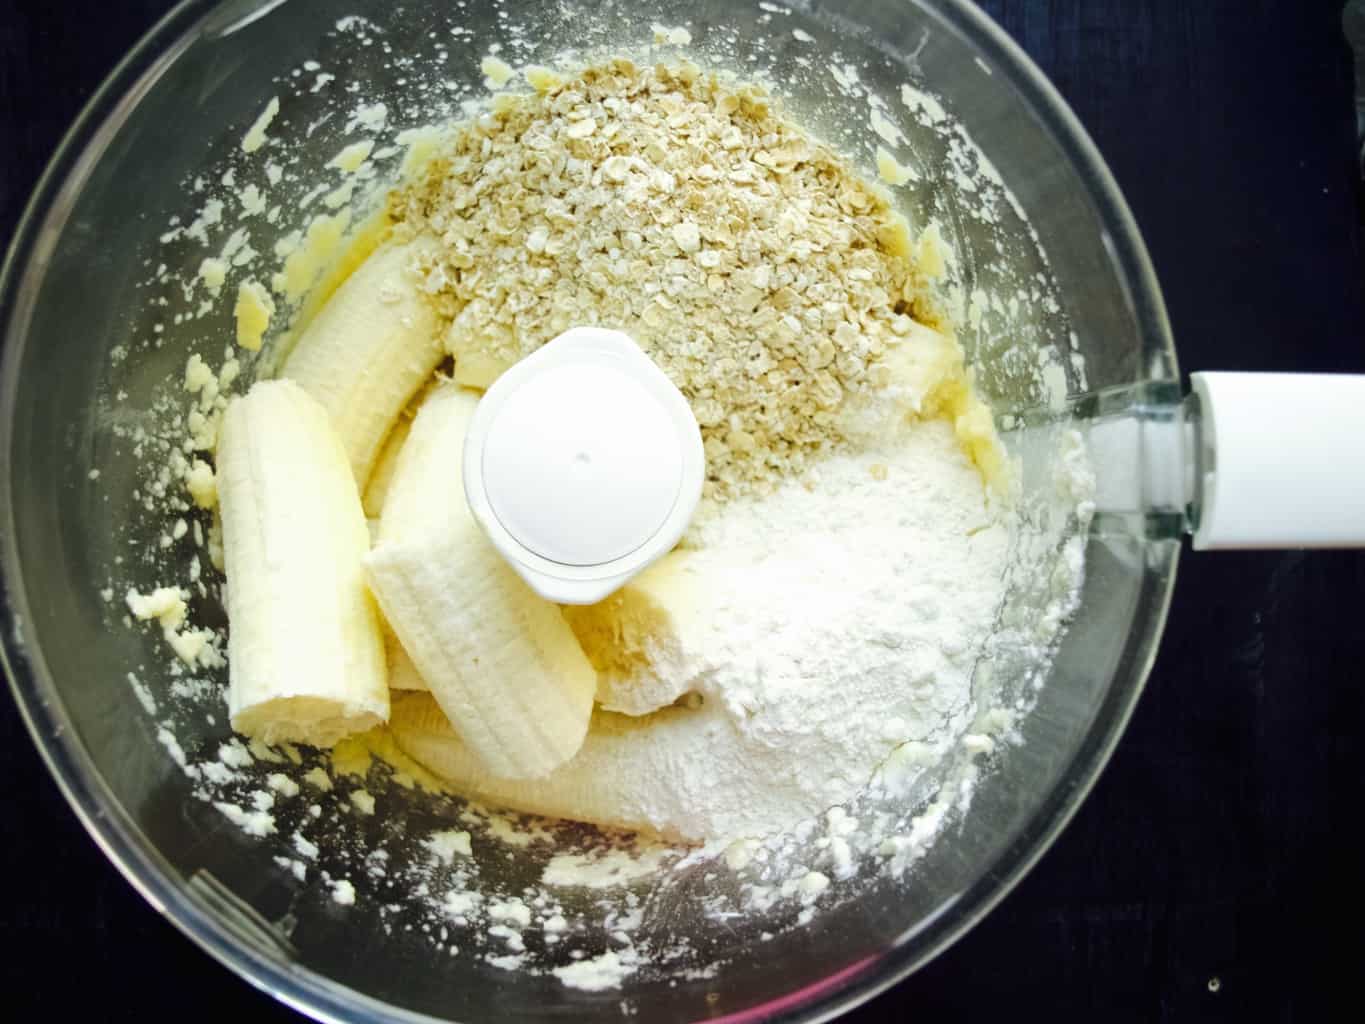
1. To make the pastry place all the ingredients (except the water) into the mixer. While mixing for few minuted gradually and slowly add water till it sticks into a ball. Wrap the dough in cling film and refrigerate for an hour or till when you are ready to use it.Easy salmon and nettle quiche recipe + dairy free version 
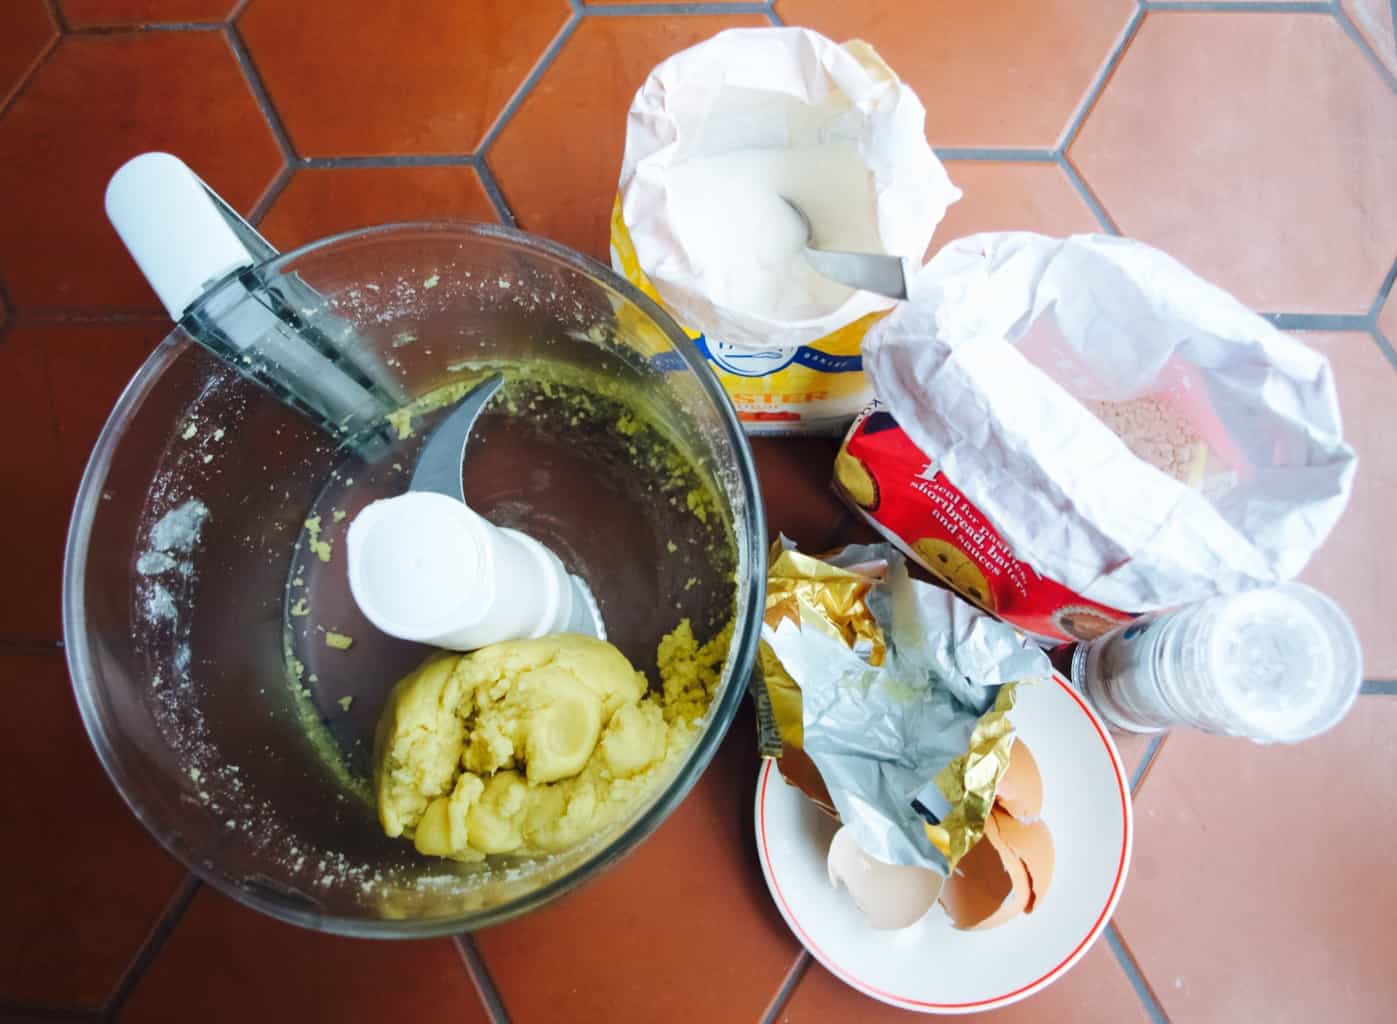
The dairy free version came out more moist (which is why you probably don’t need to add water into it) and did not solidify in the fridge.Easy salmon and nettle quiche recipe + dairy free version 
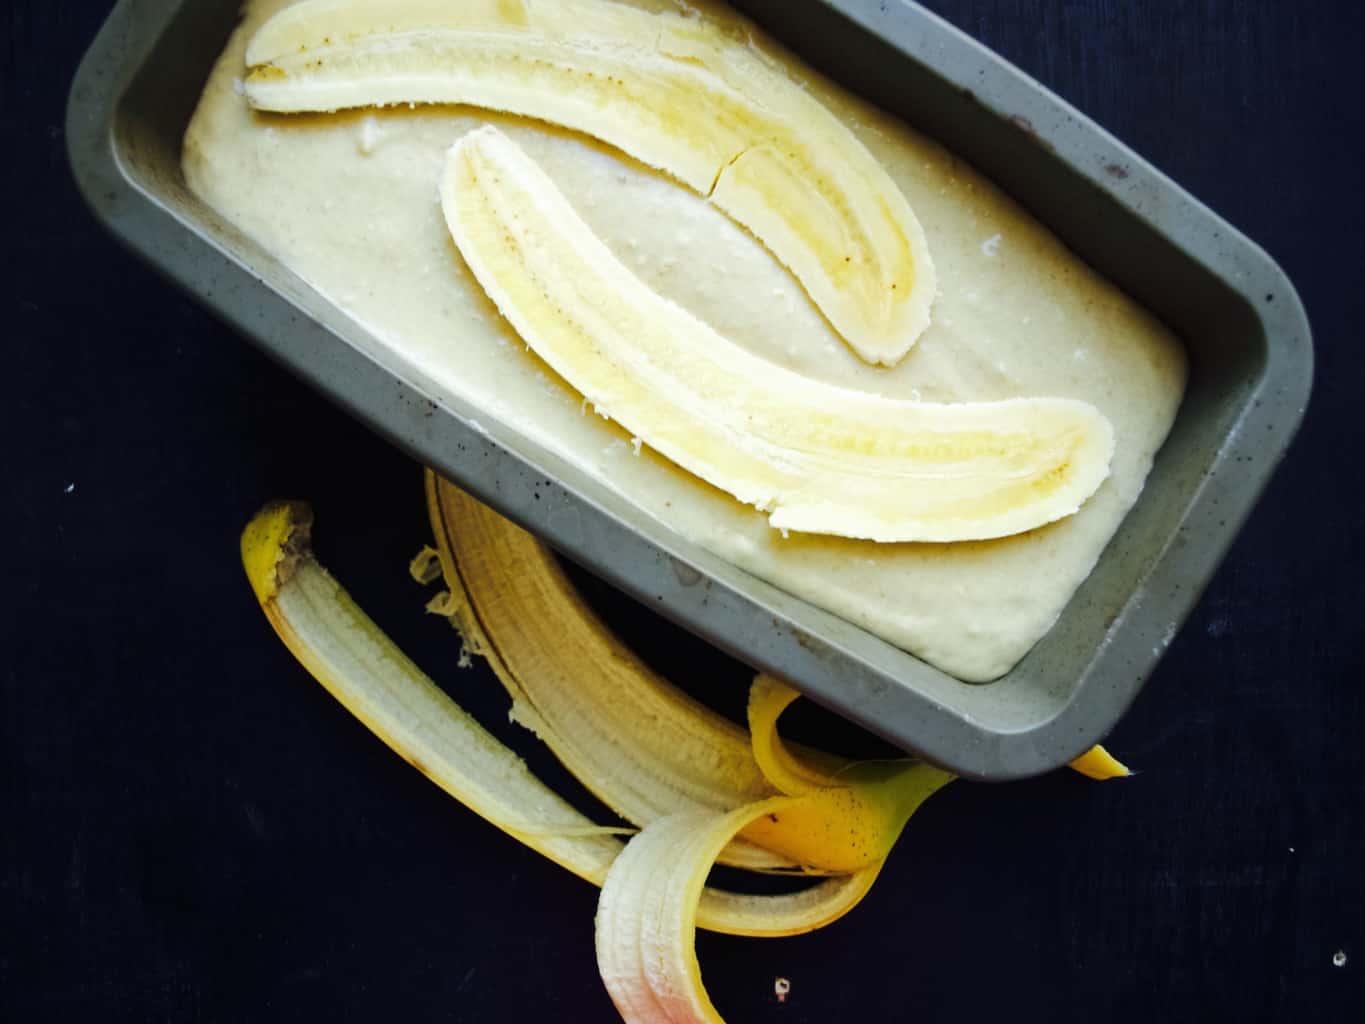
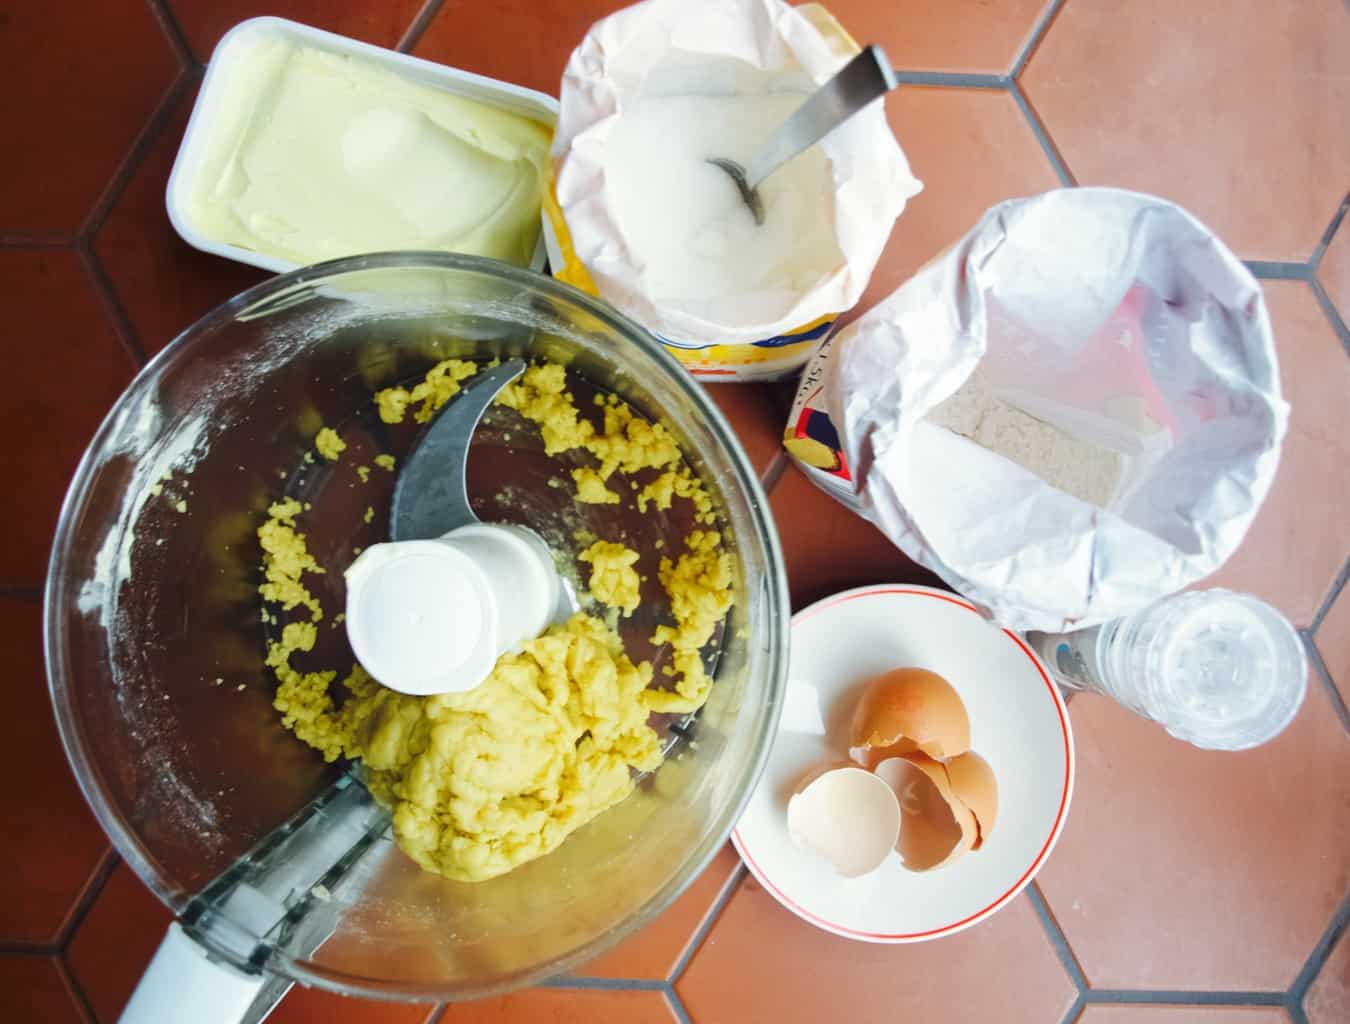
2. Remove the pastry from the fridge 30min before using. Roll out the pastry between 2 sheets of baking paper to avoid until it is 5 mm thick. Line the baking tin or quiche dish with the pastry, brush it with egg white. Scatter salmon and nettle leaves in the pastry case. Refrigerate while preparing the egg mixture.Easy salmon and nettle quiche recipe + dairy free version 3. To make the egg mixture lightly beat the eggs in a bowl, add the creme fraiche (and cream if using) and seasoning and continue to beat until mixed well. Easy salmon and nettle quiche recipe + dairy free version 
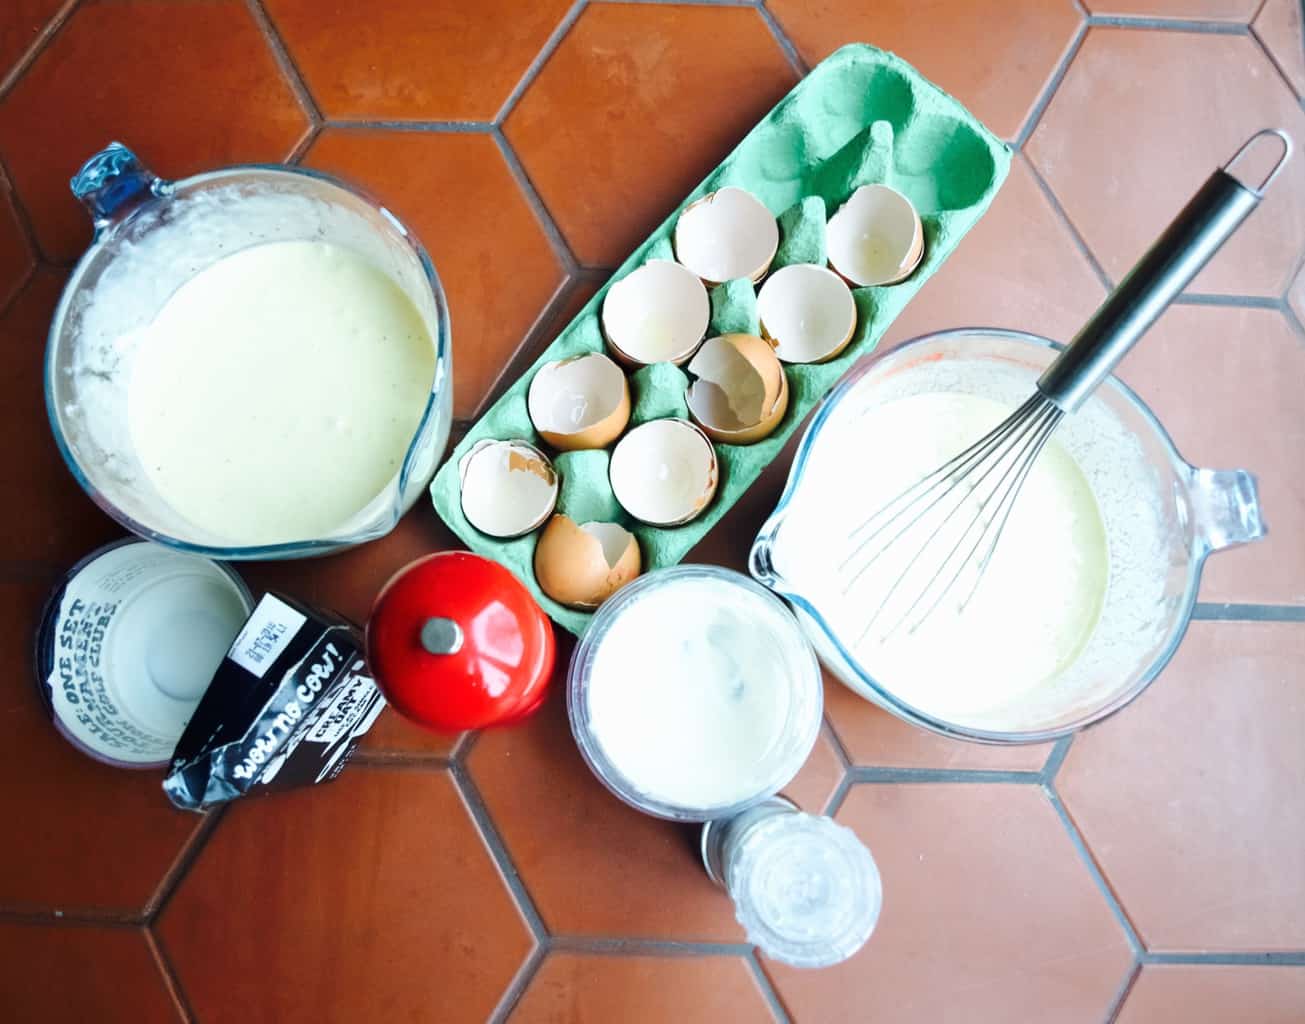
4. Pour the egg mix into the pastry case. Bake the quiche for 30-45min in 180C preheated oven or until the filling is golden brown and set.Easy salmon and nettle quiche recipe + dairy free version 
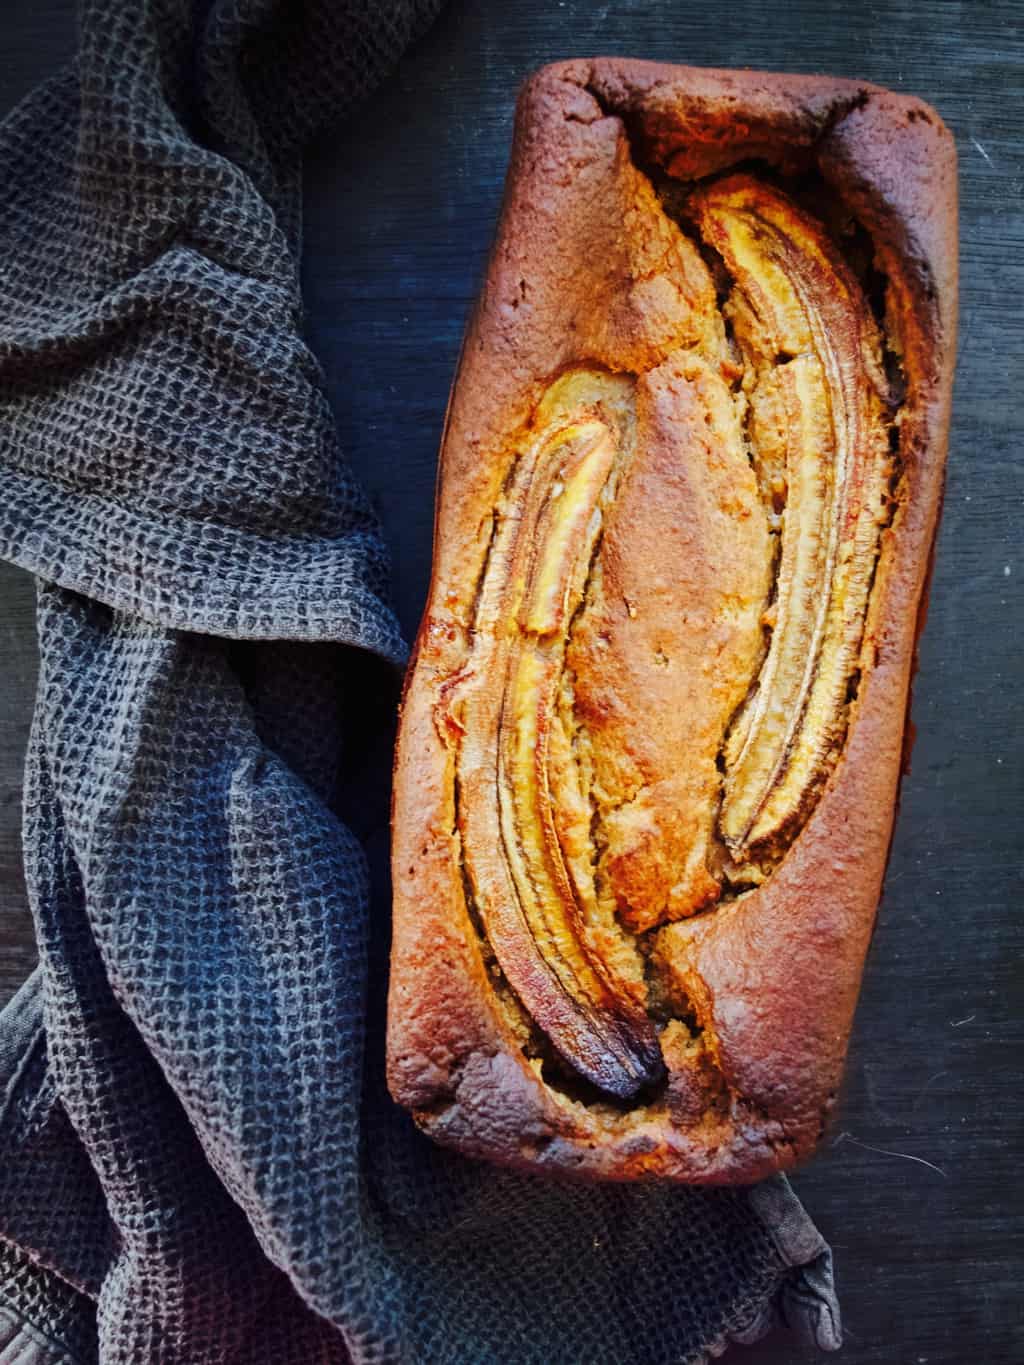
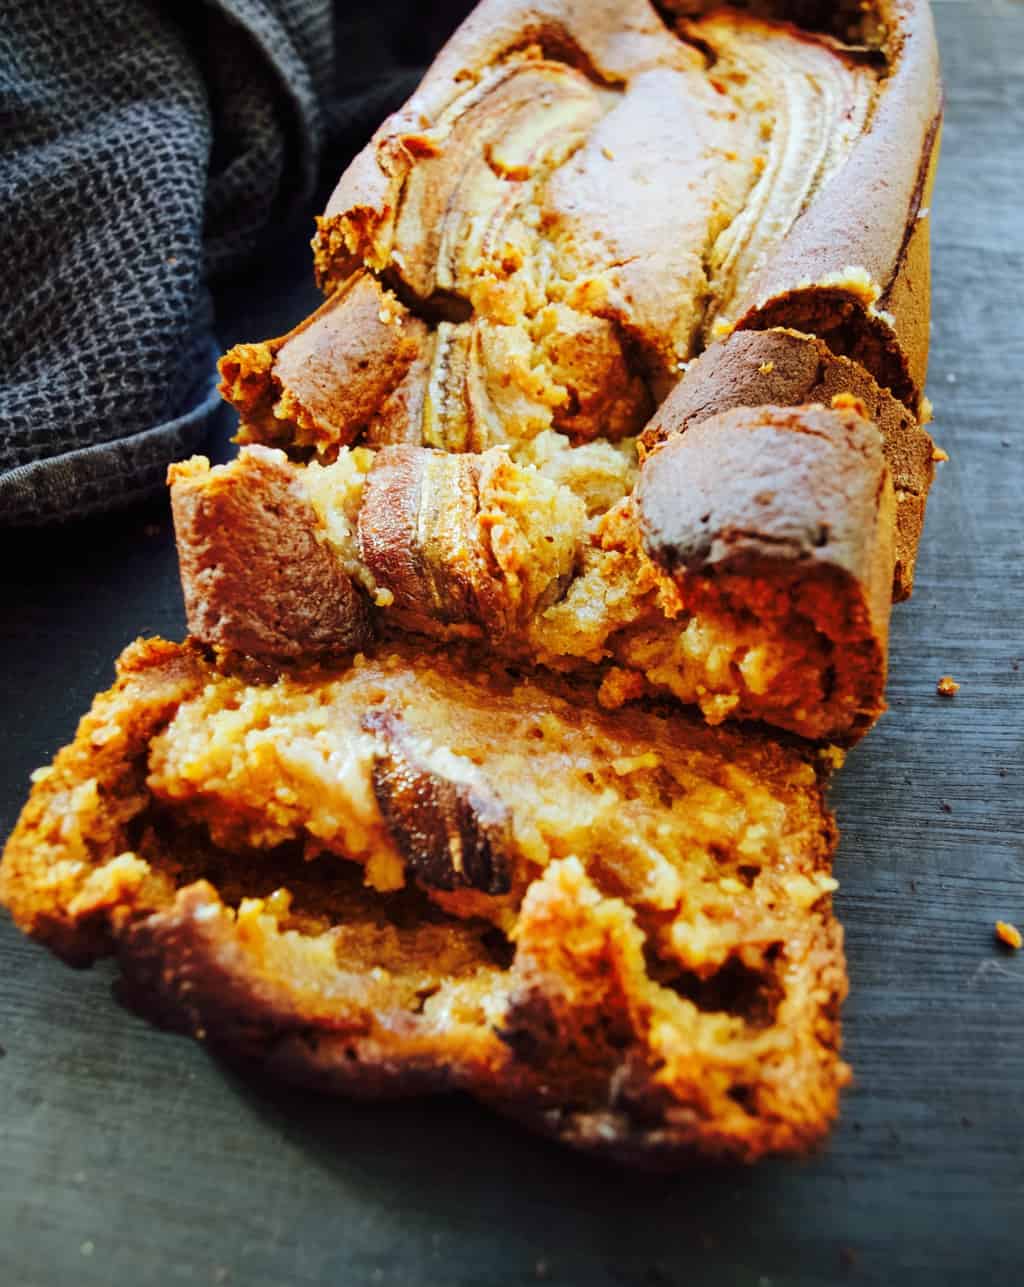
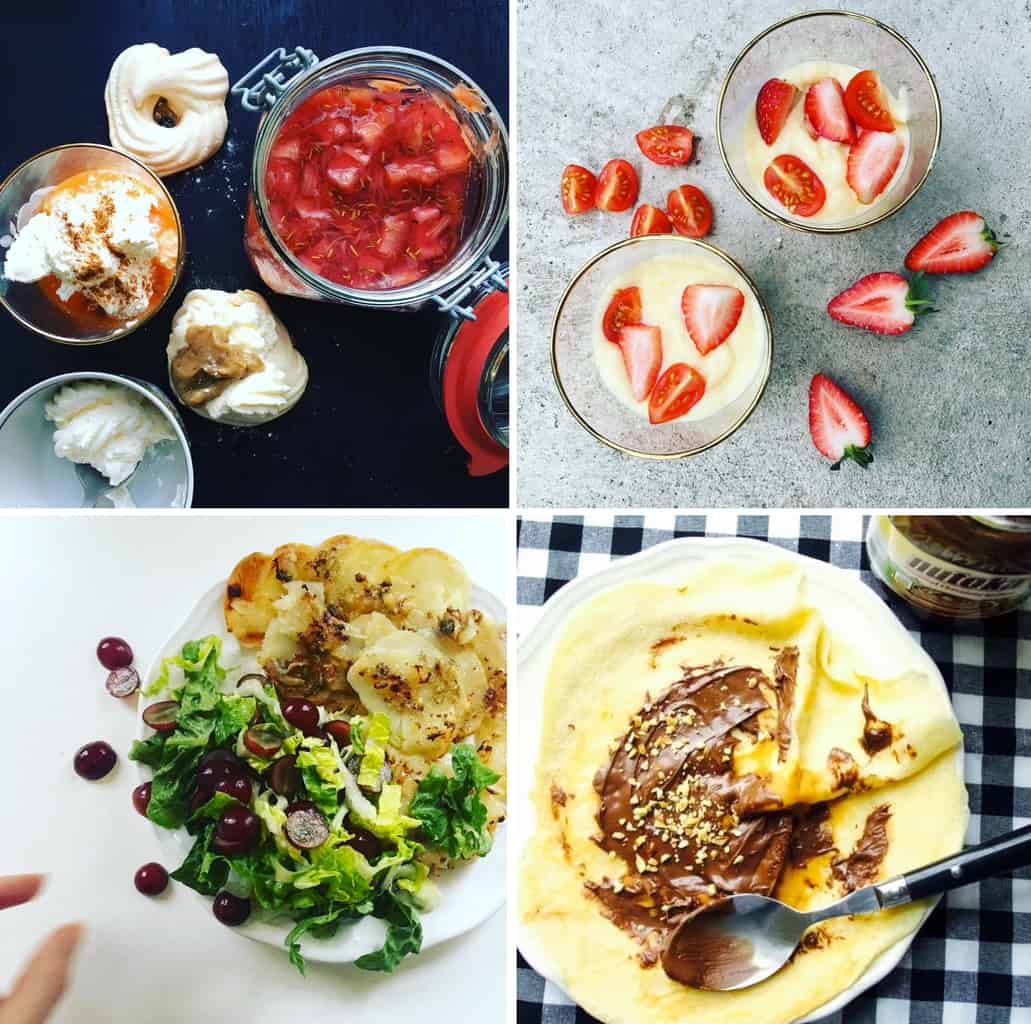
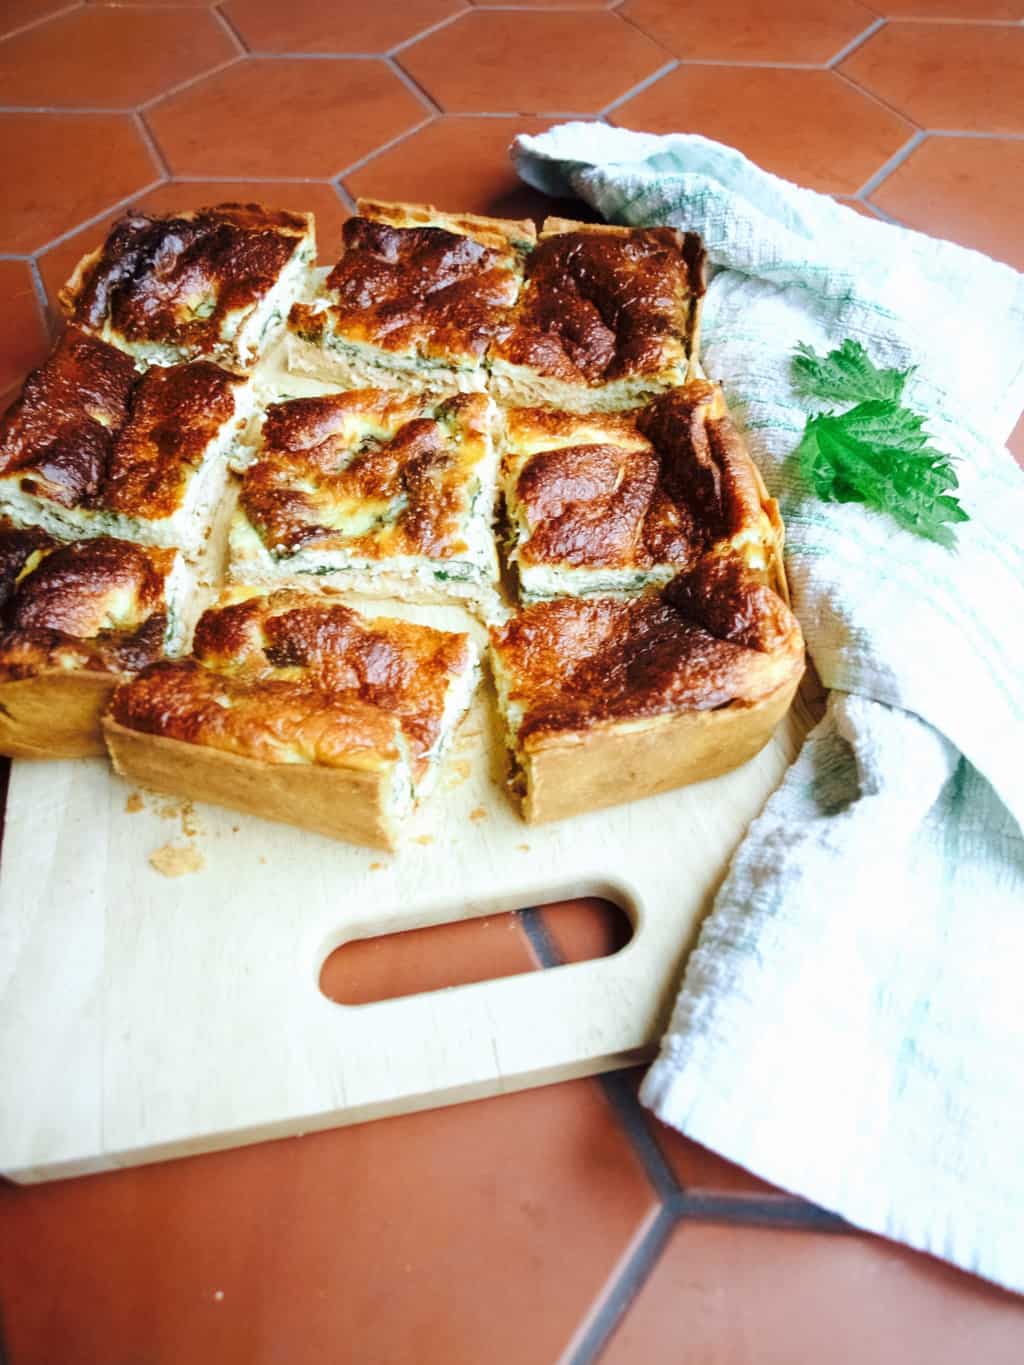
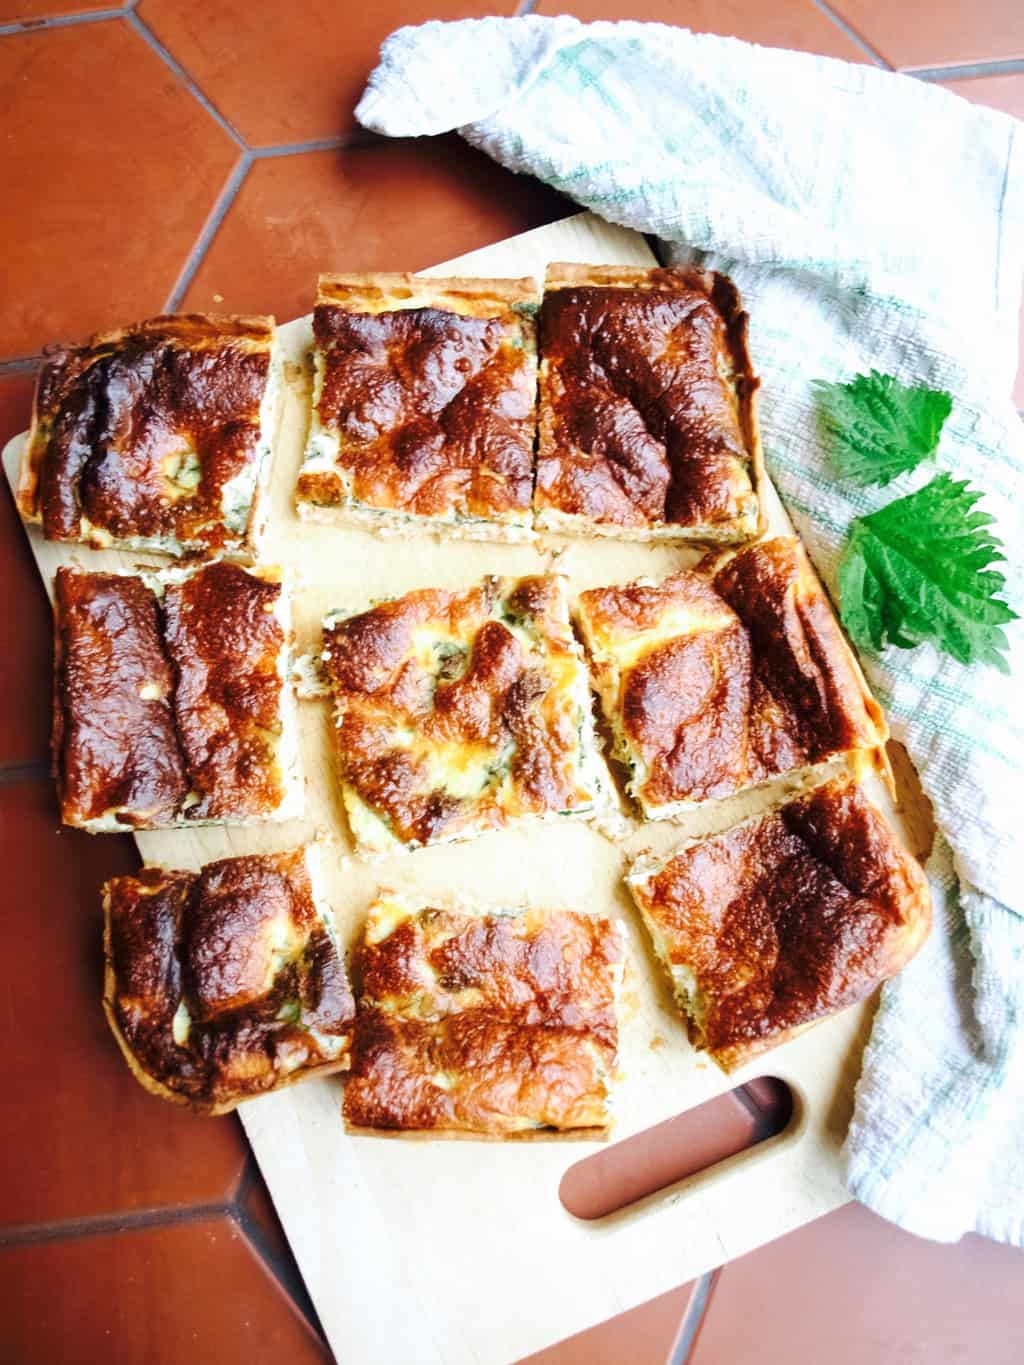
Can you guess which quiche is in the pics? I will give you a clue, it has oat milk in it! Yes, there were not many differences between these two quiches other that the texture and slight taste differences. Joni preferred the dairy one, I liked both. Tomas loved non-dairy one for all I care.Easy salmon and nettle quiche recipe + dairy free versionHope you like it too!

Rasa xoxo

0

How to make a baby mobile

Jumping bunny baby mobile diy No no, I am not expecting again! This baby mobile I made last week is for my new nephew Alexi. Although I do think this is a perfect project when you expecting… hmm. Think of all that time you have when the baby is not out yet (only kidding there is always another one near by to pester you about his needs lol).

Anyhow if you would like to make a baby mobile then you will need something to hang on it. I prefer soft mini animals or shapes and this time I chose these crochet jumping bunnies (because that was the theme), but you can hang on it anything else suitable such as this knitted bird or this felt bird.Jumping bunny baby mobile diy Jumping bunny baby mobile diy To make the baby mobile you will need a hoop (around 12 inches), some thread (strong enough to handle hanging weight), some mini jingle bells (or beads) and 5 jumping bunnies (or any other mini stuffed animal or shapes).Jumping bunny baby mobile diy Attach five threads to the hoop together with the jingle bells.Jumping bunny baby mobile diy Join all five threads leaving lots of space on top for hanging (you might want to hang it onto the ceiling).Jumping bunny baby mobile diy Hang the mobile and carefully attach all the bunnies onto each thread at the bottom while trying to keep it all level (its very challenging I know!).Jumping bunny baby mobile diy Ta-da!!Jumping bunny baby mobile diy Jumping bunny baby mobile diyHope your baby likes this mobile although I believe it is more for mummy to enjoy ;-)

Rasa xoxo

0

Kids art Easter biscuits

Kids art Easter cookies diyHands up who is really really looking forward to Easter! We do! Me and kids are in Devon with the grandparents already and we are pretty much ready here (its easy when you are not hosting).

Me and Lukas has been drawing and painting lots recently so I initially thought we will do good old Lithuanian tradition and paint some eggs, but then I decided against it when I thought of shortbread biscuits… hmmm! I thought if I make the biscuits into egg shape then it will be like painting eggs but on the flat surface rather than the round surface (a little less messy I thought). Plus, I thought this is a very good opportunity to try out more of natural food colouring :-).Kids art Easter cookies DIYKIDS ART EASTER BISCUITS

(for biscuits)

  • 240g butter, softened
  • 200g sugar
  • 1 egg
  • 500g flour
  • 1tsp baking powder
  • 4tbsp milk

(for the “paint”)

  • 4tbsp icing sugar, sifted
  • water
  • 1tsp beetroot powder for pink
  • 1/2tsp turmeric powder for yellow
  • 1tsp matcha powder for green

1. Place all the biscuits ingredients into the mixer and switch it on for few min till everything turns into nice soft dough. At this point you can wrap the dough and place it in the fridge for the next day or freezer for whenever you need it in the future.

2. Flour the surface and the rolling pin and roll the dough about 7 mm thick. Using biscuit cutter or a cup/glass cut the circles in the dough. Once the circles are out of the dough roll it once more again (only one way) to make an oval shape.

Kids art Easter biscuits DIY 3. You can involve your kid at this point. Lukas was treating the dough as he would the play-dough.

4. Place all the dough shapes into lined baking tray and bake them in C200 preheated oven for 10min.Kids art Easter biscuits DIY 5. Meanwhile make the “paint”! gradually add water into the icing sugar until you are happy with the consistency. Split the icing into four cups so you can make up few different colours. Add each colouring to the separate cup and mix. Kids art Easter biscuits DIY 5. Initially I showed Lukas how to brush the “paint” onto biscuits…Kids art Easter biscuits DIY but soon after he realised it is so much more fun to drizzle and splatter the paint over the biscuits. I totally agree, these remind me of Jackson Pollock paintings.Kids art Easter biscuits DIY Kids art Easter biscuits DIY Kids art Easter biscuits DIYHave a very lovely Easter everyone xx

Rasa xoxo

0

Watercolour challenge: jungle

Watercolour challenge: inspired by jungle To be completely honest it was very hard to come back to painting but once I started I really felt piece and joy. I felt inspired by the plants that I saw on our holiday in Dominican Republic. Tropical climate plants are so so pretty!!! I am inspired to have some of them at my home some day, but for now they can at least live on my walls.

As usual I started with the method in mind I wanted to try. This time I wanted to try watercolour combined with the wax crayons. I remember first time I fell in love with the watercolour is when my Finish art teacher showed me how crayons makes paper waterproof and when watercolour is painted on top of it, the wax of crayon blocks from colouring (mixing with) the drawing leaving the colour it was but colouring all around it instead. This technique really fascinated me back then which is why I wanted to try it out again. In the painting above I drew the core lines with the crayon and painted leafs on top of it. I was pretty pleased with the outcome. The lines kept its sharp green shade!Watercolour challenge: inspired by jungle Watercolour challenge: inspired by jungleThe plant in the pic above have been my favourite so far! Although I don’t feel I depicted it well in my painting…Watercolour challenge: inspired by jungle Painting this curly leaf plant was quite fun! I love making repetitive patterns and painting these wiggly lines been real pleasure.Watercolour challenge: inspired by jungle Watercolour challenge: inspired by jungle Watercolour challenge: inspired by jungle To add some colour (not only paint in green) I tried painting this pink flower. I feel this was not my best painting so far. And look at all this mess I made in my watercolour palette! I wonder if other artist end up like that. Although I have seen other people just using water colour from the little tubes and mixing palette on separate piece of paper. I wonder if it is worth investing in fresh collection of water paint, hmm…Watercolour challenge: inspired by jungle Watercolour challenge: inspired by jungle For my next botanical painting I decided to use pencil instead (and rub it off after), that way I thought I will improve my shading technique. I divided the leaf into different segments that are “coloured in” separately and therefore shading is visible (hopefully). This painting took 2-3 hours, but it was so so worth it. I am in love!Watercolour challenge: inspired by jungle Watercolour challenge: inspired by jungle Finally this was a quick painting, I used pencil to mark the stalk of the fern and leaf in watercolour. I don’t know why, but this is my another favourite, so simple but so beautiful at the same time!Watercolour challenge: inspired by jungleThanks for letting me share my experiences here re my new found passion :-)

Rasa xoxo

0

Make your own triangle garlands

Triangle garland DIYAs a follow up from a previous post here is what we had as a decoration for Tomas’s birthday last month. These triangle garlands fitted really well with our “cheerful, exciting and bold” theme. If you would like to make these for your next party (does not have to be kids party at all) then you are in luck, I am sharing how I made mine (along with the struggles I had too). Triangle garland DIY So first I cut some card/paper into triangles. I used the same technique to cut it as I used to make confetti just on a bigger scale of course! I was not bothered about being precise, the important thing is to be fast as there are quite a lot of them to cut in order to make an impact. Having done this myself however I do not recommend choosing different thickness paper/card (will tell you why later). Triangle garland DIY Next up is stitching all the triangles together and this is where I struggled the most. You see the different thickness paper/card can really confuse the sewing machine (unless my machine is not very good… hmm). It stitched either tight or loose or was cutting the thread in the middle of the job, it was really really frustrating for me. So if you can avoid it, please do! I think this project could be relatively quick otherwise.Triangle garland DIY Triangle garland DIY And there we are, its done! I hung mine from the light fitting in the centre to different corners of the room. I am sure you can hang from corner to corner too!Triangle garland DIYHope I inspired you xx

Rasa

0

Natural frosting birthday cake

Spiced honey cake with turmeric soft cheese frosting & plum jam filling Few weeks ago we celebrated Tomas birthday, which is why I baked the cake. Anyone who knows me I like the cakes with minimum frosting, made with natural ingredients and most of all I like good flavours. This cake ticks all the boxes for me!!

When I was thinking of Tomas birthday party theme I was thinking of something cheerful, exciting and bold (exactly how I would imagine Tomas when he grows up). This is why I thought bright yellow frosting on the cake would be ideal. But what natural colouring could I use for a bright yellow? I did not need to think for too long, I suddenly remembered the power of turmeric that is vibrant with not much taste to it. The flavour of the cake followed of course. I thought what goes better with turmeric then other spices such as cinnamon, clove and nutmeg. I was completely right, when testing the cake I realised everything just work really well together. I used plum jam to neutralise the taste of richness which also turned out a very good choice.

Hope I got you seduced to try to bake this cake yourself. You will find the recipe below ;-).Spiced honey cake with turmeric soft cheese frosting & plum jam filling HONEY SPICED CAKE WITH TURMERIC FROSTING AND PLUM JAM FILLING

(for the cake)

  • 200g butter
  • 100g light brown sugar
  • 100g dark brown sugar
  • 170g honey
  • 2 eggs
  • 260ml milk
  • 325g flour
  • 1/2 tsp salt
  • 3tsp baking powder
  • 3tsp mixed spice
  • finelly grated zest of 2 oranges

(for the frosting)

  • 150g softened butter
  • 150g soft cheese
  • 150g icing sugar, plus a bit more for white frosting
  • 1tsp turmeric
  • 1/2 jar plum jam

1. Over the hob melt the butter together with sugars and honey till everything is incorporated and the sugar is dissolved.

2. Add the rest of the cake ingredients and mix again to combine everything well.Spiced honey cake with turmeric soft cheese frosting & plum jam filling 3. Split the cake mixture into two ready tins (same size, springform are the best). Bake in 150C preheated oven for 1h and 15min.Spiced honey cake with turmeric soft cheese frosting & plum jam filling 4. Sandwich the cake with some plum jam. My tip is to put the cake upside down so the top is completely flat (really felpful when you do frosting).Spiced honey cake with turmeric soft cheese frosting & plum jam filling 5. To make the frosting place all the ingredients except turmeric into the mixer and let it run for few minutes. Put few table spoons of frosting aside for the white frosting. Add turmeric and let the mixer do its job one more time.  Spiced honey cake with turmeric soft cheese frosting & plum jam filling 6. Next job is to apply the frosting. I always add almost all the frosting on top to begin with and then push it down gently to the sides and then I work with frosting palette knife to the top again (I make the frosting thin for a reason so it flows easily). Once the base frosting is done I recommend to place the cake into the fridge so it sets.Spiced honey cake with turmeric soft cheese frosting & plum jam filling 7. Meanwhile add more icing sugar to the frosting left on the side. Continue adding the sugar till you are satisfied with the stiffness of the cream. Transfer white frosting into the piping bag with large round nozzle attached. Carefully pipe your decorations on the cake.Spiced honey cake with turmeric soft cheese frosting & plum jam filling 8. Finally decorate with any cake toppers. I used water balloons to make these mini balloon cake toppers which made the cake look very fun like I expected :-).Spiced honey cake with turmeric soft cheese frosting & plum jam filling Spiced honey cake with turmeric soft cheese frosting & plum jam filling Hope you like it too!!

Rasa xoxo

0

Hey I am back! (my feedback on phone free month)

Our holiday in Dominican Republic Last month I said I would ditch my phone for a month (well… almost) and here we are I did it and now I am back to tell you all about it (if you care to listen). It was indeed what I was expecting, freedom like you could not believe! Even now when I am back using social media I started thinking how to minimalise the use of it (and I am not even back on Facebook properly!!)

I started my little experiment when we were on our do-nothing-all-day-every-day holiday in the Dominican Republic. I removed the most distracting apps from my phone such as Facebook, Instagram, Pinterest and WhatsApp and instantly I did not know what to do with myself. I still kept checking my phone although there was nothing to browse other than s few text messages that I occasionally get. I started reading more and only after few weeks I realised that I stopped checking my phone so much. I originally wanted to switch my smart phone completely to a basic phone, but I soon realised there is no need and besides there were a few complications around doing that (such as a transfer of contacts from one phone to another). I also really really needed my map app as I would really get lost without it.Our holiday in Dominican Republic Our holiday in Dominican Republic Our holiday in Dominican Republic As soon as we were back from our holidays I threw myself into preparations for Tomas birthday and DIY projects to make progress with our new kitchen. It was a breath of fresh air not to be distracted by any notifications from my phone. Although there were a few occasions where I needed certain information and I had to go into Facebook messenger just to get the right address or to get a recipe from Pinterest. And there was one time when I misplaced my phone when I was about to leave the house and I knew I needed to keep in contact with Joni that day (so it was quite panicky). But other than that it was a very productive month. Our kitchen/diner in progress Garlands for Tomas birthday I was hoping because of my phone free month that I will spend more quality time with my kids, but to be honest I was too busy getting things done (sadly). I did however occasionally involve Lukas in home decorating such as covering ugly plastered wall with this lovely painting (he is still so proud of it when he sees it hanging on the wall!). Kids art On the final days of the month things got little challenging. Tomas got ill straight after his birthday party, but that does not stop me from saying that February was productive and clear in focus just because I was less distracted by my phone. I started reading my bible and even started thinking more about opening my dream cafe earlier then expected…

However I have one advice to anyone thinking of ditching their phone for a month. Do let everybody know that you are doing this. You would be surprised to know how many people tried to contact me through iMessage or WhatsApp. Even though I posted here about my intensions, this obviously did not reach everybody.Snowy day and last piece of Tomas birthday cakeHope I inspired you and I hope you will enjoy your phone free month if you are going for it some time this year.

Rasa xoxo.

0

Why I’m putting my phone down for 28 days

 So here is a good idea, how about we ditch our smartphones for a month?! This is what I thought when somebody I follow on Instagram claimed they did it last year. Back then I thought it’s not a good timing to do it, but I was definitely interested in the freedom (I presumed) I would get. So I decided February is best and not only because it is shortest of all months. It’s because February is least eventful I suppose (minus Tomas birthday and Valentine’s Day)! And now I am getting really excited about this idea!!! And here are few good reasons why:

1. Need some time off. Can you imagine how much time I will save if I stop using my phone? Loads! I must admit I am practically living on Instagram, Facebook and Pinterest and often flashing notification really distract me from doing the really important stuff. I can’t highlight enough how much time is wasted on media and because I will be stopping the use of media I decided not to blog for a month too. Because let’s admit it, it’s ok to take a break sometimes and get the other stuff done that never really gets done. Why? Because I am doing day to day jobs while still going through Instagram feed and while putting kids to sleep (please don’t judge).

2. Refocus! I am hoping while I am not constantly plugged into media, I may be able to start realising what is more important in my life. Because of screen I have been ignoring my kids sometimes. Sometimes I am so deep into reading an article that I don’t see my own child trying to get my attention. Hopefully I will get inspired not by Pinterest pictures but by images I see outside my phone screen.

3. I need to rest my eyes for a bit. Because let’s be honest, my eyesight is not getting any better. Not that they are getting worst either. What I really mean, I just need rest, a true rest.Be still and know that I'm with you Ok, those were my reasons and here are my terms. How else would you know if I am not cheating!

I am actually going to read my texts and answer the phone calls! I am only ditching my smart phone and instead I am going to use one of those basic phones. We got one spare in case one of our phones breaks, so it will be easy to switch.

I will read e-mails once in the while on my laptop. And I might need to switch back to my smart phone when I need directions. I will try memorise google maps as much as I can or print out directions like in good old days.

And that’s it, hope I remembered to mention everything in here.Focus quote Do you want to join me? It’s not too late and it does not have to be in February (you can pick a month most convenient to you)! Hope I inspired you ;-)

Rasa xoxo

0

Watercolour challenge: forest in snow

Forest in snow inspiration from our recent trip to Austrian Alps As you may have already noticed I enjoy taking challenges, and for a good reason! Challenges are good for achieving goals. Not all types of goals of course, but if you want to learn something or get to start doing something then this method is the best (at least in my experience). In the past I did Pinterest challenge to get myself to try more recipes from Pinterest (still doing it sometimes), then I did a photography challenge so I could learn to take better pictures, I did a sugar free diet in the form of a challenge (sort of) and a book reading quest for three years which worked a treat. Now my aim is to get myself painting more and this is why I came up with this watercolour challenge ;-).

Few weeks ago we went to ski to Austrian Alps and I loved the snow there (as well as occasional snow at home). Falling snow brought be joy and the whole experience was quite magical so I decided to put it all on the paper. But at the first glance snow is white, so how do I paint the white? Once I look through this first obstacle I realised snow came in different shades actually. Whats more, I liked seeing some bold colours in a pretty misty landscape such as people wearing bright outfits or a lift cabin like in the pic above.Forest in snow inspiration from our recent trip to Austrian Alps I began painting the forest landscape first. I thought if I do it using the classic watercolour method I should achieve the right texture quite easily. I tried dipping paper into water and then paint vogue outline of fir trees. I thought the paint would bleed and that way would create required texture. That did not work out even when I tried getting better paper and paint brushes. The fir trees just looked too plain for my liking. Eventually after much trial and error and some research I found that salt is best in creating this so much desired texture. Yey!!! Now I am quite pleased with my winter wonderland forest painting. Hope you can pardon my spelling, but I do love this quote. It’s exactly how I feel when I see snow!Forest in snow inspiration from our recent trip to Austrian Alps Forest in snow inspiration from our recent trip to Austrian AlpsThis is what I mean by many shades in the white snow. It was fun painting this as shading with watercolour is very pleasant. It works quite simple: the more water you add the lighter the colour. If you want the colours to bleed less then wait for it to dry more before applying another layer. Watercolour challenge: snow Forest in snow inspiration from our recent trip to Austrian AlpsPainting trees has always been my favourite thing to paint. Here I initially tried to create the branches by blowing on the drop of paint that was sitting already on the paper. Later I added more branches and snow by lightly brushing some tinted water on it. Watercolour challenge: forest in snow Forest in snow inspiration from our recent trip to Austrian AlpsLastly I was amazed of fir tree needles sticking out in the snow. This took quite a lot of attention on detail but it was all worth the try.Watercolour challenge: forest in snow Watercolour challenge: forest in snowHope I inspired you too to take a challenge or thought you something new about watercolour.

Rasa xoxo

1

Breakfast banana bread

Breakfast banana bread recipeI am not going to lie, last week was a bit difficult. Coming back from holidays straight to real word is overwhelming! And we are going for another holiday again next week so not sure how I am going to cope to do this all over again. One thing is certain, I am trying to prepare as much as I can for it. Last week I had a meltdown when I find out we have no bananas left for breakfast. This is why this time round I am making banana bread to put in the freezer just in case so I can toast it if I am in banana emergency again (sounds funny, but it was seriously an emergency because banana is a very important staple in our house). I made this banana with porridge oats and replaced sugar with honey, so it is sort of healthier than regular banana bread. It’s not like I am giving cake to kids for their most important meal!

BREAKFAST BANANA BREAD

  • 160g honey
  • 100g butter
  • 2 eggs
  • 2 tbsp yogurt
  • 500g ripe bananas (4-6 bananas) + 1 for the decoration
  • 100g porridge oats
  • 150g plain flour
  • 2tsp baking powder

1. in the blender or food processor cream butter with honey then add eggs and yogurt and whizz once again.Breakfast banana bread recipe2. Add remaining ingredients, including pealed bananas and turn the food processor on to make a smooth banana bread mixture. Breakfast banana bread recipe 3. Pour the mixture into the prepared baking tin. Top it with sliced banana and bake it in preheated 180C oven till it is baked through.Breakfast banana bread recipe 4. Don’t slice baked banana bread while it is still hot like me here. It wont cut well as it is a very very moist banana bread. Once it’s cool it can be eaten straight away or frozen ready sliced.Breakfast banana bread recipeHope January is treating you well!

Rasa xoxo

0

How I started bullet journal + my New Year goals

How I started bullet journal So here we are, I am starting my very first bullet journal!! As excited as I am you should really know that it took me over a year to actually try out this organisational system. Initially I noticed my friend Jacolien journaling on the Instagram (@made2celebrate) and then I read somewhere that this system lets you do more with less??? This could not fit in my head, how pretty page layouts with beautiful fonts would save me time and make me more organised? This is when my friend Jacolien explained that these layouts are completely optional and bullet journal can be whatever you make of it! So I decided to go with the original Ryder Carroll style (who by the way created this system after all) which is very simplistic indeed. May upgrade it later if my handwriting improves in any way. I will let you know how I got on, but for now here are my goals for this year that is already included in my bullet journal.

I may not set many goals last year, I am expecting quite a lot this year. My bullet journal is pretty full for the next six months which has not happen for few years. For each goal I listed tasks to help me to achieve it, some tasks have the deadline and some have been scheduled into calendar already.

1.Upgrade Friendly Nettle website goal was on my mind for four years. I think this year will be the year when I finally do it. I I will begin in February as this is when I am thinking to take a break from blogging for a month and from then on I will schedule once a week appointment with the website. Hopefully this will do.

2.Get arty, because I forgot how to paint or draw. This is why I decided this year to replace reading books to watercolour painting (the media I like the best). Like with books I will review my artwork here on the blog.

3.Reach healthy BMI as I am seriously overweight. I reached my biggest I have ever beed and I am feeling this is effecting my health too. Luckily loosing weight is not time consuming. All I need to do is reduce my meal portions, don’t stress eat and fast once a month. I think this should do the trick.

4.Make our house beautiful, because we still doing it up. Hopefully this year the cosmetics and decorations are going to be done. I am not actually thinking it’s possible to finish all the house DIY completely.  I have already set up some deadlines for some tasks, although this goal I am feeling least confident about sadly.

5.Create child friendly garden has been my dream for a while. I need to be confident that kids can play safety outside as well as growing a small patch of veg on the side. I am thinking to start in March once the preps for Tomas dedication/birthday party prep is over.How I started bullet journal So how did I got on with bullet journaling so far? I think quite ok, I understood the system after reading about it on few blogs, but the video that explain it best is on bullet journal website. There are few pros and cons that I can see so far. But what does’t have pros and cons? So far I love that this system requires you to (1) handwrite (kind of con as well), you got to have a love for stationary! I even bought myself a fountain pen that I get so much pleasure out. The bullet journal itself is (2) very easy to set up, all you need is index, future log and a monthly log. From that on you just can start scribbling simple notes that are either to-do lists or ideas. As long as all those notes are attached to the right symbol you are set to go. Besides, you can (3) customise it as much as you like! I started using my BUJO (short for bullet journal) for personal stuff such as tracking my weight loss and recording my body temperature for NFP. So these are my positives.

Things that I am still trying to work out is (1) how to organise events between our family planner and my personal journal. I end up writing the same event twice, to the journal and then to our planner, this is often confusing and sometimes I wish all those notes synchronised somehow! The other issue I have so far is that (2) the bullet journaling is not for perfectionist (at least at the beginning). I already made many mistakes that can’t be erased. I guess I just have to look at it as a journey on improving my hand writing.How I started bullet journalHope you started 2018 well!

Rasa xoxo

1

My reflections on 2017

Our biggest project of 20172017 is about to be over and as usual I thought I will quickly reflect on it before I get into 2018. And what a year it has been! Tomas birth made it both very very challenging and exciting at the same time. I struggled lots, had lots of back pain, got really overweight, took sleeping pills and was almost considering taking antidepressants at one point. Thankfully it is much better now and I can see how amazing Tomas is becoming. I love his little character that is coming more and more everyday. Now I can finally say “babies gives you wings” like one of the mums I follow on Instagram :-DQuick toy storage label ideaNow, did I achieve my 2017 goals? Mostly! Because I did not expect to achieve much this year I only had one goal. This one goal was to organise our family life. I started organising everything in May one room at the time and now I at least know where everything is. You see, we moved into our current house one month before Lukas was born and from then on we were constantly doing DIY’s and then Tomas was born as well. It was crazy two years, so for me to have the house organised is a  very very big achievement. What helped me to organise is the planner, storage boxes and the big shelved wall in the spare room (also kids napping ha ha!).My reflections on 2017To organise the toys (it seems like our toy collection is expanding all the time!!) I used the idea from loundry basket project. I used 3D fabric paint instead of embroidery because I needed a quick fix. Besides I don’t think fabric boxes will last very long with kids (lol).Quick toy storage label ideaHappy New Year everyone!

Rasa xoxo

0

How to make mini triangle confetti

Handmade confettiConfetti was not the love at the first sight but something that I fell in love with over time. Now when I see some confetti sprinkled anywhere I get really really excited! It makes everything so much more joyful and thats what you need when the new year is approaching. And it can be used in soooo many ways! It can be sprinkled on the dining table, party floor, letters, present wrapping and anywhere you need some happiness sprinkles. Of course not everyone likes confetti (very sad, I know!!), but for those who do, here is how I make mini triangle confetti. Trust me, it is very simple to make and you don’t need any special punch for it.mini triangle confetti diy (no need for punch)First I cut the cardboard into strips. I use the ruler and the scalpel knife to make really straight strips.

mini triangle confetti diy (no need for punch)Then I cut / and then \ to get the triangle shapes.mini triangle confetti diy (no need for punch)mini triangle confetti diy (no need for punch)Did I forget to mention that confetti is brilliant in making fab photography effects and backgrounds. Try it for your next photoshoot ;-).mini triangle confetti diy (no need for punch)Happy celebrating!!!!

Rasa xoxo


1

Printable 2018 planner

OLYMPUS DIGITAL CAMERAI love love planning and as new year is approaching I have so many dreams and plans that I wanted to add to a 2018 calendar. Except I did’t have a new calendar… Until now!

I loved the layout of 2017 planner so much that I almost copied it to make the new one. If you loved it as much as me that read on to see how I use it in practice.

Click here to upload your 2018 planner.Printable weekly 2018 plannerI picked a second week (because who plans anything for the first week in new year?) in 2018 to illustrate how I use it in practice. Of course I could not fill it too much in detail because some stuff is difficult to know so far ahead in the future.

Calendar comes first as everything is connected to it. From it you find out what appointments or events are on. I also often use this part to jot down the task I want to get done on specific day. For example, I wrote down that I need to buy yellow and black printer cartages on the 8th and need to close certain current account on the 12th. However, it’s important to be reasonable with the daily tasks and not to add too many in one day. Otherwise nothing gets done. Trust me! I have done this mistake too many times in my past ;-).

To do list one of my favorite parts. I prioritize my tasks by category and then I am always in the know what to do as soon I have a break from kids. In my case blogging comes first and then DIY. I added what DIY’s I need to get done in that week as we need to get house ready for the big party in February. Of course unfinished tasks can be forwarded to next week, so no pressure. At least priorities are there to focus on.

Meals is essential for meal planning. Just list all the meals you are going to have for the week including dishes for hosting if you are planning to have guests that week. I usually cook three main dinner meals for the week that last 2-3 days. I also cook soup that I split into 7-12 kids portions for the freezer. I usually make myself a toast and we have porridge for breakfast.

Shopping list is useful when making a list of items that you need from the shop. When I go about my business I quickly jot down things I run out of or things I notice we will need. When I make the meal plan I often go back to shopping list to add the ingredients I need for the cooking. Milk, bananas and eggs are our family food staples so you would find these are often on my shopping list ;-).Printable weekly 2018 plannerHope you found this inspiring and you will find the 2018 planner useful next year xx

Rasa :-)

1

Year three with books: “Little Paris Kitchen”

My thoughts on 'Little Paris Kitchen" cookbookDear oh dear I had a busy weekend (it was fun as well), but I finished reading the “Little Paris Kitchen” cookbook (and trying almost all the recipes) which has taken me a whole year. I of course could not make all the items from the book. Some of the recipes were not very family friendly such as steak tartare, some had ingredients that were hard to get in regular supermarket (even if I tried to get a substitute) or I simply missed the season (oops!). I also must admit I did not plan the cooking of the recipes very well. I did very little at the beginning of the year and then by the end of the year I tried like 10 recipes a week. Which made things slightly stressful, but I am very glad that I made it. Yey!Cooking through Little Paris Kitchen BookWhat I liked about it? I first fell in love with the style of the book and the pictures (am I shallow or what?), but then I really liked the recipes as well! these were classical recipes with a twist. Some were surprising and amazing and some were ok. Some recipes forced me to experiment as I did not have all the ingredients (but found some substitutes), which worked out wonderfully well. I felt some of the basic recipes could be reinvented again and again. It really woke my excitement up when it comes to cooking! I once again felt like in heaven when tasting different flavours.

What did I not liked about it? Some of the recipes were more complicated than they had to be. When making some of the basics such as caramel I had to google other recipes/videos as I just did not get it right from the book. It seemed like Rachel Khoo loves challenge herself and sometimes overcomplicate some recipes just because. I also have slight suspicion that there were some mistakes in the recipes. For example, I was trying to make this spicy sauce that had nothing spicy in the ingredients.

Is it worth buying? Absolutely! It’s a beautiful book to own with all the basic french recipes at the back (which I still use).

My thoughts on 'Little Paris Kitchen" cookbookPerhaps this could be good gift idea to a foodie?

Rasa xox0

1