Top

Archive | Blog

French holiday with friends

French holiday with friends (in Brittany)Back from French holidays last week and I can honestly say these were the best holiday so far since having kids. Although I thought I learned so much already how to do relaxing with kids, I still keep learning on the job. For those who are still struggling to holiday with babies here are my post from few years ago, I can only encourage you that things gets better with kids age.

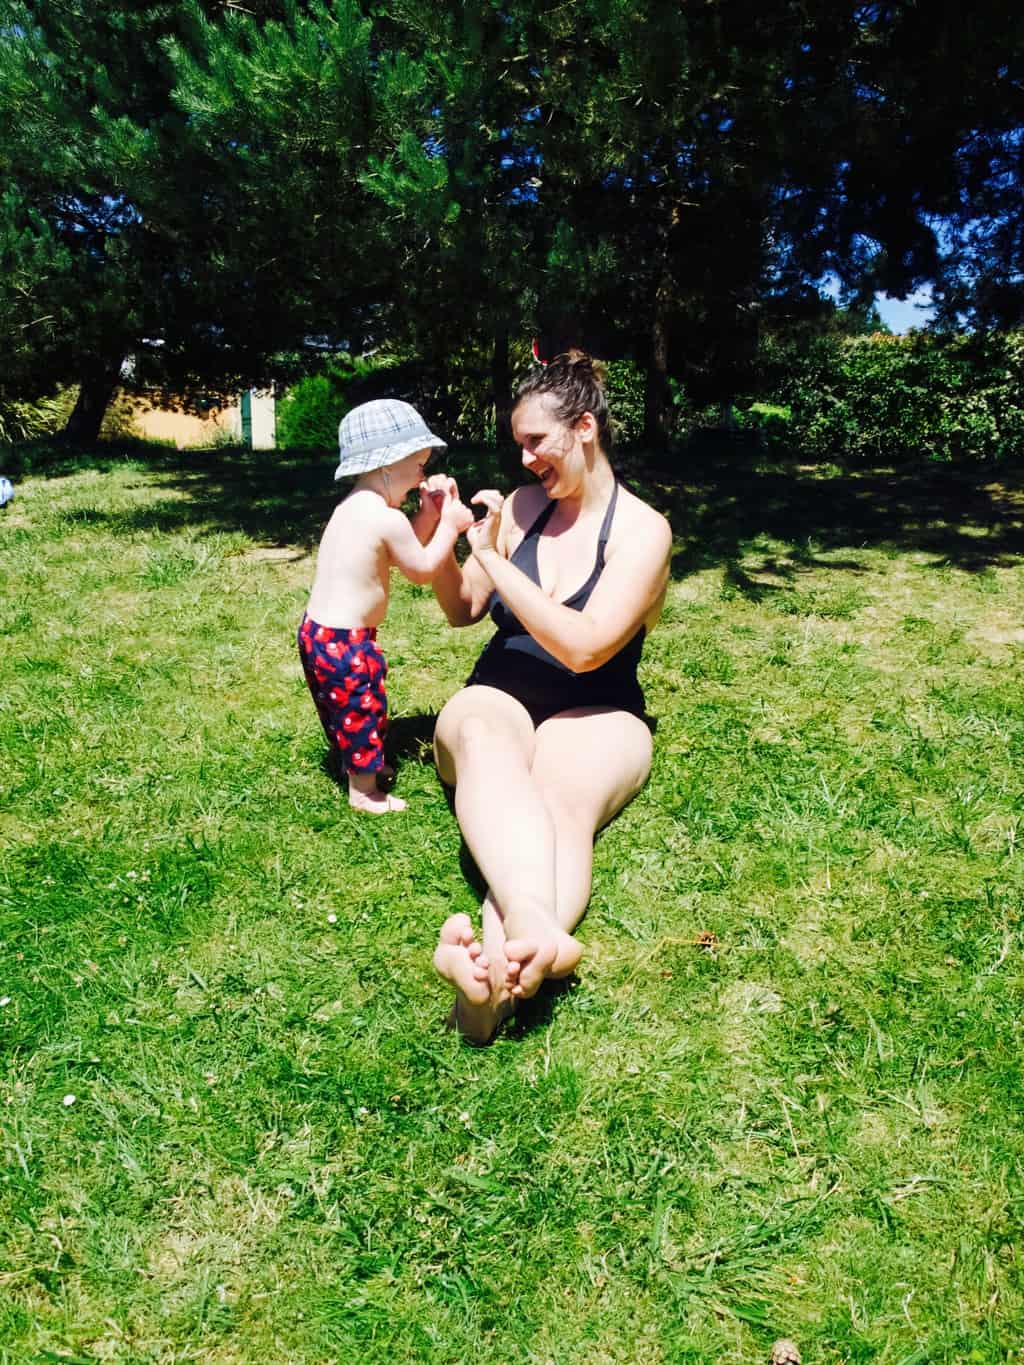
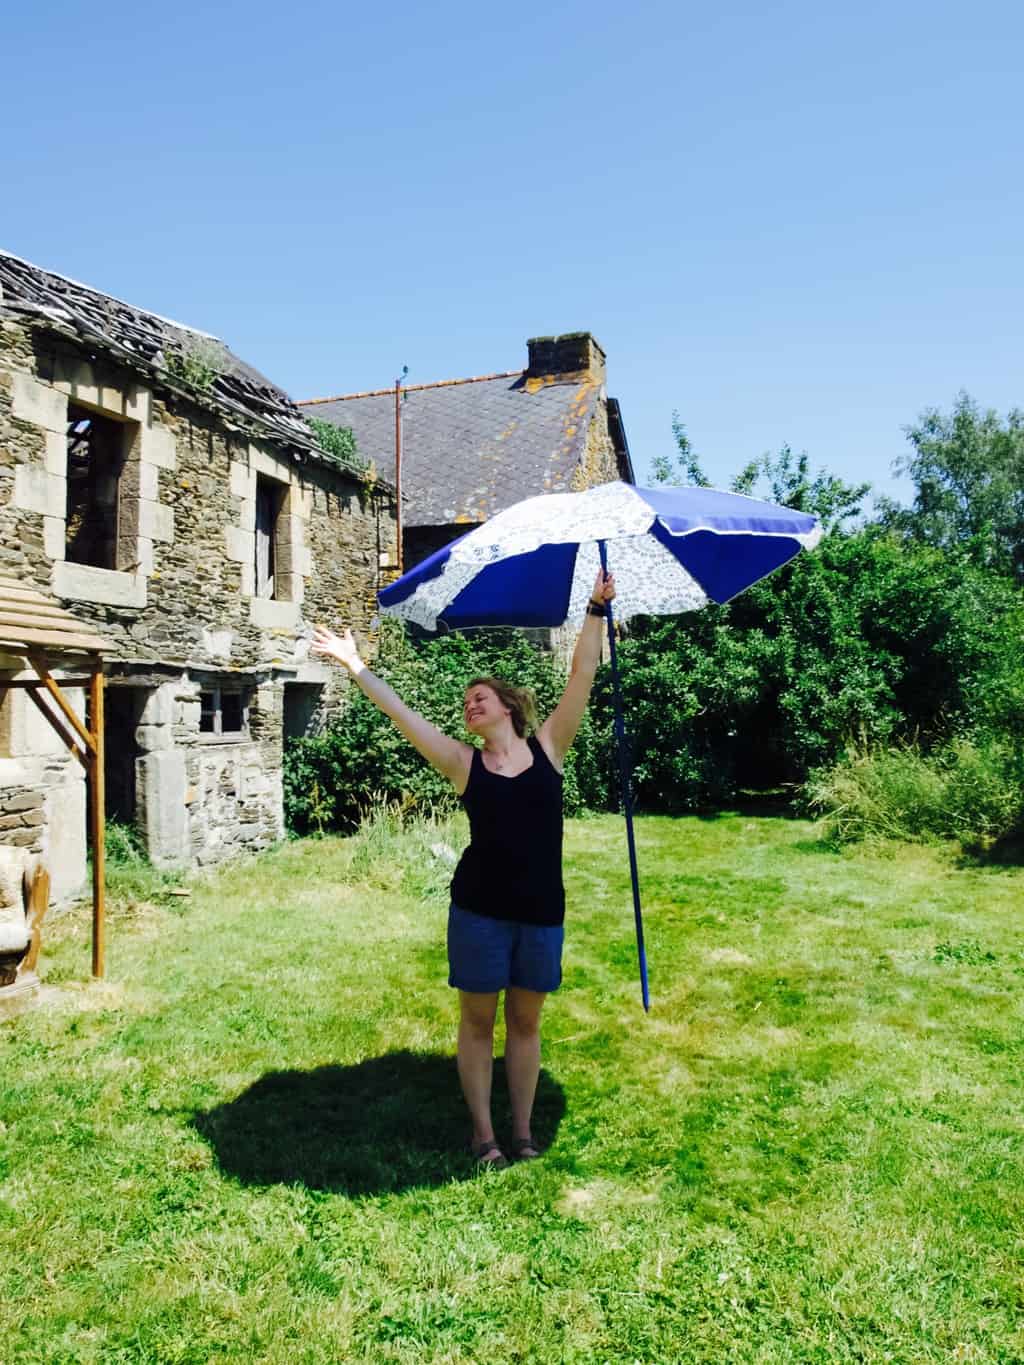
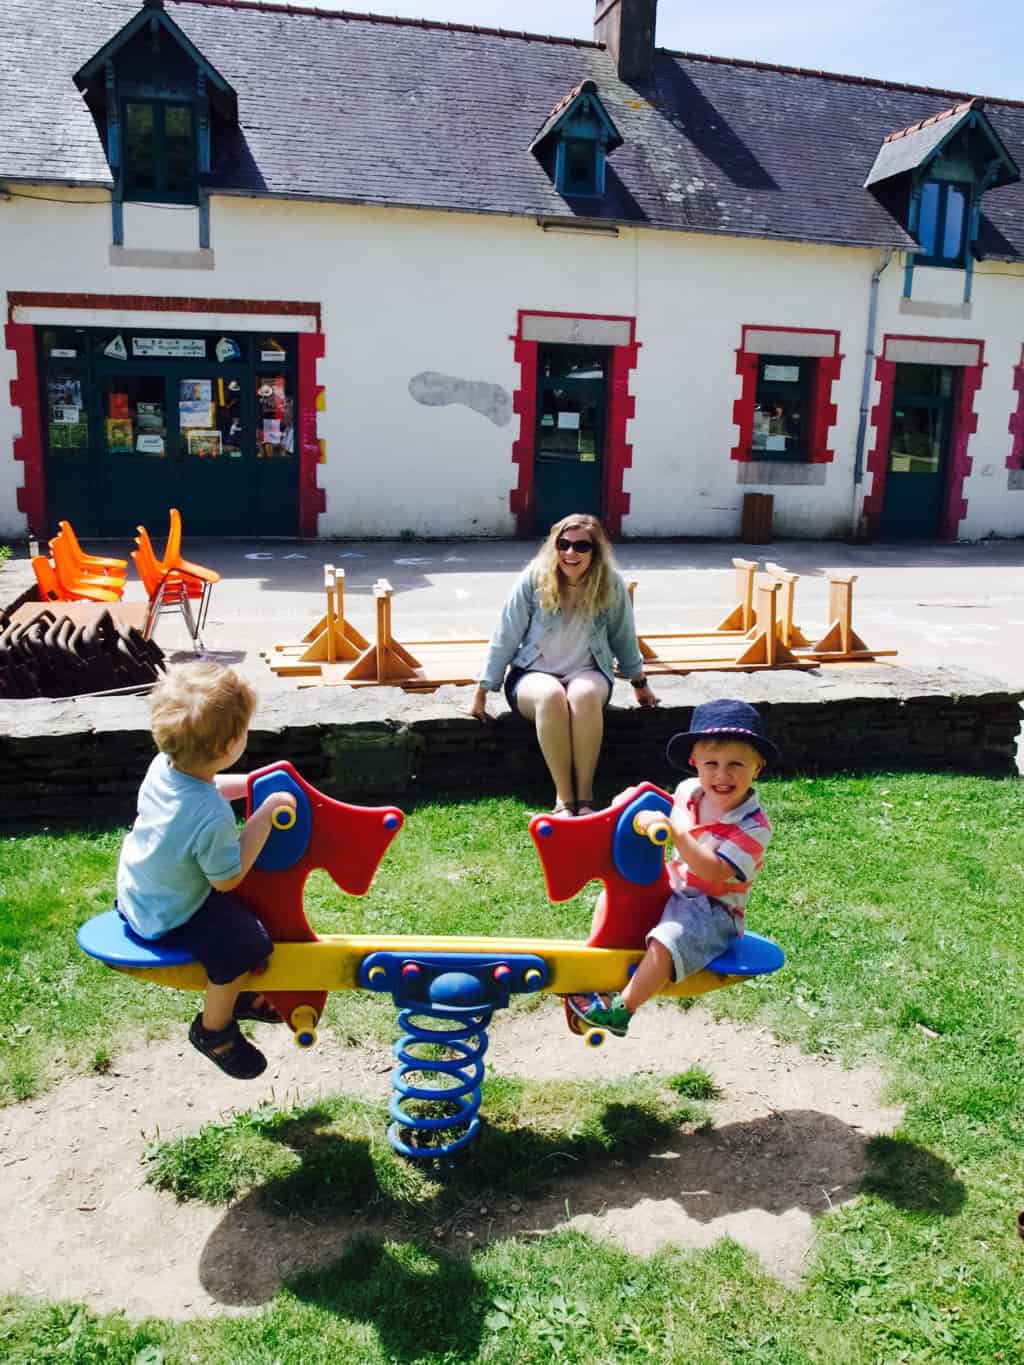
With older kids you can create play area where they can play independently. Which is why it is so important to pick a place that is child friendly and safe. Self catered houses/villas are the best! Not only that they provide more space for your children, but it also come up much cheaper than hotels. French holiday with friends (in Brittany)
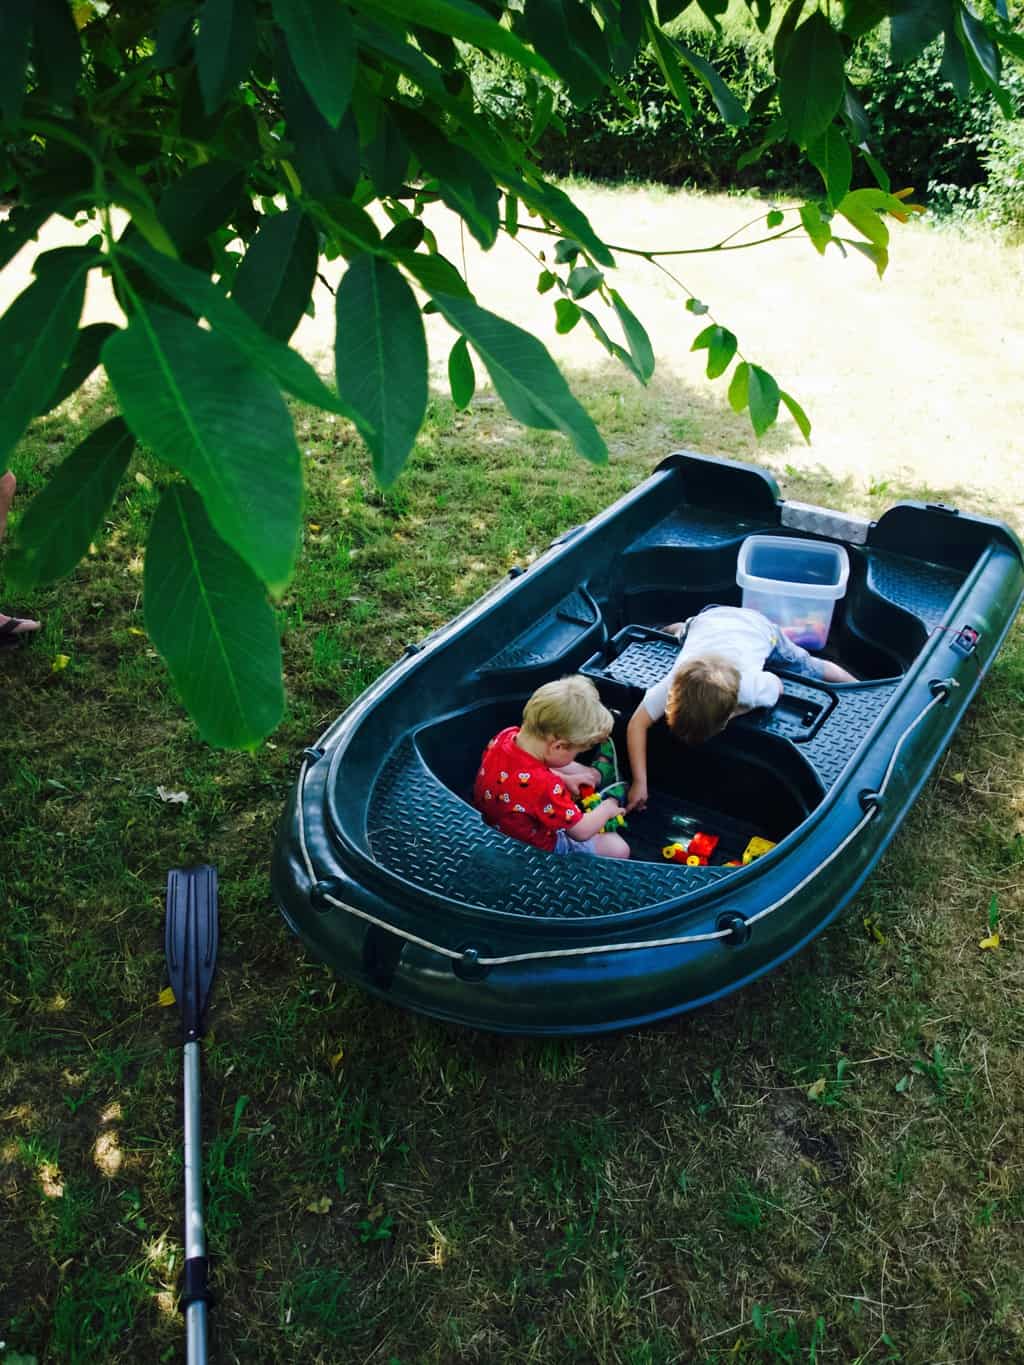
We loved eating in as it was so much more relaxing in the evening and that meant we could relax outside while kids are sleeping near by. I have learned (thanks to our friends that went on holidays with us) how simple is to pack lunches which saved us money and time (no need to find a restaurant and wait for a food with impatient kids). It was so much more relaxing just to picnic outside. We were so lucky to have such a good weather!French holiday with friends (in Brittany) We loved local activities such as kayaking and walks by the cannel. So my advice is to pick a location/house that comes with activities you like. That way you can exchange with baby sitting and do fun things in turns!French holiday with friends (in Brittany) French holiday with friends (in Brittany) French holiday with friends (in Brittany) French holiday with friends (in Brittany)French holiday with friends (in Brittany) 
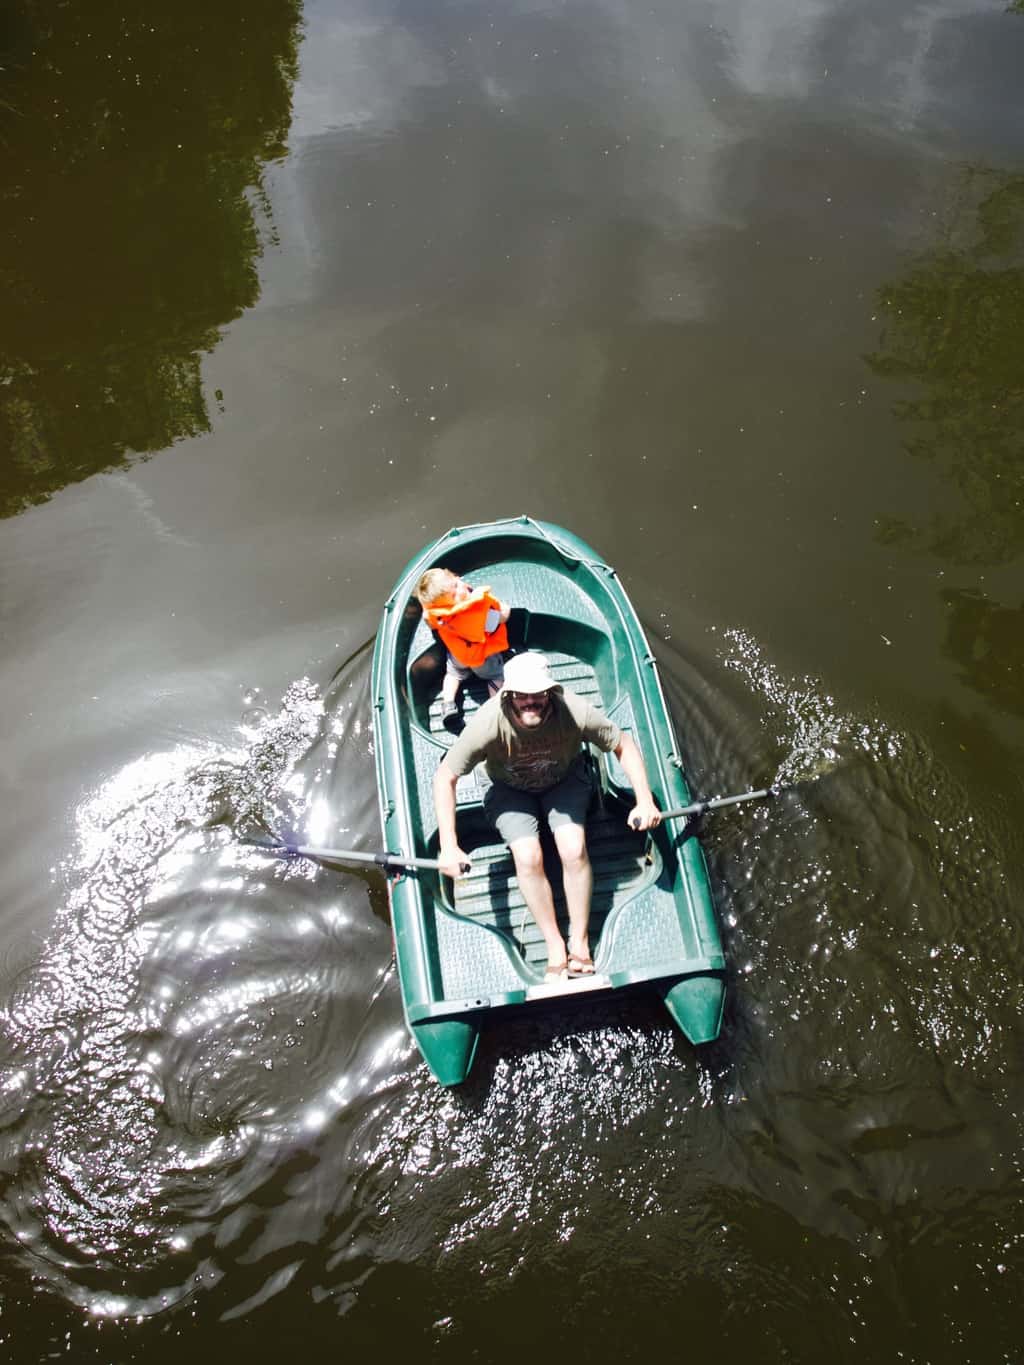
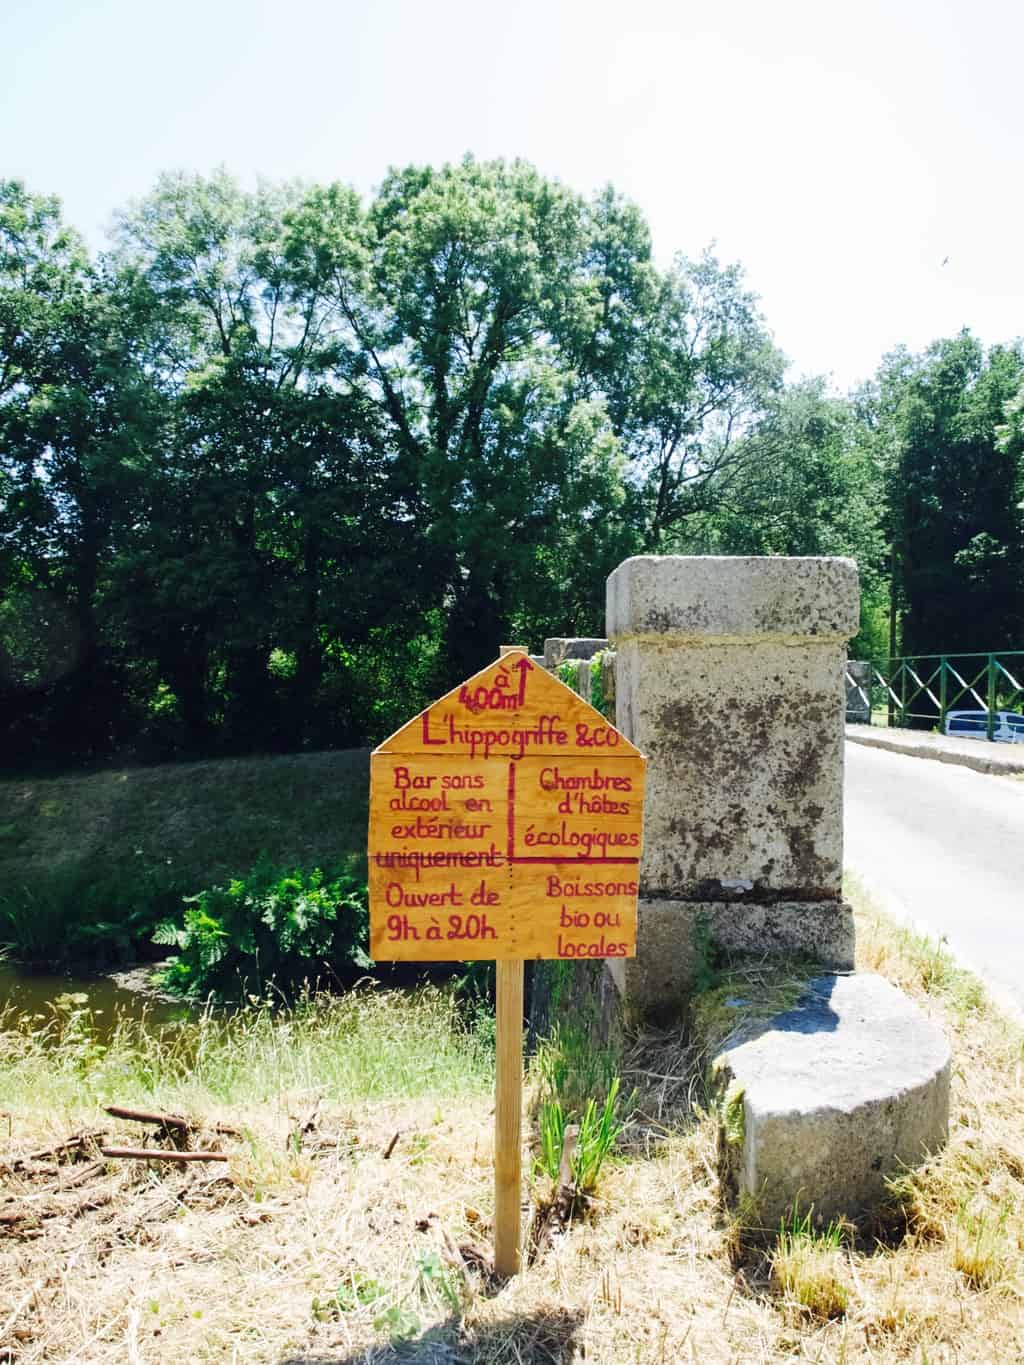
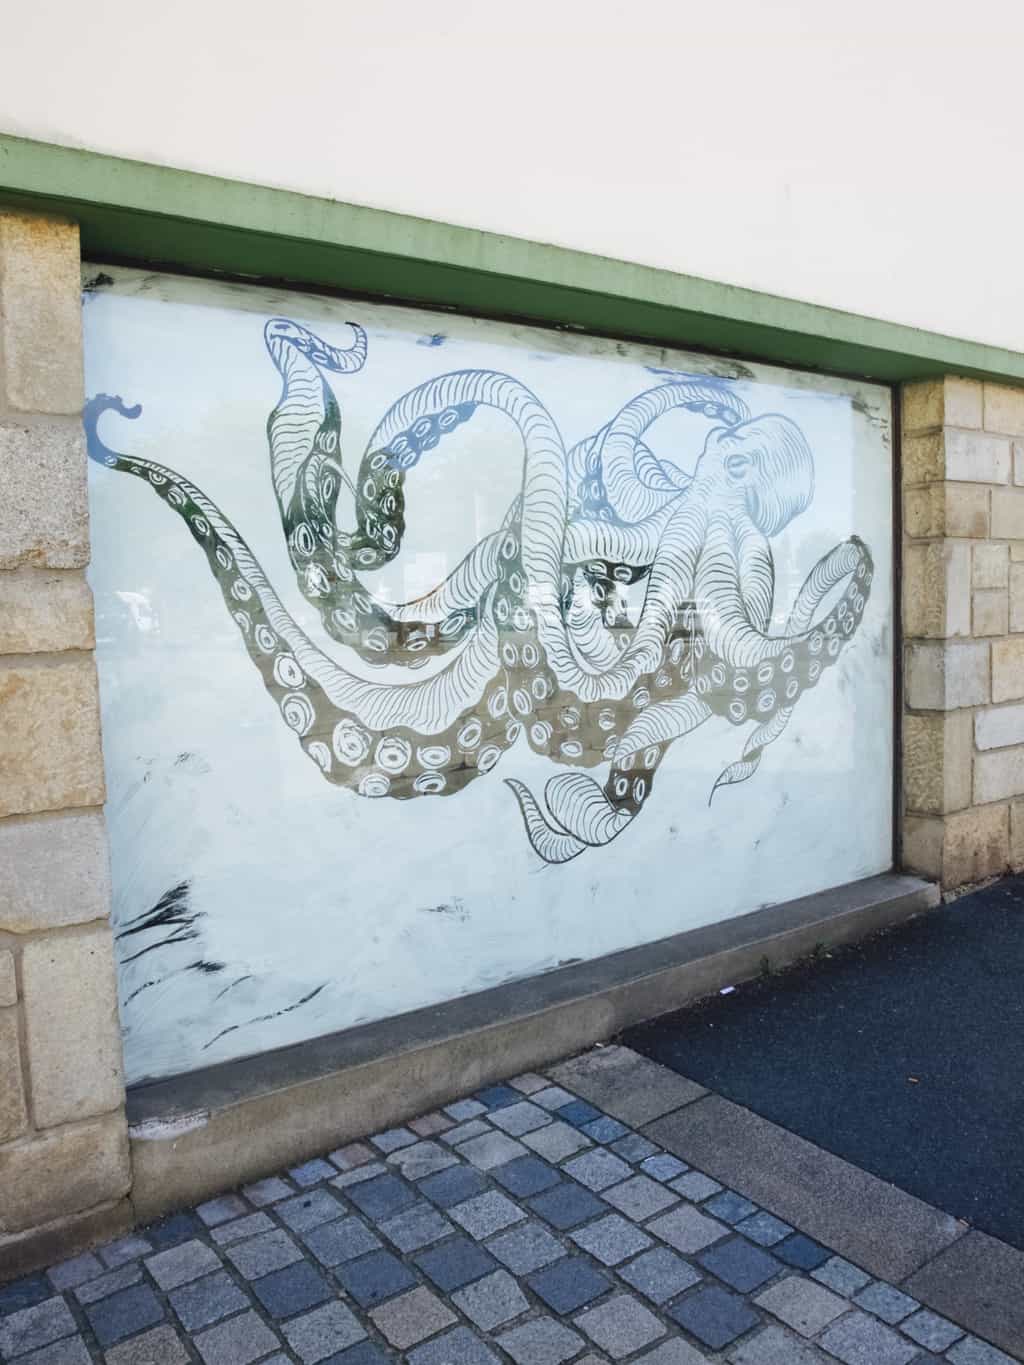
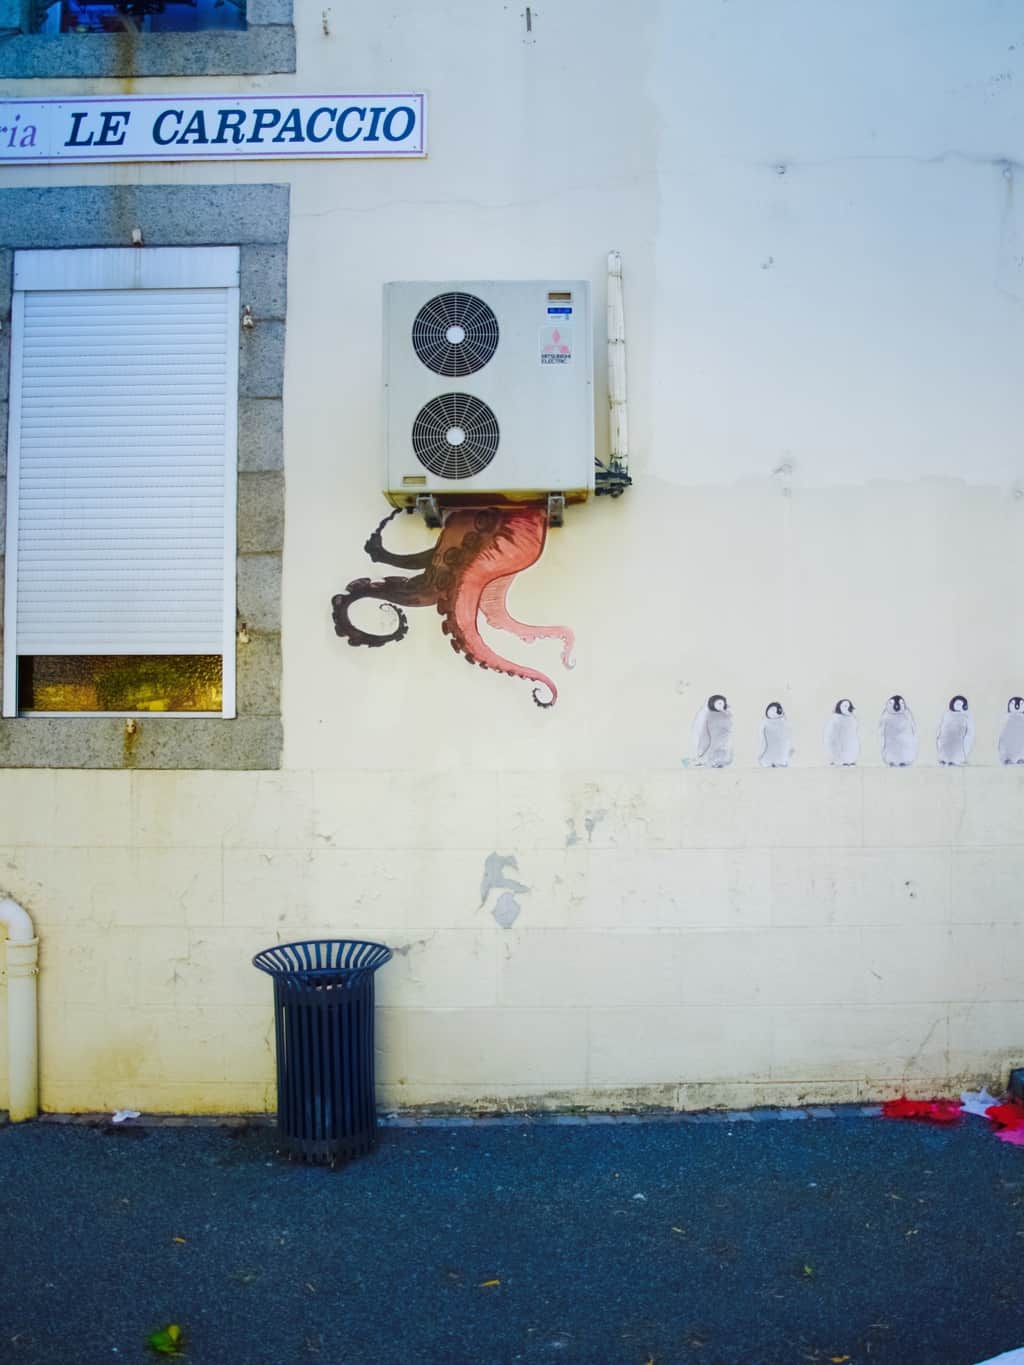
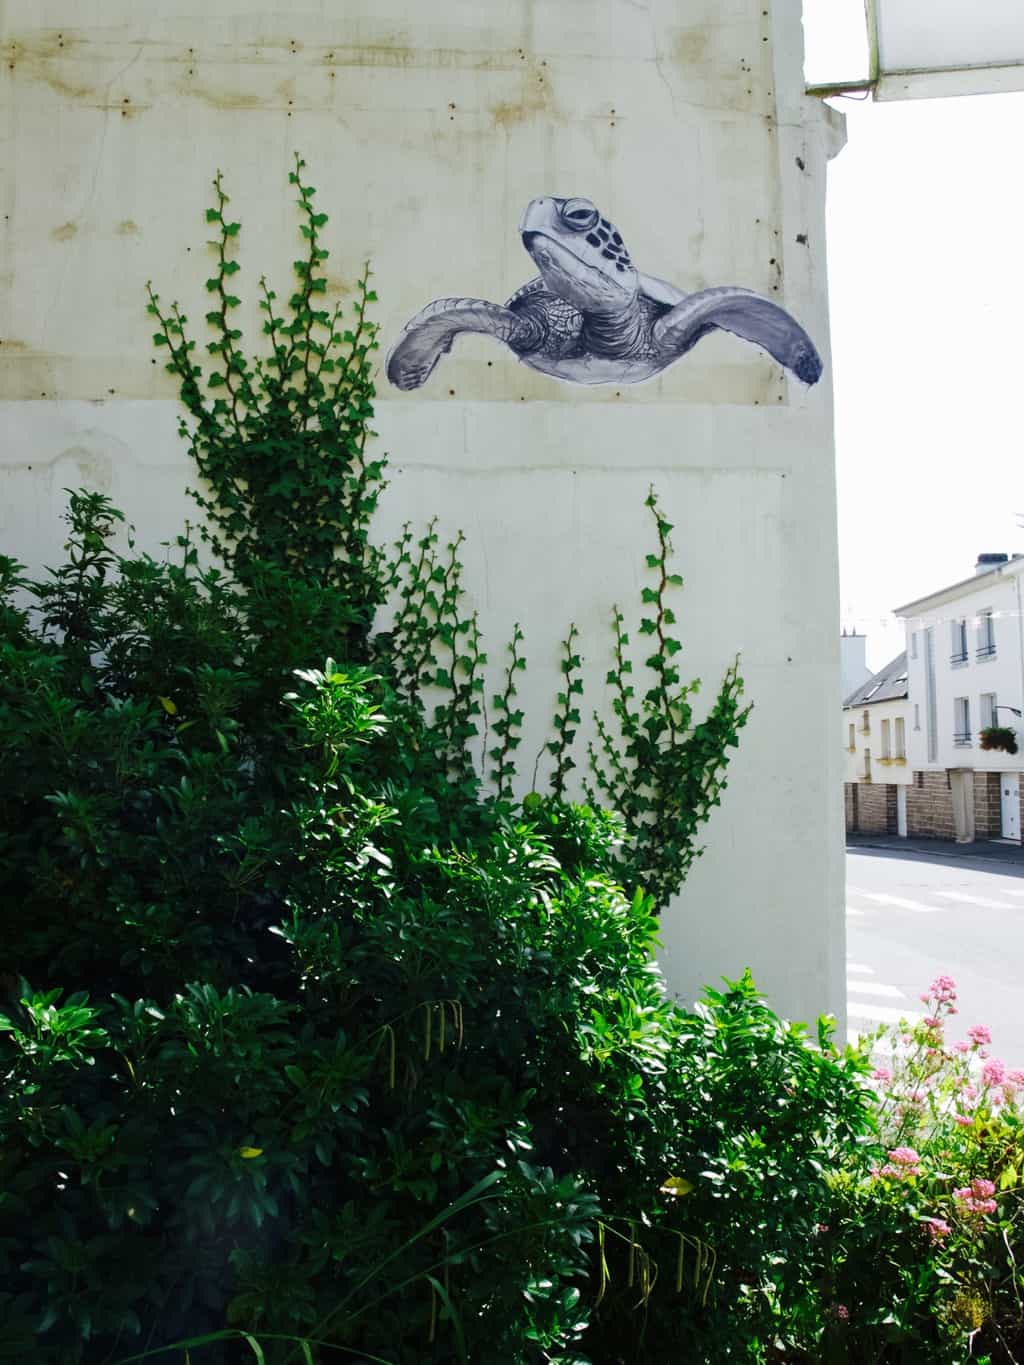
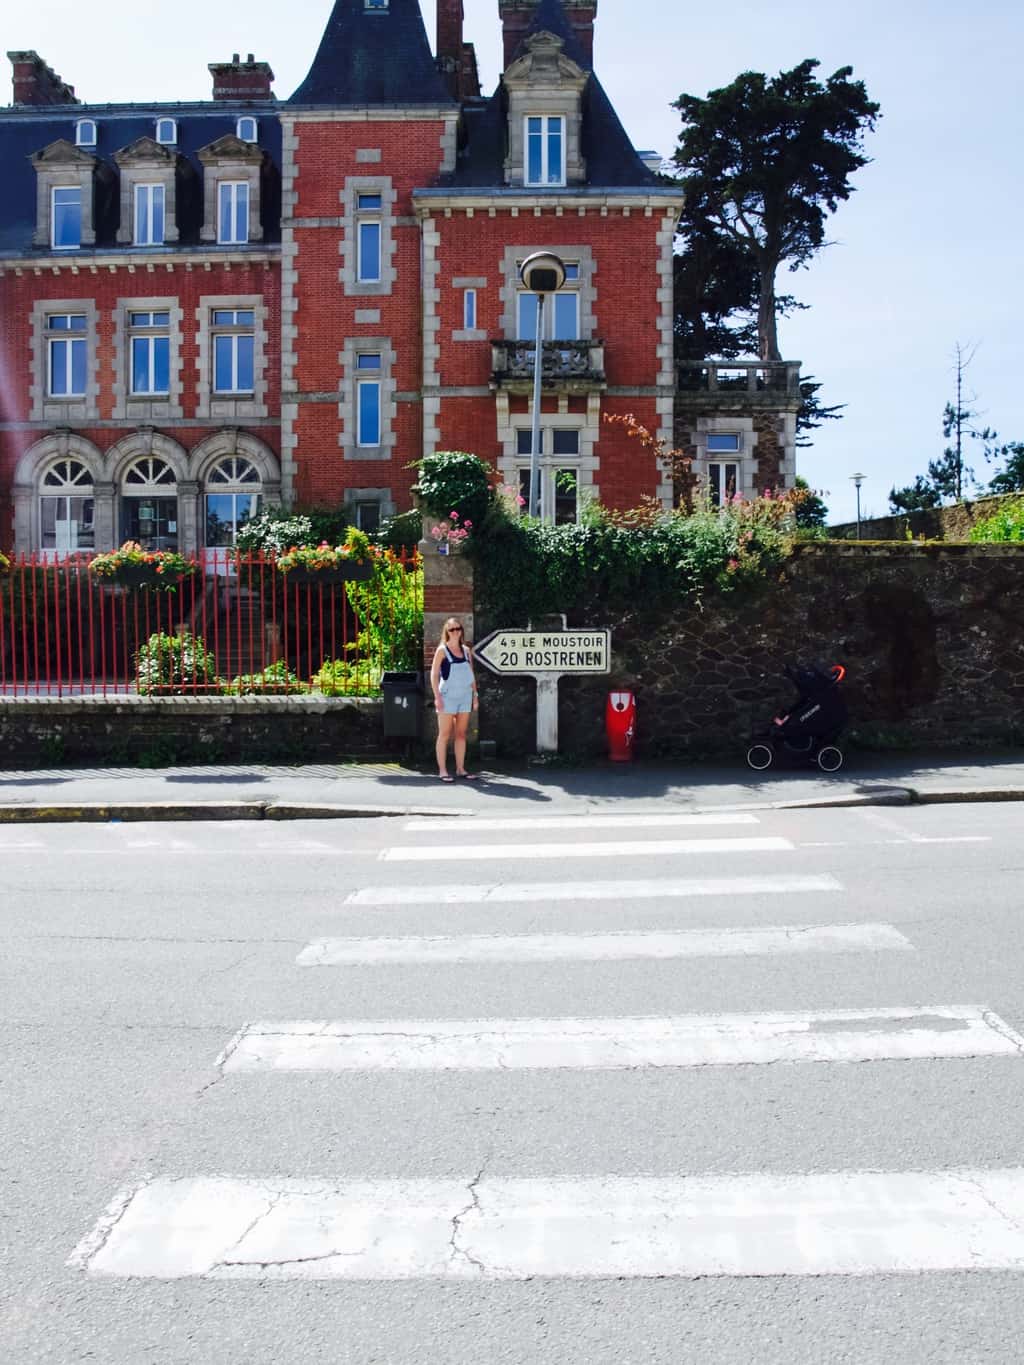
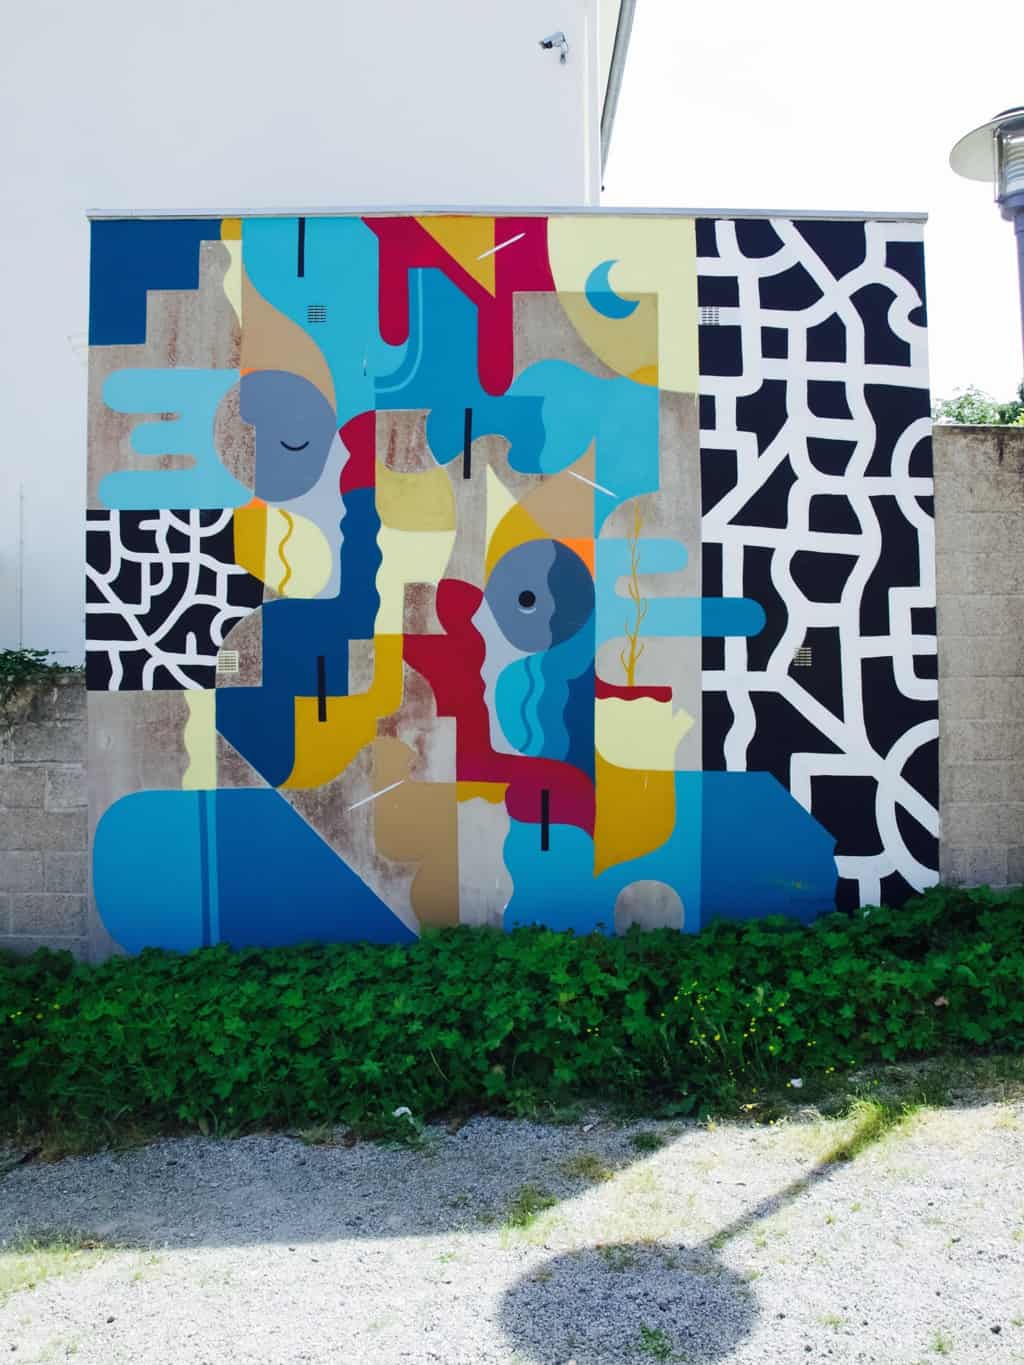
We stayed in Brittany, near Carhaix-Plougue. It is a very cute and creative town with lots of wall murals around (I am so into #wallmurals right now!!!).French holiday with friends (in Brittany) French holiday with friends (in Brittany) French holiday with friends (in Brittany) French holiday with friends (in Brittany) French holiday with friends (in Brittany) French holiday with friends (in Brittany) French holiday with friends (in Brittany) French holiday with friends (in Brittany) French holiday with friends (in Brittany) French holiday with friends (in Brittany) 
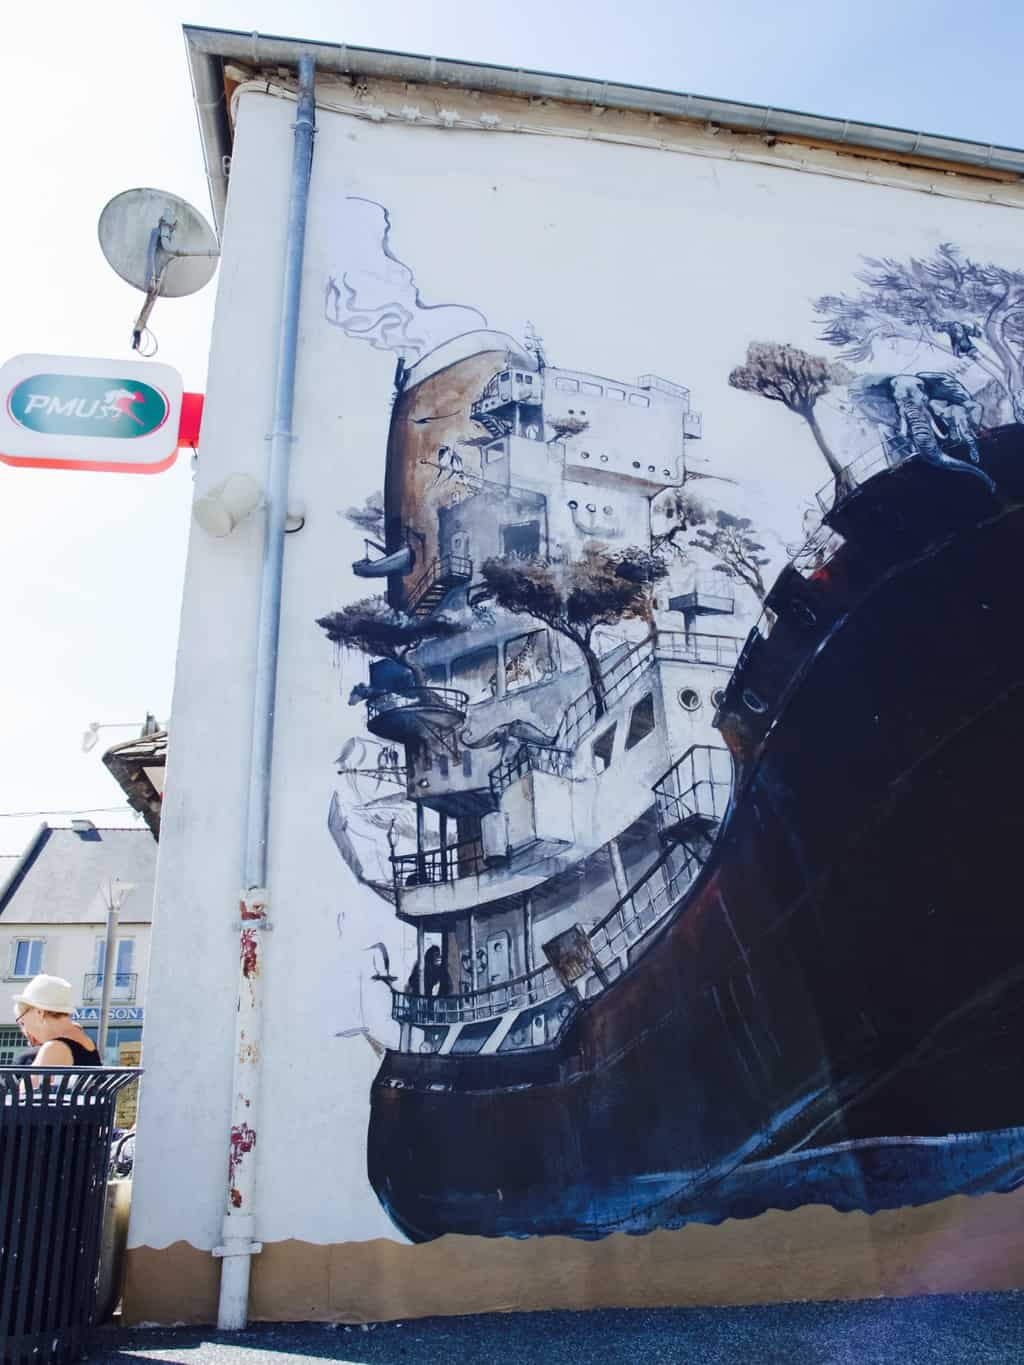
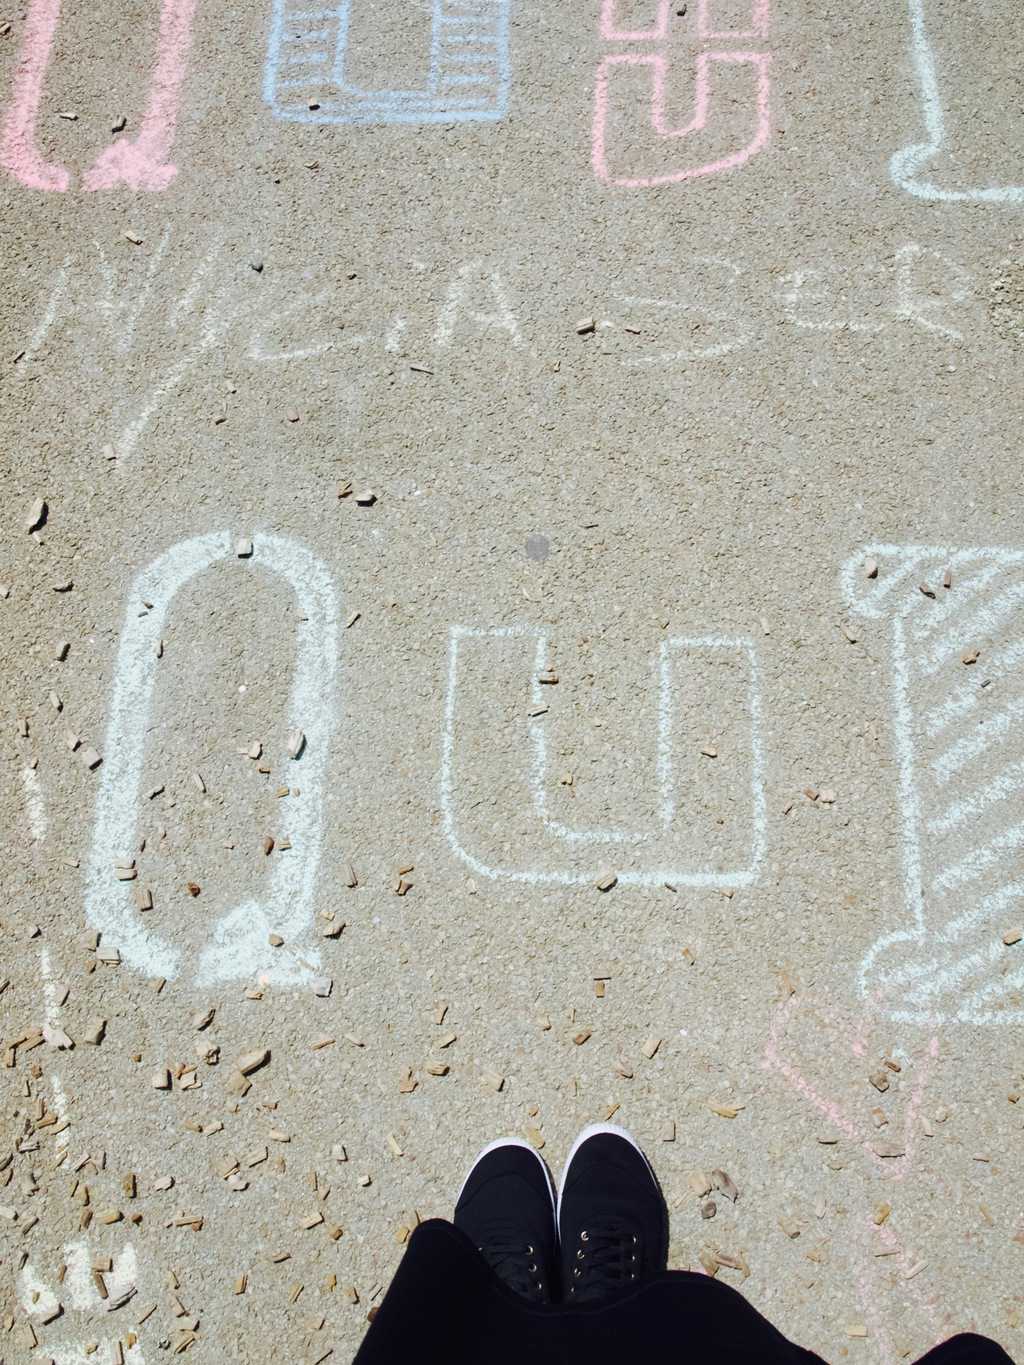
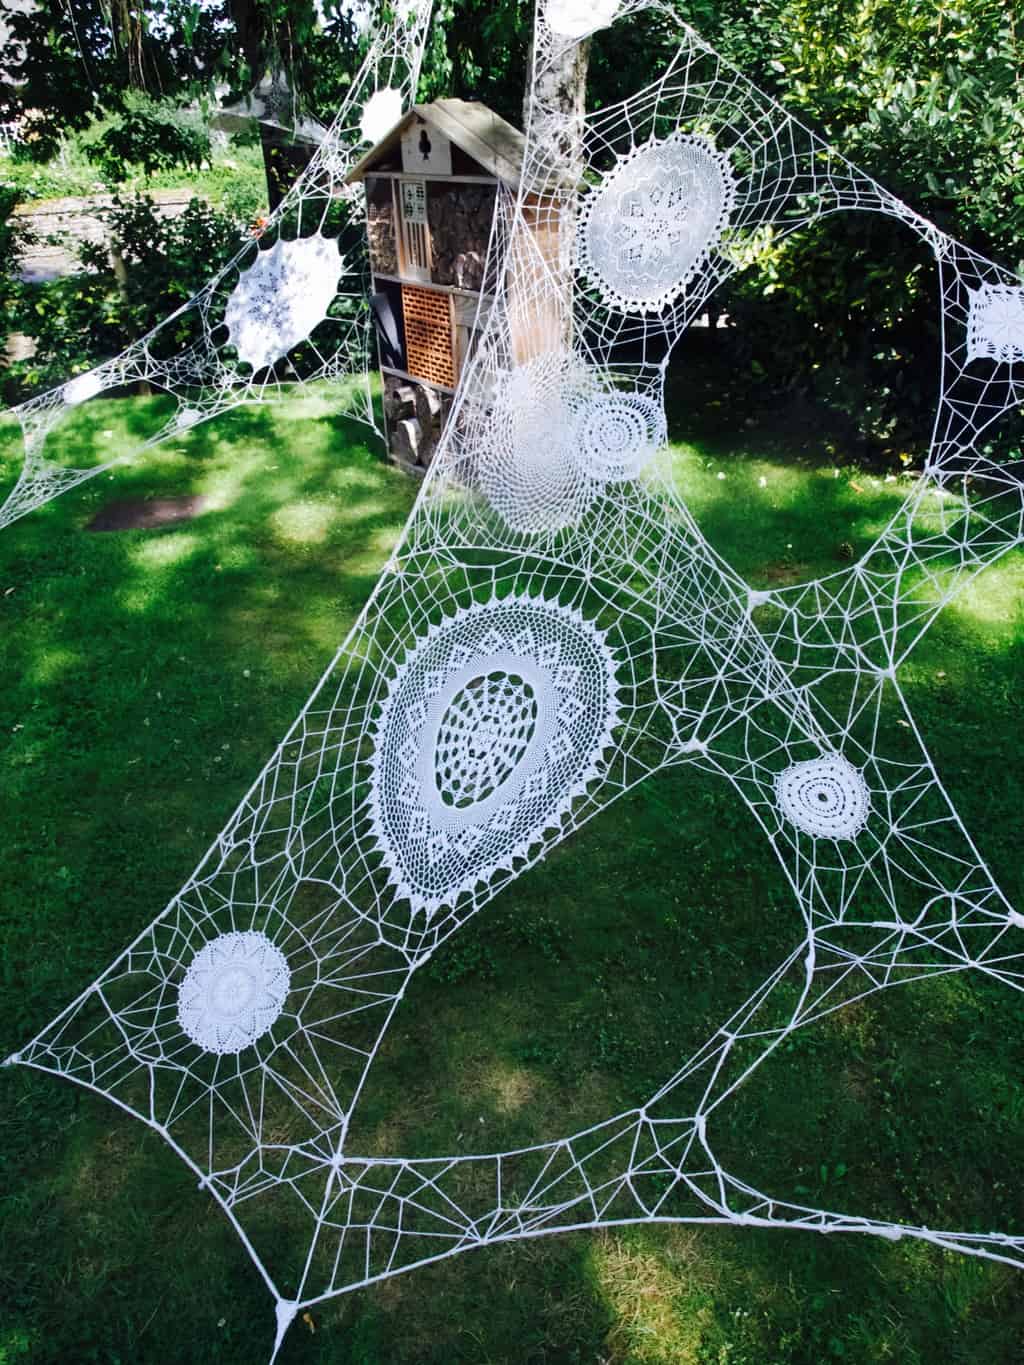
There was this crochet doily artworks all around the town centre and library. Feeling very inspired just remembering it!French holiday with friends (in Brittany) 
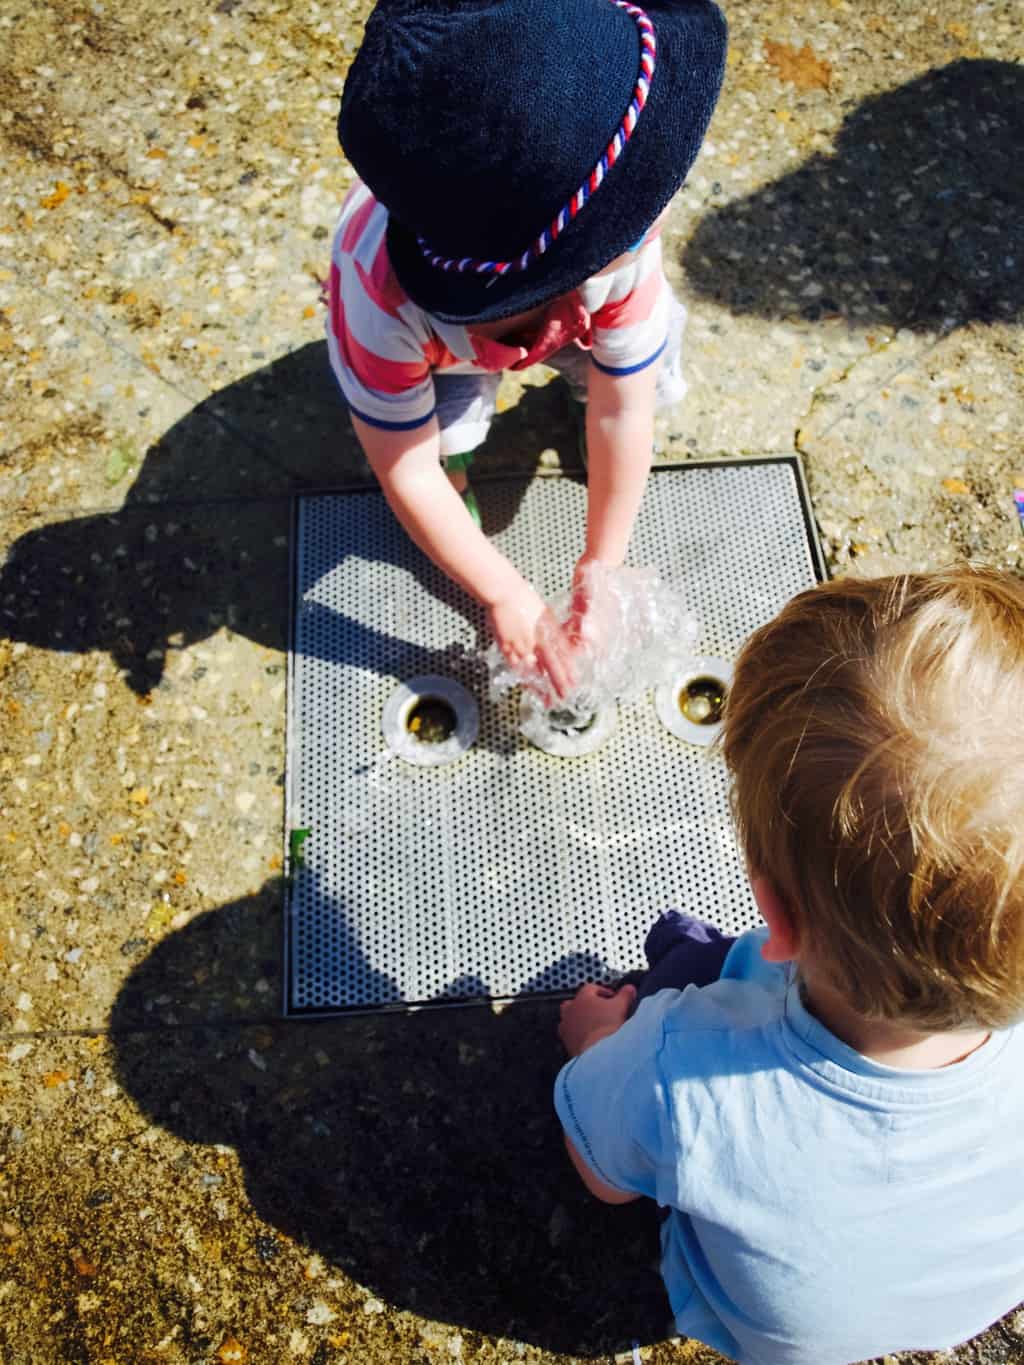
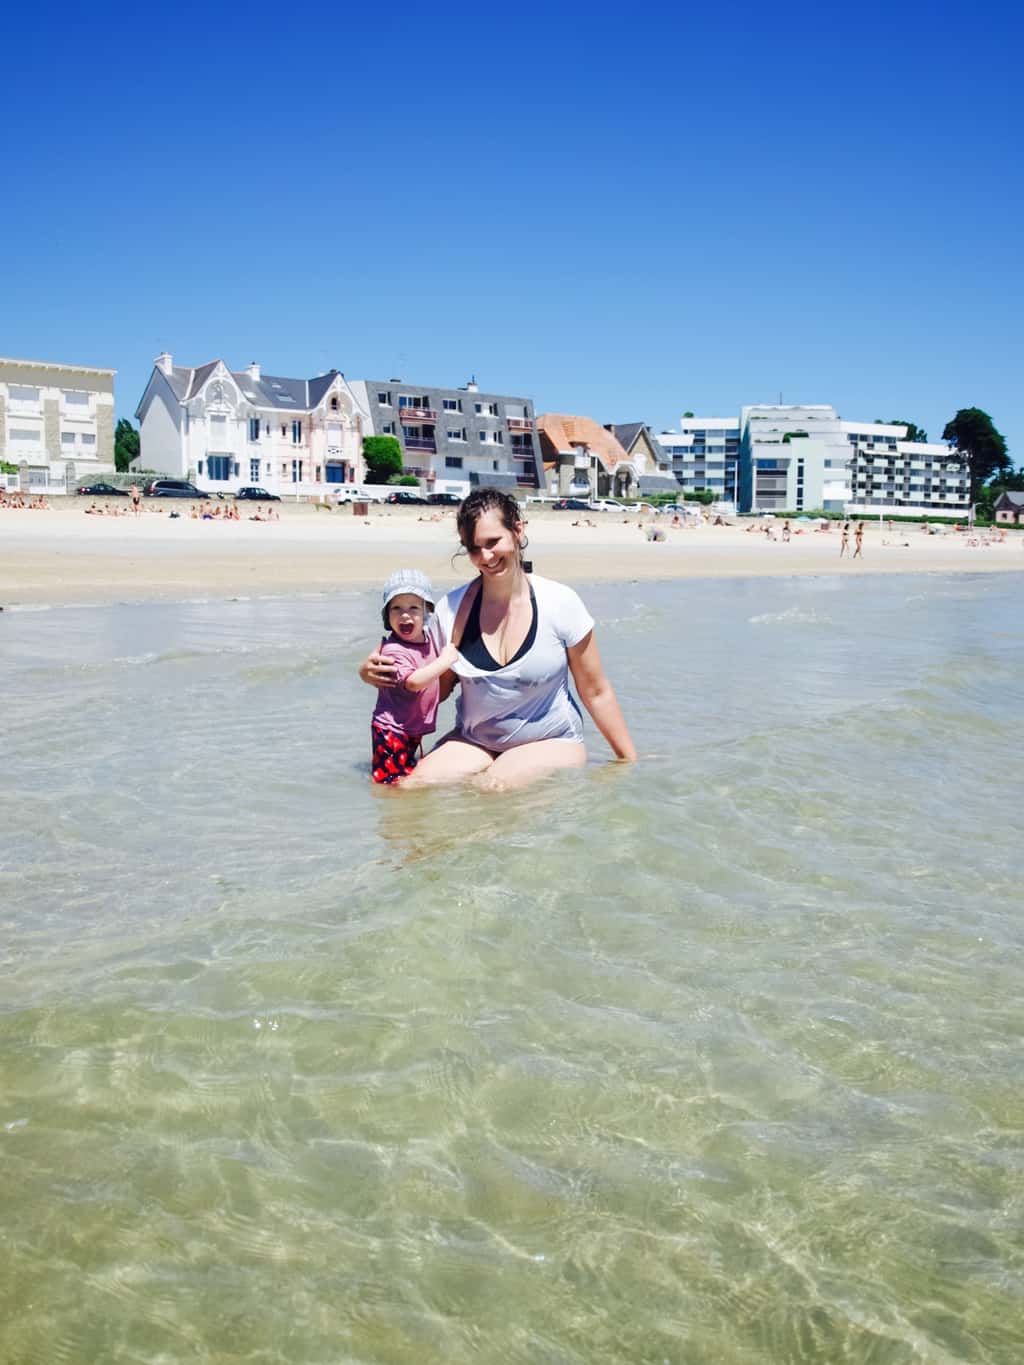
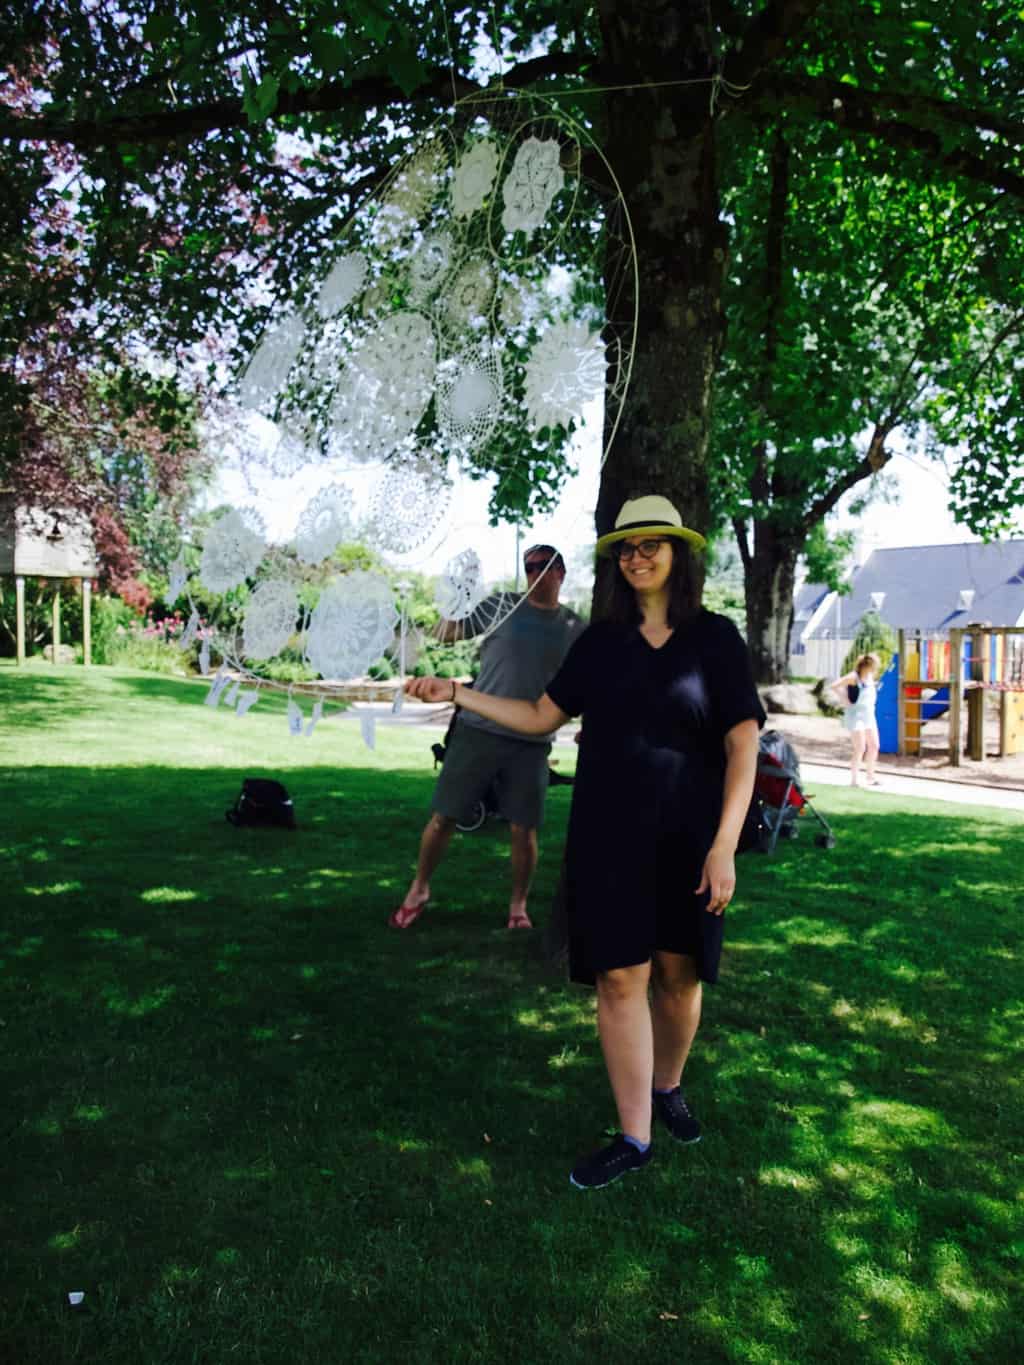
Of course we also visited the lake and local sea side which was the highlight I think.French holiday with friends (in Brittany) 
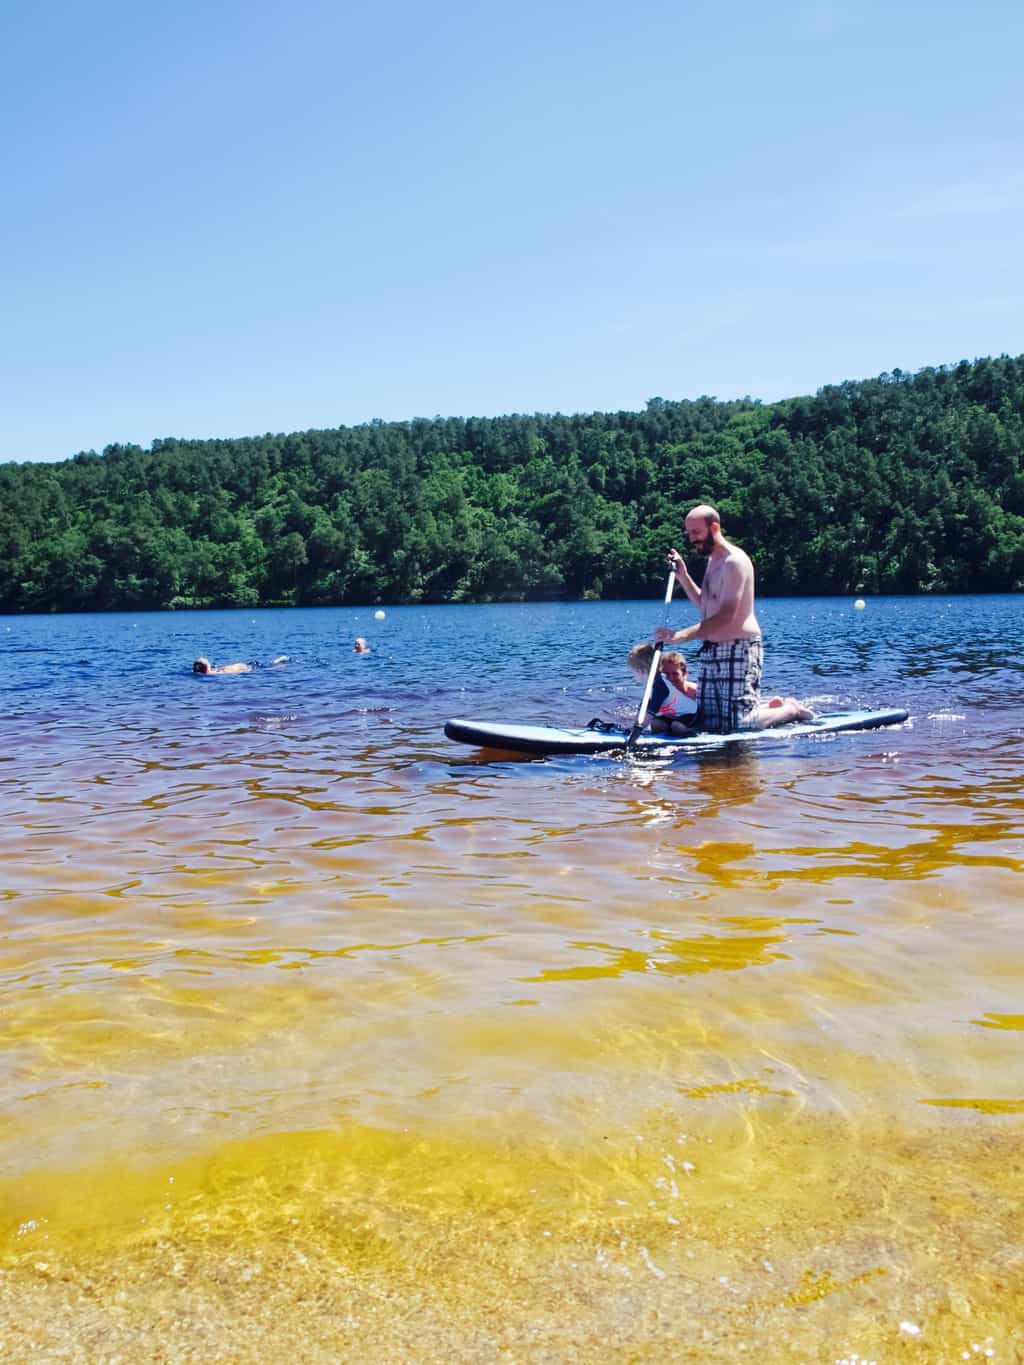
Amber water is not what people tend to get excited about lol, but I did!French holiday with friends (in Brittany) French holiday with friends (in Brittany)
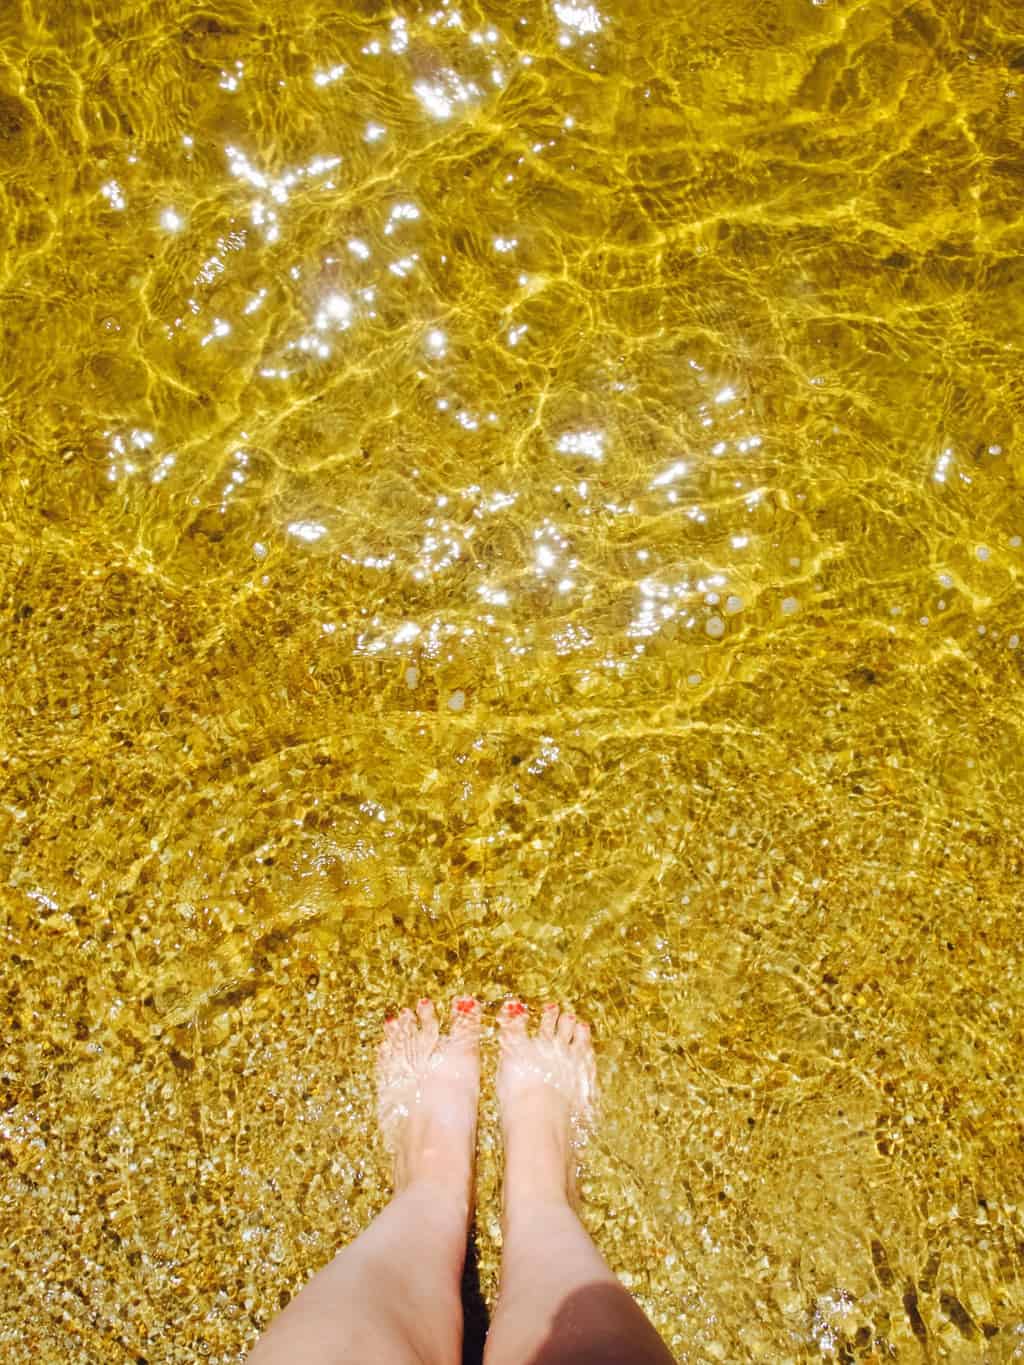
Have you started the holiday season yet? Hope my tips help ;-)

Rasa xoxo

1

Mint sauce – Lithuanian style!

Mint sauce Lithuanian style recipe So I am in Lithuania waiting for Joni to come and join us here for my brothers wedding. My dad is very eager to impress Joni with his culinary skills and kept asking what Joni would really enjoy to have for dinner when he comes.

Me: I am not too sure, we like a lot of things.

My dad: But what he really really likes?

Me: Ok, ok. I think he would really enjoy a good steak (I would enjoy that too with lots of salad… hmm)

My dad: How about I make roast lamb?

Me: But steak is beef? (why did he even ask if he is planning to make what he likes?)

My dad: So Joni does not like lamb?

Me: He likes lamb too. We like it with mint sauce.

My dad: Ok if I make roast lamb will you make the mint sauce?

Me: Ok sure!

I go and start looking into making some mint sauce. We have plenty of mint in the garden (check), salt (check), apple cider vinegar (Lithuanians are against using vinegar so I decide to try and use lemon instead), sugar (since lemon is sharp in taste I decide to make it more mellow by using some honey that we have plenty of as my dad is a bee keeper).

When Joni arrives my dad start introducing what he is making for dinner.

My dad: here is mussels for starter and here are some beef steaks for dinner.

Me: ????

Me: I thought you are making roast lamb??

My dad: But you said Joni prefers steak??

Me: never mind! I am not going into it.

I make the mint sauce anyways because I am interested how it turns out with lemon and honey. Joni is surprised how close to taste it was. I think I prefer it to the original recipe, because I am Lithuanian after all. I prefer food without vinegar although I do think sometimes it is necessary. Are you interested too how it tastes? Recipe is below.

MINT SAUCE LITHUANIAN STYLE

  • 1 cup compressed mint leaves
  • 1 tbsp honey
  • pinch salt
  • boiling water
  • 2-4 tbsp lemon juice

1. Place mints, honey, salt and some boiling water and whizz it with the hand processor.Mint sauce Lithuanian style recipe 2. Cool the mint puree and add lemon juice to your taste.Mint sauce Lithuanian style recipe This sauce is not only to use with lamb (although it goes with the lamb best). It can be used in mushy peas, mixed with yogurt to be used with rich stews. Maybe in salad too methinks?Mint sauce Lithuanian style recipeThanks for letting me share, hope this post does not sound too silly.

Rasa xoxo

0

Savoury pesto crepes (cheese filling is the best!!!)

Pesto crepes filled with cheese recipeTruth to be told I recently started to dislike mealtimes with my kiddies. Lukas has reached such a fussy age that I can’t predict if the food I make will meet his standards. Can anyone relate to this? And guess what, it’s not a gourmet food he is after. It’s pasta and pancakes that makes him really happy. Ok, we recently found out that he also likes curry, but I shall keep this story for another post. Ok? For now lets talk pancakes… hmmm

I came up with pesto crepes on one of those days when I wanted to keep lunch time casual. You see, sometimes Tomas goes for a nap in the middle of the day, which is why I started using this time to sort the meals out. I prep the dinner (often in slow cooker) and then me and Lukas casually lunch in the kitchen. I sit Lukas up on the counter while I fry some pancakes for him. I find this totally relaxing as I love nibbling on pancakes myself (with a cup of coffee on the side of course). This week I added pesto into the crepe batter which was a game changer. I started imagining how I could add different herbs next time as well  because it is so easy to make your own pesto using different kinds of bases (it can even be spinach!!). And most of all Lukas liked these “pancakes” equally as the plain ones. I made these savoury and filled it with cheese and tomato which was even better.

PESTO CREPES

  • 200g flour
  • 2 eggs
  • pinch of sugar
  • pinch of salt
  • 1 tbsp butter, melted (+ more for frying)
  • about 350ml water or milk
  • 4-6 tbsp pesto (doesn’t have to be basil pesto)

1. Place the flour into the bowl together with eggs, sugar, salt and butter. Whisk everything together into a dry mass. While whisking begin pouring the water gradually into the flour mass (not all in one go because you might not need it all). You are aiming for a batter consistency that easily drips down the whisk when held up but still leaves temporary traces when whisked. Pesto crepes filled with cheese recipe 2. Add pesto and mix again to combine.Pesto crepes filled with cheese recipe 3. You will need to fry pancakes in a well heated pan with a little butter. Pour one spoonful of batter into the pan and immediately start swirling round the pan to get a nice even layer. If you are having a cheese filling then add it at this stage as it needs to melt while the crepe is still frying. Pesto crepes filled with cheese recipe Just roll the crepe once the cheese is slightly melted.Pesto crepes filled with cheese recipe Best eaten warm!Casual lunch me and a toddler!Enjoy!

Rasa xoxo

0

Kids art Easter biscuits

Kids art Easter cookies diyHands up who is really really looking forward to Easter! We do! Me and kids are in Devon with the grandparents already and we are pretty much ready here (its easy when you are not hosting).

Me and Lukas has been drawing and painting lots recently so I initially thought we will do good old Lithuanian tradition and paint some eggs, but then I decided against it when I thought of shortbread biscuits… hmmm! I thought if I make the biscuits into egg shape then it will be like painting eggs but on the flat surface rather than the round surface (a little less messy I thought). Plus, I thought this is a very good opportunity to try out more of natural food colouring :-).Kids art Easter cookies DIYKIDS ART EASTER BISCUITS

(for biscuits)

  • 240g butter, softened
  • 200g sugar
  • 1 egg
  • 500g flour
  • 1tsp baking powder
  • 4tbsp milk

(for the “paint”)

  • 4tbsp icing sugar, sifted
  • water
  • 1tsp beetroot powder for pink
  • 1/2tsp turmeric powder for yellow
  • 1tsp matcha powder for green

1. Place all the biscuits ingredients into the mixer and switch it on for few min till everything turns into nice soft dough. At this point you can wrap the dough and place it in the fridge for the next day or freezer for whenever you need it in the future.

2. Flour the surface and the rolling pin and roll the dough about 7 mm thick. Using biscuit cutter or a cup/glass cut the circles in the dough. Once the circles are out of the dough roll it once more again (only one way) to make an oval shape.

Kids art Easter biscuits DIY 3. You can involve your kid at this point. Lukas was treating the dough as he would the play-dough.

4. Place all the dough shapes into lined baking tray and bake them in C200 preheated oven for 10min.Kids art Easter biscuits DIY 5. Meanwhile make the “paint”! gradually add water into the icing sugar until you are happy with the consistency. Split the icing into four cups so you can make up few different colours. Add each colouring to the separate cup and mix. Kids art Easter biscuits DIY 5. Initially I showed Lukas how to brush the “paint” onto biscuits…Kids art Easter biscuits DIY but soon after he realised it is so much more fun to drizzle and splatter the paint over the biscuits. I totally agree, these remind me of Jackson Pollock paintings.Kids art Easter biscuits DIY Kids art Easter biscuits DIY Kids art Easter biscuits DIYHave a very lovely Easter everyone xx

Rasa xoxo

0

Watercolour challenge: jungle

Watercolour challenge: inspired by jungle To be completely honest it was very hard to come back to painting but once I started I really felt piece and joy. I felt inspired by the plants that I saw on our holiday in Dominican Republic. Tropical climate plants are so so pretty!!! I am inspired to have some of them at my home some day, but for now they can at least live on my walls.

As usual I started with the method in mind I wanted to try. This time I wanted to try watercolour combined with the wax crayons. I remember first time I fell in love with the watercolour is when my Finish art teacher showed me how crayons makes paper waterproof and when watercolour is painted on top of it, the wax of crayon blocks from colouring (mixing with) the drawing leaving the colour it was but colouring all around it instead. This technique really fascinated me back then which is why I wanted to try it out again. In the painting above I drew the core lines with the crayon and painted leafs on top of it. I was pretty pleased with the outcome. The lines kept its sharp green shade!Watercolour challenge: inspired by jungle Watercolour challenge: inspired by jungleThe plant in the pic above have been my favourite so far! Although I don’t feel I depicted it well in my painting…Watercolour challenge: inspired by jungle Painting this curly leaf plant was quite fun! I love making repetitive patterns and painting these wiggly lines been real pleasure.Watercolour challenge: inspired by jungle Watercolour challenge: inspired by jungle Watercolour challenge: inspired by jungle To add some colour (not only paint in green) I tried painting this pink flower. I feel this was not my best painting so far. And look at all this mess I made in my watercolour palette! I wonder if other artist end up like that. Although I have seen other people just using water colour from the little tubes and mixing palette on separate piece of paper. I wonder if it is worth investing in fresh collection of water paint, hmm…Watercolour challenge: inspired by jungle Watercolour challenge: inspired by jungle For my next botanical painting I decided to use pencil instead (and rub it off after), that way I thought I will improve my shading technique. I divided the leaf into different segments that are “coloured in” separately and therefore shading is visible (hopefully). This painting took 2-3 hours, but it was so so worth it. I am in love!Watercolour challenge: inspired by jungle Watercolour challenge: inspired by jungle Finally this was a quick painting, I used pencil to mark the stalk of the fern and leaf in watercolour. I don’t know why, but this is my another favourite, so simple but so beautiful at the same time!Watercolour challenge: inspired by jungleThanks for letting me share my experiences here re my new found passion :-)

Rasa xoxo

0

Natural frosting birthday cake

Spiced honey cake with turmeric soft cheese frosting & plum jam filling Few weeks ago we celebrated Tomas birthday, which is why I baked the cake. Anyone who knows me I like the cakes with minimum frosting, made with natural ingredients and most of all I like good flavours. This cake ticks all the boxes for me!!

When I was thinking of Tomas birthday party theme I was thinking of something cheerful, exciting and bold (exactly how I would imagine Tomas when he grows up). This is why I thought bright yellow frosting on the cake would be ideal. But what natural colouring could I use for a bright yellow? I did not need to think for too long, I suddenly remembered the power of turmeric that is vibrant with not much taste to it. The flavour of the cake followed of course. I thought what goes better with turmeric then other spices such as cinnamon, clove and nutmeg. I was completely right, when testing the cake I realised everything just work really well together. I used plum jam to neutralise the taste of richness which also turned out a very good choice.

Hope I got you seduced to try to bake this cake yourself. You will find the recipe below ;-).Spiced honey cake with turmeric soft cheese frosting & plum jam filling HONEY SPICED CAKE WITH TURMERIC FROSTING AND PLUM JAM FILLING

(for the cake)

  • 200g butter
  • 100g light brown sugar
  • 100g dark brown sugar
  • 170g honey
  • 2 eggs
  • 260ml milk
  • 325g flour
  • 1/2 tsp salt
  • 3tsp baking powder
  • 3tsp mixed spice
  • finelly grated zest of 2 oranges

(for the frosting)

  • 150g softened butter
  • 150g soft cheese
  • 150g icing sugar, plus a bit more for white frosting
  • 1tsp turmeric
  • 1/2 jar plum jam

1. Over the hob melt the butter together with sugars and honey till everything is incorporated and the sugar is dissolved.

2. Add the rest of the cake ingredients and mix again to combine everything well.Spiced honey cake with turmeric soft cheese frosting & plum jam filling 3. Split the cake mixture into two ready tins (same size, springform are the best). Bake in 150C preheated oven for 1h and 15min.Spiced honey cake with turmeric soft cheese frosting & plum jam filling 4. Sandwich the cake with some plum jam. My tip is to put the cake upside down so the top is completely flat (really felpful when you do frosting).Spiced honey cake with turmeric soft cheese frosting & plum jam filling 5. To make the frosting place all the ingredients except turmeric into the mixer and let it run for few minutes. Put few table spoons of frosting aside for the white frosting. Add turmeric and let the mixer do its job one more time.  Spiced honey cake with turmeric soft cheese frosting & plum jam filling 6. Next job is to apply the frosting. I always add almost all the frosting on top to begin with and then push it down gently to the sides and then I work with frosting palette knife to the top again (I make the frosting thin for a reason so it flows easily). Once the base frosting is done I recommend to place the cake into the fridge so it sets.Spiced honey cake with turmeric soft cheese frosting & plum jam filling 7. Meanwhile add more icing sugar to the frosting left on the side. Continue adding the sugar till you are satisfied with the stiffness of the cream. Transfer white frosting into the piping bag with large round nozzle attached. Carefully pipe your decorations on the cake.Spiced honey cake with turmeric soft cheese frosting & plum jam filling 8. Finally decorate with any cake toppers. I used water balloons to make these mini balloon cake toppers which made the cake look very fun like I expected :-).Spiced honey cake with turmeric soft cheese frosting & plum jam filling Spiced honey cake with turmeric soft cheese frosting & plum jam filling Hope you like it too!!

Rasa xoxo

0

Watercolour challenge: forest in snow

Forest in snow inspiration from our recent trip to Austrian Alps As you may have already noticed I enjoy taking challenges, and for a good reason! Challenges are good for achieving goals. Not all types of goals of course, but if you want to learn something or get to start doing something then this method is the best (at least in my experience). In the past I did Pinterest challenge to get myself to try more recipes from Pinterest (still doing it sometimes), then I did a photography challenge so I could learn to take better pictures, I did a sugar free diet in the form of a challenge (sort of) and a book reading quest for three years which worked a treat. Now my aim is to get myself painting more and this is why I came up with this watercolour challenge ;-).

Few weeks ago we went to ski to Austrian Alps and I loved the snow there (as well as occasional snow at home). Falling snow brought be joy and the whole experience was quite magical so I decided to put it all on the paper. But at the first glance snow is white, so how do I paint the white? Once I look through this first obstacle I realised snow came in different shades actually. Whats more, I liked seeing some bold colours in a pretty misty landscape such as people wearing bright outfits or a lift cabin like in the pic above.Forest in snow inspiration from our recent trip to Austrian Alps I began painting the forest landscape first. I thought if I do it using the classic watercolour method I should achieve the right texture quite easily. I tried dipping paper into water and then paint vogue outline of fir trees. I thought the paint would bleed and that way would create required texture. That did not work out even when I tried getting better paper and paint brushes. The fir trees just looked too plain for my liking. Eventually after much trial and error and some research I found that salt is best in creating this so much desired texture. Yey!!! Now I am quite pleased with my winter wonderland forest painting. Hope you can pardon my spelling, but I do love this quote. It’s exactly how I feel when I see snow!Forest in snow inspiration from our recent trip to Austrian Alps Forest in snow inspiration from our recent trip to Austrian AlpsThis is what I mean by many shades in the white snow. It was fun painting this as shading with watercolour is very pleasant. It works quite simple: the more water you add the lighter the colour. If you want the colours to bleed less then wait for it to dry more before applying another layer. Watercolour challenge: snow Forest in snow inspiration from our recent trip to Austrian AlpsPainting trees has always been my favourite thing to paint. Here I initially tried to create the branches by blowing on the drop of paint that was sitting already on the paper. Later I added more branches and snow by lightly brushing some tinted water on it. Watercolour challenge: forest in snow Forest in snow inspiration from our recent trip to Austrian AlpsLastly I was amazed of fir tree needles sticking out in the snow. This took quite a lot of attention on detail but it was all worth the try.Watercolour challenge: forest in snow Watercolour challenge: forest in snowHope I inspired you too to take a challenge or thought you something new about watercolour.

Rasa xoxo

1

Breakfast banana bread

Breakfast banana bread recipeI am not going to lie, last week was a bit difficult. Coming back from holidays straight to real word is overwhelming! And we are going for another holiday again next week so not sure how I am going to cope to do this all over again. One thing is certain, I am trying to prepare as much as I can for it. Last week I had a meltdown when I find out we have no bananas left for breakfast. This is why this time round I am making banana bread to put in the freezer just in case so I can toast it if I am in banana emergency again (sounds funny, but it was seriously an emergency because banana is a very important staple in our house). I made this banana with porridge oats and replaced sugar with honey, so it is sort of healthier than regular banana bread. It’s not like I am giving cake to kids for their most important meal!

BREAKFAST BANANA BREAD

  • 160g honey
  • 100g butter
  • 2 eggs
  • 2 tbsp yogurt
  • 500g ripe bananas (4-6 bananas) + 1 for the decoration
  • 100g porridge oats
  • 150g plain flour
  • 2tsp baking powder

1. in the blender or food processor cream butter with honey then add eggs and yogurt and whizz once again.Breakfast banana bread recipe2. Add remaining ingredients, including pealed bananas and turn the food processor on to make a smooth banana bread mixture. Breakfast banana bread recipe 3. Pour the mixture into the prepared baking tin. Top it with sliced banana and bake it in preheated 180C oven till it is baked through.Breakfast banana bread recipe 4. Don’t slice baked banana bread while it is still hot like me here. It wont cut well as it is a very very moist banana bread. Once it’s cool it can be eaten straight away or frozen ready sliced.Breakfast banana bread recipeHope January is treating you well!

Rasa xoxo

0

Croissants with poppy seed filling

Croissants with poppy seed filling recipe  In Lithuania we are big on poppy seed, especially when it comes to Christmas. This is why I feel that these croissants filled with poppy seed goodness is very appropriate for this season. I have been wanting to make this hundred leaves cake to begin with (It’s so traditional in Lithuania like fruit cake in England), but I felt it was too time consuming. This is when this croissant idea came around! You see the dough of hundred leaves cake is kind of similar to croissant dough so I decided to incorporate it with the shop bought dough. Everything went swimmingly well and the rest is history.

CROISSANTS WITH POPPY SEED FILLING

makes 6

  • 100g poppy seed
  • 50g raisins
  • 1tbsp honey (optional)
  • uncooked croissant dough ( I used Jus-Rol brand as it seem the only one available in the shops)
  • 1 egg, whisked for egg wash

1. Place poppy seeds and raisins into the bowl and pour over boiling water over it. Let it sit for an hour or so till it is well soaked and doubled in size.

2. Using the blender whizz poppy seeds and raisins till it becomes like a paste. Add honey if needed for the sweetness, otherwise it is quite sweet from the raisins.Croissants with poppy seed filling recipe  3. Roll out the dough and cut into triangles. Spoon some poppy seed mixture into each triangle and wrap it using the corners. Place croissants parcels into lined baking tray and brush it with egg wash. Bake the croissants in preheated 180C oven for 10-15min.Croissants with poppy seed filling recipe Croissants with poppy seed filling recipe Croissants with poppy seed filling recipe Happy Christmas waiting!

Rasa xoxo

0

Gingerbread advent calendar

How to make gingerbread cookie advent calendarI have not made an advent calendar for a while so this year I thought I better not miss out and count the days till Christmas in style . I thought I should at least try and make it for Lukas and I am glad that I did. I made it out of gingerbread which means it can be eaten day by day. The only problem is that I made it a little early, a whole two weeks before December! Now daily (sometimes hourly) Lukas asks me for “a bisc” which means biscuit in his language. It’s wonderful to see him so excited but hopefully the calendar will last till advent begins without too many tears!How to make gingerbread cookie advent calendar I used this recipe to make the dough for the gingerbread cookies. I made sure I made a hole in each cookie before baking it so I can feed a tread through it and that way cookie can be hanged. How to make gingerbread cookie advent calendar I used basic icing (icing sugar mixed with little bit of water) to write the number on each cookie. I originally was planning to use food colouring to make it black, but I am glad I stayed with basics. Sometimes easy and simple stuff look best!How to make gingerbread cookie advent calendar Last job was to arrange the cookies. I first arranged the cookies on white surface so I can find the nicest arrangement before actually hanging everything. I used a little bit of greenery as it brings out a lovely contrast that I love. Gingerbread cookie advent calendarI been very lucky that we have picture rails in our house. I only now discovered the real purpose of them. Before I used to think that it is just a nice trim! If you would like an alternative hanging solution then check out here. I used a wire hanger to make my last advent calendar three years ago.How to make gingerbread cookie advent calendar How to make gingerbread cookie advent calendar How to make gingerbread cookie advent calendar How to make gingerbread cookie advent calendarHope you have been inspired and I am wishing you all an exciting Christmas season!

Rasa xoxo

0

Devon in Autumn

Devon in Autumn We spend last week in Devon to celebrate Lukas birthday and I was blown away by a beautiful scenery once again. I was thinking yeah yeah, I been here before and blogged about it as well. Surely there is nothing new to see and share. But guess what? I changed my mind! Initially I was taking pictures with my phone not planing to post it and only on our last walk I took my DSLR with me when I realised this beauty needs to be captured properly. So forgive me for some pics that does not have such a great quality, I included some pics from my older walks when I was not prepared. Devon in AutumnYou would think Devon is coloured with Autumn colours right now, but thats not the case. It turns out the grass is still green (very very green in fact), then there are evergreen plants such as my beloved ferns ❤︎ ❤︎ ❤︎ . Devon in AutumnDevon in Autumn Even the pond is green in Autumn because of green algae, who could have thought!Devon in Autumn Lukas liked the muddy puddles the best and I decided to chillax and let him enjoy the Devon properly. He even took his cars to have a wash :D.Devon in Autumn Devon in Autumn Devon in Autumn Devon in Autumn Devon in Autumn And of course there were bees. Joni’s dad said I was brave to go and take pics of them so close so I could share these pics with you ;-). Luckily I did not get stung! I wonder what the bees are up to in Autumn.Devon in Autumn Devon in AutumnHope you are enjoying Autumn wherever you are :-).

Rasa xoxo

0

Woodland themed birthday cake

Woodland themed chocolate birthday cake (dairy and gluten free version) recipe Although we celebrated Lukas birthday together with Granny birthday last weekend he is officially turning 2 today (wow, where does the time go!). It was good to get together with the family in Devon, staying here a little longer with the kids while Joni is sorting out our new kitchen (hopefully will share about it more soon).

As for a birthday cake I am very very pleased that I was not asked to bake him a cake in Paw Patrol theme (or something along those lines), so I chose to make woodland themed one. Which is much prettier and tasteful in my opinion. I really dislike heavily iced cakes! I also decided to keep it simple as I am quite busy these days (bringing up baby and toddler at the same time is no joke).

DAIRY AND GLUTEN FREE CHOCOLATE BIRTHDAY CAKE

(for the cake)

  • 6 eggs
  • 300ml oil (I used olive oil)
  • 400g caster sugar
  • 300g ground almonds
  • 3tsp baking powder
  • 50g cocoa powder mixed with 125ml boiling water

(for the frosting)

  • 1 avocado
  • 85g dairy-free sunflower spread
  • 200g dairy-free chocolate, melted (do it carefully if doing in microwave)
  • 50g cocoa powder mixed with 125ml boiling water
  • 150g icing sugar, sifted (+100g extra for thicker frosting)

(for the decoration)

  • woodland themed gingerbread cookies
  • rosemary stalks

1. First bake a cake. Whisk the eggs with sugar and oil until you have custard like consistency. Add almonds, baking powder and cocoa powder liquid. Mix everything again to combine. Woodland themed chocolate birthday cake (dairy and gluten free version) recipe 2. Pour equal amount of cake mixture into two lined baking tins. Bake in 180C oven for 40-45min.Woodland themed chocolate birthday cake (dairy and gluten free version) recipe3. While waiting for the cake to bake, prep gingerbread cookies. You may be able to buy yours in store, but I needed dairy free ones at least so I ended up baking my own. I used this recipe and replaced butter with sunflower spread. Woodland themed chocolate birthday cake (dairy and gluten free version) recipe 4. Finally, time to make the frosting. Place all the ingredients (only 150g icing sugar at this stage) into electric mixer/processor and whizz. The mixture should turn into smooth frosting .Woodland themed chocolate birthday cake (dairy and gluten free version) recipe Spread half of the frosting in between the cake layers, top and sides.Woodland themed chocolate birthday cake (dairy and gluten free version) recipe Use pallet knife to smooth the frosting on the cake.Woodland themed chocolate birthday cake (dairy and gluten free version) recipe 5. To decorate add 100g more icing sugar into the remaining frosting to make it thicker. Pipe it on top to make a decorative texture. Top the cake with woodland themed cookies and rosemary stalks to represent trees/bushes. Woodland themed chocolate birthday cake (dairy and gluten free version) recipe Woodland themed chocolate birthday cake (dairy and gluten free version) recipeHope I inspired you ;-)

Rasa xoxo

0

Pinterest challenge: apple and butternut squash soup

Apple and Butternut Squash soup recipe So the soup season is continuing here and I am trying to explore more and more flavours to stock up with (for the freezer). I find these soup portions very handy for lunches (super kid friendly too!!).

Apple and butternut squash seemed like a great match, was very eager to go and try it out as soon as I saw it on Pinterest. Made few changes, because I needed dairy free option as well as keeping it rich in flavour (I am talking about butter here). Hope you like it too as much as I did. Scroll down for the recipe ;-).Apple and Butternut Squash soup recipe APPLE AND BUTTERNUT SQUASH SOUP adopted from Foodess

serves 6 adults (you are welcome to double it up!)

  • 1 medium butternut squash, peeled and chopped
  • 1 large cooking apple, cored and chopped
  • 1tbsp fresh sage, or 1 tsp dried
  • olive oil for roasting and frying
  • 1 onion, diced
  • 1/2 tsp mixed spice
  • 1l chicken stock
  • double cream (optional)
  • salt and pepper to taste

1. Place butternut squash and apple into the baking tray, sprinkle with sage and drizzle with olive oil. Roast the veg for 25min.Apple and Butternut Squash soup recipe2. In large pot fry the onion for 5 min and add the mixed spice.Apple and Butternut Squash soup recipe 3. Add roasted veg (and fruit) together with chicken stock. Bring everything to boil and simmer for 20min.Apple and Butternut Squash soup recipe4. Puree soup using a blender. Stir in cream, if using, and return to a simmer (although it tastes totally wonderful without the cream as well). Season with salt and pepper. Apple and Butternut Squash soup recipeEnjoy!

Rasa xx

0

Pinterest challenge: broccoli, cumin and yogurt soup

Broccoli, cumin and yogurt soup So the chill is on and I thought to better start the soup season (well… I have started it a while ago actually). Joni cooked this soup last year for Lukas dedication and I have been revisiting it ever since. Its my favourite soup at this moment! Whats not to like, its flavoursome (sorry to say it is better than stilton and broccoli soup), kids love it, packed with all the green veg and its freezable (lunches sorted in advance). It’s found on Pinterest but it is not challenging at all ;-).

BROCCOLI CUMIN AND YOGURT SOUP  adopted from Trois Fois Par Jour (thank goodness for Google Translator)

serves 12 adults or makes many many portions for kids lunches

  • 50g butter
  • 2 large onions, chopped
  • 2 large potatoes, sliced or cubed
  • 1-2 tsp cumin
  • 2 large handfulls spinach
  • 2 large broccoli heads, chopped
  • 5 garlic cloves, crushed and chopped
  • 2l vegetable stock
  • 2 tbsp maple syrup
  • salt and pepper to taste
  • 200ml yogurt

1. In the largest pot you can find, melt the butter and fry the onions for 3 to 4 minutes. Add potato and cumin, continue cooking for about 3 minutes.Broccoli, cumin and yogurt soup2. Add broccoli, spinach and garlic then mix well so that broccoli is soaked in spices and spinach has wilted. Cover everything with vegetable stock, then add maple syrup and simmer for 25 to 30 minutes.

Broccoli, cumin and yogurt soup3. Blend the soup and stir in the yogurt. Season and serve it while still hot! Broccoli, cumin and yogurt soupEnjoy xx

Rasa :)

0

Cheesecake for breakfast

Fit-for-breakfast cheesecake recipe When in Lithuania we were eating loads. No wonder I gained so much weight! Never the less I am missing Lithuanian food, especially the cheesecake (technically it’s a curd cake) that is fit to eat for breakfast. I was so eager to try and make one myself that as soon as I got home I tried making it using more available alternative, Ricotta (so it is a cheesecake after all!). I would personally say that I could not notice any difference between two. I love that it is not too sugary and can be dressed up as you like. I love it with cream fraiche and pureed strawberries. Next time I shall try with honey me thinks ;-).

FIT-FOR-BREAKFAST CHEESECAKE

makes a very small cheesecake that makes up breakfast for two (feel free to double up)

  • 2tbsp semolina
  • 4tbsp full fat milk
  • 50g butter
  • 2tbsp sugar
  • 2 eggs, separated
  • 250g ricotta cheese

1. soak semolina in milk for at least 30min or overnight in the fridge.

2. Cream butter with sugar than gradually add egg yolks, soaked semolina, ricotta cheese and mix everything to combine well. Carefully fold in whisked egg whites.Fit-for-breakfast cheesecake recipe3. Spoon the cake mixture into lined spring form. Bake in 180C preheated oven for 25-30min.Fit-for-breakfast cheesecake recipe4. Meanwhile prep your toppings. I pureed strawberries with a little sugar (you need it somewhere sometimes).Fit-for-breakfast cheesecake recipe5. Serve it warm or cold the next day. Fit-for-breakfast cheesecake recipe Fit-for-breakfast cheesecake recipeEnjoy!

Rasa xoxo

0