Top

Archive | Sweet Treats

Alex’s birthday cake :b

IMG_3649

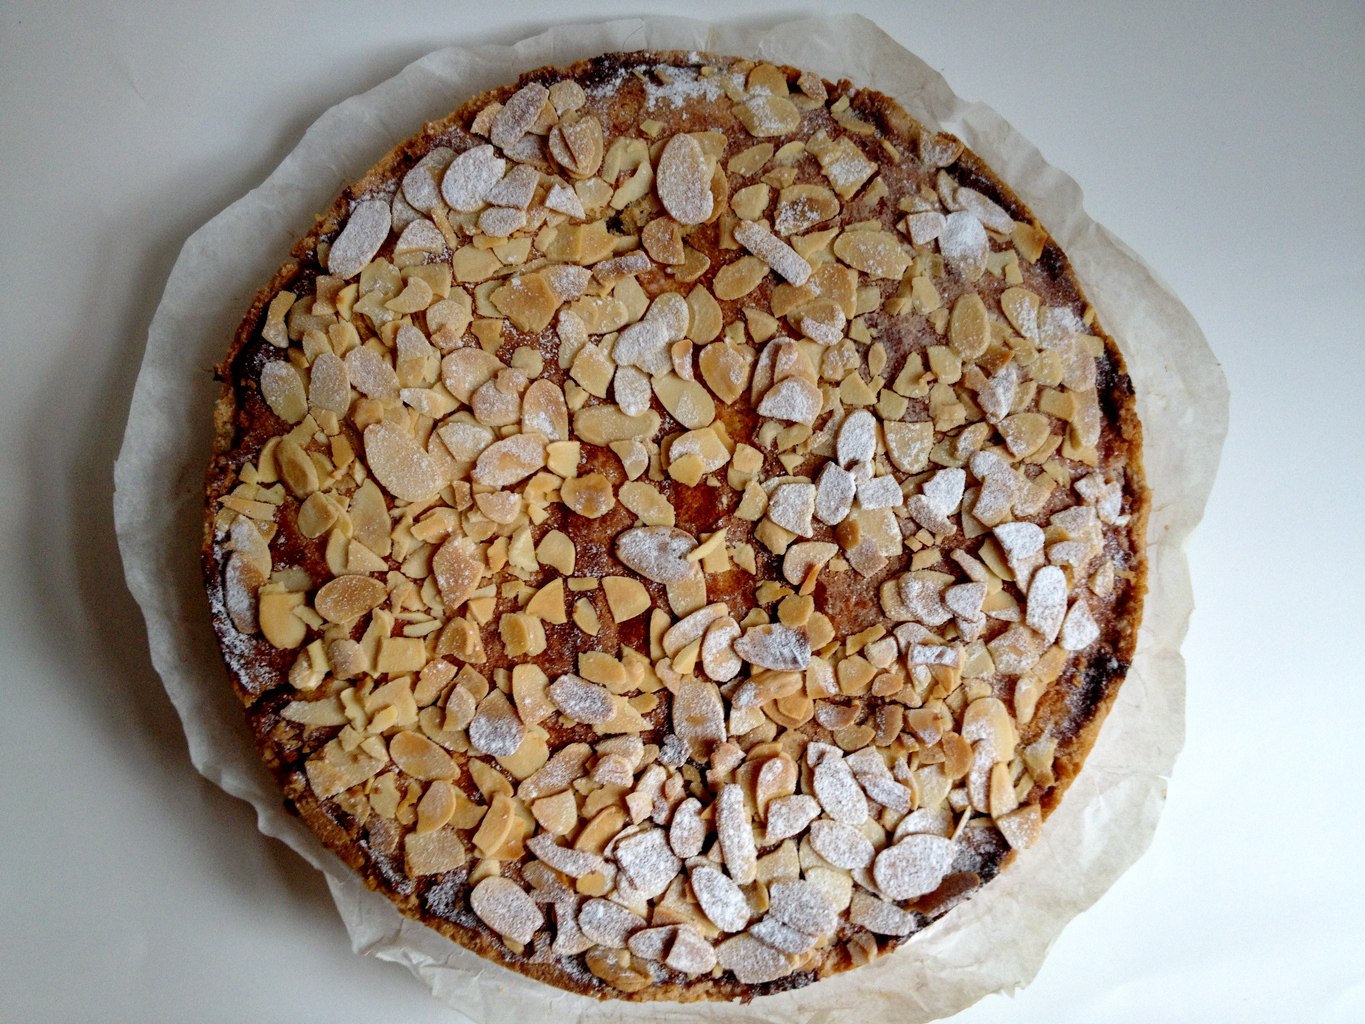
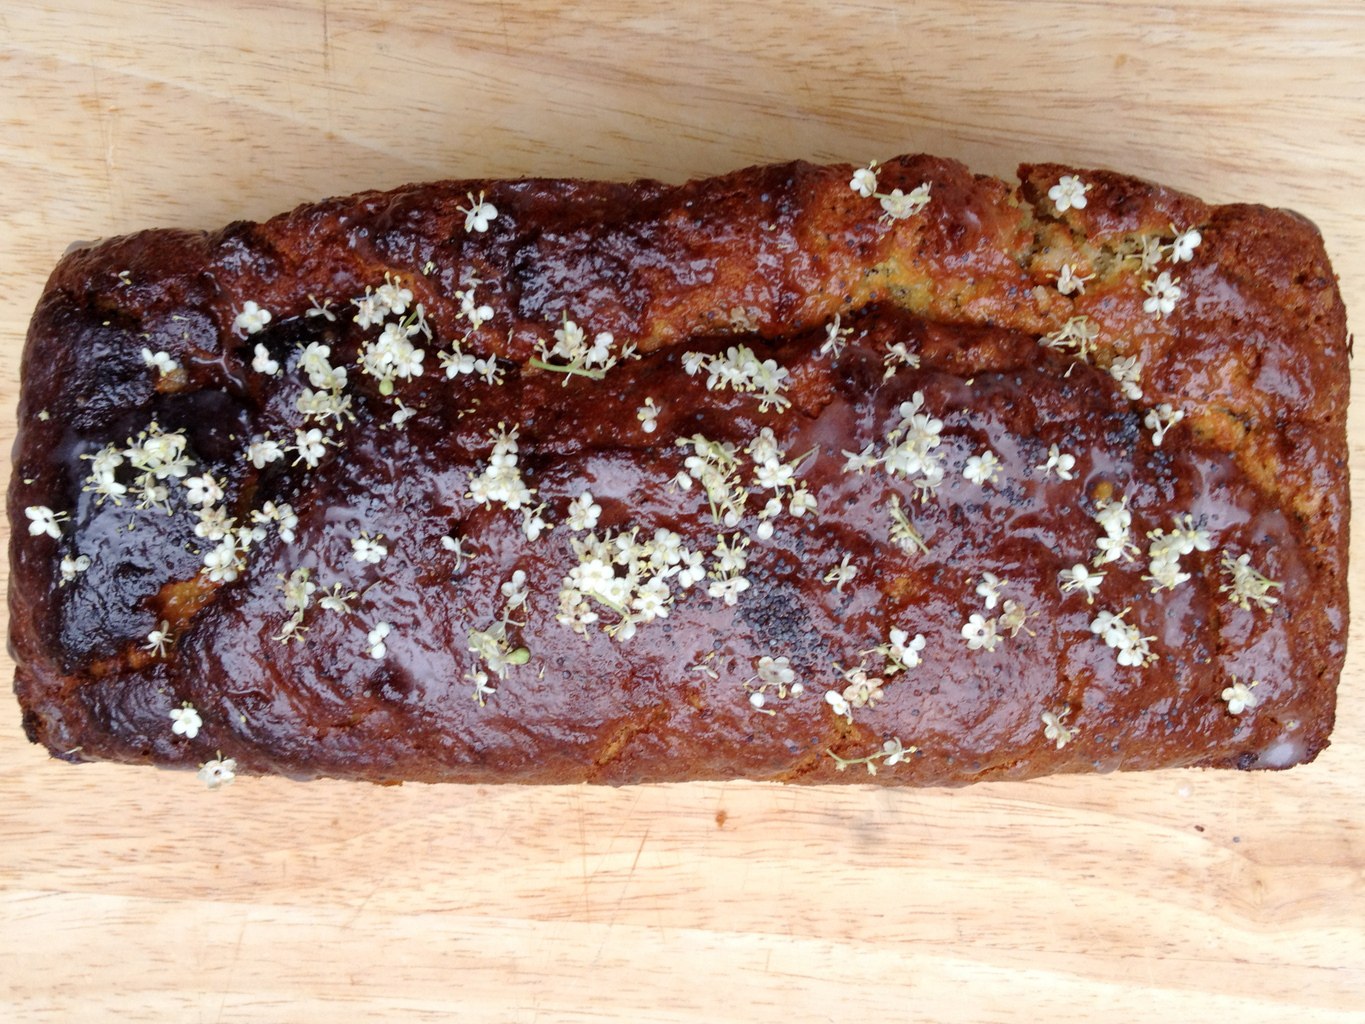
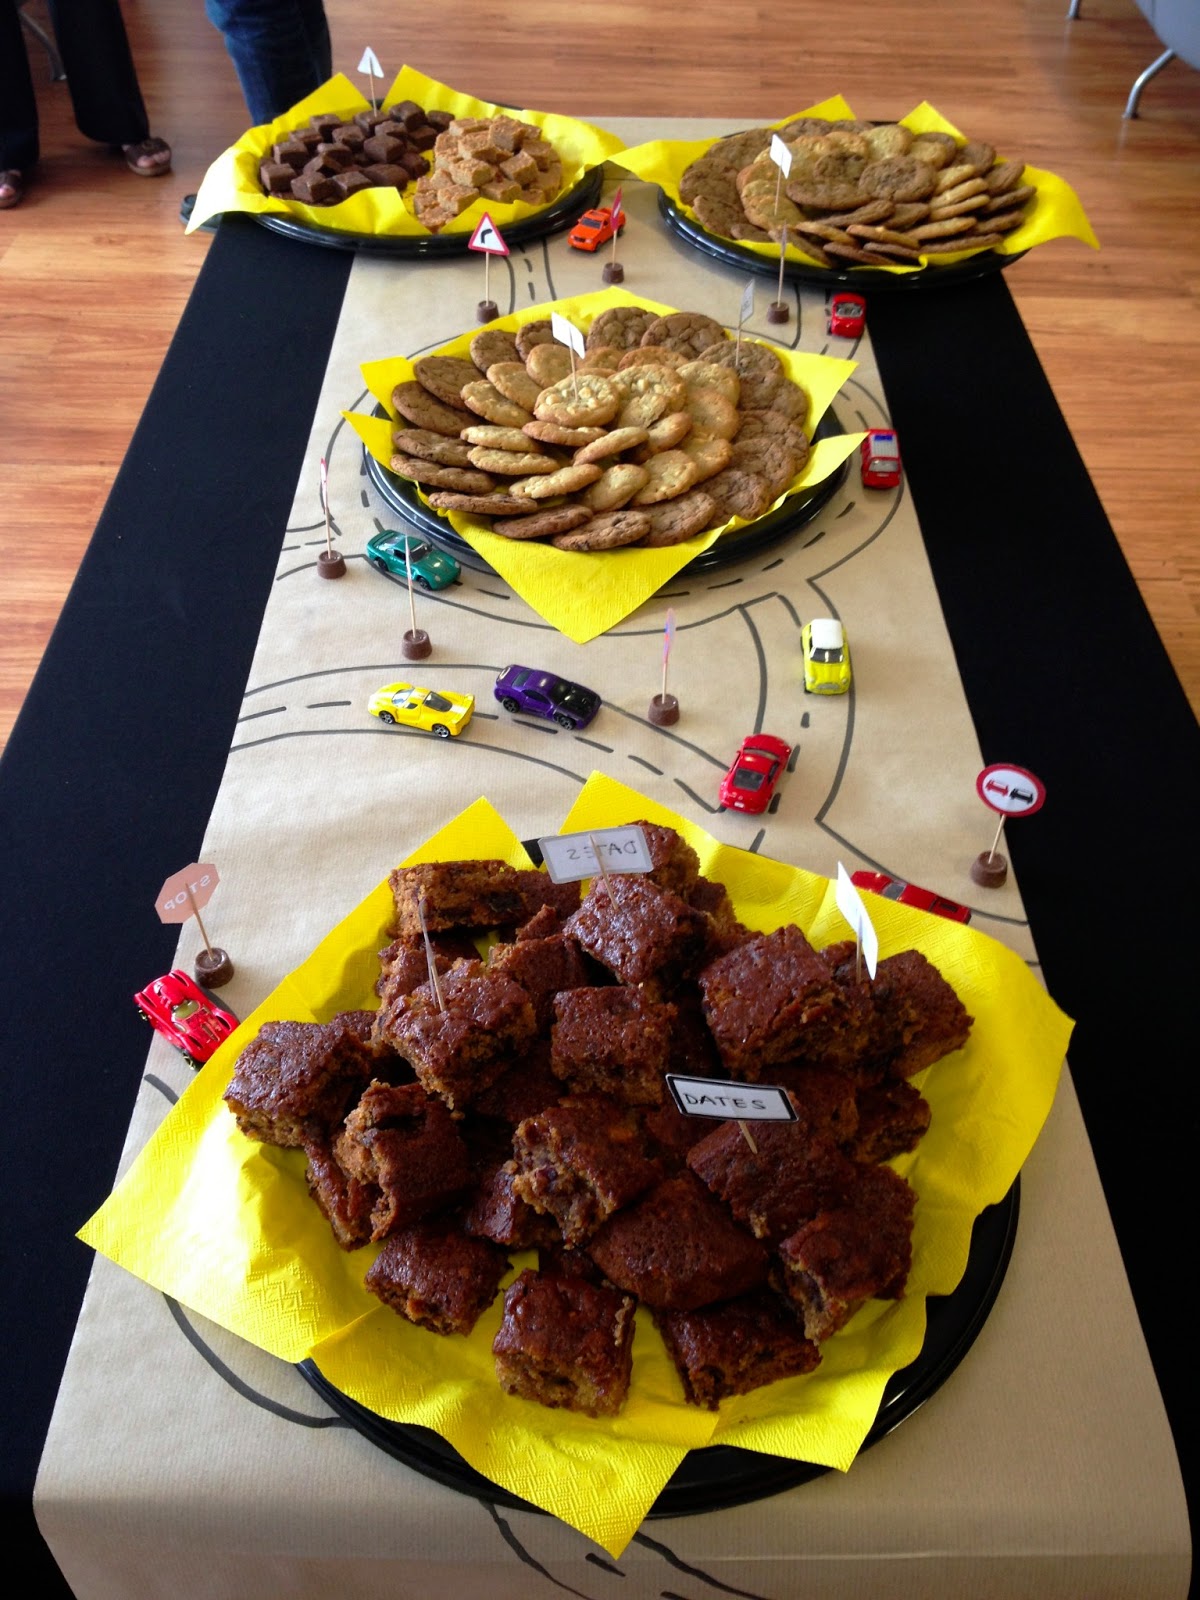
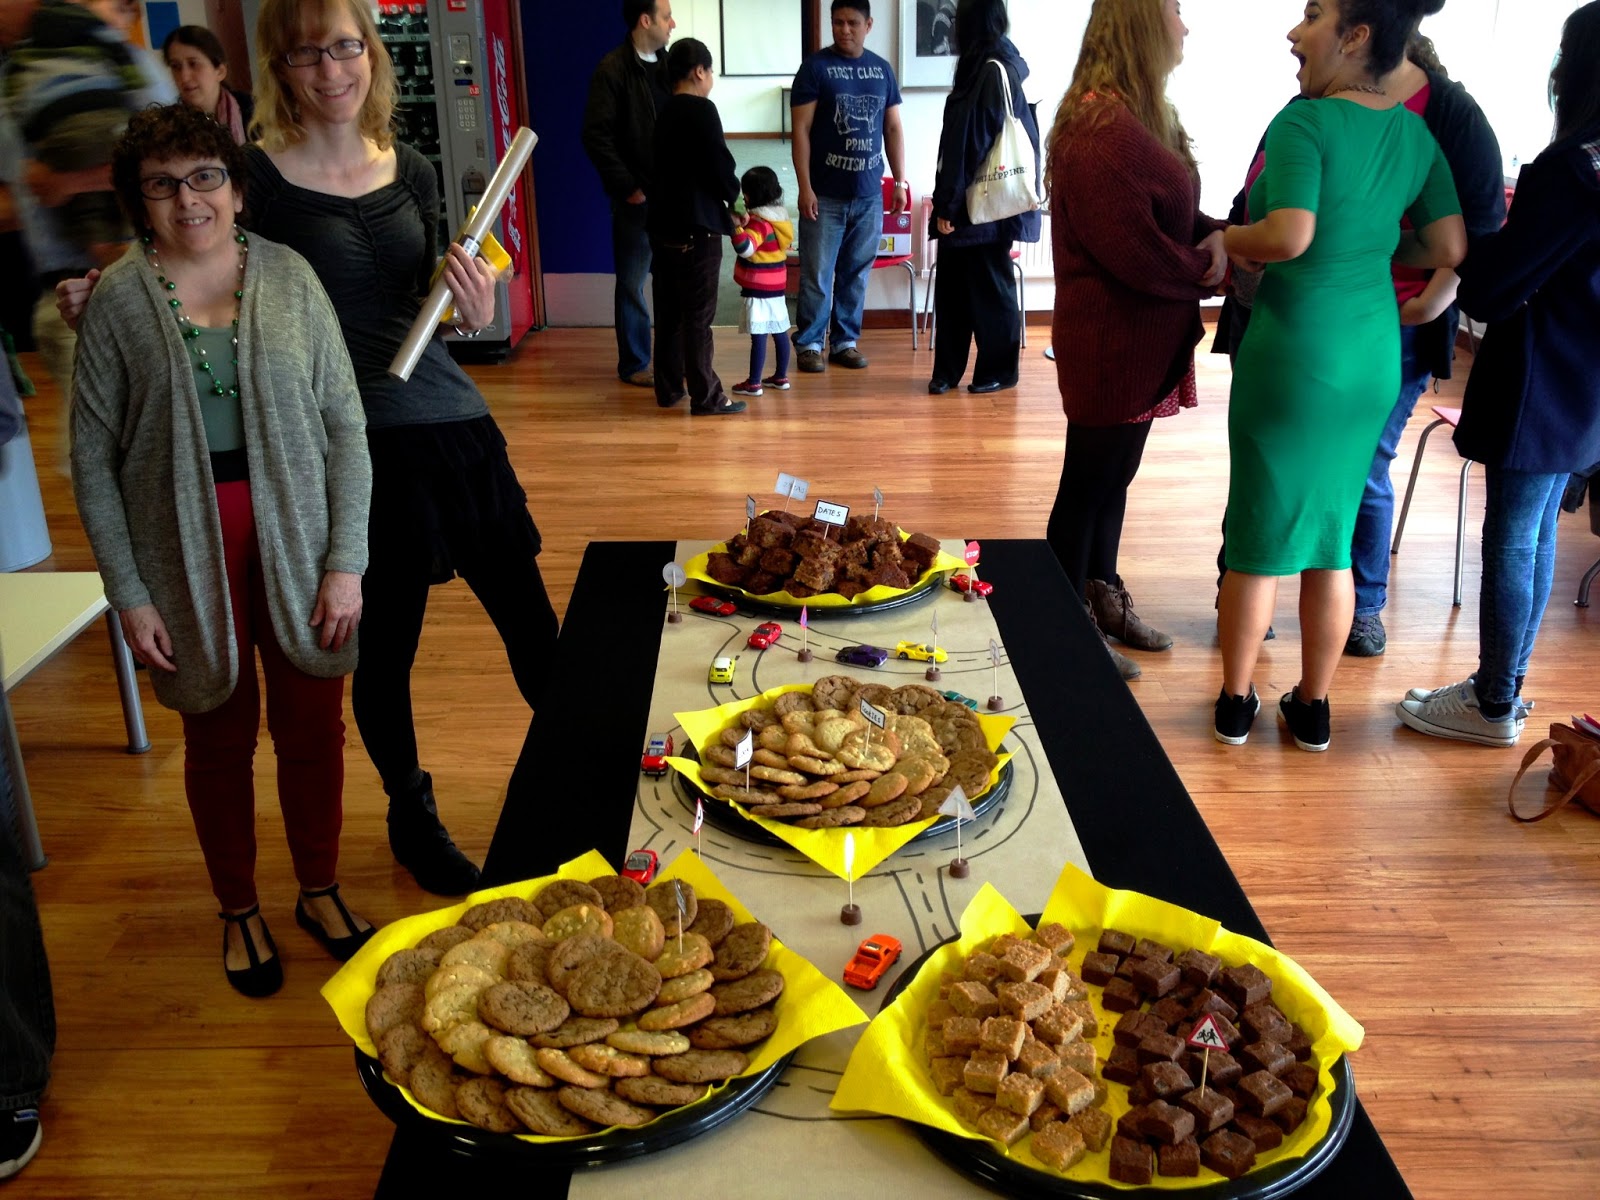
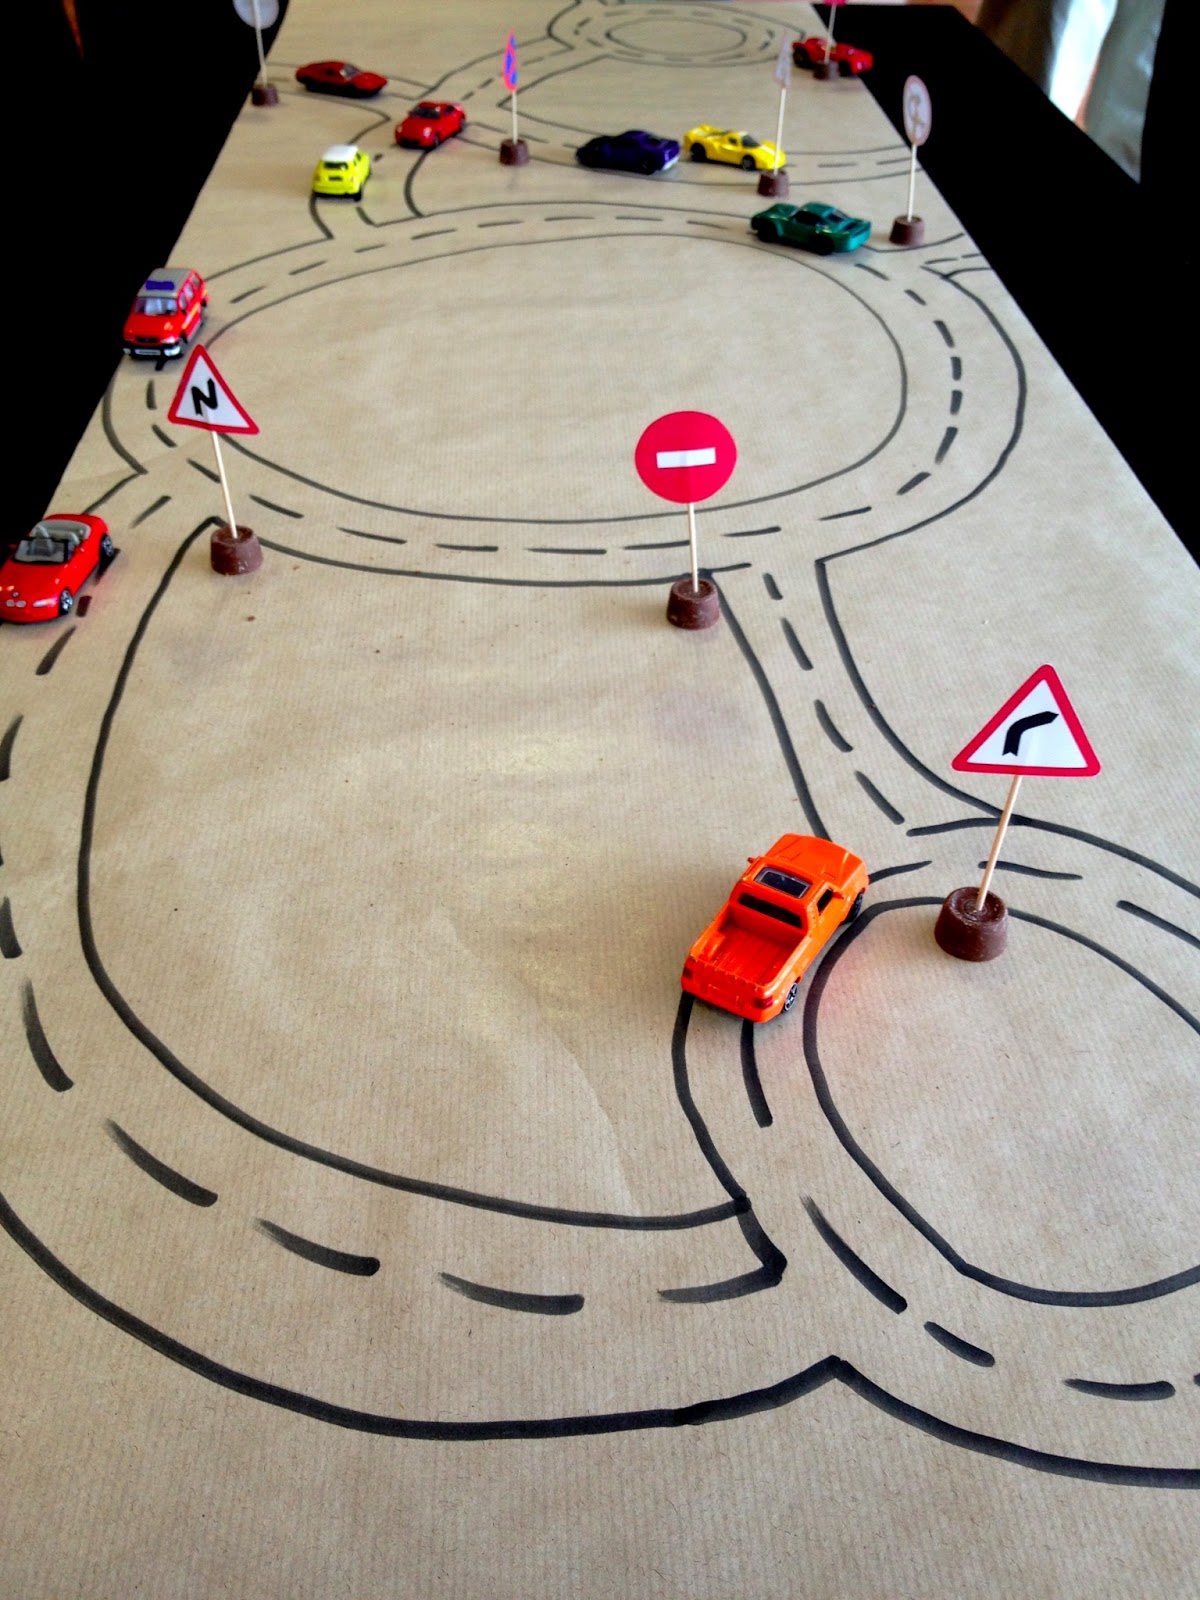
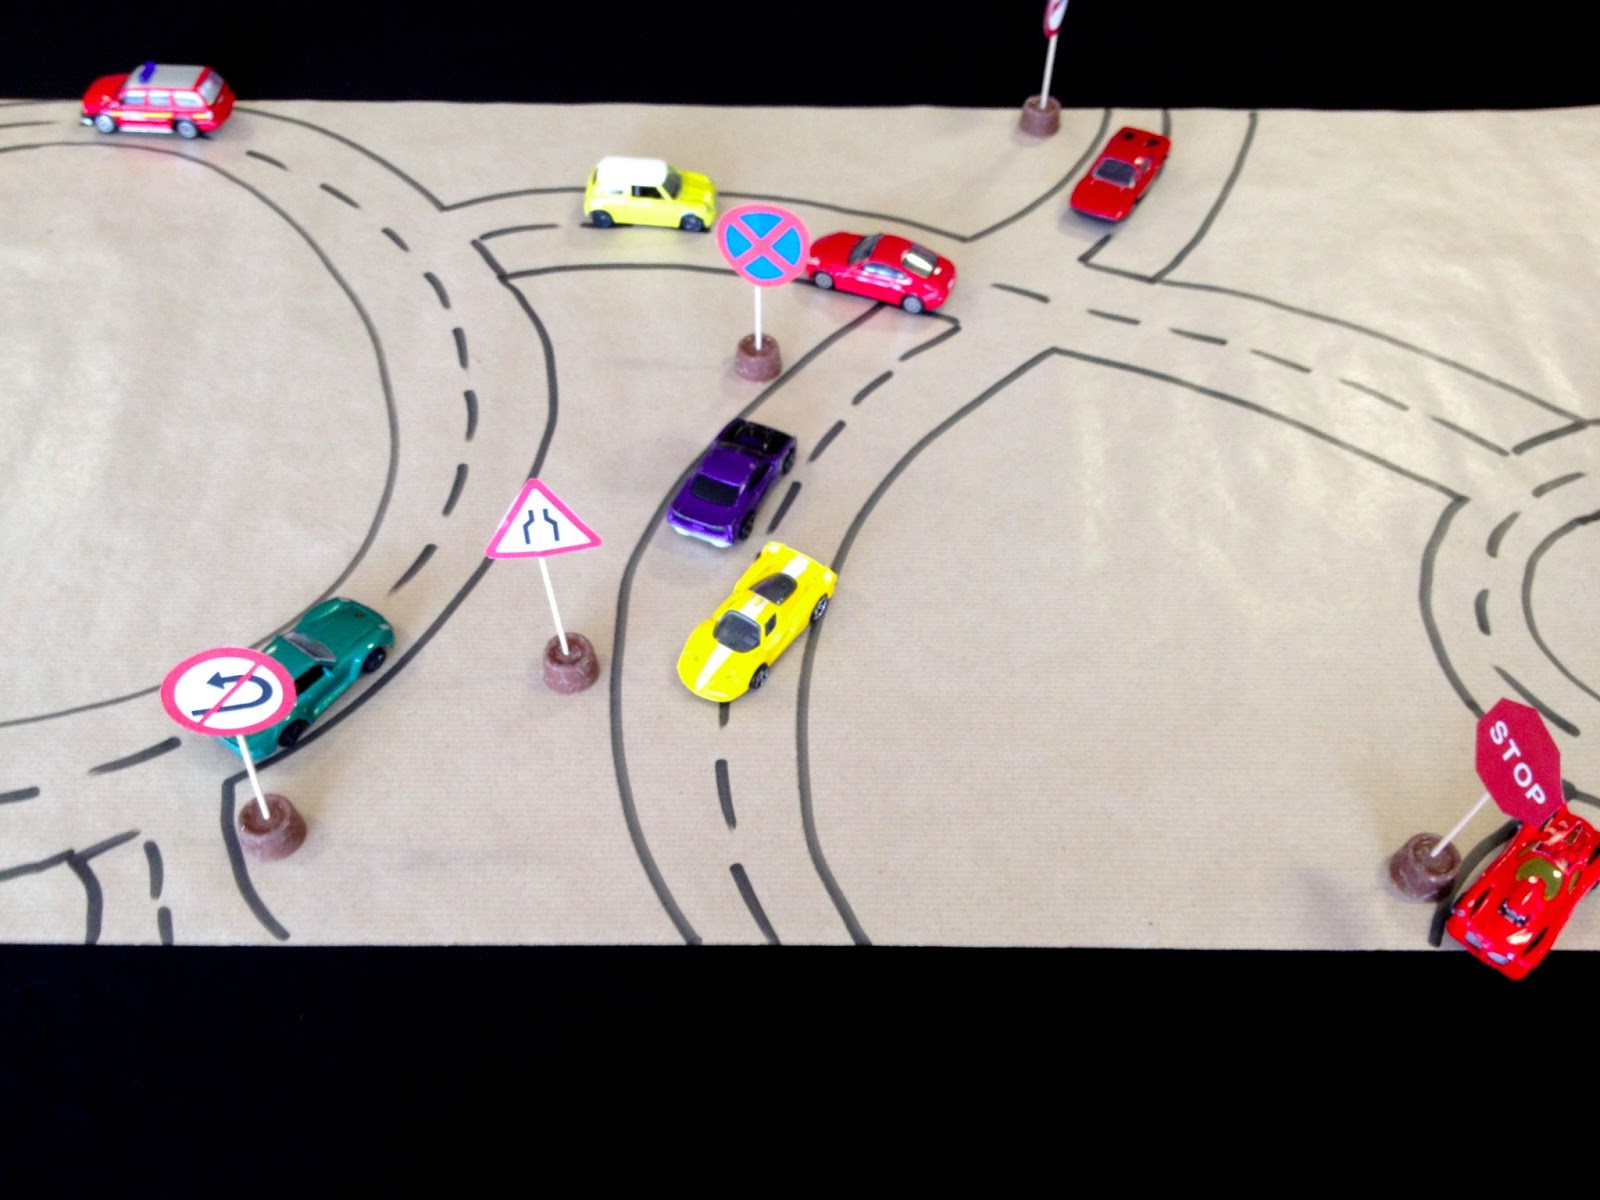
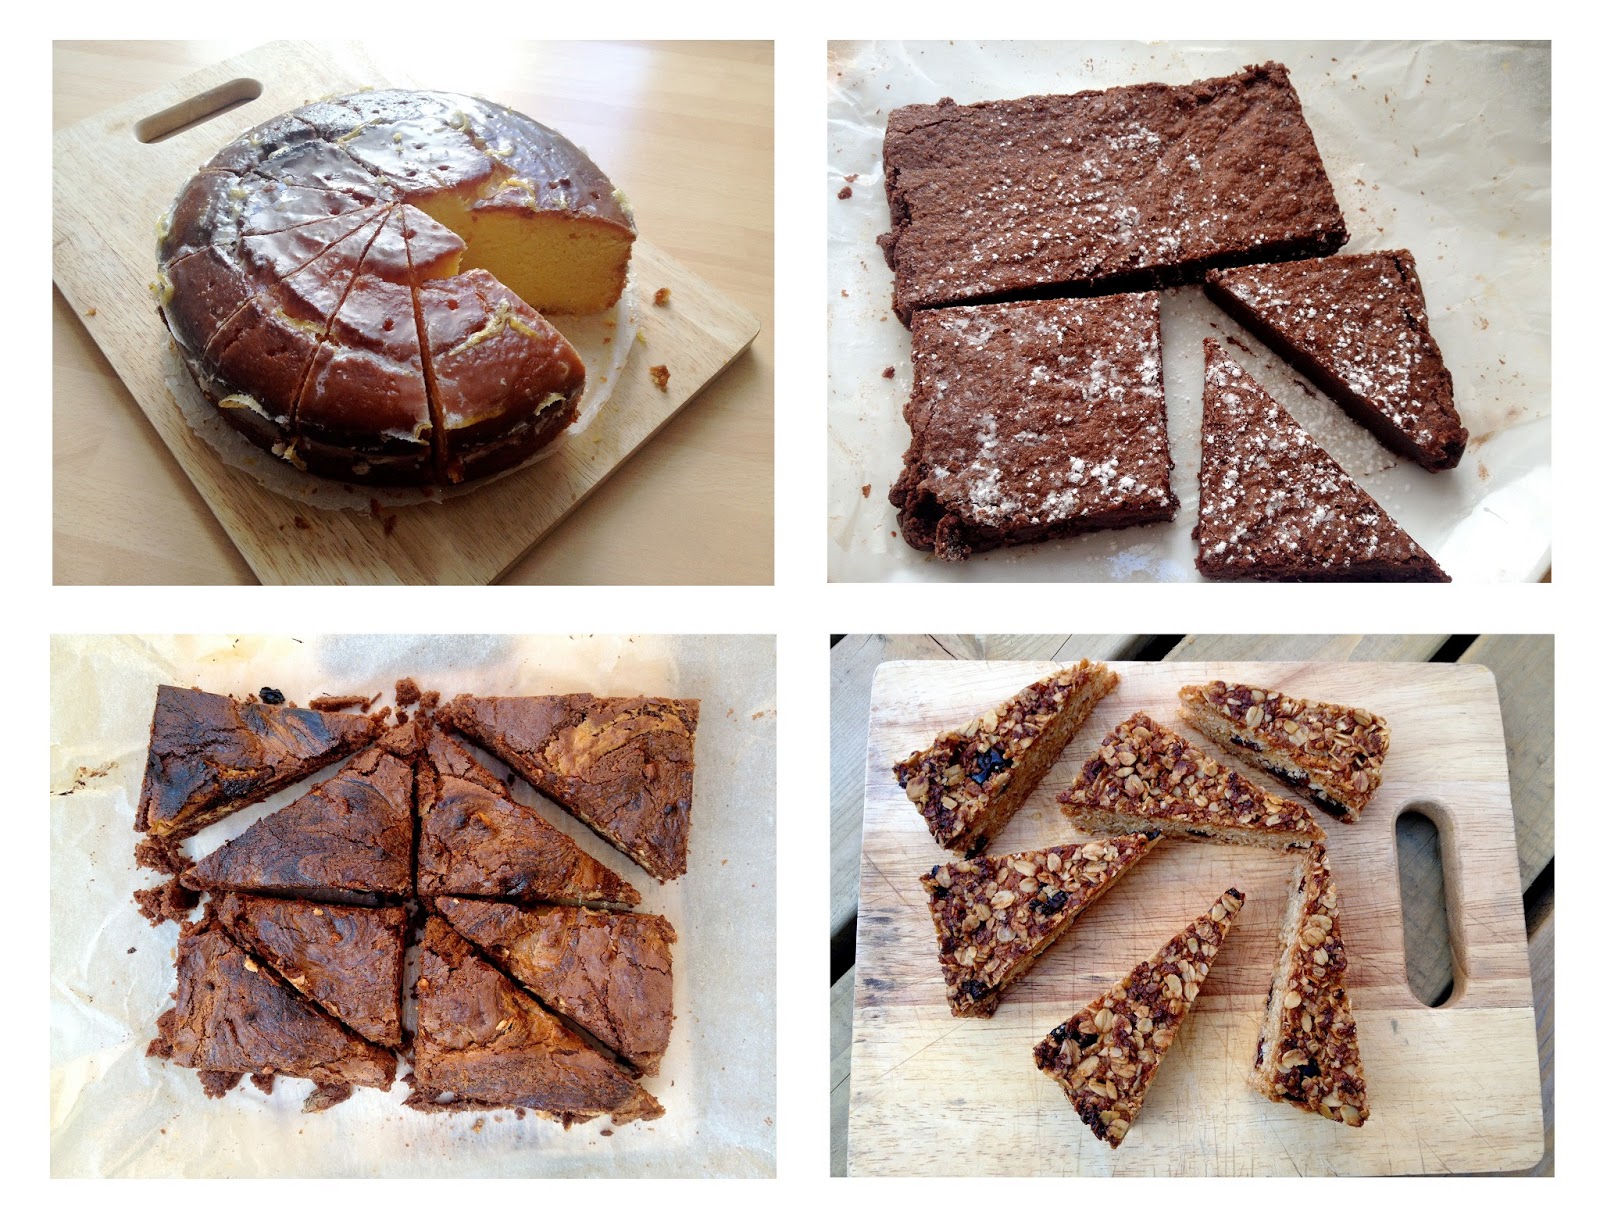
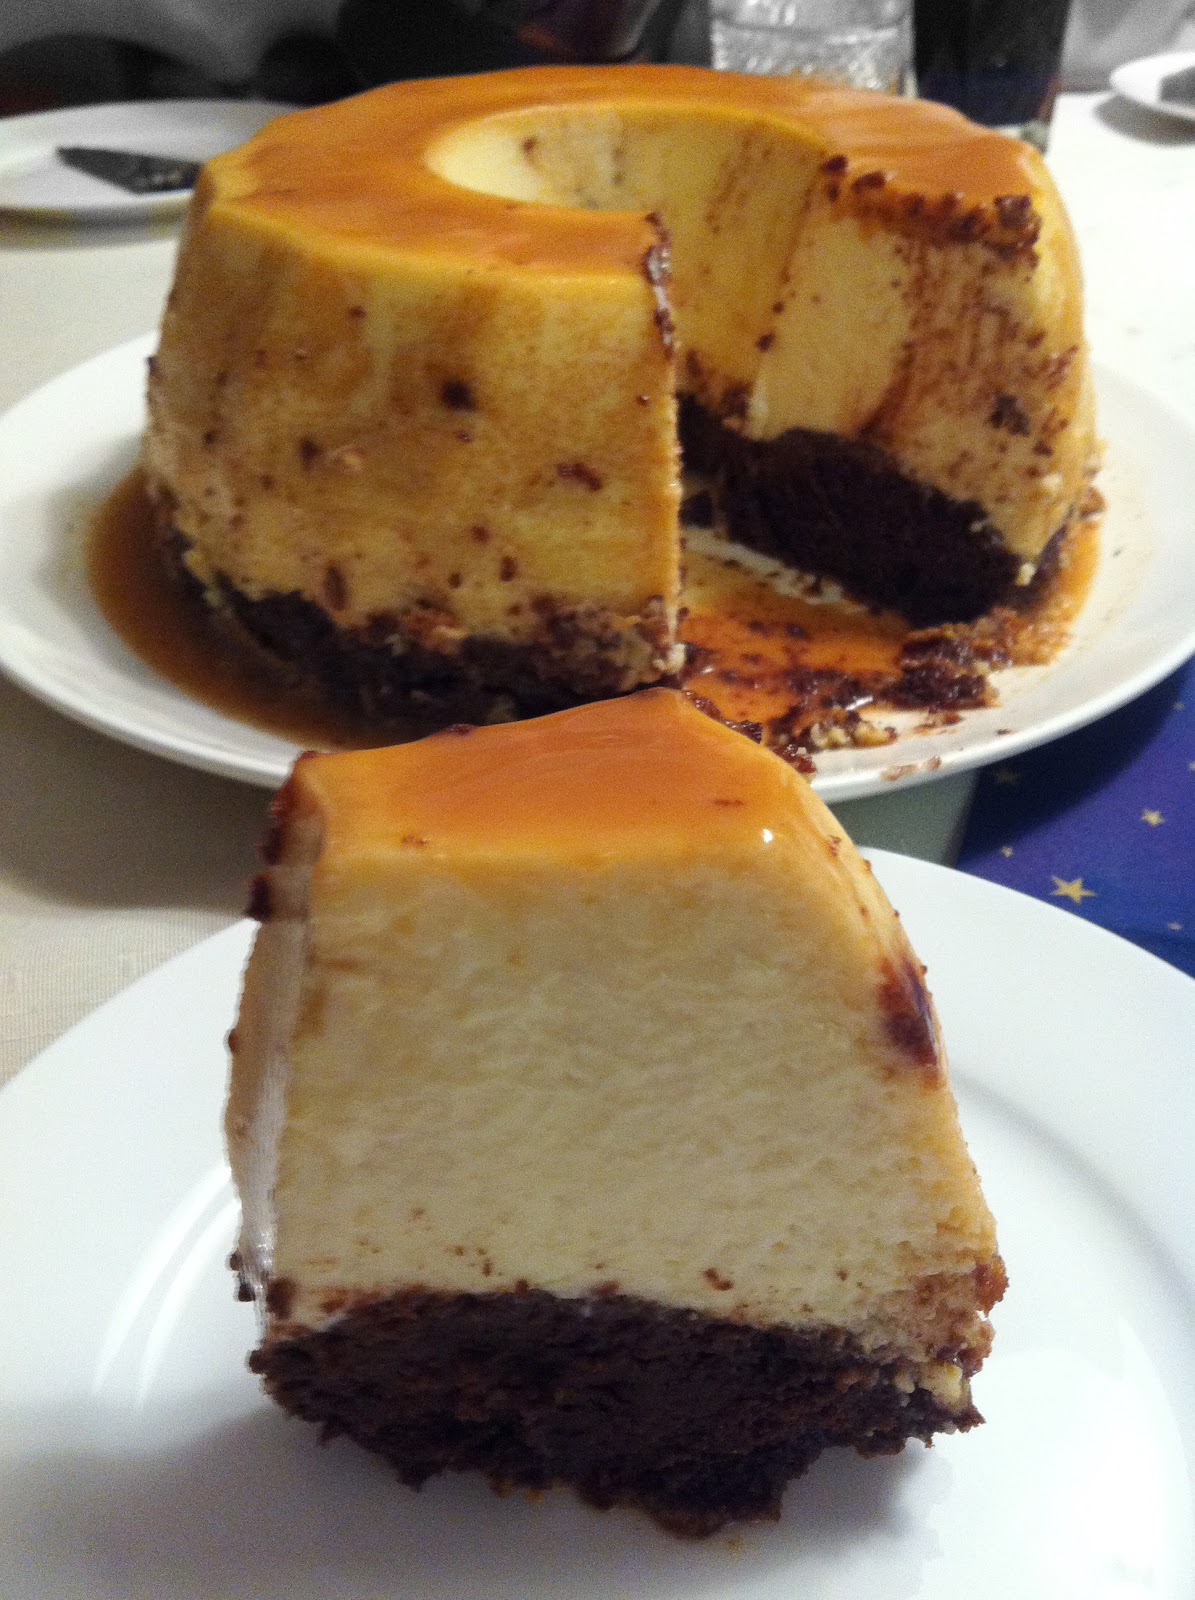
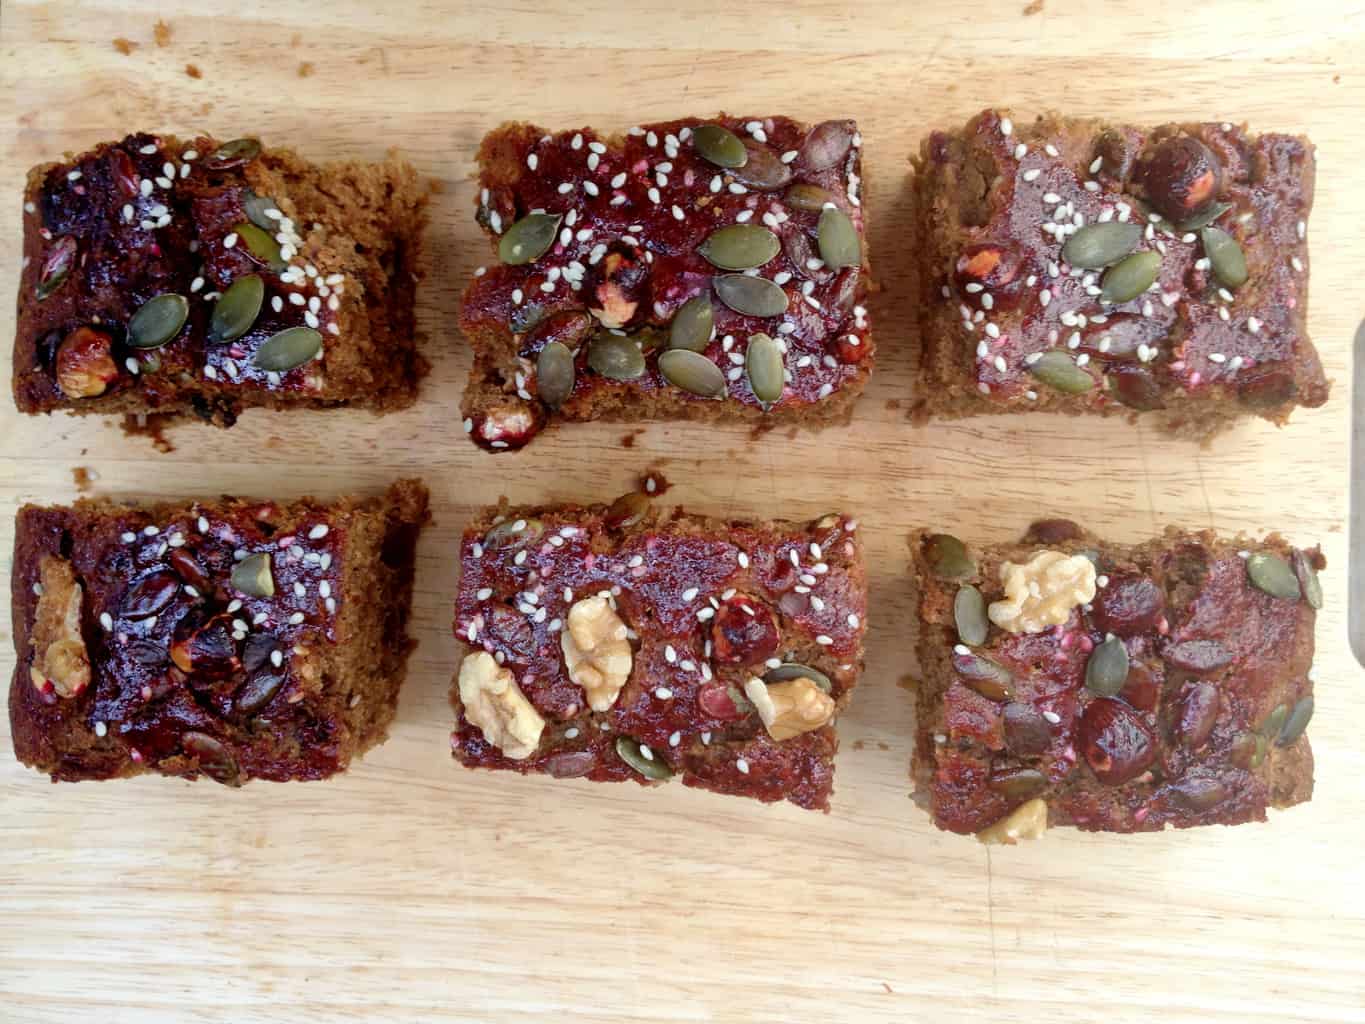
It’s my dear friend’s Alex’s birthday today! So for this occasion I have baked Spiced Date Brownie Cake from Abel&Cole book “Veg Box Companion”. It went a treat! Apparently this recipe originated from “Tartelettes” cakerie – nice! I especially love Vicki’s idea to make the “pretend” candles that are made out of toothpicks stuck with picture of little lights. Cute! Here is the recipe:

IMG_3650

SPICED DATE BROWNIE CAKE

  • 300g stoned dates, finely chopped
  • 2 lemons, zest only
  • 500ml freshly brewed strong black coffee
  • Crushed seeds from 12 cardamom pods
  • 2 tsp cinnamon
  • 2 tsp mixed spice
  • 4 tbsp honey
  • 4 tbsp black treacle or more honey
  • 250g dark brown sugar
  • 150g unsalted butter
  • 3 eggs
  • 150g mixed nuts
  • 4 tbsp sesame, pumpkin and sunflower seeds
  • 400g plain wholemeal or spelt flour
  • 1 tbsp baking powder
  • 4 tbsp apricot jam (optional)
  1. Line a large rectangular baking dish (approx 30 X24 cm) with baking paper
  2. In large saucepan, add the dates, lemon zest, coffee, spices, honey, black treacle, sugar and butter. Simmer and stir till combined. Let cool fully.
  3. Preheat your oven to 180C .
  4. Beat the eggs in large bowl. Add flour, baking powder and cooled date/coffee mix. Chop half the nuts and add them to the mix. Stir everything together.
  5. Pour into the lined dish. Scatter the seeds and remaining nuts evenly over the top.
  6. bake for an hour , or till a skewer poked comes out with just a few tiny moist crumbs stuck to it. Cover with a large layer of baking paper or foil after 30min, to stop the nuts from burning.
  7. To give it a stunning gloss, warm 4 tbsp of apricot jam till syrupy. Brush over the top.

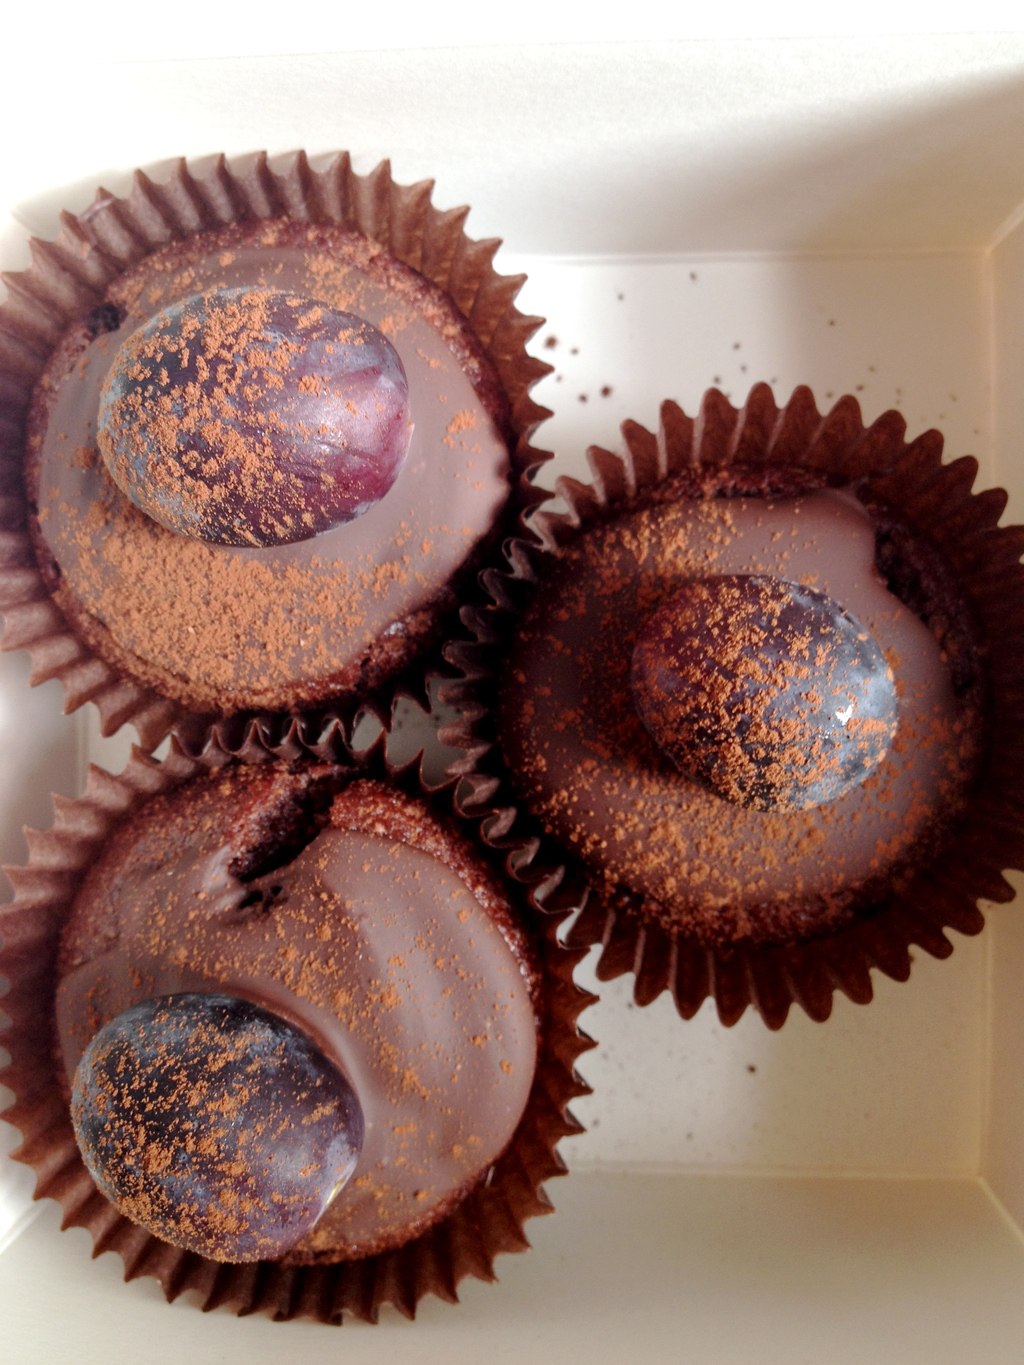
I must admit that I used black current jam as I did not have any apricot one. This made the cake look odd as black current jam coloured everything purple so I had to scatter few more fresh nuts and sesame seeds to “fix” it. So use apricot jam or nothing at all! But other than that it was really delicious :b

Rasa :)

0

Innocent smoothie berry cake

IMG_3621

Last night at our mini knitting group we were knitting mini hats to contribute to Innocent Big Knit campaign. These mini knitted hats will go onto the innocent smoothie bottles, that will be available to buy in stores across the country in November, and for every hatted bottle sold, 25p is donated to Age UK. Yey!

For this occasion I baked this innocent smoothie berry cake. Here is the recipe!

IMG_3629

INNOCENT SMOOTHIE BERRY CAKE

  • 4 eggs
  • 300g sugar
  • 120ml vegetable oil
  • 250g flour
  • 4tsp baking powder
  • 1/2tsp salt
  • 130ml blackberries, strawberries & blackcurrent innocent smoothie
  • 200g blackberries

1. Preheat your oven to 180° C. Line with parchment paper or grease the baking tin you are using.

2. Beat together the eggs and sugar until thick. Gradually beat in the oil.

3. Stir in the flour, baking powder and salt, and then the smoothie. Combine well.

4. Pour the mixture into your prepared pan and scatter the blackberries on top.

5. Bake for about 50 minutes, or until the cake tests done.

Happy knitting ;)

Rasa xox


2

Happy girlfriends day! Wine chocolate cupcakes anyone?

IMG_3468

Today is a International Friendship Day (which I would like to call girlfriends day). For this occasion I have decided to bake wine chocolate cupcakes for my friend Vickie. Why? I will try to tell you in this short (as much as I can) story.

Basically, few months ago I have been given a pack of “After Eights” (mint chocolate) to pass it to Vickie (people seem to think that we are one body even if we live far away from each other). Everyone who knows me should know that I should not be entrusted with chocolate as before I knew it the need to eat something sweet has hit me so I turned my need to Vickie’s “After Eights”. Although Vickie was forgiving I still felt like I should replace what was hers. So today (Friendship Day)  have given me a perfect occasion to do just that!

IMG_3467

So there you go, back to the cupcakes. My decision on baking wine chocolate cupcakes was purely based on the ingredients Vickie likes. These include not only wine and chocolate, but also healthy ingredients such as wholemeal flour and brown sugar. Also the cupcakes are vegan and low in fat! Yey!

IMG_3460

WINE CHOCOLATE CUPCAKES

(makes 12)

  • 180g cups whole wheat flour
  • 40g unsweetened cocoa powder
  • 1 tsp baking soda
  • 150g brown sugar
  • pinch of salt
  • 1 tsp vanilla essence
  • 75g olive oil
  • 85g black current jam
  • 240ml red wine
  • 150g dark chocolate
  • 12 red grapes

1. Combine all the ingredients in one bowl.

2. Divide the mixture into 12 lined muffin tins

3. Bake in the preheated oven (170C) for about 20 min or until toothpick comes out clean when inserted in one of the cupcakes.

4. Let the cupcakes cool before the decorating

6. Melt the chocolate over the pot of boiling water (make sure the bowl you melting the chocolate in doesn’t touch the water) and spoon it on top of each cupcake.

7. Top each cupcake with the grape and let it cool once again.


Before serving sprinkle some coco powder just to make it extra elegant ;)

Rasa xox


2

Piña Colada Cupcakes

IMG_3390

Hey all! I hope you had a lovely weekend so far and when it is just about to finish here is the recipe for the Piña Colada Cupcakes (at the bottom) so the weekend last for a little longer ;)

I baked these cupcakes for the Luau party which went well with the hawaiian theme…

IMG_3397

Initially I wanted to decorate the cupcakes with the “pineapple flowers” that I have seen a lot on Pinterest,  however I managed to burn it :(. I really don’t like food to be wasted so I had to focus really hard on the positive side: I have learned the lesson!

IMG_3386

IMG_3395

PIÑA COLADA CUPCAKES

(for the base)

  • 2 eggs
  • 220g caster sugar
  • 160g flour
  • 1.5 tsp baking powder
  • 1 tsp vanilla extract
  • 120ml rapseed oil
  • 100ml sour cream
  • 1 (400g) canned pineapple chunks (slightly drained and crushed)

(for the buttercream)

  • 50g creamed coconut (slightly heated so it soft)
  • 100g softened butter (room temperature)
  • 1 tsp vanilla extract
  • 250g icing sugar

(for deco)

  • coconut flakes
  • glazed cherries
  1. to bake the bases you need to whisk the eggs and sugar together until it is pale in colour.
  2. Add flour, baking powder, vanilla essence, oil, sour cream, crushed pineapple chunks and combine well.
  3. Line a cupcake pan with 12 paper liners and fill about 2/3 full.
  4. Bake in the preheated oven (180C) for about 20 min.
  5. To make a buttercream combine butter and creamed coconut with icing sugar and vanilla extract until mixture becomes smooth like a cream
  6. Pipe the buttercream on the baked (and cooled) pineapple cupcake bases, sprinkle it with the coconut flakes and top it with the glazed cherries.

Enjoy!

Rasa :)

0

Green tea and elderflower ice-cream

IMG_3360

After coming back from San Francisco where I tasted sooo many interesting ice-cream flavours I have been experimenting with it myself. Green tea and elderflower flavour has been my favourite!

IMG_3368

Here is the recipe…

GREEN TEA AND ELDERFLOWER ICE-CREAM

Ingredients: 8 egg yolks
200g sugar
250g milk (full fat)
250g double-cream
250g elderflower cordial
2tsp matcha green tea
1.First, prepare egg cream by mixing egg yolks with sugar and whisking until it becomes pale.

2.Put double cream and milk together into the sauce-pan and heat it up, but don’t let it to boil. Then reduce the heat and add egg yolk mixture into the pan. Cook it on the small heat (don’t let it boil) and mix continuously until it becomes thick (about 10 min).

3. Cool the mixture down by placing the pot in the cold water.

4. When the mixture have cooled you can add the rest of the ingredients: elderflower cordial and matcha. Pour the mixture into the plastic container and put it into freezer.

5. After two hours scrape off the sides of the container and mix it with the fork. Repeat this after three hours and after that you can let it stay there until it is completely frozen or the time when you want to have a cool sweet treat.

Have a great week!

Rasa :)


0

Cherry Bakewell Tart

IMG_2810

As I have recently visited Bakewell (little town in Peak district, not a tart), I had a opportunity to taste the real original Bakewell Pudding.

IMG_4557

Surprisingly this pudding doesn’t look nothing like the typical Bakewell tart we know of! The almond paste sits in the puff pastry rather than sweet pastry, which gives salty after taste… yum!

IMG_4576

I baked my own Bakewell Tart version today! Here is the recipe…

CHERRY BAKEWELL TART

IMG_2811

For the sweet pastry:

  • 85g unsalted butter
  • 50g caster sugar
  • 1 egg
  • 200g flour

For the filling:

  • 200g cherry jam
  • 150g unsalted butter
  • 150g caster sugar
  • 3 eggs
  • 150g ground almonds
  • 50g plain flour
  • 50g almond flakes
  1. Place the butter and sugar in mixing bowl and beat them together until they are light and fluffy. Add the egg to the butter mixture and mix it until combined. Then add the flour gradually and mix until it looks like smooth dough.
  2. Place the pastry in the refrigerator for 30-60 minutes to rest. (or into freezer if you want it to be used another time)
  3. Meanwhile make the cream. Place the butter and sugar together in a mixing bowl and mix them together until they are creamy and light. Mix the eggs in 1 at a time until well combined. Sift the flour and ground almonds together. Slowly add the almond and flour mixture to the butter mixture. Mix the ingredients together until you have a creamy mixture. Set the almond cream aside until ready to use.
  4. Remove the pastry from the fridge. Roll it out on a well floured surface until it is around .5-.75mm thick. Lightly grease 30cm tart tin (or line it with baking paper). Line the tart tin with the pastry. Place the lined tin in the freezer for 15 minutes or in the fridge for 30 minutes to rest.
  5. Preheat the oven to 180°C. Pour cherry jam into the tart and spread the almond cream on top of it.
  6. Sprinkle flaked almonds on the top an place the tart in the preheated oven and cook it for 30-40 minutes. The cream will be golden brown, risen and firm when the tart is ready.
  7. Remove the tart from the oven and allow it to cool for 10 minutes. Remove the tart carefully from the tin.

IMG_2809

0

Elderflower and poppyseed cake

IMG_2622


As promised here I am sharing the recipes for bakes that I took on my Peak District road trip. To bake Sweet Potato And Pepper Tortilla I used my all time favourite GoodFood website (to get the recipe click here), I added whole roasted peppers into the tortilla instead of making the sauce out of it. For Onion And Bacon Tart I used this really really simple recipe! And finally the Elderflower And Poppyseed Cake was our favourite! It was so light and refreshing (but not too lemony), try it for yourself!

IMG_2614

ELDERFLOWER AND POPPYSEED CAKE  (adopted from Peyton and Byrne “British Baking” book)

  • 165 g butter (softened)
  • 100g caster sugar
  • 2 eggs
  • 30g poppyseed
  • finely grated zest of small lemon
  • 1 tbsp elderflower cordal (recipe is here)
  • 1 tsp orange essence
  • 200g flour
  • 2 1/2 tsp baking powder
  • 140 ml milk

(for decoration)

  • 50g icing sugar
  • 3-4 elderflower cordal
  • poppyseed
  • Elderflower blossoms (optional)

1. Preheat the oven to 170C. Butter a 900g loaf tin and line the bottom with baking paper.

2. Beat the softened butter and sugar in a large bowl until pale and fluffy. Add the eggs one at the time, mixing well after each additions.

3. Add the poppyseed, lemon zest, elderflower cordial and orange essence and mix through. Gently fold in half of the flour, followed by half the milk, and then the remaining flour and milk until it is all incorporated. Spoon the mixture into your prepared loaf tin.

4. Bake in the oven for 40-45min or until the cake is firm to touch and skewer inserted into the centre comes out clean. Remove from the oven and leave it to cool down.

5. Make the glaze by mixing icing sugar with the Elderflower cordal and brush it on the cooled cake. Sprinkle it with poppyseed and Elderflower blossoms.

IMG_2616

I am sure you will enjoy this cake!

Rasa ;)

0

Our first knitting meet!

1

We had our first knitting group meet at my house today which was fun. Hopefully I managed to teach how to cast on and knit stitch. Next meet will be on Monday 1st of July (Tottenham). Let me know if you interested, beginners are welcome!

5

2

3

4

The sweet treats are to be had off course! The recipe is bellow

6

RHUBARB  TART
I had lots of rhubarb in my garden (the only thing that does not get eaten by snails) so I baked my mum’s favourite apple tart with rhubarb (of course) instead of apples.
Ingredients: 200g unsalted butter
                   6-8 tbsp sugar
                   2 egg yolks
                   15-20 tbsp flour
                   8 chopped rhubarb stalks
                   6 tbs brown sugar
1. Preheat the oven to 170C.
2. Cream butter with sugar and mix it together with egg yolks.
3. Gradually add flour (I usually start with 15 tbsp and then see how the dough is reacting to it). The goal is to get the dough soft but not too sticky. So the less flour you can handle the better!
4. Roll out the dough flat on floured surface. Line  baking tin with the dough (line baking tin with baking paper first if needed or just a butter is enough).
IMG_2491
5. In the pan, melt sugar and cook chopper rhubarb stalks for few minutes.
IMG_2499
6. Add the “rhubarb” contents into the tart.
IMG_2508
7. Bake for 30min until the top looks slightly golden.
IMG_2510
8. I Added meringue and baked for further 30min, but it should be nice on its own too or couple of scoops of vanilla ice-cream… hmmm
Enjoy!
Rasa xo


0

Happy Father’s Day!

Today we were celebrating Father’s Day, so we baked (and eaten) so many delicious cakes for this beautiful occasion.

I am especially pleased with the table setting! Marked roads on brown paper, traffic signs on toothpick and cars worked really well together as a theme. Although I must say that the kids loved this more than their dads :-)

I baked these lovelies,”Rolo” peanut-butter cupcakes! The recipe is bellow.

“ROLO” PEANUT-BUTTER CUPCAKES

Makes 12

For the base (adopted from Peyton and Byrne “British Baking” book)

  • 100g dark chocolate
  • 110g softened butter
  • 100g caster sugar
  • 100g light brown sugar
  • 2 eggs
  • 140g plain flour
  • 1.5tsp baking powder
  • 1tsp vanilla extract
  • 100ml buttermilk (or 50ml milk mixed with 50ml yogurt)
For the deco (used basic buttercream mixed with peanut butter)
  • 85g softened butter
  • 120g icing
  • 0.5tsp vanilla extract
  • 65g peanut butter
  • 12 “Rolo” chocolates
1. Preheat the oven to 170C and line 12-hole muffin tin with baking cases.
2. Melt the chocolate in a heatproof bowl set over a pan of simmering water, then remove from heat and set aside.
3. In the bawl, cream the butter and sugars together until pale and fluffy. Incorporate eggs, chocolate melted chocolate, flour, baking powder, vanilla extract and buttercream together. Mix well after each addition,  however if you are using electric mixer (so glad I have it!) you can mix everything in one go. 4. Divide the mixture into 12 baking cases. Bake the cakes for about 15min or until they are springy to touch.
5. To make peanut-butter frosting cream butter and icing sugar together. Mix in peanut-butter and vanilla extract. Spoon the icing into a piping bag fitted with round tip (or other shape if you prefer) and pipe swirls onto the cupcakes. Top it with the “Rolo”.
All the dads out there (including mine), Happy Father’s Day!
Rasa :)
1

My mum’s favourite apple tart

I am having such a relaxing day today by doing absolutely nothing (except writing this post perhaps)!!! And this is is much needed after baking so many samples to supply to cafes. After all this have been really successful as I am baking for one more cafe with few other really interested!

My mum’s favourite is the apple tart, however the credits go to Ramune who introduced this lovely recipe to our family. I love this too as it is such a freestyle cake! Although in theory the base is a sweet pastry, the amounts however are rough, there are no blind baking involved and you can pick any filling (I mean any but for now I am of course only adding apples).
APPLE TART
Ingredients: 200g unsalted butter
                   6-8 tbsp sugar
                   2 egg yolks
                   15-20 tbsp flour
                   3 sliced apples
                   3tbs brown sugar
1. Preheat the oven to 170C.
2. Cream butter with sugar and mix it together with egg yolks.
3. Gradually add flour (I usually start with 15 tbsp and then see how the dough is reacting to it). The goal is to get the dough soft but not too sticky. So the less flour you can handle the better!
4. Split the dough in two and roll out flat on floured surface: one for the base and other for the top. Line  baking tin with the dough (line baking tin with baking paper first if needed or just a butter is enough).
5. Coat slices apples with brown sugar and arrange them in the tart.
6. Cover the tart with the second part of the dough. If you want you can cut out little shapes on top with the biscuit cutter. But that is up to you – it won’t effect the taste ;)
7. Bake (I never take the time) until the top looks slightly golden. But be worn! As Ramune says: “it is better to under-bake than over-bake it”.
I hope you like it!
Rasa :)
1

Berry Meringue Tartlets – The Tartlet for Easter

I love tartlets! I probably said this so many times before… they are sooo cute! This one is perfect for Easter! Not only it has a spring appeal (contains refreshing wild berries with crunchy meringue topping), but it also can be made in any season as frozen berries are totally expectable. Have a lovely Easter weekend!

BERRY MERINGUE TARTLETS
Makes  6

For the sweet pastry:

110g softened unsalted butter
80g caster sugar
1 small egg
210g plain flour
a pinch of salt

For the berry filling:

Half cooking apple
4 tbsp frozen mixed berries
60g caster sugar

For meringue:

4 egg whites
200g caster sugar
poppy seeds for deco

1. Make the pastry in a food processor, if you have one, by placing all the ingredients in the machine and pulsing gently until they form a soft but not sticky dough. If you are making the pastry by hand, lightly cream the butter and sugar together with a wooden or plastic spoon. Beat the egg and to the creamed mixture a little at a time, beating well between each addition. Sift the flour and salt on to a piece of baking parchment and add to the creamed mixture all in one go. Bring the paste together gently to form a soft but not sticky dough. Do not over-handle it.
2. Wrap the dough in cling film and chill for 2hours. Then roll it out on a lightly floured work surface to about 5mm thick and use to line six 10cm loose-bottomed tartlet tins. Leave the lined tartlet tins to rest in the fridge for 30min.
3. Preheat the oven to 170C. To bake the pastry cases blind, line it with cling film and fill with baking beans . Bake for about 15min, until the pastries have started to colour and bases are firm to touch. Remove the packages of beans and return the pastry cases to the oven for about 10 min, until the pastries are golden brown. Leave to cool completely.
4. Turn the oven down to 150C.
5. To make the filling shred apple into the saucepan and heat it together with the berries and sugar. When the sugar is completely melted spoon the filling into the baked cases.
6. Finally, prepare the meringue topping by whisking the egg whites in a clean bowl until stiff (it’s best to use an electric mixer for this as it takes a while). Add the sugar a little at  a time until it is fully incorporated. The meringue should be stiff and glossy.
7. Spread the meringue over the berry filling and bake for 40min.
8. Sprinkle some poppy seeds (for deco purposes only)

Enjoy!

Rasa :)

0

Thyme and Lemon Tartlets

I just made these tonight, so writing this post while I am eating one of them. Absolutely yamm…!
I like the cinnamon/cornmeal crust (I know! odd! But it defiantly works) and really impressed with my new sugar crusting skills (this is my first time to use cooks torch) as I managed without burning the house down! Try it for yourself, the recipe is here.

Enjoy!

Rasa xox

1

Earl Grey Poppy Seed Tea Cakes

I hope everyone is enjoying the snow in London like I do. I am Lithuanian after all!

Anyway (change of the subject), around to weeks ago I came across this recipe on SprinkleBakes website that blew my mind. I honestly get excited when I see nontraditional  ingredients matched together. So I made it! I changed the the deco to more “natural” looking and it came out like something really suitable to serve on St. Valentines day (very dainty as my flatmate said). But I could not wait until February… so there you go!

EARL GREY POPPY SEED TEA CAKES
Makes 6

For the cake:

  • 170g caster sugar
  • 6 Earl Grey tea bags (removed from the bags)
  • 2 tbsp poppy seeds
  • 4 eggs
  • 1 1/2 tbsp. rapeseed oil
  • 2 tbsp buttermilk
  • 1 tsp vanilla extract
  • 125g plain flour
  • 1 tsp baking powder
  • 1/2 tsp salt
  • sugar for dusting
For the Earl Grey syrup:
  • 170g caster sugar
  • 180ml water
  • 4 Earl Grey tea bags
For buttercream:
  • 115g unsalted butter, softened
  • 250g icing sugar
  • 1 tsp orange extract
  • Juice of 1 small lemon
  • Zest of 1 small orange
  • Zest of 1 small lemon
  1. Preheat oven to 180C.  Grease an 11×14-inch pan (I used oven shelve pan) with butter and line with baking paper (grease the paper as well).
  2. In a large bowl beat the eggs, then add sugar, tea leaves (from the tea bags), poppy seeds, oil, buttermilk and vanilla extract. Mix well!
  3. Sift together flour, baking powder and salt.  Slowly add to the liquid ingredients.  Mix until well combined.
  4. Pour mixture into prepared pan and tilt pan to distribute the mixture evenly.
  5. Bake for 12-15 minutes. Check at 12 minutes. Cake is done when it springs back when pressed with fingers.
  6. Turn cake out and dust surface with powdered sugar.  Let cool completely.
  7. Use cookie cutter rings to cut out about 18 cake circles.  Set aside.
  8. To make the syrup stir together sugar and water in a small saucepan.  Place over medium-high heat and bring to a bubble. Stir to make sure all the sugar is dissolved.  Remove from heat and place the teabags in the hot sugar syrup to steep.  Infuse for 5-7 minutes, then remove and discard tea bags.  Set aside to cool.
  9. To make buttercream cream butter together with sugar. Add orange extract and lemon juice; beat again for another minute until light and fluffy.  Add zests and mix until smooth.  Transfer to a piping bag or zip-top bag with the end snipped (no decorator tip necessary)
  10. To assemble brush each cake circle with the syrup and apply some buttercream on top of 12 of them. Join three together leaving the one for the top without the cream. Dust the tops with icing sugar. I used small heart shaped cookie cutter as a stencil to make poppy seed deco on top.

Enjoy the snow!

Rasa :)

0

Little bit of magic for Christmas… or New Years Eve!

I tasted this cake at the time when I was working at the French Patisserie and I fall in love with it. Now when I was looking for something to bake for Christmas I accidentally came across this blog with the recipe! As I was reading I realized that the blog author has experienced the same: first watched it being made on the TV and then later found the recipe in the magazine. I sure agree with Bree that this cake is magical not only because of the taste, but also because of the baking process. You see… the cake base floats up and exchanges with the flan without any mixing! Try it for yourself… it might be too late for Christmas, but there is always time for your New Year’s party ;)

CHOCOLATE FLAN CAKE
For the cake:
  • 120g caramel/toffee sauce
  • 75g cup flour
  • 40g cocoa powder
  • 1/2 tsp baking soda
  • 1/4 tsp salt
  • 110g bittersweet chocolate, chopped
  • 85g butter, melted
  • 120ml buttermilk
  • 110g sugar
  • 2 eggs
  • 1 tsp vanilla essence

For the flan:

  • 2 (395g) cans sweetened condensed milk
  • 600 ml whole milk
  • 175g cream cheese
  • 6 eggs
  • 4 egg yolks
  • 1 tsp vanilla
  1. Preheat the oven to 180°C. Spray a Bundt cake tin with baking spray. Pour caramel/toffee sauce into the bottom of cake pan.
  2. In a medium bowl, combine flour, cocoa, baking soda, and salt. Set aside. Place chocolate and butter in a microwave safe bowl, heat until melted, 2 minutes at 50% power. Whisk buttermilk, sugar, eggs, and vanilla into chocolate until incorporated. Add flour mixture and stir until combined. Pour batter over caramel.
  3. Add sweetened condensed milk. milk, cream cheese, eggs, egg yolk, and vanilla to a blender, Blend for one minute, or until very smooth. Slowly pour over cake batter.
  4. Place the cake pan in a large roasting pan. Pour boiling water halfway up the sides of the pan and bake for 75 to 90 minutes, or when a toothpick comes out clean. Transfer to a wire rack and cool to room temperature, about 2 hours. Transfer to refrigerator and chill for at least 8 hours.
  5. To unmold, place the bottom of the cake pan in hot water for 1 minute. Place a cake plate over the cake pan and flip over. Slowly remove pan and serve.
  6. Visit BakedBree for the instructions with pictures.

***Merry Cristmass ***

Rasa :)

0

Gingerbread cookies for snowy weather :)

I am finally almost there! My presents are almost packed, a lot of my knitting projects are over, my baking is coming to the end and the most importantly I am here in Lithuania watching the snow falling down :) (sorry I needed to brag).

Anyway… as I am waiting for Christmas Eve to come I remembered about last years’ Christmass and the lovely gift that I received from Liz. That was a little folder with all the American recipes including the gingerbread cookies recipe of course. I baked so many this year!

GINGERBREAD COOKIES

Ingredients:  490g flour
1/4 tsp salt
1/2 tsp baking soda
1/4 tsp ground cloves (I used all spice mix instead)
2 tsp ground ginger
1 tsp ground cinnamon
230g butter, softened to room temp
130 brown sugar
1 egg
90g treacle (if you can’t find it you can substitute with more brown sugar)

Whisk together first 6 ingredients and set aside. In a separate bowl cream butter and sugar with a mixer. Add egg and molasses (or more brown sugar); beat on medium until mixture is smooth. Add the flour/spice mixture slowly, blend on low until just combined. Wrap in plastic and chill for an hour. Preheat oven to 165C. Roll out and cut cookies. Place 1/2 an inch apart on an ungreased pan. Bake for 9-11 minutes (be careful not to brown them as that means they are burning). Wait until they are cool and decorate with frosting if desired

Happy Christmas waiting

Rasaxox

1