Top

knitted scrubby pouches + three ways to use it

Knitted scrubby pouches 
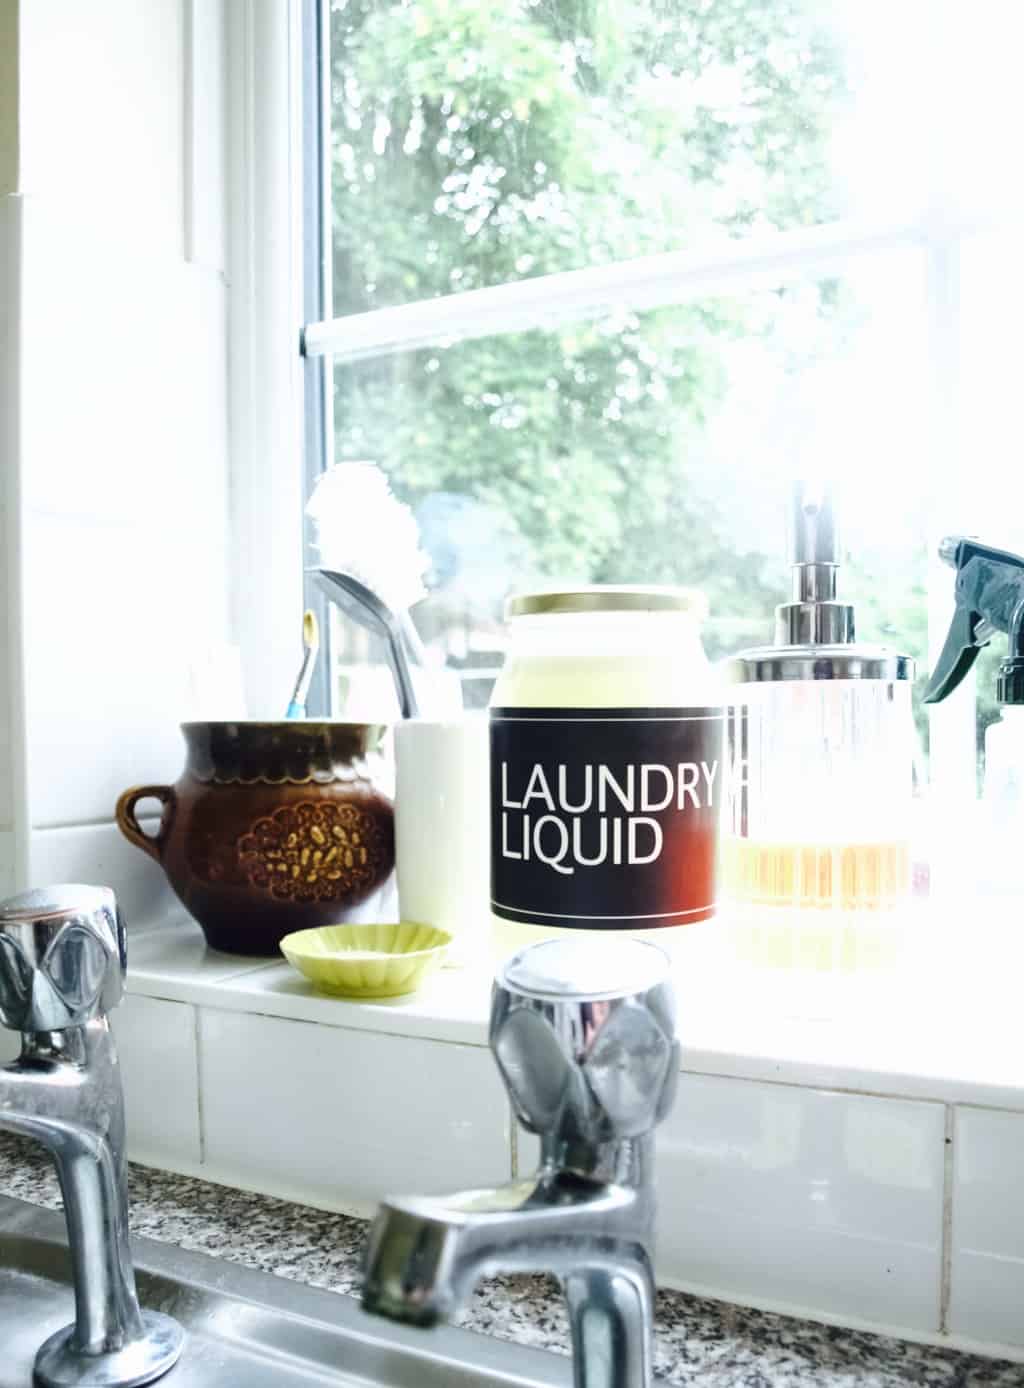
It was such a breakthrough when we started reusing cleaning cloths, I am sure it saved few £££ too. It does not take a lot of space in the washing machine and I never seem to run out of them. Now my next step is to reuse scrubbing sponges, we go through soooo many! This is when I thought I could make my own! I saw few knitted wash cloths around so I thought it will be fun to knit the scrubbers too. I chose garden twine for it’s ridged and rough properties and garter stitch for it’s simplicity and texture. Let’s see how they hold up ;-)

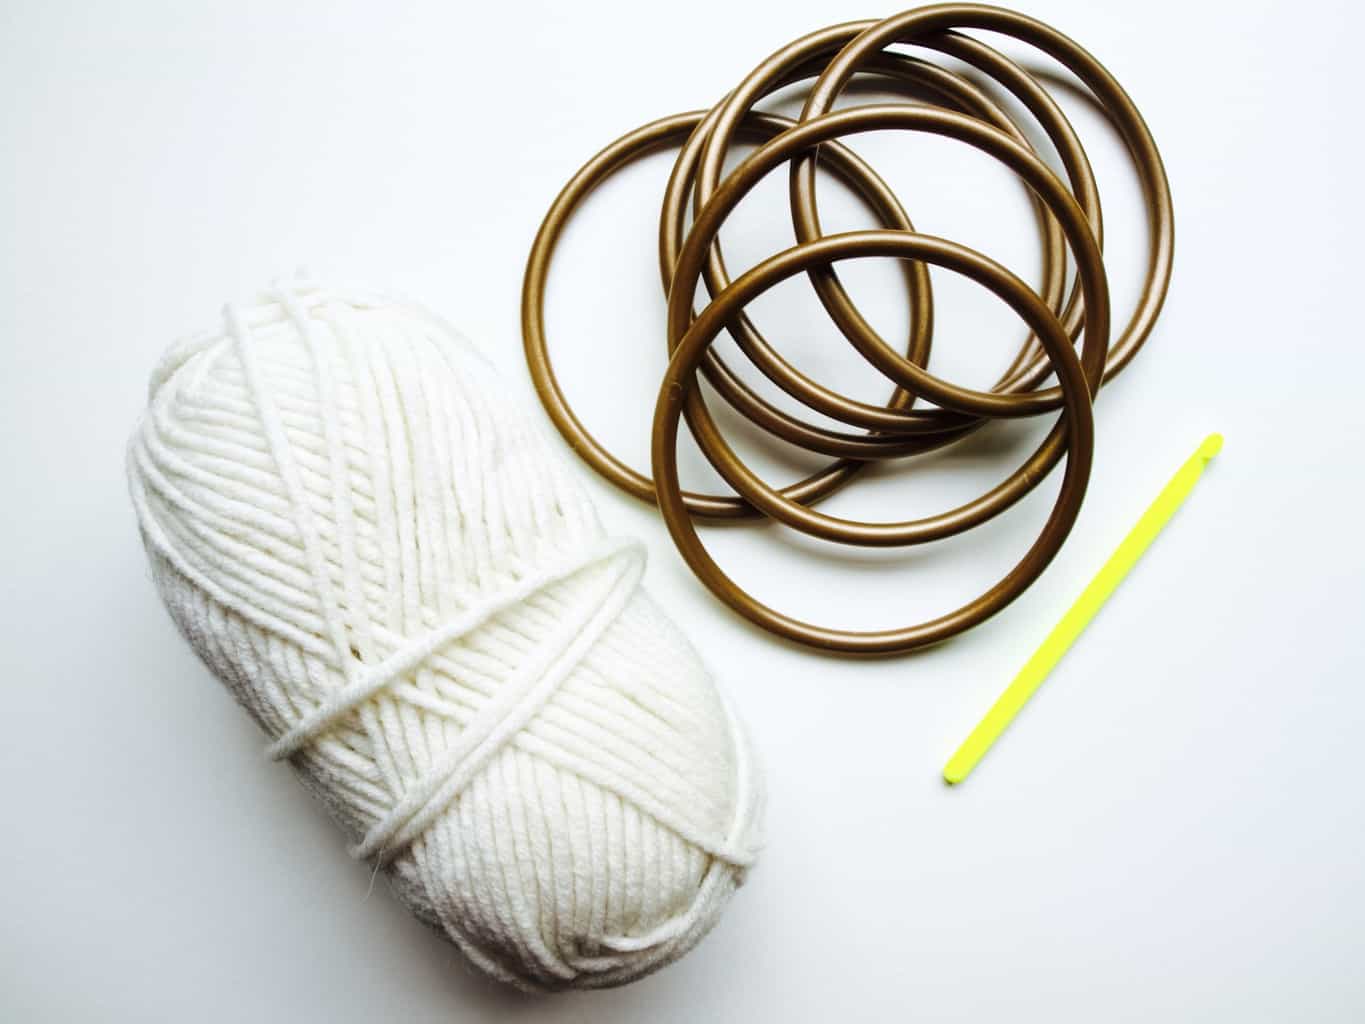
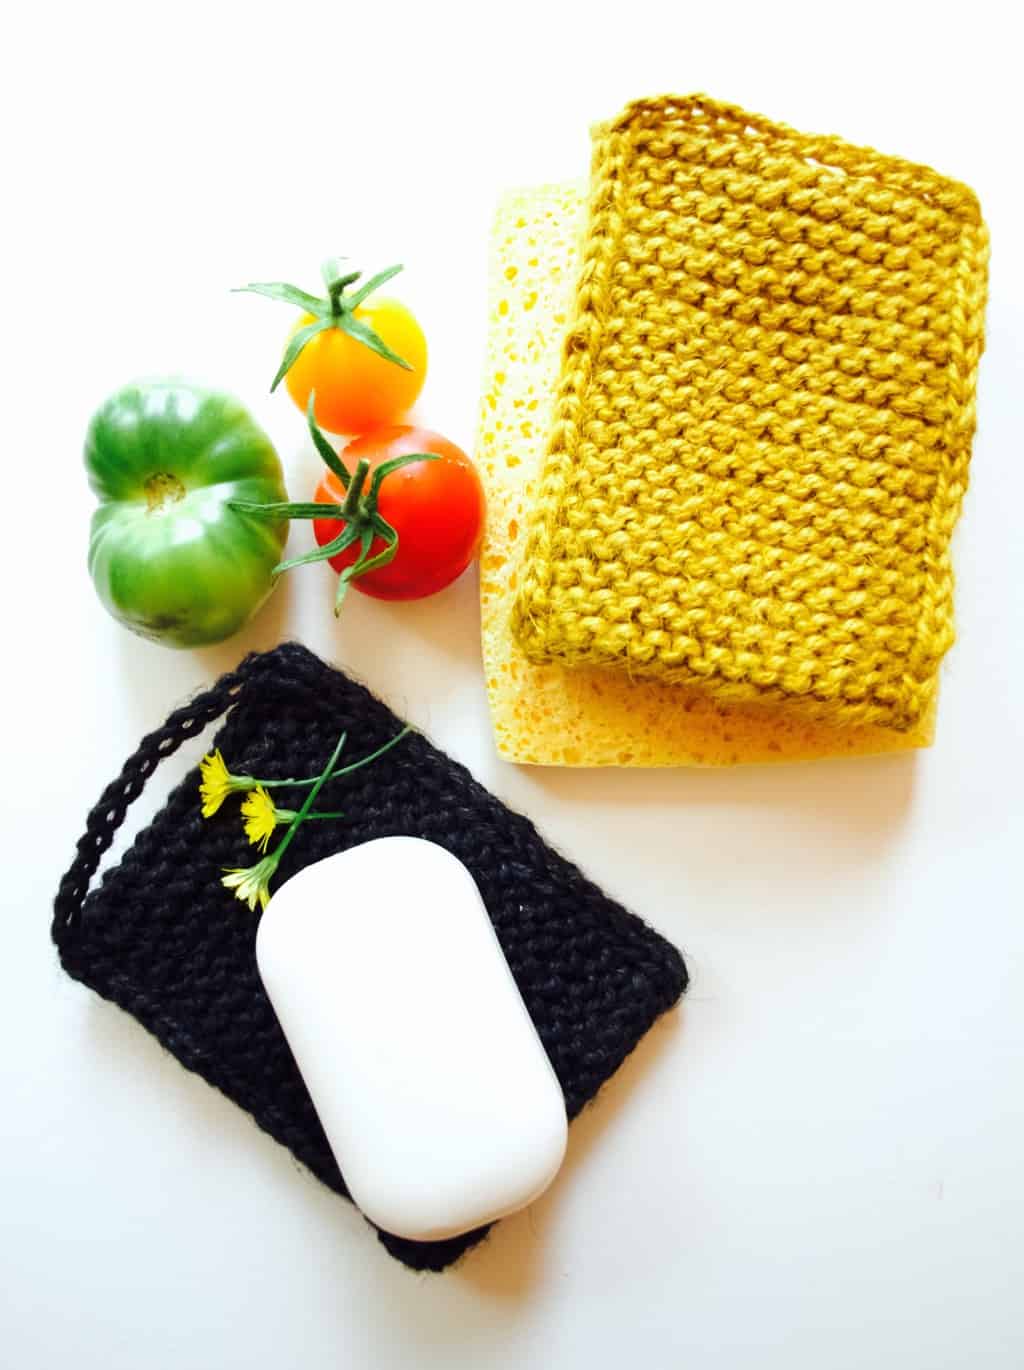
These scrubby pouches are great as they can be used three ways. You can insert biodegradable sponge for some sponginess or a bar of soap for continuous foam (this can be suitable to use it in the bath I am sure). Alternatively you can use your hand which I find is easiest when doing some intense scrubbing.Knitted scrubby pouches 
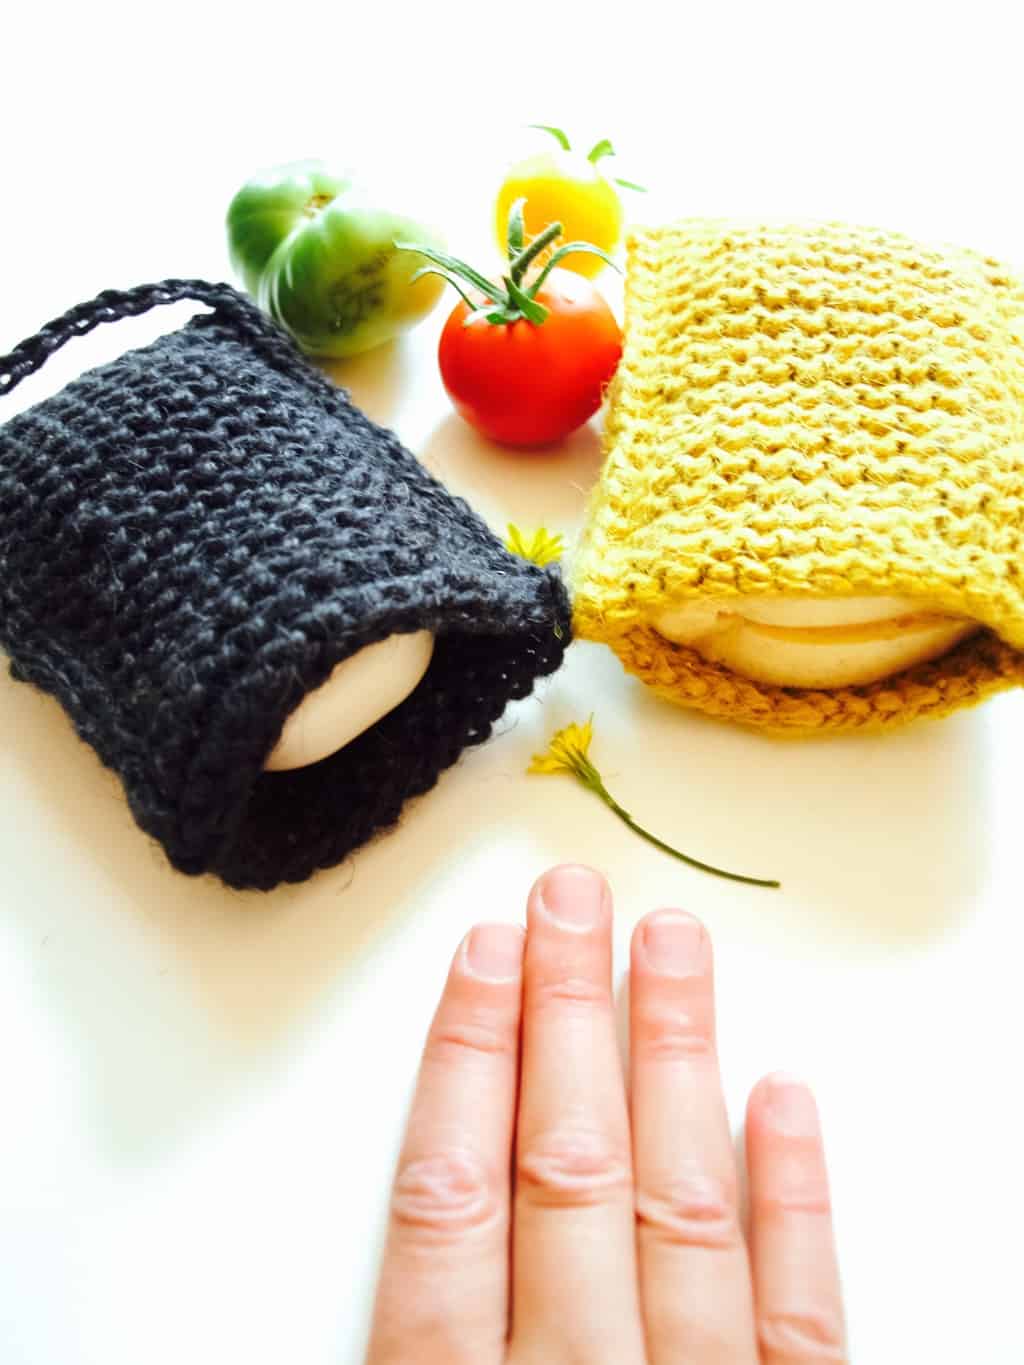
To make this scrubby pouch you will need:

  • garden twine
  • 4-6mm knitting needles
  • matching size crochet hook
  • scissors

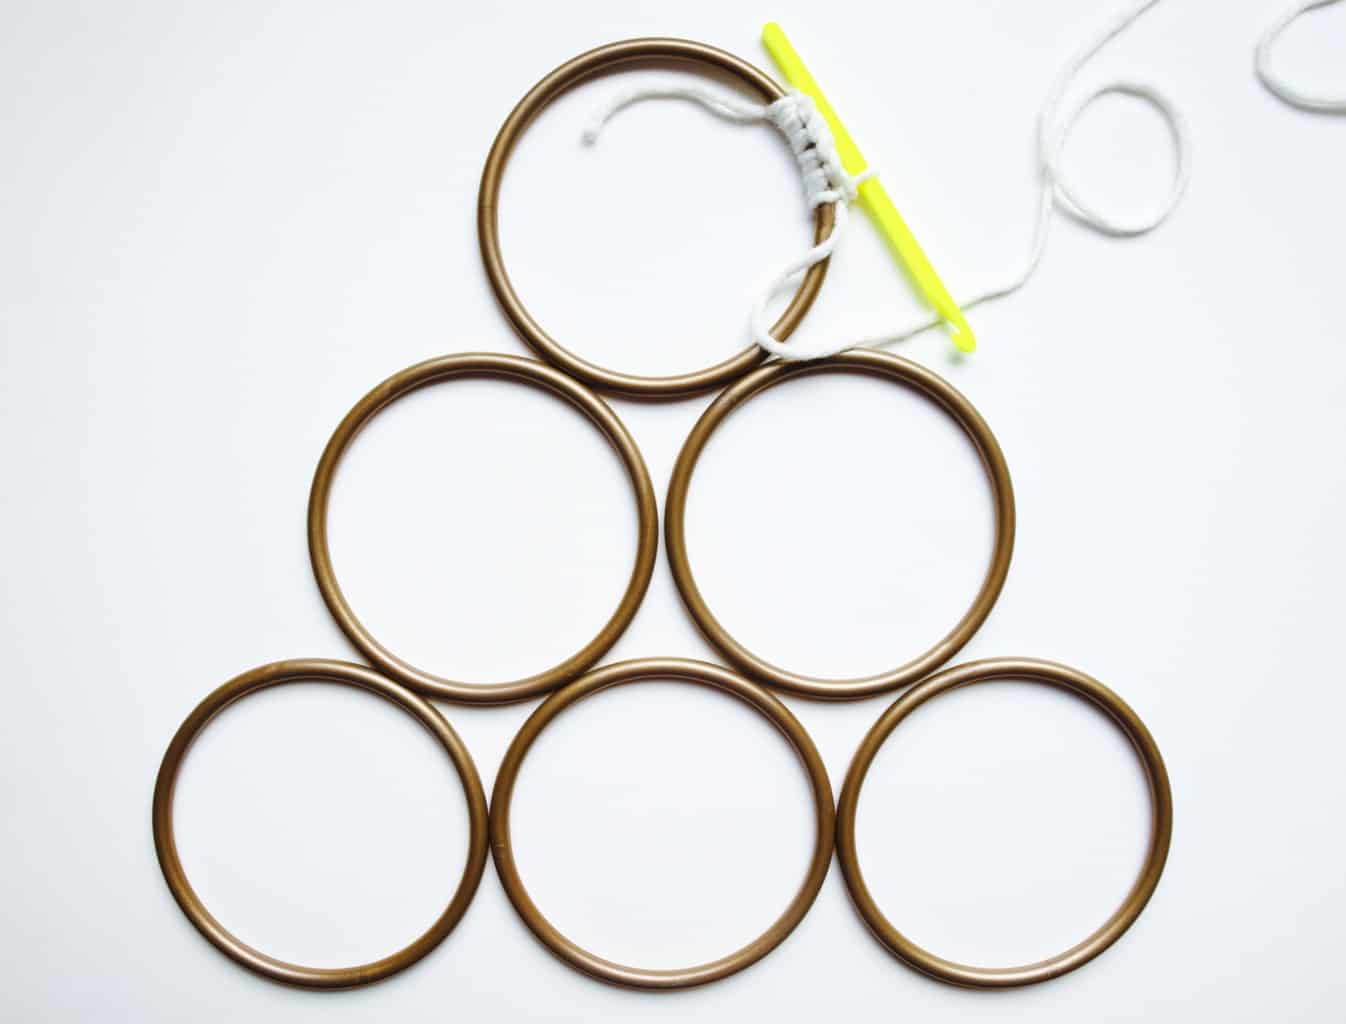
To begin with cast on a row measuring your hand width.

Knitted scrubby pouches
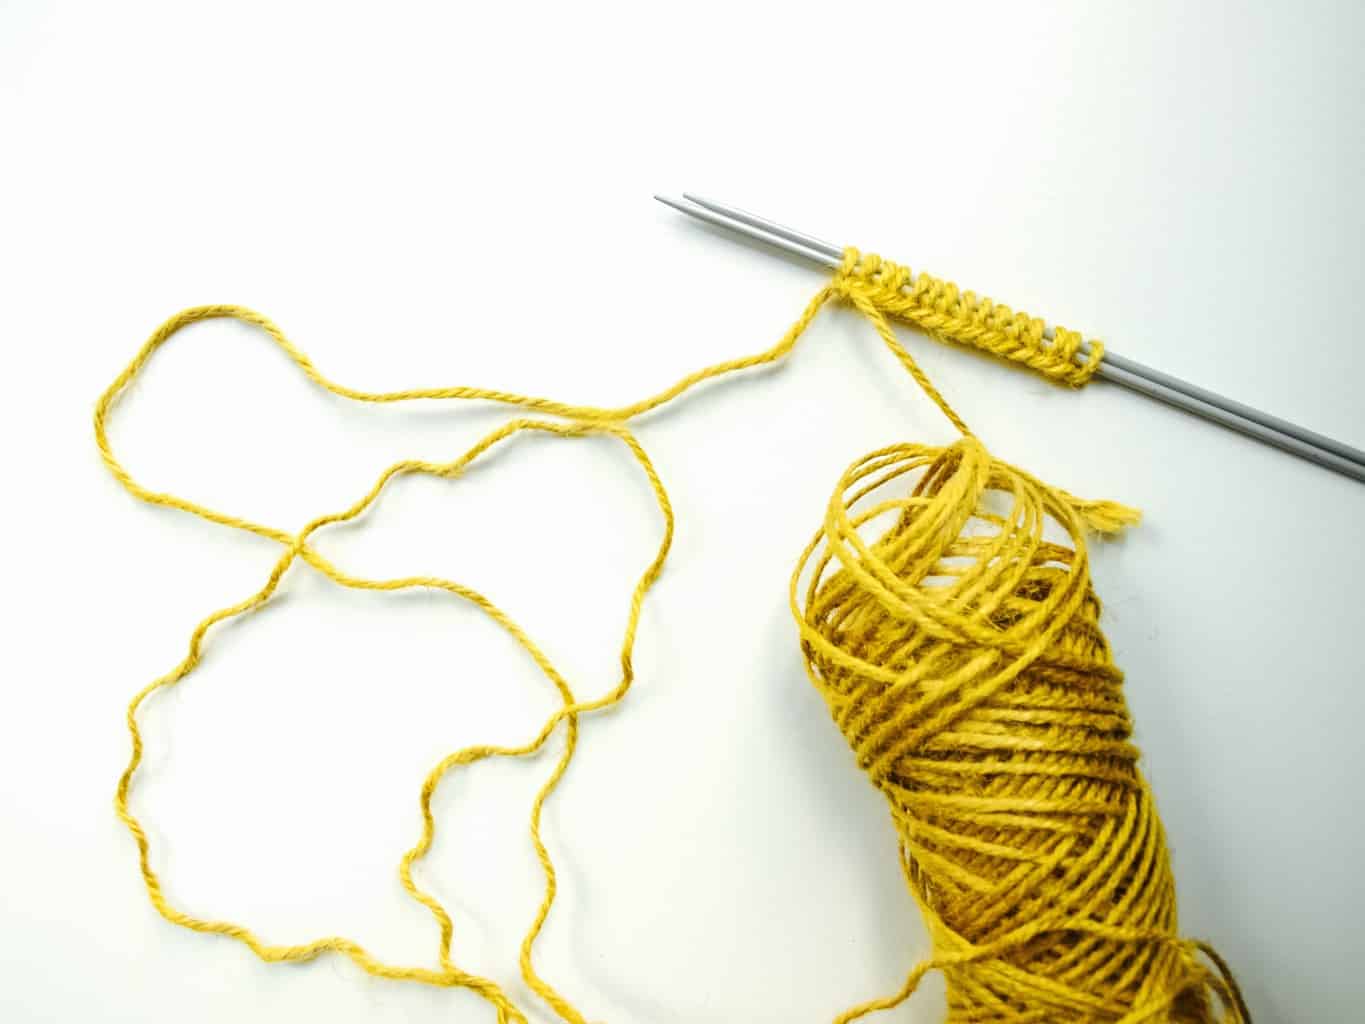
Continue by knitting on both sides which makes up garter knit stitch. Carry on knitting till you achieve long enough cloth that fits your sponge when folded.Knitted scrubby pouches 
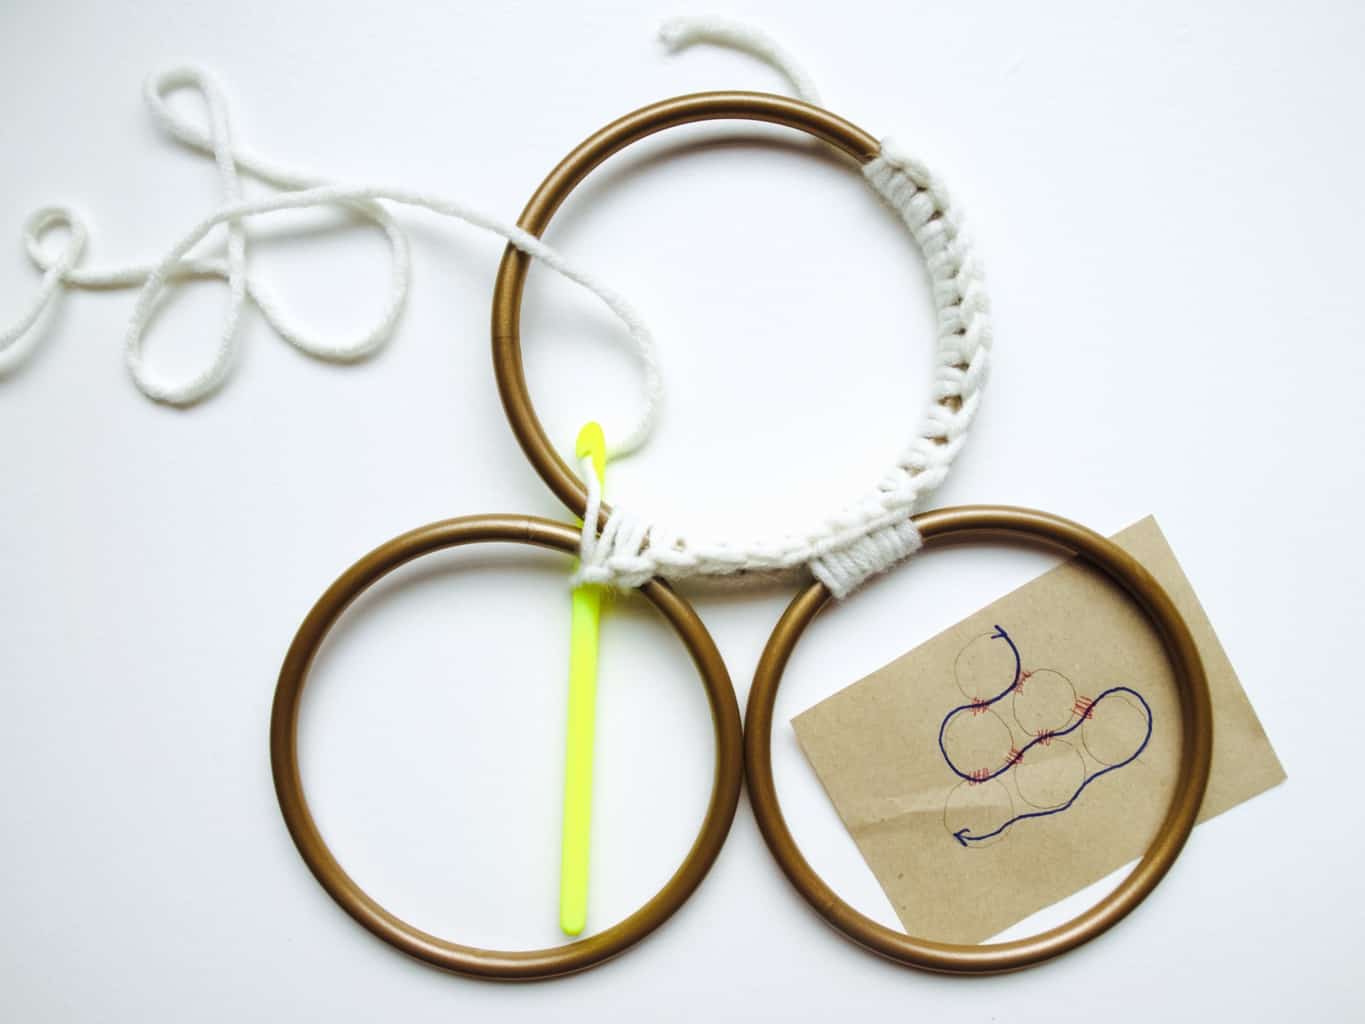
Fold the cloth in half and join one side together using a crochet hookKnitted scrubby pouches
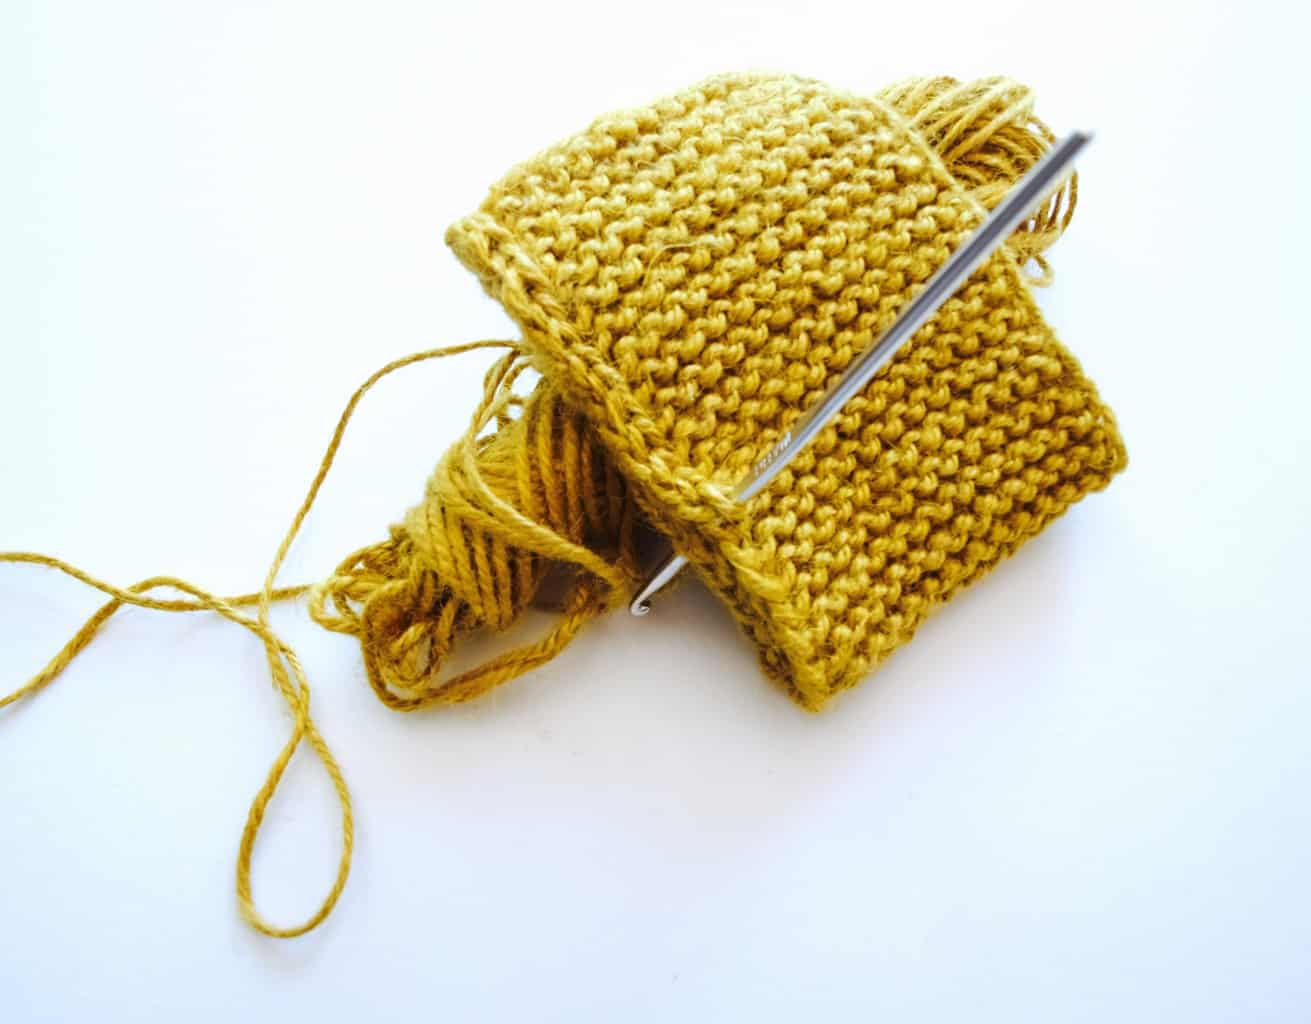
Crochet a chain same length as the cloth width. Knitted scrubby pouches 
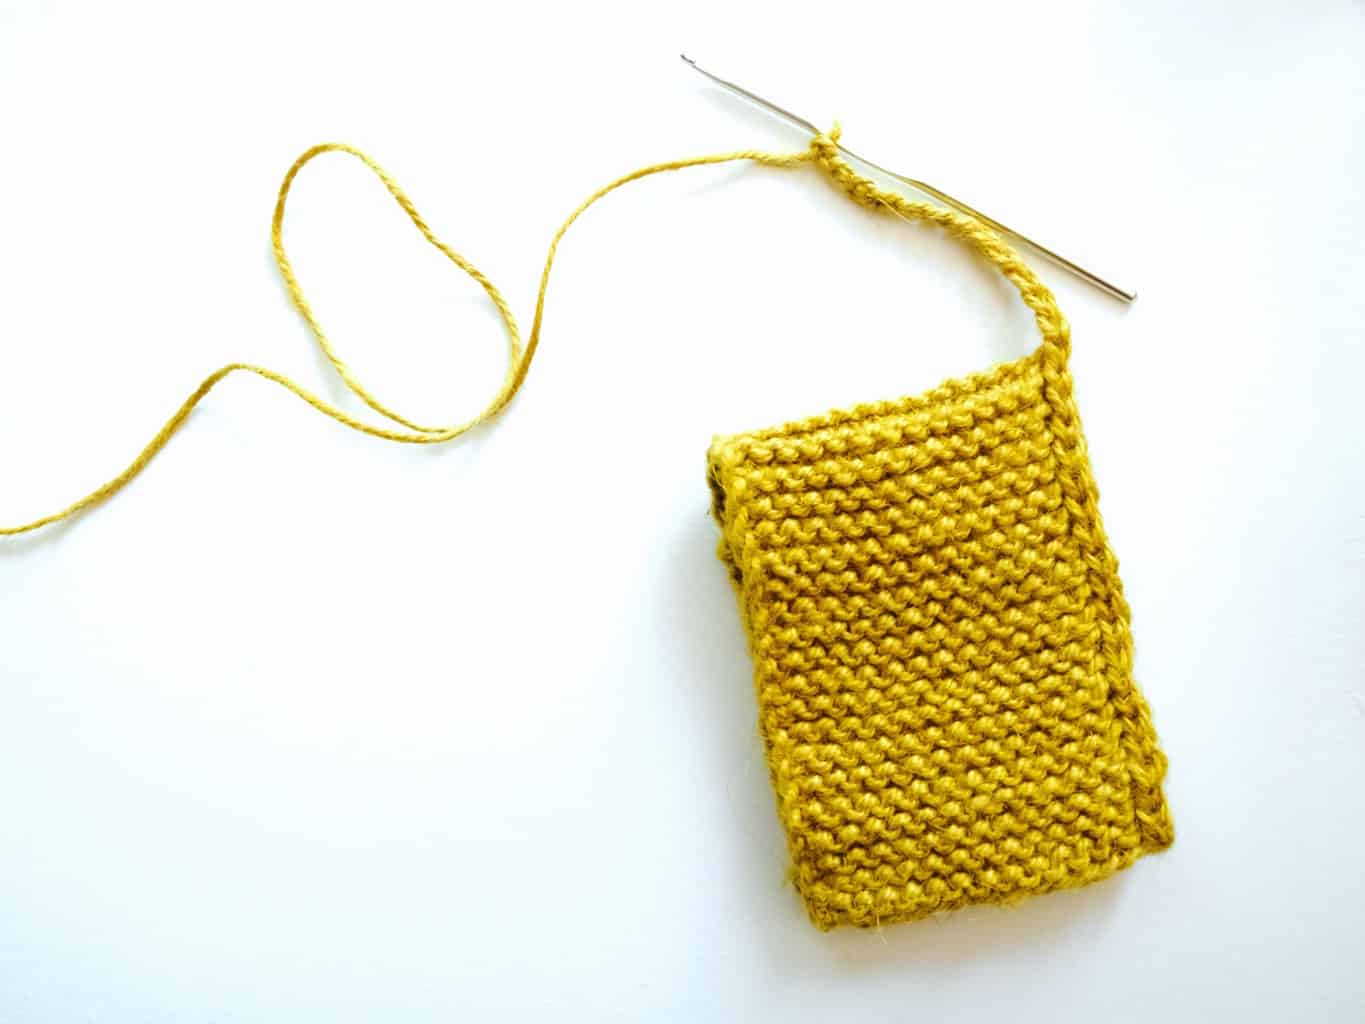
Join another side same way as the other previously.  Knitted scrubby pouches
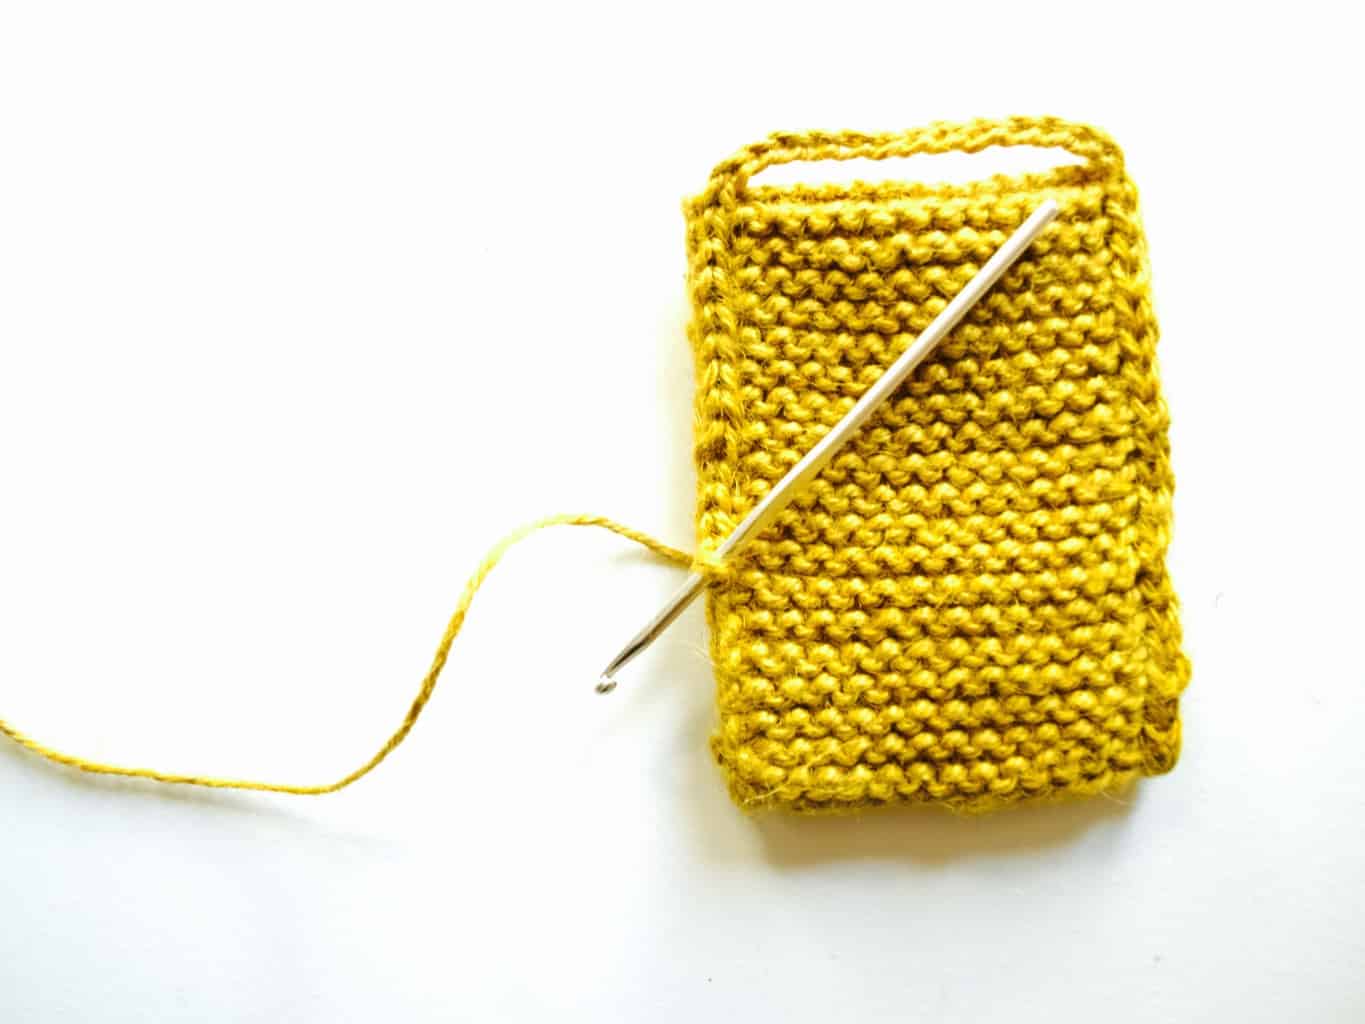
This turns the cloth into pouch.Knitted scrubby pouches 
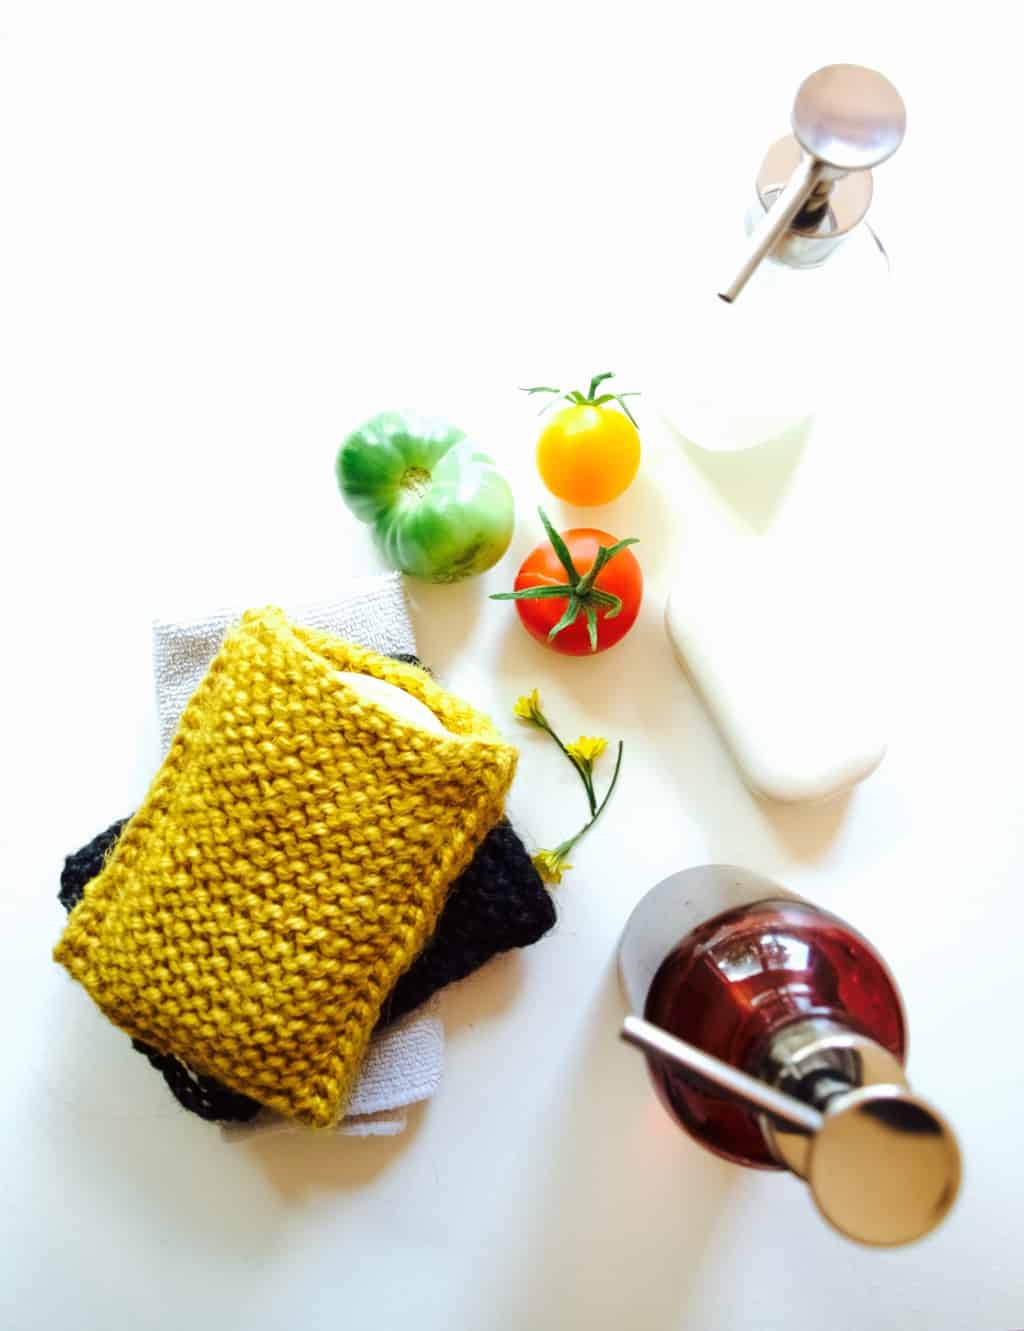
I have already tried out this scrubby pouch and must admit it is not as effective as a regular scourer sponge because it is not as flexible and soft. However with some practice it does work and it is gentle enough not to damage your pot and pans ;-).Knitted scrubby pouches
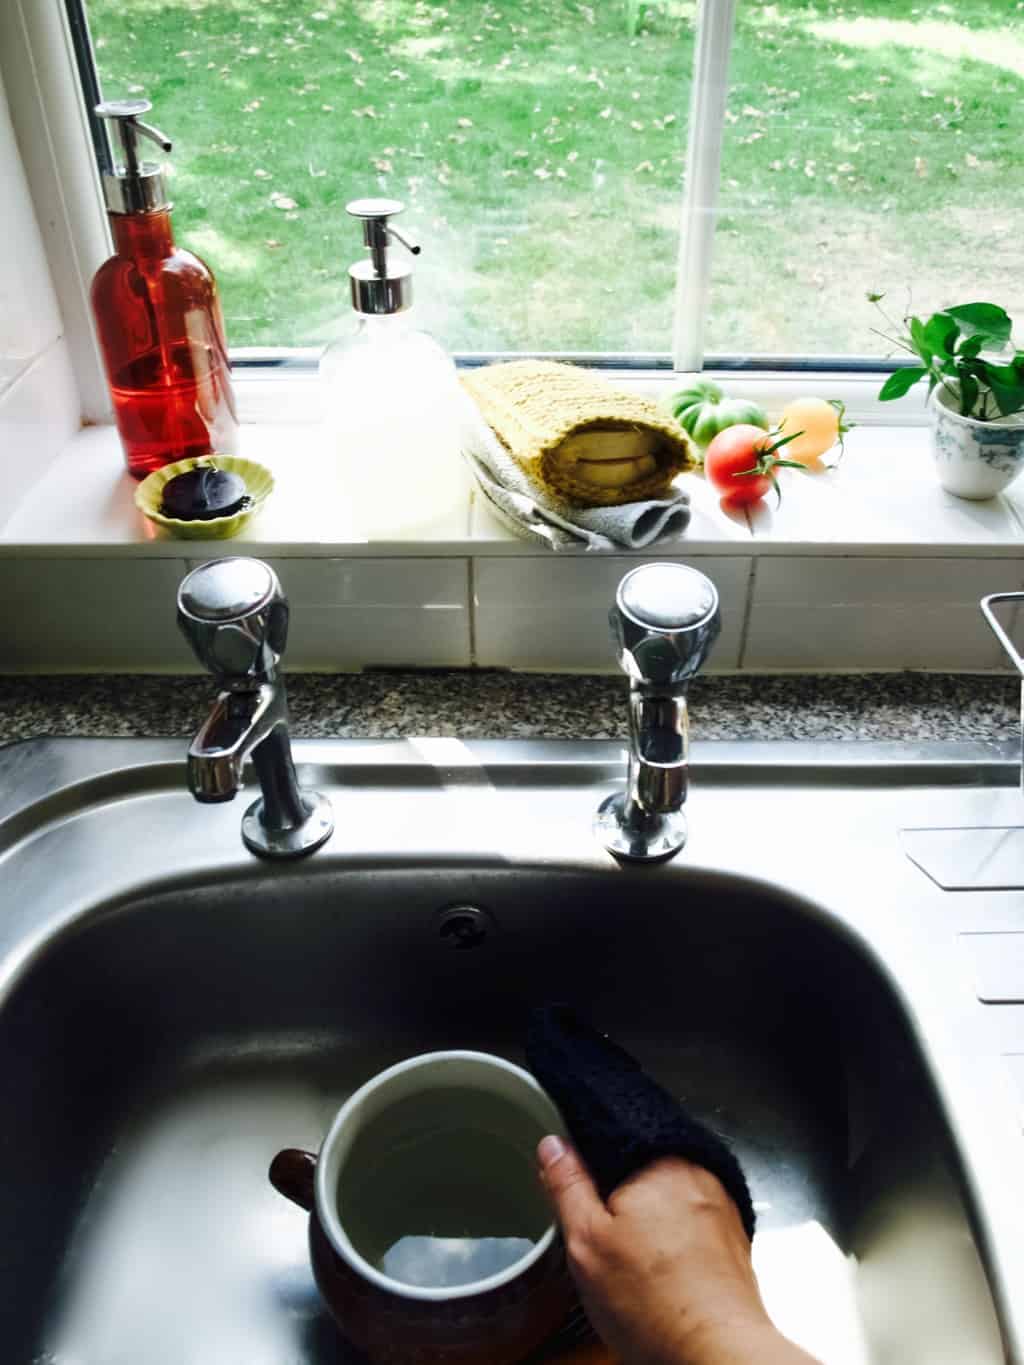
Hope you found this useful!

Rasa xoxo

0

Gluten free pizza topped with fresh ingredients (two ways)

Gluten free pizza topped with fresh ingredientsSo we started a new diet for Tomas this month. We (which is really me) decided that his eczema may be caused by gluten intolerance. Like with any other diets we tried this includes a long 6 weeks trial where we change our menu to avoid the ingredient in question. I found gluten is not that difficult to avoid. Unlike dairy gluten mostly can be found in carbs. So essentially I thought I need to start baking my own bread, but then I was putting that off as bread baking involves quite a lengthy process…. however without gluten it is not so lengthy. The trouble with gluten free bread is that is difficult to bake a nice bread, but it does not take that much time to make it since we don’t need to kneed the dough to get the gluten to stretch. So all and all no gluten means hello quick bread!

I have been recently inspired by fresh tomato toast recipes from Half Baked Harvest blog. Fresh tomatoes in summer are just amazing! I don’t have such a big harvest of tomatoes (yet) this year, but I thought it would be lovely to make fresh tomato pizza anyways. I made pizza with cucumber as well (I have started getting them in my green house too!!).Gluten free pizza topped with fresh ingredientsGLUTEN FREE PIZZA TOPPED WITH FRESH INGREDIENTS

Makes two pizzas

(for the base)

  • 600g gluten free flour mix (mine consisted of rice, tapioca and potato starch)
  • 25g xanthan gum
  • 1 tsp garlic salt
  • 2tsp brown sugar
  • 3 tsp baking powder
  • 10g quick acting dry yeast
  • 350ml warm water

(for the fresh tomato pizza)

  • 125g mozzarella cheese, torn into pieces
  • 100g cheddar cheese, grated
  • 1 clove garlic, smashed
  • ground pepper
  • 1 tbsp olive oil
  • 3-5 tomatoes, sliced
  • basil

(for the potato and cucumber pizza)

  • 125g mozzarella cheese, torn into pieces
  • 1 potato, pealed and thinly sliced (I used a grater)
  • salt and pepper to taste
  • 1tbsp olive oil
  • chives, finelly chopped
  • 1-3 cucumbers, sliced

1. Mix together the flour, xanthan gum, garlic salt, sugar, baking powder and yeast in a large bowl. Make a well in the middle. Pour the water into the well and mix everything to form two balls. Roll out the dough onto the baking sheet until it is 5mm thick.Gluten free pizza topped with fresh ingredients 2. To make the cheese and fresh tomato pizza sprinkle the garlic, mozzarella and cheddar cheese over the base. Season it and drizzle some olive oil on top. Bake the pizza in the preheated 200C oven for 20-30min. Once baked top the pizza with sliced tomato and fresh basil.Gluten free pizza topped with fresh ingredients 3. For the potato and cucumber pizza sprinkle the base with mozzarella, potato and chives. Heavily season it (potato requires more salt) and drizzle some olive oil on top. Bake the pizza in the preheated 200C oven for 20-30min. Gluten free pizza topped with fresh ingredients 4. Once baked, top the pizza with cucumber and more chives (and maybe salt if needed). Gluten free pizza topped with fresh ingredientsEnjoy!

Rasa xoxo

0

Quick and easy liquid hand soap recipe

Quick and easy liquid hand soap recipeI have a little confession to make. When I go shopping for cleaning products or cosmetics I often judge it by its cover. I feel very very embarrassed by it as I made very bad (spontaneous) decision few weeks ago. I saw this handwash in a pretty packaging at Aldi and without much research or checking ingredients label I went and bought it…. Just because it looked stylish! I placed this bottle of hand soap by our kitchen sink and after first use I was hugely disappointed. A hand soap that supposed to smell like grapefruit stunk like cheap perfume. Not something you want to smell when preparing the food. This is when I decided to make my own liquid hand wash.

Now I made liquid soap before my friends, but honestly that recipe I used before never been used again. Why? Because it was not easy enough to make! I knew I needed a recipe that is quick to make and I could just mix something up when I run out. I was hoping to make soap in small quantities that does not need to be stored. After some research I came up with the recipe that is simple and easy and hopefully uses ingredients you already have (if you made any cleaning products before like this laundry liquid). I realised that the magical combination for perfect liquid hand soap is liquid castle soap, oil, essential oil (for a lovely smell) and water. For oil you can use glycerol or even fractionated coconut oil to make antibacterial soap. For water I saw people often use distilled water, but I used cooled boiled water instead.Quick and easy liquid hand soap recipe To make your own hand soap you will need:

  • about 300ml soap dispenser
  • 130ml liquid Castile soap
  • 70ml oil (I used glycerol instead as I had some already)
  • 15 drops essential oil (I used lavender)
  • cooled boiled water

Quick and easy liquid hand soap recipe Pour the Castile soap, oil and essential oils into the dispenser bottle.Quick and easy liquid hand soap recipe Fill up the rest of the dispenser with water.Quick and easy liquid hand soap recipe Voila, it is that easy!Quick and easy liquid hand soap recipeHope this has been useful

Rasa ;-)

0

Watercolour challenge: underwater

Watercolour challenge: underwater paintings inspired my mural walls in FranceLast month while exploring Carhaix-Plougue in France I was surprised to see so many creative wall murals around. These were mostly underwater creatures and seaweed that were appearing not only on the walls. There were few similar artworks displayed on the windows too. Watercolour challenge: underwater paintings inspired my mural walls in France Watercolour challenge: underwater paintings inspired my mural walls in France Watercolour challenge: underwater paintings inspired my mural walls in FranceSo inspired by all this art I decided to paint similar art for my watercolour challenge. It has been refreshing to paint something in one colour and discover different tones in it. I chose bluish grey which was perfect for sea world paintings.Watercolour challenge: underwater paintings inspired my mural walls in France Watercolour challenge: underwater paintings inspired my mural walls in FranceLater I realised that the wall murals in France were actually just the paintings on white paper and then stuck onto the wall. I wonder if they were having an open-air art gallery out there in Carhaix-Plougue…. hmmWatercolour challenge: underwater paintings inspired my mural walls in France Watercolour challenge: underwater paintings inspired my mural walls in FranceWe found this jelly fish at the beach which is soo pretty and obviously made its way to my pages on my notebook. I think sometimes the best inspiration comes from nature itself ;-).Watercolour challenge: underwater paintings inspired my mural walls in France Watercolour challenge: underwater paintings inspired my mural walls in FranceThanks for letting me share!

Rasa xoxo

0

Salad in a crepe

Nicoice salad in a crepe recipeMy love for crepes have reached the next level while in France. I knew crepes can be savoury and sweet but it never crossed my mind that crepes can be served with salad inside it. Woaaaah!!! Sunny times like these require a lot of salad eating I think! I also decided to brave up this time and make crepes 100% buckwheat (we all know pancakes without gluten are just too complicated). But after many failures you eventually get it, buckwheat pancakes need a lot of practice and patience. If you are not up for challenge, regular crepes/pancakes taste just fine ;-).Nicoice salad in a crepe recipeNICOISE SALAD IN A CREPE

(for the crepe)

  • 200g buckwheat flour
  • pinch of salt
  • about 500ml water
  • knob of butter for frying

(for the salad)

  • 3-4 potatoes, pealed and thinly sliced
  • sunflower oil
  • 200g canned tuna in brine
  • 20 green olives, halved
  • 1 cucumber, thinly sliced
  • 1 handful of lettuce, chopped
  • 1 handful cherry tomatoes, quartered
  • 3 eggs, quatered
  • 1 tbsp balsamic vinegar
  • 4 tbsp extra virgin olive oil
  • 1 tsp dijon mustard (we did not use it here, but I think it would taste good)
  • 1 clove of garlic, crushed to paste
  • juice of 1/2 lemon
  • 1 tbsp brown sugar
  • salt and pepper
  • chives, finelly chopped

1. First prep the crepe batter by combining all the ingredients. Start with dry ingredients and then gradually add water into it till the batter reach double cream consistently (be careful not to overmix). Refrigerate for an hour or overnight.

2. Boil the eggs.

3. Fry the potatoes in the frying pan with the generous amount of oil.Nicoice salad in a crepe recipe4. Make the salad. Arrange prepped ingredients ready for serving. Sprinkle with chives and seasoning.Nicoice salad in a crepe recipe5. To make vinaigrette combine vinegar, olive oil, dijon mustard, garlic paste, lemon juice and sugar in the jug. Add salt and pepper to taste. Nicoice salad in a crepe recipe6. Melt the butter in well heated frying pan. Pour one spoonful of crepe batter and immediately start swirling round the pan to get nice even layer. Loosen around the edge with a spatula once the top “dries up”, then turn the crepe and cook for further 1 minute. As you can see its not easy as with lack of gluten these crepes are flaky and therefore easily collapse when flipping. However I am sure lovely crepes can be achieved once you have a bit of practice.Nicoice salad in a crepe recipe7. To serve arrange Nicoise salad on the crepe and scatter more chives on the top.Nicoice salad in a crepe recipeBon Apetitte

Rasa xoxo

0

French holiday with friends

French holiday with friends (in Brittany)Back from French holidays last week and I can honestly say these were the best holiday so far since having kids. Although I thought I learned so much already how to do relaxing with kids, I still keep learning on the job. For those who are still struggling to holiday with babies here are my post from few years ago, I can only encourage you that things gets better with kids age.

With older kids you can create play area where they can play independently. Which is why it is so important to pick a place that is child friendly and safe. Self catered houses/villas are the best! Not only that they provide more space for your children, but it also come up much cheaper than hotels. French holiday with friends (in Brittany)We loved eating in as it was so much more relaxing in the evening and that meant we could relax outside while kids are sleeping near by. I have learned (thanks to our friends that went on holidays with us) how simple is to pack lunches which saved us money and time (no need to find a restaurant and wait for a food with impatient kids). It was so much more relaxing just to picnic outside. We were so lucky to have such a good weather!French holiday with friends (in Brittany) We loved local activities such as kayaking and walks by the cannel. So my advice is to pick a location/house that comes with activities you like. That way you can exchange with baby sitting and do fun things in turns!French holiday with friends (in Brittany) French holiday with friends (in Brittany) French holiday with friends (in Brittany) French holiday with friends (in Brittany)French holiday with friends (in Brittany) We stayed in Brittany, near Carhaix-Plougue. It is a very cute and creative town with lots of wall murals around (I am so into #wallmurals right now!!!).French holiday with friends (in Brittany) French holiday with friends (in Brittany) French holiday with friends (in Brittany) French holiday with friends (in Brittany) French holiday with friends (in Brittany) French holiday with friends (in Brittany) French holiday with friends (in Brittany) French holiday with friends (in Brittany) French holiday with friends (in Brittany) French holiday with friends (in Brittany) There was this crochet doily artworks all around the town centre and library. Feeling very inspired just remembering it!French holiday with friends (in Brittany) Of course we also visited the lake and local sea side which was the highlight I think.French holiday with friends (in Brittany) Amber water is not what people tend to get excited about lol, but I did!French holiday with friends (in Brittany) French holiday with friends (in Brittany)Have you started the holiday season yet? Hope my tips help ;-)

Rasa xoxo

1

How to make your own laundry liquid

All natural laundry liquid recipeLiving sustainably does not mean going extreme, I believe every little bit helps (oops, did not mean to sound like Tesco slogan). I dream to be completely sustainable one day, but for now I only choose the steps towards it that have immediate benefits for us (like reusable food wraps I made last month).

So this month I have been researching about cleaning products (all natural as possible of course!!!). I am very sensitive to synthetic and strong smells, so this was my main driver for going ahead and making some myself. Because I thought I could make cleaning products that smell nice and do not break the bank.

I made laundry liquid first because I was keen to make something for Tomas who has eczema. I heard that added perfumes and other nasty bits can make eczema worse! I looked at a few laundry liquid recipes and decided on the ingredient combination that I though would work best and that are easily accessible in UK (so you won’t find any borax in my ingredient list!). I added some lavender essential oil so now my laundry liquid smells very similar to the Ecover liquid that we tend to buy. All natural laundry liquid recipeTo make your own laundry liquid you will need:

  • 240g soda crystals (similar to Borax but not the same)
  • 50g bicarbonate soda (can be baking type)
  • 150ml liquid Castile soap
  • 800 ml boiling water (it needs to dissolve soda mix)
  • 20 drops essential oil of your choice (I used lavender)
  • large bowl or a jug
  • whisk

All natural laundry liquid recipeMix soda crystals with bicarbonate soda. Gradually add boiling water and the Castile soap while whisking. Continue whisking till it combines well and the soda is dissolved. You should end up with foam on top.All natural laundry liquid recipeLet the laundry liquid cool down and then add essential oil if using.All natural laundry liquid recipePour the laundry liquid into jars or bottles. Use half a cup per wash, so the recipe last for about 12 loads. I already did a few washes and I must admit I can’t see much of a difference between shop bought and mine, except the homemade one is much cheaper. Besides this laundry liquid is so quick to make and uses similar ingredients that other cleaning products need. So essentially you only need a few basic ingredients to make many cleaning products for around the house!All natural laundry liquid recipeHope you found this useful ;-)

Rasa xoxo

1

Watercolour challenge: planes and letters

Watercolour challenge: planes and lettersSooo, we are still on the mission to fill the walls in the kids room with pictures and Lukas is involved in this project as always (even if I don’t ask him to).

This months watercolour challenge theme is planes! Obviously because Lukas loves planes! This boy builds the planes out of lego, pretends to be flying like a plane and flies every possible object like a plane. You got the picture! I felt I had to make the boys room plane themed.

I have been imagining to paint those pretty biplanes and then an alphabet to go along with it. However (as always) things did not go to my plan. Although at least I have one artwork on the wall now!! Watercolour challenge: planes and letters Watercolour challenge: planes and lettersI started this month’s watercolour challenge with painting biplanes. It needed lots of attention to detail and lots of pencil work with rulers. The watercolour part only took few minutes. I did not like the end result too much. I can’t even explain why, definitely did not look what I had in my vision.Watercolour challenge: planes and lettersNext I started on the alphabet and I guess because painting biplanes did not work that much I looked at other planes to inspire me too. It was real fun to look through Joni’s plane books to find some planes that actually start with the letter I wanted to use it for. For instance I used the Avro Arrow aircraft to represent letter “A”.Watercolour challenge: planes and letters Watercolour challenge: planes and lettersI made plenty of mistakes, the letter “Z” is the wrong way round and plenty of mess that I could not quite rub off with the eraser. However I do love this artwork and it is hanging in the boys bedroom till one day I will decide to redo it.Watercolour challenge: planes and lettersSince I had so much fun painting different aircrafts from Joni’s book, I tried drawing one with propellers. Was not too pleased with this painting so decided to end painting here.Watercolour challenge: planes and letters Watercolour challenge: planes and lettersFor now I am just so pleased with the plane inspired alphabet.

What’s your favourite painting?

Rasa xoxo

0

Make your own macrame inspired crochet wall art

Do you remember when I made watercolour and embroidery wall art? I did say I was not 100% sure if it went with our bedroom interior and I think I was right (although there is no right and wrong when it comes to deco they say). This artwork never grew on me and it was time to replace it to something else completely different.

Now I am currently loving macrame craft although I am clueless how it’s done. When you are too busy with other projects I think sometimes its best to use the skills you already have. In my case this means crochet. Don’t you think crochet looks visually similar to macrame? I think when it is done the right way it can look pretty close!

Few months ago I made the climbing plant trellis inspired by macrame. I loved the outcome (and some yarn left) so I decided to repeat the technique somewhere else (although it happened to be in the same room). What do you think?Make your own macrame inspired crochet wall art If you are loving this as much as I do then you can access the project here.Make your own macrame inspired crochet wall artThanks for letting me share my macrame love ;-)

Rasa xoxo

0

Mint sauce – Lithuanian style!

Mint sauce Lithuanian style recipe So I am in Lithuania waiting for Joni to come and join us here for my brothers wedding. My dad is very eager to impress Joni with his culinary skills and kept asking what Joni would really enjoy to have for dinner when he comes.

Me: I am not too sure, we like a lot of things.

My dad: But what he really really likes?

Me: Ok, ok. I think he would really enjoy a good steak (I would enjoy that too with lots of salad… hmm)

My dad: How about I make roast lamb?

Me: But steak is beef? (why did he even ask if he is planning to make what he likes?)

My dad: So Joni does not like lamb?

Me: He likes lamb too. We like it with mint sauce.

My dad: Ok if I make roast lamb will you make the mint sauce?

Me: Ok sure!

I go and start looking into making some mint sauce. We have plenty of mint in the garden (check), salt (check), apple cider vinegar (Lithuanians are against using vinegar so I decide to try and use lemon instead), sugar (since lemon is sharp in taste I decide to make it more mellow by using some honey that we have plenty of as my dad is a bee keeper).

When Joni arrives my dad start introducing what he is making for dinner.

My dad: here is mussels for starter and here are some beef steaks for dinner.

Me: ????

Me: I thought you are making roast lamb??

My dad: But you said Joni prefers steak??

Me: never mind! I am not going into it.

I make the mint sauce anyways because I am interested how it turns out with lemon and honey. Joni is surprised how close to taste it was. I think I prefer it to the original recipe, because I am Lithuanian after all. I prefer food without vinegar although I do think sometimes it is necessary. Are you interested too how it tastes? Recipe is below.

MINT SAUCE LITHUANIAN STYLE

  • 1 cup compressed mint leaves
  • 1 tbsp honey
  • pinch salt
  • boiling water
  • 2-4 tbsp lemon juice

1. Place mints, honey, salt and some boiling water and whizz it with the hand processor.Mint sauce Lithuanian style recipe 2. Cool the mint puree and add lemon juice to your taste.Mint sauce Lithuanian style recipe This sauce is not only to use with lamb (although it goes with the lamb best). It can be used in mushy peas, mixed with yogurt to be used with rich stews. Maybe in salad too methinks?Mint sauce Lithuanian style recipeThanks for letting me share, hope this post does not sound too silly.

Rasa xoxo

0

Important website privacy updates

Important website privacy updatesIf you been following my feed on Instagram/Facebook/Twitter you probably heard that we had massive issues with our website all last week, but thankfully we are back. Phew! Hopefully you can continue enjoying it without further disruptions ;-).

It all started with the spring cleaning (or a detox as I would like to call it). We were removing all the unused elements of the website. You know, all those bits that are no longer used or no longer serve their original purpose. Because of new privacy laws in Europe(GDPR) we mostly removed all the member areas such as forum and the profile parts. This is where all went wrong, when updating some plug-ins it broke everything which meant even we could not access the website. Of course it is fixed now which is why I am able to write this post. Yey!

So why did we have a member area on our site to begin with? All because of our dream to build a community site that would be a place to meet and share about crafts of all sorts. Sadly this did not quite work out. Mostly because we are not very good with website building and not crazy rich to pay someone to build it. Instead it became more like a personal blog and I would like to continue doing it as I love love doing it (totally honest here). So here we go, instead of figuring out how to comply with new laws it was much more easier (almost) just to remove these data collecting forms and remove all the members at the same time (about 35K in total).

So if you were signed up then do not worry, we no longer keep your details. You don’t need to take any further steps. Hope this did not disappoint you, I don’t think it should have as all the website content is available to you freely anyways.Important website privacy updatesOf course there is so much more to fix on this website, but I think this is a good start. Hope you have a lovely week everyone!

Rasa xoxo

0

How to make reusable food wraps (to replace cling film)

Reusable food wrap DIY (with wax and resin)The thing is that I always dreamed of living sustainably, even before it be became popular. Sometimes I succeeded and sometimes business just took over my life and I had to cut some corners. The bottom line is I passionately hate waste and I feel like my heart bleeds when I see stuff wasted when it could have had another life (hope I don’t sound like a hoarder, because I am definitely not!!).

When it comes to sustainable living I believe it comes to choosing the products that should also benefit us directly (not only the earth). You see I dislike wasting money too (or even seeing somebody else wasting theirs). Which is why I always look out for things I could make myself and save money that way. For instance, last week I made some reusable food cloths, because I thought it would be lovely not to use as much cling film. I know, I know, this is not our biggest household waste (nappies and baby wipes are), but you’ve got to begin somewhere! I researched quite a few recipes and methods, so trust me you are getting the best here! Although after making some wraps I had a few other ideas how to make it even easier and cheaper.

To make these reusable food wraps you will need:

  • 130g wax (I used some wax thats been given to me by my mother in law who keeps the bees)
  • 26g pine rosin (or any other tree resin)
  • 4tsp jojoba oil
  • about 5-7 squares of light, woven cotton
  • pinking shears
  • old pot
  • old paint brush (optional, you will only be using it just for this)
  • baking paper
  • iron with the ironing board

Reusable food wrap DIY (with wax and resin)First cut your fabric to size. I used pinking shears as this really helps to stop fabric from fraying

Put the wax, rosin, and oil into the pot and while stirring heat all the ingredients till melted. I think because I used not well filtered wax it had few black bits in it. It did not cause too many problems in the end result but it did leave a few black speckles on the cloth.Reusable food wrap DIY (with wax and resin)As you brush the wax mixture onto the fabric it hardens very very quickly. I think I was too generous with it (so be stingy). The excess wax created lots and lots of mess later. I felt like a brush is not necessary here as the wax hardened after few strokes. I think I will try just dipping the fabric straight into hot wax next time. I imagine that should give good coverage without the wax hardening onto the surface. But of course I could be wrong!Reusable food wrap DIY (with wax and resin)So here comes the mess I was talking about. In order to impregnate the fabric with the wax mixture completely, the fabric needs to be reheated. When I researched how to make reusable food wraps it seemed that one of the most popular methods to reheat the wax in the fabric is to stick it into the oven. That seemed a bit limited by oven size and I imagined it would be messy (plus the oven tray to clean up). I guess I failed to avoid the later! I used baking paper to sandwich the waxed cloth and heated the wax and the fabric once again by ironing it. In my case the excess wax spilled everywhere: the floor, another layer of baking sheets (I wasted whole roll!!), and the ironing board (thankfully not the iron itself). This wax mixture was very sticky to clean because of the resin (special ingredient to make the cloths clingy). Definitely NOT applying that much wax liquid on the fabric next time!!!Reusable food wrap DIY (with wax and resin) The cloth cools almost immediately and can be used a few minutes after making it.Reusable food wrap DIY (with wax and resin) As I mentioned before the resin mixed in with the wax makes the wrap slightly sticky against itself which is why you can use this exactly as you would use cling film.Reusable food wrap DIY (with wax and resin)Hope you found this very useful and you can learn from my mistakes.

Rasa ;-)

2

Watercolour challenge: toddler doodles

Toddler doodles turned into abstract artSo this month for my watercolour challenge I decided to collaborate with my own 2 year old toddler (Eek!!). I enjoyed watching Lukas do art so much that I thought it would be very cool to create some careless abstract art inspired by his doodles and fill our kids room walls with it. Isn’t that the greatest idea you ever heard? Well, not quite! Although it did not work out exactly how I imagined (no artwork on the walls yet), working with the toddler thought me one thing or two. Before I tell you all about it, shall I explain how we did go about it first? If you agree then read on to hear my full story below. For our first arty session I set out with all material I had in stock. Although I don’t have crazy amount of art material, it was still little too much. This was my first lesson on how to make art with the toddler. Never give too much choice or you will be overwhelmed or (what happened in our case) he will be obsessed with one art media. I started by painting large rainbow on the page and Lukas joined in as soon as he noticed me painting. He picked a brush and kept dipping it where ever he could find: acrylics and water paint. The result was as I was expecting although I am not sure about the colour combo here, it did not go with our house interior at all.  Because I noticed Lukas likes to spread a paint with the brush, I realised watercolour was too watery. This is why I mixed up few watercolours with white acrylic paint to get thicker paint. But that meant the colours ended up very pastel. If you like pastel colours than this is fine, but I was not a big fan of this as I LOOOOOVVEEE bold colours.Toddler doodles turned into abstract art Toddler doodles turned into abstract artBut why I did not like Lukas using water colour straight? Well… a 2 year old did not quite understand the concept of using it. To use watercolour you need to constantly dip your brush into water between colour change and before to moisten the paint as well. To fix this problem I tried to dilute some watercolour pigment in little water. Here it is, I made a palette that I though would work.  Toddler doodles turned into abstract artExcept, yellow soon got mixed with green, created lime colour and other colours got mixed up as well. Did I tell you how easily watercolour mixes? You get the image: lots of grey/brown paintings. The pic below was the least overdone (lol).

I also tried placing few drops of watercolour ready on paper. You can blow on those drops to create pretty lines and patterns (this is my fave painting technique!!!). However this did not work out with 2 year old, he just did not quite get what exactly I wanted him to do with the straw I gave him (although I gave him plenty of demonstrations). Toddler doodles turned into abstract art Eventually I let him scribble away with crayons. Toddler doodles turned into abstract art I used Lukas scribbles to make my own abstract art which I much preferred. However I realised that this does not go with our house or my style. Toddler doodles turned into abstract artThe artwork with alphabet is my fav, however it does not have so much input from Lukas. I am thinking maybe for my next watercolour challenge I should do something alphabet themed (I really really enjoyed painting letters). Will see ;-).Toddler doodles turned into abstract artHope you have been inspired ;-)

Rasa xoxo

0

Savoury pesto crepes (cheese filling is the best!!!)

Pesto crepes filled with cheese recipeTruth to be told I recently started to dislike mealtimes with my kiddies. Lukas has reached such a fussy age that I can’t predict if the food I make will meet his standards. Can anyone relate to this? And guess what, it’s not a gourmet food he is after. It’s pasta and pancakes that makes him really happy. Ok, we recently found out that he also likes curry, but I shall keep this story for another post. Ok? For now lets talk pancakes… hmmm

I came up with pesto crepes on one of those days when I wanted to keep lunch time casual. You see, sometimes Tomas goes for a nap in the middle of the day, which is why I started using this time to sort the meals out. I prep the dinner (often in slow cooker) and then me and Lukas casually lunch in the kitchen. I sit Lukas up on the counter while I fry some pancakes for him. I find this totally relaxing as I love nibbling on pancakes myself (with a cup of coffee on the side of course). This week I added pesto into the crepe batter which was a game changer. I started imagining how I could add different herbs next time as well  because it is so easy to make your own pesto using different kinds of bases (it can even be spinach!!). And most of all Lukas liked these “pancakes” equally as the plain ones. I made these savoury and filled it with cheese and tomato which was even better.

PESTO CREPES

  • 200g flour
  • 2 eggs
  • pinch of sugar
  • pinch of salt
  • 1 tbsp butter, melted (+ more for frying)
  • about 350ml water or milk
  • 4-6 tbsp pesto (doesn’t have to be basil pesto)

1. Place the flour into the bowl together with eggs, sugar, salt and butter. Whisk everything together into a dry mass. While whisking begin pouring the water gradually into the flour mass (not all in one go because you might not need it all). You are aiming for a batter consistency that easily drips down the whisk when held up but still leaves temporary traces when whisked. Pesto crepes filled with cheese recipe 2. Add pesto and mix again to combine.Pesto crepes filled with cheese recipe 3. You will need to fry pancakes in a well heated pan with a little butter. Pour one spoonful of batter into the pan and immediately start swirling round the pan to get a nice even layer. If you are having a cheese filling then add it at this stage as it needs to melt while the crepe is still frying. Pesto crepes filled with cheese recipe Just roll the crepe once the cheese is slightly melted.Pesto crepes filled with cheese recipe Best eaten warm!Casual lunch me and a toddler!Enjoy!

Rasa xoxo

0

Growing jasmine indoors + macrame style trellis diy

Macrame style indoor trellis diyI can’t remember when and how I came up with the idea of a climbing plant in our bedroom, but I am very pleased right now to actually have achieved this goal. I must admit I did not do much research when it comes to what climbing plant to get specifically though. It went something like this: I went to Homebase to get some paint, checked out their indoor plant selection, saw some jasmine plants heavily reduced (it was after their flowering season in March), looked up on Google on how to care for them and so on, liked the description so I thought worth it to have a go for £2 per plant. These plants need bright light with some direct light if possible (check), moist soil without being soggy (check) and natural season temperatures (check). Now I just hope I like the flowering scent when it comes next February…. should be lovely for the bedroom, surely!Macrame style indoor trellis diy I repotted the plants within a week of purchasing. Bingo! They don’t have to be fancy pots, don’t even need to have a drainage hole. Instead fill the pots with gravel, then soil and that should do the trick.Grow jasmine indoorsTo make one of the pots more exciting (it was a very basic pot). I used some masking tape for areas where I wanted the original colour to stay and create a pattern of my own. I used some Hammerite metal paint that was leftover from our shelf brackets, but you can use any other suitable spray paint too. I love how spray paint creates an even finish without those undesired brush marks.Quick planter refresh deco with spray paintNow, forgot to mention, when I used to dream about climbing plants indoors I always envisioned that two vines would meet over this wardrobe door. This is why I placed the jasmine plants right where they are (one either side of the door). Grow jasmine indoorsTo tell you the truth I have never been a fan of macrame deco, but after seeing so much inspiration on Instagram its hard not to fall in love with it. I obviously have no idea how to do macrame, but I am sure I will learn one day. I used my crochet skills this time to create an indoor trellis looking slightly like macrame art. Or could it be because I used classic cream white yarn that looks like cord?

To make this trellis you will need macramé rings (whatever size and amount you want), some yarn (preferably cotton or even cord, but I needed to use up wool so I used that) and a large crochet hook (used size 9mm).Macrame style indoor trellis diyTo begin with, have a plan how you would like the rings laid out. I wasted so much time trying to work this out on the fly while i crocheted them together. I had to undo it many times as I realised there were better ways to connect the rings. I began with single crochet on my first ring.Macrame style indoor trellis diyThe plan does not have to be complicated. All you need to do is draw the rings and draw the direction the crochet will flow round the ring and onto other rings to connect the rings together. You can see how I did it at the picture below. Macrame style indoor trellis diyBy the end I began using chain stitch on the areas where I skipped from one ring to another without connecting any other rings at the bottom. Macrame style indoor trellis diy Macrame style indoor trellis diy Macrame style indoor trellis diy I hung the trellis with nails, I thought this is the least damaging and sturdy at the same time. Macrame style indoor trellis diyMy poor jasmine plants have been waiting for their trellis for a month or so. This is why I did not even prune them straight away as I should. Hopefully I was not too late. Apparently you should prune jasmine as soon as they flowered to give a good chance for the flowers to develop next year (fingers crossed). As I was pruning I also removed dead vines as well as dried leaves.Grow jasmine indoors Macrame style indoor trellis diy I am so looking forward to see that trellis to fill up, will keep you posted how it goes.Macrame style indoor trellis diyHope I inspired you

Rasa xoxo

3