Top

Rosemary Bread

sliced bread

I love rosemary so I thought I will share my other favourite recipe with it. Rosemary bread is one of the breads that I bake quite often. I hope this bread will also become your daily bread ;).

ROSEMARY BREAD

rosemary

  • 230g whole wheat flour
  • 80g strong bread flour
  • 2 tbsp olive oil + extra for kneading
  • 1 small handful fresh rosemary, chopped (or 2tsp. dried)
  • 8g salt
  • 7g active dry yeast (1 pack)
  • 1 tbsp sugar
  • 240ml warm water
  • 1 egg yolk for egg wash

1. Put all the ingredients together (except the egg yolk) in the bowl reserving a pinch of rosemary for later.

ingrediants

2. Mix the ingredients in the bowl together until well incorporated.

sticky dough

3. Place the dough on the slightly floured surface and start kneading it. Don’t be tempted to add more flour as it won’t help to solve the dough stickiness anyway. Just keep kneading the dough for 10min regardless how much of the dough sticks to your hands.

kneeding

4. After kneading is done, scrape off as much dough as you can from your fingers and wash your hands. Take some oil in your hand and rub the dough with it. Oil will help to handle a sticky dough and therefore shaping a dough ball should be really easy!

olive oil

5. Place shaped dough ball into the clean bowl and cover it with cling film. Keep the bowl in warm place, but not in the oven.

before prooving

6. After 1 hour come back to the dough and see if it has risen. If it doubled in size then go to the next step. If not, then give another 30min.

risen dough

7. Punch down the dough and form it into a loaf.

punch the dough

8. Dust the baking tin with flour and place the dough inside. Cover it with cling film again and let it rise for another 45min.

final rise

9. Once the dough is risen, gently brush the top with egg wash and sprinkle with the rosemary.

ready to bake

10. Bake in preheated 250C (or what ever the highest temperature available) oven for 20-25min until the top is golden brown and sounds hollow when tapped.

bread loaf

11. Let the bread cool before slicing.

lunch!

This bread is great for quick lunches as it livens up any boring food!

Enjoy!

Rasa :)

0

Courgette crisps

IMG_4812

Today, as I was picking the vegetables from my garden, I found one courgette that has overgrown it’s regular size. I bet, you won’t find a courgette in the shop that big! So this is why I thought of making courgette crisps :).

IMG_4787

First of all, courgette that big produces a good size chips! So this was one of the biggest reasons for my decision…

IMG_4794

COURGETTE CRISPS

  • 1 courgette
  • olive oil
  • salt and pepper
  • fresh rosemary (optional)

1. Slice the courgette into thin slices and lay it over lined baking tray. Brush the slices with a little bit of oil.

2. Chop fresh rosemary if using and sprinkle it  over the courgette slices together with salt and pepper.

IMG_4799

IMG_4802

3. Bake in preheated 100C oven for about an hour. Turn and bake for another hour again.

4. Cool it and ready to serve.

Oh… and completely forgot. Happy Vegetarian Day! These courgette crisps are dedicated to you :).

Rasa xoxo

0

Wake up to an autumn Sunday coffee ♥

IMG_4690Since today is an International Coffee Day, I have decided to share how I recently started drinking spiced  coffee! I once tried spiced coffee in the food exhibition and it tasted surprisingly AMAZING. Although I would not recommend this coffee for an everyday brew, I occasionally enjoy it on Sunday mornings :).

IMG_4682SPICED COFFEE

(for 2 adventurous coffee drinkers)


  • 2 scoops ground coffee
  • 1/2tsp ground cinnamon
  • 1/2tsp grated nutmeg
  • 300ml water
  • 3 whole cloves
  • 5 cardamon pods
  • 1 star anise
  • milk and sugar if desired (recommended)


  1. Place ground coffee, cinnamon and nutmeg into the french press pot.

IMG_4680

  1. In the milk pan heat the water with cloves, cardamon pods and star anise. Let it boil for 5-10min.
  2. Pour boiled water over spiced coffee and let it sit for another 2-5min.
  3. Press the coffee to filter and pour it into the cups. Serve it with milk and sugar if desired. I don’t usually drink coffee with sugar (I used to in the past), but I do think that sugar (only little) go well in the spiced coffee. So do try it out!

IMG_4697

I like September not only because it is my birthday month, but also because it is a last warm enough month to enjoy my coffee break outdoors on my terrace. My coffee is usually accompanied with the crepes and jam…hmm. September, you will be missed and this is probably the last Sunday I am enjoying it!


Rasa xoxo

1

Innocent Big Knit

IMG_4666

As mentioned previously, we have been knitting mini hats to contribute to Innocent Big Knit campaign. Sadly the time have came to say goodbye to our little hats as they are about to be posted to the Fruit Towers (Innocent Head-office) this afternoon :(.

On the positive note, I hope these little hats will make someone else happy, it could even be you (available from  November).

IMG_4670

Have a very happy day!

Rasa :)

1

Passionfruit and coconut tart

passionfruit & Coconut tart

Recently I have baked passionfruit cheesecake for one of the cafes I supply to and I had too many passion-fruits left. As I really hate food waste I kept thinking what else I can do with passion-fruits until I remembered this passionfruit and coconut cake that I tasted few years ago (baked by my secret competitors… ghhr). I could not get over the taste of it so it wasn’t too difficult to recreate the recipe. It is soo easy to make and you don’t have to have it as a tart: bake the filling on it’s own!

passionfruit and coconut tart slice

PASSIONFRUIT AND COCONUT TART

For the sweet pastry:

  • 85g unsalted butter
  • 50g caster sugar
  • 1 egg
  • 200g flour

For the filling:

  • 4 eggs
  • 165g caster sugar
  • 330ml rich and creamy coconut milk (dunn’ river is good)
  • 125 double cream
  • 80g desiccated coconut
  • 75g plain flour
  • 50g almond flakes
  • 125ml passionfruit pulp (7-9 small passion fruits)
  • 1tbsp lemon juice
  1. Place the butter and sugar in mixing bowl and beat them together until they are light and fluffy. Add the egg to the butter mixture and mix it until combined. Then add the flour gradually and mix until it looks like smooth dough.
  2. Place the pastry in the refrigerator for 30-60 minutes to rest. (or into freezer if you want it to be used another time)
  3. Meanwhile make the filling. Place the eggs and sugar together in a mixing bowl and beat them lightly. Combine the egg mixture with the rest of the ingredients, except icing sugar. Set the mixture aside until ready to use.
  4. Remove the pastry from the fridge. Roll it out on a well floured surface until it is around .5-.75mm thick. Lightly grease 30cm tart tin (or line it with baking paper). Line the tart tin with the pastry. Place the lined tin in the freezer for 15 minutes or in the fridge for 30 minutes to rest.
  5. Preheat the oven to 180°C.
  6. Pour the filling into the pastry and place it in the preheated oven and cook it for 45-55 minutes. The filling will be golden brown, risen and firm when the tart is ready.
  7. Remove the tart from the oven and allow it to cool for 10 minutes. Remove the tart carefully from the tin.

passionfruit & coconut tart slice

Enjoy!

Rasa :)

2

Autumn canning

  IMG_4568

Recently I shared some preserving and pickling recipes. I hope you enjoyed trying them out! Here is the list of the veg, fruit and berries that I canned this year:

The biggest lesson I have learned is to always sterilise the jars and never wait until the preserves are cooled before canning. So always wash your jars with the soapy water and heat them for 10min in preheated 180C oven just before using them.

IMG_4646

Here you can access free printable labels.

Happy autumn canning!

Rasa :)

2

My grandma’s pickled beets

IMG_4625

I grew way too many beetroots this year! Although I am quite happy with this as I love beetroots very much, especially their colour ;) So I asked my grandma for a pickled beets recipe as I knew I would not be able to use all of them before winter. I like this recipe as it doesn’t need any vinegar that sometimes gives a harsh taste (in Lithuania we don’t use much vinegar for cooking). It is simply preserved by using apple juice. Although I must say that the apple juice we use in Lithuania is quite sour. So make sure you get sugarless, not from concentrate apple juice. Sainsbury’s organic apple juice is a good one (not promoting, just recommending ;).

IMG_4633

PICKLED BEETS

  • 10 medium sized beetroots
  • 500ml sugar free apple juice
  • salt to taste

1. Cook the beetroots, whole with the skins on for about 30-40min(If you using a ready cooked ones from the shop then skip this step).

2. Once the beetroots are cooked then rub the skin off and chop them into desired sizes.

3. Place chopped beets into the clean pot and pour apple juice just to cover it. Add salt to taste.

4. Prepare the jars for preserving. Wash them with the soapy water and heat them for 10min in preheated 180C oven.

5. Heat the beetroots with apple juice until it reaches the boiling point.

6. Spoon the beets into the jars while still hot and pour the liquid on top.

7 Seal the jars with the lids and let it cool.

Enjoy!

Rasa ;)


2

Learning how to Crochet

Hey lovelies! What are you up to this weekend? If you have nothing planned then this would be a great opportunity to learn crocheting :). Don’t worry if you don’t know how to knit as crocheting is even easer and no experience necessary. Just follow this path:

1. learn the chain stitch that is useful to form a background for many crochet projects.

IMG_4618

2. master a slip stitch and you are almost there…

IMG_4620

3. get to know single crochet!

IMG_4621

4. learn a double stitch if you fall in love with crocheting already ;)

IMG_4622

Have a lovely weekend!

Rasa xox

2

Jamming with the Elderberry!

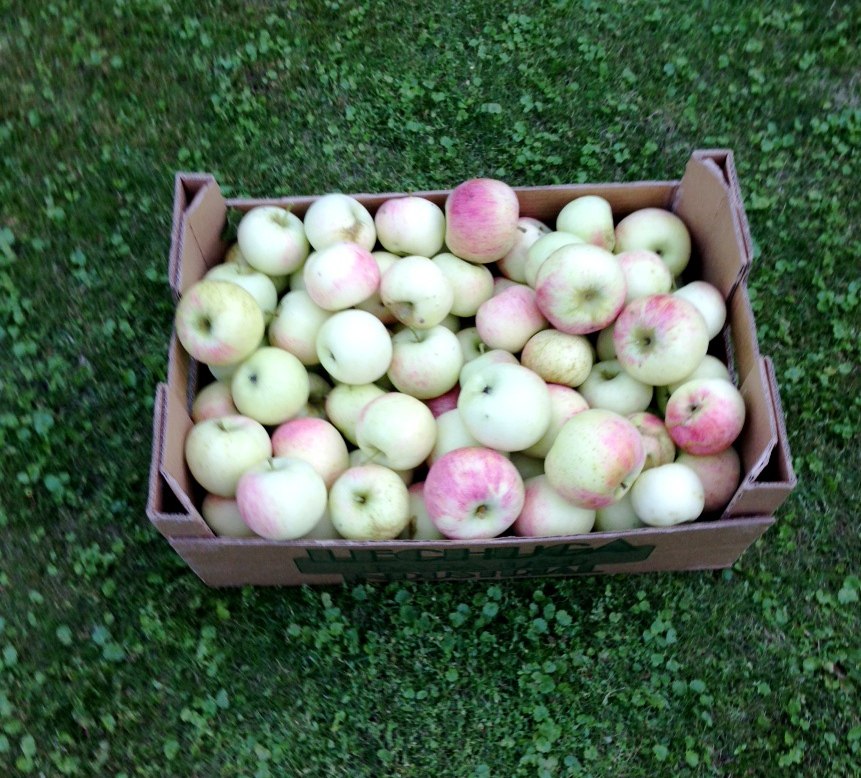
I am loving the Autumn! Mainly because the gardens (and the parks) are full of berries, fruit and veg! My dad keeps sending me these pics of the produce he is collecting from his big garden (he is the proud owner of many apple trees)….

IMG_4576

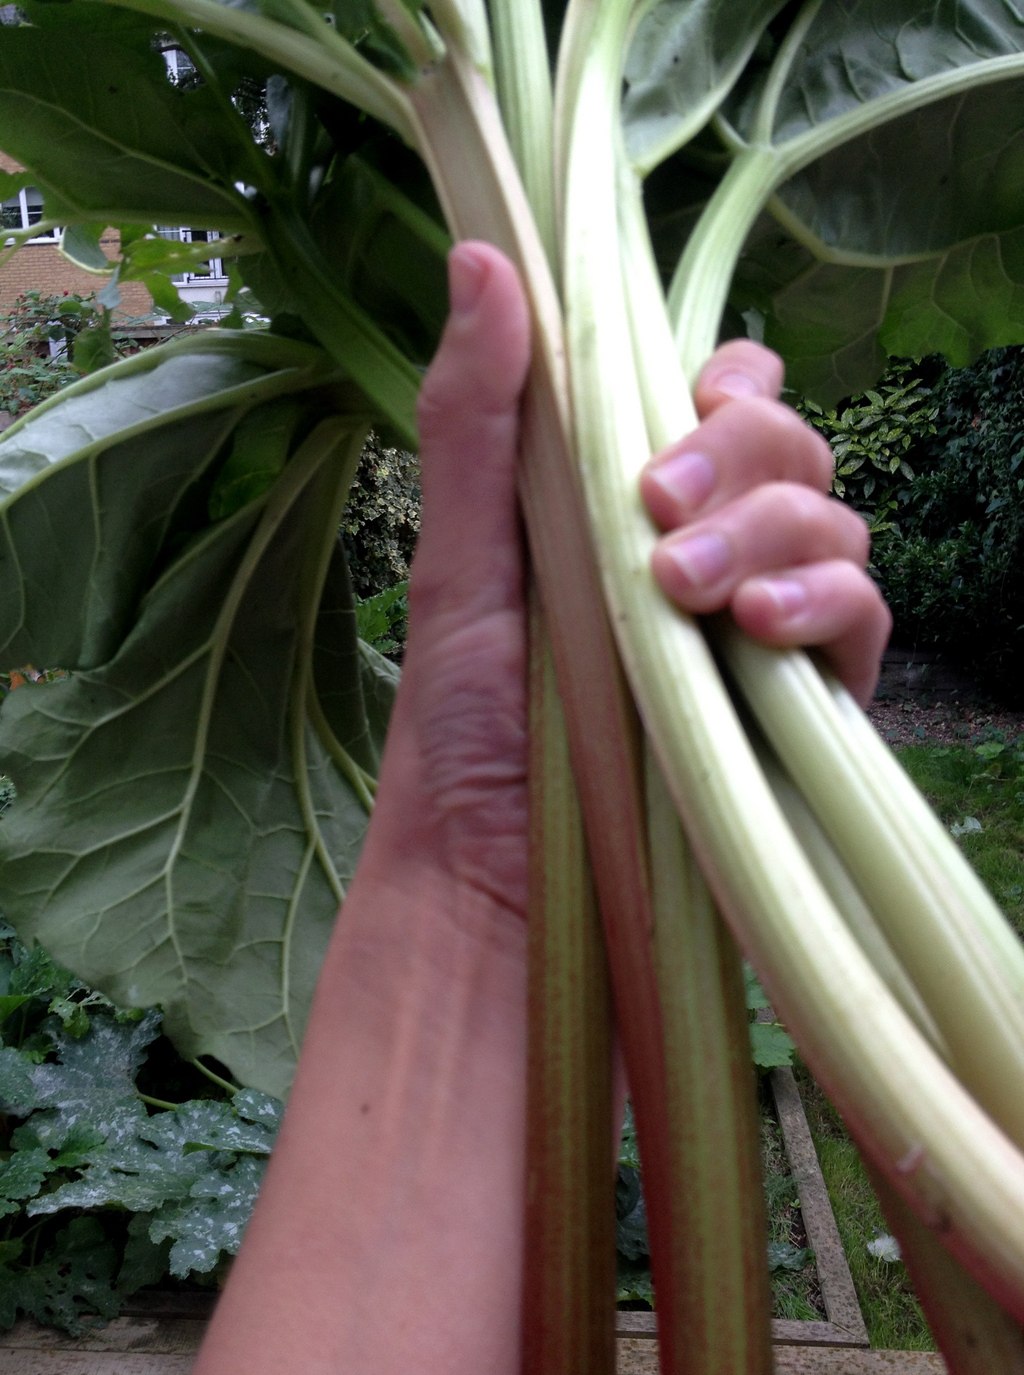
While in return I send him this (even more proud owner of the rhubarb)… To be fear,  my garden is a much smaller garden than my dads!

IMG_4557

The other day I went out for a run with my neighbour Anna. While we were running we were picking some elderberries that were just waiting for us by the river (how cool is that!). On the way home me and Anna we were already plotting what we were going to do with our find (how exciting!). Anna could not wait, so she made her jam on the same afternoon. That was some tasty sugarless elderberry jam with some honey and drizzle of lemon!

IMG_4518

Meanwhile (two days later) I have made some big jamming experiment by combining apples and my lovely rhubarb which I though was even more amazing! Had to make the basic elderberry jam first as these small little berries need sieving (all those tiny seeds etc). But you must try this out while it is still not too late!

IMG_4573

ELDERBERRY JAM

  • 500g elderberries
  • 500g jam sugar

1. Wash the elderberries under cold running water and gently pull off the berries from the stems (you can freeze the berries prior to make this job easer).

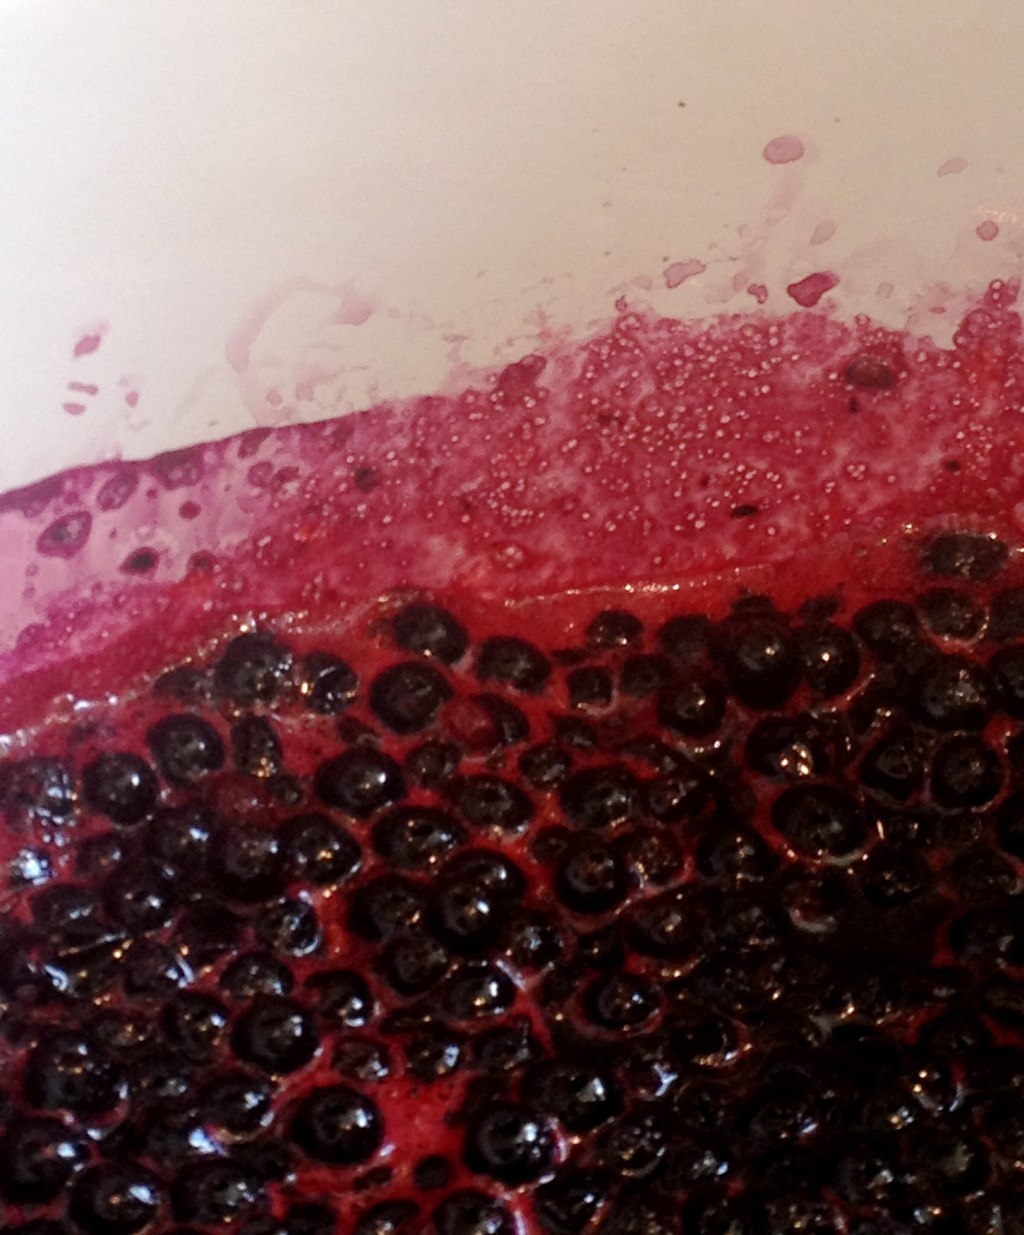
2. Cook the berries in the dry saucepan until the juice until the juice start running. Use the wooden spoon to bruise the berries slightly.

3. Add one third of sugar into the saucepan and continue cooking everything until the berries becomes thoroughly soft and pulpy.

4. Sieve the mixture trough the fine mesh (no seeds must go through).

5. Put the pulp, juice and remaining sugar back into the cleaned saucepan. Let this simmer for half an hour, stirring and skimming frequently.

6. Remove the pan from the heat and skim off any impurities from the surface using a slotted spoon. Leave to cool for 5 minutes. Pour the Elderberry Jam into heated sterilised jars and seal. Leave the jars to cool completely, then label and store in a cool, dark place.

ELDERBERRY & RHUBARB JAM

  • 350g rhubarb (trimmed and cut into 1cm pieces)
  • 300ml water
  • 1tbsp rose water (my secret ingredient ;)
  • 150g elderberry jam
  • 350g jam sugar

1. Put rhubarb, water and rose water into the saucepan and bring it to boil.

2. Cook the rhubarb for 10min and then add elderberry jam and sugar.

3. Boil the jam for another 15 min.

4. Remove the pan from the heat and leave to cool for 5 minutes. Pour the jam into heated sterilised jars and seal. Leave the jars to cool completely, then label and store in a cool, dark place.

ELDERBERRY & APPLE JAM

  • 350g apples (peeled, cored and chopped)
  • 80ml water
  • 1tbsp cinnamon
  • 150g elderberry jam
  • 350g brown sugar

1. Put apples and water into the saucepan and bring it to boil.

2. Cook the apples for 10min and then add elderberry jam, sugar and cinnamon.

3. Boil the jam for another 15 min.

4. Remove the pan from the heat and leave to cool for 5 minutes. Pour the jam into heated sterilised jars and seal. Leave the jars to cool completely, then label and store in a cool, dark place.

Happy jamming!

Rasa :)


0

Protect and customise your favourite books!

IMG_4404

The other day me and my friend Vickie (and Nadine) went for a afternoon coffee. While at the cafe, Vicki taught me how to cover the books so they last longer. I don’t know about you, but when I use the book over and over again I tend to really destroy it. So I am really happy to be able to protect my books in this pretty way ♥ ♥ ♥

Try it out for yourself ;). The “how to” instructions are here!

IMG_4449

Happy book loving!

Rasa ♥ ♥ ♥

0

Cake decorating

IMG_4530

I have celebrated my birthday today so I have had a good opportunity to bake a fancy cake. I generally don’t like overly decorated cake as then it can look like a statue, not a treat ;). I love cakes decorated with fruits and berries (sometimes flowers) that gives a rustic appeal. I baked honey cake this time decorated with sugared figs. Yum!

IMG_4528

HONEY MASCARPONE CAKE

  • 170g honey
  • 115g butter
  • 80g yogurt
  • 160ml milk
  • 2 eggs
  • 220g flour
  • 0.5 tsp salt
  • 3 tsp baking powder
  • 1 tbsp vanilla extract

(For the frosting)

  • 500g mascarpone cheese
  • 250ml double cream
  • 55g sugar
  • 1tbsp vanilla extract
  • 1 vanilla bean seeds

(For the decoration)

  • 2-3 ripe figs, cut in quarters
  • granulated sugar

1. Preheat the oven to 350 degrees. Line two same size baking tins and set aside.

2. Cream butter with honey. Add yogurt, milk, eggs, flour, salt, baking powder and vanilla extract and mix to combine.

3. Divide the mixture into the prepared tins and bake for 20min each, or until a cake tester inserted into the centre comes out clean.

4. Cool the baked cakes on the wire rack

5. Meanwhile make a mascarpone frosting by whisking mascarpone cheese together with double cream, sugar and vanilla.

IMG_4524

6. When the frosting becomes thick enough, spread the half of it on one cake.

7. Line two cakes on top of each other (plain cake goes on top of the frosted one).

8. Pipe the rest of the frosting on the top.

9. Dip the figs into the sugar and place them on a baking sheet lined with aluminium foil (I used just a baking sheet, but that burns quite easily so I don’t recommend using that). Using a kitchen torch, caramelise each fig.

IMG_4522

10. Use these figs to decorate the cake.

IMG_4550

Enjoy!

Rasa ;-)

2