Top

Author Archive | Rasa Pelham

Making Cake Toppers

Heart shaped cake topper DIY.... using washi tape!!

Cake toppers are amazing when you want to make cake look more festive or just little bit special ;-). And they are not that difficult to make! Here is heart shaped cake topper DIY project (click here to access it) that only needs some colourful washi tapes and wooden skewers.

Heart cake toppers DIY... using washi tape!

Heart cake toppers DIY... using washi tape!

Have fun!

Rasa x

0

Cherry nut cake

Cherry nut cake recipie

I am currently obsessed with cherries. No, I am not baking or making anything with them. I just like having cherries as a snack with my tea (or hot chocolate). In fact, I can actually go through the whole box in one go!

So today it was my first time when I actually baked a cake with the cherries (first time this year as I baked cherry related cakes before). My favourite part was pitting the stones out. It was exciting to try out this cherry pitter that I have just bought!

Cherry nut cake recipie

The other part (not as fun) that was quite an important part is to grind the hazelnuts. Unfortunately there are no ready ground hazelnut available in shops, so this is the only option. You can of course replace the hazelnuts with the ready ground almonds. But be warned, you will be missing out on this amazing hazelnut flavour. Your choice ;-).

CHERRY NUT CAKE

  • 180g butter, softened
  • 250g sugar
  • 3 eggs
  • 100g plain flour
  • 2tsp baking powder
  • 100g hazelnut, ground
  • 150g ready ground almond
  • 450g cherries, pitted
  • white chocolate for drizzle (optional)
  • icing sugar for dusting (optional)

1. Cream the butter with sugar until pale in colour

2. Gradually add eggs and mix everything together to combine.

3. Add the flour, baking powder and the ground nuts and mix the mixture well.

4. Spoon out the mixture into ready lined baking tin and push the cherries on top.

Cherry nut cake recipie

5. Bake the cake in preheated 180C oven for 50min.

Cherry nut cake recipie

6. Cool the cake down before drizzling melted white chocolate or dusting icing sugar on top.

Cherry nut cake recipie Cherry nut cake recipie

Enjoy!

Rasa xoxo

0

Knitting basic socks (part 1)

knitting socks step by step

In my opinion, woollen socks are not only for winter. They are great for a rainy spring day worn under wellies and are really comfortable at home as the slippers :-). Knitting them is also quite enjoyable. And it is not as difficult as it looks! I use 5 double pointed needles to knit in circle, but if you find it easer you can use circular needles for that too. So are you ready to begin? Click here for step by step instructions.

knitting socks basics Knitting socks basics

By the way, big thanks to Vicki’s mum who helped me to put the size chart together for these socks (even if she doesn’t know it).

Rasa xoxo

1

Ale and cheese bread

Ale and cheese bread recipie

Having previously made steak and ale pies, I had some ale left. I have decided to make bread with that leftover! The cool thing is when you know bread baking basic, you can customise your recipe as much as you want. I added some cheese together with that ale leftover to mine! The outcome? Strong flavour bread, tasting like “Marmite”! You either love it or hate it ;-).

ALE AND CHEESE BREAD

  • 150g wholemeal flour
  • 350g white bread flour
  • 7g fast acting dry yeast
  • 10g fine salt
  • 300ml ale (warmed in the bath of hot water)
  • 50g (or more) cheddar cheese, grated
  • 1 tbsp melted butter (1 tbsp extra for handling the dough)

1. Measure all the dry ingredients in the bowl and pour the ale over it. It should be bubbly as in the picture bellow :-).

Ale and cheese bread recipe

2. Add cheese + butter and mix everything well. Give good 10min kneading, this works well as a workout!

3. Shape the dough into the round. I rub my hands into the fat (butter in this case) so the dough does not stick to my fingers while handling it.

Ale and cheese bread recipe

4. Place the dough round back into the clean bowl. Cover it with cling film and let it rise in warmth for 1-1.5 hours. The dough should double (if not triple) in size.

Ale and cheese bread recipe Ale and cheese bread recipe Ale and cheese bread recipe

5. Deflate the dough and let it rise again for another 30min or so. I use proving basket at this stage.

Ale and cheese bread recipe Ale and cheese bread recipe Ale and cheese bread recipe

6. Cross slash the top of the bread. This is my first time doing it too! This really helped to produce more civilised looking bread as it did not crack wherever it wanted when rising in oven :-D. Bake in preheated 200C oven for 45min.

Ale and cheese bread recipe

Ale and cheese bread recipe Ale and cheese bread recipe Ale and cheese bread with raspberry jam

Now, I will tell you little secret. I know this might sound odd, but I did enjoy this bread best as a toast with some raspberry jam… can’t get enough of it!

Rasa xoxo

0

Missing Bruno

No, I am not missing a dark Spanish man! If you have been following me (past couple of months), than you probably have been acquainted with my cat (named Bruno). Sadly, Bruno left me a month ago, he just never returned :-(. There is still hope they say, but today I decided to let it go for now. I thought I will share my favourite video of him…

Enjoy!

Rasa xoxo

0

Steak and ale pies ♥

Steak and ale pies

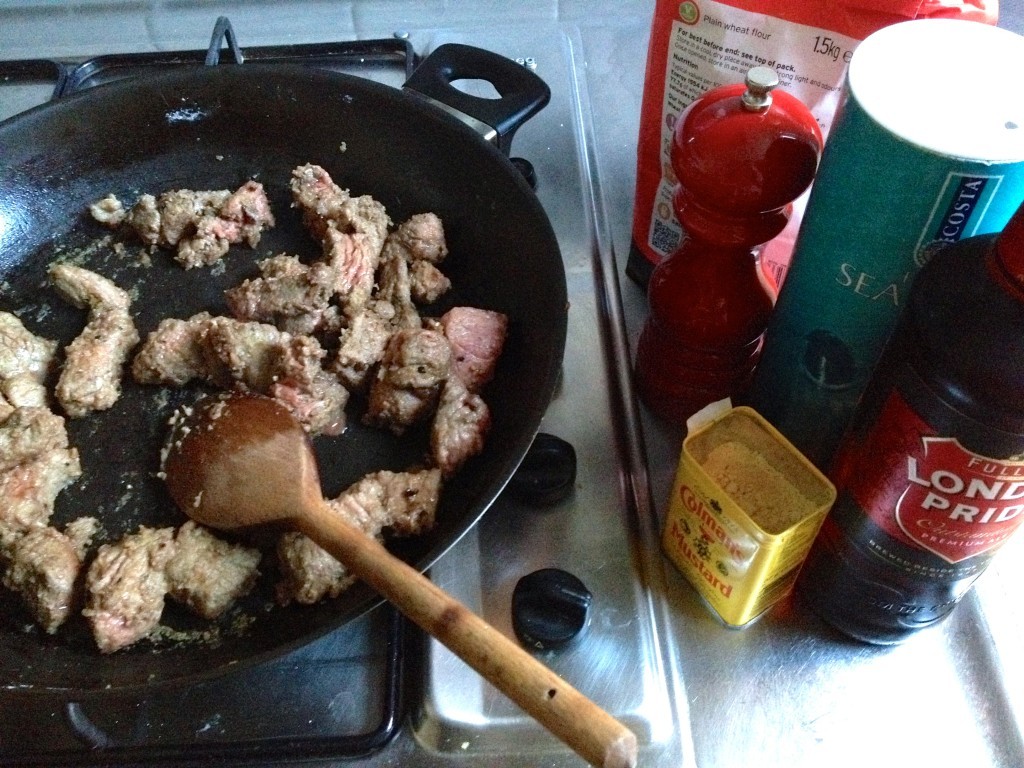
Pies take a special place in my heart, because I can have them sweet or savoury! Steak and ale pie is Joni’s (my boyfriend’s) favourite pie to make :-). Like a proper Englishman he loves “Colman’s” mustard and local ale (“London Pride”). Brussels sprout is his favourite vegetable!

STEAK AND ALE PIES                                                                                                                                 Serves 2

  • 400g beef steak, cut into pieces
  • 2 tbsp plain flour
  • 1 tsp Colman’s mustard powder
  • salt and pepper
  • 2 tbsp olive oil
  • 150ml local dark ale
  • 2 cloves garlic, crushed and finely chopped
  • 1 onion, sliced
  • 1 carrot, chopped
  • 1 parsnip chopped
  • 1 bay leave
  • bunch of fresh thyme springs
  • 150ml beef stock
  • 1 tbsp tomato puree
  • 1 tbsp balsamic vinegar
  • 150g chestnut mushrooms, chopped
  • knob of butter
  • ready made puff pastry (because it is too much to ask to make your own)
  • egg, whisked
  • steamed brussels sprouts to serve

1.  Mix the beef with the flour, mustard powder and some salt and pepper in the bowl. Fry it in the large frying pan until it is gently browned.

2. Transfer the beef pieces back to a bowl, then add ale to the same pan and scrape up any meaty bits. Pour the liquid into the bowl of beef.

Steak and ale pie

3. In the same frying pan fry the garlic, onion and other vegetables.

4. Return the beef pieces into the pan together with the juices. Add bay leaf, thyme, beef stock, tomato puree and balsamic vinegar. Simmer everything for at least an hour.

5. Meanwhile fry the mushrooms in the butter and add it into the pan together with beef and vegetables.

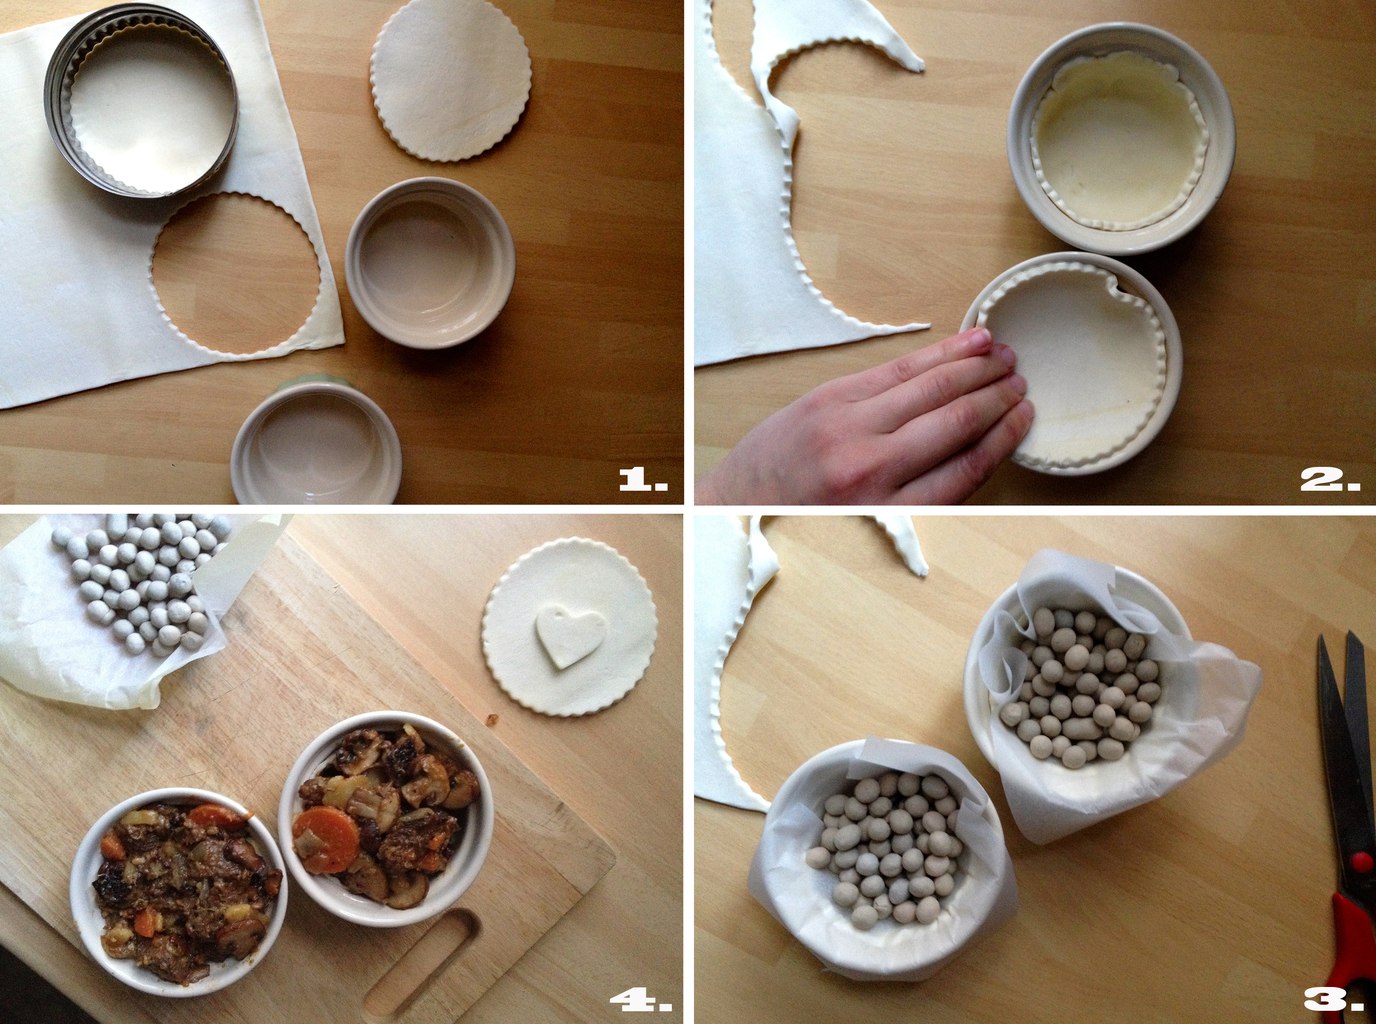
6. To make a pie base use cookie cutters to cut out big enough circles to cover the base of the ramekin (pics. 1-2). Blind bake the base by placing baking paper and ceramic beans on top to stop it from rising (pic. 3).

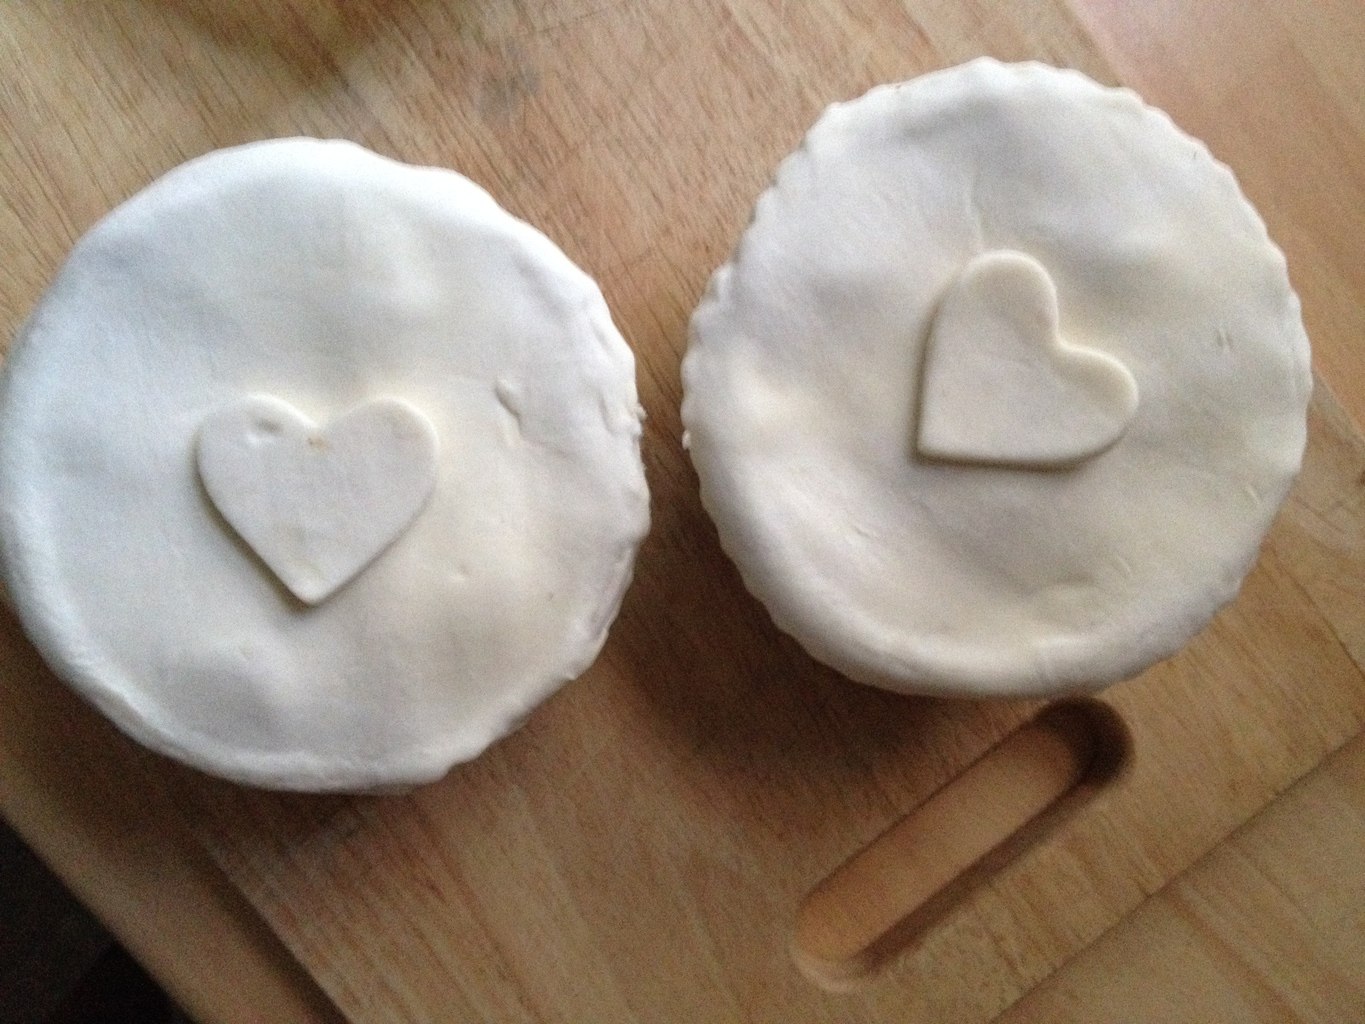
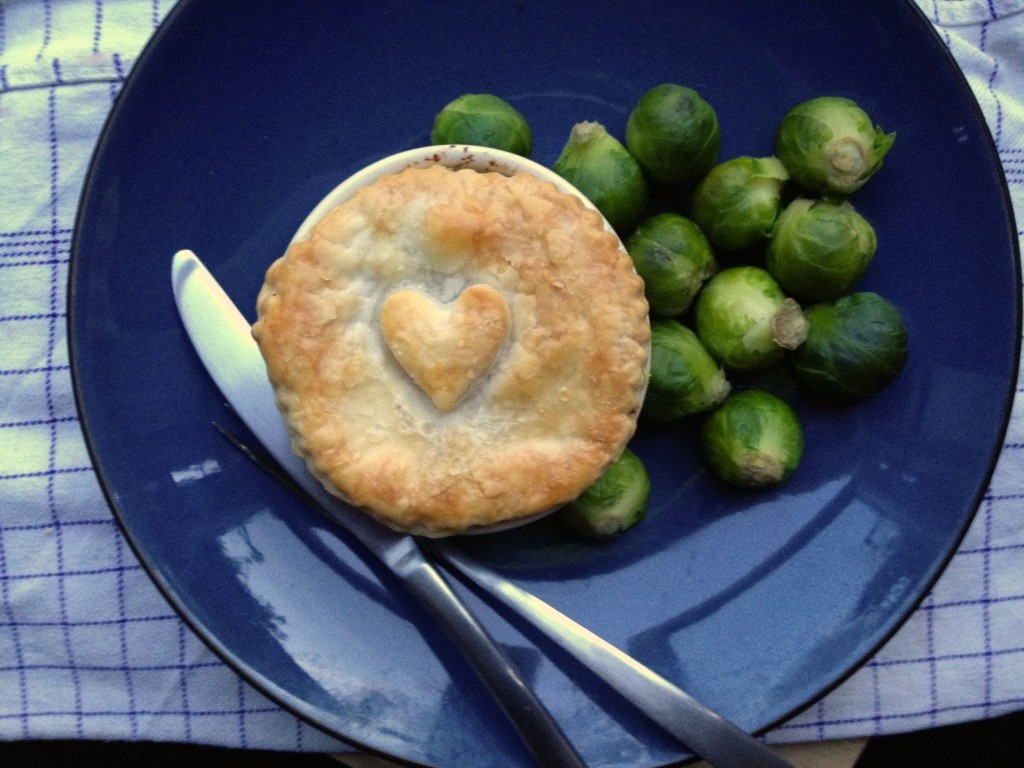
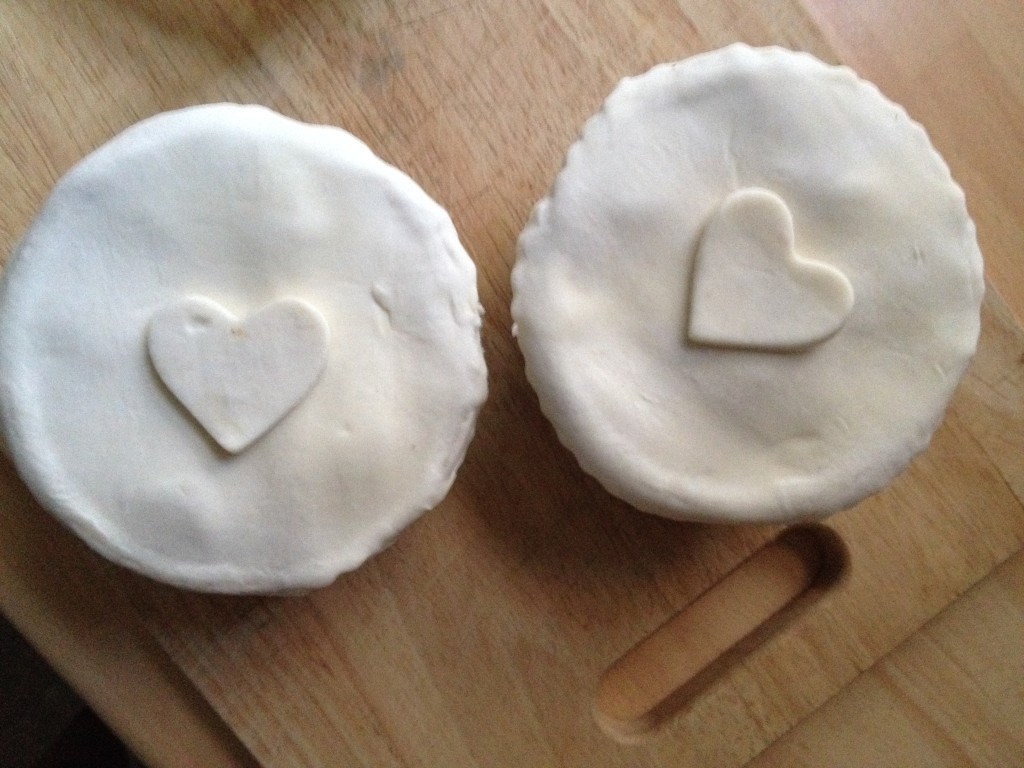
7. Fill the pie with the beef and vegetable filling and cover it with another pastry circle (pic. 4).

Steak and Ale pies

8. Brush the pies with the whisked egg and bake them for 25min in 200C preheated oven.

steak and ale pies

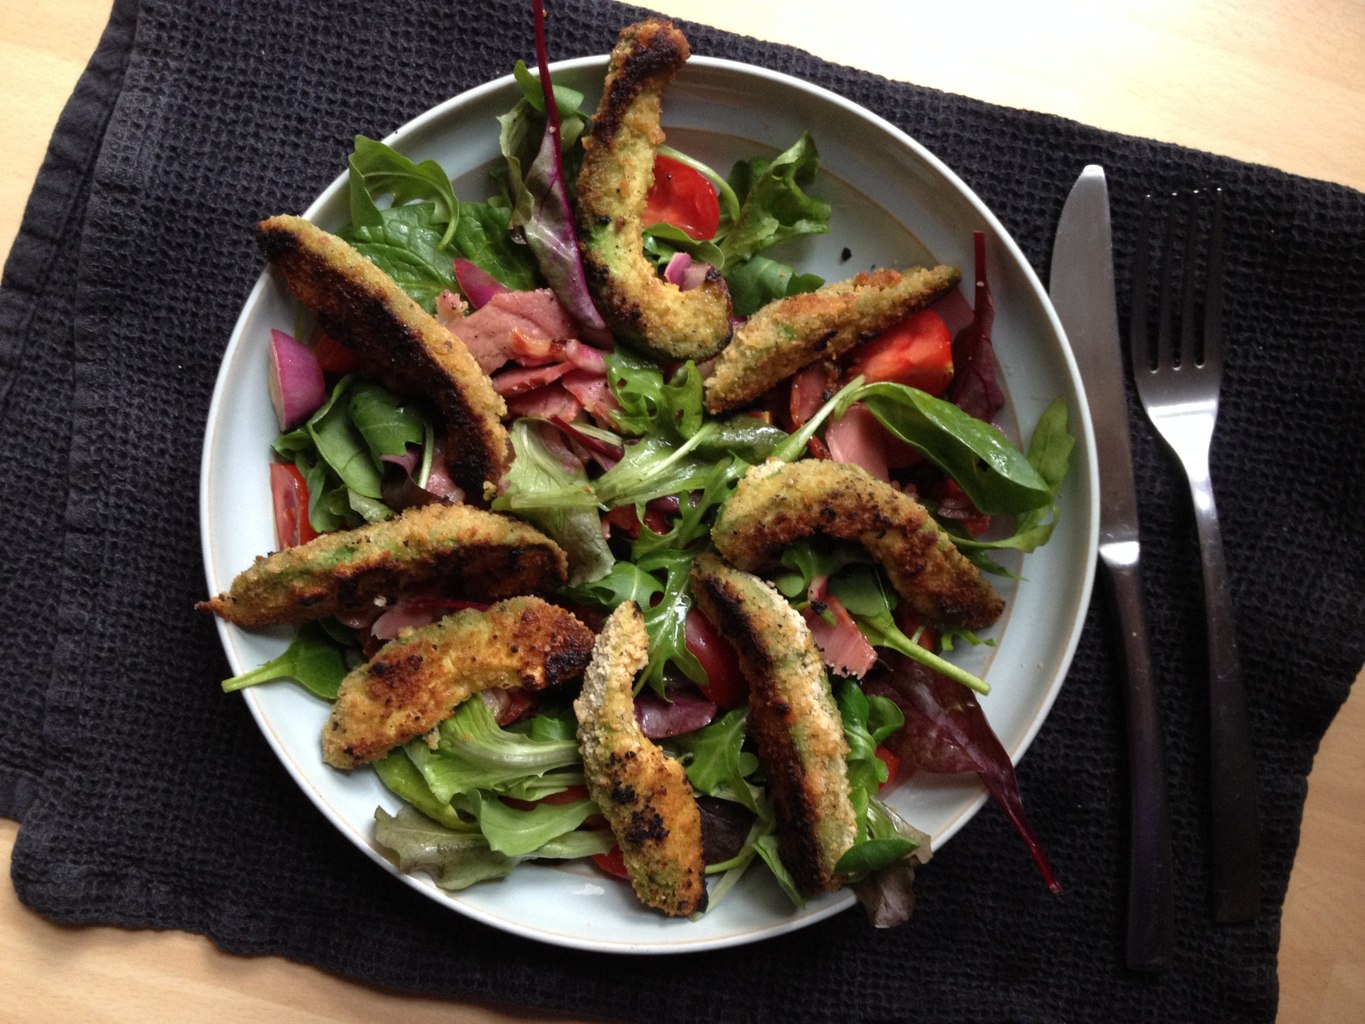
Serve the pie with some brussels sprouts.

steak and ale pies

Enjoy!

Rasa :-)

3

Cable sweater

Cable sweater

I finally completed the cable sweater I have been knitting since last year (beginning of this winter)! I know I know, this might be a little late! But if you put your mind to it, you can knit your own in no time ;-). This Sweater is loose knit and chunky, therefore really easy and fun to knit. Click here for the pattern.

Cable Sweaterknit your own cable sweater

Enjoy your week :-)

Rasa

2

Salad for lunch

Crispy avocado and bacon salad

I have been dreaming of salad since my overeating season have finally ended (I mean Christmas). Just needed something lighter for a change! I made warm salad today as I thought the weather is still not quite right for the traditional cold one. It’s warm, because it has crisped bacon and fried avocado. Avocado? Yes, I finally had a chance to fry avocado. I am amazed with the crispiness of it, will definitely try it again!

CRISPY AVOCADO AND BACON SALAD

(serves 1-2 people for lunch)

  • 1 red onion
  • 2 tbsp balsamic vinegar
  • 2 tbsp molasses
  • 1 tbsp olive oil + a drizzle for frying
  • 1-2 avocados
  • 1/4 cup bread crumbs
  • 1 tbsp plain flour
  • salt and pepper to taste
  • 1 egg, lightly whisked
  • 2 rashers of bacon
  • 1 handful of cherry tomatoes
  • 2 handfuls of baby leaf salad

1. First, marinate red onion (overnight is best, but 10min before serving will do). Chop the onion into “rainbow” slices and mix it together with balsamic vinegar, molasses and oil in the bowl. Set aside.

2. Prepare the breadcrumb mix by combining bread crumbs, flour, salt and pepper. Dip sliced avocados into the egg and then to breadcrumb mix.

Crispy avocado and bacon salad

3. Fry breaded avocados in well heated frying pan with a little oil.

crispy avocado and bacon salad

4. Crisp fry bacon in the same frying pan. Arrange salad by mixing baby leaf salad with tomatoes, red onion (drained) and bacon. Drizzle the liquid from the onions over the salad and arrange fried avocado pieces on top.

crispy avocado and bacon salad

Enjoy!

Rasa :-)

0

Winter flowers

Tissue paper flower DIY

I don’t know about you, but I have been missing flowers this Winter. I really can’t wait until the Spring comes so I can begin bringing random blossoms indoors. I made these tissue paper flowers last year for Mothers Day. Something to make while waiting for flowering season? Click here to find out how to make these colourful paper flowers :).

Happy Spring waiting :-)

Rasa

0

Popcorn for snack

Cherry and Poppyseed PopcornDon’t you just love sometimes to stay in at home, relax, play board games and watch lots of movies. My weekend was just that ;-). I often make a lot of snacks to go along with this type of indoor entreatment. Popcorn is often the most popular one as it is so quick and easy to make. Cherry and poppyseed popcorn is my favourite, simply because it is sweet and on the healthy side (if you exclude all the sugar).

Cherry and Poppyseed Popcorn

CHERRY AND POPPY SEED POPCORN                                                                                                           (serves 2 people)

  • 2 tbsp popping corn
  • 1 tbsp oil
  • 2 tbsp golden syrup
  • 2 tbsp golden sugar
  • 2 tbsp poppy seeds
  • 2 tbsp dried cherries

1. Pop the popcorn. Just drizzle some oil into the sauce pan, drop the popping corn in, cover it, heat the pan and wait :-).

Popping Popcorn :-)

2. Add the rest of the ingredients into the popcorn pot. If the pot is really full (like in the pic above) than place everything into the bigger bowl. Combine everything well.

Have a lovely week

Rasa x

0

Starting tomato seeds 101

Tomatoes 101Visiting Eden Project has inspired me to think about gardening a little bit early this year. Tomatoes came first to my mind. Although I have grown them for few consecutive years I have managed to make many mistakes along the way. One of the mistakes I have often made is that I started the seeds quite late. growing tomato plants indoors under less than optimum conditions (less light and lower temperatures), you can expect each growing stage to progress somewhat more slowly than normal. I of course did replant ready tomato plants outside, but they often struggled to produce fruit (not veg) before the autumn. So I decided to follow my grandma’s example this year, who starts the tomato seeds right in January. I know I know, the tomato seed packaging disagrees with this, but I think it’s worth a shot!

Since I did not find any degradable seeding pots to buy in the shop at this early season, I have made them myself (really proud!). I used empty toilet paper rolls for this. I folded in on one side (pics.2-5) and flatten it from the inside (pic. 6).
Making degradable potsI have placed ready pots into the plastic container ready to be filled with compost :-).
tomatoes 101

Next step is to fill the pots with the compost and sprinkle the seeds on top. I often have little faith in the seeds thinking that many of them won’t sprout. In many of those cases I am wrong as many of them come out and I end up pulling the access sprout out.

tomatoes 101

Finally cover the seeds with the little compost (1cm layer maximum) and place the pots on the windowsill.

Enjoy this mini session of gardening ;-)

Rasa xoxo

3

Eden Project

Eden Project

Visiting Eden Project in winter is great (especially when my boyfriend organised it)! When you feeling chilly and summer holidays seems so far away this is a perfect place to hang out :-). To visit Eden Project has been my dream for so many years! I was quite amazed by the structure of Biomes. Although it is warm enough in the Rain Forest Biome, we are hoping to visit it in summer when the plants outside are in full bloom. Hopefully you will enjoy this quick Eden Project tour and the pics will speak for themselves :-).

Eden Project Eden Project, Rain Forest Eden Project, Rain Forest Eden Project Eden Project Eden Project Eden Project Eden Project Eden Project Eden Project

Happy Wednesday!

Rasa xoxo

1

2014 goals made simple

2014 goals made simple

I don’t know about you, but it became my tradition to write New Year’s resolutions on New Years eve. Although the goals I have written down in the past for the new years never lasted (such as eating healthier), I always liked the idea of giving a chance to new habits while getting rid of the old ones. Can you relate to this? This year somehow is different, I struggled quite a lot to think of any goals mostly because there were many exciting changes last year. Meeting someone really amazing is one of them!

So I came up with these simple goals! Simple goals sometimes are the most effective they say ;-).

Happy New Year!

Rasa :)

1

Wishing you an organised New Year!

fabric covered diary DIY

I love being organised! That’s why buying new diary just before New Year Eve is my tradition. This year is slightly different however… I could not find a diary that I liked, so I have covered a basic one myself. Really pleased with the outcome :). Go here for DIY instructions!

fabric covered diary DIYHappy New Year!!

Rasa xoxo


1

Christmas spirit

Glitter Bird Decoration

Last week I have made these glitter bird decorations which did look super cute with the rest of the decorations :-). I suppose everyone is sorted with their decorations so I don’t suggest changing everything completely! But if you do want extra christmas spirit and would love to make those then click here!

glitter bird decoration

glitter bird decoration

Merry Christmass!

Rasa :)

1