Top

Our website has moved!

We have moved!!! Our new website ends with .co.uk instead of .com and to access simply go to www.friendlynettle.co.uk. For now we are keeping this website with projects online, but eventually we will move it all over and this website will be converted so that any existing links to the .com domain automatically redirect to the relevant page on the .co.uk domain.

Thank you for your support, things are getting exciting!!!

Rasa xoxo

0

Cafe Inspirations: our weekend away in Paris

Cafe inspirations: our weekend away in ParisNow when we announced our big news last week, you have wondered what this cafe is going to look/feel like?! Let me share a glimpse of it through the french cafes and patisseries we visited on our weekend away in Paris. It was quite an inspiration!

Those who have been following us here for a while may know I love anything French (or specifically Parisian). Except the smell of urine in summer of course (those who visited Paris in summer will understand what I am talking about)! But seriously how good is french pastry, it is always worth visiting Paris any day! In the past I took french pastry baking classes, I read books on how to parent the french way and went through the “Little Paris Kitchen” book in a year. So yes, Parisian lifestyle is not all about the pastry, but also the culture and their relationship with food. Food is not only for nourishment and enjoyment but also for relationship building and this is what we hope to achieve here in our cafe 🙂.

Cafe inspirations: our weekend away in Paris Cafe inspirations: our weekend away in Paris Cafe inspirations: our weekend away in Paris Cafe inspirations: our weekend away in ParisWhile in Paris, we purposely avoided the touristy places. We stayed by Canal Saint-Martin, walked around in 3rd and 11th districts, went on bike rides, visited Musée des arts et métiers, and ate in as many cafe’s as we could.Cafe inspirations: our weekend away in ParisCafe inspirations: our weekend away in Paris Cafe inspirations: our weekend away in ParisWe also had to experience going for a picnic. We bought some coffees and pastries and took it to this Park (Square du Temple – Elie Wiesel) and watched people dancing tango on the bandstand ;-).Cafe inspirations: our weekend away in Paris Cafe inspirations: our weekend away in Paris Cafe inspirations: our weekend away in Paris Cafe inspirations: our weekend away in Paris Cafe inspirations: our weekend away in Paris Cafe inspirations: our weekend away in Paris Cafe inspirations: our weekend away in Paris And I had to include this pic, which depicts a very realistic instagram culture in Paris. This guy have spend good 15 min taking picture of this cupcake over the Canal Saint-Martin without feeling any awkwardness or public fear (or t least he did not look bothered). This really inspired me to take my sweet time when taking pictures in public. I tend to be quite nervous otherwise and want to end my photoshoot in public as soon as I got at least one ok pic. Cafe inspirations: our weekend away in Paris Cafe inspirations: our weekend away in ParisHave a lovely weekend, we are off to the wedding. Hope you a lovely last day of summer!

Rasa xoxo

0

Our big news!

Cafe Family picWell well well, this has probably been our best kept secret (ok, longest kept secret) for over a year and a half! And the secret was (some of you may have guessed it, or may have been told) that we are opening a cafe here in Shortstown where we live! I am also back to blogging (sort of) as I promised myself back in March that I will have a break from it while I prepare for this venture. I think it’s like having a new baby, nothing can really prepare you for this. As I collected the keys yesterday, I am still overwhelmed with the things we need to get done even before starting the fit out works. There is a lot that needs doing. We are taking this property on as a completely bare shell as you can see from the pictures below. No windows, floor, plumbing, or electrical wiring. Eeek, but I think it will be worth it in the end!

Now for those who are reading this blog for the first time here is where you can read more about us (I updated our About us page just for you). Hope you will find it interesting ;-).Current state of cafe space Current state of cafe space Our plans as you can see here are basic, there is still many things to refine, like what food to serve, what hours to open, how many staff to employ and so much more. I expect I will do quite a few surveys involving those living locally very soon. Fun stuff is coming up ;-). Obviously if you have any suggestions already then please give us a shout!Proposed cafe exterior Proposed cafe plan You may have plenty of questions right now, please do not hesitate to ask! For now I will answer the questions that people (who I told about the cafe already) tend to ask most.

  1. When are you planning to open? Oh yeah! this is like the most important information I may have missed here. We are hoping to open sometime in January 2020.
  2. What type of food will you serve? I have not figured this out yet, but I will be posting surveys to find out what the Shortstown likes to eat.(Shortbread?)
  3. Shortstown has a lot of parents with little children, will it be kid friendly? Yes! We have young kids as well and I completely understand how hard is to have lunch with kids. We are planning on a separate area (on the upper side of the kitchen and toilet if you are looking at the floor plan above) which is going to be a kids corner with kid friendly seating.
  4. What are the opening hours going to be? Still don’t know, will have to see what Shortstown needs. For now I am thinking to start with 8:30am-4:30pm. What do you think?
  5. Are you still planning to continue with blogging? I think yes, but can’t promise. I imagine I will be pre occupied by cafe stuff, but for now I have few posts ideas and pictures that I would love to let out. So let’s see.

Original cafe goals for this yearHope you are as excited as we are :-)

Rasa xoxo

1

Our city break in Bristol

Our city break in Bristol with kidsLast month when I was planning what to do for Tomas birthday I have decided we need to visit Bristol and so we did few weeks ago! I must admit this trip was little selfish of me as I wanted to check this city for myself. I was following few bloggers on IG who live in Bristol and so it got me inspired to visit at the first place. Fear not! I also included some kiddie activities in our itinerary. After all it was Tomas birthday! I planned to visit Aquarium, but we have visited We The Curious exhibition centre instead, which I recommend to everyone with kids.  Our city break in Bristol with kidsWe mostly stayed around the wharf area, but went for lunch and breakfast to the city centre. I think you would need at least a week to explore the whole of Bristol!Our city break in Bristol with kidsFirst stop was breakfast at Pinkmans after not so great night in Airbnb (don’t you always get really bad first night when traveling with kids and then it gets better??!!). Anyhow, heard lots of good things about this bakery and I was not disappointed with food. A little pricey and not very kids friendly, although they did have few high chairs. I loved the plants that were populating most of the place, I guess the indoor lighting is enough?! There was the whole stair covered in plants which looked like a little jungle. Quite inspiring for when I will open my own cafe one day ;-).Our city break in Bristol with kids Our city break in Bristol with kids Our city break in Bristol with kids We walked a lot! I mean we walked all around the Canon’s Marsh. Luckily the weather was very summery, although it did not feel right to be in t-shirt just yet. Our city break in Bristol with kids Our city break in Bristol with kids Our city break in Bristol with kids Our city break in Bristol with kids Our city break in Bristol with kids Our city break in Bristol with kidsOne of the things I really loved about Bristol are the mural art displays. Unfortunately I did not take that many photos of them.Our city break in Bristol with kidsFor lunch we went to Pizzarova where we stuffed our faces with the artisan type pizzas. Ours had a béchamel sauce which was lovely… hmmm. I also liked the deco! Another inspiration for my cafe one day ;-). Our city break in Bristol with kids Our city break in Bristol with kids Our city break in Bristol with kids Our city break in Bristol with kidsNow more about our Airbnb, it was our first time to do it with kids. And I think I would do it again! So much more flexible than staying in a small hotel room. The only thing I would have done differently next time is not be afraid to rearrange the rooms to fit our needs. You can always put everything back when leaving. On the first night kids were sleeping in a large bedroom while me and Joni were crammed in a small one because it had more plant pots that could be knocked down by kids. On the second night we decided not to suffer and move all the plants to the bigger bedroom. We all slept so much better that night!Airbnb in BristolI generally love staying in Airbnb’s (I used to host on Airbnb), not only flexibility. I like seeing different ideas on how to decorate my own house as well as wondering about the host personality (if they live in the property themselves). This time round It was a lovely host who likes to travel and I am guessing he rents the whole place when he is on holiday. What a great way travel!Airbnb in BristolOn our way home we saw this Clifton Suspension Bridge, which was grand!!Our city break in Bristol with kidsHope you got inspired to travel ;-)

Rasa xoxo

0

Basic potato pancakes

Basic potato pancake recipeYey! The pancake day is here! I thought I will share one of my savoury pancake recipe for this occasion ;-). It’s a potato pancake but not how you imagine. It’s not an Eastern European type of pancake that taste a little like a hash brown (although they are very tasty too) and it’s not a vegan type of pancake either. However it is a very versatile pancake that is tasty on it’s own or with the filling. I adapted this recipe from this waffle recipe. I loved it too much, but now in the pancake form I think I can enjoy it more frequently. Yum! Basic potato pancake recipeBASIC POTATO PANCAKES

  • 2 medium sized potatoes, cut into small uniform pieces
  • 2-4 garlic cloves
  • 1 onion
  • 1 tbsp fresh rosemary leaves (optional)
  • 60ml olive oil
  • 160ml milk
  • 2 eggs, whisked
  • 125g plain flour
  • salt and pepper to taste

1. Put potatoes and garlic in a large pot with cold water to cover. Add a pinch of salt and bring to a boil. Then lower heat and cook until potatoes can be pierced easily with a fork drain, reserving about 60ml of potato/garlic water.Basic potato pancake recipe 2. While potatoes cook, puree onions with rosemary leaves if using. Heat olive oil and fry onion in a frying pan over low heat just until onion softens a bit.Basic potato pancake recipe3. Transfer the potatoes and garlic into the bowl or large mixing jug. Mash it and mix it together with onions.

4. Gradually add garlic/potato water, oil, milk and eggs while constantly mixing so it all combines well. Eventually add flour and seasoning and give a last mix. Basic potato pancake recipe 5. Fry pancakes in well heated pan with little oil. Pour one spoonful to the pan and immediately start swirling round the pan to get nice even layer. Lift the pancake to flip and cook the other side as well. Basic potato pancake recipe Serve it either with a dollop of creme fraiche  and parsley. Basic potato pancake recipeOr if you like you can use these pancakes as a wrap. There are quite many fillings to experiment with. We had chicken roast the other day so that went really well with it!Basic potato pancake recipe Basic potato pancake recipeEnjoy!

Rasa xoxo

0

How to create your own palette using paint

Baltic sea colour palette, how to create palette using paintColour palettes are useful little things when designing, especially interior design. Colour palettes are a selection of colours kept on a board or paper as a reference, ready mixed for specific project/artwork. It helps you to keep focus on the selection of the colours that create concept consistency through the design/painting process. There are many ways you can create a colour palette. You can use different material swatches or magazine cutouts to create 3D colour palette. Computer generated swatches are quite useful too and easy to create. However today we are talking how to make a colour palette by mixing your own paint. This technique is especially useful when you need to use some colours to create wall artwork or want a specific paint colour when painting the walls or furniture (of course these swatches can be successfully scanned at the paint shop for a larger quantity paint).Baltic sea colour palette, how to create palette using paintRecently I visited the Lithuanian seaside that I get constantly inspired by. I blogged about it  many times across different seasons. This time I visited when there was still a little snow left! I used the photos I took as my inspiration.Baltic sea colour palette, how to create palette using paintSo how do I create a colour palette using paint? First step is of course to choose the paint. Any type of paint can be used for this purpose, but acrylic is probably the easiest to handle. I used a mix of acrylic paint and also some kids washable water based paint because I did not have a good selection of acrylics. It is important that you have the primary colours (yellow, green, blue and red), plus black and white. The rest of the colours can be mixed.  Baltic sea colour palette, how to create palette using paint Baltic sea colour palette, how to create palette using paint Baltic sea colour palette, how to create palette using paintTo create the colour palette you really need to have a good understanding of a colour wheel. When you understand how to achieve secondary and intermediate colours from primary colours you unlock so many other colours. Once those colours are unlocked they can be further developed by adding adding white or black to lighten or darken them. Just remember that black and white also dull the colours as well. Baltic sea colour palette, how to create palette using paint But first, before you begin creating the palette, you need to find an inspiration. You can either use photos like I did or pick an object (like a rug or patterned fabric) that has a colour combination you like. Mixing colours take practice, but it’s so fun when you get the right shade! Once I achieve the right shade I simply transfer them onto a clean piece of paper and let it dry. I particularly enjoy naming those colours, claiming ownership over them.Baltic sea colour palette, how to create palette using paint Baltic sea colour palette, how to create palette using paint Baltic sea colour palette, how to create palette using paint Baltic sea colour palette, how to create palette using paintHope you found this inspiring!

Rasa xoxo

0

Spring-inspired celebration cake

Spring-inspired celebration cake (with sweet peas) recipeI always wanted to try and bake a cake using sweet peas, but I never had an opportunity. Sweet peas is such as spring vegetable and no one in our family have a birthday in a spring. Eventually I decided to just go for it for Tomas birthday. It almost feels like a spring now! Spring-inspired celebration cake (with sweet peas) recipe SWEET PEA CAKE WITH BEETROOT FROSTING adopted from Veggie Desserts

(for the cake)

  • 180g sweet peas, steamed or boiled
  • 130g butter, softened
  • 100g caster sugar
  • 2 eggs
  • 1tsp vanilla extract
  • 1 tsp lemon zest and a drizzle of juice
  • 165g flour
  • 2tsp baking powder
  • pinch salt

(for the frosting)

  • 250g soft cheese
  • 70g icing sugar (plus some more for later stage)
  • 1-2 tsp beetroot powder
  • 1tsp other type of natural frosting such as turmeric, matcha etc (optional)

1. Puree the sweet peas in the food processor and set aside

2. Cream the butter with sugar either in the large bowl with the wooden spoon or in the mixer.Spring-inspired celebration cake (with sweet peas) recipe 3. Add the rest of the ingredients (including sweet pea puree) into the butter cream and mix again to combine. Spring-inspired celebration cake (with sweet peas) recipe 4. Bake the cakes in the 15cm (6inch) tins in 180C preheated oven for about 20 min. Alternatively you can bake these in the sheet tray and use a large cookie cutter to cut out the rounds. I ended up cutting off the crust as I wanted bright green colour to show through the frosting.Spring-inspired celebration cake (with sweet peas) recipe5. Meanwhile make the frosting. Using the whisk, mix the soft-cheese with sifted icing sugar.

6. To assemble spread a little of the frosting between the layers of the completely cooled cakes and sandwich together. Cover the cake with some more frosting reserving a little for later. Using palette knife gently scrape of the icing creating that naked cake look.Spring-inspired celebration cake (with sweet peas) recipe 7. Split the remaining frosting into 2 or more bowls, unless you only want to dye it in one colour. I personally would have had only one colour (pink) now when I tried the multicolour. Add the beetroot powder (or other natural colour) and more icing sugar till the frosting reaches the right consistency. It needs to be stiff in order to keep its shape.Spring-inspired celebration cake (with sweet peas) recipe 8. Pipe the frosting on the cake using a piping bag and large round nozzle.Spring-inspired celebration cake (with sweet peas) recipe 9. Decorate the cake with wild flowers and herbs. It is amazing what you can find in the garden or in the park. These daisies are actually edible and were growing on my lawn.Spring-inspired celebration cake (with sweet peas) recipe Spring-inspired celebration cake (with sweet peas) recipeHappy spring waiting everyone!

Rasa xoxo

0

A year to find my style again: the basics

A year to find my style again: the basics
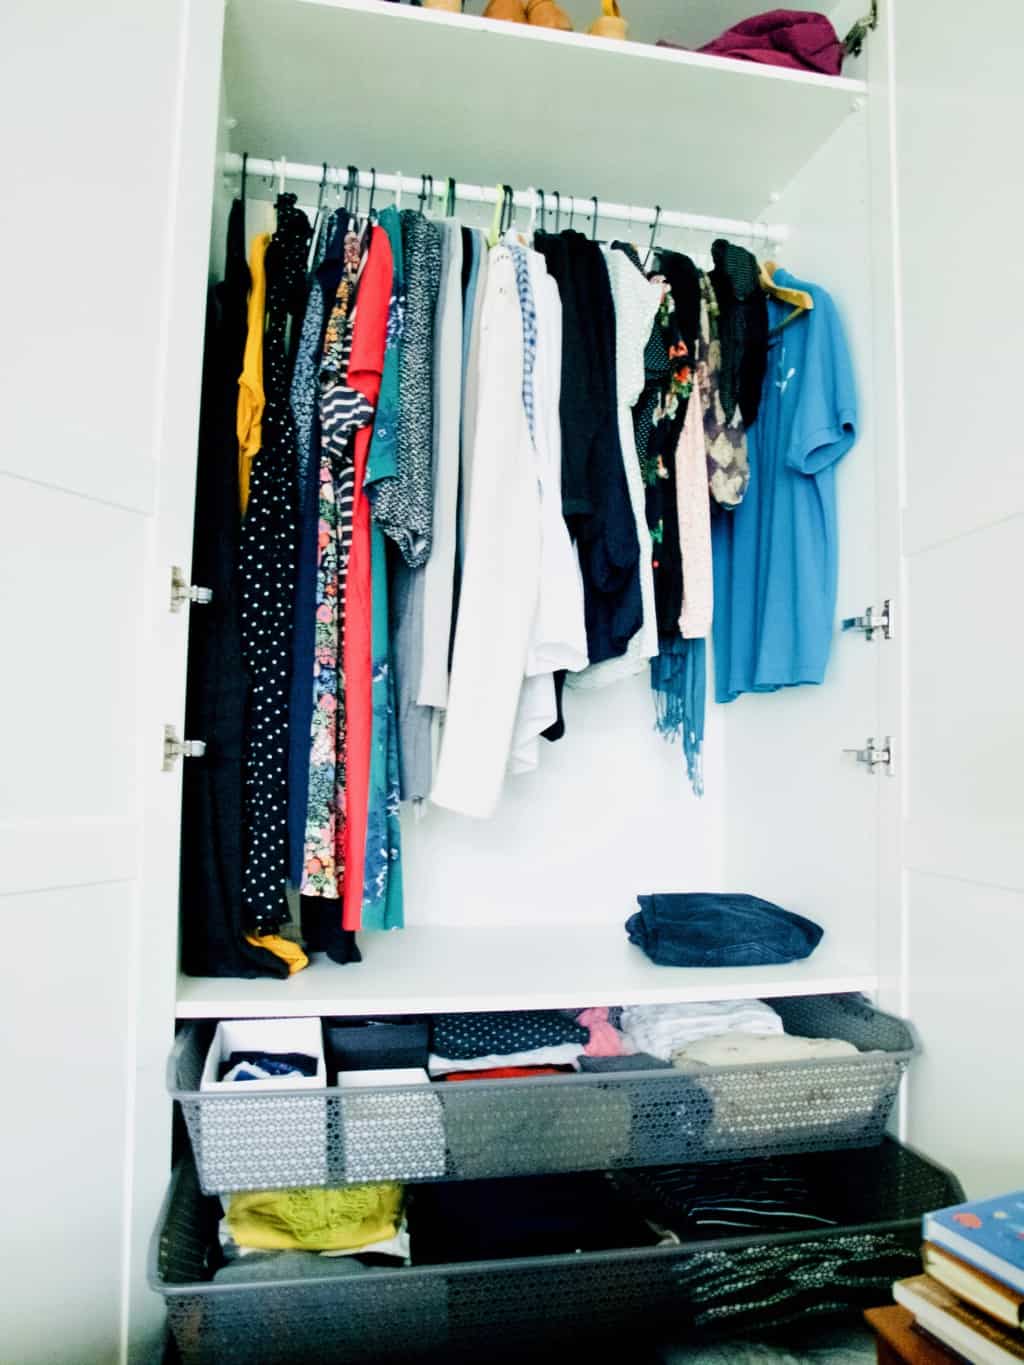
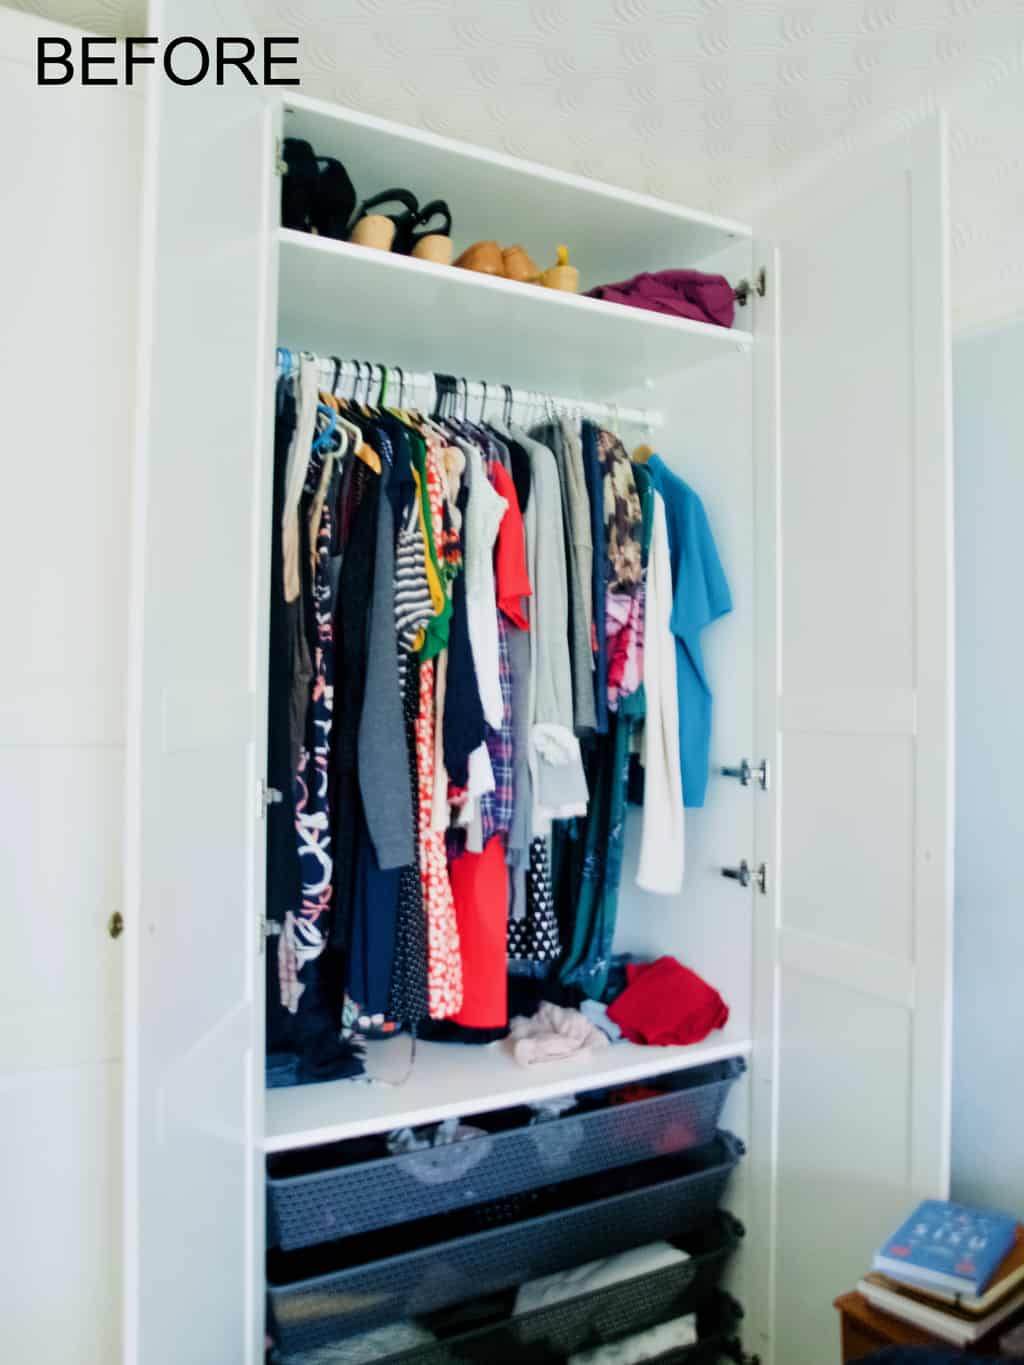
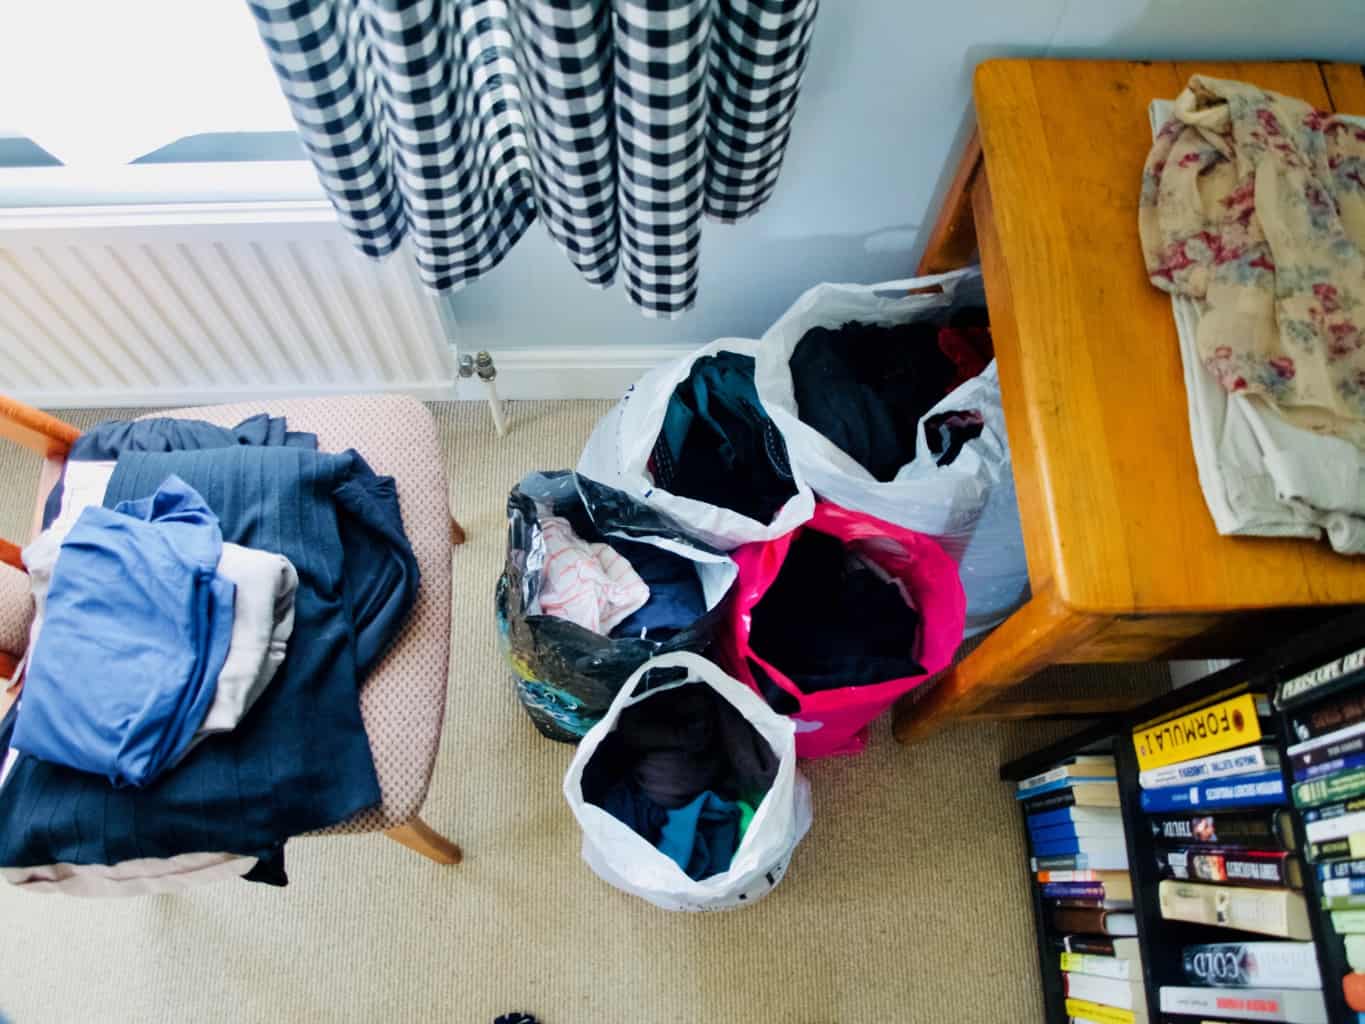
Welcome back to my journey to finding my style. Today I am all about the basics! I am not talking only about the underwear (although this is also an important part of my wardrobe) but also about the clothing items that I think I should have in my wardrobe. You know, those kind of clothes that match pretty much everything else. These include the dresses (basic jersey type ones are my favourites), my loyal jeans, vests, t-shirts, some cardies (prefer the long ones) and sweaters (I got quite a few). After doing the wardrobe detox last month, I figured what suits me, what I already have and what is missing. When investing into new basics I always heard that you need to aim for top quality items, but from my experience this is not always the case. Read on if you want to find out more!A year to find my style again: the basics
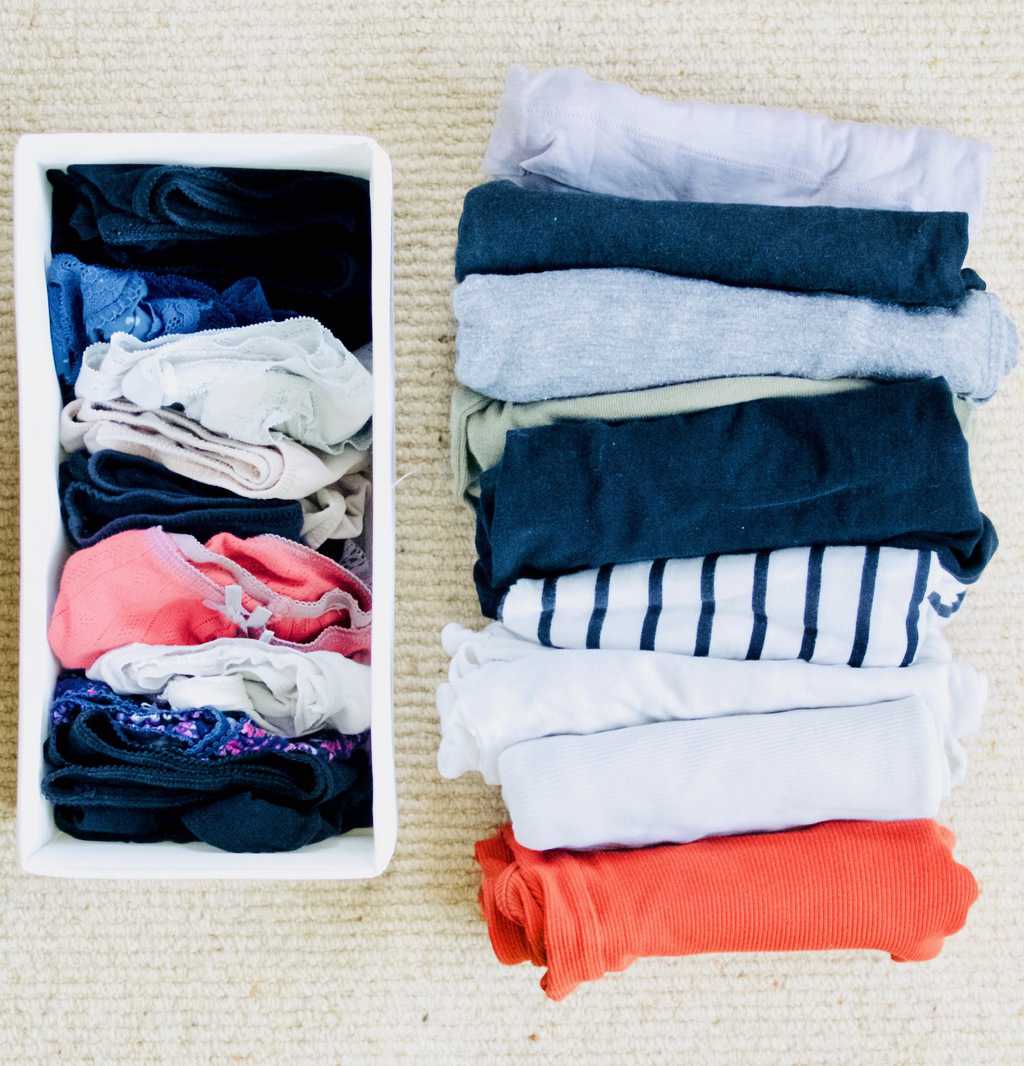
First I wanted to share what I had missing. Due to my body changing during two pregnancies what I needed are the bras (hope I am not oversharing here). I had the sports bra that still fits, some maternity bras that are just too big and then my old bras that look like brand new, and I have no idea how they ever fitted me (all been donated of course!). Like with anything else when investing in something new, I really did my research, then asked for recommendations and went to bra fitting. I did not settle for any uncomfortable bra like I did in the past. This time round I knew what I looked for and that was practicality and the comfort at the same time. I think it also look good, because it really fits. And I am not against underwire bras, turns out they can be as comfortable as the seamless ones. So hey, do your own research and do try on lots on before investing on the one (or two like me). And I did not end up spending too much money. £35 for a pair!

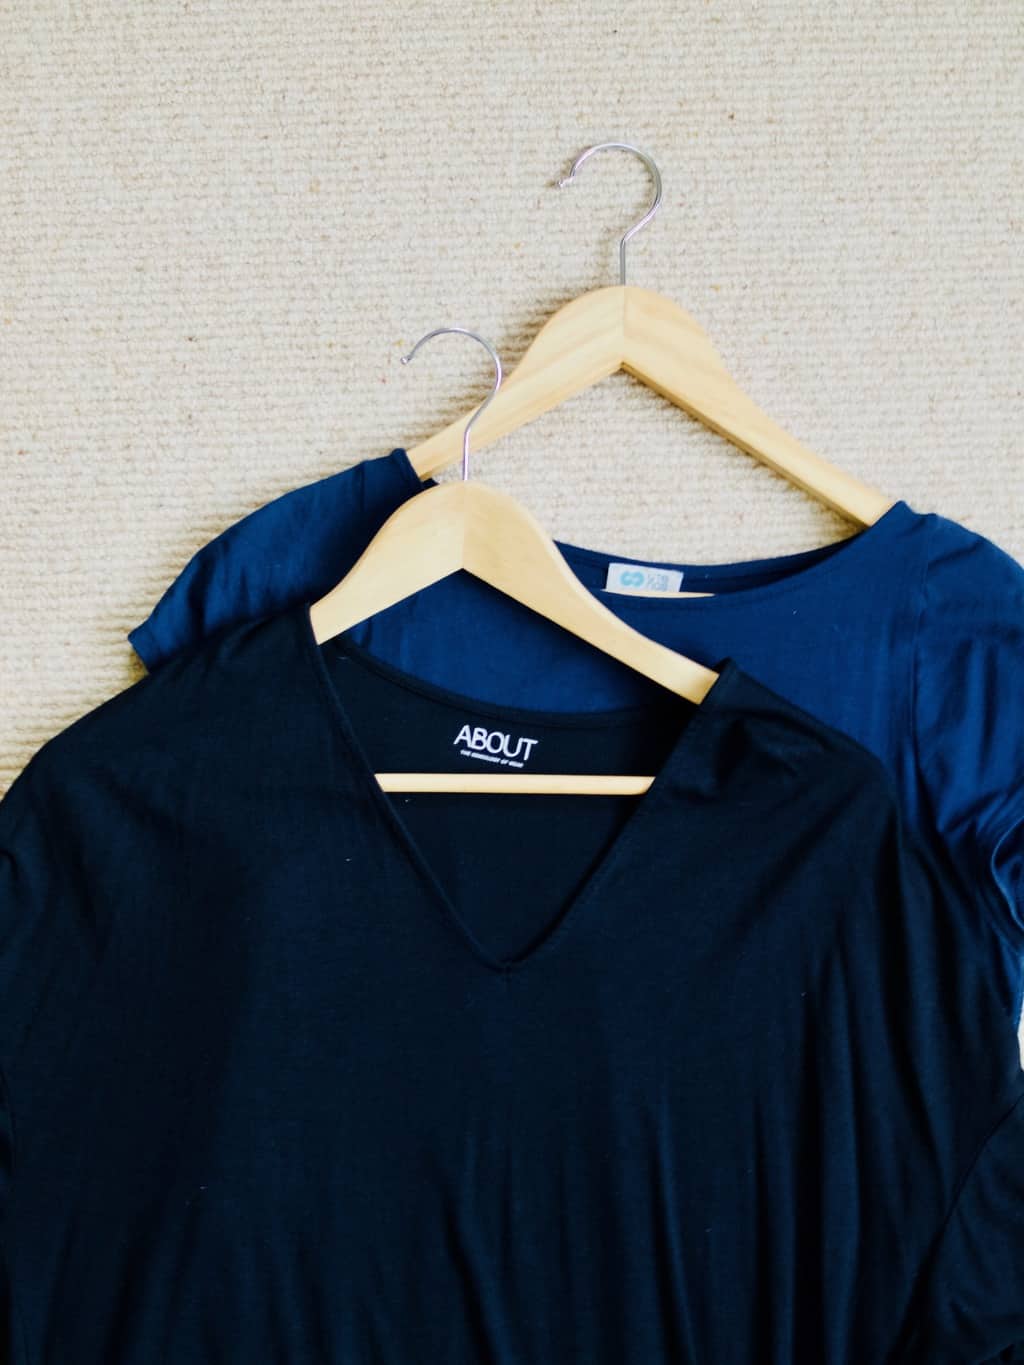
While in Lithuania I also visited Utenos Trikotažas, the company specialising in clothes made out of jersey material. I so wish they sold it globally so you could see it for yourselves! Although they manufacture a lot of clothes for the high street brands they do have in house designers too. Their designs may not be exactly my style, but I always manage to find lots of unique basic pieces at such a divine quality and low price! This time round I bought a long sleeve dress, few basic menswear t-shirts (I like their loose fit), some vests (some of my vests started deteriorating after 10 year service) and undies of course!A year to find my style again: the basics
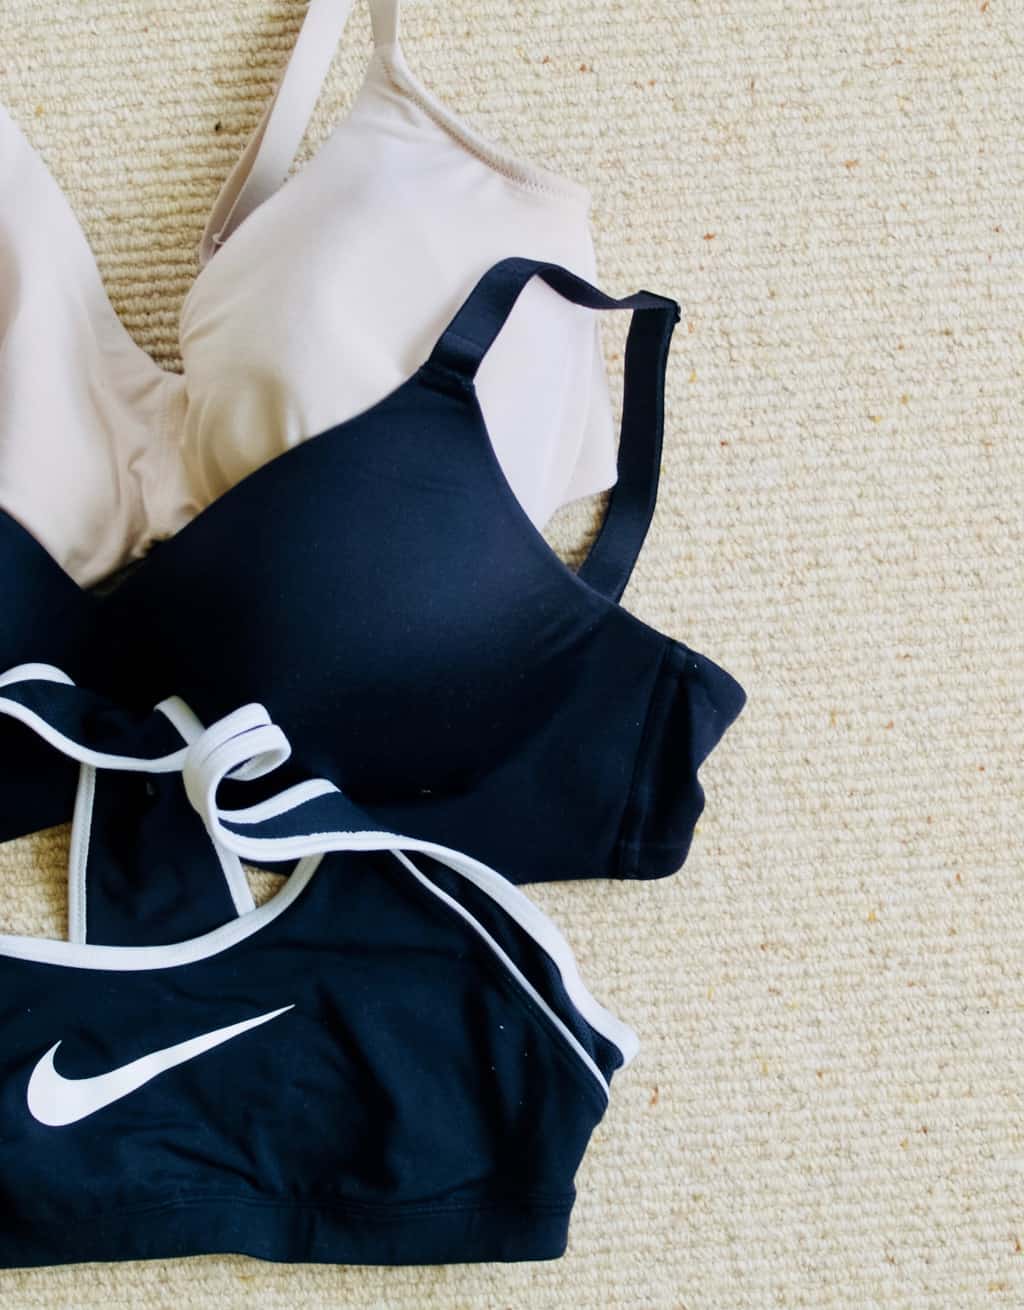
Now, coming back to subject where I talked that the basics don’t have to be expensive. Any high street store would sell basics and they are not that bad when you consider these few basic rules.

  • Makes sure it fits you well
  • Its the right shape to compliment your figure (I found longer dresses and high rise jeans are my yes’s!)
  • Focus on natural fiber (although not always the case, but I could not buy a sweater that was pure polyester for example)
  • Ask yourself, does material feel nice to your skin?
  • Take good care of your basics (will tell you more about this shortly)

I think this is it. I am obviously not against in investing in high quality clothing, but you would be surprised what you can find in Lidl’s for example. As you can see from the picture below I got quite a mixture. Two John Smedley sweaters that are made of high quality fine wool and then two cotton sweatshirts (one from Aldi that I am quite pleased with). I tend to focus on cotton when buying from supermarket and of course the fit may not be always great, but you might be lucky (it does not hurt to try!).

A year to find my style again: the basicsOne downside when you buy the knitwear or jersey clothing from the high street brands or supermarket is that they twist. See in the picture below, the side seams are not running straight. This does not bother me anymore like it used to. The cause of this is the way the fabric was cut for the production. You see, it takes extra care to cut the pattern of the garment on the “grain” and often this is compromised when cost is a factor. Companies like John Smedley knit the garment pieces separately, which means garment made this way should not stretch sideways and therefore should not twist. A year to find my style again: the basics
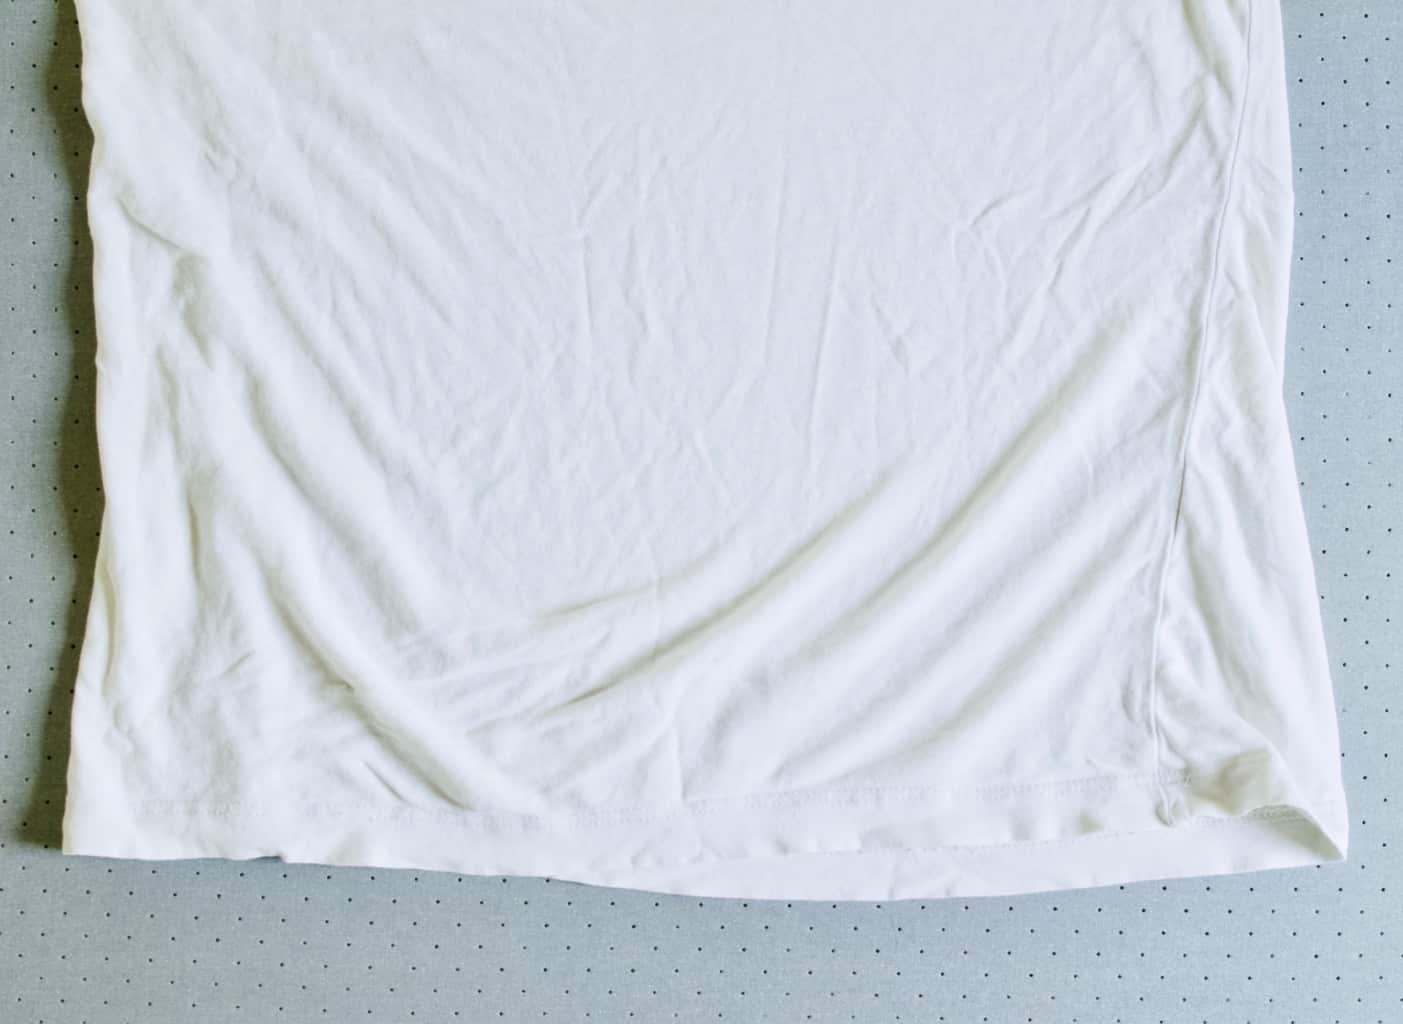
Pilling happens to any quality garment with the wear. At least in my experience. I find the more fluffy the garment the greater is the pilling. Now I know that many good companies invest in testing machines that test the pilling (I have seen them used in many factories on my visits when I worked in the fashion industry), but I think this is impossible to avoid. I learned this technique to deal with this issue. I simply use a shaving razor (gently does it) and shave these pilling balls away. Once in the while should do the trick!A year to find my style again: the basics
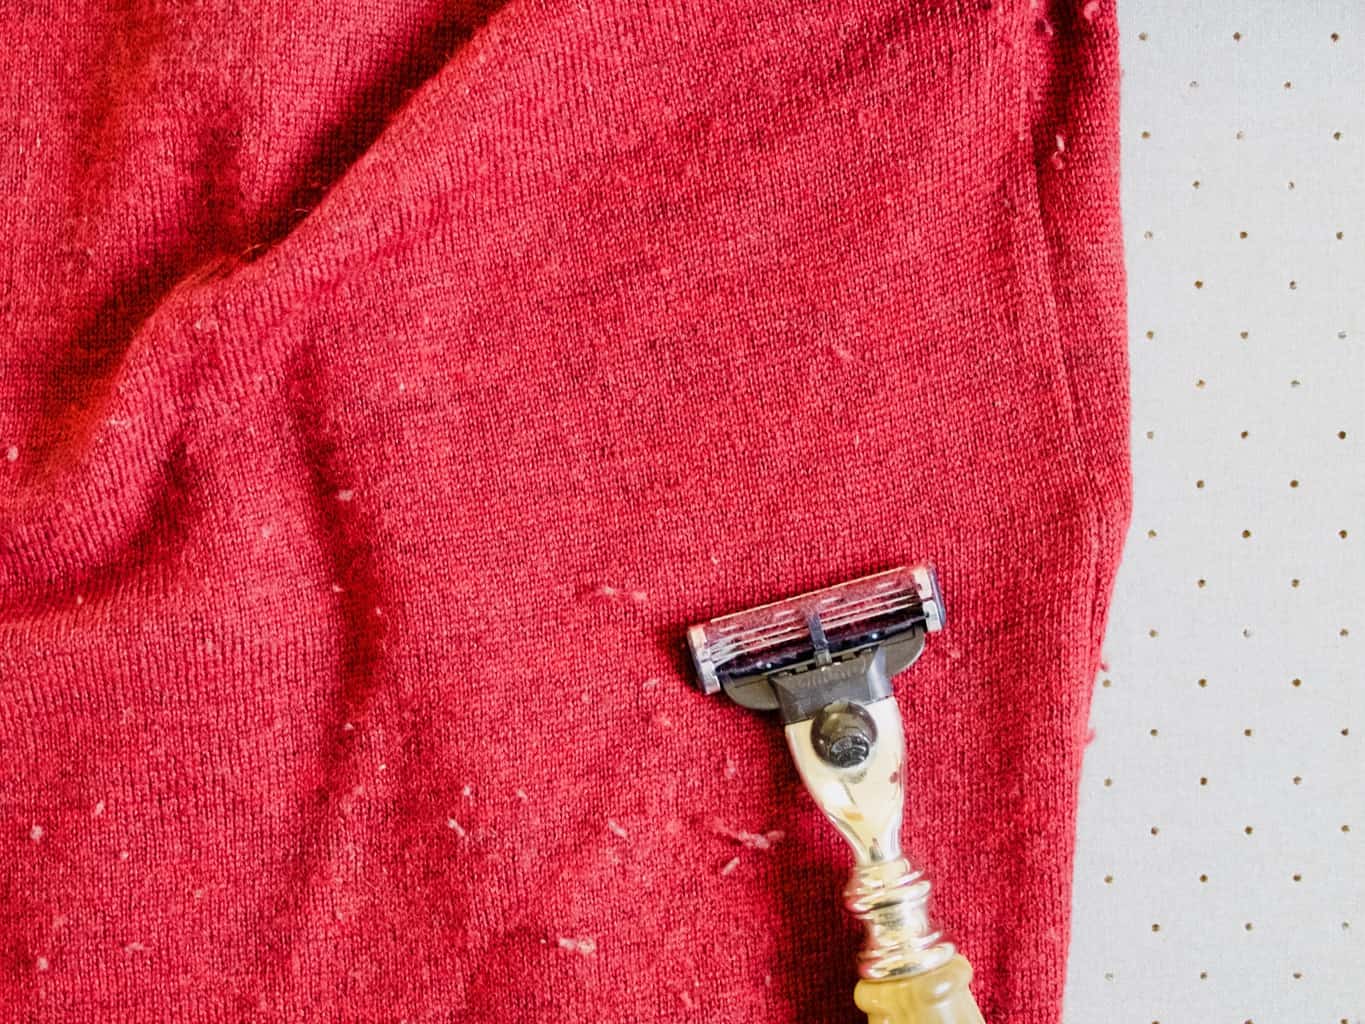
Ironing is a great way to care for your garment, not only to remove the creases. The steam that comes out from the iron (hopefully you use this function) revives any clothing and gives some breath to it. I used to be obsessed with ironing and used to iron almost everything. It took a long time to narrow down my priorities (now I iron much less), but I still believe that ironing (steaming) really prolong the clothing lifespan. A year to find my style again: the basics 
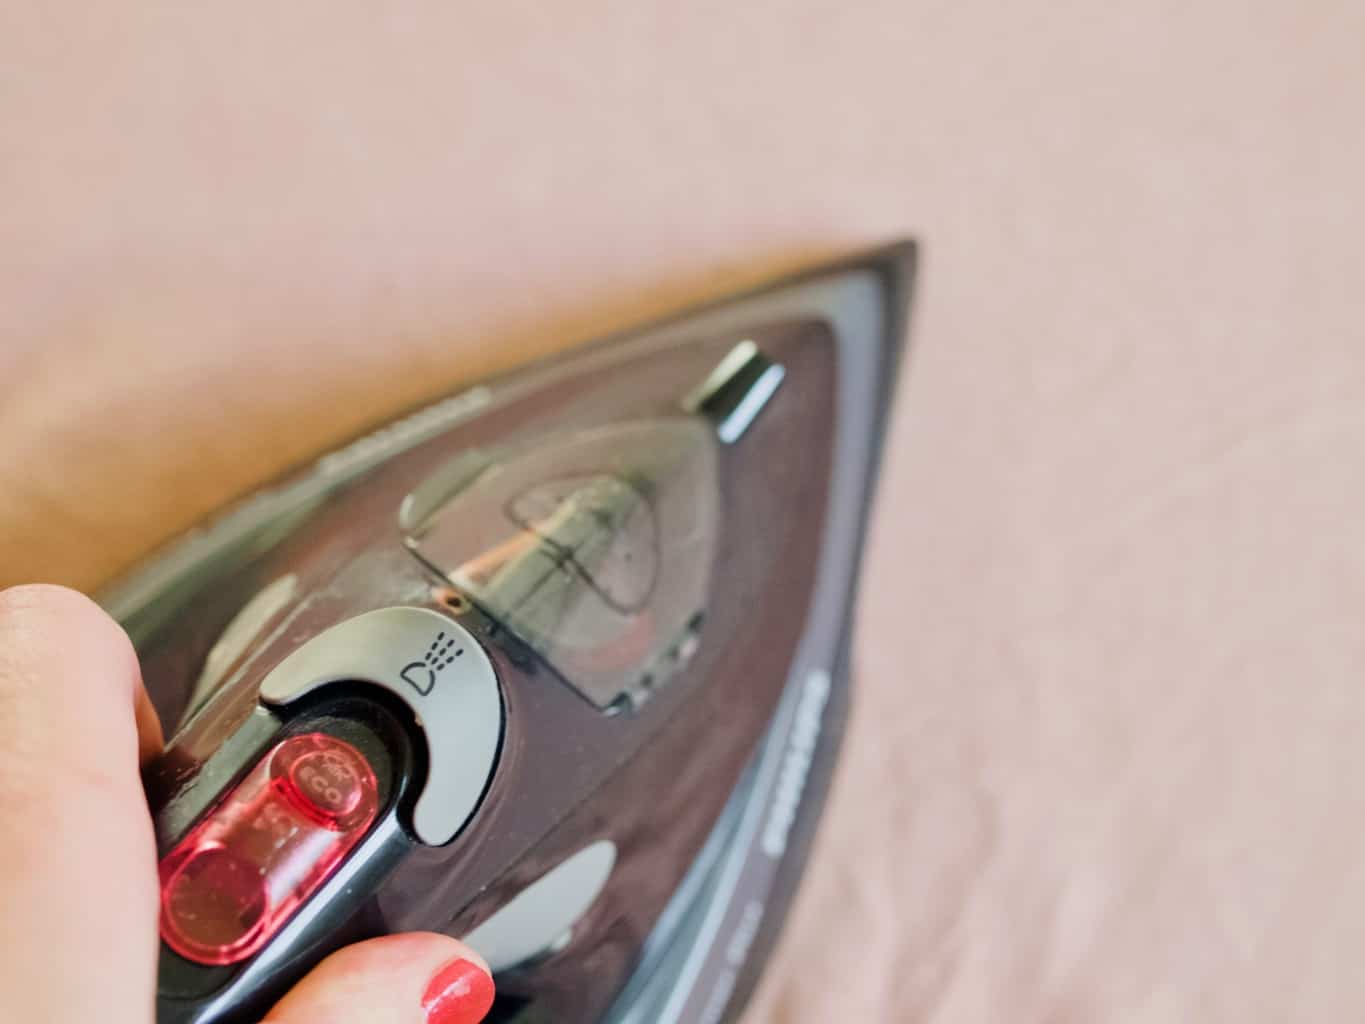
Mending the clothes is another way to prolong garment lifespan! I feel I could write the whole post about the different techniques of mending, but here are few stitches to learn for a start.A year to find my style again: the basics
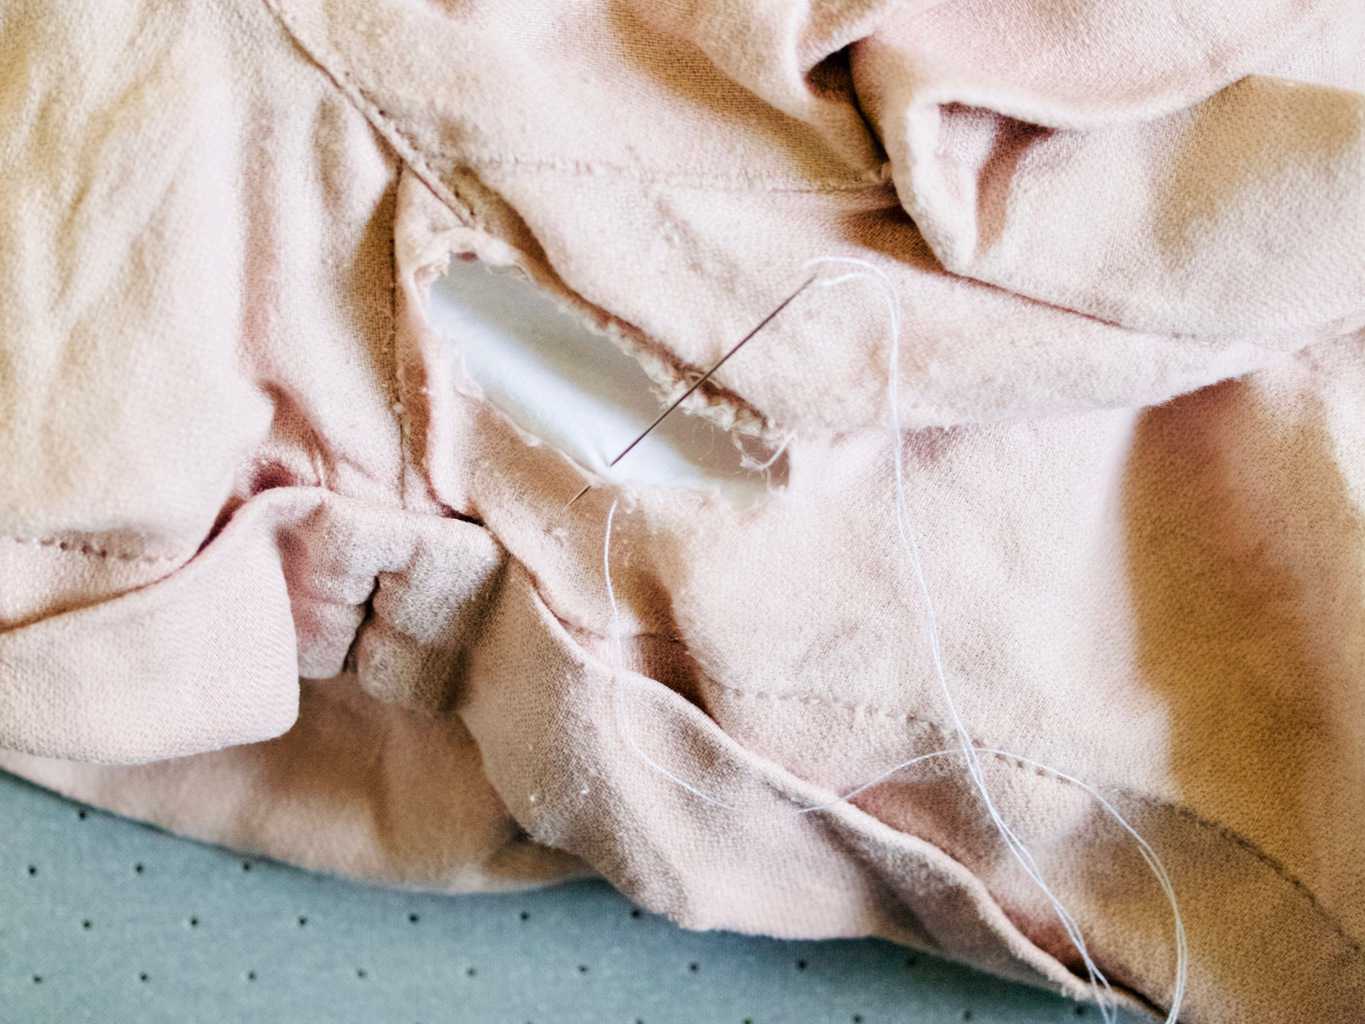
Hope (as always) that this post have been useful to everyone. Thanks for letting me share!

Rasa xoxo

0

Date night in: paper and pen games

Idea for date night in: paper and pen games table layoutMe and Joni have not gone out for ages. When you got kids it’s just not easy. Everyone who have young kids I am sure can relate how difficult it is to find a babysitter! And when you do find a babysitter this once in the while outgoing can cost you at least £40. Am I right or am I wrong?

Recently Joni had an idea to have date nights in. And that changed the dating game completely! We set to have the date night in every Friday and we reduced the amount of tasks we need to do that day so we are free. This gives me something to look forward every week! Since the Valentines day is coming up I though I will share how we do these night ins ;-).

Me and Joni take turns who organises the date. If any money spend we budget into our own budgets. This time it was my turn therefore I could share the preview with you. I picked games theme and this is often what we like to do on our dates. We (I mean me) get a bit competitive sometimes!Idea for date night in: paper and pen games table layoutSince I decided to do paper and pen games this time round I used craft brown paper for the table layout. To be honest I don’t even have that many dining table setup props! This is why I mostly used what I already have. Kitchen towels instead of napkins for instance was one of those replacements when I did not want to buy something I may not use again.

First I rolled brown craft paper out on the table and drew what is needed using permanent oil pen. I am sure you can use any other pen you like. I was tempted to use metallic pens and I used black marker pens before. I used plates and cutlery to trace out the table layout. I wrote out the menu here as well.Idea for date night in: paper and pen games table layoutI decided to play battleships for the night. So I did make a grid so we did not need to do that on the date.  Idea for date night in: paper and pen games table layoutNext I arranged some items related to games such as dices, pens and books (for protecting the battleships). Candles and some leafy twigs were not related but pretty and I could not help myself.Idea for date night in: paper and pen games table layoutThe date night was a complete success. Joni was very very surprised! I did not want to spend too much time in the kitchen so I used the take away to order some of the food. I made the dessert and rice myself. So I only spend £20 (half of the price to compare how much we would have spend if we went out). Idea for date night in: paper and pen games table layoutAnd do you know who won the battleships this time? It’s Joni. I may not want to play this game again ( ha ha).Idea for date night in: paper and pen games table layoutHappy Valentines day everyone and don’t forget the dates does not have to be spend with you husband or boyfriend. I am sure your BFF would appreciate this kind of date too ;-).

Rasa xoxo

0

Pinterest challenge: parsley cheese crackers

Parsley cheese crackers recipeFirst of all I would like to inform you that I won’t be doing any “Pinterest challenge” posts anymore (Booo! I know!). I feel like I have been doing this for ages (4 and half years to be more specific) and I felt these lack of creativity on my part. Yes, I have learned a lot, I have made my own alterations on some of the recipes, I tried many recipes that just have been sitting there on my boards and I use some of these recipes again and again… BUT I feel it’s time to move on! I realised I need to start creating more of my own recipes as well (which I have been doing already).

Now coming back to my final “Pinterest challenge” post. I have been doing a lot of cupboard clearing lately. This included me going through my cupboards and using up all these leftover flours and grains etc. Although these crackers does not call for any special flour, I baked them anyways as these make good lunch box fillers (Lukas calls them lunch box stars) and they make as a tasty snack on the go too! I tweaked the recipe a little bit to add some parsley. I feel better when this adds some green into the kids lunch boxes, even though I am not too sure how many nutrients from the parsley survive the process. Either way at least the parsley give some work out for the taste buds ;-). Parsley cheese crackers recipe PARSLEY CHEESE CRACKERS adopted from Winter Monroe

  • 200g flour
  • 1/2 tsp garlic powder
  • 85g butter
  • 200g cheese, finely grated
  • 1 egg
  • handful parsley + 2tbsp water, whizzed to a paste

1. Add the garlic powder into the flour and mix to combine. Rub the butter into the flour mix with your fingertips until the mixture looks like moist breadcrumbs.

2. Add the rest of the ingredients and mix well to combine.Parsley cheese crackers recipe3. Roll the pastry out, 7mm thick. Using a cookie cutter cut out the shapes and place them on ready lined baking tin or tray. This part is fun to do with kids!Parsley cheese crackers recipe 4. Bake the crackers in 180C preheated oven for 10-15min.Parsley cheese crackers recipe Parsley cheese crackers recipeEnjoy!

Rasa xoxo

0

My 2019 goals

My 2019 goalsI usually set my new year goals on New Years eve (or even before), but this time I waited… I was worried, because I was still not sure if the new venture is going to work out. What if it did not and then I would need to cross that goal off? I realised the unexpected often happens and even when you think all the goals you set are achievable, sometimes things just don’t work out in the end. I realised the simple truth that goals are there to guide you and keep you focused, not some commandments set in stone. So have you set your goals yet? I hope you are finding your 2019 planner very useful!

I have five goals this year, just like last year! However I can only share three of my goals. My first goal is to do with my new venture; I have been planning all last year, but can’t share it due to the fact it’s not signed off. My fifth goal is too personal to share. Here are the three goals I am sharing:

1. Upgrade Friendly Nettle website goal was on my mind for five years. In fact I just copied this over from last year’s bullet journal! Hopefully this is the year I achieve this.

2. Keep on gardening my goal is a follow up from my last years “Create child friendly garden” goal. I enjoyed gardening in the summer so much that I decided to keep on doing it this year!

3. Find a new personal style this goal is a totally new goal in my books. It’s born due to huge changes in my life (kids and loosing some weight) where my style just did not follow. This is why I thought I need to find a new one ;-).My 2019 goalsHope I am not too late to say Happy New Year again!!!

Rasa xoxo

0

A year to find my style again: wardrobe detox

How I did my first wardrobe detoxOnce upon a time I knew my style. Yeah sure, I did not always wear the most exciting piece of clothing all the time, but I did know what suited my body shape. After having kids this changed dramatically. Yes I gained lots of weight (and lost some too), but my figure (my bust to be specific) has changed a lot which made me a little confused for a while. I could not understand why some of my clothes just don’t look right even though I do fit them. It took a while to figure out that because of my bust changes the overall balance of my figure changed too. Things that suit a flatter figure simply do not look the same on a fuller figure. I decided I need to find my new style and I couldn’t wait to start.  Now I have lost some weight finally the time is now!

On this journey I am planning to share my top findings on how to organise your wardrobe, how I do some alterations to old clothing to better fit my new figure, how to dress effectively (thinking to try creating one of those capsule wardrobe collections). I am going to invest in new clothing and maybe make some myself too! So watch this space girlies ;-).

So where do I start now? My obvious though is to first clear my wardrobe. I am not starting from scratch however! Over these past few years I bought some basics that fit and also some clothing pieces from the past does not do any harm in my wardrobe either. I decided to do a simple wardrobe detox where I remove all the clothes that no longer fit within the strict criterions I set out. So let’s get brutal, shall we?How I detoxed my wardrobeMy criteria for clothes that stay in the wardrobe were:

  • I have to like them (obviously), similarly to Mary Condo’s saying “it needs to give me joy”.
  • Have to fit me well, lots of time spend trying everything on!
  • Have to go with my style board, I have one on Pinterest.
  • Have to suit my body shape, probably the most important criteria!

With this I probably got rid of like at least 40%, my wardrobe looked a bit empty to begin with, but then I hang some stuff that could be hung from the drawers and that fixed it. Plus my drawers are much less crammed!

I did not empty the whole wardrobe and then put back what I am keeping (this is what Mary Condo does), instead I removed only the items that I am not going to wear straight away. When you have kids running around I find this is much more practical.

I made three piles:

  1. clothes that I am getting rid off
  2. clothes that I am passing on to my friend Vicki (we did lots of clothes switching in the past)
  3. clothes that need some alterations.

How I did my first wardrobe detoxEventually the pile of clothes that I am getting rid off ended up being the largest of course. That has been bagged ready to go to the charity shop.How I did my first wardrobe detox How I did my first wardrobe detox The drawers! I wish I took a picture of how it looked before. It was very very crammed. Although I am generally quite organised and I would not describe myself as a hoarder, because of a busy season in my life I let myself go a bit. My clothes were not only crammed, but also as hard as I find to say it; they were in chaos. I did not know what clothes I had and were mostly wearing a couple of items over and over again that were on the top. With the clear-out I gained the space where I could insert clothes organisers/dividers and fold everything in a way that is visible. I have been using my new organised wardrobe for few days now and I can’t describe how happy it makes me every time I open it :-).How I did my first wardrobe detoxHope you find this helpful if you are also going to do a wardrobe clear-out.

Rasa xoxo

1

How to install a gallery wall in five easy steps

How to install a gallery wall in 5 easy stepsOne of my last years goal was to fill the walls with art, and thanks to my watercolour challenge I kinda did! Except the wall space above our fireplace stayed empty for a while. I planned a wall gallery here with family pics and I have been putting this task off for a while. Why? Because I must admit making a gallery wall is challenging to me too. It’s overwhelming, so many pics to add, how to decide on frames (there are so many available!), how to arrange them. I get you! I got the same feelings too!

After doing some research and remembering what I learned in the past when doing other wall galleries at my old house I came up with a step by step plan that made arranging the frames on the wall much much easer. Creating this gallery was such an easy job after all!  Which is why I decided to share these 5 easy steps with you!

First thing I learned about creating a gallery wall is to deal with one component at the time. It soon get’s very overwhelming if you try to visualise everything in one go. My starting point is often choosing the frames maybe with one main photo installed in it. You can think what pictures to install in what frame later.

1. Create picture frame layout. When you remove one distraction is so much easer to focus on another aspect of creating gallery wall. Lay the frames you choose on the floor and keep rearranging and taking pictures of different layouts till you have at least 3 variations. Have fun!How to install a gallery wall in 5 easy steps 2. Arrange pictures/photos into the frames. After you have decided on the picture frame layout you can begin arranging pictures into it. I found using photoshop or other photo editing program to arrange the images into frame so much easer. That way you know what sizes to aim for when you do actually print it out. I used this technique when making our wedding album and that helped me to visualise the end result much better!

My Tip: Aim for balance between pictures and photos (or at least different type of photos). It looks a bit boring when all you have on the wall are pictures of people faces (as lovely as they are).How to install a gallery wall in 5 easy steps 3. Print and and frame the pictures/photos. It is that simple once you have the layout designed! This is when you can decide how much of white area you want to have around the photo in the frame. How to install a gallery wall in 5 easy steps 4. Transfer the layout onto the wall. Using cheap craft paper (in my case it was pattern cutting paper that I have loads of) trace around each frame and title each of them so you know what is what when you paste it on the wall. Cut the frame shapes out of the paper. Using sticky tape (not too strong as you don’t want to rip the wall paint off) arrange the cut-out frames onto the wall according to your original layout design.

Joni tip: Mark the centre on each cut-out frame so you know where to insert the nail/hook to hang the frame (usually in the centre). How to install a gallery wall in 5 easy steps How to install a gallery wall in 5 easy steps 5. Finally, hang the frames on the wall. And that is all! Don’t worry if the frames are slightly off the level. I think as long as it is pleasing to the eye then it’s ok.How to install a gallery wall in 5 easy steps How to install a gallery wall in 5 easy stepsHope you found this super useful!

Rasa xoxo

0

It’s not too late to knit a hat!

kids bear hat knitting instructionsFirst of all, Happy New Year everyone!

Secondary, just because it’s winter, that does not mean it’s over very soon. I hope I am not sounding too negative for some (I know some of you are really looking forward to Summer already), but we only had one winter month and there are two left to go. My point is that we should enjoy this weather and make the most of it!

I personally love love January (I learned to love every season), because it’s time for refocusing, spring cleaning (would like to call it winter cleaning but it sounds weird), detoxing (If you are into it) and knitting of course. I love January because it is a beginning of the year and the plans are not strictly set therefore it is often not a busy month.kids bear hat knitting instructionsOver holidays I have started knitting because we have gone away and I was free from doing all the house tasks. I find knitting (or any other crafting) is something I can do while chatting or watching a movie. I find it very relaxing! I knitted this hat for my nephew that Tomas is modelling here, hence blurry pics because he can’t stay still. If you fancy knitting this hat then you can access the project here!kids bear hat knitting instructionsHave an enjoyable January!

Rasa xoxo

0

My reflections on 2018

My reflections on 2018As I sit here and reflect on the past year, I am actually panicking due to the many tasks I still need to complete. It has been a busy year indeed! I think I need to accept that some of the goals I planned were not achieved. But that’s ok, right? Having set goals does not mean you have to achieve them all, but have them as a guideline to keep you focused. And I definitely felt focused this year. Therefore I decided today to reflect on what I have achieved so I can set new goals for the next year instead. Sounds fair? I think so!My reflections on 20181. This year I have created more art, thanks to my watercolour challenge. Not only has it been lot’s of fun, but also taught me a new few tricks for handwriting and definitely created more wall art that I can hang on our wall. My reflections on 2018 My reflections on 2018 My reflections on 20182. I really enjoyed the gardening, thanks to my goal to create a child friendly garden. We  were very lucky with the green house and very hot summer. Gardening has been the most enjoyable goal so far! I think I will carry on gardening next year as well!!  My reflections on 2018 My reflections on 20183. We have had the most enjoyable holidays. Although we did not plan most of it, the trip to France with friends made my year!My reflections on 20184. I enjoyed more walks this year, discovered our local forest and a new forest school for kids too! We have even started sharing one car to reduce costs and motivate me to do more walking. Hope to walk even more this year as we start doing school runs.My reflections on 2018 5. Have been more experimental with baking thanks to all the birthday cakes I baked for both of my kids!My reflections on 2018 6. And finally we have completed our kitchen renovations! Although I thought we would have completed it earlier this year, we took a little longer then expected. We have however have something exciting coming up next year, so bear with us ;-).My reflections on 2018Happy New Year everyone!

Rasa xoxo

0