Top

The joy of Christmas cooking…

Christmas cooking is something I look forward every year, that is if I get to cook after all as the competition is usually humongous! Somehow during Christmas everybody wants to become a chef and show off their skills, but this year (even though I had more freedom) I felt like not cooking at all. I just wanted to sit there and rather eat-talk-drink-eat-nap-talk…. how is that possible?

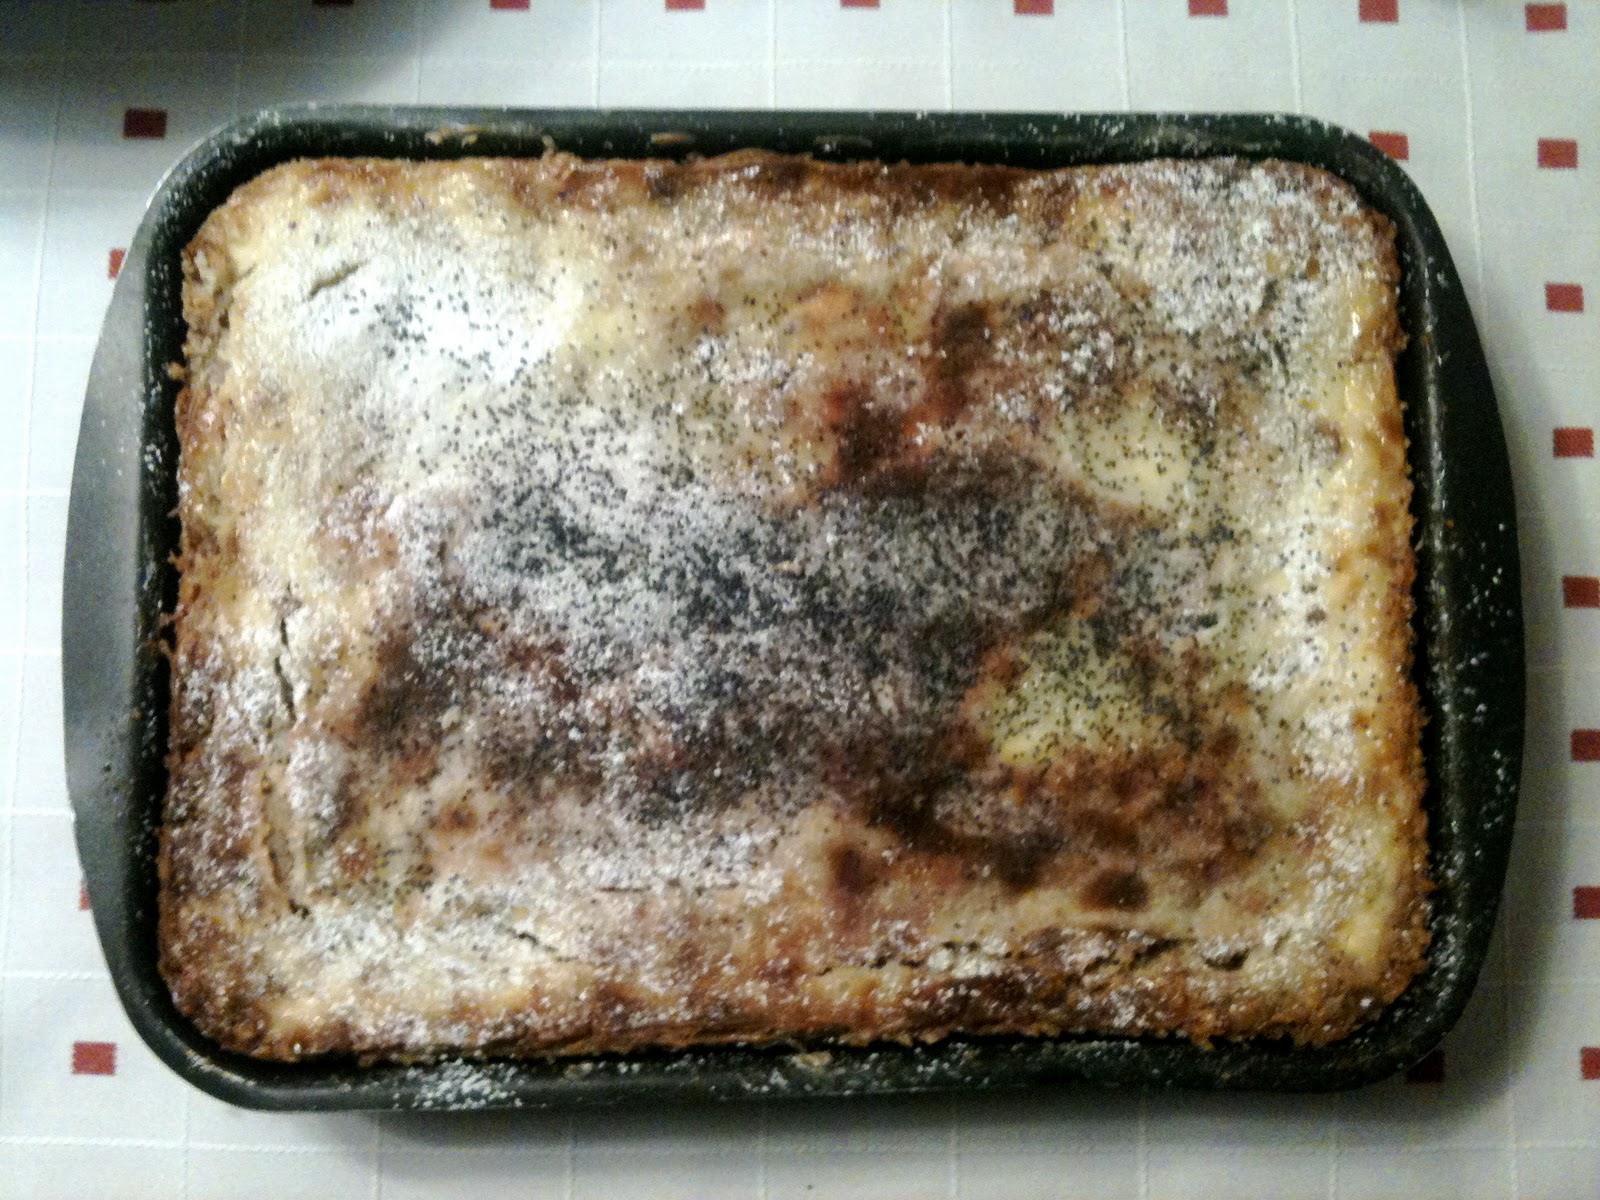
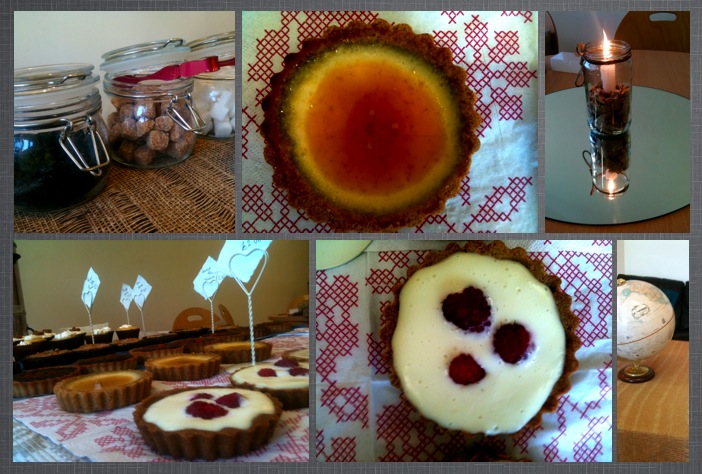
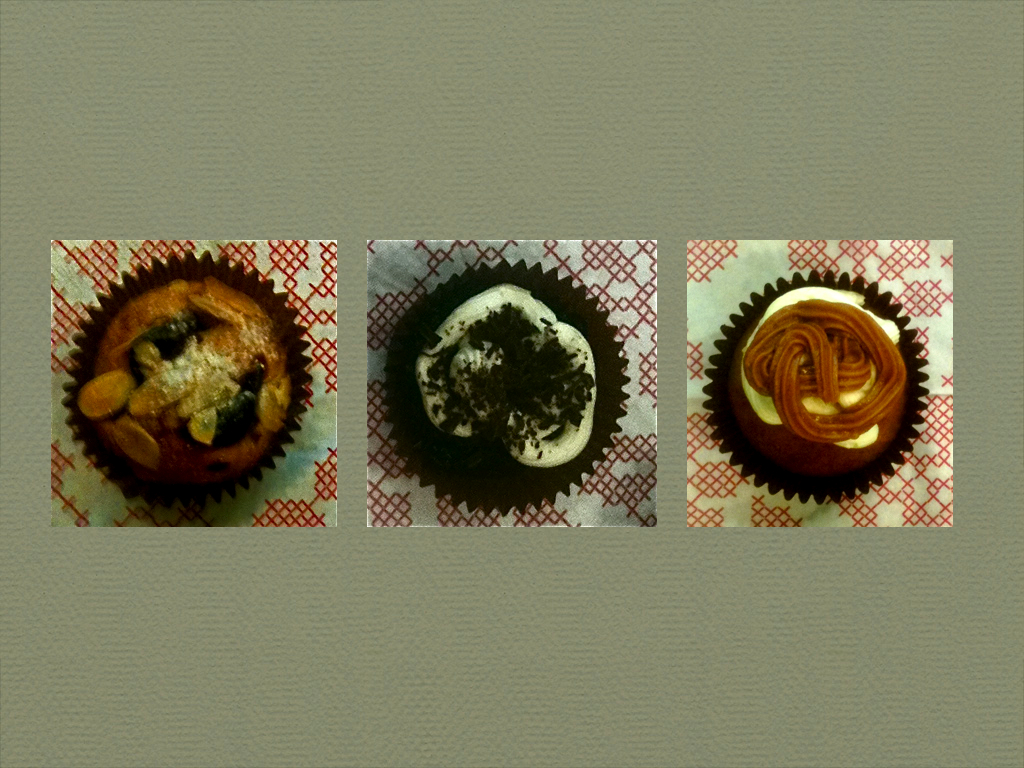
Anyway I had no other option… and I mostly proud of this pie I baked above. It is Slovenian apple, walnut and poppy seed pie. I first got introduced to this pie by this Slovenian friend Maja four years ago (she never gave me a recipe, I had to Google it)  and I really loved it! So there it goes…

SLOVENIAN PIE

For the strudel dough:

  • 300 g flour
  • 3 tablespoons lukewarm water
  • 2 tablespoons wine
  • 1 tablespoon sugar.
  • salt to taste
  • 2 tablespoons oil
  • 2 tablespoons melted butter for brushing dough

(You can also substitute store-bought filo pastry but I went all the way as I my dad was shopping and I was worried he is going to get something else… but really recommend to just buy the thing as it is really difficult to roll home made dough)

For the fillings:
The poppy seed filling:

  • 400 g poppy seeds, ground with a mortar and pestle or very briefly whizzed in a food processor with the steel blade
  • 200 g sugar
  • cinnamon to taste
  • 240ml cup hot milk

The apple filling:

  • 500 g apples, grated
  • 200 g sugar
  • cinnamon to taste
  • 1 lemon rind, grated
  • 1 tablespoon lemon juice

The cottage cheese filling:

  • 500 g cottage cheese
  • 360ml Creme fraiche
  • 1 egg
  • 200 g sugar
  • 2 tablespoons raisins, soaked in rum
  • vanilla to taste

The walnut filling:

  • 500 g ground walnuts
  • 200 g sugar
  • cinnamon to taste

Topping: 1 cup sour cream

Separately for each filling, mix the ingredients well. Grease well (butter is best) a square or oblong ovenproof baking dish or pan.
For the strudel dough: Mix the ingredients in a bowl, knead thoroughly (ten minutes at least) and let stand to relax for one hour. Then roll out and cut into thin sheets the size of the baking container. (Alternately, purchase large sheets of filo pastry to suit your baking dish.)
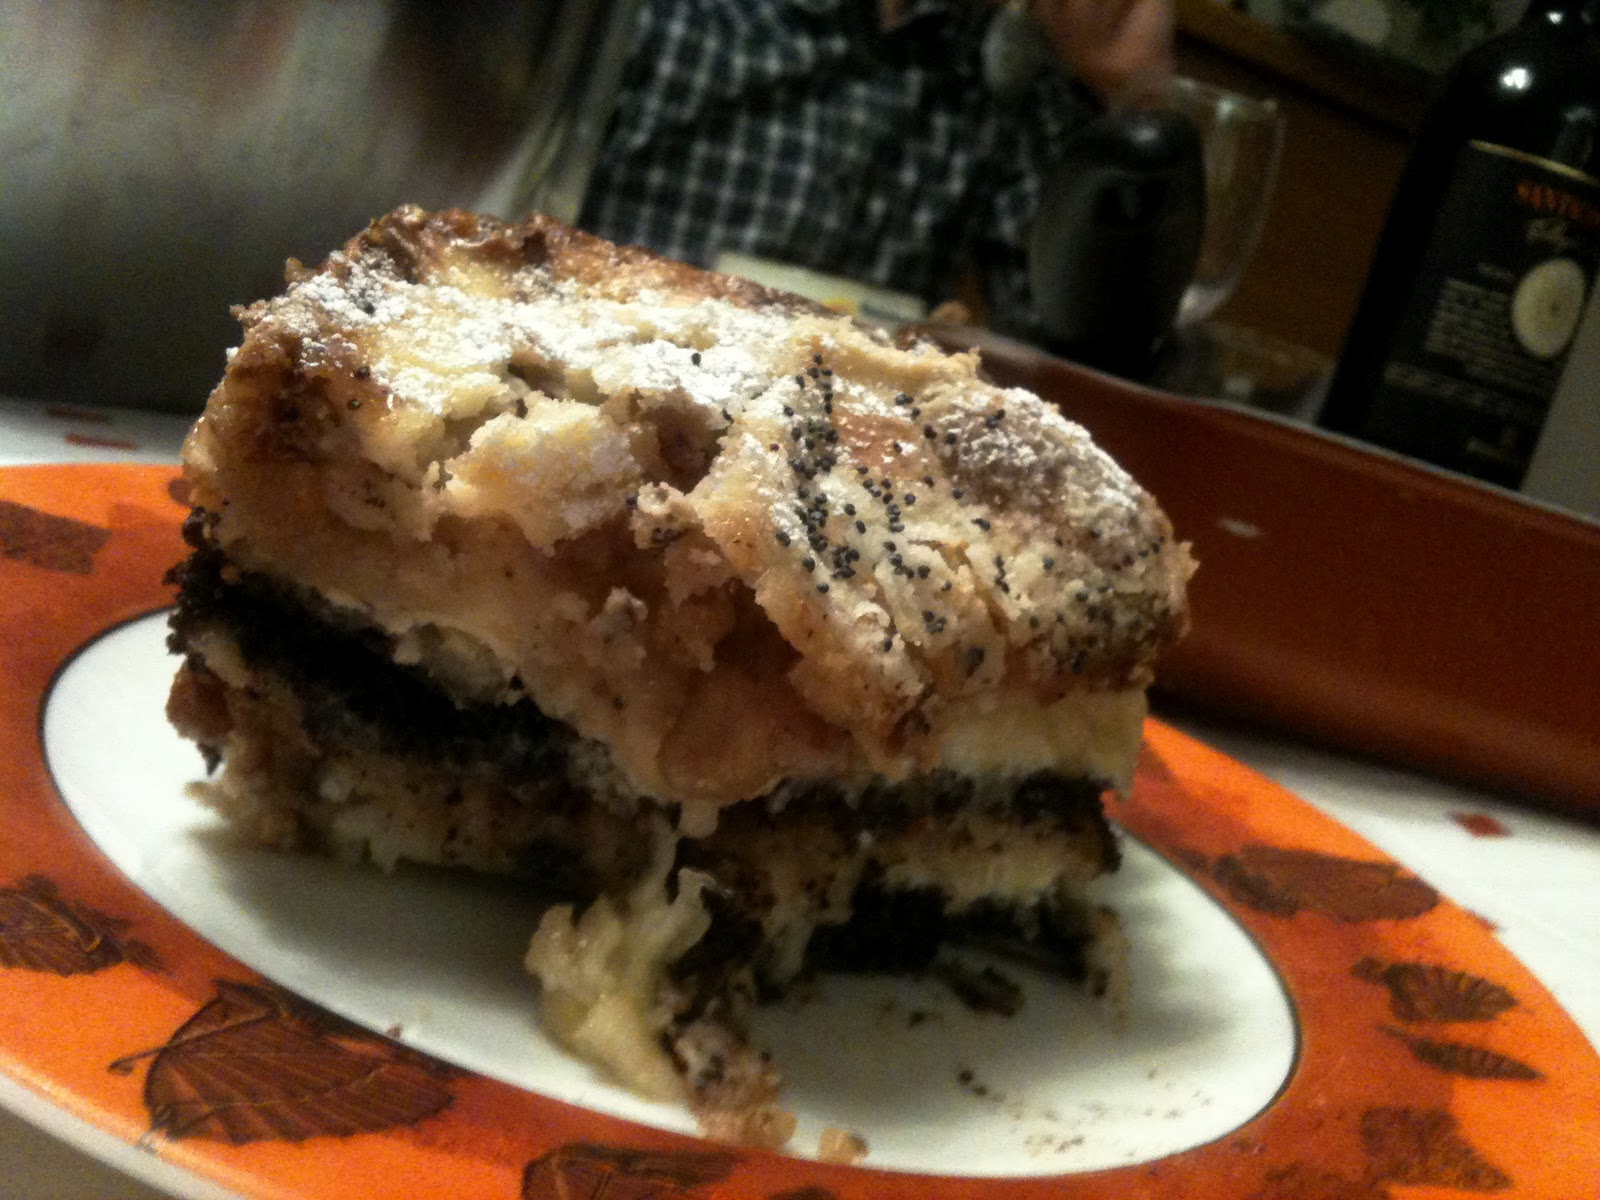
Place a layer of strudel dough / filo pastry in the bottom of the baked dish. Brush lightly with melted butter. Spread half the poppy seed filling evenly over it. Cover this layer with another sheet of strudel dough and brush the dough with melted butter. Spread this layer with half the apple filling. Cover with another sheet of dough: brush with melted butter. Spread with half the cottage cheese filling: cover with a sheet of dough, brushing with melted butter. Spread with half the walnut filling: cover with dough and brush dough with melted butter.
Repeat this process with the remaining poppy seed filling, apple filling, cottage cheese filling and walnut filling, making sure to brush each layer of strudel dough with the melted butter as you proceed.
Top with a final layer of strudel dough: brush with melted butter. If you like, spread this last layer with 1 cup sour cream (thinned a little with milk, if necessary, to make it easier to spread).
Bake for about 1 hour in a medium oven (175C). Cut into squares and serve

BTW: This Pie is not only for Christmas so you can enjoy it any time!

Rasa

1

Christmas decorations! (if it is not too late)

I love Christmas, especially the preparation for Christmas bit… you know, buying gifts and decorating… except I have not had a chance to decorate the festive tree for quite some time! You see, I usually spend Christmas in Lithuania and often I find that by the time I get there my little brothers (aged 12 and 9 years) get it all decorated without me…. Well, this year I thought I will go to Lithuania early therefore in advance I tried to negotiate if I could get at least one tree. It wasn’t easy as my little brother got stuck with those traditions that the tree should be decorated exactly on 1st of December as that’s when Advent starts. However I managed and the Christmas tree viewed above now is mine!

I don’t know but I most likely to be late with Christmas  decorations, but if you are like me (being late) and stuck for ideas, there you go – I am sharing here with you!

Happy decorating!

Rasa xox

1

Away from London

It has come up to a month since I exchanged my busy lifestyle in London for royal Windsor and I am ready to give you my feedback  so far. For those who did not know I left my old job for a cafe managing job so I get to learn practical ways to run my own cafe at some point and so far it have been life changing! Although I am learning a lot about the cafe industry (really enjoying that) the biggest thing that changed is my lifestyle. I am not saying that I am less busy, just that I am not living in such a rush anymore. The most amazing thing that now it takes me around 15min on the bike to get anywhere I need in town (that is a big difference to 1hour in London). So if I get a moment of “woops… I forgot my sandwich at home!” I have no regrets of coming back and getting it back. Well… that does not happen exactly like that, but you get the picture!
… And for the end here are some “royal” treats for you – the truffles…

ROYAL TRUFFLES

Ingredients: 250g dark chocolate (at least 70% cocoa content)
120ml double cream
50g butter
1-2 tbsp brandy or dark rum or any other liquor (I used “Tia Maria”)

15-20 glazed cherries

for rolling: cocoa powder, ground almonds, desiccated coconut etc

1. Melt butter and chocolate together in microwave or in the bowl over boiling water.
2. Remove melted butter, chocolate from heat and add double cream while mixing it well.
3. Let the mixture to cool and then put it into the fridge for at least an hour
4. When the mixture is hardened scoop with the spoon the small pieces of chocolate and cover the glazed cherries with that and shape them into to the small balls. Roll the balls into the cocoa powder or ground almonds or desiccant coconut.

These would go splendidly with the tot of sweat cherry!

Rasa ;)

0

Back to my childhood….

It is my birthday today and my mum and my little brother have visited me here  in London. So my mum baked me an apple cake (not a pie) as my birthday cake (well I requested that from her). It is very basic cake and even my brother could have baked it, but it brings back good childhood memories… Well, around twenty years ago, when I think I was 9years old my mum baked it for my personal birthday party where the only guests were me and her (I had a bigger birthday party on the weekend but my actual birthday was on weekday). So I remember I really liked it as it was quite nice to have another birthday “party”!…

Other then the cake, me and my family visited the Legoland in Windsor (I used my little brother, who is aged 9 years as an excuse to visit there…). I think what I liked most is the mini London made out of Lego (never mind the long queues and the fact that we only were able to make to seven rides through all day because of that). Here are the pics…

And back to my birthday cake, here is the recipe…

MY MUM’S APPLE CAKE

Ingredients:  5 apples (medium size)
7 eggs
8 tbsp sugar
8 tbsp flour (with the heap)
Pinch of cinnamon (optional)

1. Preheat the oven to 180C and grease the baking tin with butter
2. Cube the apples (remove seeds, but no need to peal the apple peal) and put them into the bottom of the tin
3.  To make the cake mixture whisk eggs with the sugar until pale, then add flour and cinnamon (if wanted).
4. Pour the mixture over the cubed apples and put into oven. Bake the cake for around an hour until golden brown.

I hope you like it ;)

Rasa xox

0

Inspired by Sims game… (if you not in it please skip this)

I promised to someone (anonymous) to write a feedback about my previous bake sale, but I took quite a long time as you can see :(. You see…. I got addicted to Sims (literally) and I know that is very sad story, but this was the reason why I took sooo long to write this post (I will write more about this in the minute). Anyway, the bake sale… it was great experience, even though it wasn’t as busy as the previous one  (I blame the rain for that!). But it was still fun as Bekka (my thoughtful helper) managed to keep me entertained at all times!… And, as embarrassed as I am (can’t be more embarrassed after my Sims confession) I did try to dance ballet…

And here are few pics from the actual bake sale as well as new mini bakes, the mini cheesecakes…

Now back to Sims(if you have never played it this might sound like gibberish to you, so I recommend you skip it to the last paragraph)… Initially I got addicted to actual Sims computer game (later I got addicted to the Facebook Sims Social as well) and then only lived “their” life (or shall I say I was creating my own), even at night until 6am in the morning sometimes! I think what got me addicted is that I could achieve everything so easily… So, I have joined culinary career at Little Corsican Bistro where I started as The Kitchen Scullion (apparently the one who gets all the rubbish jobs from Chef) and meanwhile  I was learning recipes (some interesting ones like Goopy Carbonara, Eggs Machiavellian  and Baked Angel Food Cake that I would like to try to make in real life) from books at home so I could get up the level in cooking.  Eventually I became Five-Star Chef earning 350 Simeons per hour and recipe Librarian (???), builded a big house (not so pretty but really practical!), Had five children (long story, but in my defence one was adopted), and became “Filthy Rich” (at least that’s the phrase they use to describe rich people :D). I even bought that Little Corsican Bistro and renamed it to The Friendly Nettle Cafe! So after all this no wonder I got inspired (or shall I say I got carried away) to take similar actions in real life… Last Sunday I popped in to one of my favourite cafes by Cambridge Heath  station to  “join culinary career”…. Turns out they did not have any vacancies, I suppose it is not that easy to get any job in this life :(

To end on the happy note here is the recipe for the best seller so far, the Banoffee cupcakes. After all, this is supposed to be the feedback for my bake sale;)

BANOFFEE CUPCAKES

Ingredients:     300g flour
1tbsp baking power
1 egg
200ml milk
150g soft brown sugar
85g melted butter
2 bananas
150ml double cream (preferably elmlea)
Milk based toffee ( to make it boil a can of condensed milk for three hours) or 4 tablespoons of dulce de leche

1. Preheat the oven to 200C and line 12-hole muffin pan with cupcake cases.
2. Sift flour and baking powder into the mixing bawl
3. In separate bowl beat the egg with milk, than add the sugar, melted butter and chopped banana. Mix it all up and tip it into the flour. After mixing it one more time divide the mixture into the cup cases.
4. Bake for about 25min until cupcakes are risen and golden (I am usually tempted to eat them at this stage… but don’t, you will enjoy it even more with the topping!)
5. So, whip the Elmlea cream. I recommend Elmlea, because it goes velvety (not grainy) and never turns yellow! I know this might sound like I am promoting this brand but it is really good. I give the credit for this discovery to my dear friend Jacqueline who suggested this as I was not happy with double cream I was always using.
6. Pipe (or spoon) the double cream on the top of the cupcakes and follow it by toffee swirl.

Enjoy ;)

Rasa

1

Another bake sale, but not any less important!

 Well…. for those who missed my previous bake sale, not to worry… here comes another one! I am expecting it to be bigger, better, sweeter … and so on. So please bring yourself here on 27th of August and no, I won’t be dancing ballet (just serving you with the mini bakes as always). Just that I used to like ballet when I was a child, but my mum send me to learn folk dancing instead :(… So I thought I will send my children to learn the ballet dancing… not any more after seeing Black Swan movie….
Anyway, I hope to see you soon:-)

Rasa

2

After my first bake sale….

I just wanted to give you all thanks to who was buying my bakes last Sunday! It was great success as it raised £112 for the LoveUkraine Mission… and that’s after deducting baking costs! Anyway.. here are the pics!

Rasa :)
3

My first bake sale!

There you go, my first bake sale! Please attend! I am really excited for this :D. I know that the prices are high, but this is only for a good cause and the money will go to support Love Ukraine mission 2011. The address is…..
Highway Church Building
88A Romford Road
Stratford
E15 4EH
So… be there on 7th of August at 3.30pm :)
Rasa xox
0

The Friendly Nettle Icon


Here it comes, The Friendly Nettle Icon (see picture above) which is practically me! My friend Vicki drew this in such detail that even the dress and the helmet represents the exact ones I have in reality. And yes I cycle as well and my bike is lookalike to the one drawn!
Thanks Vicki, as a thanks here is the recipe for the chocolate mousse that you always wanted! I have developed this recipe after once eating a nice chocolate mousse tartlet  at Hurwundeki cafe that is located next to Cambridge Heath station in East London (I love their arty antique look and I just found out that they also have a boutique and the hairdressers!). As for the recipe below I usually use pastry to hold the mousse, but since Vicki doesn’t like it I wasn’t dear to add it (she says that pastry is the pointlessly added extra calories). So if you want to use a pastry use a sweet one or use the ramekins (I reused “Gü Puds”, which just show how much I used to be addicted to those desserts as I have sooo many of these little glass ramekins). So here it comes…

VICKI’S FAVOURITE CHOCOLATE MOUSSE

Ingredients: 150g dark chocolate (70% cocoa content)

100g unsalted butter
1 egg
30g caster sugar
1 handful of raspberries (or other berries)

1 Preheat oven to 170C
2. Put both chocolate (broken into pieces) and the butter in a bowl set over a pan of simmering water, making sure the water doesn’t touch the base of the bowl. Leave it there until everything there are melted.
3. Whisk the egg and caster sugar together until pale and thick and increased in volume. Pour the warm melted chocolate and butter into the whisked mixture and and combine it well.
4. Spoon the mixture into the ramekins (or into pastry if you prefer) and bake them for 8min EXACTLY! (In fact once I forgot to bake it and me with my friends kept guessing why the butter have set on the top…. only later it got to me that I did not even baked it… it was quite embarrassing to admit that to my friends while we were eating it!)
5. Put the pots in the fridge for at least two hours (after cooling it down of course as apparently it would hurt the fridge)

Enjoy!

Rasa :)

2

How "The Friendly Nettle" become "The Friendly Nettle Limited"

Today I thought to myself what is stopping me to register as a company… until I made a decision to actually do it! My friend Jacqueline now running a catering business told me that even if I am not trading at this moment I can still register and form a limited company (apparently she had registered limited company for 2 years until she started trading). After filling quick form and paying small fee (it can be as cheap as £5) I have been notified that my company will be formed within 3 hours (I had to check if it said 3hours not three days). However “The Friendly Nettle” turned to “The Friendly Nettle Limited” even quicker as I have received confirmation in 30min! This was the easiest think I have ever done, I think that even child could have done it! The only think I could not understand properly is when I was adding myself as a company Director it told me to assign at least one share to myself. So I did assign one share to myself worth £1…. Can anyone tell me what this was about? I hope I did not make huge mistake and by the time I do understand what it was I can still change it.

Rasa xox

0

The food safety comes first!

I mentioned in my previous post that I will talk more about the other courses I took. Well.. here it goes! As boring as it sounds I did find food safety really interesting as well as challenging. I think if you are hygiene freak please don’t read the rest… And the rest of us who are ok to eat out of date foods sometimes (if they look ok of course!!) and like to taste food with their fingers, welcome to my world ;). Because those are the biggest challenges to me! I remember eating dried mango one day at my work and after offering it to my colleague Puiyi (she no longer works with me) I have been told off that I could have poison her when she realized that it was out of date :&… Well, it turns out that she might have been wrong as now I know (I hold a Certificate of Food Safety) that there are two types of food expiry dates: “use by” and “best by”. I will explain… “use by” is used mainly for meat and dairy and “use by” is for cereals, dried fruits and so many other things which are safe to use after the date, but the quality might not be as good. So if you reading this Puiyi, don’t worry about out of date food as you won’t always get a food poisoning. But if you are still not sure you can always use up many dried fruits or nuts that are about to go out of date by trowing it in the cakes dough like Chocolate Brownie or Carrot Cup Cakes…. Or if you feel more spontaneous or have lots of hope for the rest of this summer (weather wise) you can try to put it into home-made ice-cream… Hmm :b

VERY SPONTANEOUS ICE-CREAM
Ingredients: 5 egg yolks
200g sugar
250g milk (full fat)
250g double-cream
250g yogurt
2 medium sized bananas (mashed)
seeds and nuts of your choice (I used 1tbsp of poppy seeds and 1 tbsp of pistachio nuts)

1.First, prepare egg cream by mixing egg yolks with sugar and whisking until it becomes pale.
2.Put double cream and milk together into the sauce-pan and heat it up, but don’t let it to boil. Then reduce the heat and add egg yolk mixture into the pan. Cook it on the small heat (just in case as it is very important not to get it boiled as then you would get an omelet, not an ice-cream) and mix continuously until it becomes thick (about 10 min).
3. At this stage it is best to cool the mixture down by placing the pot in the cold water as when you get the right consistency it is best not to overcook it.
4. When the mixture have cooled you can add the rest of the ingredients like yogurt, mashed bananas, seeds and nuts. Pour the mixture into the plastic container and put it into freezer.
5. After two hours scrape off the sides of the container and mix it with the fork. Repeat this after three hours and after that you can let it stay there until it is completely frozen or the time when you want to have a cool sweet treat.

Enjoy!

Rasa :)

0

Just few updates so far…

I know I have not written here for quite a while.  This is not that I have changed my mind about my dreams… Well, I usually get carried away during summer anyway. And even though the weather wasn’t so good as I expected I still feel super happy when I receive the smallest amount of sunshine :)

So… I will begin with the updates so far what happened in these two months. I have taken some bread baking classes of course as I got to the point where I needed somebody to show where I am going wrong (believe me the books withheld some truths about bread-making,  like never add any more flour to the dough even if you tempted to stop the dough sticking!). My favorite so far is the semi sourdough one that comes out sooo soft and it taste nothing like the bread you buy in the shops! Since my baking tutor Maria have shared the link for this bread, I have never bought ready baked bread from the shop…

The other courses I took was mainly about taxes as well as about food safety. But I will share more about this on my next post….

Goodbye for now ;)

Rasa

0

My bumpy ride on learning how to bake the perfect bread…..

As I my plans to open a Cafe becoming more and more real I have started thinking about the menu. So I thought to myself: “what Cafe is without sandwiches and what sandwiches are without nice bread?”. At that time I have decided to learn how to bake the bread. Yes, I can bake cakes, but to bake bread is the whole new game. The only bread baking I have done in the past is by bread making machine. Should this count? I actually don’t like machine bread anymore as it always comes out square shaped and taste like any other bread. I like the rustic look and that’s what I want to achieve with my sandwiches as well.  So firstly I checked out few courses and I did find them super expensive (this is probably why I have no formal training on cooking or baking). However I came across this blog where the blogger (Maria) offers courses at her own house and that’s definitely cheaper! Anyhow I have bought loads of book for bread baking as I could not wait for my next lesson. As I really got bored with basic bread (probably because of the baking machine I have) I went for this Hungarian potato bread recipe (picture above). Sounds amazing, but sooo messy. You see, the dough was so sticky that I kept adding flour which did not help much. Also, I started in the evening and I did not realize that this would take me 4 hours! I thought I would leave it to rise (from yeast) overnight, but then the book warned that it may over-rise if I leave it for more than two hours so I got stuck with it for a night (I kept alarm clock so I could wake up to do another step for the bread cycle). I also got really sick as I have this really bad habit to taste everything I cook or bake so I did the same with the bread dough (I know, I know really bad, but I have done it with the cake dough and I was fine). And they say that it is unhealthy to eat warm bread, but this must have been worst! Eventually I got the result, which was not too bad, only that the crust was super thick and a little bit burned. Never mind I will get it improved! It is only my first time and nobody can judge me for the bumpy start! Therefore I am not giving away the recipe until I am super confident about it. For now I will give a recipe for the sandwich that I made with that bread. I must say I have enjoyed and was proudly eating during the lunch time. It was so good that I forgot to eat my soup that I usually eat with the sandwich!

PARMA HAM, FIG & MOZZARELLA SANDWICH
Ingredients: small bunch rocket salad
                    3 ripe figs (cut in quarters)
                    175g mozzarella cheese (thorn into pieces)

3 slices Parma ham (thorn into smaller pieces)
1tbsp honey
1tbsp lemon juice
fresh ground black pepper
butter for spreading
4-6 bread slices (or more, it all depends on how much of sandwich filler you put on one slice)

1. combine all the ingredients except the bread and butter
2. Butter the bread slices (very important as butter stops sandwich from becoming soggy)
3. Apply Sandwich filler!

The end ;)

Rasa

1

Busy busy lives!

As I mentioned in my previous posts I do like to read the “stylist” magazine occasionally (only if I can get hold of it!).  Well… I don’t read it inside out, but I quickly flick it through and sometimes I stop at the “work life” page (obviously after observing “gourmet-on-the-go” page). I don’t know why this attracts me, but I do look forward to it every time. This page is about woman’s diary (each time different woman with different occupation) who talks about her interesting job or business she has opened etc. I find especially intresting when they talk about business start ups and how they got successful…. and every time I read, I imagine that one day my picture (and my diary) will be displayed there. This is of course just a dream, but I always wanted to start my own business…
This time the article is about “CEO” Sarah Walter (picture above), but the other interesting ones to mention are about “the Flower Girl” Gemma Blaskey who opened a flower shop or Jennifer Irvine who launched dieting and convenience food service called “The Pure Package”. I find them all inspiring and when I read their diaries I imagine what my diary would look like when I open a Cafe…. However there is one thing I find common in all the diaries: they wake up at 5am-6pm and go to sleep at 11pm-12pm…. I know that starting own business is a lot of work and sometimes can mean no lunch break (ouch!), but I kind of feel a little envy when people can survive on 5-6 hours sleep! Can you imagine how much more I could get done if I had more hours in the day! I always plan to do a lot and often get disappointed when I don’t reach those goals (they are usually reaaally high! Or do I just spend too much time on day dreaming?). Never mind, but when I am depressed and when I have a sweet-tooth craving (it gets super strong when I am depressed!!!) I bake some carrot cup cakes. They are easy and quick to make and most of the times you don’t even need to step out of the house to buy some special ingredients. That’s because all the ingredients are very common and can be found at home without special planning. The other good thing about this recipe is that it is healthier than other carrot cakes. I say “healthier” because there is no cake that is healthy as sugar (which ever you use: brown or white) makes it bad for you. But at least these cup cakes have olive oil fat base which is safer to use as it does not release so much toxins when heated. I hope you like it :b

CARROT CUP CAKES (makes 12 cup cakes)

Ingredients: 3 medium size carrots (shredded)
150g cup brown sugar
2 eggs
120ml olive oil (you can try other types as long as it is not sunflower oil as the cakes with it taste like fried dinner!)
200g flour
55g or more nuts (in this case I used almonds and pecan nuts)
1tsp salt
1tsp cinnamon
1tsp baking powder

1. Very simple! Just mix all the ingredients together and divide them into cup cake cases. I used silicon cup cases therefore I did not need to use disposable paper cases (but you are welcome to use it if you want!)
2. Preheat the oven to the 170C and bake the cakes for around 30min until golden. Good way to check it is to stick toothpick inside and see if it comes out clean. If it comes out clean that means it is ready!
3. If you have extra time and willingness to satisfy your sweet-tooth properly then make a yogurt icing for the cup cakes. Mix 200g icing sugar  with 1tsp yogurt, 1/2tsp grated fresh lemon rind and 1/2tsp lemon juice. When the mixture is even (with no lumps) and the cup cakes are cooled then pour the icing over it.

Enjoy!

Rasa ;)

0

"Kaziuko Muge" (Little Casimir’s Fair)

Those of you who are Lithuanian (and maybe Polish or Russian or Latvian) might know what “Kaziuko Muge” is. For those of you who is not aware I will try to describe it. Well it is a Lithuanian fair where lots of people come together on the street and sell hand made stuff like jewelery, crafts, food and many other things. Others come just to buy (like me!). The fair is traditionally held on the Sunday nearest to St. Casimir’s Day, March 4, the day Saint Casimir died. I know I am writing about this now when it is almost April, but I have been lucky this year. I recently went to Lithuania for my mums birthday (11th of March) and realized that the Fair have been moved forward to 12th-13th of March. I got excited of course and grabbed a bunch of friends (including my mum) and made my way to the Laisves Aleja (Freedom Alley) where “Kaziuko Muge” takes place. You won’t believe how many things I bought! First I got attracted by two wooden angels that you can see above (I have a thing for angels ;)). I also found the earnings with red stones in the middle very pretty (red is one of my favorite colors) displayed bellow….
On top of this I bought 1kg of wool tread… Call me crazy, but I do love knitting! The only thing is that I can’t find time for this indulge :(. I got so many unfinished knitting projects! Once I was knitting gloves for my dad (birthday present) and I did not finish it, but I did write a card with a promise to finish…. Three years later he still  sometimes shows me the card with the promise (he uses that card as his book-marker) and the gloves are still not finished, but they are still somewhere and I still can promise that it will be completed!…. one day… :/
At the fair some elderly was selling a hand made soap and I always wanted to learn how to make my own soap, but until that happens I bought the whole lot… seven blocks :/…Well they did smell nice and looked all pretty like cakes….and I was too greedy to share it with my friend Vicki :(

And finally, I bought herbs. Most of them are wild flowers, weeds and things that grow unwanted everywhere. Well you know… nettle for instance :) I have never seen anybody sowing nettle seed, nettle just comes uninvited whether you want it or not.  But, before you get all angry with the nettle I have to say: nettle has good qualities! Like people, nettle is not perfect, but definitely wants to be friendly. Nettle tea fights coughs, tuberculosis and asthma; It also counters arthritis, rheumatism, tendonitis and other disorders of the muscles and joints; Nettle tea combats a variety of intestinal disorders; Nettle tea fights skin problems; Nettle tea fights allergies like eczema, and hay fever. And many many more things :)

Finally I would just like to say that “Kaziuko Muge” is lots of fun and is a must visit event when you are in Lithuania! And you can always negotiate prices there! Well that’s the part I find most fun! :)

Rasa
2