Once someone told me that when it comes to the wedding planning choose one thing that is most important to you, spend most of the money for that and make everything else work around it. This advice stuck in my head throughout my wedding planning! I guess majority of the brides would say that the most important wedding thing is a dress, but that wasn’t the case for me. I prioritised the venue (and caterers that sort of came with the venue), leaving the dress on the low budget.
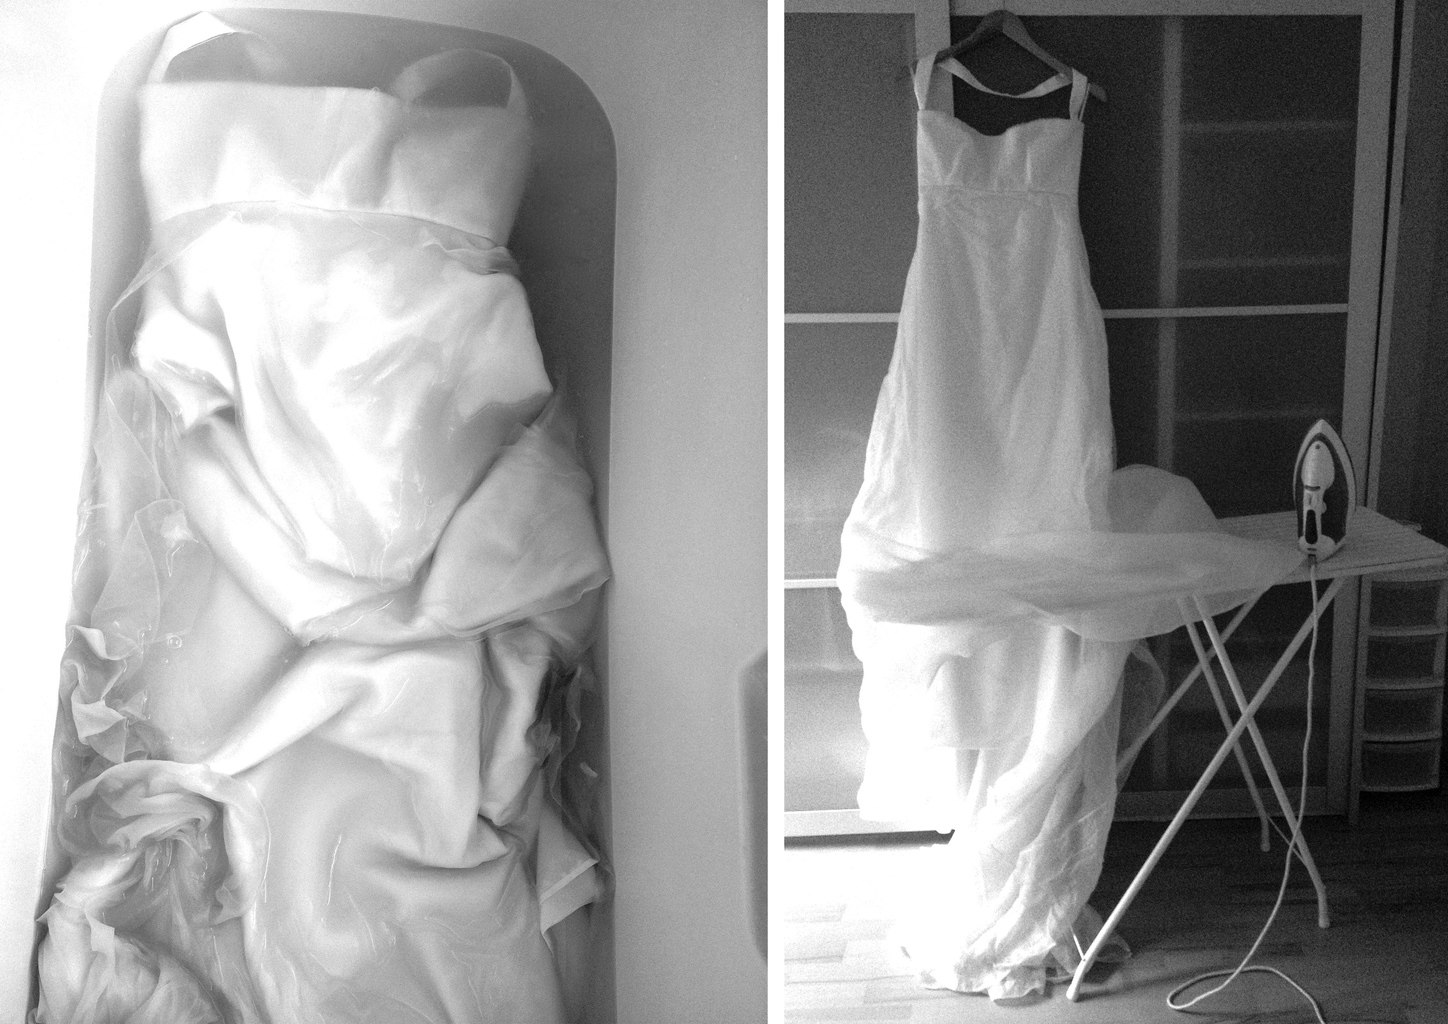
Initially I thought to make my own dress, but then I realised that this might stress me out as it would take more than one skilled person to help me. So then I have decided to alter an excising dress. I tried Nicola’s wedding dress and then some wedding dresses at the charity shop and hey…. I got lucky with one of them ;-). I paid £100 for slightly damaged dress that I knew how to fix. That was a good first spend from our wedding budget don’t you think? After that the dress stayed untouched for good few months as I was trying to slim down before altering it (I could not completely fit into the dress even if the size was bigger that my usual!). My slimming down wasn’t going well however :-(. At some point I have even though to replace the zip with the lace. Luckily my friend Vicki have managed to squeeze me in just on time. Another thing I dreamed about was adding some lace to the dress, however I needed someone who knew dressmaking to help me. As an alternative I thought I will just add some ribbon flowers, however that did not quite worked out either (read on, will tell later).
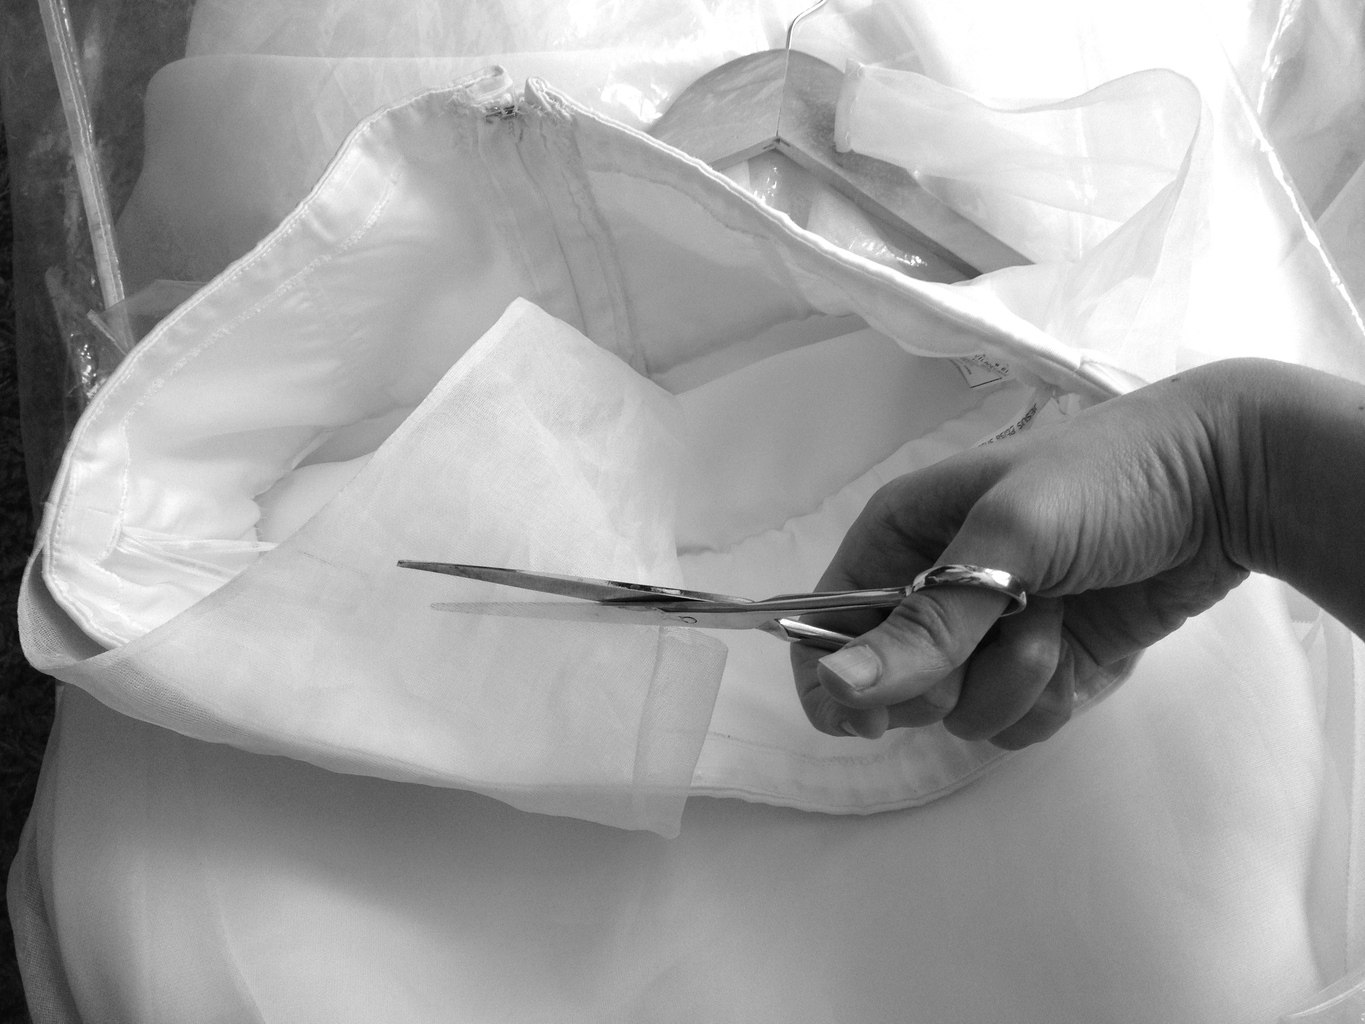
 As you can see, originally the dress had halter neck which I completely disliked. Yes, it looked unique, but I did not feel it was my style! So the first alteration I have made (after fixing a broken zip) was to cut them off and tuck them in over the “boobtube” edge.

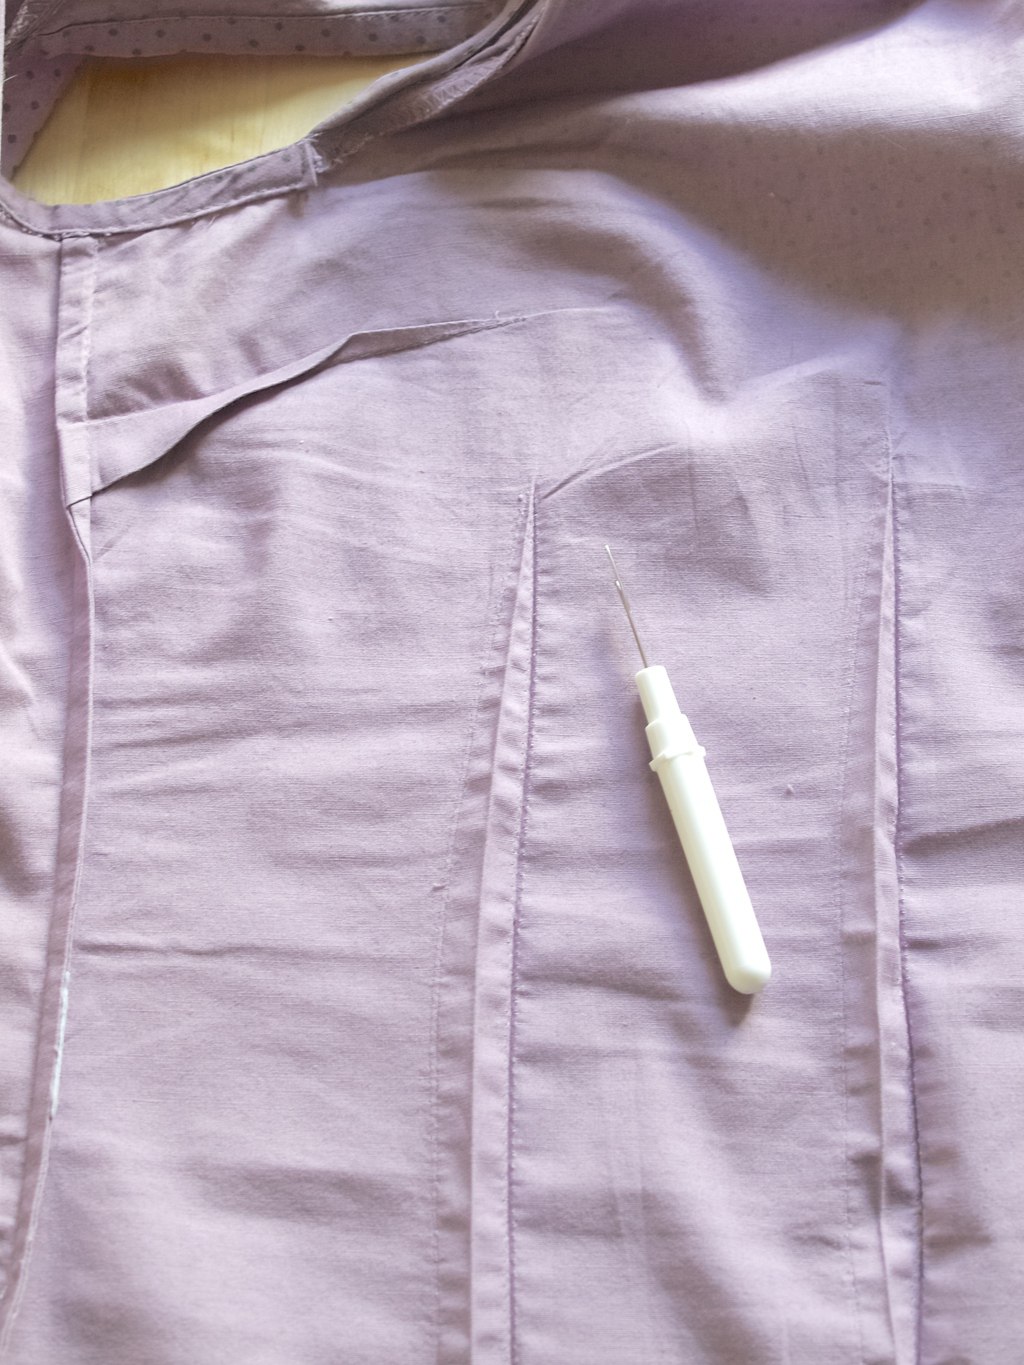
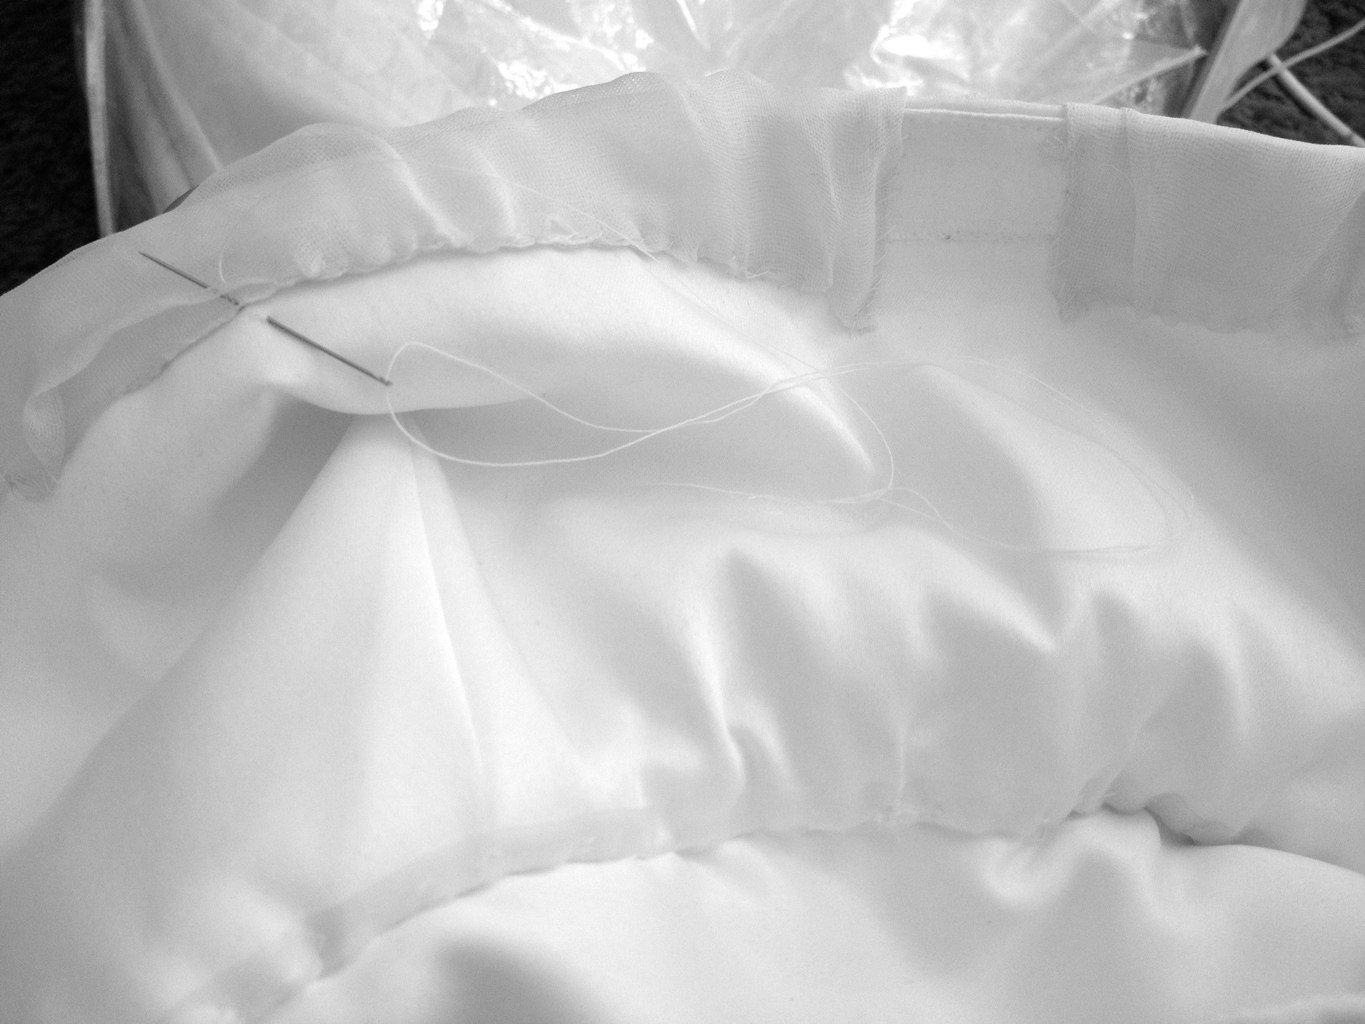
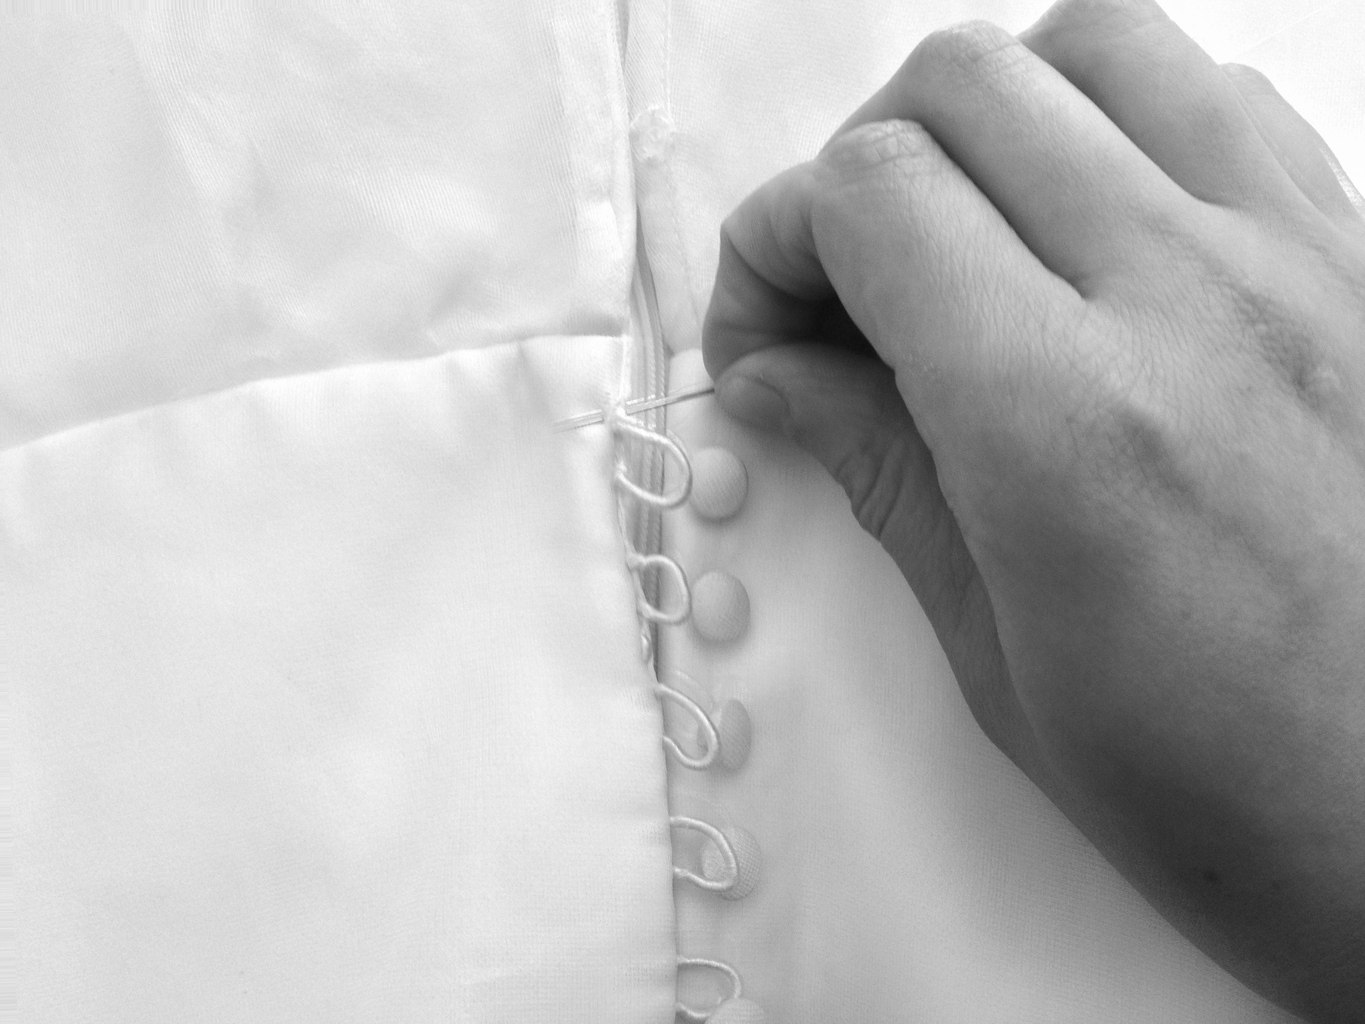
 Next, I fixed the obvious. The broken button loop has been stitched back and the trail connectors has been reinforced.
  With the halter neck off the dress seemed sitting very low exposing too much of my cleavage. I felt like I needed some straps to push the dress up. However I wasn’t keen on the straps so I was thinking to come back to my original idea to add some lace over the top….
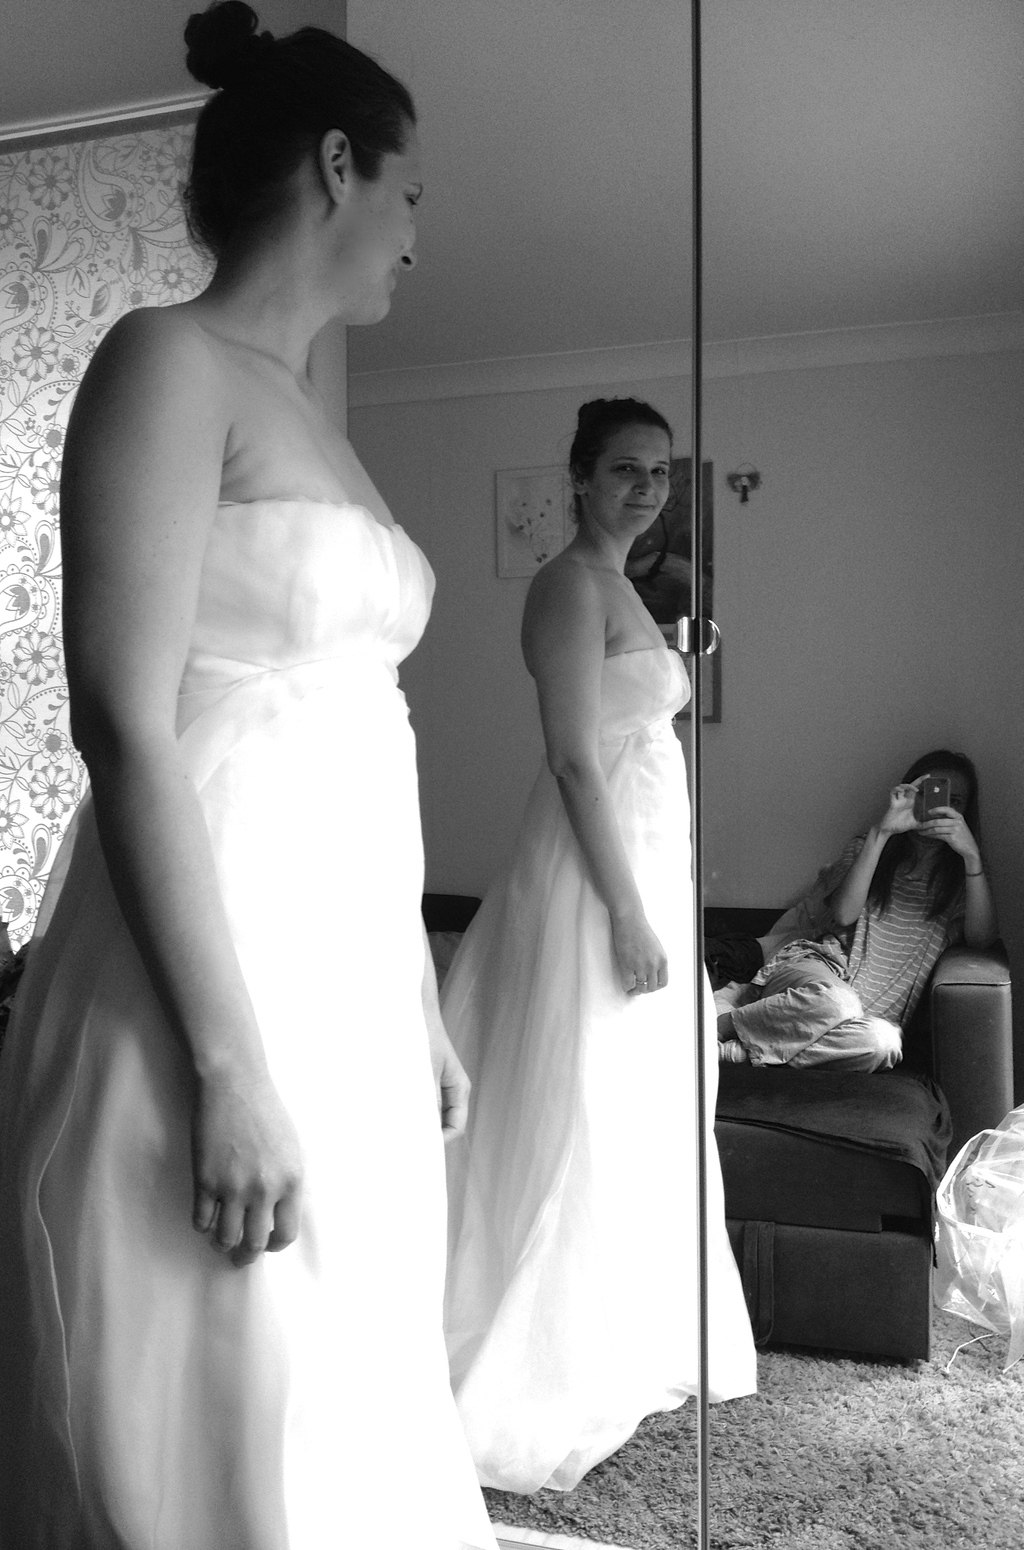
 The lace idea did not worked out, too difficult to do that by myself and I really did not want to get a mannequin just for this occasion. So making a long strap going over the neck made complete sense. I know I know this looks like another halter neck, but at least it suited my taste!
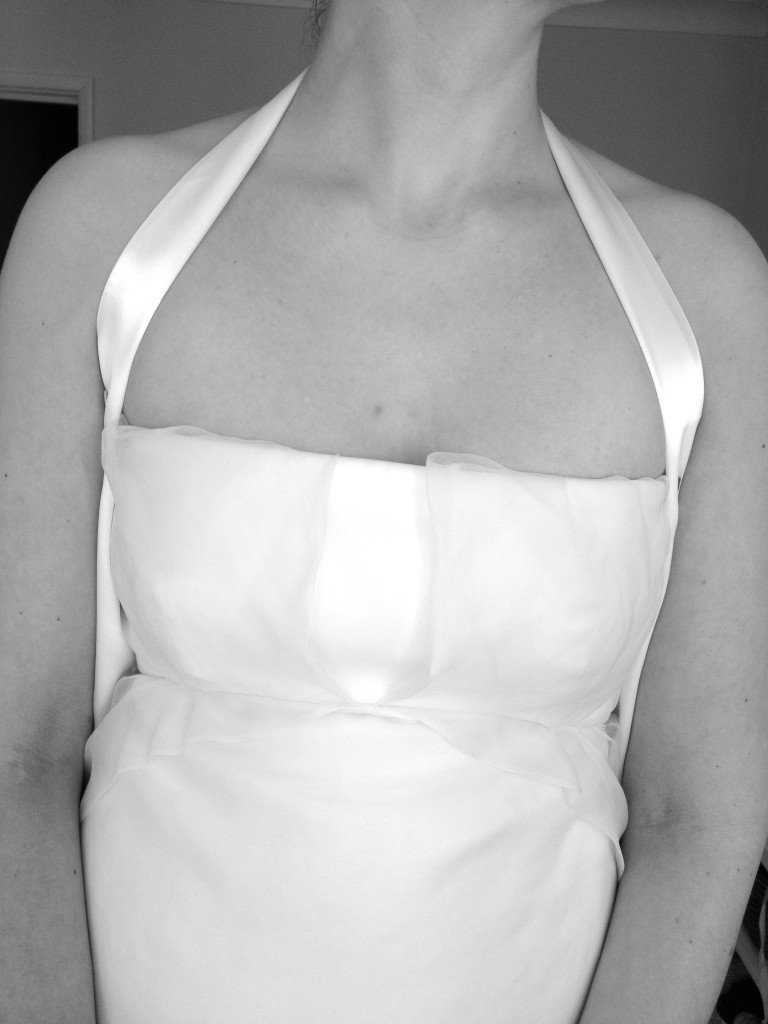 Next step was cleaning the dress. When I found out that to dry clean the dress would cost at least £70, I have decided to wash it myself. I have done quite a bit of research and realised that this is quite safe to do. What did I have to lose? my dress only costed a £100! So I gave my dress a little warm bath with some Ecover Delicate Laundry Liquid and it came out super clean. I would like to say it almost came out brilliant white, but it did’t as the dress was ivory. But if it was a white dress I am sure the bath would have turned it into brilliant white!
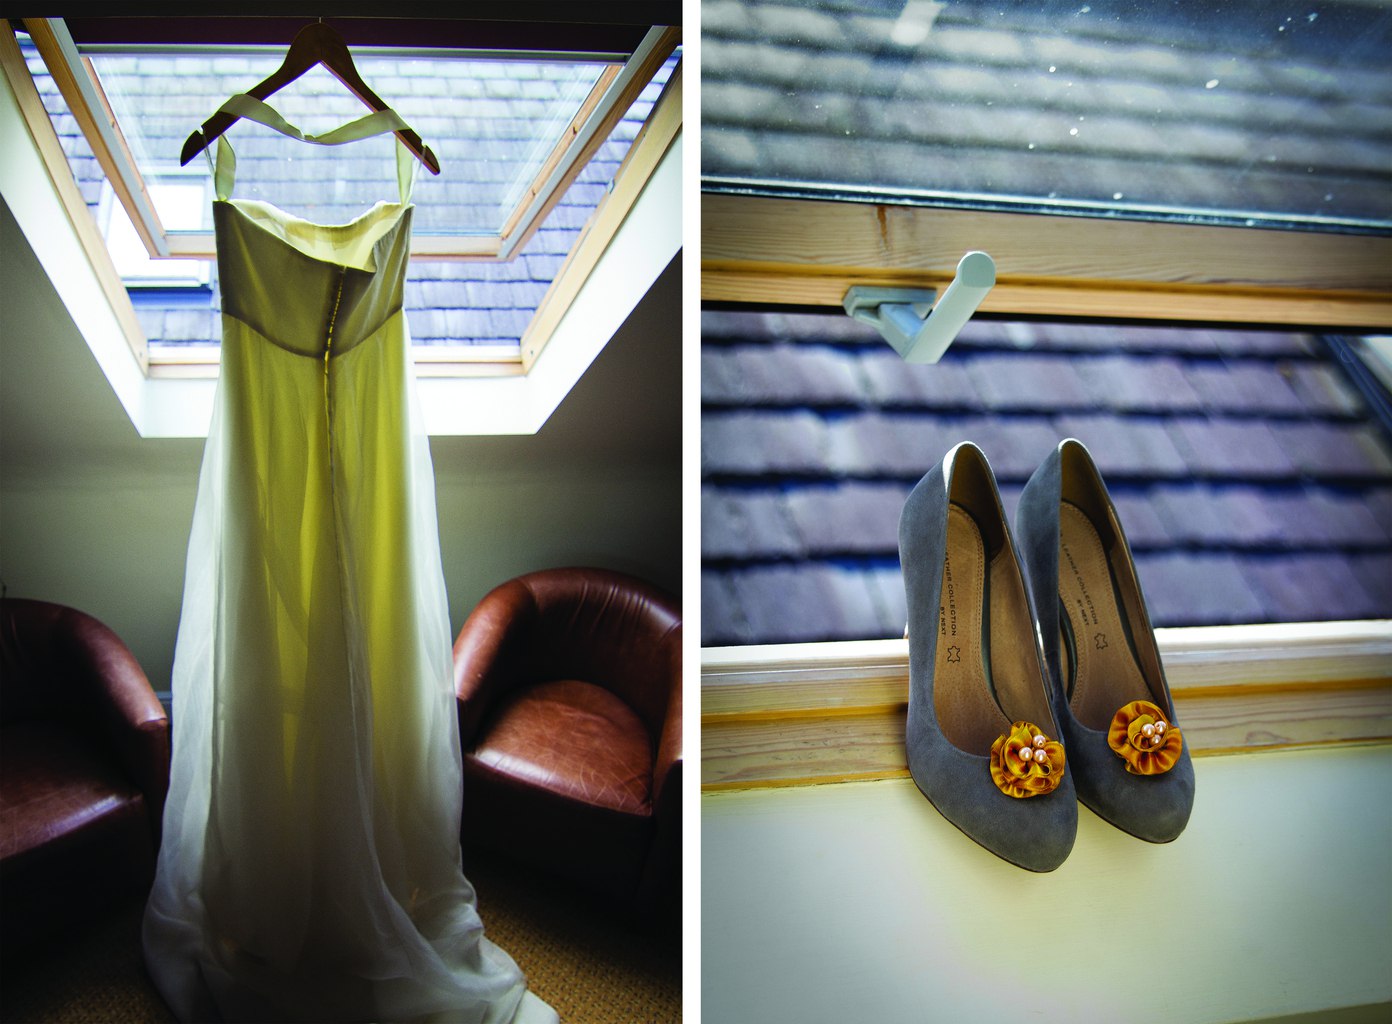
Getting rid of the creases was a tough task. Luckily it passed the iron test, so I steamed ironed the whole dress. It was still quite challenging as there were many layers to go through!!  As I mentioned at the beginning of this post I planned to decorate the dress with some ribbon flower brooches, however it did not look as I have imagined. So last minute decision was just to leave the dress plain. I did however decorated my wedding shoes with coloured ribbon flowers. That worked really well!
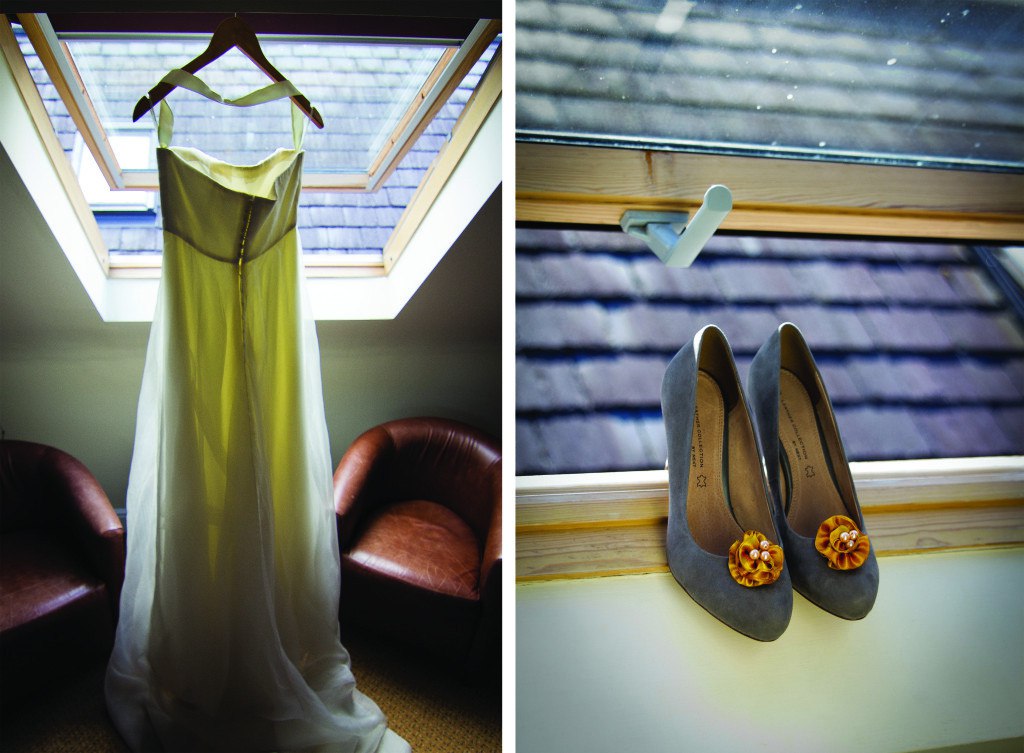
I hope you have been inspired ;-)
Rasa xoxo


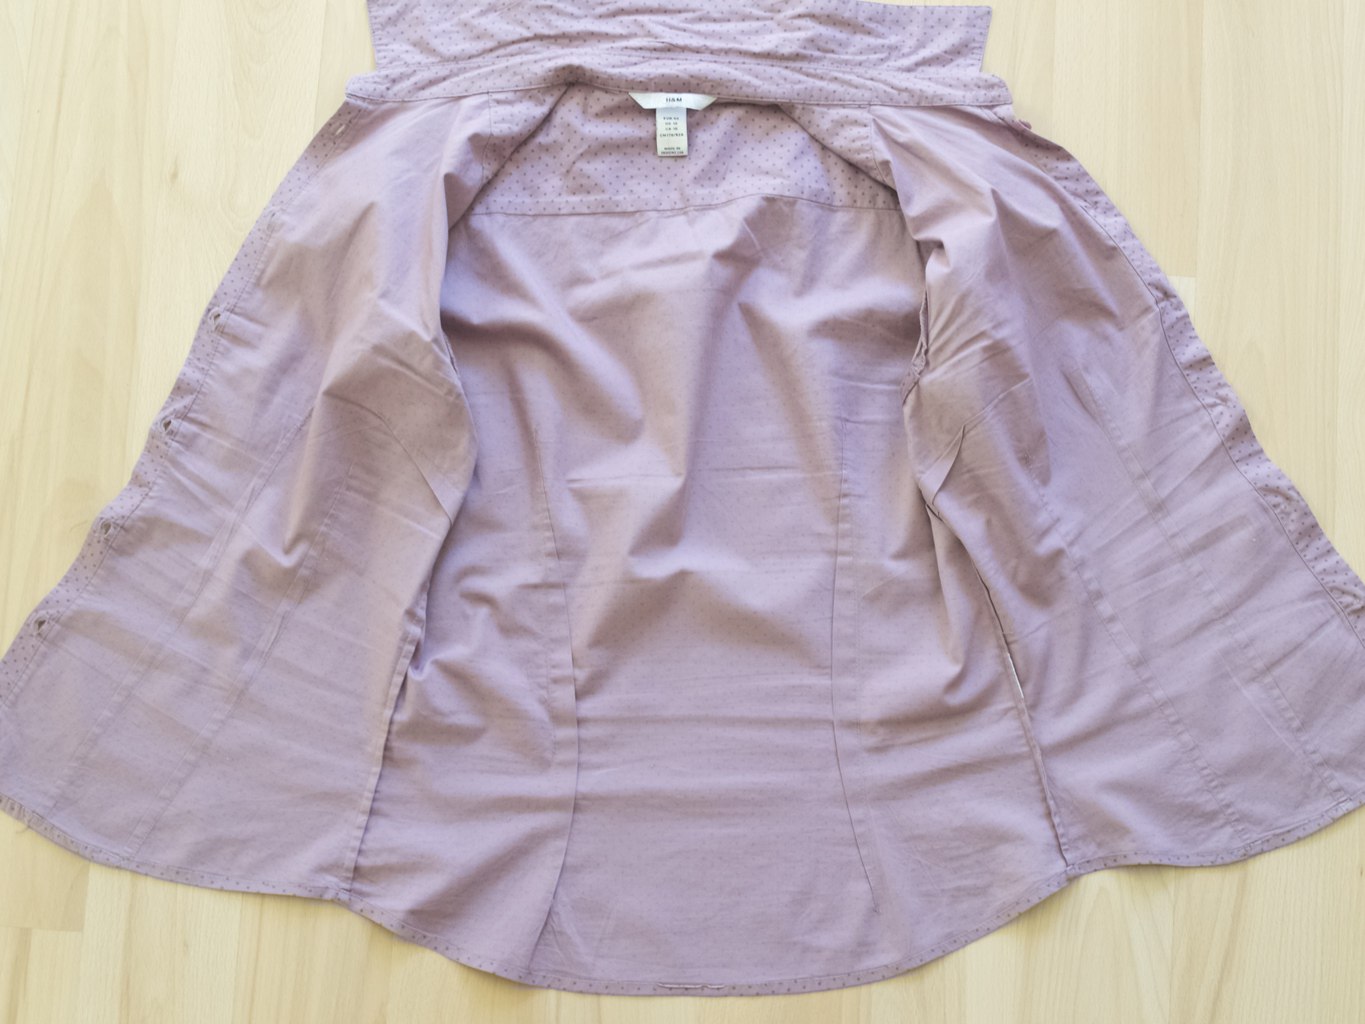
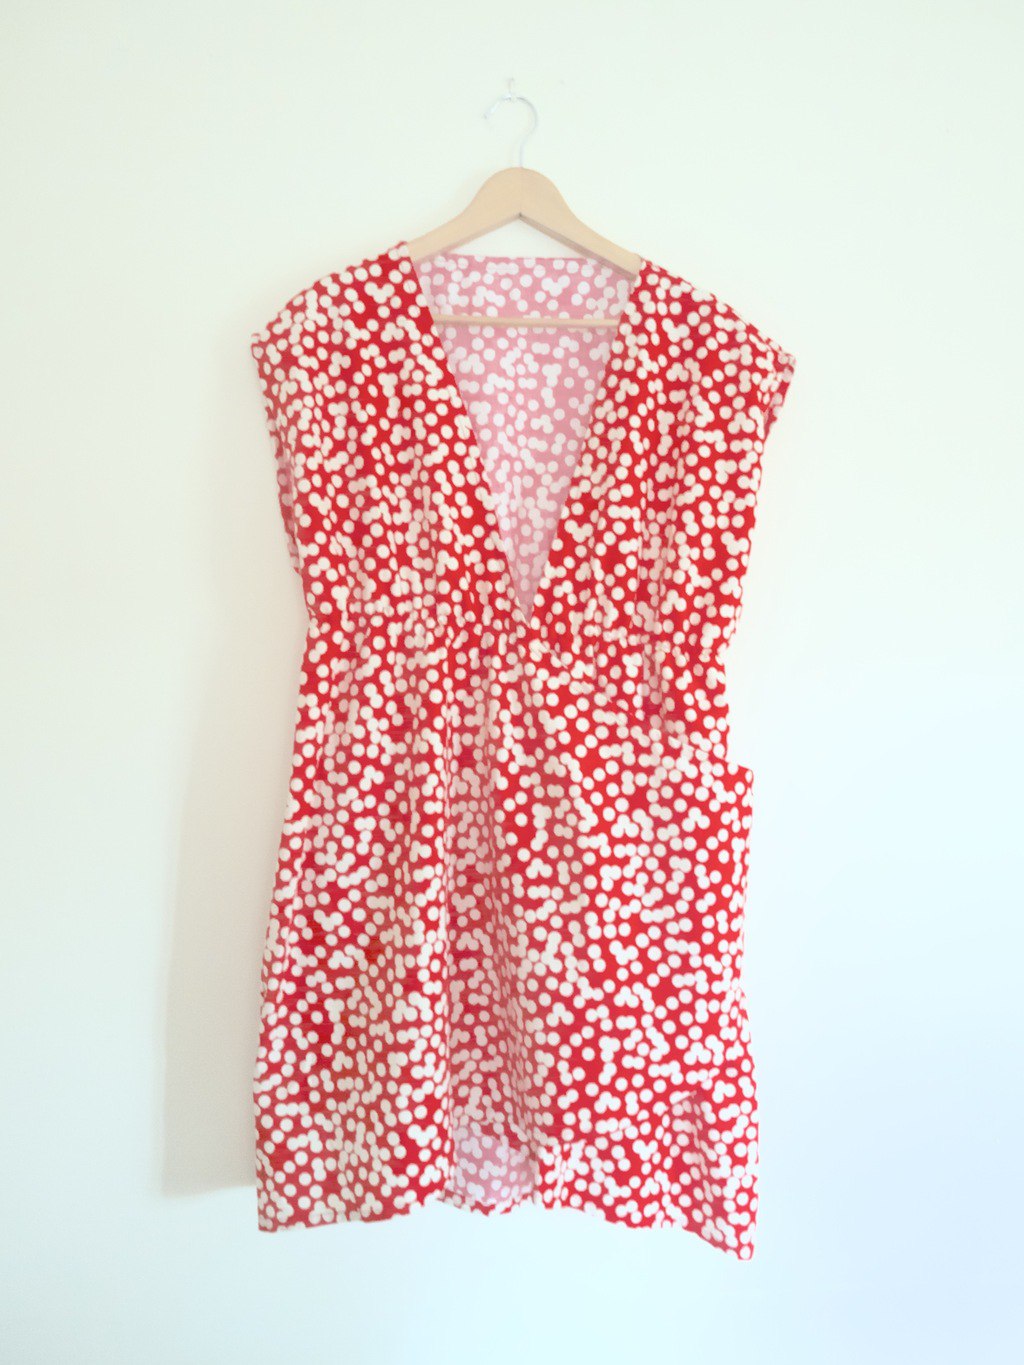 I wanted to update this wrap dress pattern for quite a while now and I wanted to complete it before the summer began. However due to my pregnancy, house buying and other unexpected events I was not able to finish it on time. But I was persistent and voila! I have the dress here! Not sure if the fitting is any better now to compare to the previous wrap dress.
 I would not call this pattern complete failure, just because it’s so difficult to judge the fitting of it when my body is so different because of pregnancy. The dress looks like a block on me :D. Anyways, I will leave it till next summer perhaps till I release this pattern (that is if it fits properly).
  Have a lovely weekend :-)