

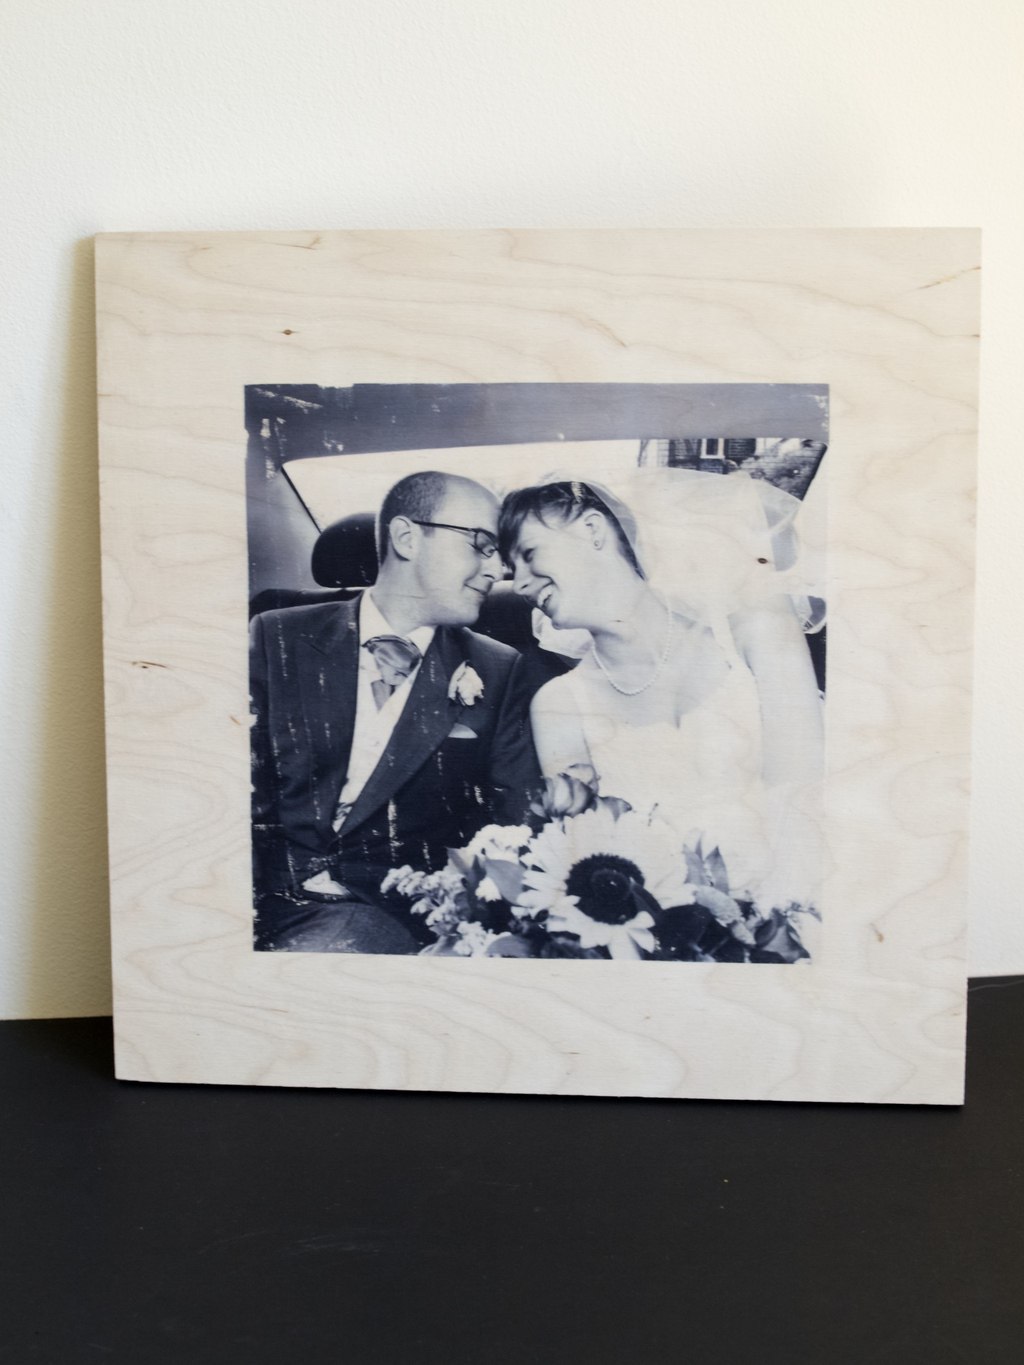
 When I have been asked for nicely printed wedding photo as a birthday gift I got really excited as I realised that I could try out different techniques on transfer printing. To begin with I thought I will transfer the wedding photo on canvas, but then realised printing on wood would be much more unique (well, kind off). I also got stuck with slight limitation. I have laser printer which means I could not use the ink from the printer like I would with ink jet printer. But there is always hope, even if that means buying extra products in the craft shop instead of using what is already available at home. So instead of extensive experiments I just did a bit of research on what products to use (only because I did not want to spend a massive amounts of money). Here is what products you can try when transfer printing:
PVA or Mod Podge. I heard that some people swear by it and apparently it works, especially with Mod Podge (which is I believe a fancy type of PVA). I went and bought Mod Podge only because it was available in matte finish unlike PVA basic glossy finish. However I ended up returning it after reading this helpful article.
Mod Podge image transfer (or any other brand image transfer). I have no idea where to get it, but here is the post where I have seen it used. The blogger there then used Matte Mod Podge as a finishing sealer.
Gel Medium. This is mainly used for mixing your acrylic paints with so larger areas can be painted more cost effectively. Unfortunately it often comes in huge pots, so if you only buying this for one off project it can be quite costly. They did not have gel medium in my local craft store which sort of worked out for the best! However gel medium can be used for finishing as well.
Acrylic Medium. Like gel medium it comes glossy or matte. It is also cheaper to compare to gel medium , but can’t be used for finishing the print.
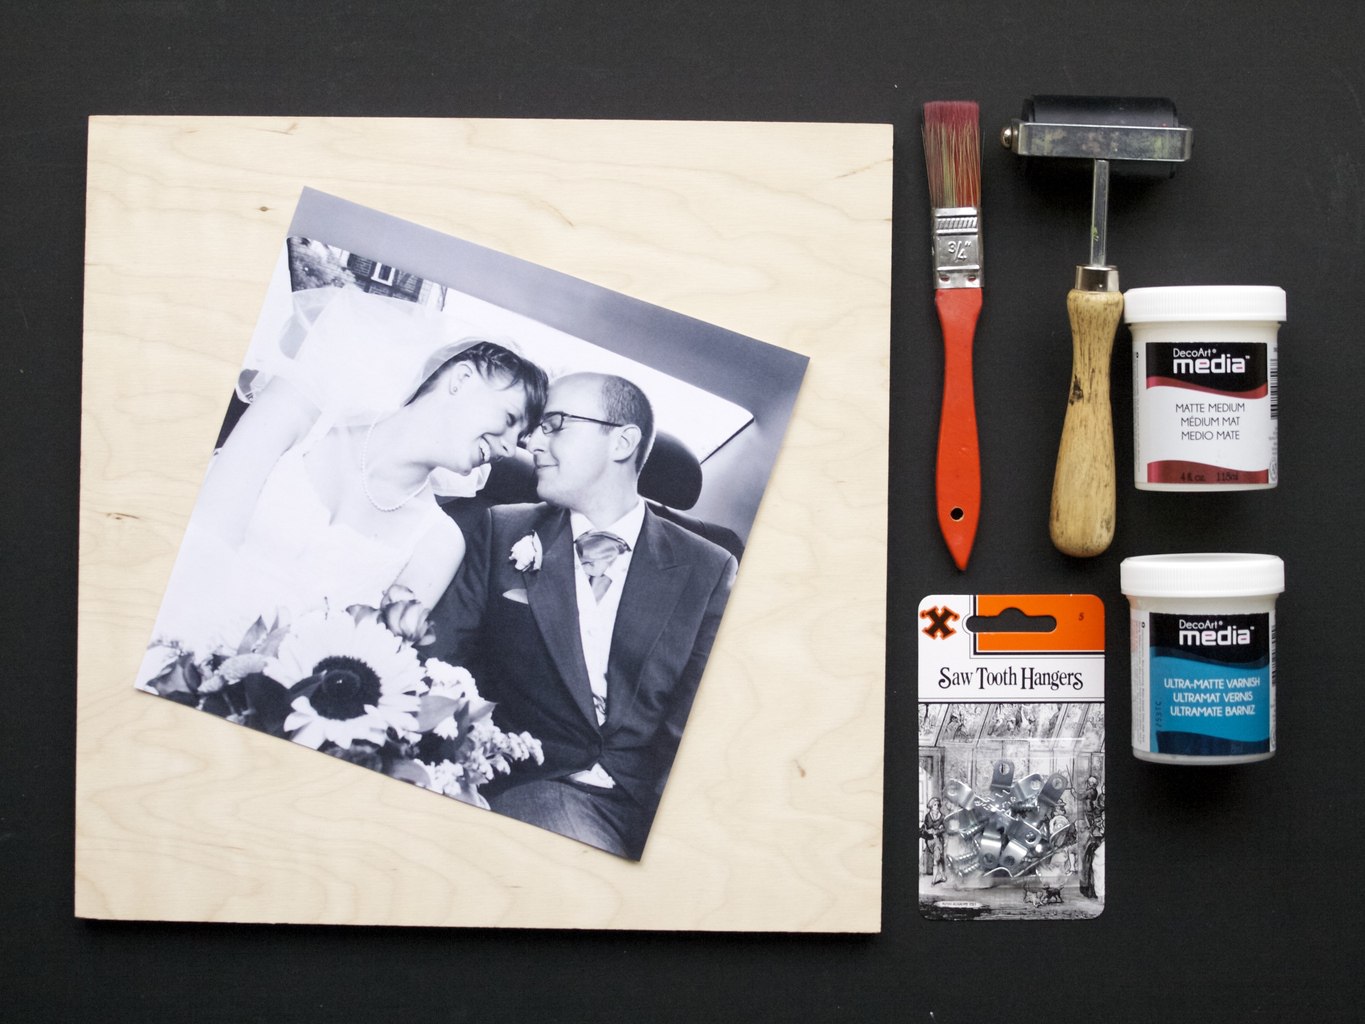
Here is what I used to make my image print:
- A block of plywood
- A laser printed picture, flipped horizontally on Photoshop (or any other image editing program)
- A paint brush
- A Roller
- Acrylic matte medium
- Matte varnish
- Saw tooth hangers (for picture hanging)
 I applied acrylic medium on top of the photo.
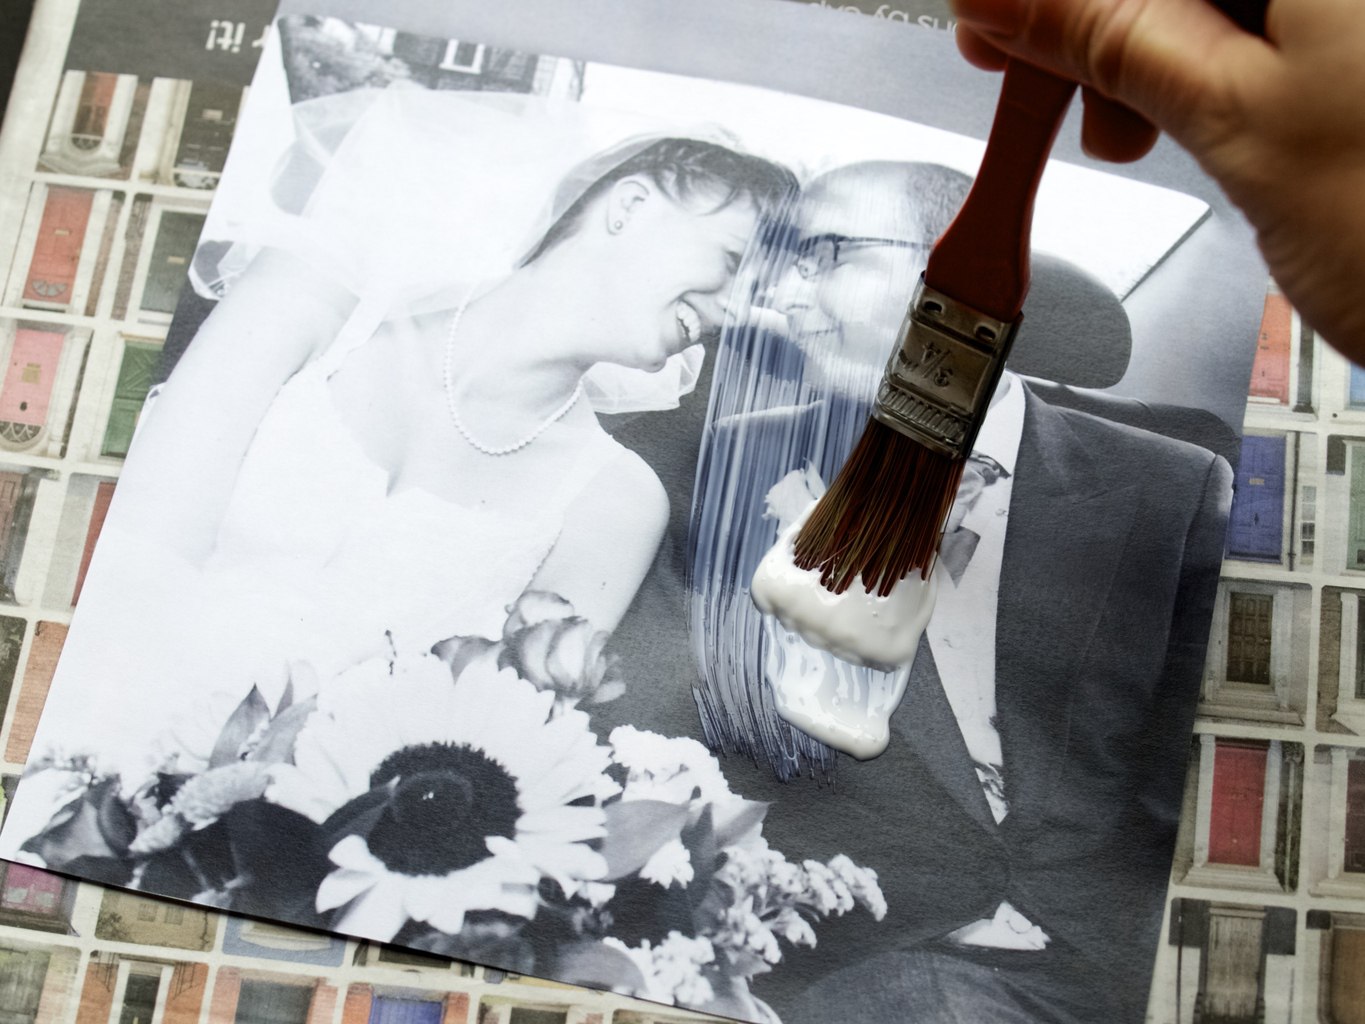 I used a roller to press the picture onto the wood. Make sure the bubbles trapped underneath get pushed out.
 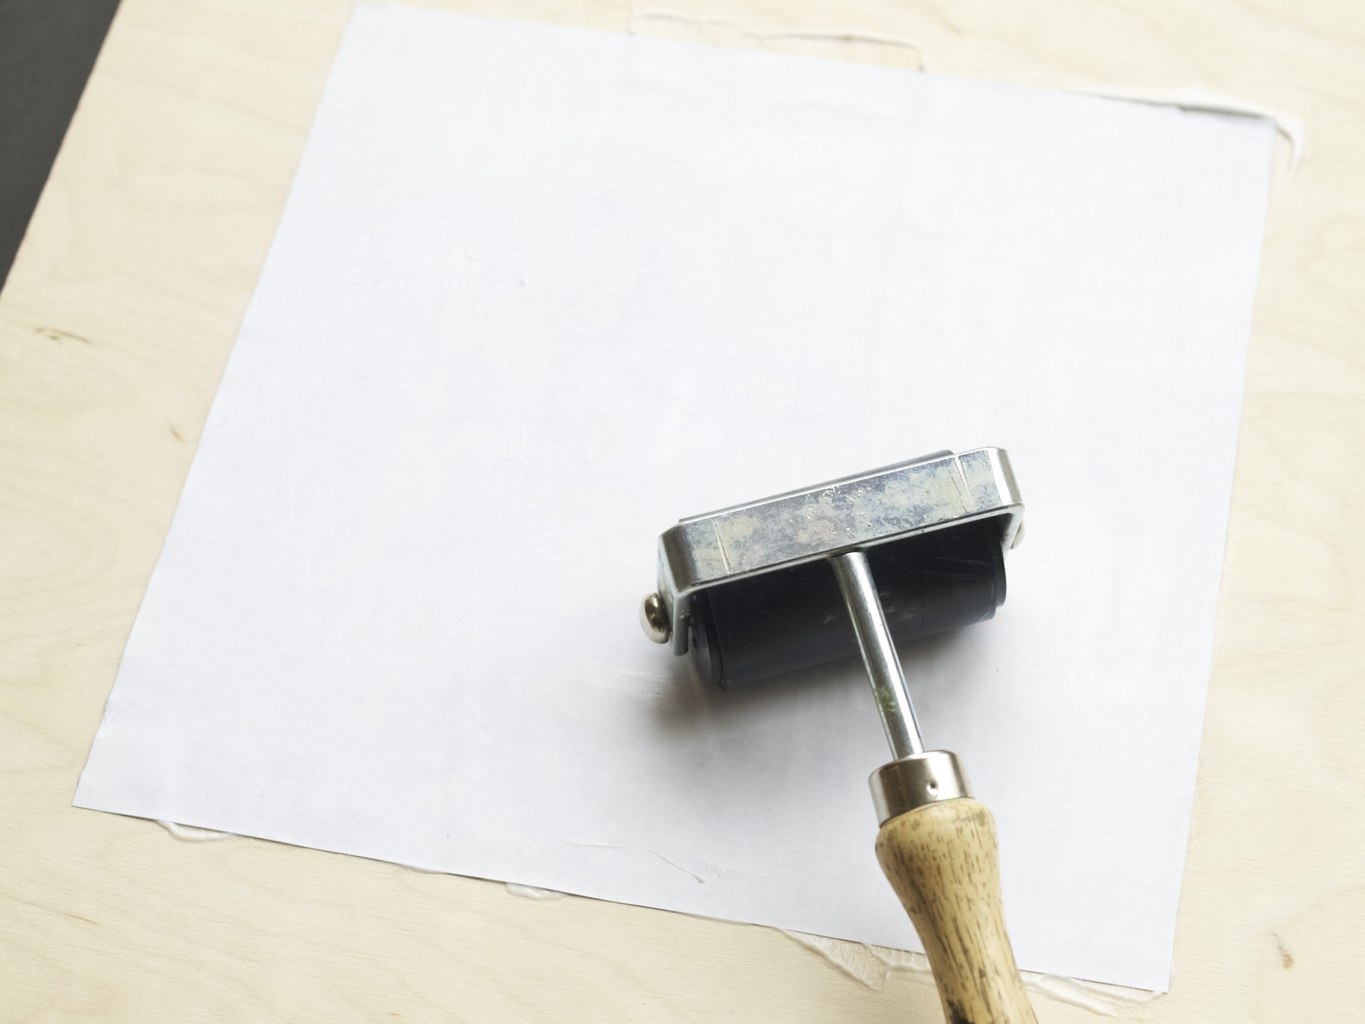 Once completely dry (after 8 hours or so) dampen the image and start rubbing the white layer off. Make sure don’t rub too much as the image itself can be easily rubbed off at this stage.
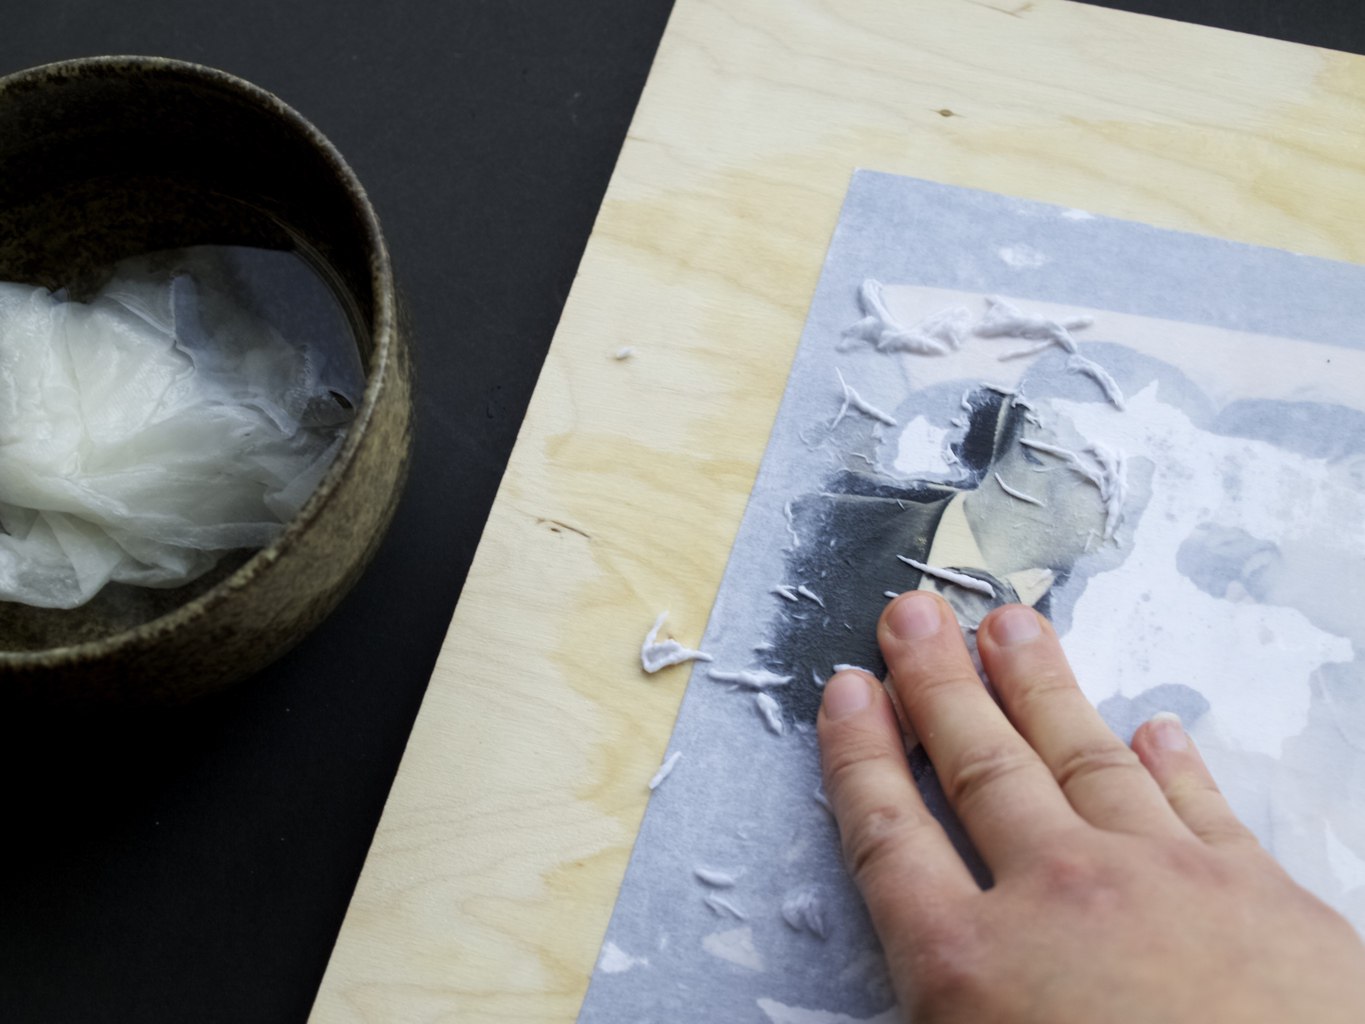 Let it dry before the next stage…
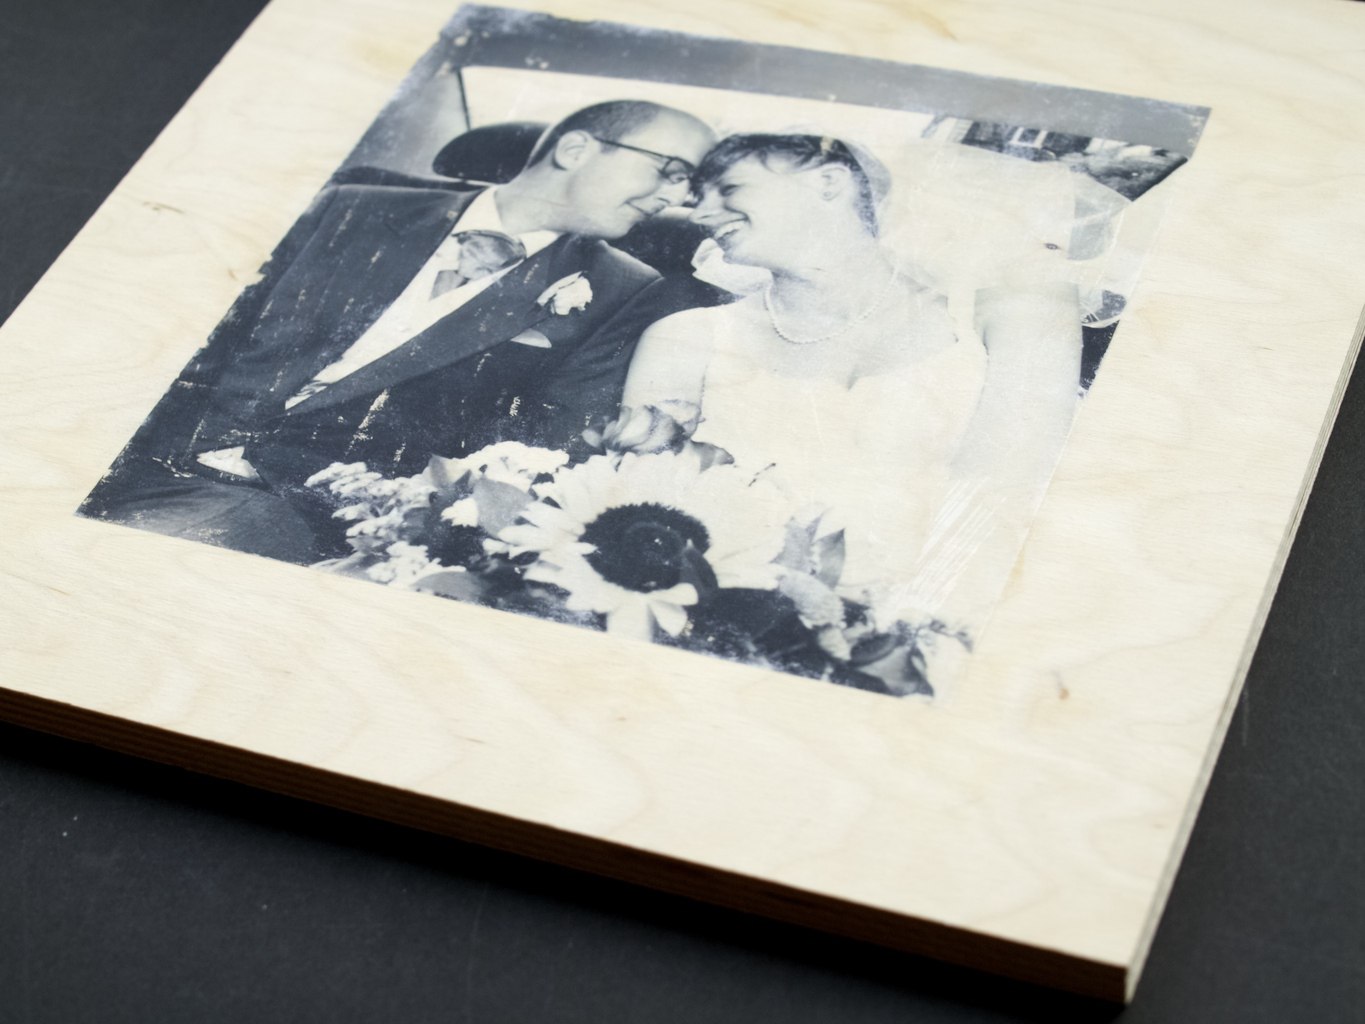 I applied matte varnish (acrylic type) on top. This stage fixes the image onto the wood (or any other surface) and remove all the white layer imperfections as well.
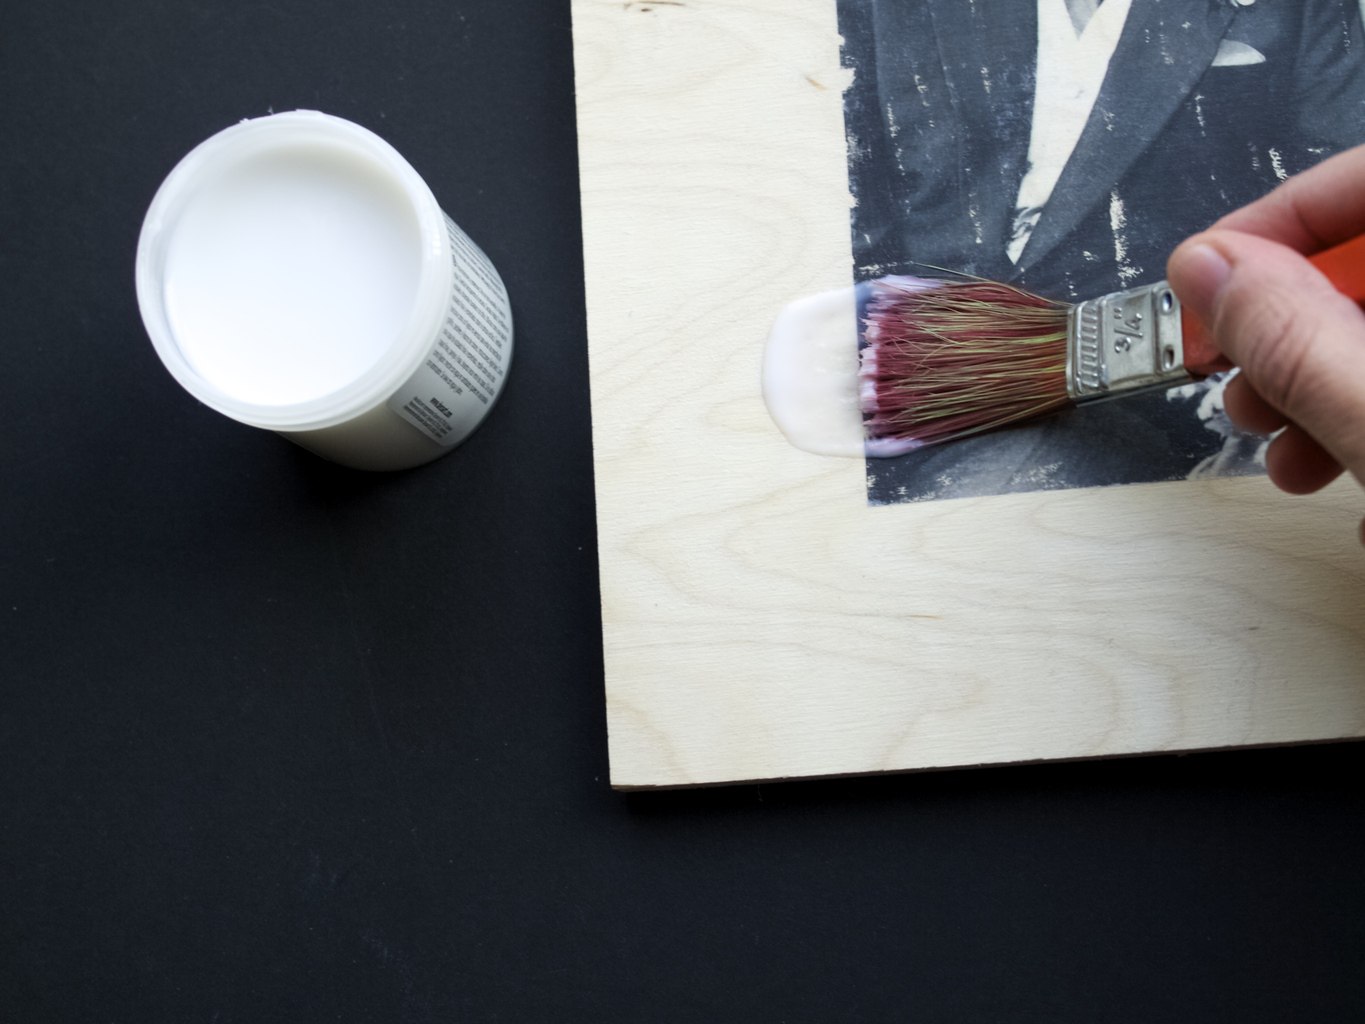 Apply the hanger onto the picture:
1. Measure and place the hanger in the centre. Use a pencil to mark the dots where the screws should go.
2. Make a hole with the nail (smaller then the screws) by hammering it in and then removing it with the other end of the hammer.
3. Screw the screws in to hold the hanger. Ta-da!
 I hope you found this inspiring :)
Rasa
No comments yet.