Top

Author Archive | Rasa Pelham

Baked Koldūnai (Lithuanian mince beef dumplings)

baked koldūnai

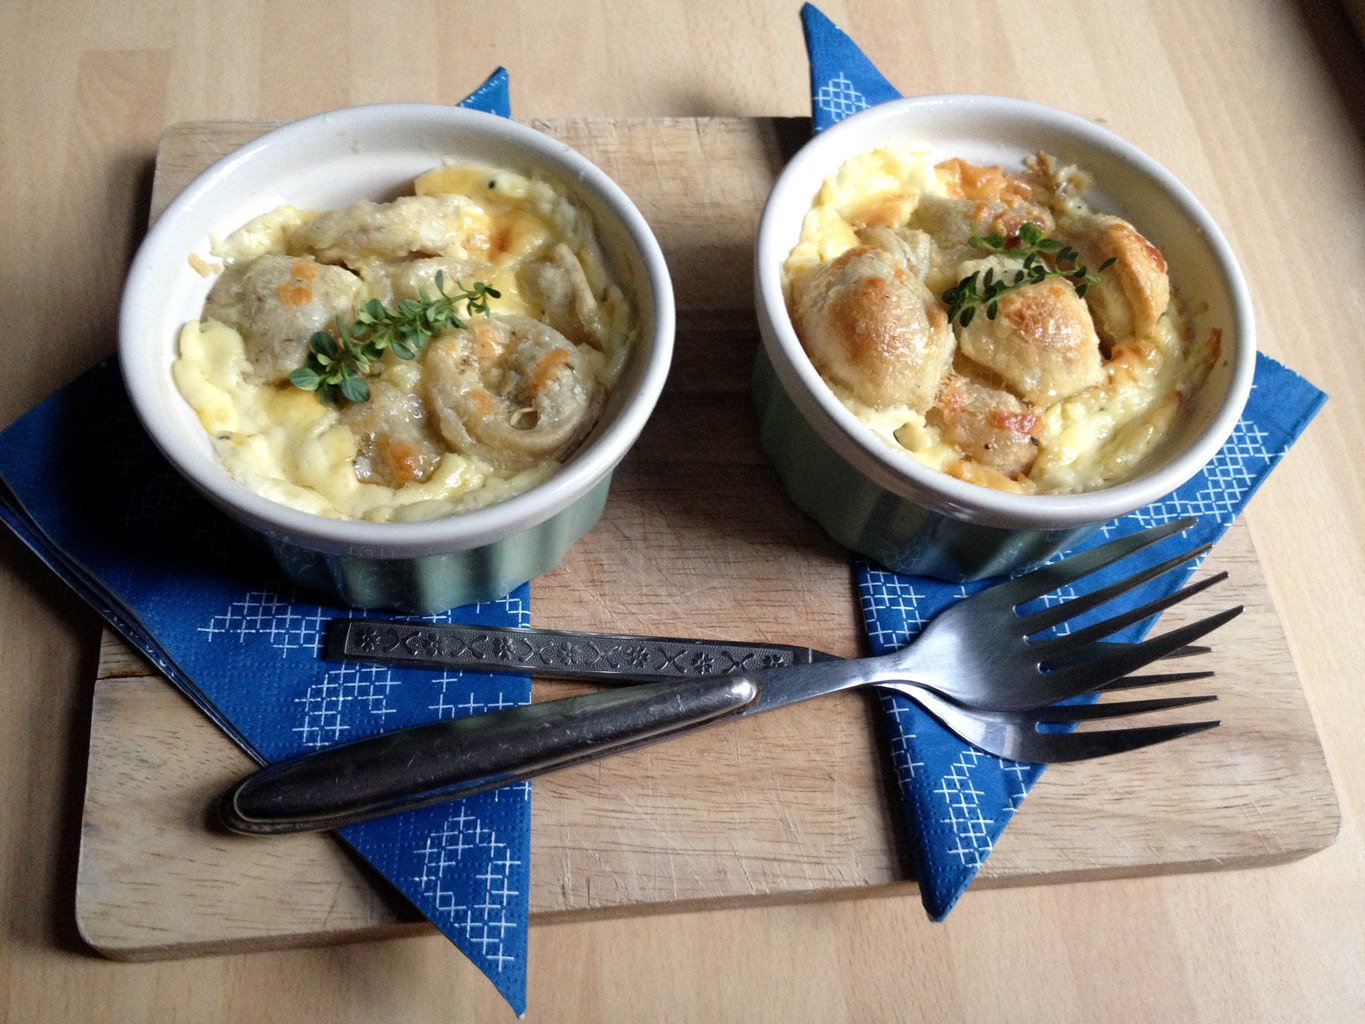
Baked koldūnai is a classical version of virtiniai and it taste even better when it is baked….hmm. The only thing is that when you see how much fat goes in it, that makes you go…. AaaAaa. But sometimes it is worth just to try it and enjoy it! I usually go to dance class when I feel I ate too much of rich food ;).

BAKED KOLDŪNAI

  • 250g plain flour
  • 1 egg
  • pinch of salt
  • 120ml water

(for the filling)

  • 300g mince beef
  • 200g lard (I used butter, grated)
  • 1 medium onion (shredded)
  • 2 tbsp stock (liquid)
  • 2 tsp sugar
  • 1 tsp herbes de provence
  • pepper and salt  as desired

(for sauce)

  • 100g cream
  • 50g parmesan cheese
  • pepper if desired

1. To make the dough mix all the ingredients together and knead to combine. Set it aside to rest for at least 30min.

2. Meanwhile make the filling by combining all the ingredients that goes in it.

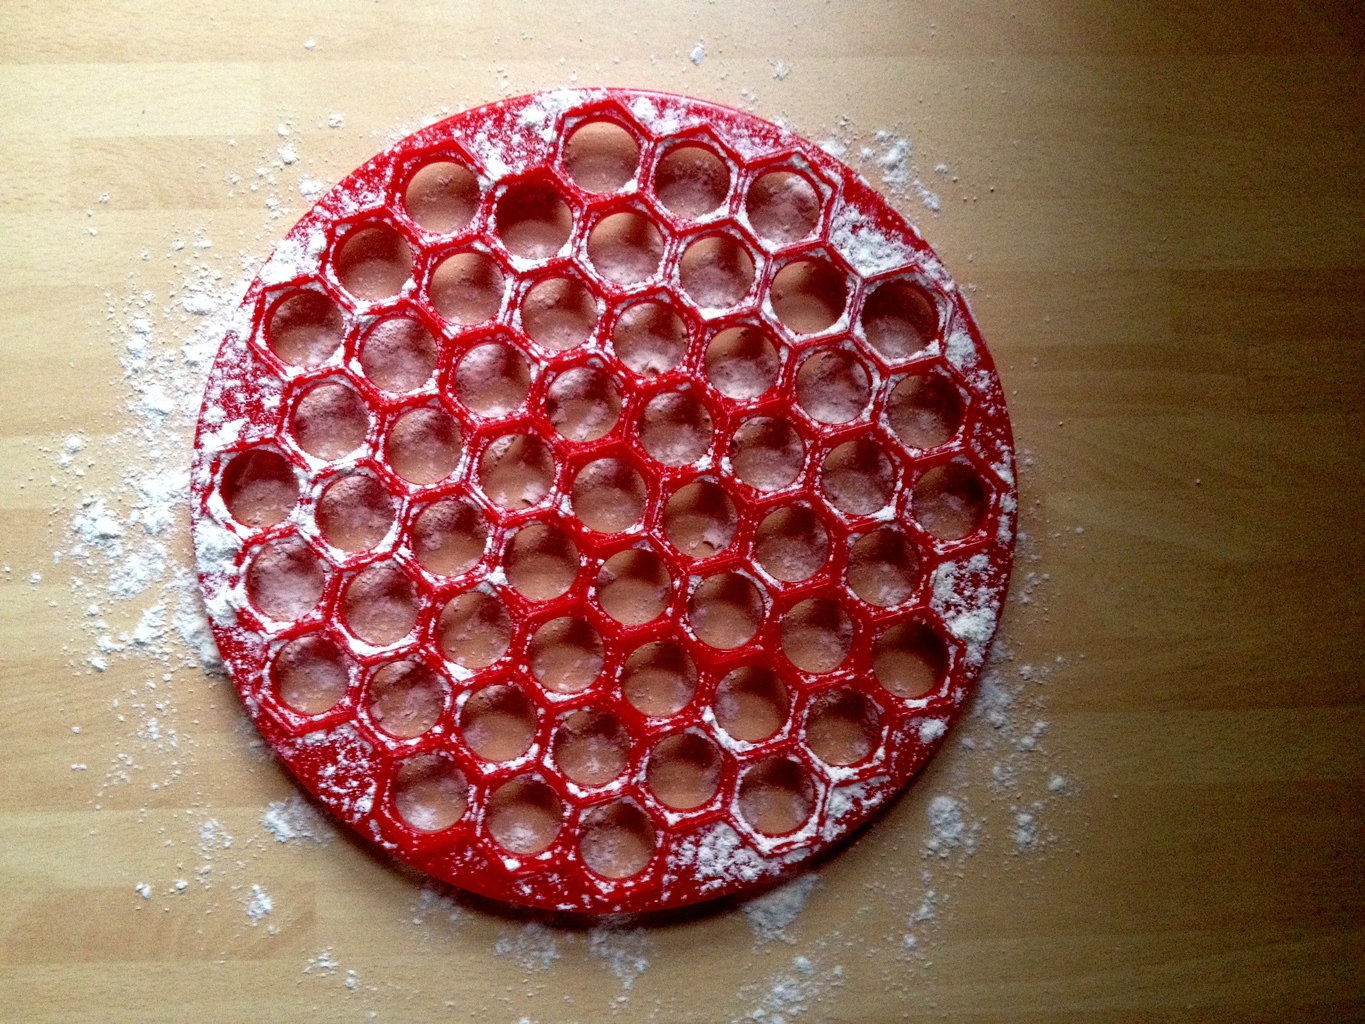
3. Dust the ravioli/dumpling mold maker with flour, before making the dumplings. If you don’t have ravioli/dumpling maker, then check out this alternative method.

dust ravioli/dumpling mold with flour

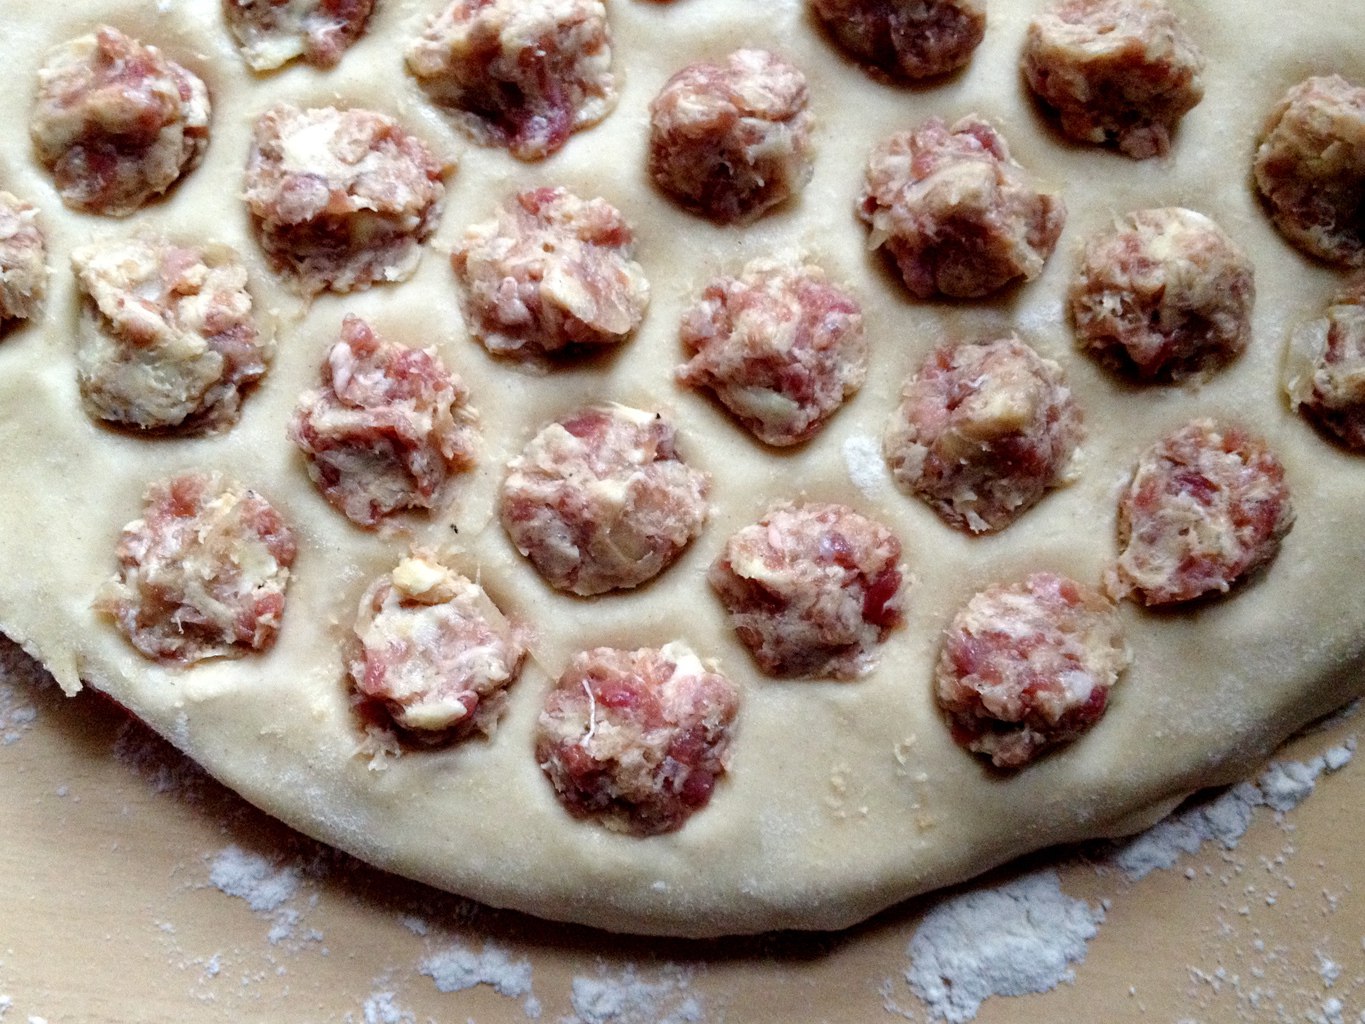
4. Roll the dough and cover the mold with half of it. Fill each “cell” with the filling.

beef filling

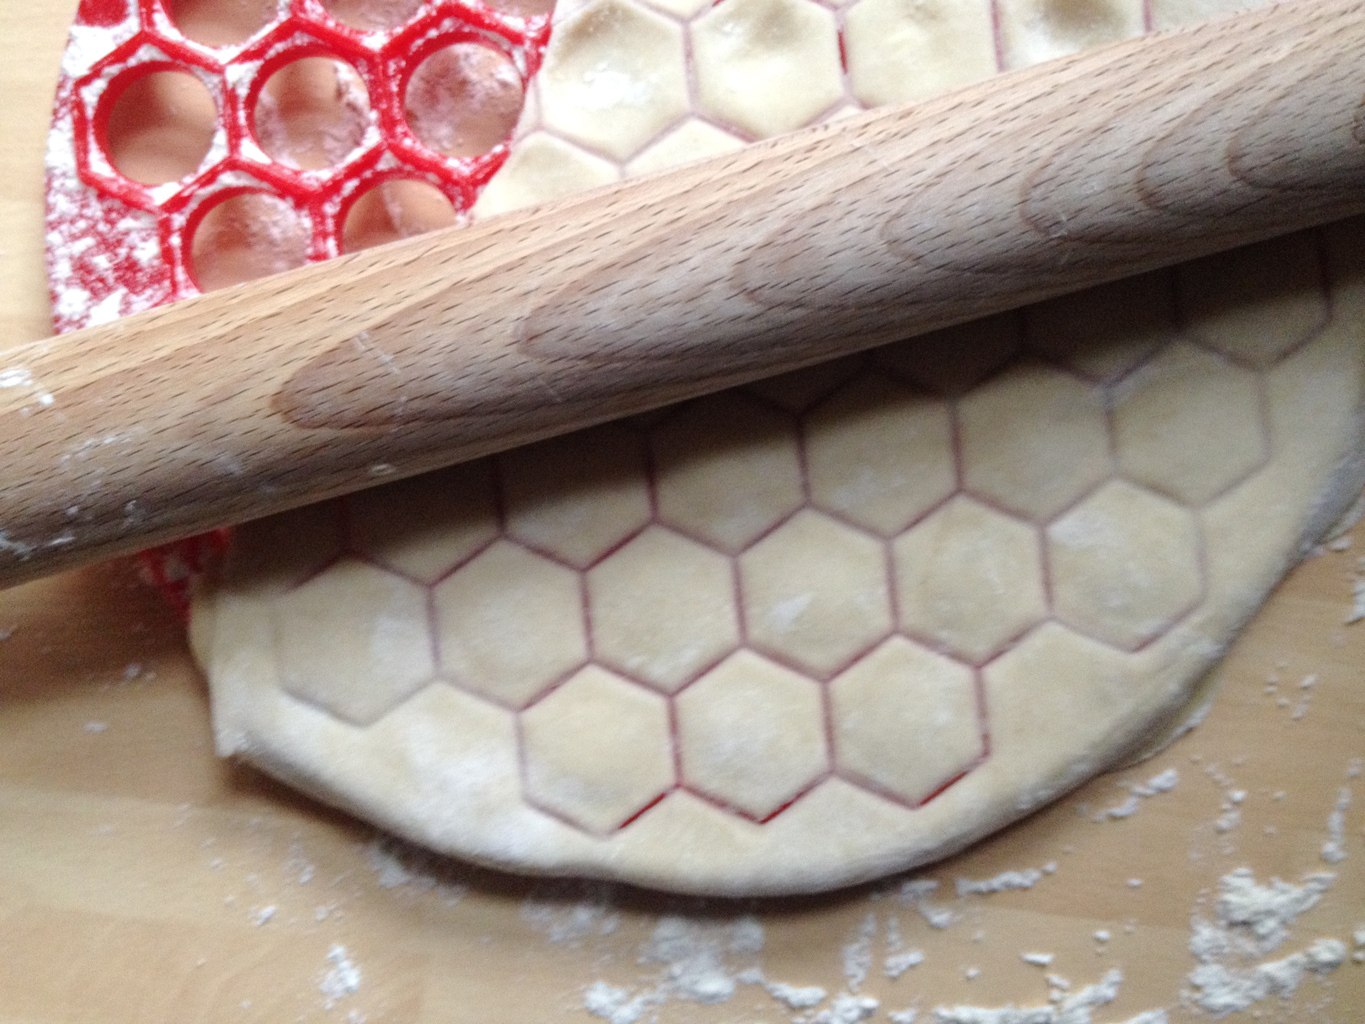
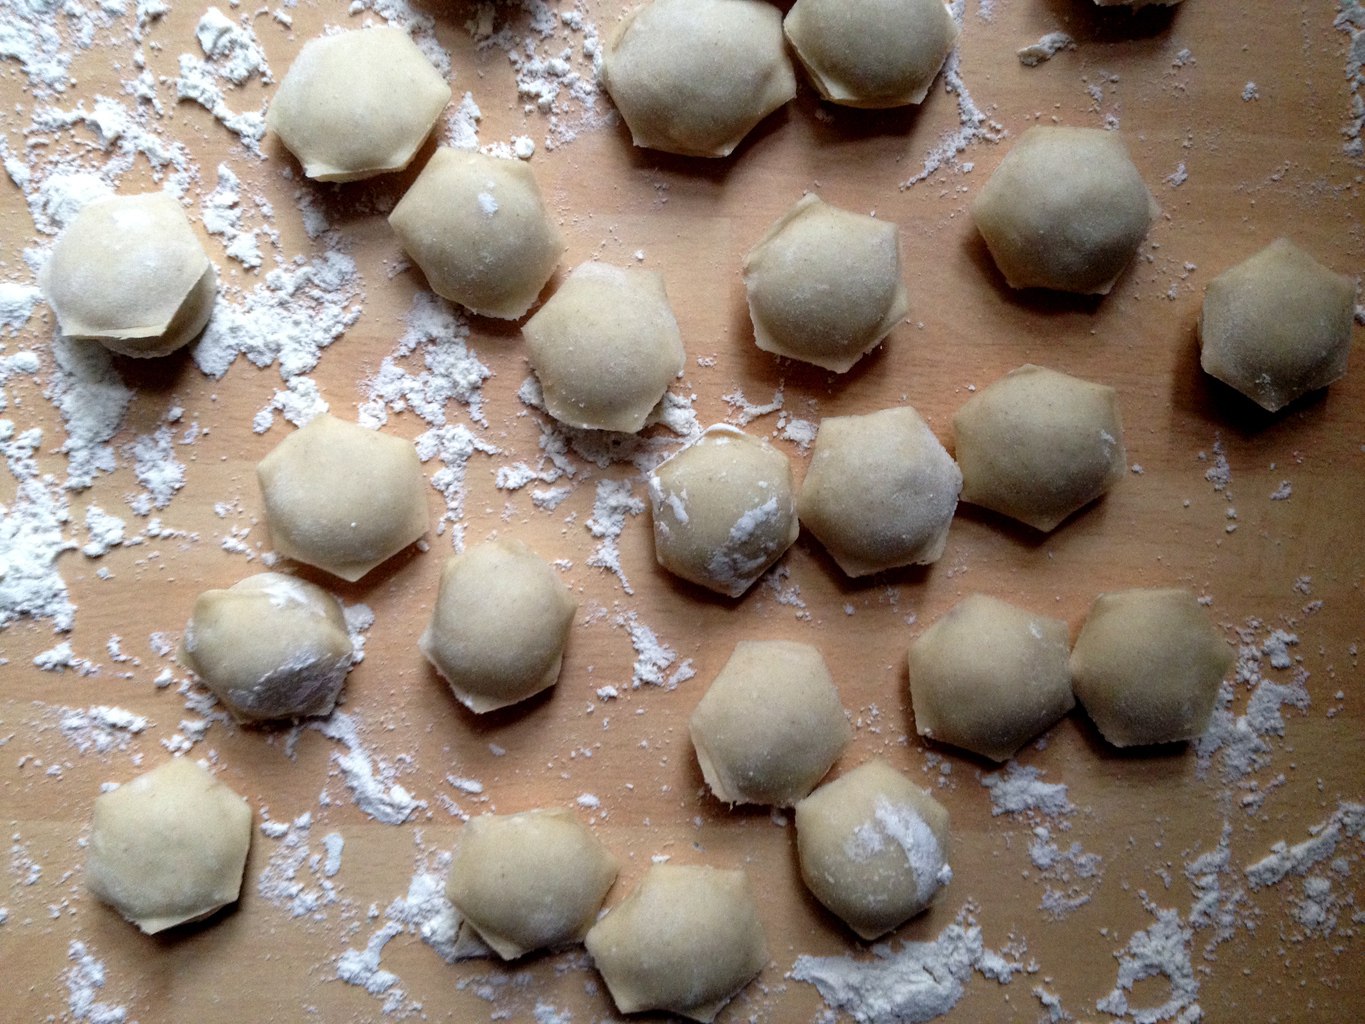
5. Cover everything with the rest of the dough. Press everything with the rolling pin and “pop” all the dumplings out.

ravioli/dumpling mold

making koldūnai

6. Cook the dumplings in salted boiling water for 10min, then drain them like pasta. They should be floating on top when the are completely cooked.

7. Meanwhile make the sauce by heating the cream and stirring the cheese in. season it with black pepper.

9. Place cooked dumplings in small gratin dishes and pour cream sauce over it. Bake for 30min in preheated 200C oven.

baked koldūnai

Enjoy!

Rasa ;)

0

Christmas decorations at Petersham Nurseries

Christmas decorations from Petersham Nurseries

I mentioned Petersham Nurseries before, it’s our favourite place in London right now! Recently Vicki have paid another visit there and came back with the beautiful Christmas decoration pictures. How can you not be inspired, even if holidays seems still far away? I already started thinking on how to make something similar for my craft projects…. I especially love these “ribbons” made out of scrap fabric!

Christmas decorations from Petersham Nurseries

Christmas decorations from Petersham Nurseries

I love this etched glass detail on silver baubles!

Christmas decorations from Petersham Nurseries

Christmas decorations from Petersham Nurseries

This bird hanging decoration is Vicki’s favourite! Seems simple to make, yet quite impressive.

Christmas decorations from Petersham Nurseries

I am quite obsessed with woodland theme this year! So these are perfect for that ;)

Christmas decorations from Petersham Nurseries

Christmas decorations from Petersham Nurseries

Big thanks to Vicki for these pretty pictures, visit her Pinterest page for more inspiration!

Rasa :)

1

Something for Bonfire Night

Spanish Tortilla with pasta

So what are your plans for tonight? Are you going to watch the fireworks or are you settling in for private party with bonfire? Whatever you are doing, making snack size tortilla is always a good way to go! Here is how I have made mine today, with pasta, leeks and bacon. You can pretty much substitute any ingredient with something that you already have in the fridge and this is why I love this dish! I believe every food deserves a second chance ;).

PASTA TORTILLA WITH LEEK AND BACON

  • 6 eggs
  • 1tsp dijon mustard
  • 3 cooked bacon rashers
  • 20g grated cheese (I used parmesan)
  • 1tbsp chopped chives
  • 130g cooked pasta
  • 1 leek (chopped and fried)
  • 2 tbsp rapeseed oil
  • 20 cheery tomatoes
  • a handful of fresh spinach leaves

1. Beat the eggs with the mustard and some seasoning if you would like, then add bacon, chives, pasta and leek.

2. Set the grill on high. Heat the oil in medium frying pan (iron pan preferably). Cook the egg mixture on low heat for about 5-10min.

spanish tortilla with pasta

3. Once the tortilla is set in the pan, place the pan under the grill to finish off cooking the top.

spanish tortilla with pasta

4. Remove the tortilla by placing plate or chopping board on top and flip it.

spanish tortilla with pasta

5. Slice the tortilla into the squares and serve it with spinach and cherry tomato skewers on top.

picking food

Enjoy your Bonfire Night!

Rasa :)

1

Gift Packaging!

crocheted flower gift packaging

I know I know, this might be too early for some of you, but I have already started gift wrapping my gifts for Christmas! I am being really organised this year ;). Here is how I packaged a scarf that I knitted for my mum. The idea is really simple, unless you still need to learn how to crochet mini doilies. In this case you need to learn the basics in crocheting and following simple doily diagrams on Pinterest should be easy. So if you up and ready for this, click here for instructions on how to package your gift using two crocheted mini doilies, button and the cord (or thin ribbon).

Crocheted flower gift packaging

Have a nice week!

Rasa xoxo

0

Pinterest lovers, let’s unite!

Hey! do you like Pinterest? I love it! Its like making inspiration idea boards online, except with less mess. If you are like me, you will be excited about this as I have created a special group crafts board that anybody can join. Basically anything that inspires you to do crafts or the DIY projects can be pinned there and because it is a group board it will be fun to see what everybody else is doing! Interested? Read on to see instructions on how to join :).

Follow Crafts! by Rasa at Friendly Nettle on Pinterest

So if you want to join follow these simple steps:

1. Follow me on Pinterest (if you haven’t done so).

2. Comment here that you did it together with your Pinterest user name.

That’s it!

As soon as I receive your comment I will follow you back and send an invitation to you to join the group.

Happy pinning!

Rasa xoxo

1

Beetroot soup

beetroot soup

I don’t know about you, but as soon as it becomes a little bit chilly outside I feel like eating something warming. Soups for instance are really good with warming you up :). One of my favourite is beetroot soup (after sour spinach soup)! I cook this soup with the raw beetroots including the leaves, however since I know that is more common to buy beetroot already cooked in the UK I have adapted the recipe to the ingredients available.

beetroot soup

BEETROOT SOUP

  • 100g smoked lardons
  • 1 onion
  • 2 carrots
  • 1 celery stick
  • 1.5l vegetable stock
  • 2 potatoes
  • 2 tbs tomato pure
  • 1 bay leaf
  • 3 cooked beetroots, chopped
  • 2 handfuls of spinach
  • 1 tbsp balsamic vinegar
  • salt and pepper
  1. Fry the lardons in the pot together with the diced onion, carrots and celery stick. Let it fry for about 5 min.
  2. Meanwhile peal the potatoes (if you want you can cook it with the skin) and dice them.
  3. Cover fried lardons with the stock and add the potatoes, tomato pure and a bay leaf into the soup
  4. Cook for about 20min or until potatoes cooks through.
  5. 5min before finishing the cooking, add the beetroots. When finished the cooking add the spinach, vinegar and season to your taste.

beetroot soup

You can serve this soup with the dollop of cream fraiche  and fresh herbs such as chives, dill or parsley.

Enjoy!

Rasa xoxo

0

New member in our knitting club!

Bruno!

Just wanted to welcome our newest knitting club member: Bruno! Although he can’t knit he has a real passion for yarn :)

Are you interested to join us too? If yes, then check out our events page! Although our knitting events are often full, we are interested to know our future demand for it. Just let us know of the location where you want to meet for social knitting (or other crafts) and you never know… we might host an event where it is convenient for you :)

Bruno

When Bruno is not sleeping or playing he loves accompanying me with blogging… aww :)

Blogging with Bruno

Have a lovely week!

Rasa xoxo

1

25th of Novemeber – Mini Knitting Group Meeting – Tottenham – PAST

2WHEN: 25th of November, 7pm
WHERE: Northumberland Park, London (full address will be given upon request)
WHO IS IT FOR: Anyone who likes knitting or would like to learn how to knit
WHAT TO BRING: your project you are working on or if you are a beginner bring 7mm or larger knitting needles and yarn (thick, bright coloured yarn is recommended)
HOW TO ATTEND: Check out Meetup to see if there are any spaces left, see ya!
0

11th of November – Mini Knitting Group Meeting – Tottenham – PAST

2WHEN: 11th of November, 7pm
WHERE: Northumberland Park, London (full address will be given upon request)
WHO IS IT FOR: Anyone who likes knitting or would like to learn how to knit
WHAT TO BRING: your project you are working on or if you are a beginner bring 7mm or larger knitting needles and yarn (thick, bright coloured yarn is recommended)
HOW TO ATTEND: Check out Meetup to see if there are any spaces left, see ya!
0

Friendly Nettle Giveaway! (CLOSED)

crocheting kit with cookies

Have you started a prep for winter? If not, this giveaway competition is for you! One lucky reader will win this crochet a scarf kit box that not only contains everything you need to get started (enough yarn, crochet hook, DIY instructions) but also a selection of freshly baked cookies to get you going ;).

crocheted infinity scarf

To enter for a chance to win, REGISTER and activate (e-mail will be sent after registration) to join our community. One entry per reader please. Giveaway will be open until 1st November, winner will be chosen at random and announced in this article shortly after.

Good luck!

Rasa xox

8

Easy chickpea crepes

chickpea crepes

Today I had chickpea crepes for brunch (I know I know, but sometimes it is just nice to start late). I make crepes quite often in general as it is great with many fillings, can be served sweet or savoury and it is quite instant. However today I am going to speak about the chickpea crepes that have an interesting flavour twist and go really well with fresh salad, yogurt, guacamole, hummus and so on… the possibilities are endless! To make proper chickpea crepes is not that easy and quick as it is egg and gluten free and has to be prepared the night before. Therefore I did come up with this quick and easy recipe that is halfway a regular crepe and socca (chickpea crepe in french). Of course if you want to do it the proper way than check out this website, but if you want quick breakfast or lunch then continue on ;)

chickpea crepes

EASY CHICKPEA CREPES

  • 50g chickpea flour
  • 50g plain flour
  • 1 egg yolk
  • 1 tbsp olive oil
  • 1 tsp salt
  • 1 tsp ground cumin
  • about 200ml water

1.  Mix the flours, egg yolk, oil and seasoning together.

2. Gradually add water while mixing it until it becomes runny, but not too watery (something like double cream).

3. Heat up the oil in the frying pan. Tip: make sure you heat the pan properly as the crepes mixture will stick less to it.

4. Pour a spoon of the mixture to the pan and spread evenly around with the spatula (use the silicon one if you have it). Otherwise if you find it easer then swirl the whole pan to make the mixture run evenly to cover the whole pan.

5. Once the top surface is dry (nothing runs on top) then the crepe is ready to turn. I carefully slide the spatula under the crepe and flip it. You may want to try to flip it in the air by tossing the pan, but that’s if you feel brave enough…ha ha

Have fun and enjoy!

Rasa :)

2

Halloween decoration idea

leaf garland

I must admit I am not the biggest fan of halloween decoration, just because it is hard to make it pretty… well its not meant to be pretty anyways, it’s suppose to be scary ha ha :D.

Regardless my feelings towards the halloween deco, I had a go at it this year. And I am quite pleased with this Halloween decoration idea! I especially like that this painted leaf garland can be used in any occasion. Just think of using different colours and letters!

Check out the detailed painted leaf project DIY here.

desk halloween decoration

Rasa :)

0

Chilly evenings need cookies with tea!

When it comes to chilly evenings I love dipping cookies into the hot tea and eating them like that. I also like the idea of stocking up on homemade sweet treats so I have it whenever I have a sweet tooth. And cookies are perfect for that! So this is exactly what I did today: baked cookies while experimenting with different flavours. I experimented with pumpkin spice, white chocolate, orange, almond and even matcha. However my favourite combination is peanut butter with jam :b.

PEANUT BUTTER & JAM COOKIES

  • 200g softened butter
  • 160g peanut butter
  • 100g icing sugar
  • 2 eggs
  • 240g plain flour
  • strawberry jelly (for filling)

1. Gradually add all ingredients into the mixing bowl (except the jelly) and mix until everything is combined well.

2. Add the cookie mixture into the piping bag with the wide round nozzle tip. Then pipe small circles on the tray lined with the baking sheet leaving big enough gaps to expand in between.

3. Bake at preheated oven 180C for about 13min.

4. Cool on wire rack then spread some jam on the flat side and join two cookies together.

Enjoy!

Rasa xox

0