Top

Archive | Cake decorating

Spring-inspired celebration cake

Spring-inspired celebration cake (with sweet peas) recipe
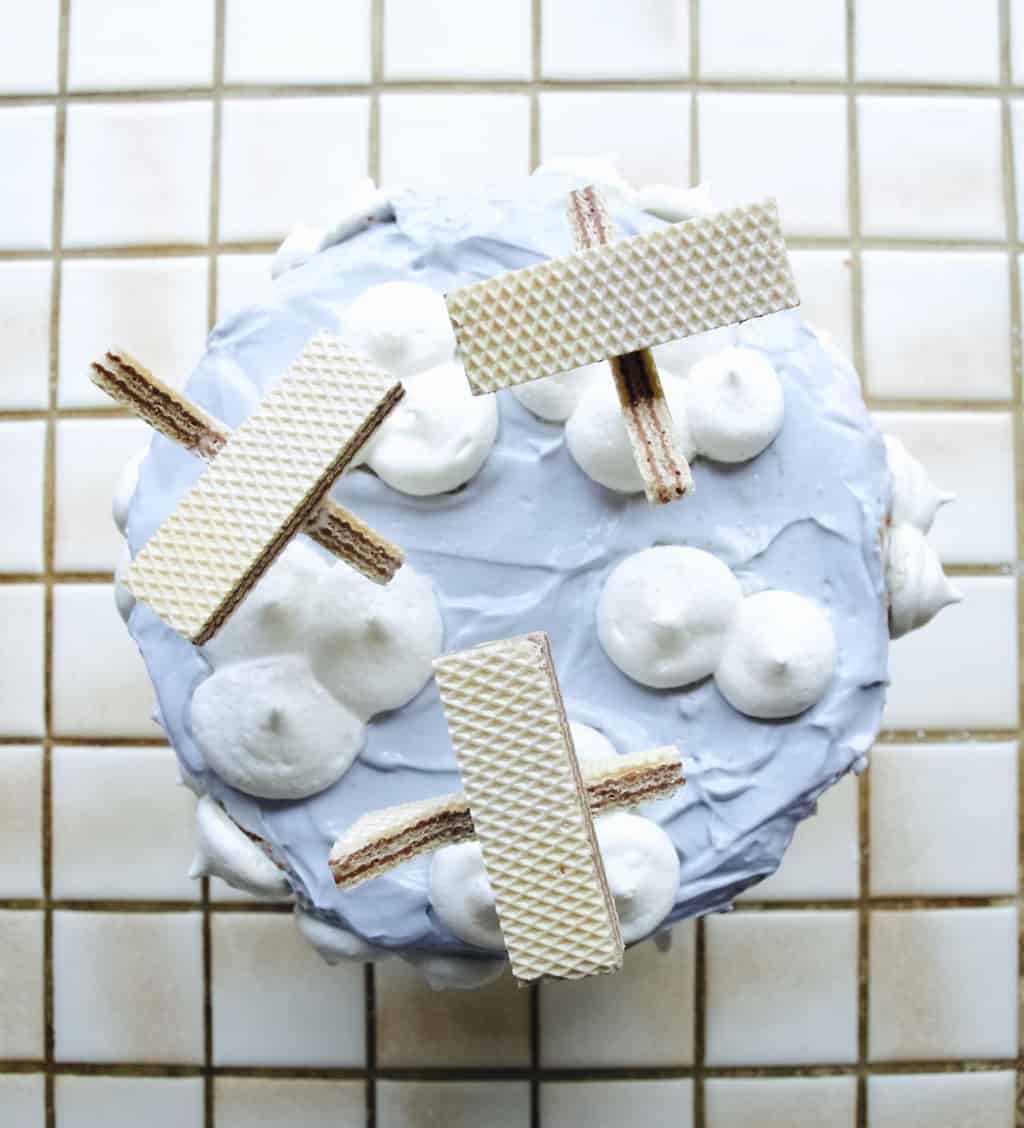
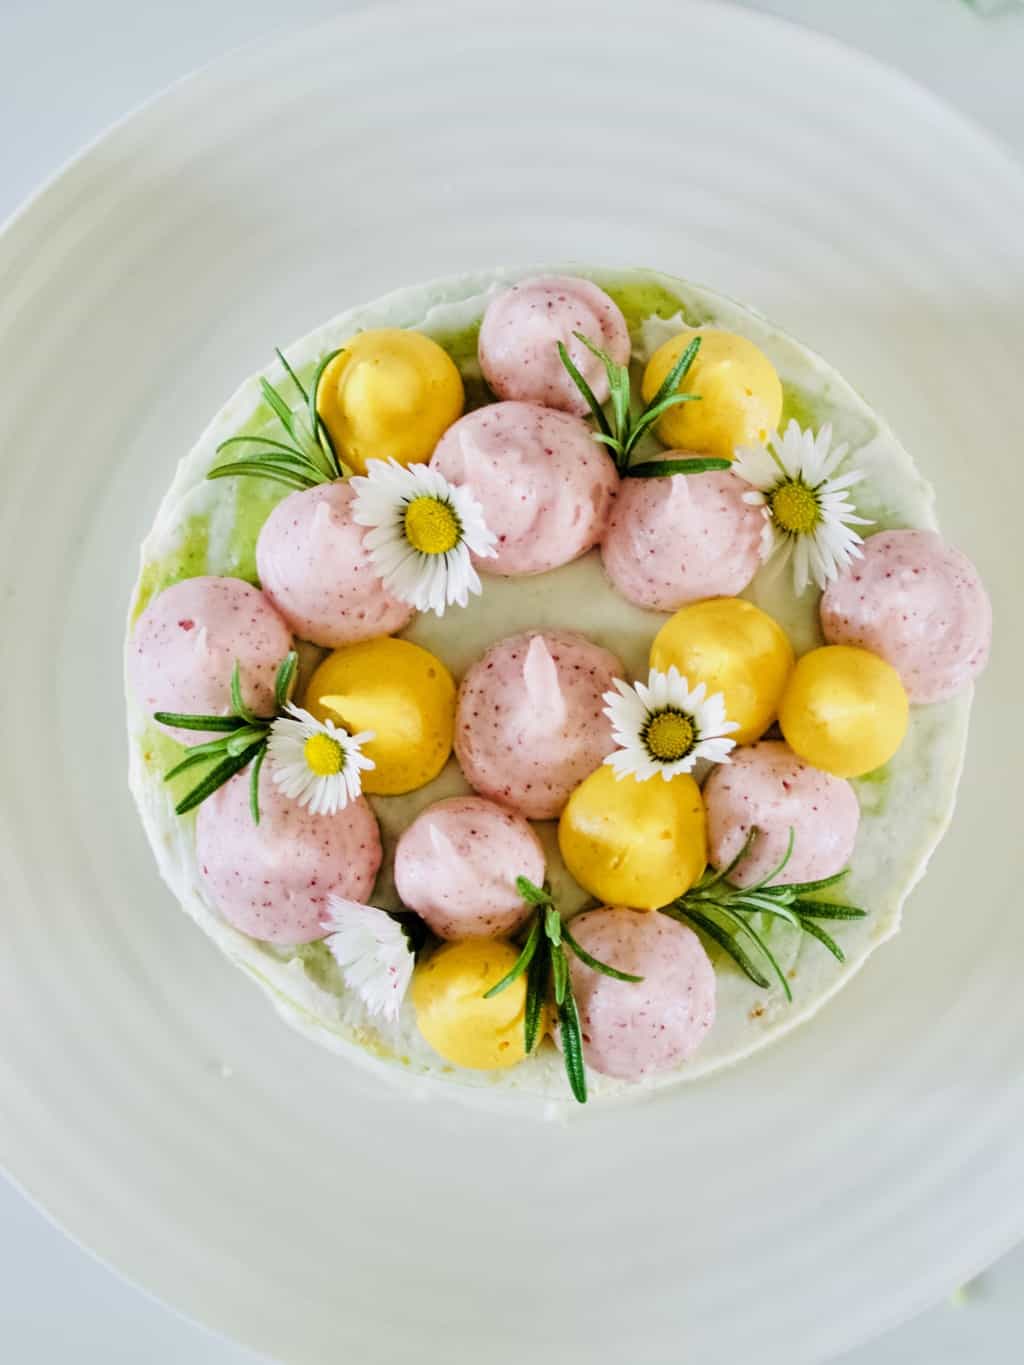
I always wanted to try and bake a cake using sweet peas, but I never had an opportunity. Sweet peas is such as spring vegetable and no one in our family have a birthday in a spring. Eventually I decided to just go for it for Tomas birthday. It almost feels like a spring now! Spring-inspired celebration cake (with sweet peas) recipe 
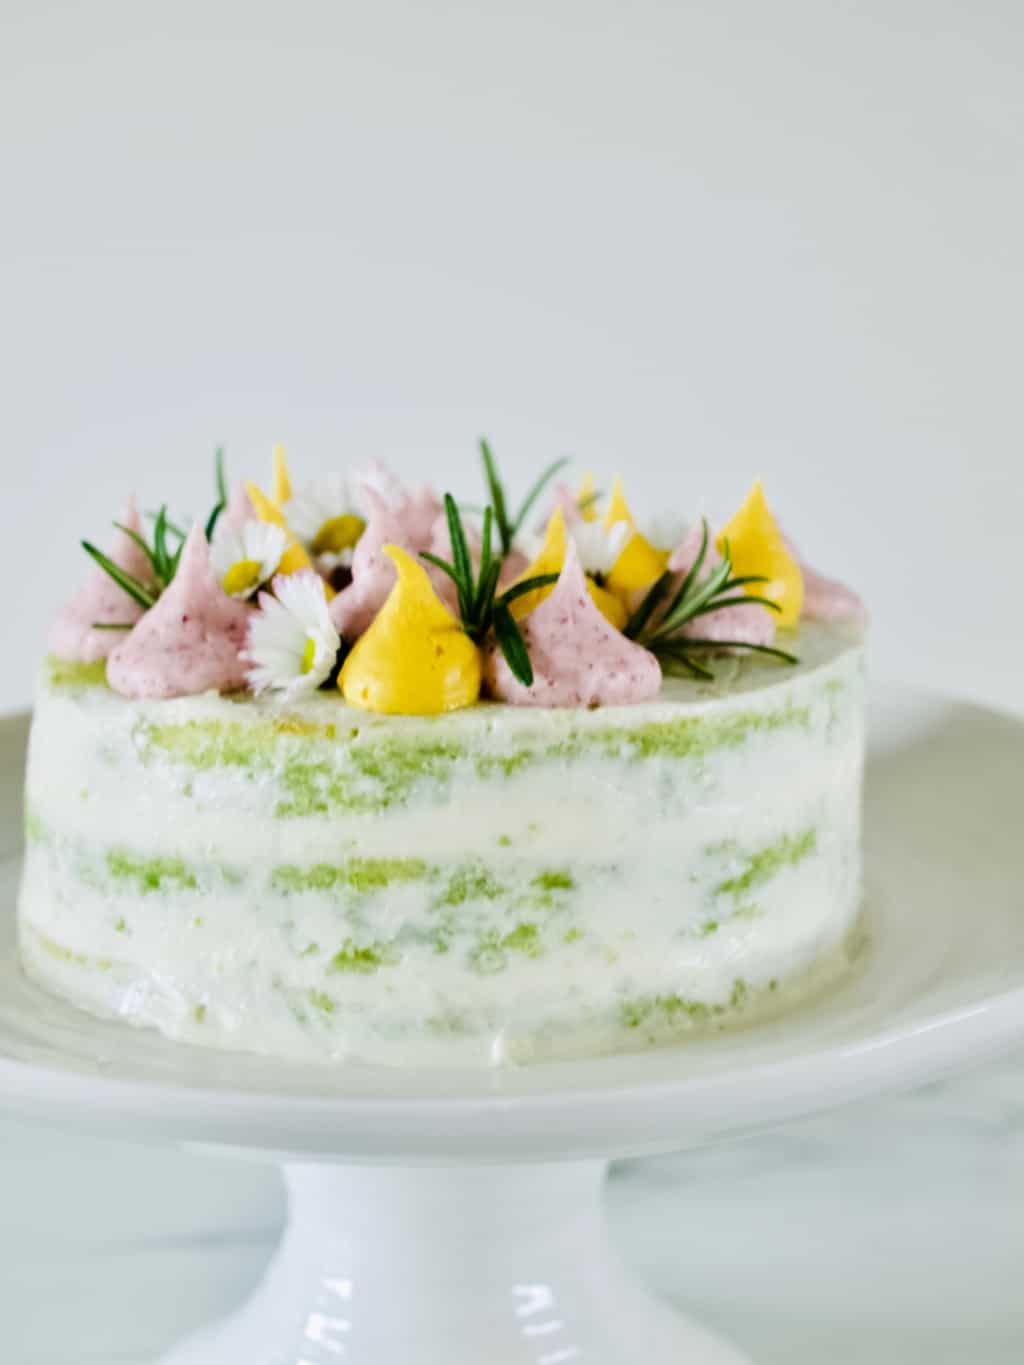
SWEET PEA CAKE WITH BEETROOT FROSTING adopted from Veggie Desserts

(for the cake)

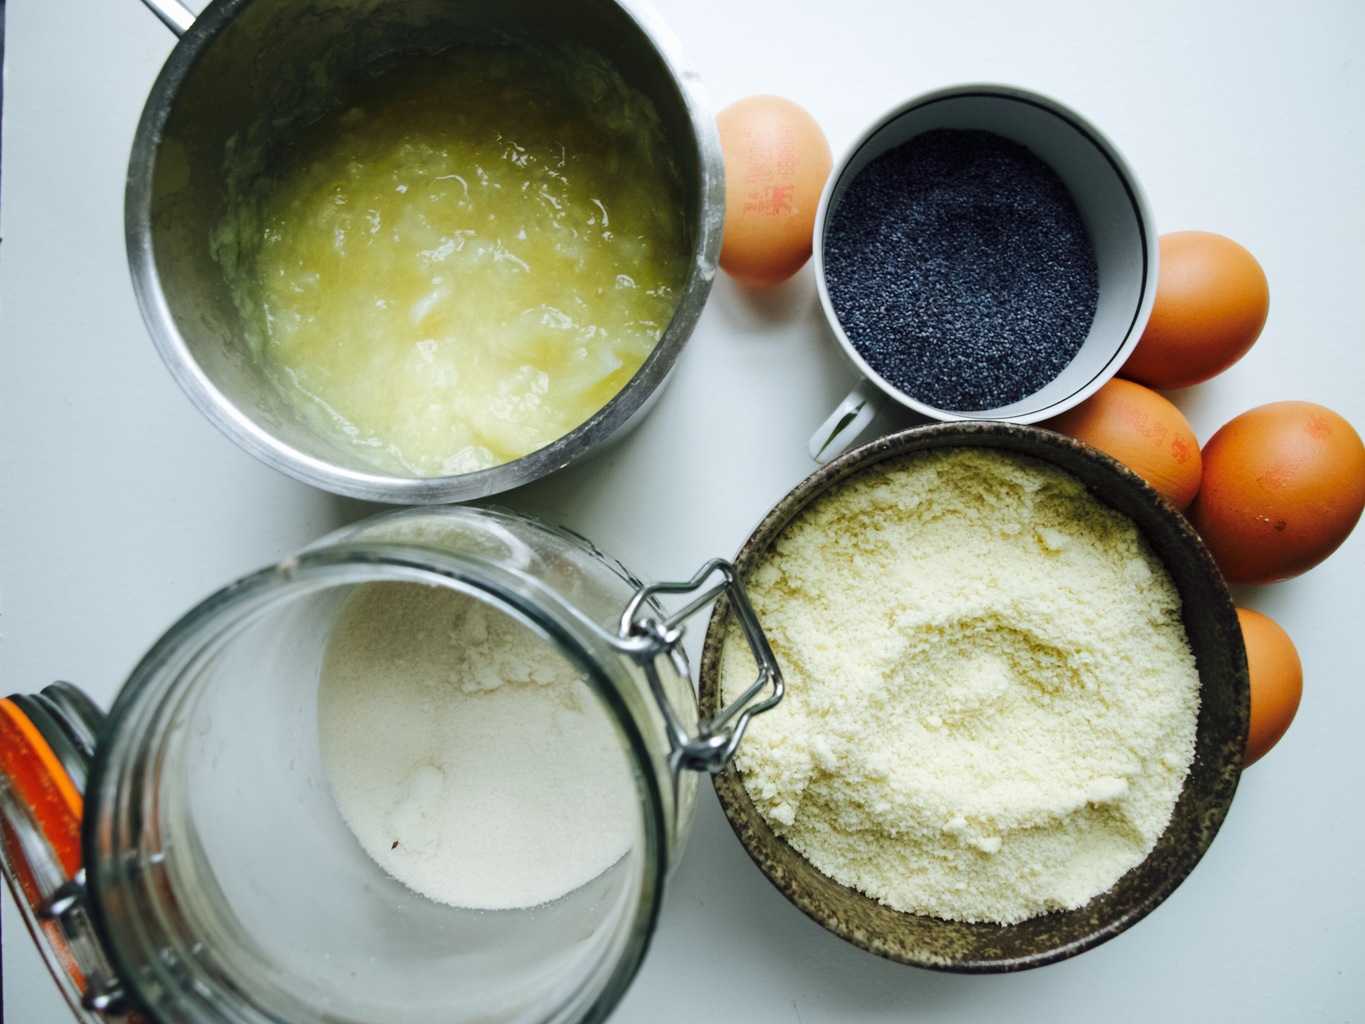
  • 180g sweet peas, steamed or boiled
  • 130g butter, softened
  • 100g caster sugar
  • 2 eggs
  • 1tsp vanilla extract
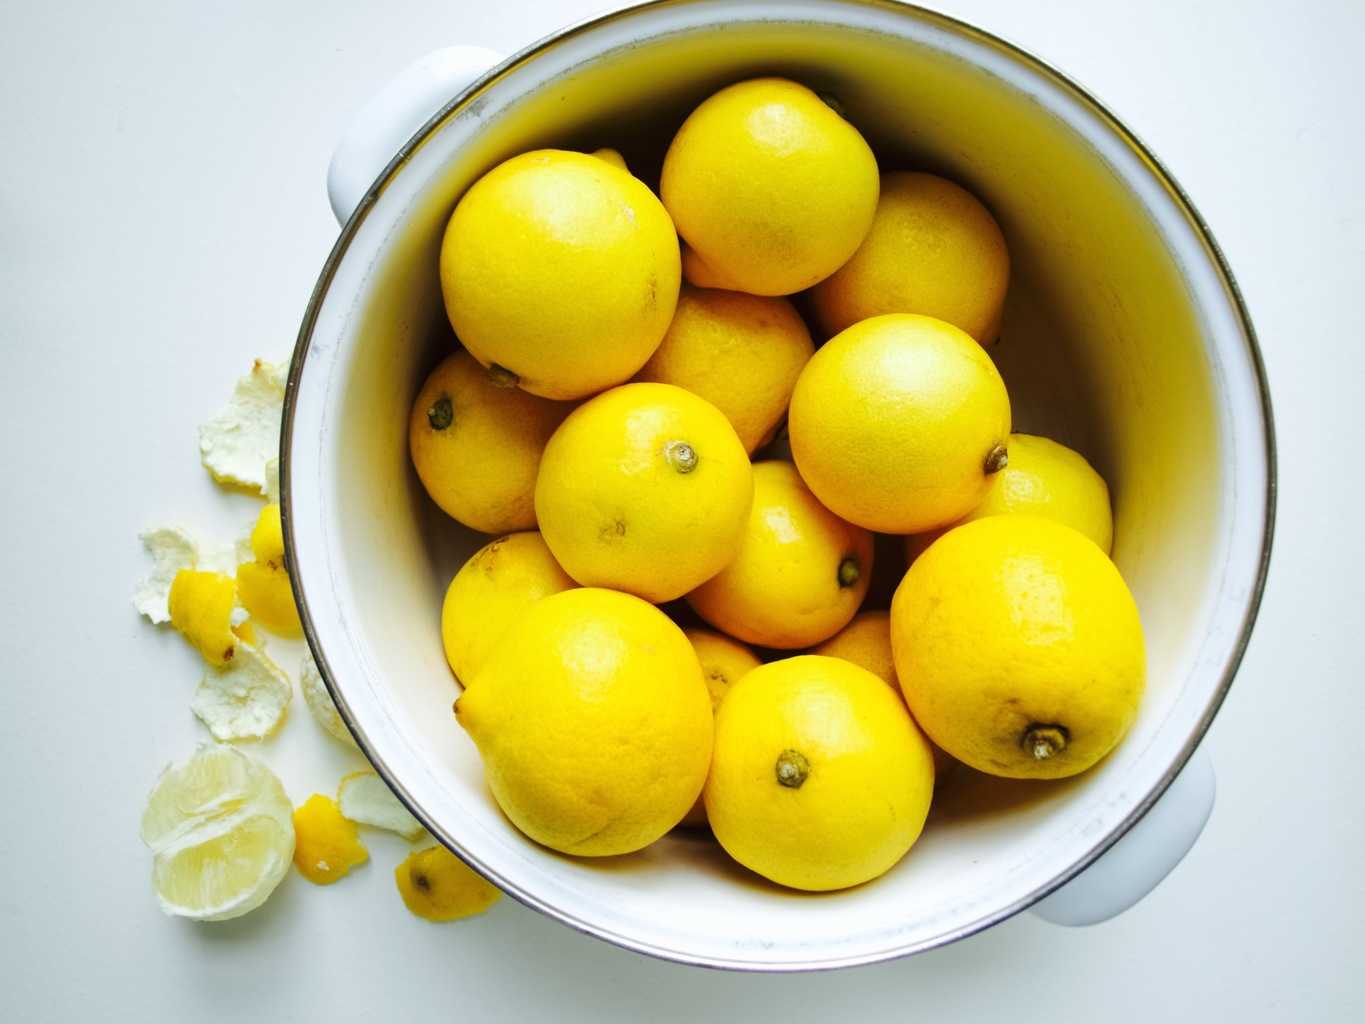
  • 1 tsp lemon zest and a drizzle of juice
  • 165g flour
  • 2tsp baking powder
  • pinch salt

(for the frosting)

  • 250g soft cheese
  • 70g icing sugar (plus some more for later stage)
  • 1-2 tsp beetroot powder
  • 1tsp other type of natural frosting such as turmeric, matcha etc (optional)

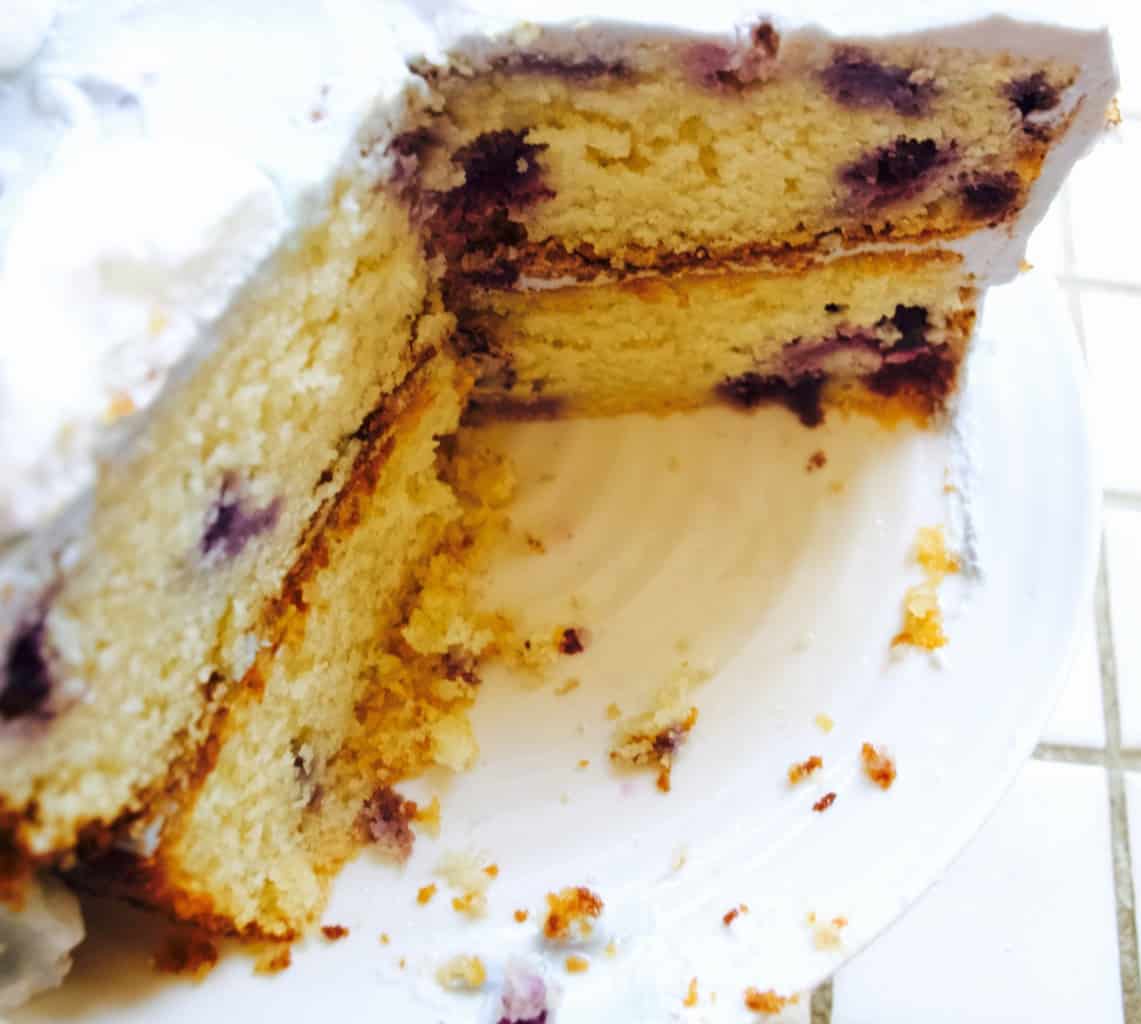
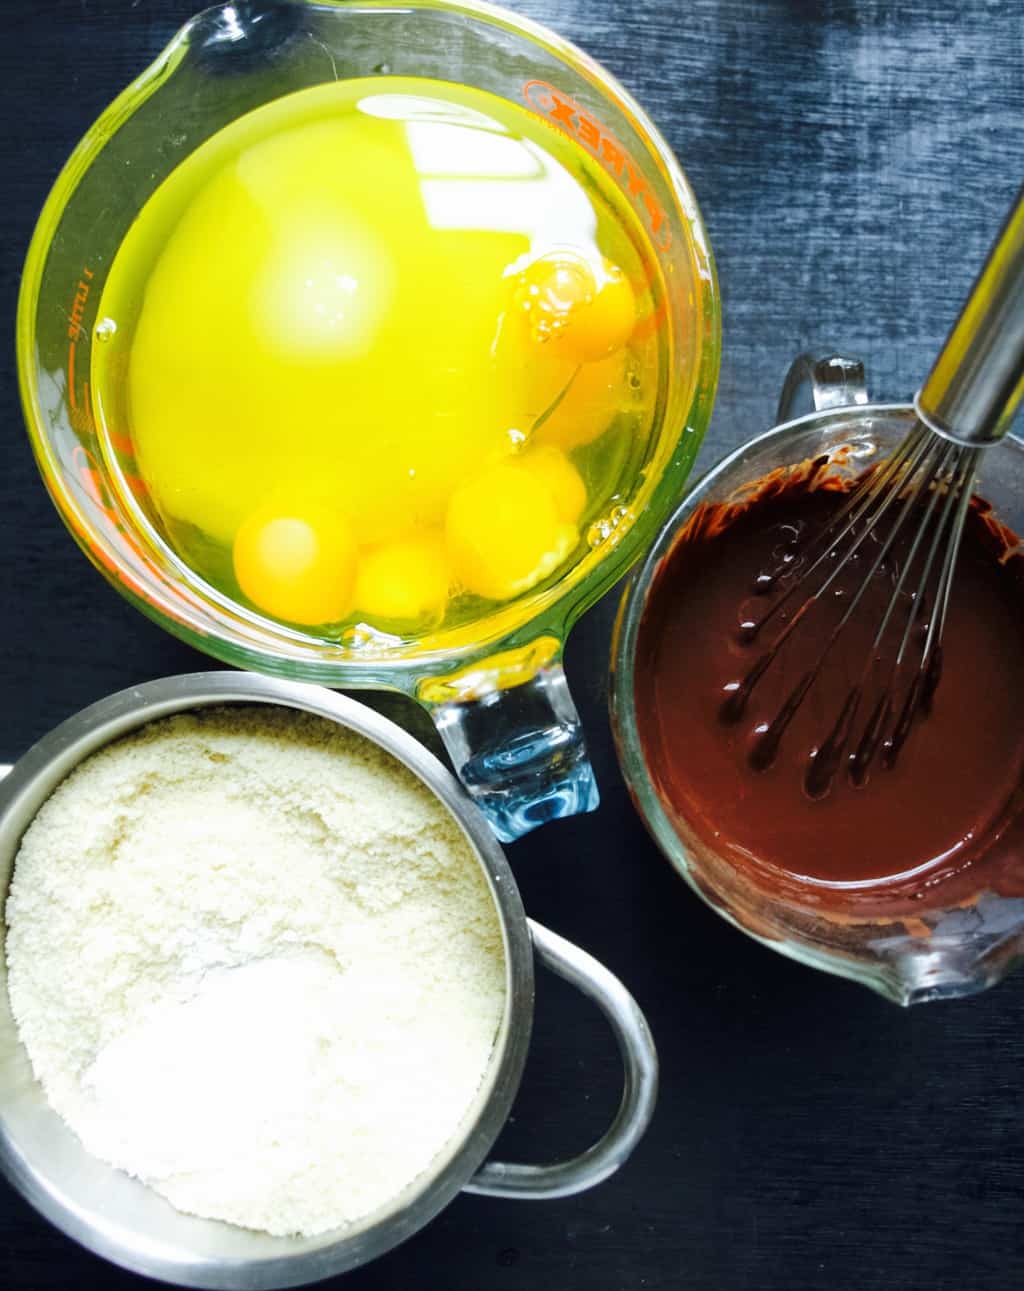
1. Puree the sweet peas in the food processor and set aside

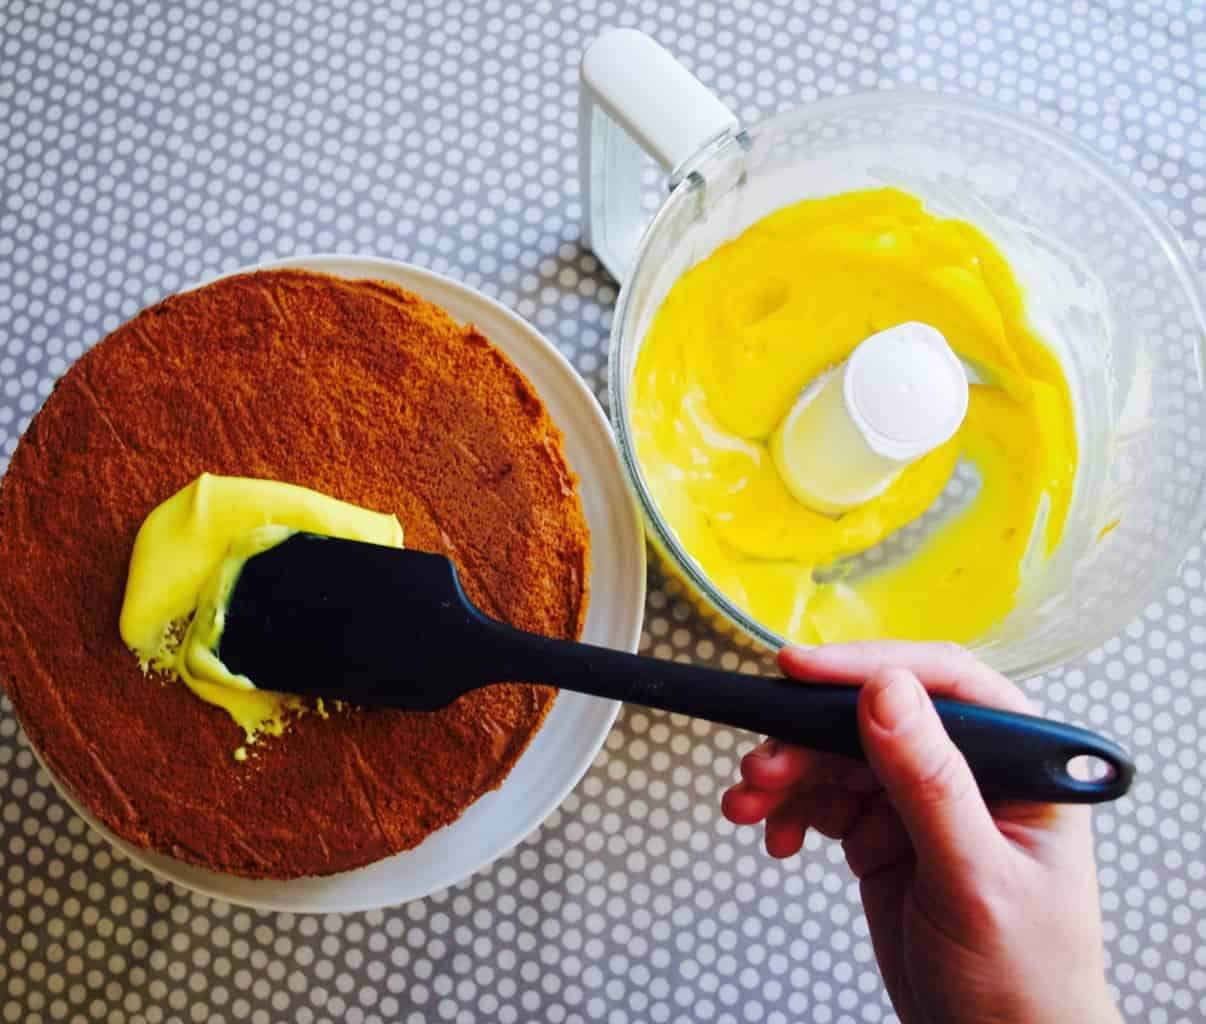
2. Cream the butter with sugar either in the large bowl with the wooden spoon or in the mixer.Spring-inspired celebration cake (with sweet peas) recipe 
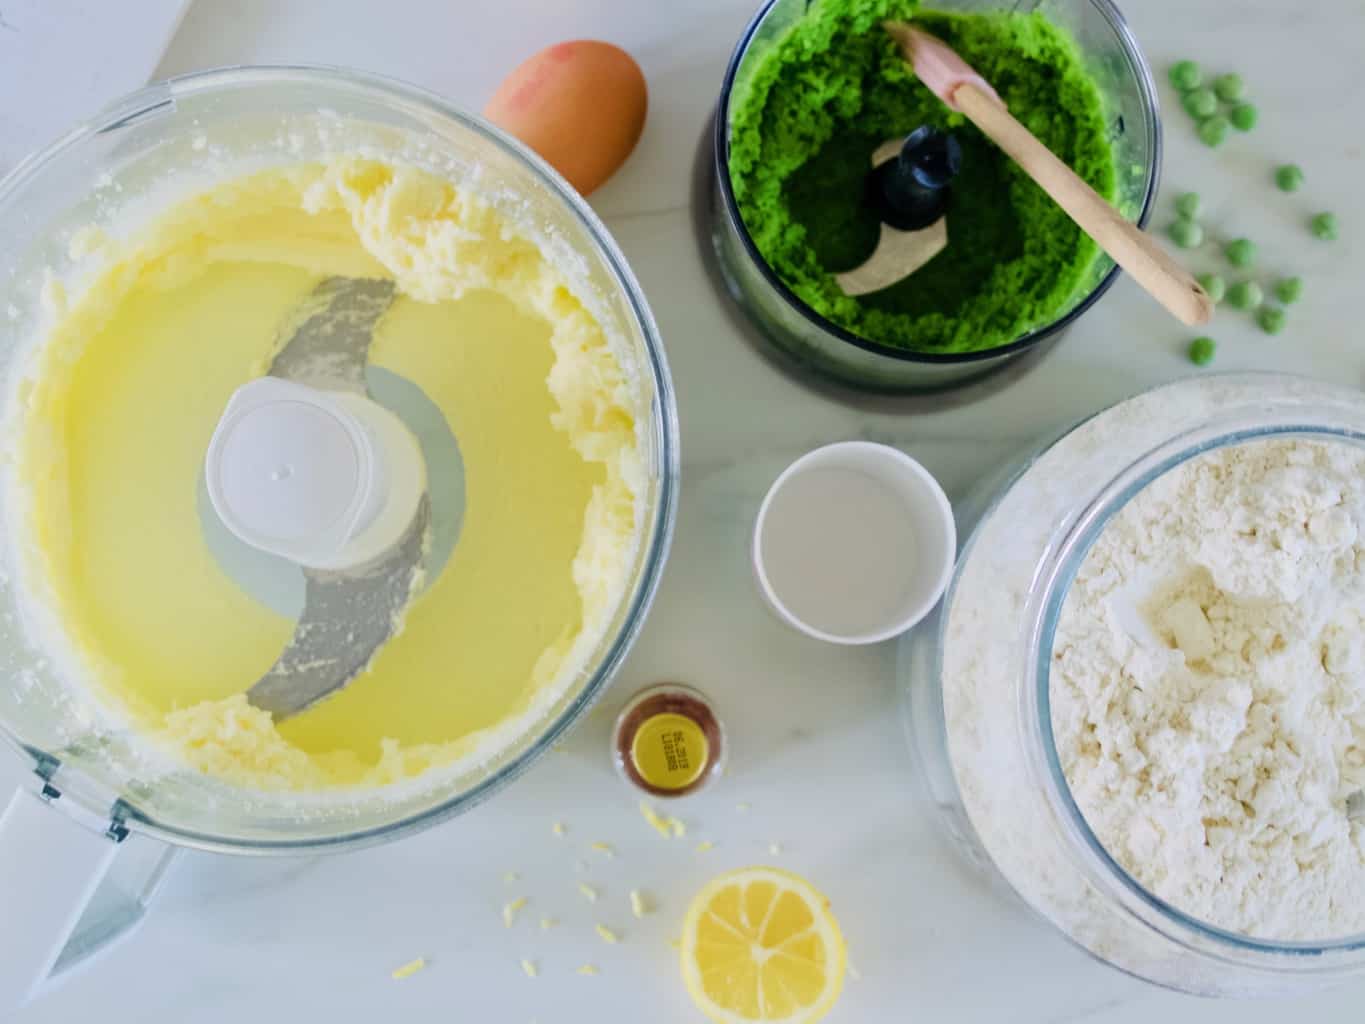
3. Add the rest of the ingredients (including sweet pea puree) into the butter cream and mix again to combine. Spring-inspired celebration cake (with sweet peas) recipe 
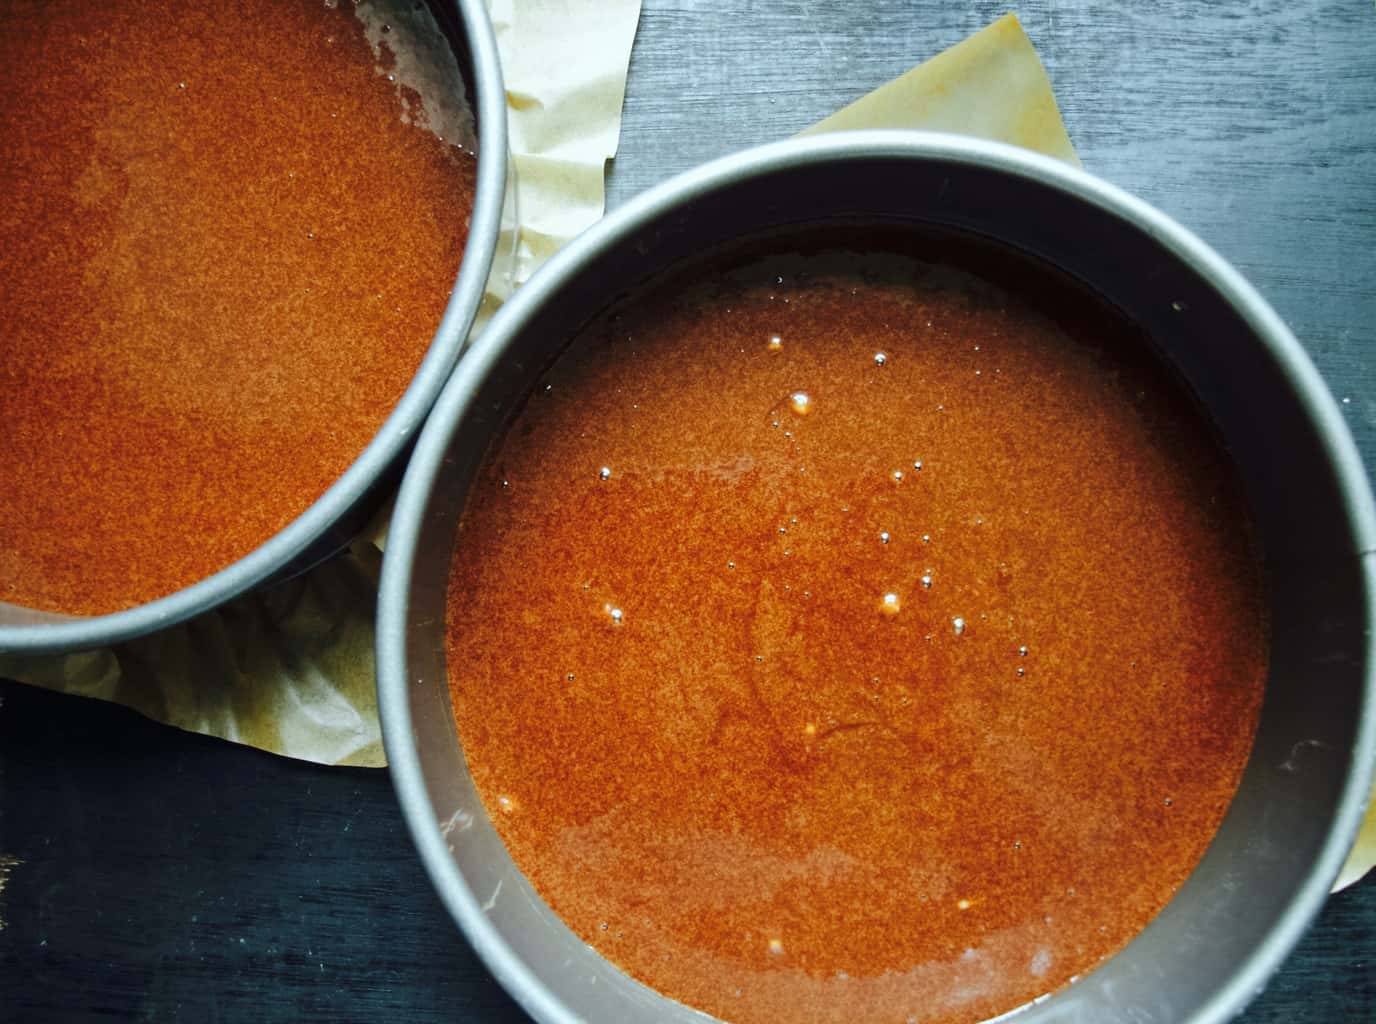
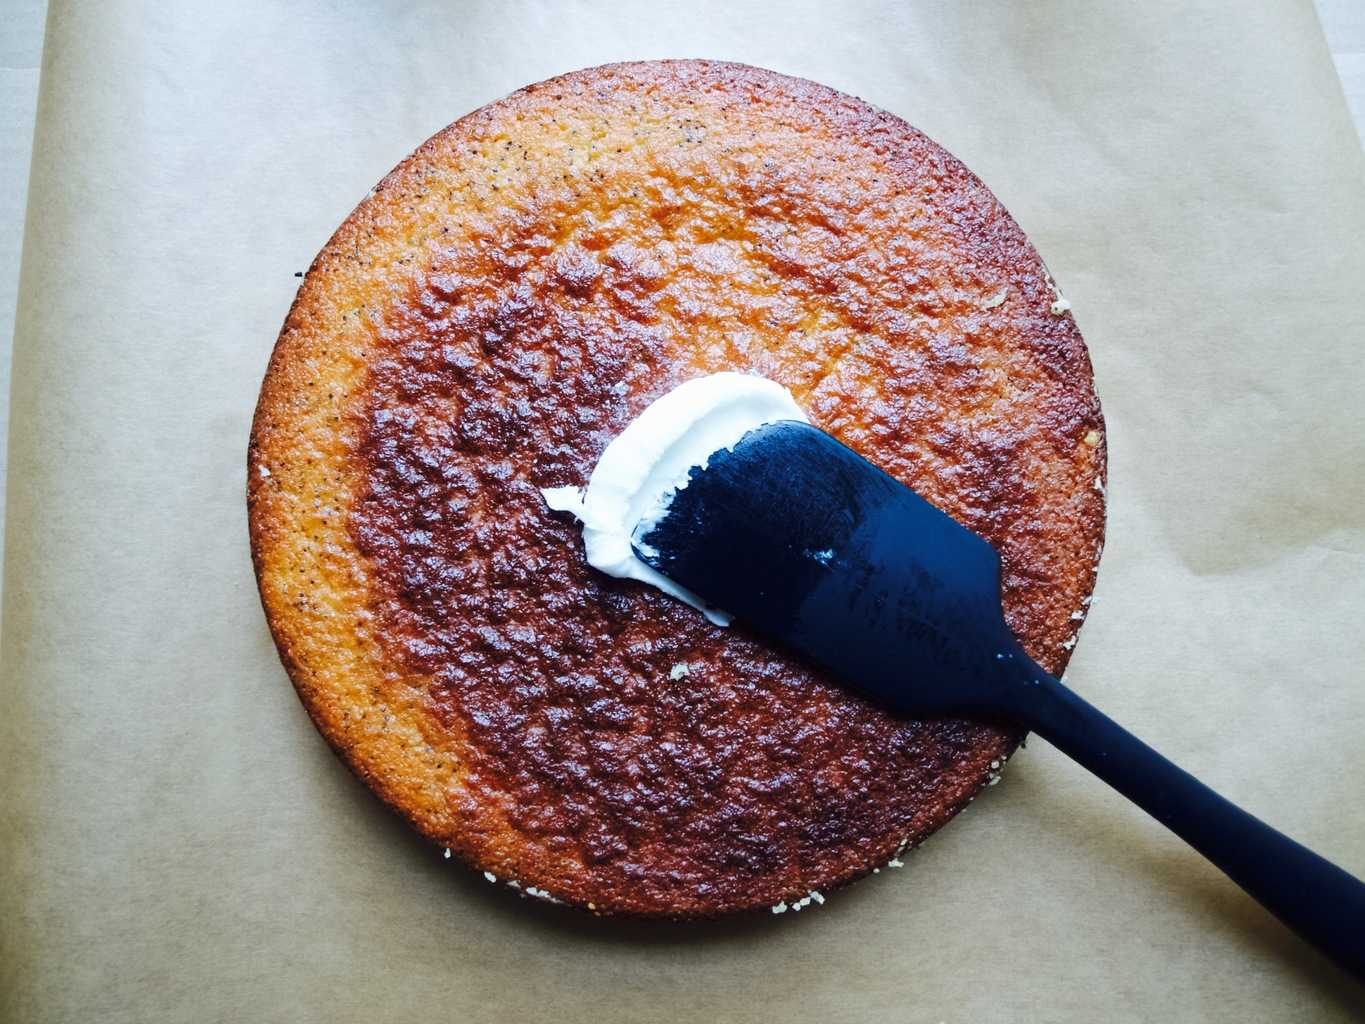
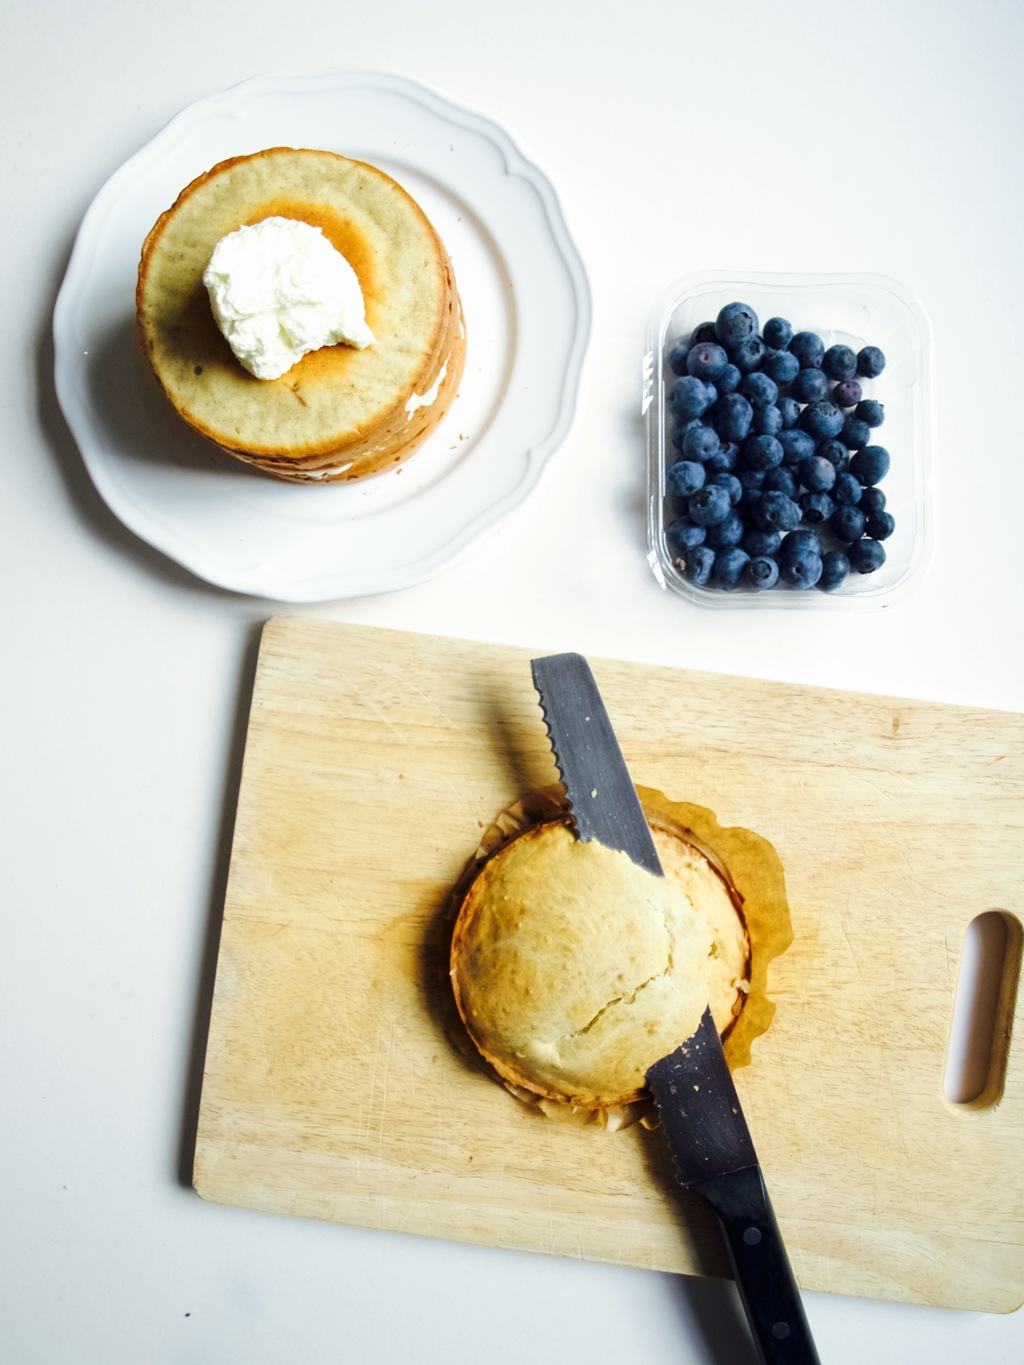
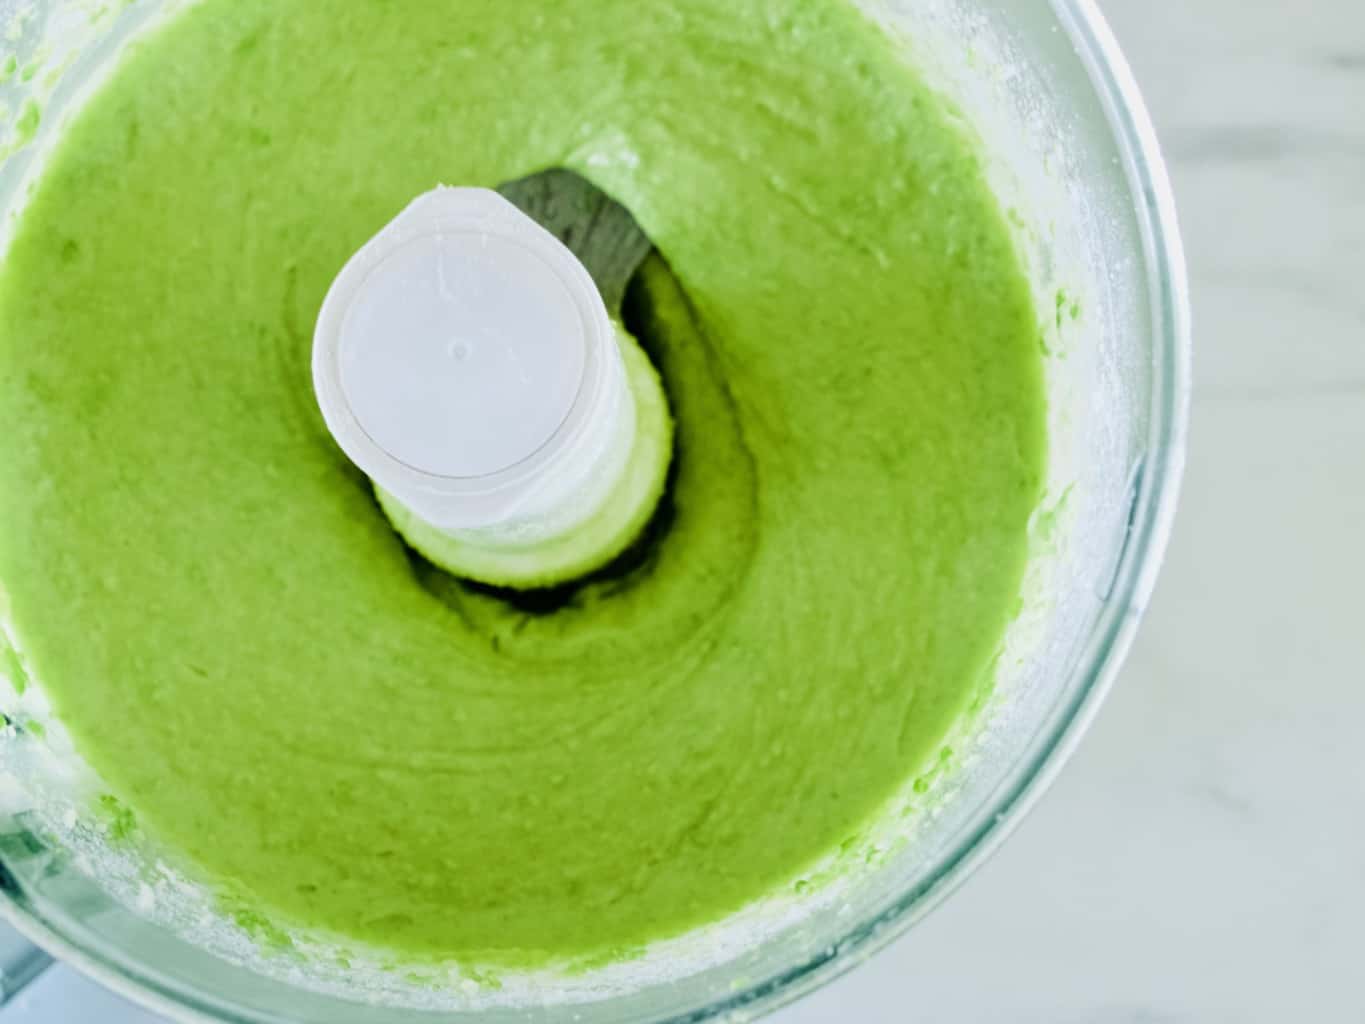
4. Bake the cakes in the 15cm (6inch) tins in 180C preheated oven for about 20 min. Alternatively you can bake these in the sheet tray and use a large cookie cutter to cut out the rounds. I ended up cutting off the crust as I wanted bright green colour to show through the frosting.Spring-inspired celebration cake (with sweet peas) recipe
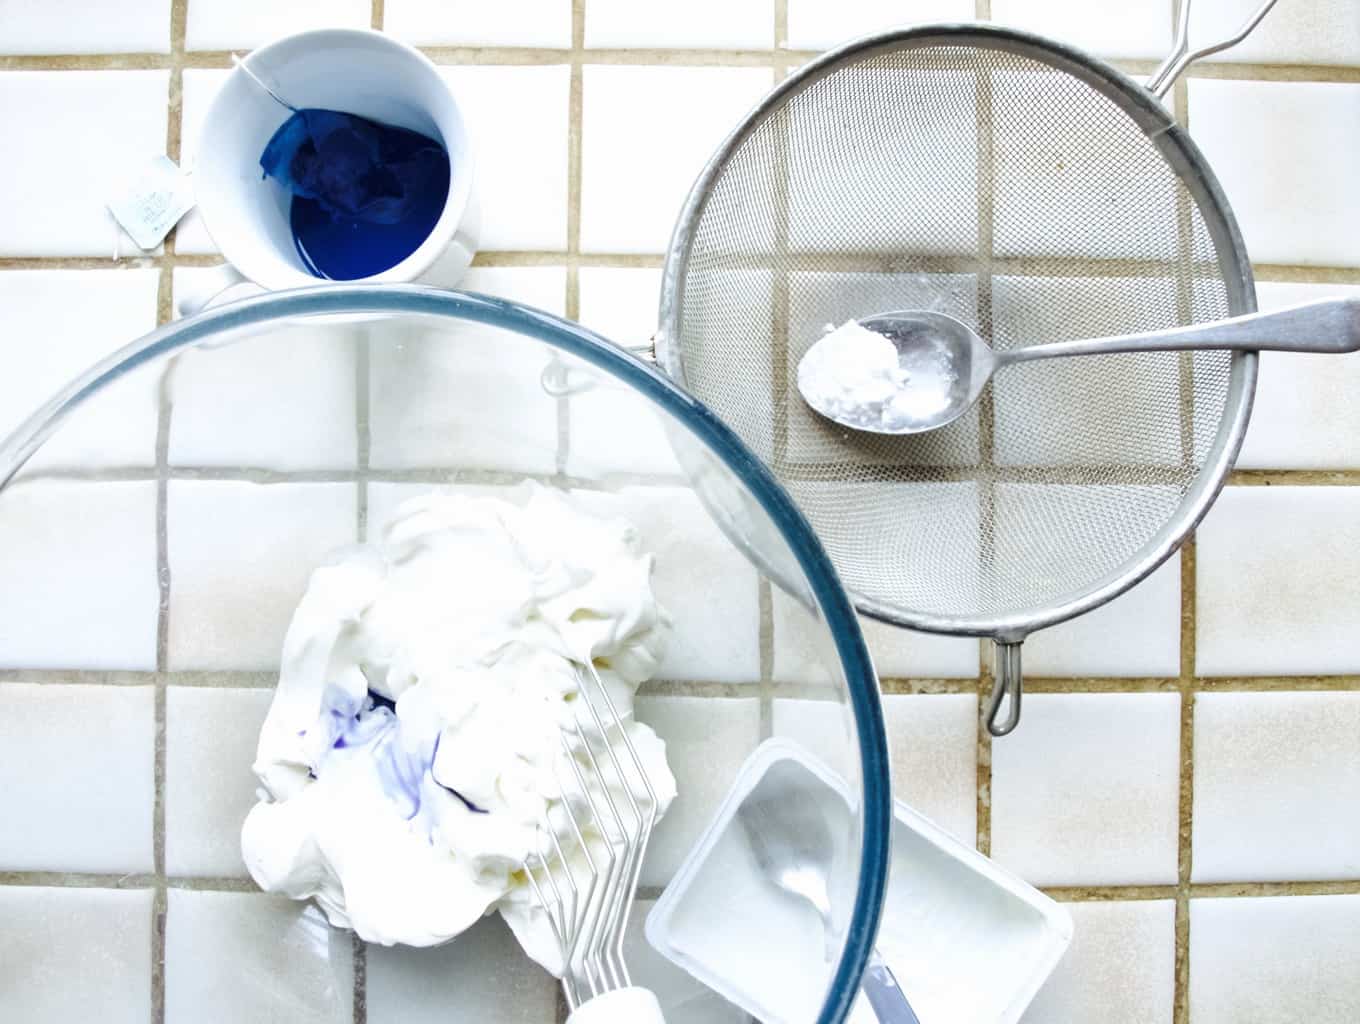
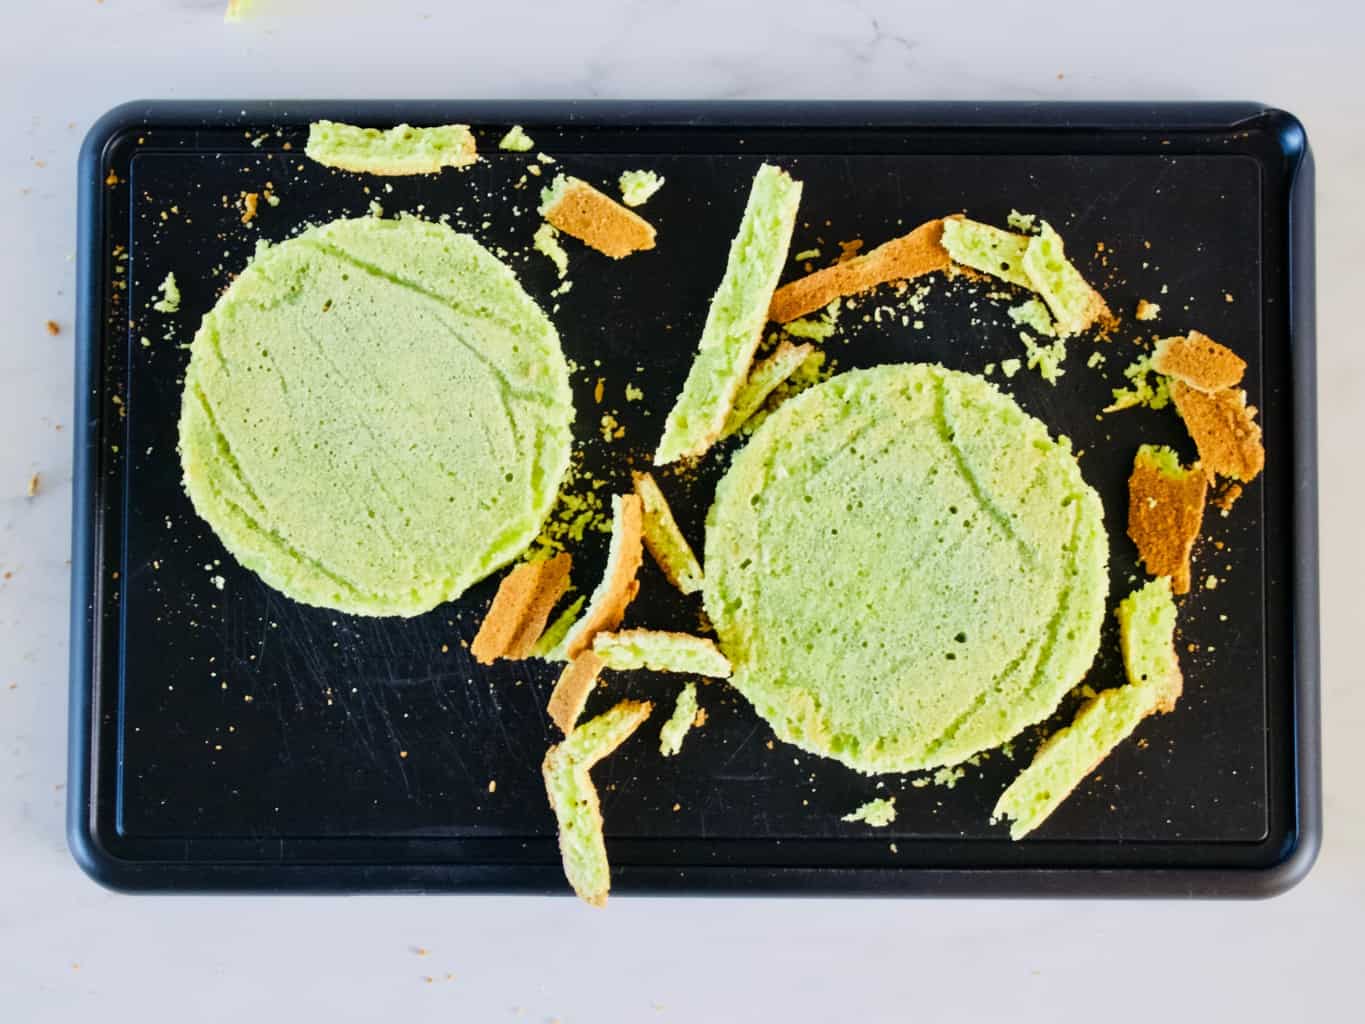
5. Meanwhile make the frosting. Using the whisk, mix the soft-cheese with sifted icing sugar.

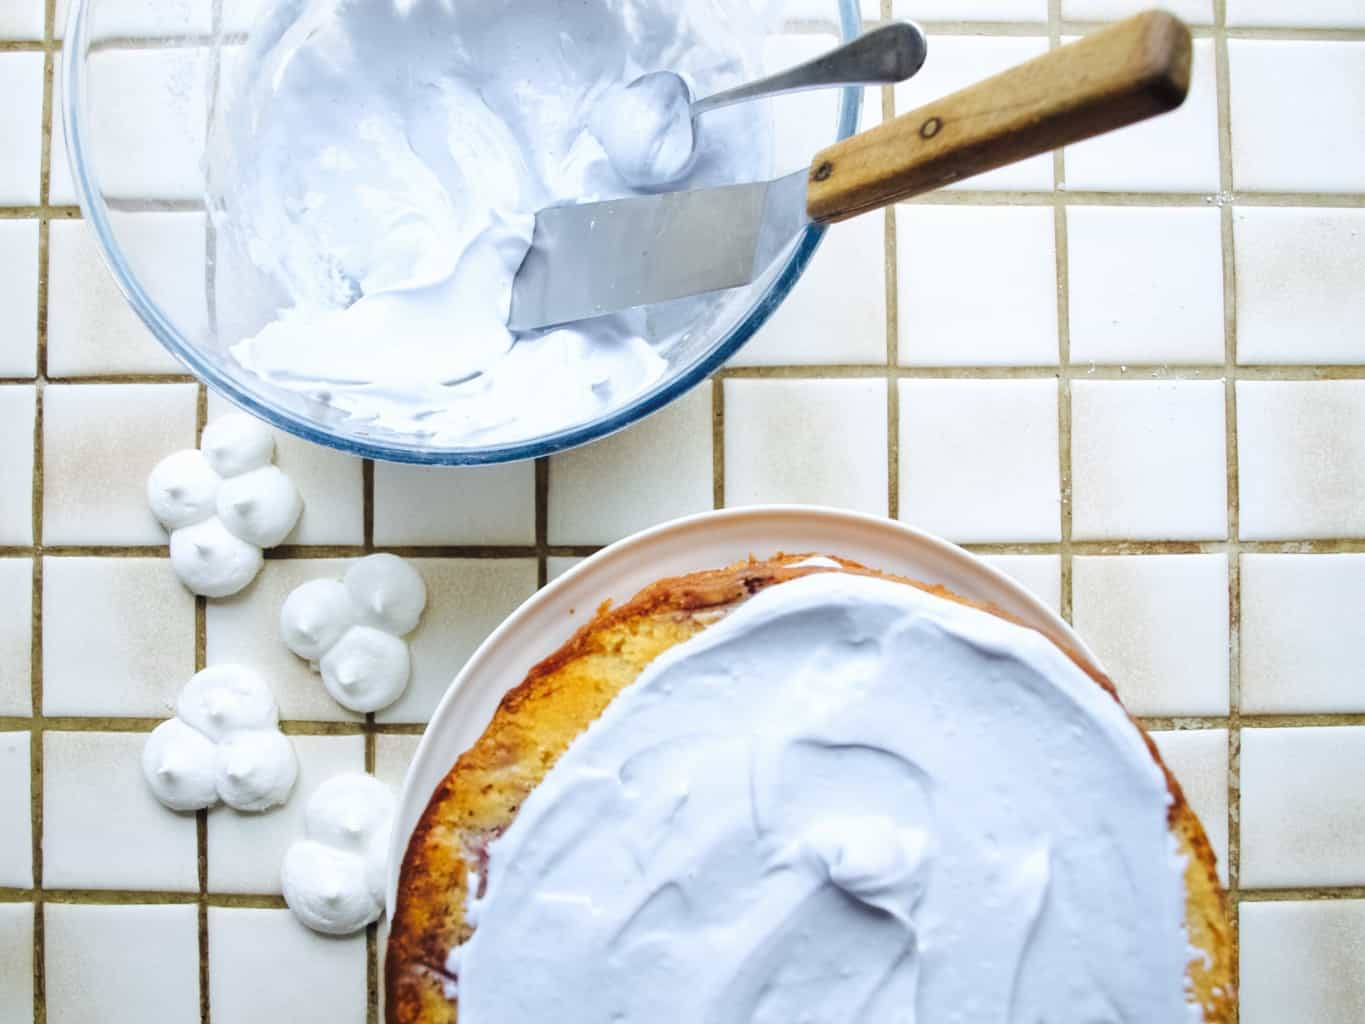
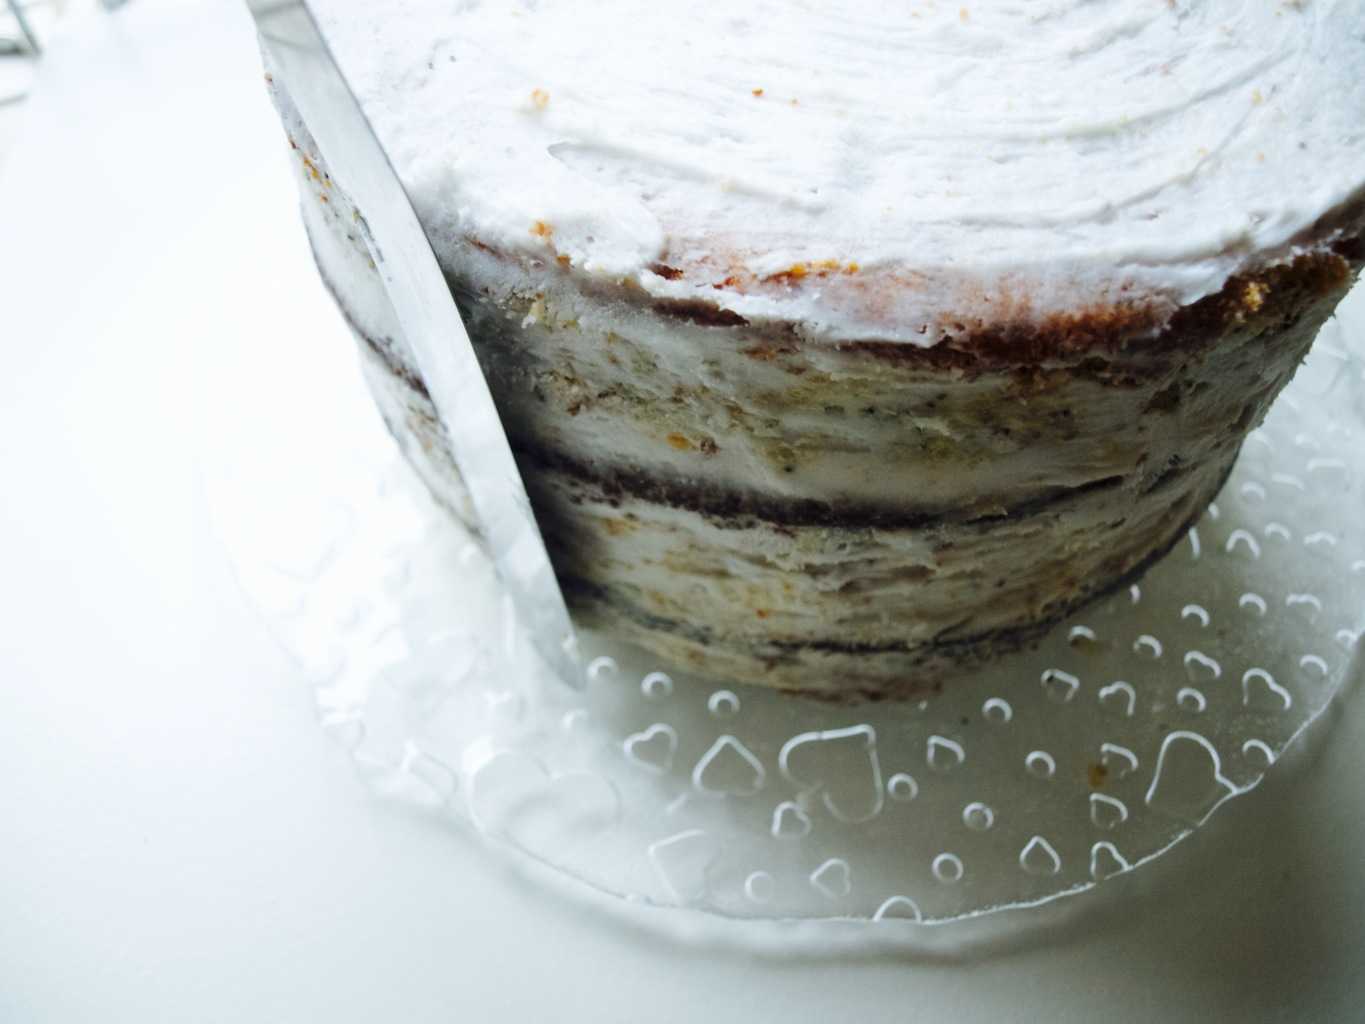
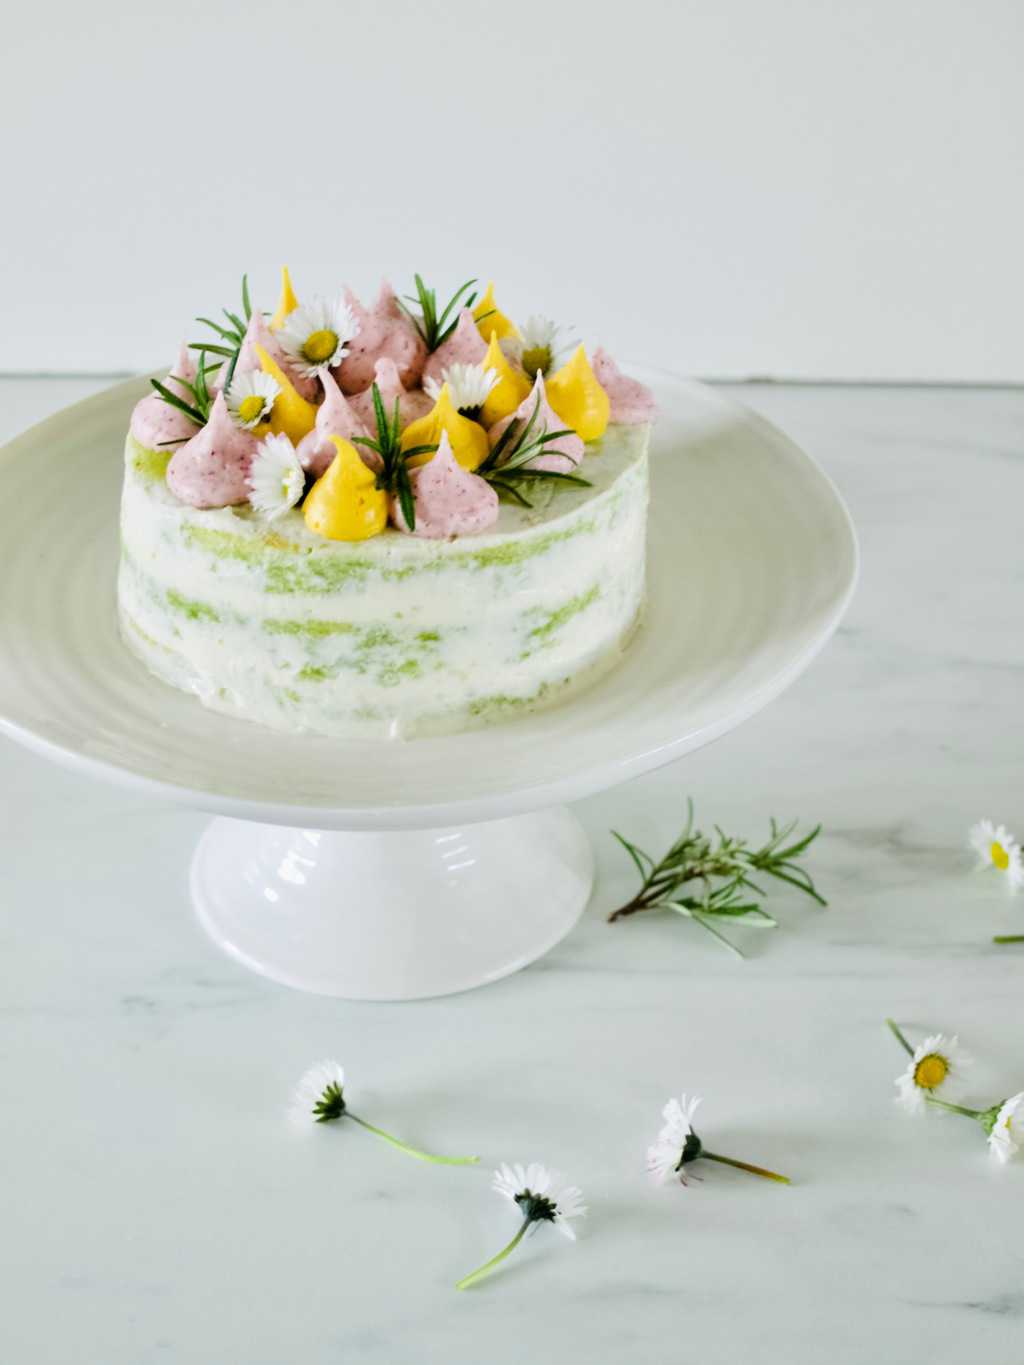
6. To assemble spread a little of the frosting between the layers of the completely cooled cakes and sandwich together. Cover the cake with some more frosting reserving a little for later. Using palette knife gently scrape of the icing creating that naked cake look.Spring-inspired celebration cake (with sweet peas) recipe 
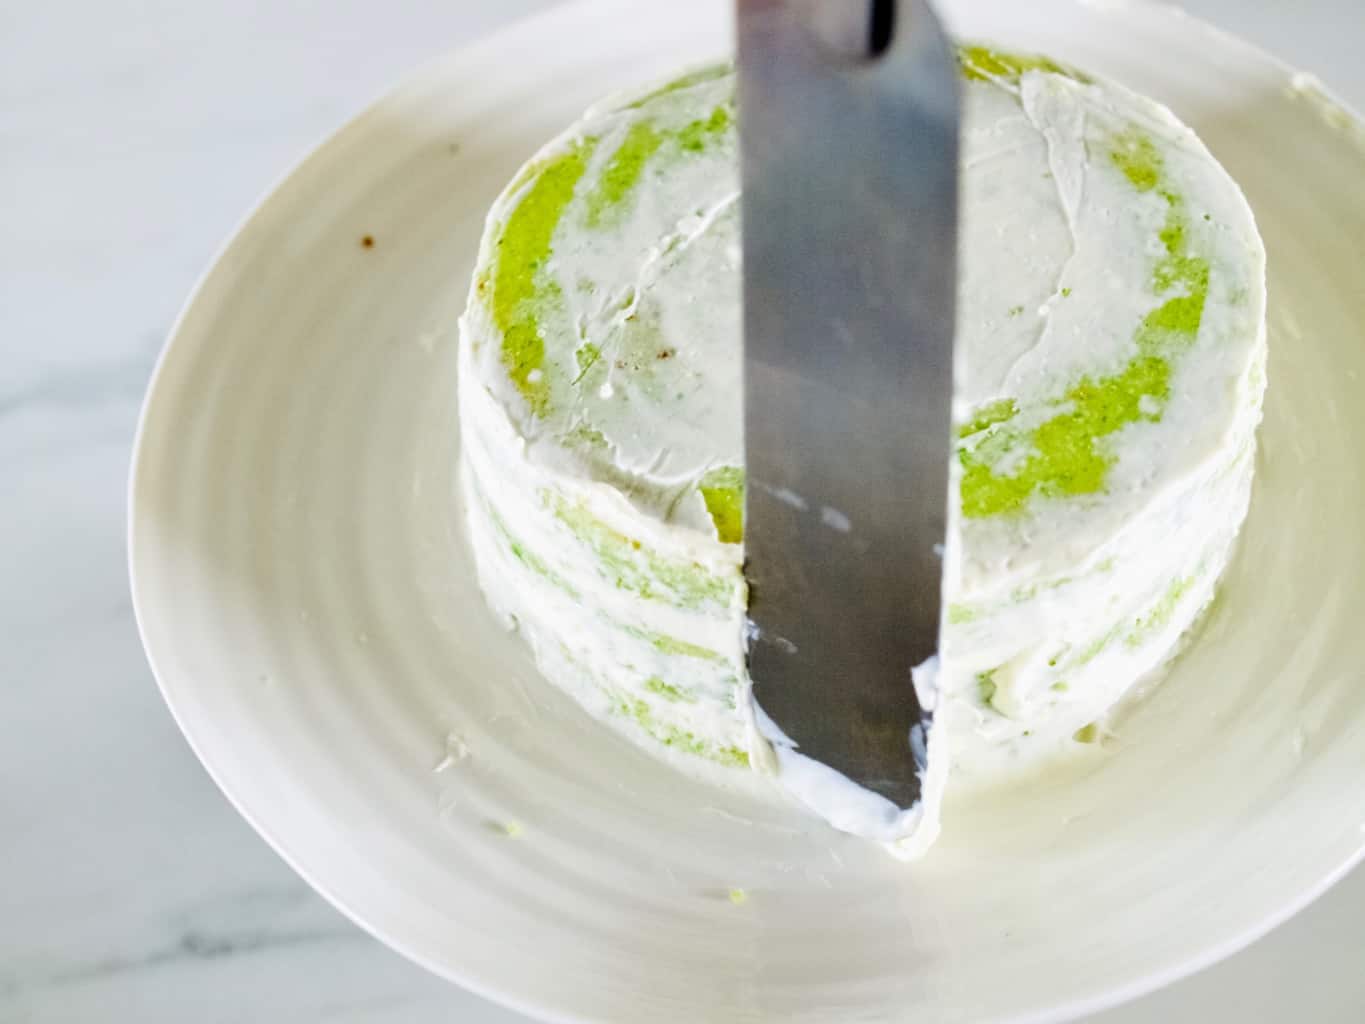
7. Split the remaining frosting into 2 or more bowls, unless you only want to dye it in one colour. I personally would have had only one colour (pink) now when I tried the multicolour. Add the beetroot powder (or other natural colour) and more icing sugar till the frosting reaches the right consistency. It needs to be stiff in order to keep its shape.Spring-inspired celebration cake (with sweet peas) recipe 
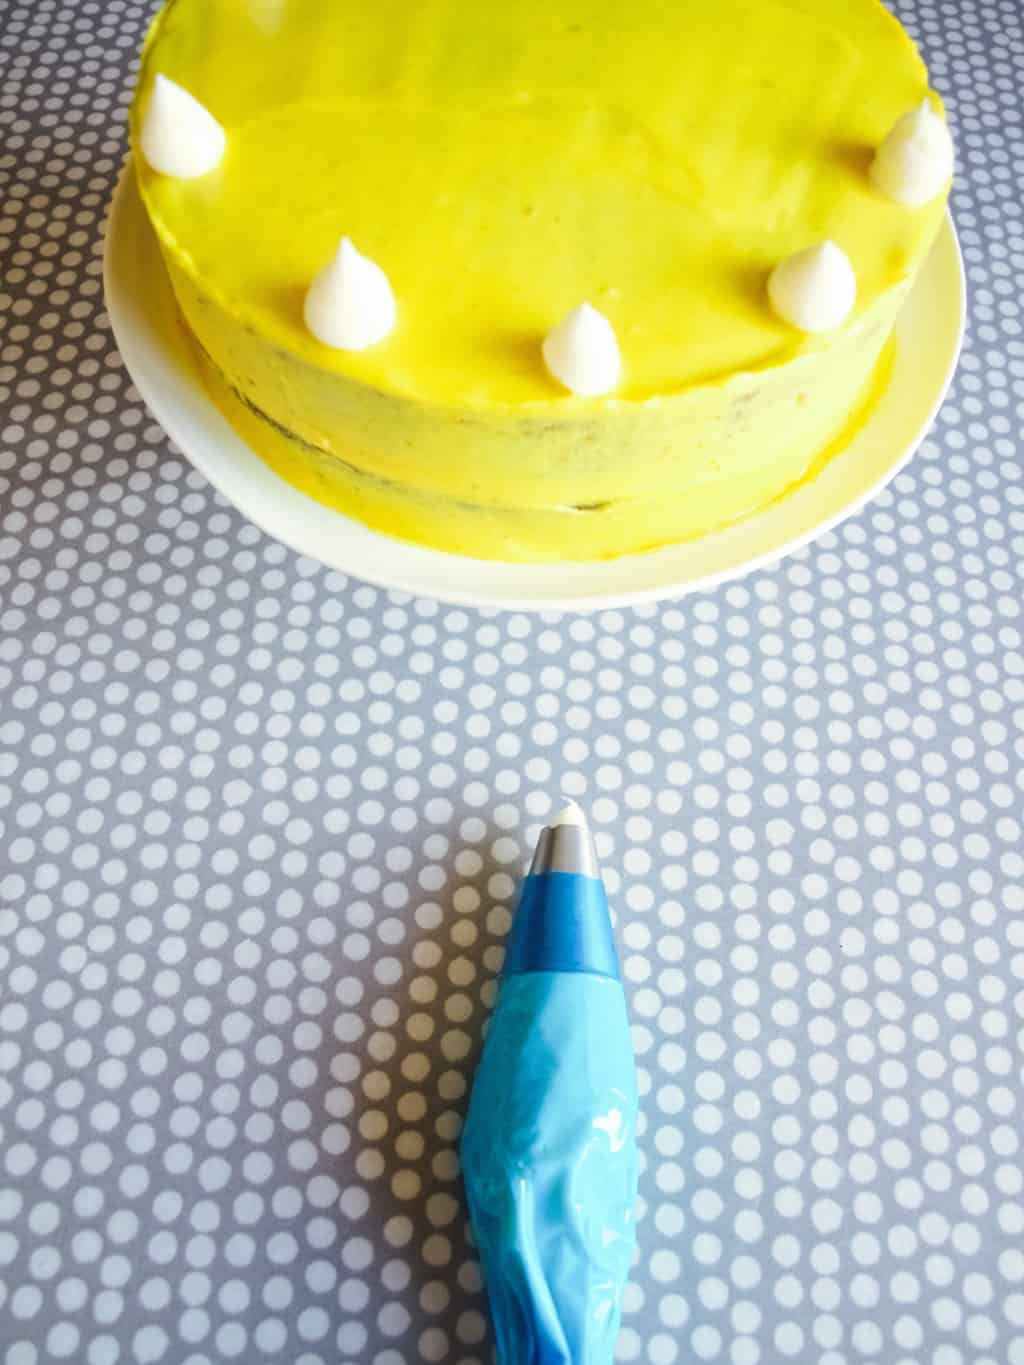
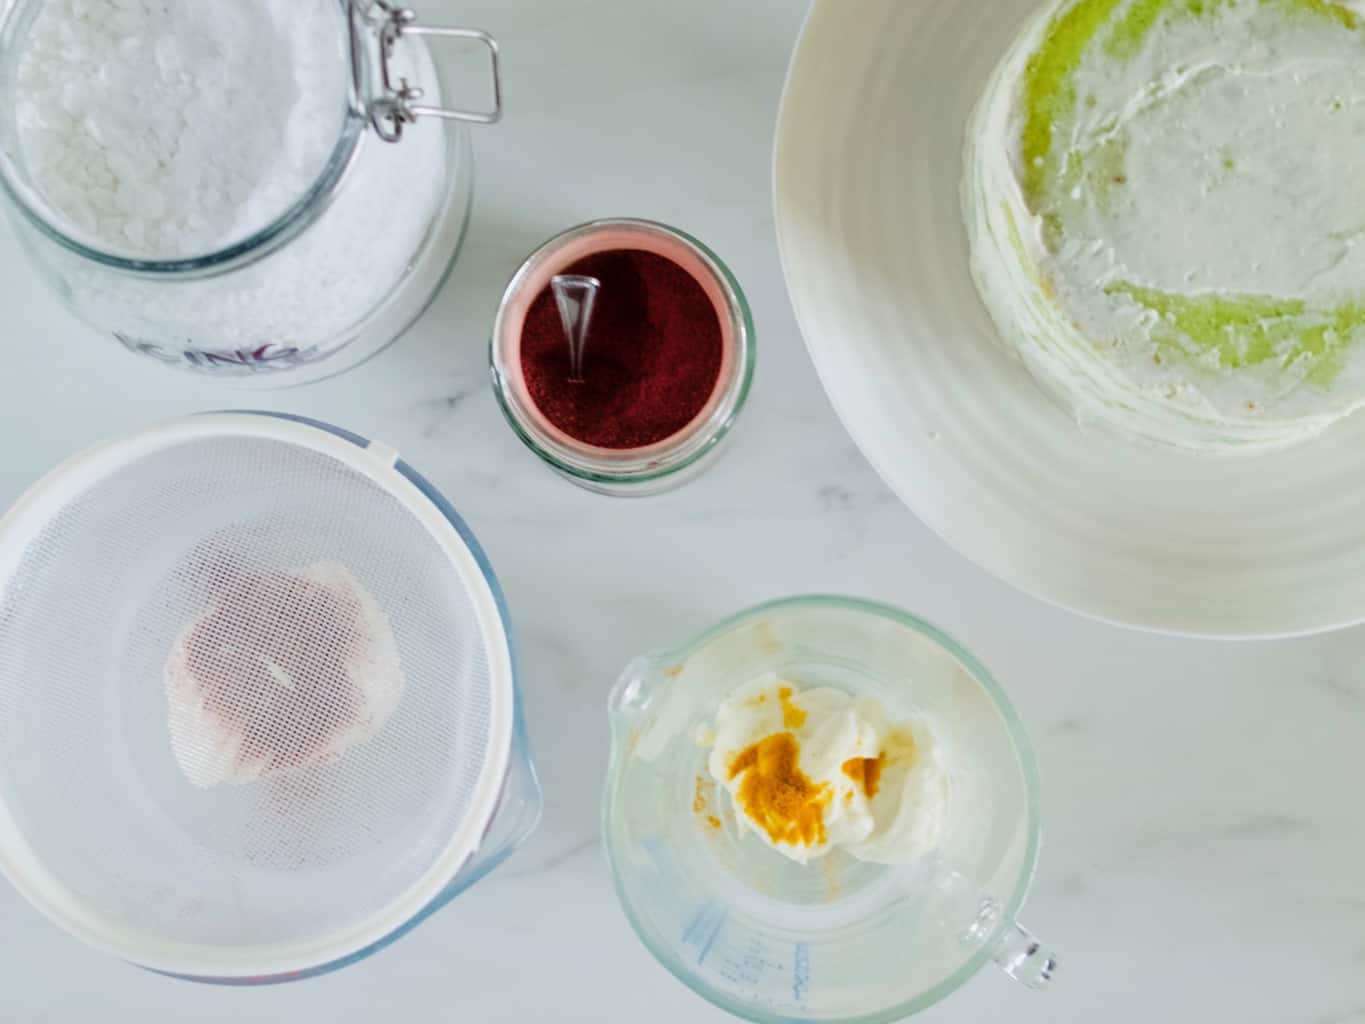
8. Pipe the frosting on the cake using a piping bag and large round nozzle.Spring-inspired celebration cake (with sweet peas) recipe 
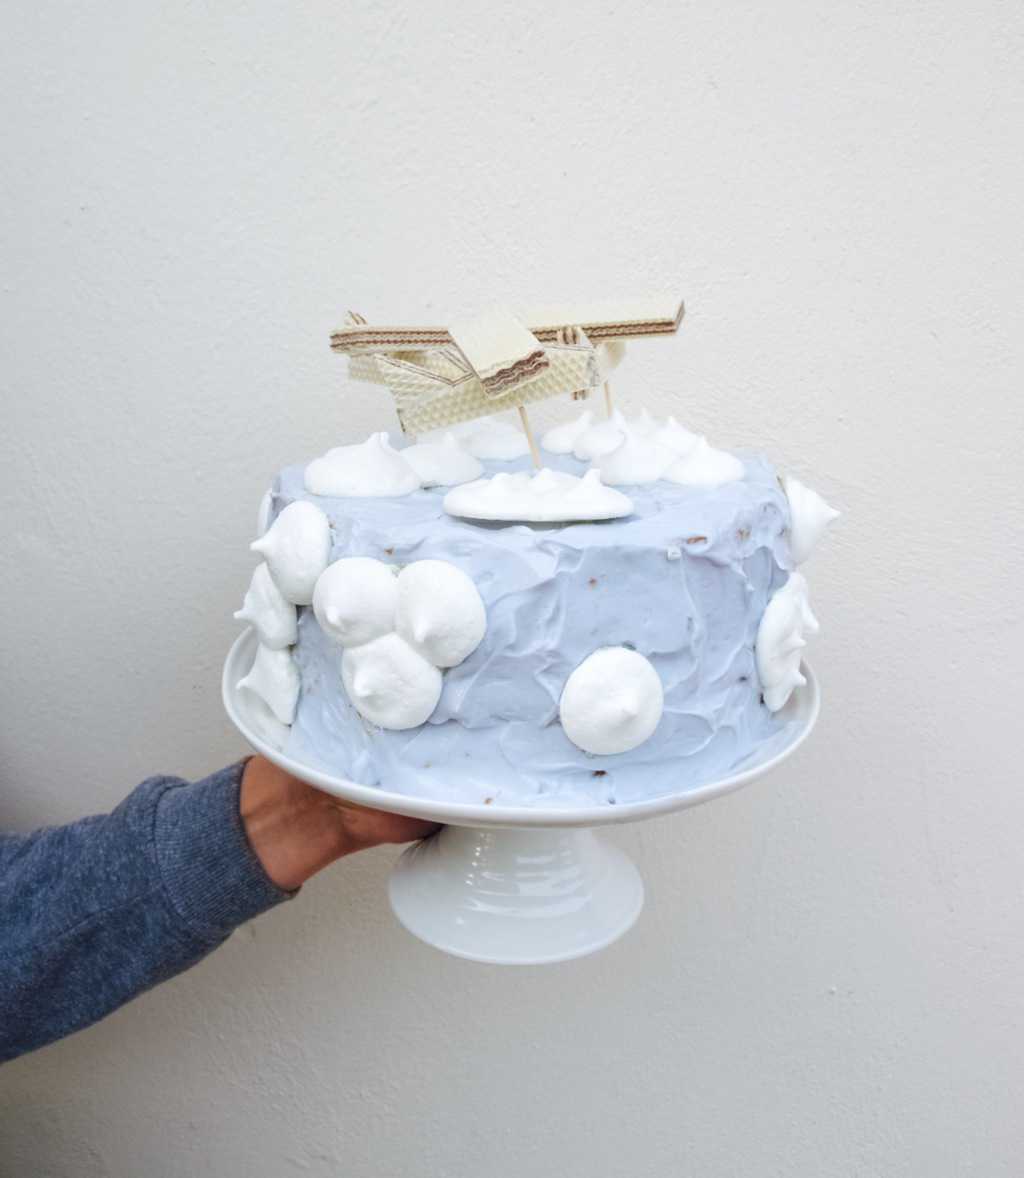
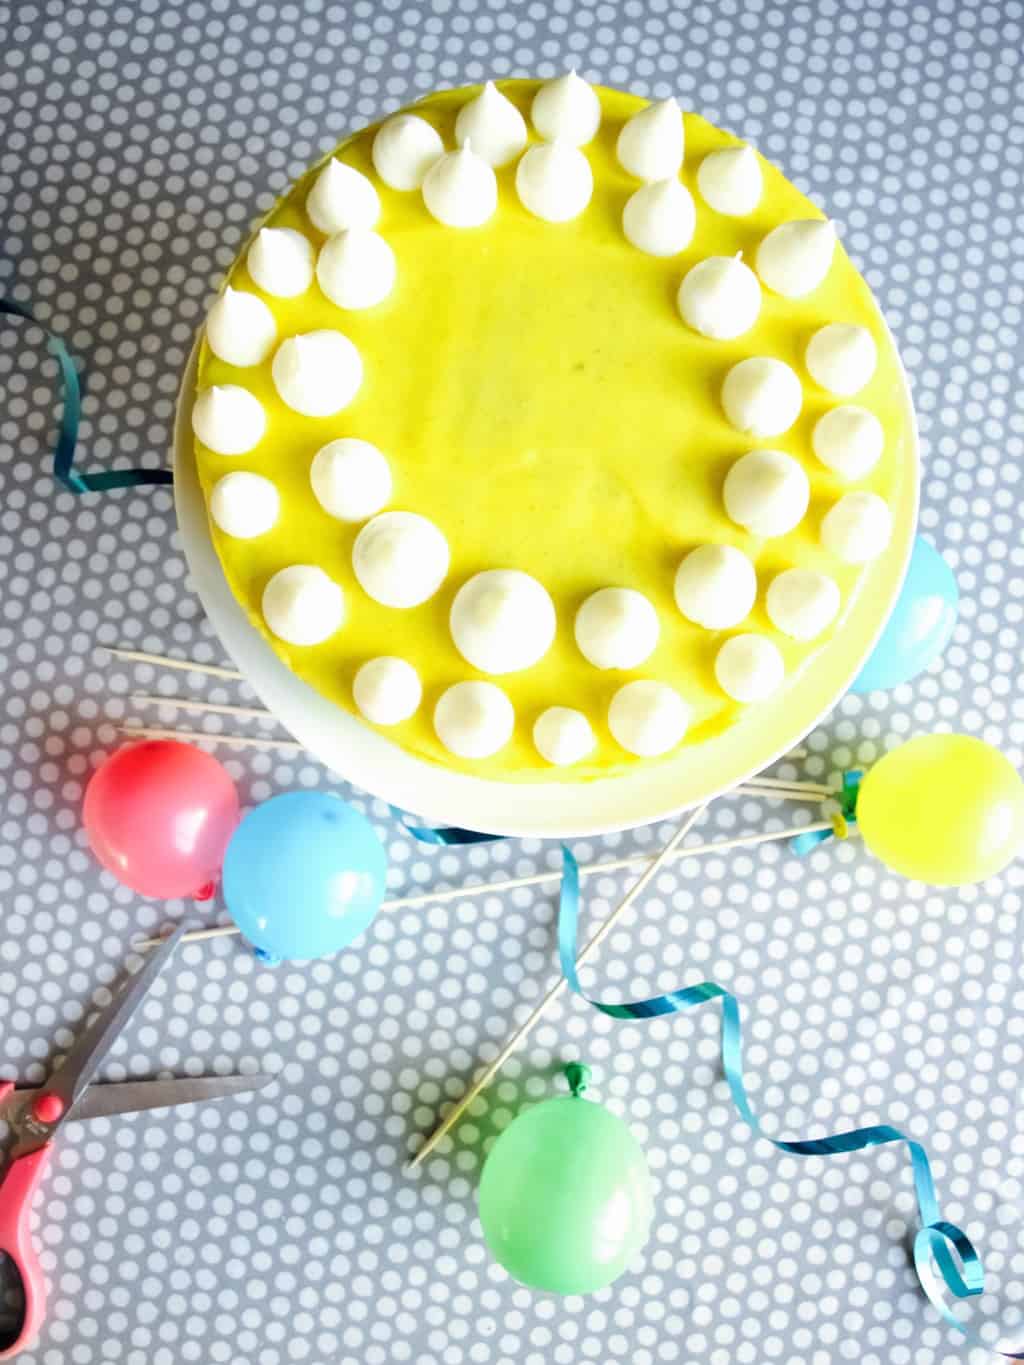
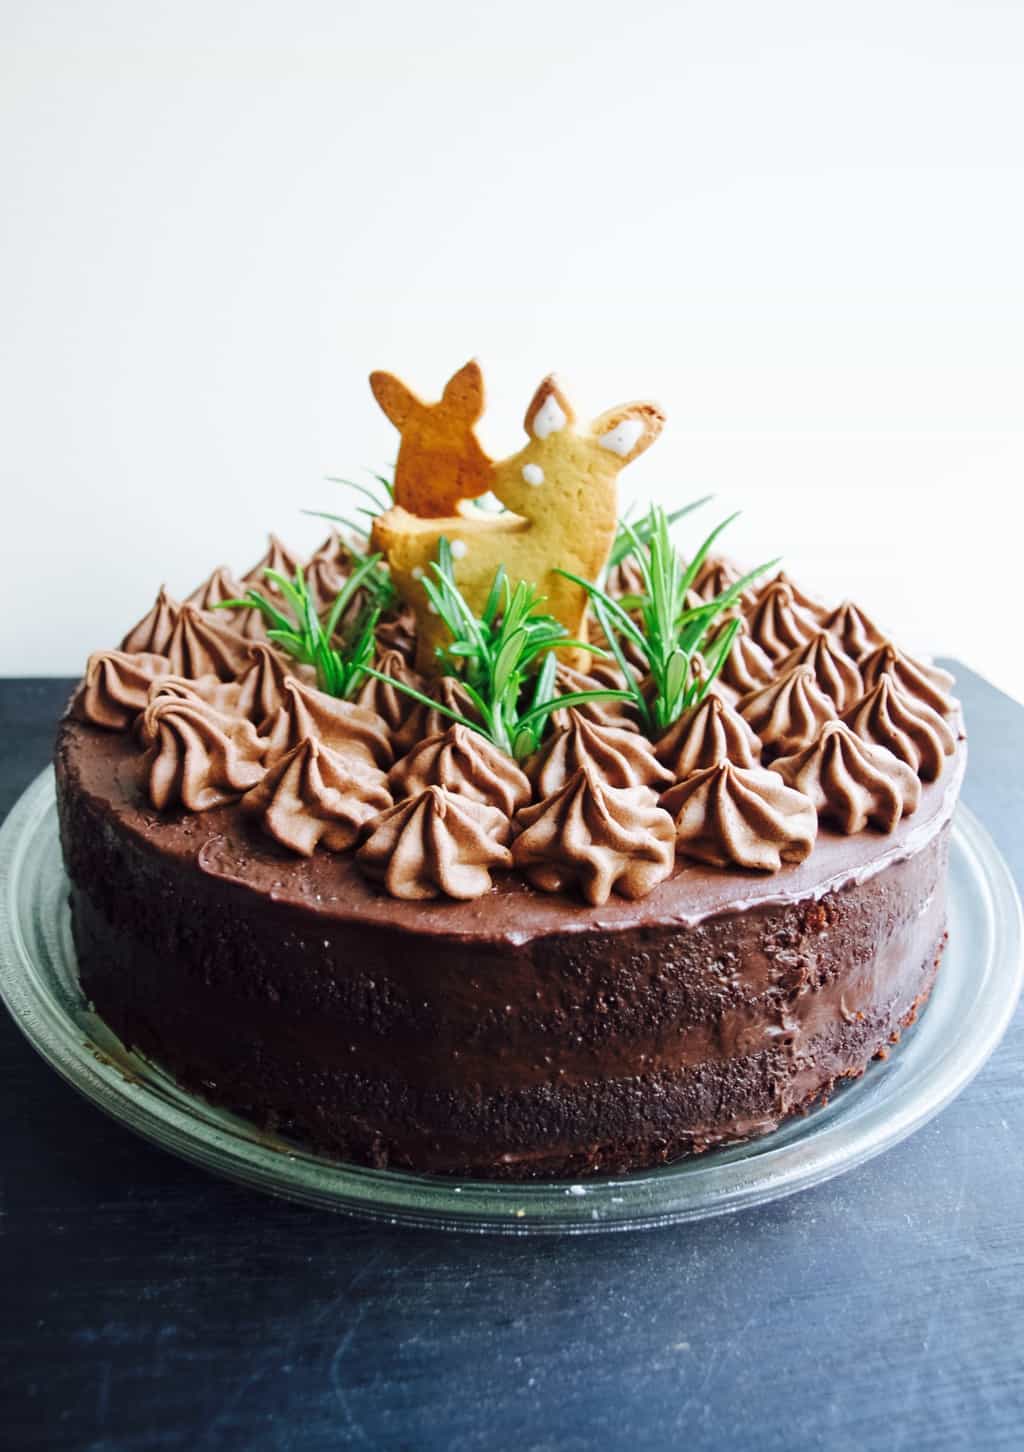
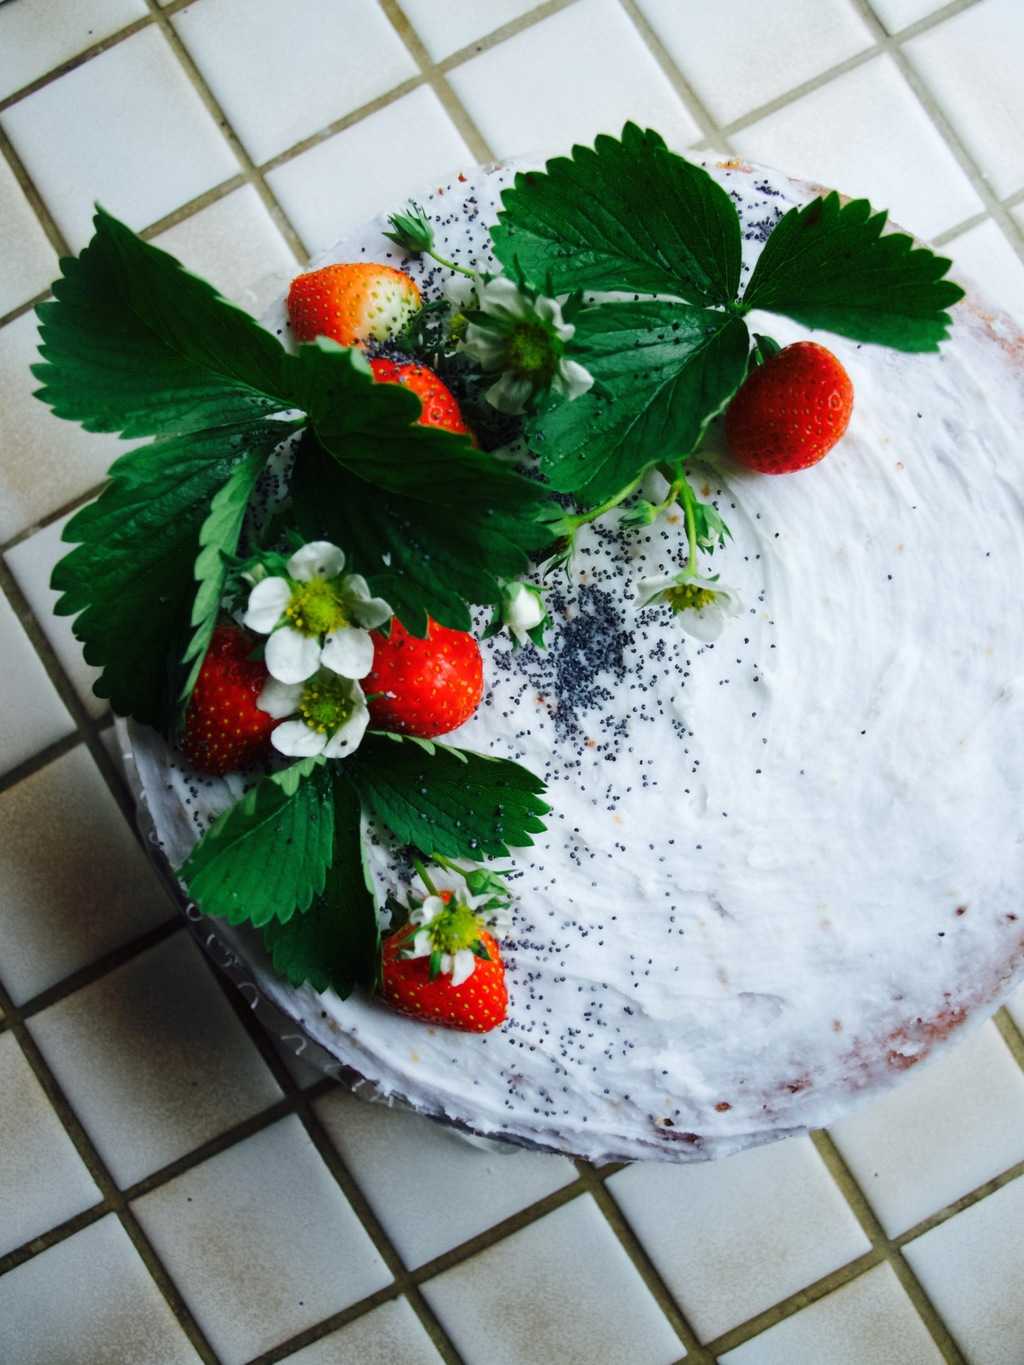
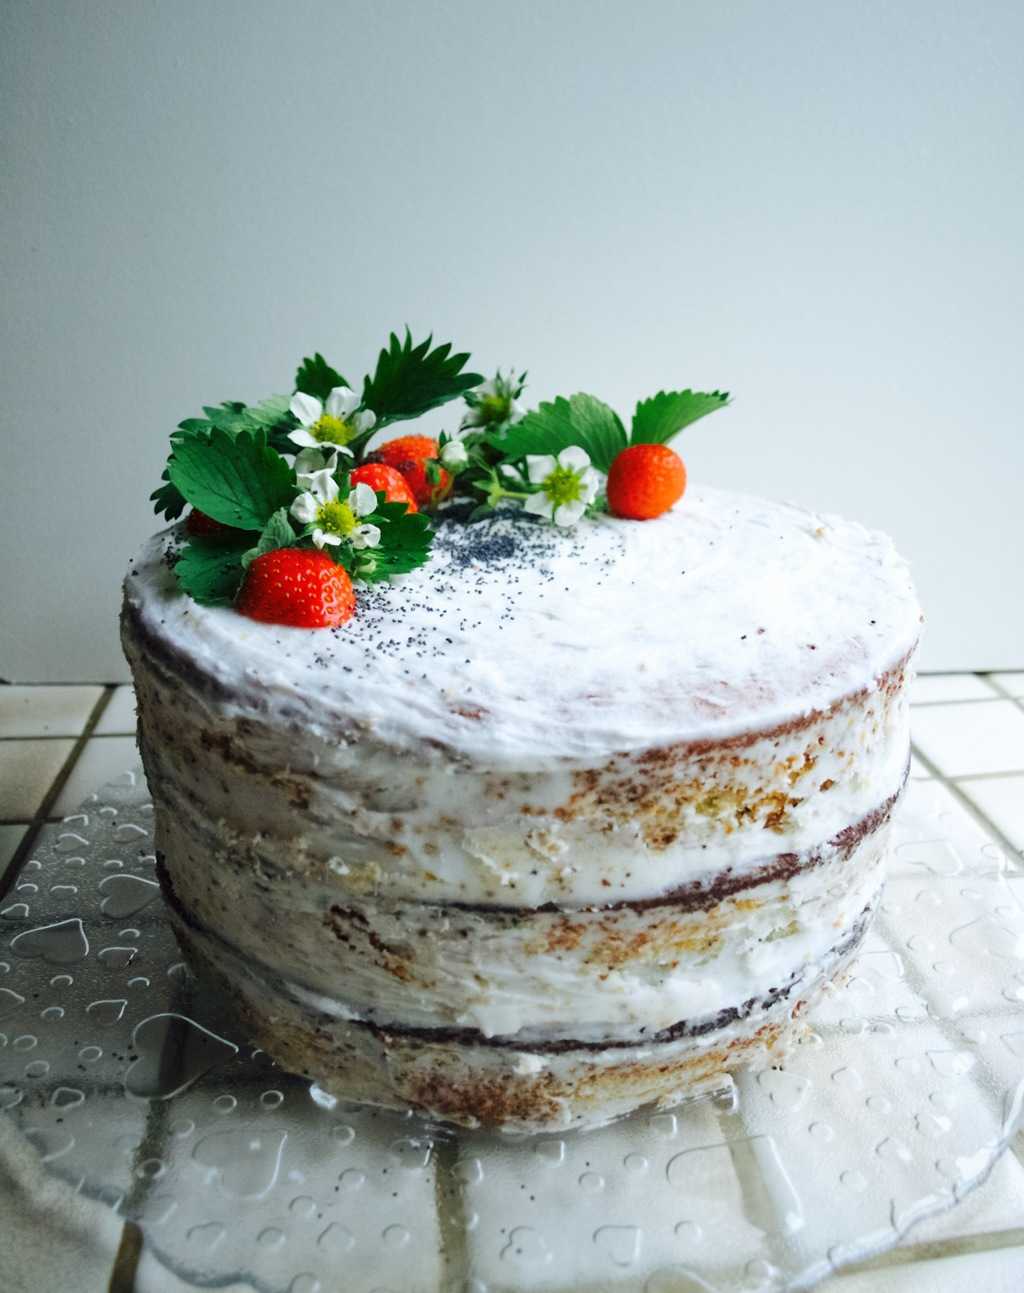
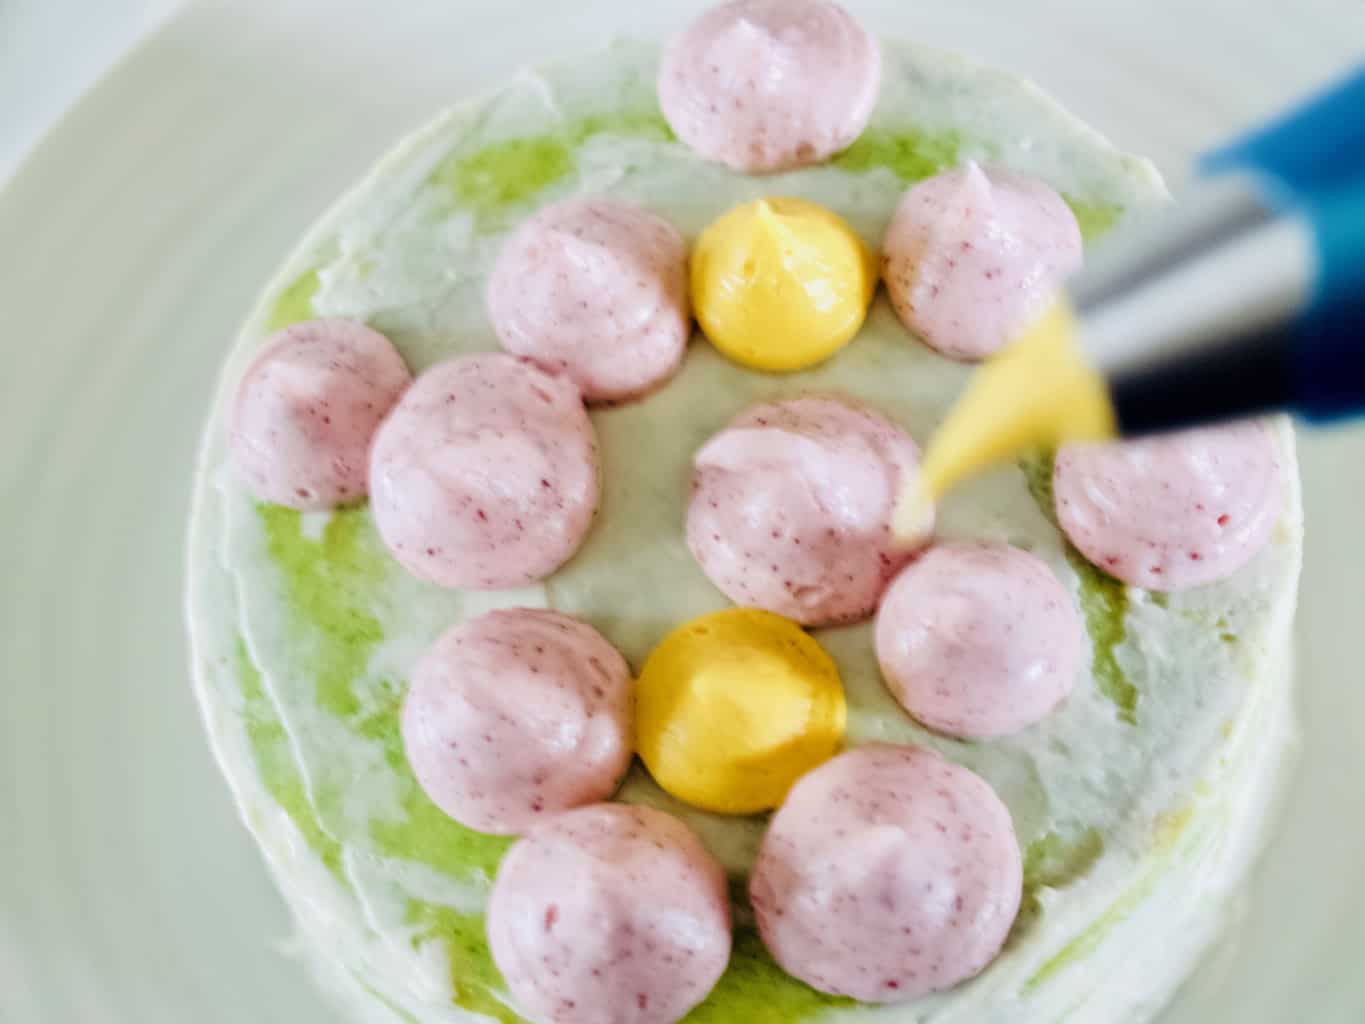
9. Decorate the cake with wild flowers and herbs. It is amazing what you can find in the garden or in the park. These daisies are actually edible and were growing on my lawn.Spring-inspired celebration cake (with sweet peas) recipe Spring-inspired celebration cake (with sweet peas) recipe
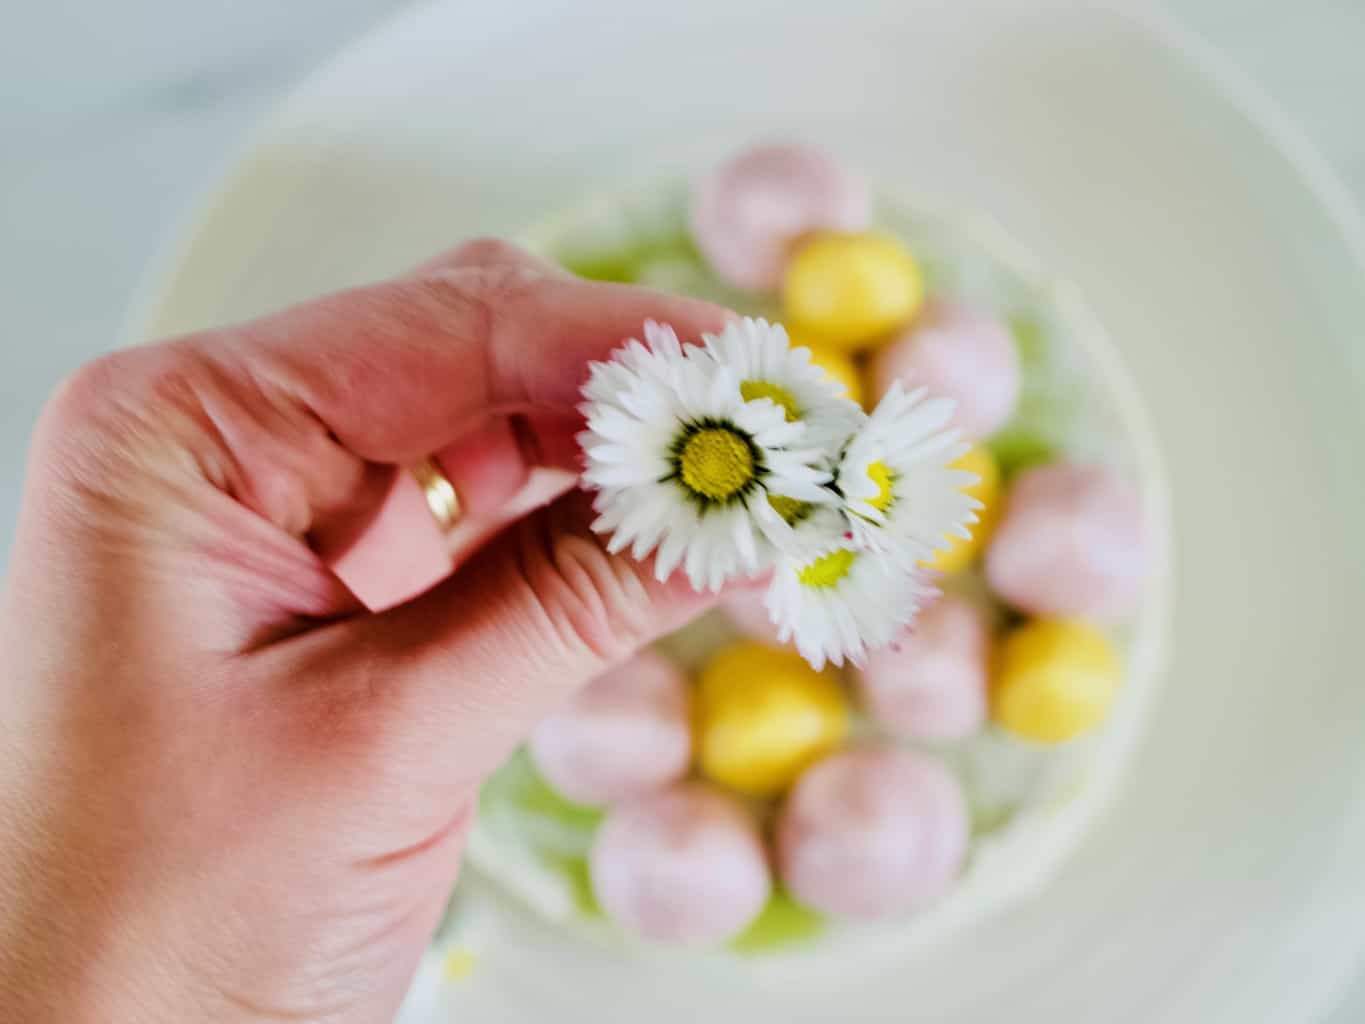
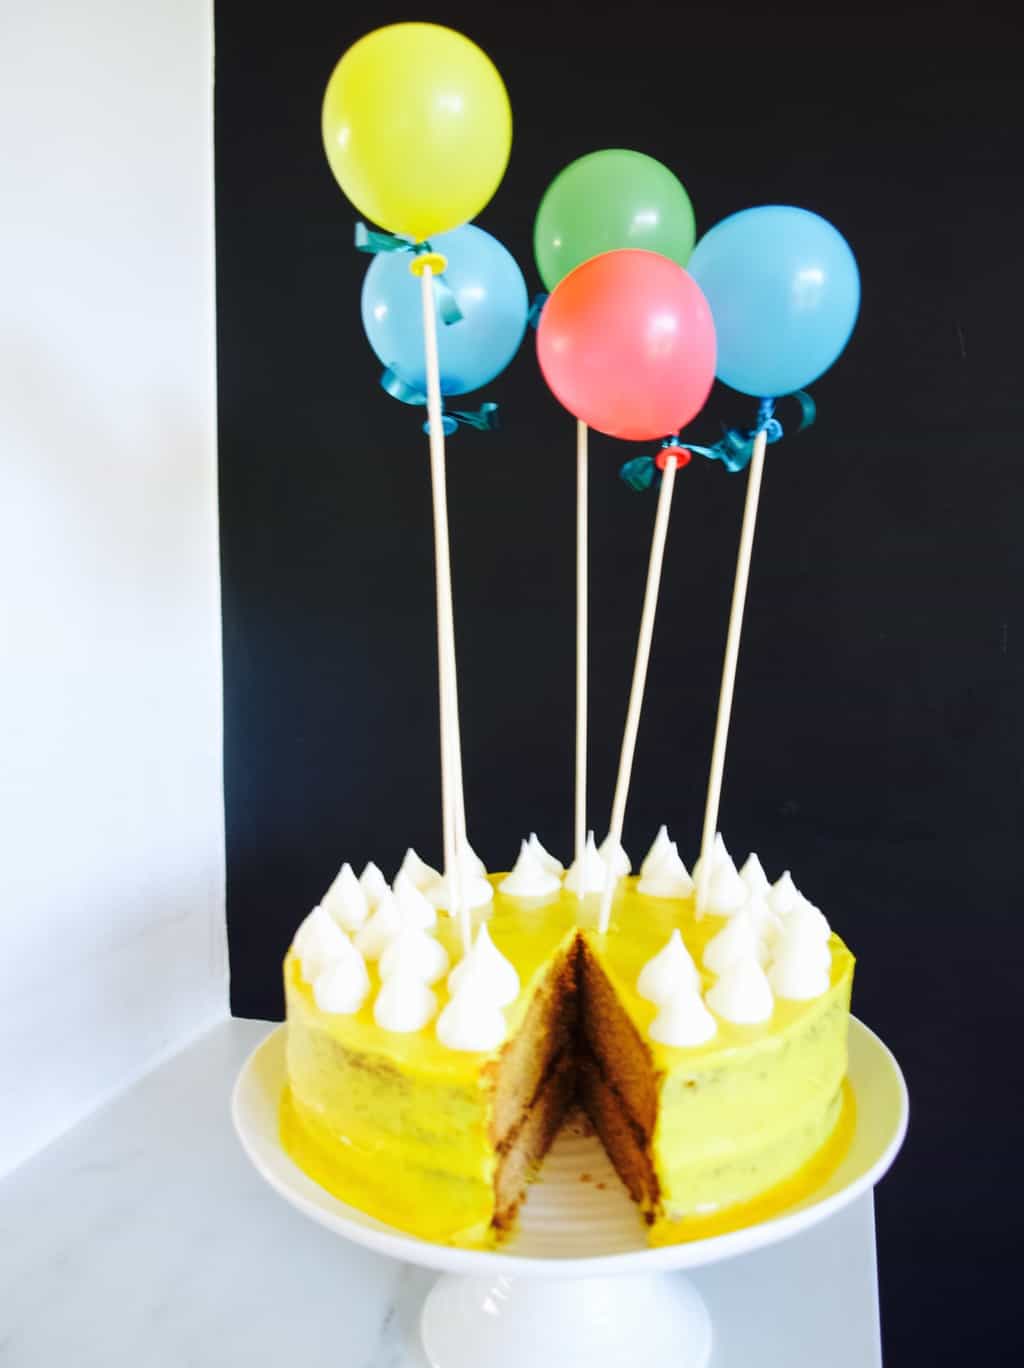
Happy spring waiting everyone!

Rasa xoxo

0

Aeroplane themed birthday cake

Aeroplane themed birthday cakeSo here it is, my vision became a reality. This year I made Lukas birthday cake aeroplane themed which he really enjoyed. I have been dreaming about this cake for ages (not really I practically copied the idea from here). The only thing I wanted to do differently is to try and dye the frosting with natural dyes….

But as you may know the colour blue is hard to find in nature! I know i know, the sky is blue, but you can’t exactly put that in the icing. With a bit of research and friends recommendation I went with butterfly pea tea that is sort of blue. You see I had fun with experimenting and realised that butterfly pea tea changes colour according to the ph of the liquid you mix it into. With a bit of lemon it turns to a burgundy violet and with milk it turns into bluish sky blue. Although this might sound easy, the blue that I get from mixing the tea with milk is not concentrated enough for what is needed when you try to dye large amounts of frosting. I ended up using it in soft cheese frosting and it turned out a little more lilac then sky blue. Shall we imagine that the planes are flying over a sunset sky?Aeroplane themed birthday cake BLUEBERRY YOGURT CAKE WITH BUTTERFLY PEA FROSTING

(for the cake)

  • 3 eggs
  • 350g caster sugar
  • 450g greek yogurt
  • 180g rapeseed or olive oil
  • 300g ground almond
  • 250g plain flour
  • 1 tsp vanilla extract
  • 3tsp baking powder
  • 2 handful blueberries

(for the meringue)

  • 3 egg whites, room temperature
  • 100g icing sugar, sifted
  • few drops of lemon
  • pinch of salt

(for the frosting)

  • 600g soft cheese
  • icing sugar to taste, sifted
  • butterfly pea tea, brewed in little water

(for the “aeroplanes”)

  • cocktail sticks
  • wafers in the finger form

1. To make the cake beat the eggs with sugar. Add the rest of the ingredients and mix again to combine. Pour equal amount of cake mixture into two lined baking tins. Bake in 180C oven for 40-45min.Aeroplane themed birthday cake 2. Meanwhile prepare the meringues for baking. Baking these will take few hours on the low heat once the cake is baked presuming you don’t have two ovens. Mix the egg whites with drop of lemon, salt and half of icing sugar. Start whisking the mixture while gradually adding the rest of icing sugar. In the past I struggled to make meringues and later I realised that all it needs a little patience. It takes really long time to achieve stiffly whisked egg whites, so bear with it till you can see the results. Don’t worry you can’t over mix it ;-)! Pipe the meringues on the baking sheet into cloud shapes using large round nozzle or no nozzle at all. Bake in C60 preheated oven for 3-4h. I find the longer the baking the whiter the meringues!Aeroplane themed birthday cake with merengue clouds  3. To make the frosting whisk soft cheese with icing sugar (I like it less sweet so I don’t add much). Gradually mix in the butterfly pea tea till you like the shade. Aeroplane themed birthday cake 4. For the plane, cut the wafer finger into aeroplane body shape and small triangle for the fin. Glue the plane using icing sugar and water mixture. Use the cocktail sicks to hold the plane together.Aeroplane themed birthday cake Aeroplane themed birthday cake5. To assemble the cake apply the frosting starting from the top and working your way to the bottom. Arrange the “the clouds” and “the planes” as closer to serving as you can. Sadly, the meringue have a tendency to go soggy.Aeroplane themed birthday cake Aeroplane themed birthday cake Aeroplane themed birthday cake I especially liked the cake. Although it was difficult to apply the frosting due to it being crumbly and moist, I feel it was worth it!Aeroplane themed birthday cakeHope you enjoy it!

Rasa xoxo

0

Natural frosting birthday cake

Spiced honey cake with turmeric soft cheese frosting & plum jam filling Few weeks ago we celebrated Tomas birthday, which is why I baked the cake. Anyone who knows me I like the cakes with minimum frosting, made with natural ingredients and most of all I like good flavours. This cake ticks all the boxes for me!!

When I was thinking of Tomas birthday party theme I was thinking of something cheerful, exciting and bold (exactly how I would imagine Tomas when he grows up). This is why I thought bright yellow frosting on the cake would be ideal. But what natural colouring could I use for a bright yellow? I did not need to think for too long, I suddenly remembered the power of turmeric that is vibrant with not much taste to it. The flavour of the cake followed of course. I thought what goes better with turmeric then other spices such as cinnamon, clove and nutmeg. I was completely right, when testing the cake I realised everything just work really well together. I used plum jam to neutralise the taste of richness which also turned out a very good choice.

Hope I got you seduced to try to bake this cake yourself. You will find the recipe below ;-).Spiced honey cake with turmeric soft cheese frosting & plum jam filling HONEY SPICED CAKE WITH TURMERIC FROSTING AND PLUM JAM FILLING

(for the cake)

  • 200g butter
  • 100g light brown sugar
  • 100g dark brown sugar
  • 170g honey
  • 2 eggs
  • 260ml milk
  • 325g flour
  • 1/2 tsp salt
  • 3tsp baking powder
  • 3tsp mixed spice
  • finelly grated zest of 2 oranges

(for the frosting)

  • 150g softened butter
  • 150g soft cheese
  • 150g icing sugar, plus a bit more for white frosting
  • 1tsp turmeric
  • 1/2 jar plum jam

1. Over the hob melt the butter together with sugars and honey till everything is incorporated and the sugar is dissolved.

2. Add the rest of the cake ingredients and mix again to combine everything well.Spiced honey cake with turmeric soft cheese frosting & plum jam filling 3. Split the cake mixture into two ready tins (same size, springform are the best). Bake in 150C preheated oven for 1h and 15min.Spiced honey cake with turmeric soft cheese frosting & plum jam filling 4. Sandwich the cake with some plum jam. My tip is to put the cake upside down so the top is completely flat (really felpful when you do frosting).Spiced honey cake with turmeric soft cheese frosting & plum jam filling 5. To make the frosting place all the ingredients except turmeric into the mixer and let it run for few minutes. Put few table spoons of frosting aside for the white frosting. Add turmeric and let the mixer do its job one more time.  Spiced honey cake with turmeric soft cheese frosting & plum jam filling 6. Next job is to apply the frosting. I always add almost all the frosting on top to begin with and then push it down gently to the sides and then I work with frosting palette knife to the top again (I make the frosting thin for a reason so it flows easily). Once the base frosting is done I recommend to place the cake into the fridge so it sets.Spiced honey cake with turmeric soft cheese frosting & plum jam filling 7. Meanwhile add more icing sugar to the frosting left on the side. Continue adding the sugar till you are satisfied with the stiffness of the cream. Transfer white frosting into the piping bag with large round nozzle attached. Carefully pipe your decorations on the cake.Spiced honey cake with turmeric soft cheese frosting & plum jam filling 8. Finally decorate with any cake toppers. I used water balloons to make these mini balloon cake toppers which made the cake look very fun like I expected :-).Spiced honey cake with turmeric soft cheese frosting & plum jam filling Spiced honey cake with turmeric soft cheese frosting & plum jam filling Hope you like it too!!

Rasa xoxo

0

Woodland themed birthday cake

Woodland themed chocolate birthday cake (dairy and gluten free version) recipe Although we celebrated Lukas birthday together with Granny birthday last weekend he is officially turning 2 today (wow, where does the time go!). It was good to get together with the family in Devon, staying here a little longer with the kids while Joni is sorting out our new kitchen (hopefully will share about it more soon).

As for a birthday cake I am very very pleased that I was not asked to bake him a cake in Paw Patrol theme (or something along those lines), so I chose to make woodland themed one. Which is much prettier and tasteful in my opinion. I really dislike heavily iced cakes! I also decided to keep it simple as I am quite busy these days (bringing up baby and toddler at the same time is no joke).

DAIRY AND GLUTEN FREE CHOCOLATE BIRTHDAY CAKE

(for the cake)

  • 6 eggs
  • 300ml oil (I used olive oil)
  • 400g caster sugar
  • 300g ground almonds
  • 3tsp baking powder
  • 50g cocoa powder mixed with 125ml boiling water

(for the frosting)

  • 1 avocado
  • 85g dairy-free sunflower spread
  • 200g dairy-free chocolate, melted (do it carefully if doing in microwave)
  • 50g cocoa powder mixed with 125ml boiling water
  • 150g icing sugar, sifted (+100g extra for thicker frosting)

(for the decoration)

  • woodland themed gingerbread cookies
  • rosemary stalks

1. First bake a cake. Whisk the eggs with sugar and oil until you have custard like consistency. Add almonds, baking powder and cocoa powder liquid. Mix everything again to combine. Woodland themed chocolate birthday cake (dairy and gluten free version) recipe 2. Pour equal amount of cake mixture into two lined baking tins. Bake in 180C oven for 40-45min.Woodland themed chocolate birthday cake (dairy and gluten free version) recipe3. While waiting for the cake to bake, prep gingerbread cookies. You may be able to buy yours in store, but I needed dairy free ones at least so I ended up baking my own. I used this recipe and replaced butter with sunflower spread. Woodland themed chocolate birthday cake (dairy and gluten free version) recipe 4. Finally, time to make the frosting. Place all the ingredients (only 150g icing sugar at this stage) into electric mixer/processor and whizz. The mixture should turn into smooth frosting .Woodland themed chocolate birthday cake (dairy and gluten free version) recipe Spread half of the frosting in between the cake layers, top and sides.Woodland themed chocolate birthday cake (dairy and gluten free version) recipe Use pallet knife to smooth the frosting on the cake.Woodland themed chocolate birthday cake (dairy and gluten free version) recipe 5. To decorate add 100g more icing sugar into the remaining frosting to make it thicker. Pipe it on top to make a decorative texture. Top the cake with woodland themed cookies and rosemary stalks to represent trees/bushes. Woodland themed chocolate birthday cake (dairy and gluten free version) recipe Woodland themed chocolate birthday cake (dairy and gluten free version) recipeHope I inspired you ;-)

Rasa xoxo

0

Nicola’s birthday cake

Nicola's birthday cake Last weekend we headed down to Devon again to celebrate my sister in law Nicola’s 30th birthday and I was asked to bake a cake (what a privilege!!). It had to be gluten and dairy free so it was a fun challenge to accept. If you have been following me on social media then you probably have seen me doing bake tests over the past few weeks. I originally wanted to make a matcha cake, but was not sure if that would have been a crowd pleaser. At the end I decided to go with more simple flavours such as lemon and poppy seed. I used a very similar method to this chocolate orange cake which essentially uses citrus fruit pulp instead of butter or oil. This method has never let me down producing a very moist and tasty cake. I just need to find a way to reduce the amount of sugar (hmmm…a tough one to do in cake!).Nicola's birthday cake GLUTEN AND DAIRY FREE LEMON POPPY SEED CAKE WITH COCONUT BUTTER FROSTING

(for the cake)

  • 16 lemons
  • 18 eggs (it’s a very large cake!)
  • 750g golden caster sugar
  • 750g ground almonds
  • 6tsp baking powder
  • 4tbsp poppy seeds + for decorating

(for the frosting)

  • 1/2 cup virgin coconut oil (butter)
  • juice from 2 lemons
  • about 1kg icing sugar

1. First things first, cook the lemons as that takes the longest. Peal them and try to pick out any pips out of them (I know I know this might take forever, but its worth it as your cake might end up tasting a little bitter). Boil the lemons for about 30 min. Once they are cooked, drain them and check any leftover pips. By now your lemons should look like puree, but whizz them anyways with the hand processor just to get it extra smooth.

Baking with cooked lemon2. Whisk the eggs with sugar till its pale and creamy. Add the rest of ingredients into eggs (including lemon puree) and mix to combine everything well. Split the cake mixture into three lined baking springform tins. Bake the cakes in 150C preheated oven for 1.5h.Baking with cooked lemon3. Meanwhile make the frosting. Sift the icing sugar into the coconut oil and add lemon juice. Mix everything using electric mixer until smooth and creamy.Lemon poppy seed cake with coconut butter frosting4. As for frosting the cake I did it very lightly. I applied thin layer of frosting between the layers and more on the sides so I could scrape it off later (still keeping a natural “naked” cake look). Lemon poppy seed cake with coconut butter frosting5. Decorate it with poppy seeds, berries and flowers in keeping with the “au naturel” look ;-).Lemon poppy seed cake with coconut butter frosting Lemon poppy seed cake with coconut butter frostingHope you are feeling inspired.

Rasa xoxo

0

Baby friendly birthday cake

Baby friendly birthday cakeLast week we celebrated Lukas birthday and today I would like to share with you the recipe of the cake I made for him. I aimed for something sugar free of course that is suitable for a baby. I made sure to include banana in it just because Lukas loooovesss banana very much (maybe he is a minion who knows :D) and also because it adds some sweetness. The cake of course wasn’t very sweet. I would say it was a brioche sweetness level. I also thought that it is better eaten warm, but I had to cool it down unfortunately to decorate it and make it look a little bit more festive ;-). For “butter cream” I just used whipping cream, so it wasn’t sweet at all, but actually Lukas liked it very much so I guess it’s ok ;-).  Baby friendly birthday cakeBABY BIRTHDAY CAKE

(for the cake)

  • 150g banana (about 1-2 bananas depending on size)
  • 1 egg
  • 60ml oil (I used refined olive oil, but rapeseed oil would probably be better)
  • 330g plain flour
  • 27g oats (I used pack of portioned porridge oats that actually comes in 27g)
  • 2tsp baking powder
  • 125ml milk
  • 3tbsp yogurt (I used greek style yogurt, but natural yogurt would work fine too)

(for decorations)

  • whipping cream, whipped till stiff (one tube of 300ml will do)
  • no added sugar chocolate (there is no such thing as sugar free chocolate my friends!)
  • blueberries (or any type of other berries that are sweet)

1. Whizz bananas, egg and oil in the food processor. Add all other ingredients and mix everything to combine.

2. Spoon the cake dough into small lined spring form tins (mine filled 4 tins).

3. Place the tins into preheated 180C oven and bake the cakes for 20min or so.

Baby friendly birthday cake4. Meanwhile I made chocolate cake decorations. I must admit I got little rusty, because I have not done it for aaaaages! I melted some chocolate, poured into pouch I made out of backing paper and cut the hole in it so I could pipe the chocolate out. I lined a metal baking tin with backing paper and piped chocolate on it in the leaf shapes. Placed it in the freezer for few minutes to set. Done!Baby friendly birthday cake5. Next up is decorating! Sandwich the cake by spreading whipped cream in between and then spread more on top and around to ice the cake. My tip is to really wait till the cakes are cool and trim the tops off, that really helps to make the cake square and therefore easy to ice.Baby friendly birthday cakeOnce the cake is iced, decorate it by piping some more whipped cream on top, sprinkling with blueberries and arranging some chocolate decorations on top if you wish.Baby friendly birthday cakeBaby friendly birthday cakeHope your baby likes it too ;-)

Rasa xx

0

Joni’s birthday trifle cake

Trifle cake, perfect summer occasion cake!I know this might be a bit delayed, but I thought I will share what cake I baked for Joni’s birthday. This year Joni wanted a trifle (he mentioned that long time ago), but as you may all know it’s a difficult one to transport (We celebrated the birthday in Mudeford). I instantly thought I of making a cake version of trifle dessert! I decided to use a basic sponge as a base and lady fingers holding the cake’s shape (hence me experiments of baking lady fingers last week). Basically the aim was to make an edible dish if you know what I mean ;-). The result was great, however if I made this again, I would have filled it with more filling (the recipe edited accordingly). Unfortunately I wasn’t prepared for such a large trifle “dish” :-D. Here it’s how I got on… Trifle cake, perfect summer occasion cake!RASPBERRY TRIFLE CAKE

(for the sponge)

  • 225g butter
  • 225g sugar
  • 4 eggs
  • 225g plain flour
  • 2tsp baking powder

(for the filling)

  • 500g mascarpone and 500g fresh custard mixed together
  • 100ml sweet fruity liquor (such as cherry or  blackberry liquor)
  • 500g or more raspberries, drizzled with 2 tbsp elderflower cordial and lightly mashed

(extras)

  • lady fingers, enough to cover the cake sides (try baking your own or just buy them ready baked)

1. Bake the sponge. Cream butter with sugar then gradually add eggs, flour and baking powder. Mix everything to combine well. Spoon the cake mixture into lined round baking tin and bake it in the preheated 180C oven for 45min or so.

2. Once the sponge has cooled I have cut the top away with the knife. The reason for this was so there would be no “hill” caused by the rising cake and because I did not want the crust stopping the sponge from absorbing the liquor.Trifle cake, perfect summer occasion cake!3. Next I have arranged the lady fingers around the sponge base sides. I used a bit of filling cream to make them stick. I tied the ribbon to fix everything in place.Trifle cake, perfect summer occasion cake!4. Layer the filling! Started with the cream layer then the raspberries (then the cream and raspberries again and so on), just because I thought cream would seal the sides better and stop the raspberry juice running through the lady finger gaps. Trifle cake, perfect summer occasion cake! Trifle cake, perfect summer occasion cake!Chill the trifle cake in the fridge before serving. Enjoy!

Rasa xoxo

Poppyseed lady fingers

Poppyseed lady finger recipeI decided to try and bake these crispy and light biscuits because I had few ideas on cake decorating with it (although they may not look suitable for decorating yet). Lady fingers (so they called) taste quite plain, but because of it’s consistency they are perfect for making fresh summer desserts such as very famous tiramisu. This is my first time making these macaroon like biscuits and I am quite pleased with the outcome even if they did not come in the perfect uniform shape (more practicing needed I guess!). Overall I prefer these to compare to shop bought as they taste better and it can be custom made such as these – with poppyseed!

POPPYSEED LADY FINGERS makes about 24 lady fingers

  • 2 eggs, separated
  • 70g caster sugar
  • 55g plain flour
  • 2 tbsp poppyseed
  • a pinch baking powder (for cheating)

1. First whisk the egg white. Make sure eggs are in room temperature before whisking. Add 2 tbsp sugar into egg whites gradually while whisking. Well whisked egg whites should be stiff and shiny. Poppyseed lady finger recipe2. In separate bowl whisk egg yolks with the reminder sugar untill pale and creamy. Gradually fold in egg white as well as flour mix (with poppyseed and baking powder) till everything is well incorporated.

3. Next, transfer the mixture into the piping bag. On lined baking tray pipe 1 cm thick and 5cm long lady fingers. My first batch was unsuccessful as I piped 2 cm thick and too close together (these biscuits do expand when baking!). Bake in preheated C200 oven for 10-15min. Very important not to under-bake as they need to come out crispy and not spongy! Let it cool for further 10 min or so while on baking sheets.My second batch looked better, but practicing is still needed as some are still wonky :-D. Poppyseed lady finger recipeHope my experience with these helps you ;-)

Rasa xoxo

0

Evangeline’s birthday cake

Chocolate sponge and Vanilla Cranberry cheesecake in oneThis cake that I baked for Evangeline’s birthday almost two weeks ago was received with the “awww…” wow!” and “that’s amazing” praises. Little did the know that this cake did not come out exactly how I imagined! I was experimenting with baking cheesecake on the top of the sponge (something like this). I took two of my favourite recipes and combined, the cheesecake unfortunately went under the sponge. I guess I will have to do more experimenting in the future! Chocolate sponge and Vanilla Cranberry cheesecake in oneCHOCOLATE SPONGE & VANILLA CHEESECAKE WITH THE CRANBERRY TOPPING

(for the sponge)

  • 50g dark chocolate
  • 55g butter
  • 100g golden caster sugar
  • 1 egg
  • 2tbsp milk
  • 2tbsp yogurt
  • 70g plain flour
  • 2tsp baking powder

(for the cheesecake filling)

  • 400g soft cheese
  • 120g caster sugar
  • 1 tsp cornflour
  • 3 eggs
  • vanilla seeds scraped from one pod
  • 1/4 tsp lemon juice or white vinegar

(for the topping)

  • 200g cranberry sauce
  • 300g fresh cranberries
  • 50g sugar

1. First make a chocolate sponge cake mix. Melt the chocolate in a heatproof bowl set over a pan of simmering water, then remove from the heat and set aside.

2. In Another bowl, cream the butter and sugar together until pale and fluffy. Add the rest of the ingredients gradually (including melted chocolate) and mix to combine. Spoon the mixture into the prepared baking pan.

3. Next, make a cheesecake filling. Place all the ingredients into the bowl or large measuring jug and mix everything well with the hand processor (I find this method the quickest!).  Chocolate sponge and Vanilla Cranberry cheesecake in one4. Pour in the cheesecake mixture on top of the sponge cake mixture. Pop the baking tin into the preheated 170C oven and leave there to bake for about an hour or hour and half. The cheesecake has to be not too wobbly!Chocolate sponge and Vanilla Cranberry cheesecake in one5. While cheesecake is baking, prepare the cranberry topping. Put cranberries, sugar and cranberry sauce into the small saucepan. Heat everything and mix until the sugar dissolves and cranberries bruise slightly.

Chocolate sponge and Vanilla Cranberry cheesecake in one6. Once cheesecake is cooked and cooled top it with the cranberry topping and let it set in the fridge for at least 2 hours.

7. Decorate this cheesecake with biscuits. I used some melted chocolate as a glue!Chocolate sponge and Vanilla Cranberry cheesecake in oneA nice ribbon holds everything in place and it makes the cake look so cute!Chocolate sponge and Vanilla Cranberry cheesecake in oneYou can dust the cake with some icing sugar, but be warned! This lovely frosting effect does not last very long time :-(OLYMPUS DIGITAL CAMERA OLYMPUS DIGITAL CAMERAEnjoy cake decorating :-)

Rasa xoxo

0