Top

Archive | For little ones :)

Our city break in Bristol

Our city break in Bristol with kidsLast month when I was planning what to do for Tomas birthday I have decided we need to visit Bristol and so we did few weeks ago! I must admit this trip was little selfish of me as I wanted to check this city for myself. I was following few bloggers on IG who live in Bristol and so it got me inspired to visit at the first place. Fear not! I also included some kiddie activities in our itinerary. After all it was Tomas birthday! I planned to visit Aquarium, but we have visited We The Curious exhibition centre instead, which I recommend to everyone with kids.  Our city break in Bristol with kids
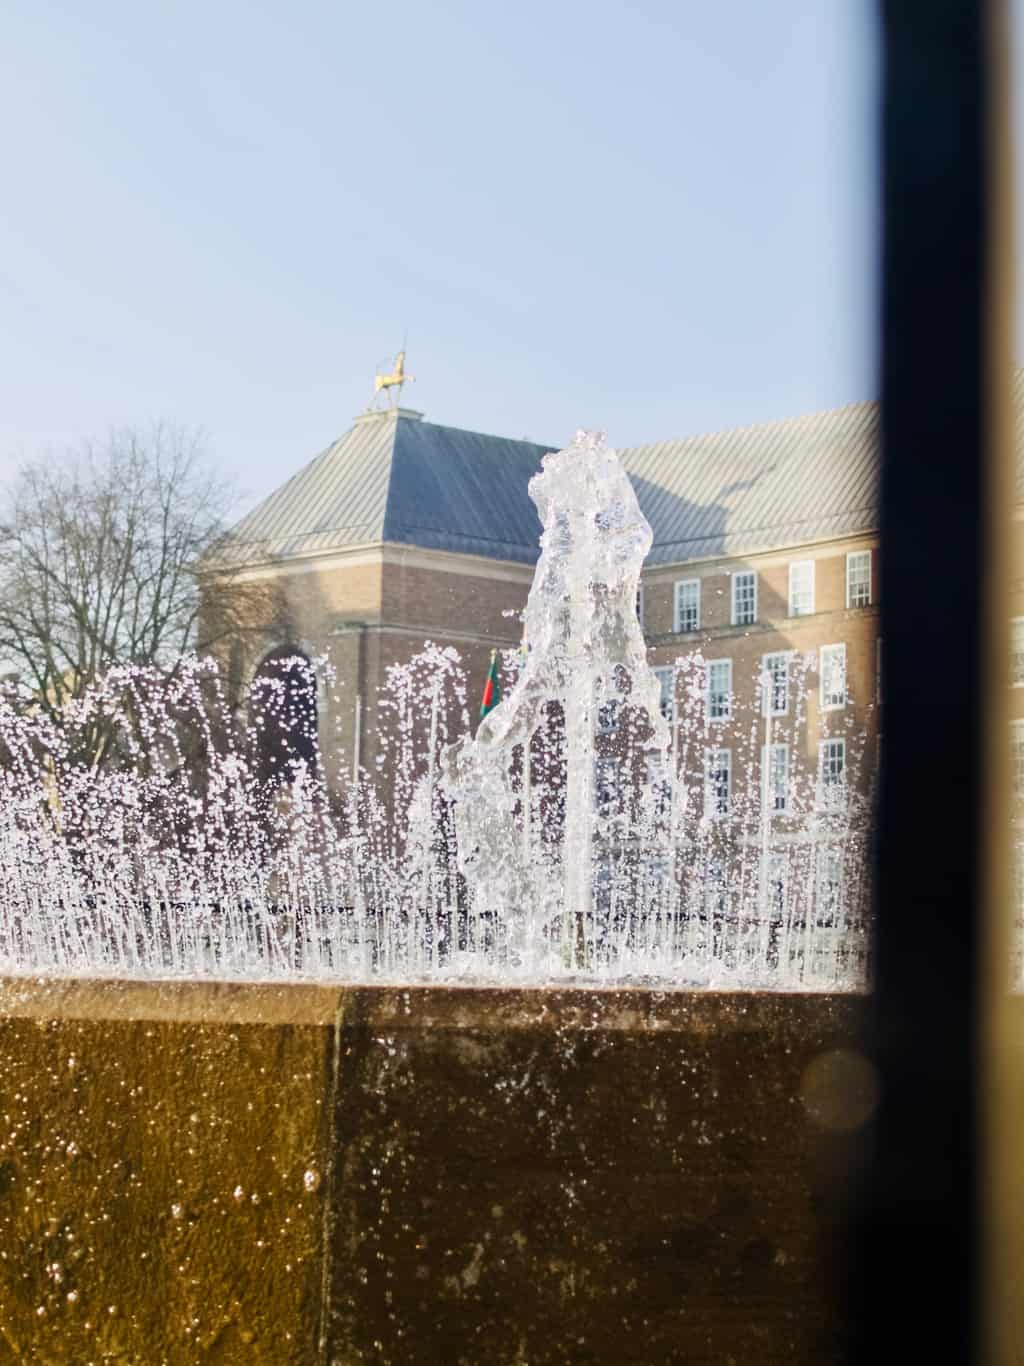
We mostly stayed around the wharf area, but went for lunch and breakfast to the city centre. I think you would need at least a week to explore the whole of Bristol!Our city break in Bristol with kids
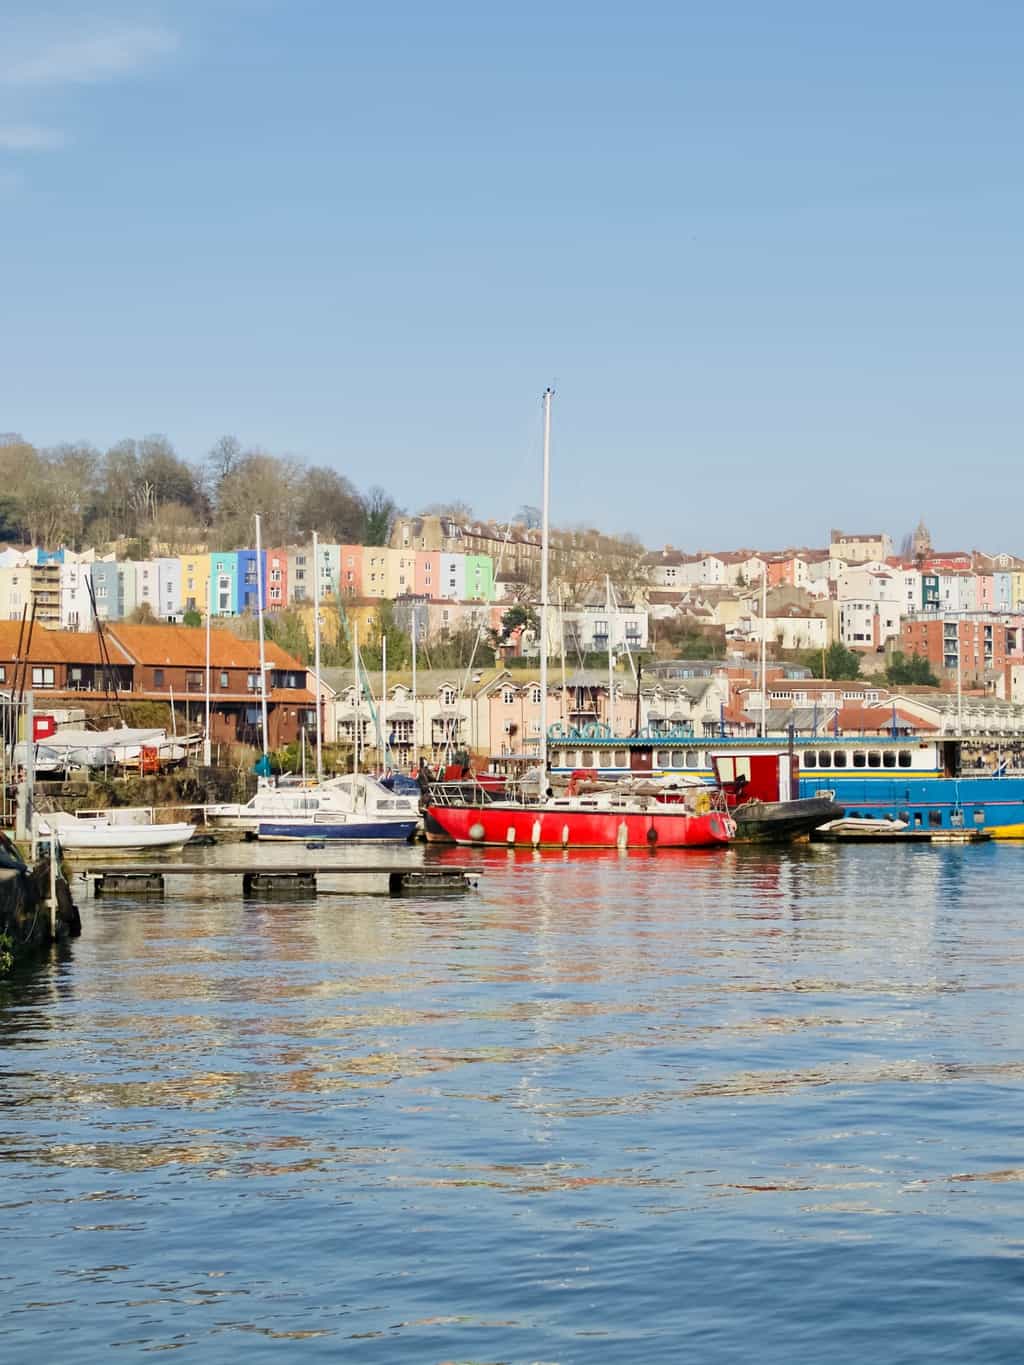
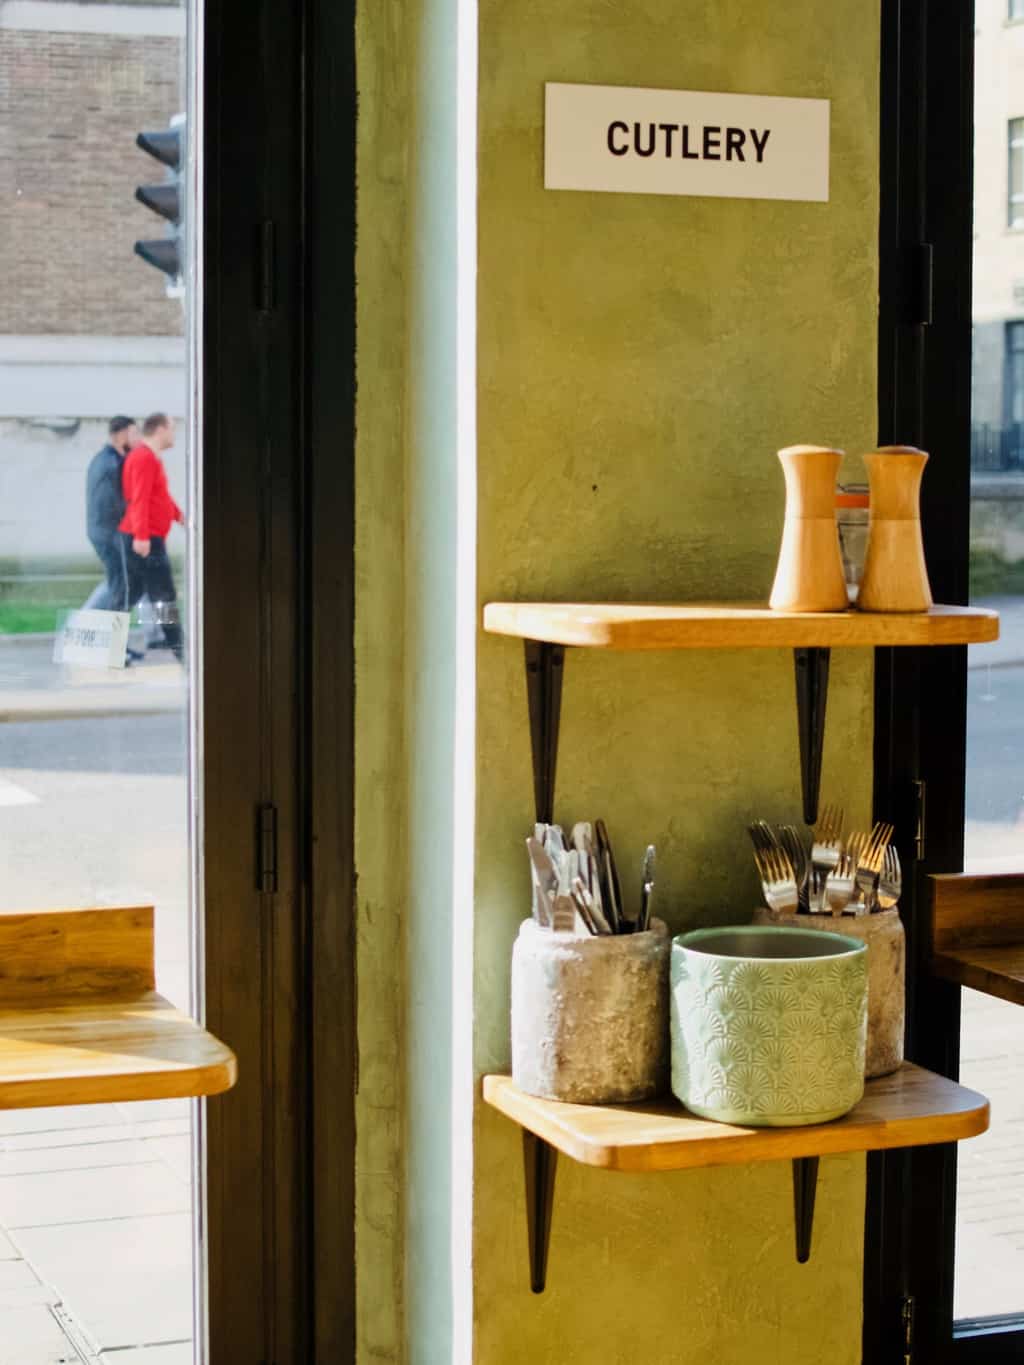
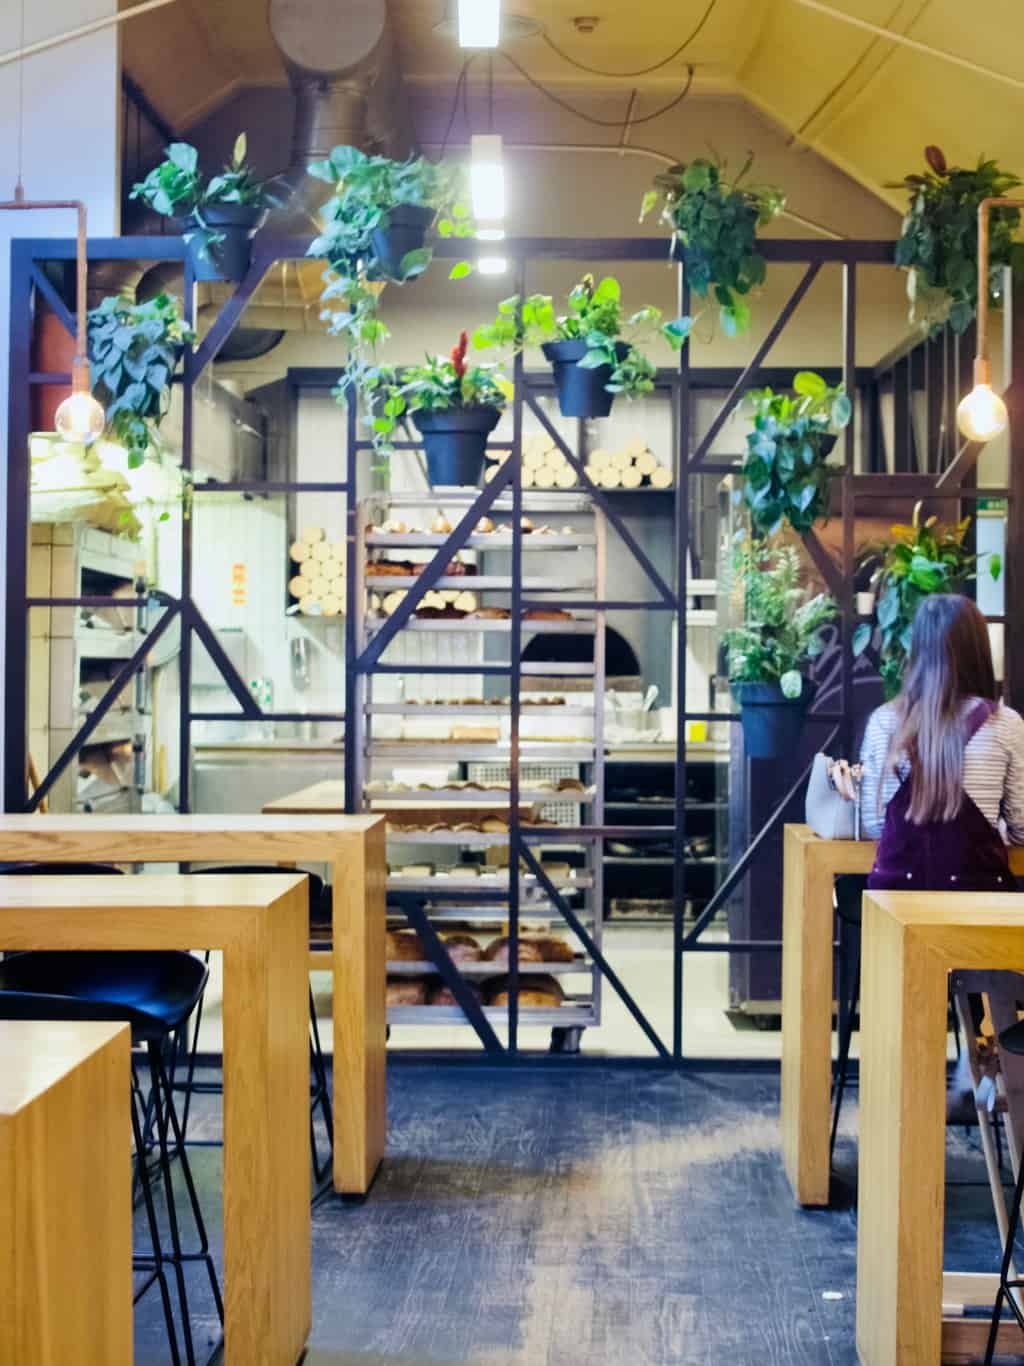
First stop was breakfast at Pinkmans after not so great night in Airbnb (don’t you always get really bad first night when traveling with kids and then it gets better??!!). Anyhow, heard lots of good things about this bakery and I was not disappointed with food. A little pricey and not very kids friendly, although they did have few high chairs. I loved the plants that were populating most of the place, I guess the indoor lighting is enough?! There was the whole stair covered in plants which looked like a little jungle. Quite inspiring for when I will open my own cafe one day ;-).Our city break in Bristol with kids Our city break in Bristol with kids Our city break in Bristol with kids 
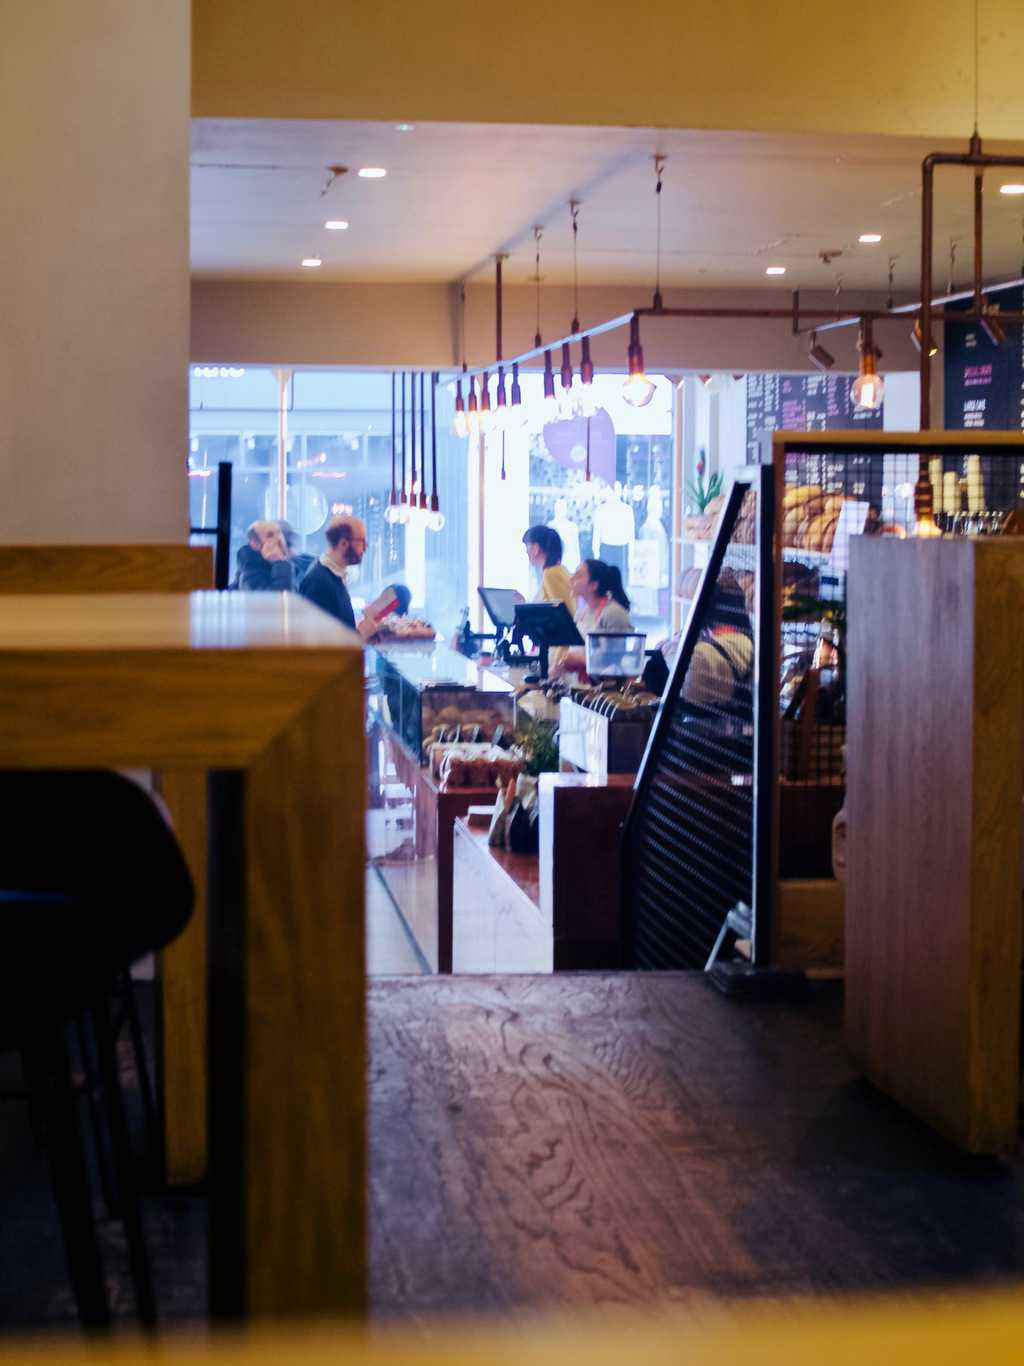
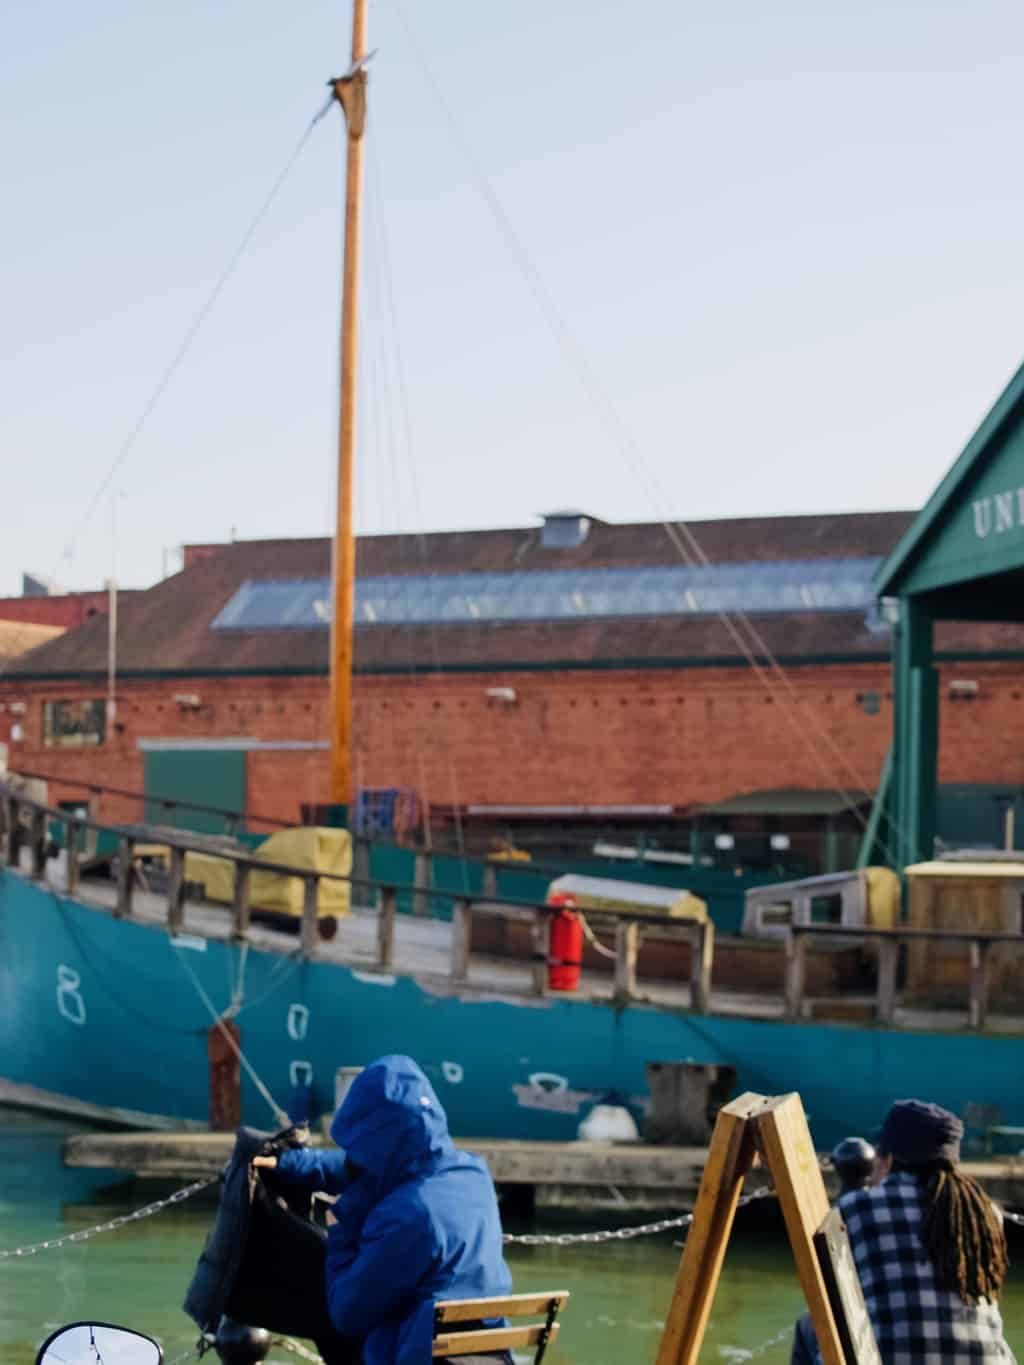
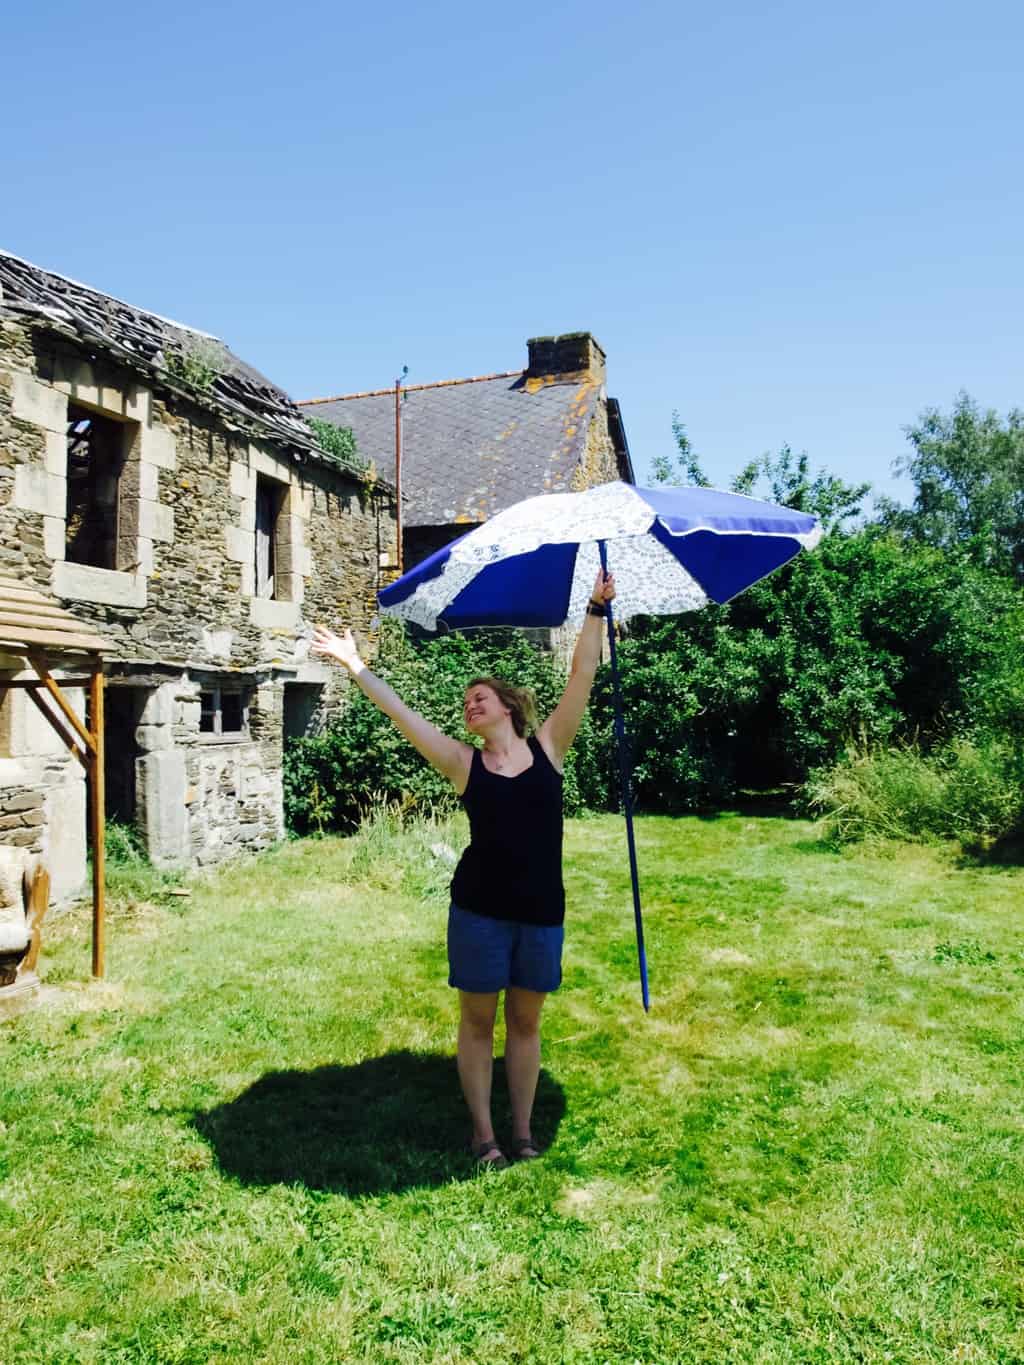
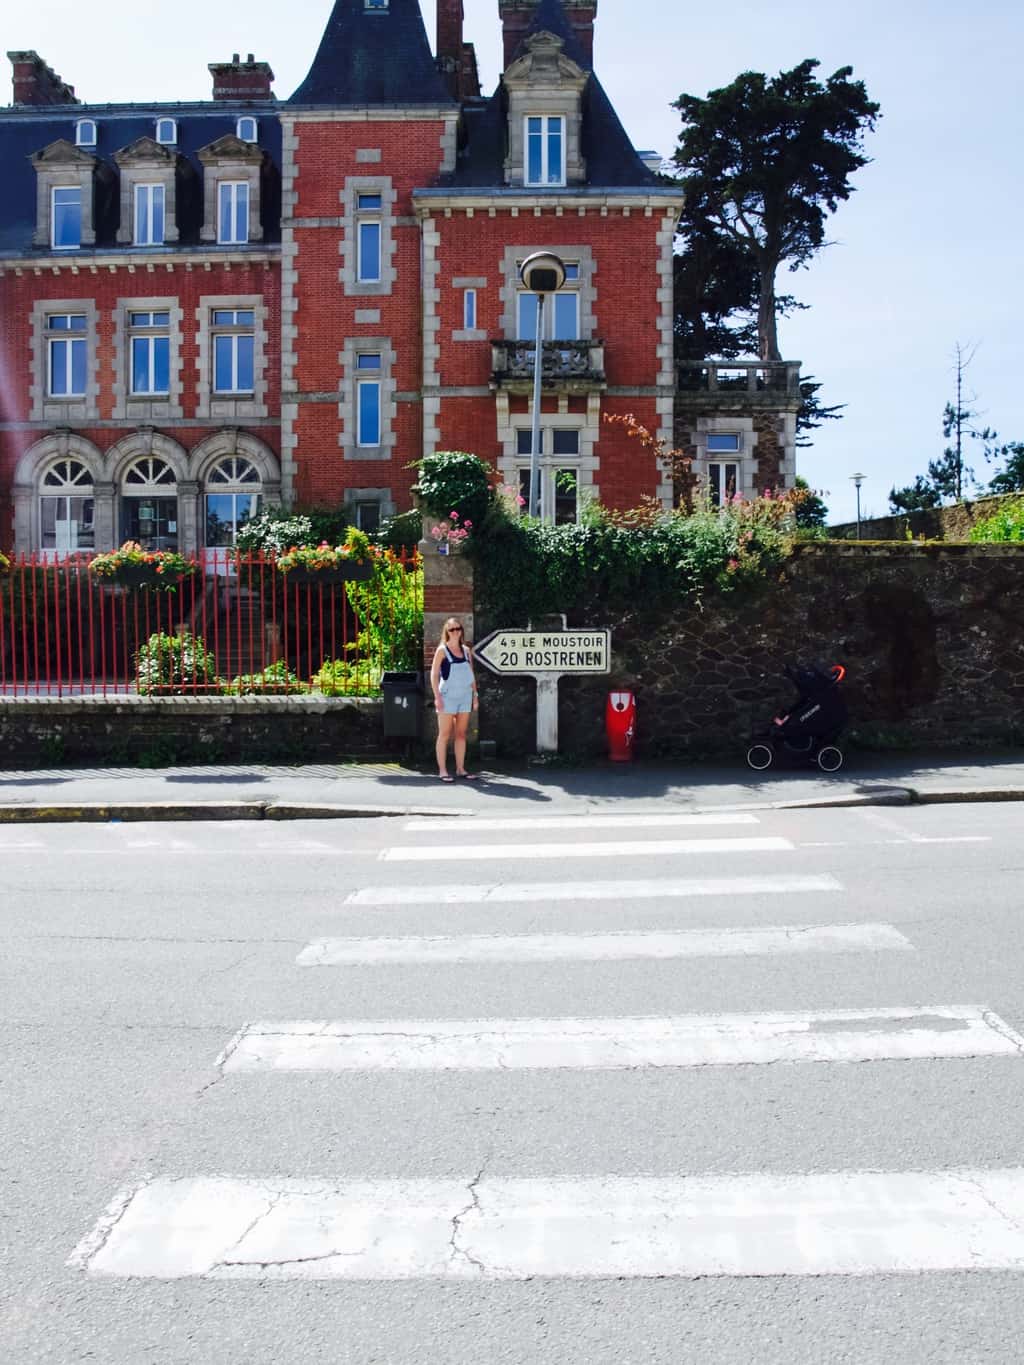
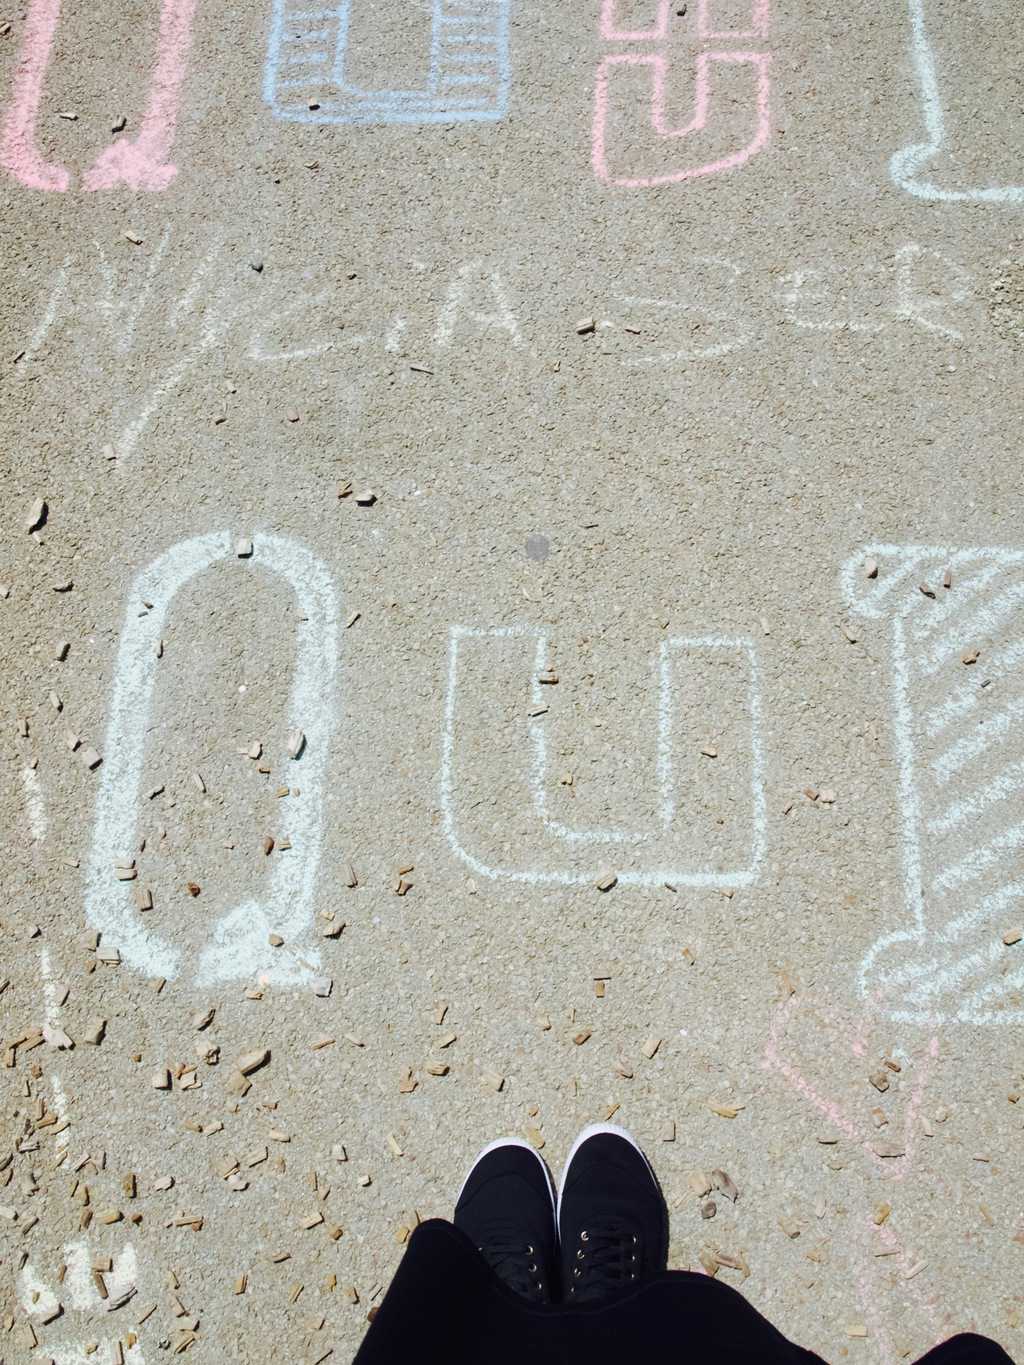
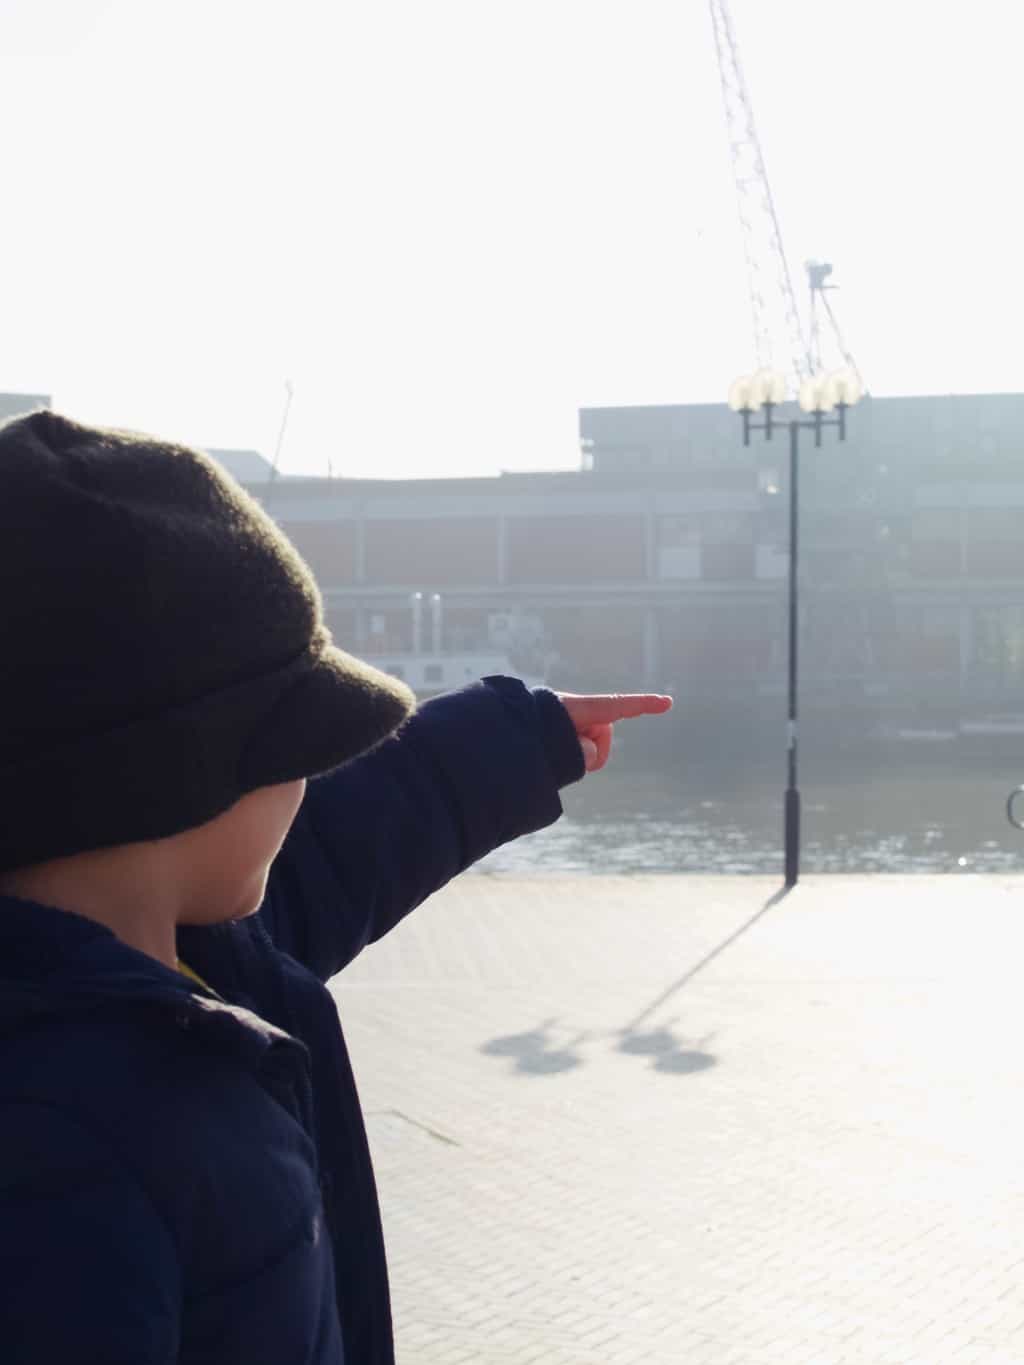
We walked a lot! I mean we walked all around the Canon’s Marsh. Luckily the weather was very summery, although it did not feel right to be in t-shirt just yet. Our city break in Bristol with kids Our city break in Bristol with kids Our city break in Bristol with kids Our city break in Bristol with kids Our city break in Bristol with kids Our city break in Bristol with kids
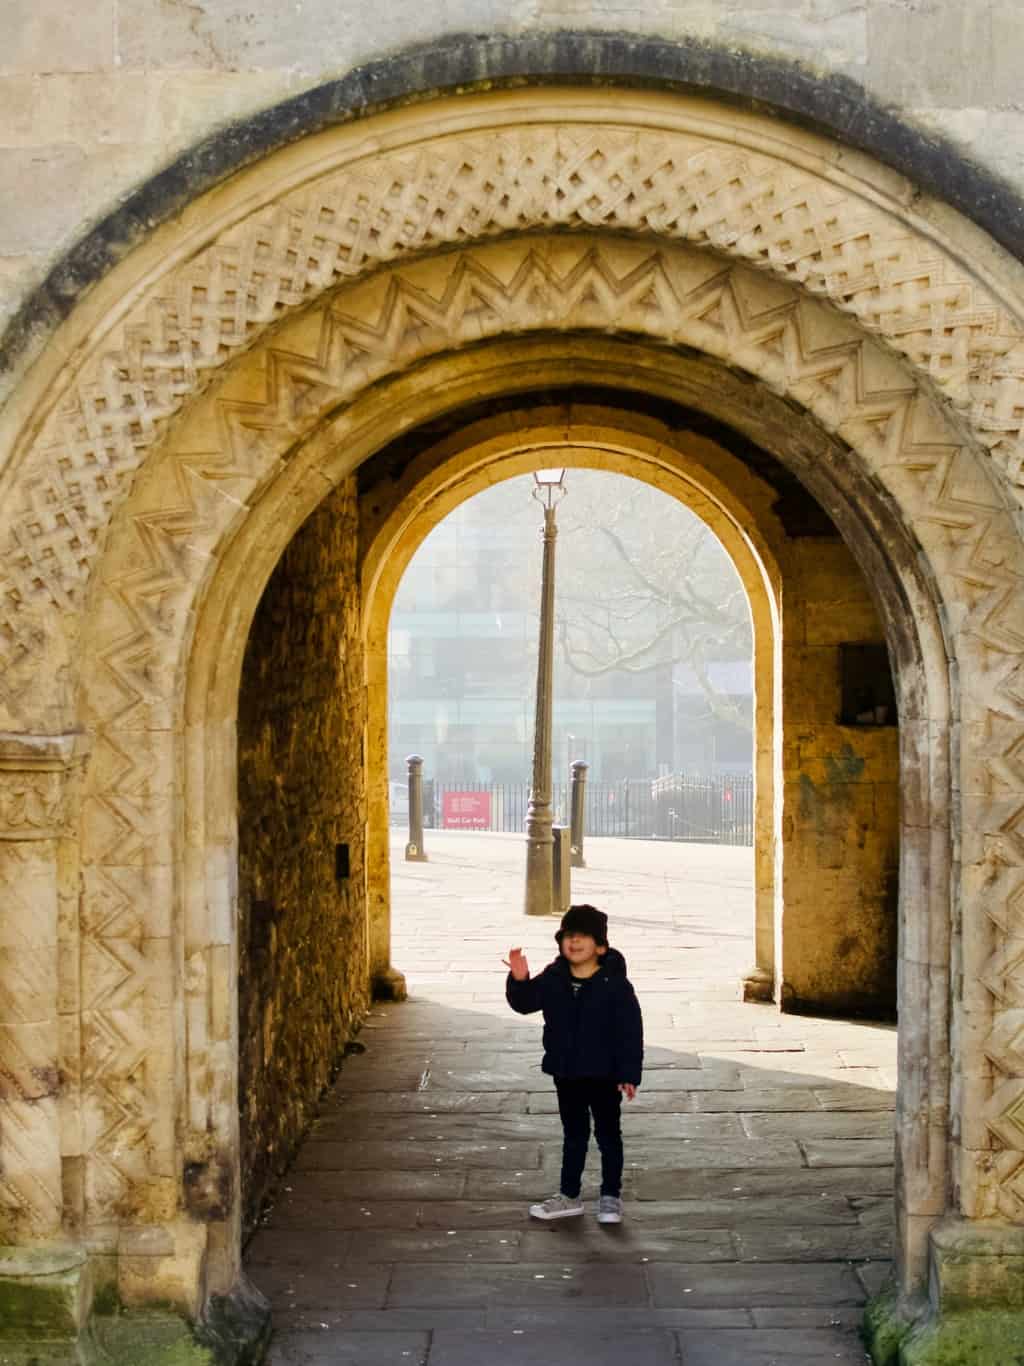
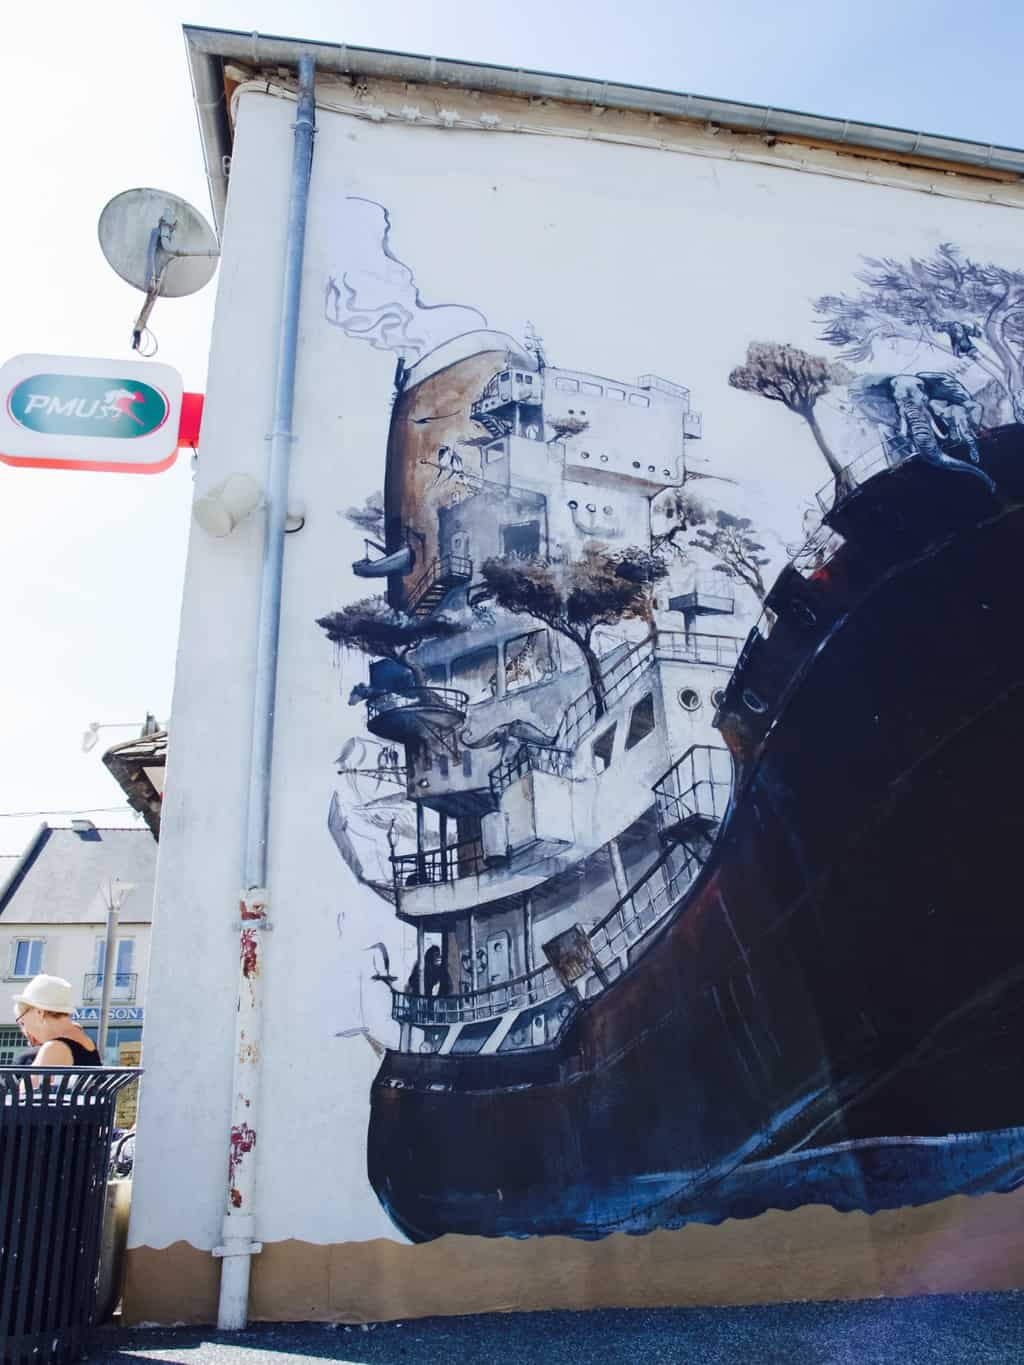
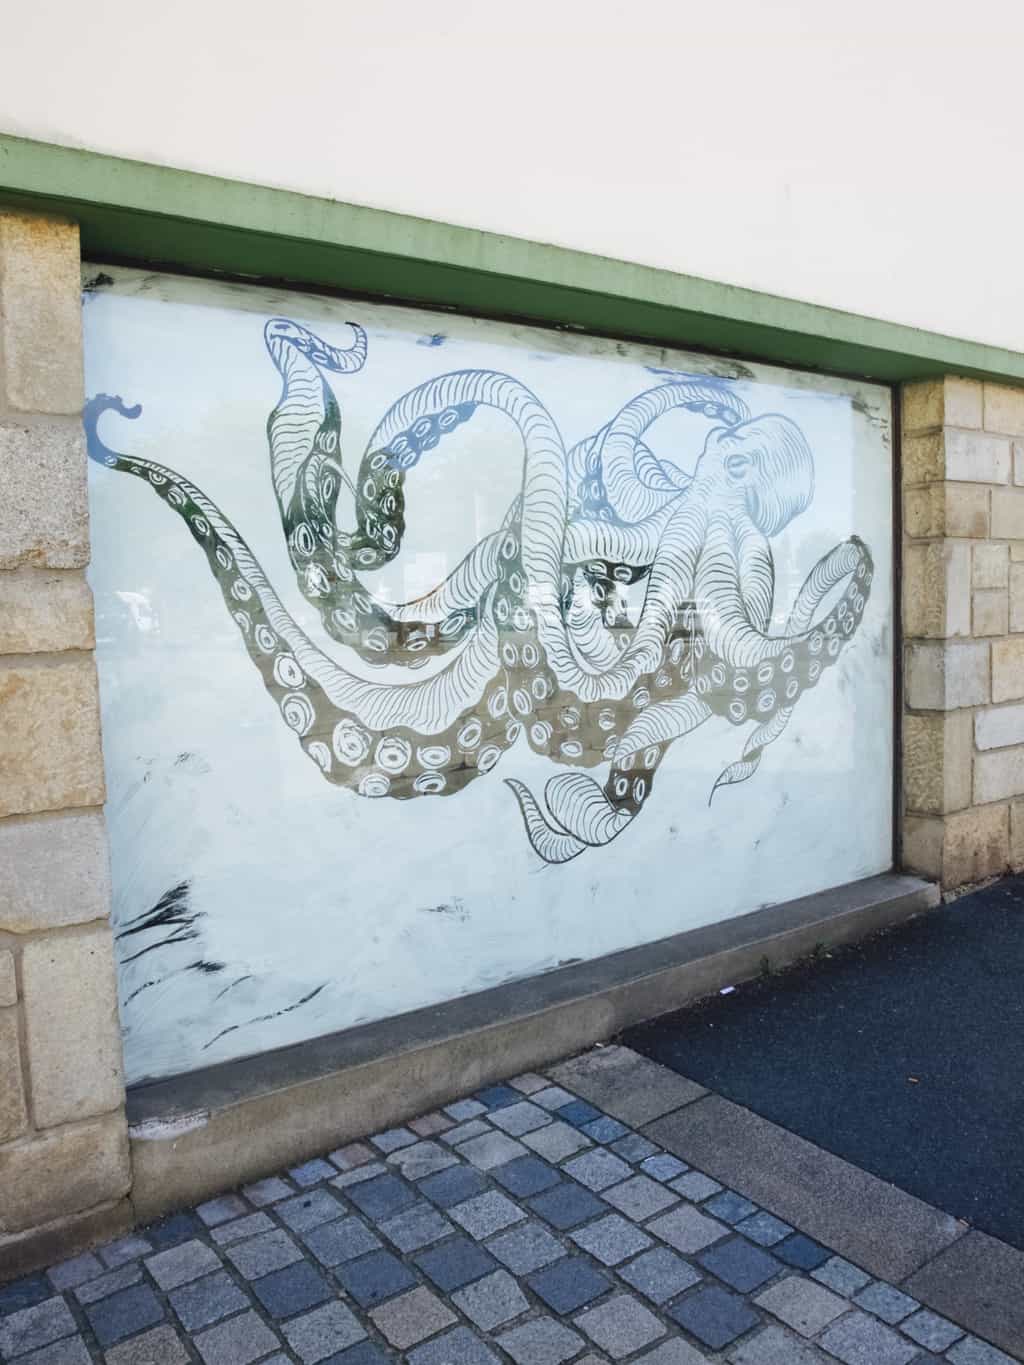
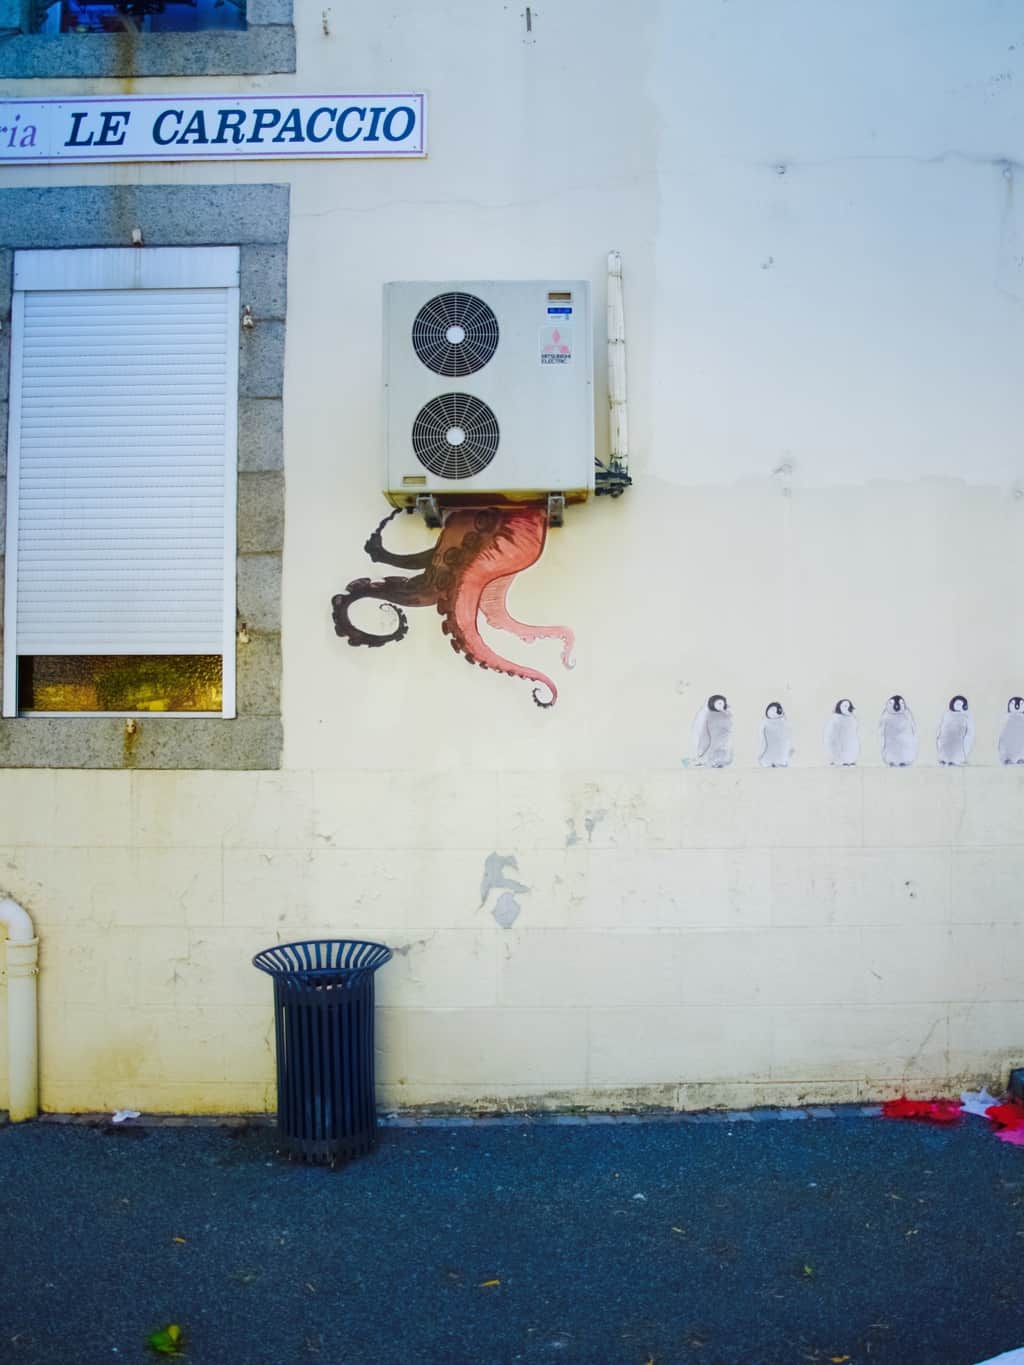
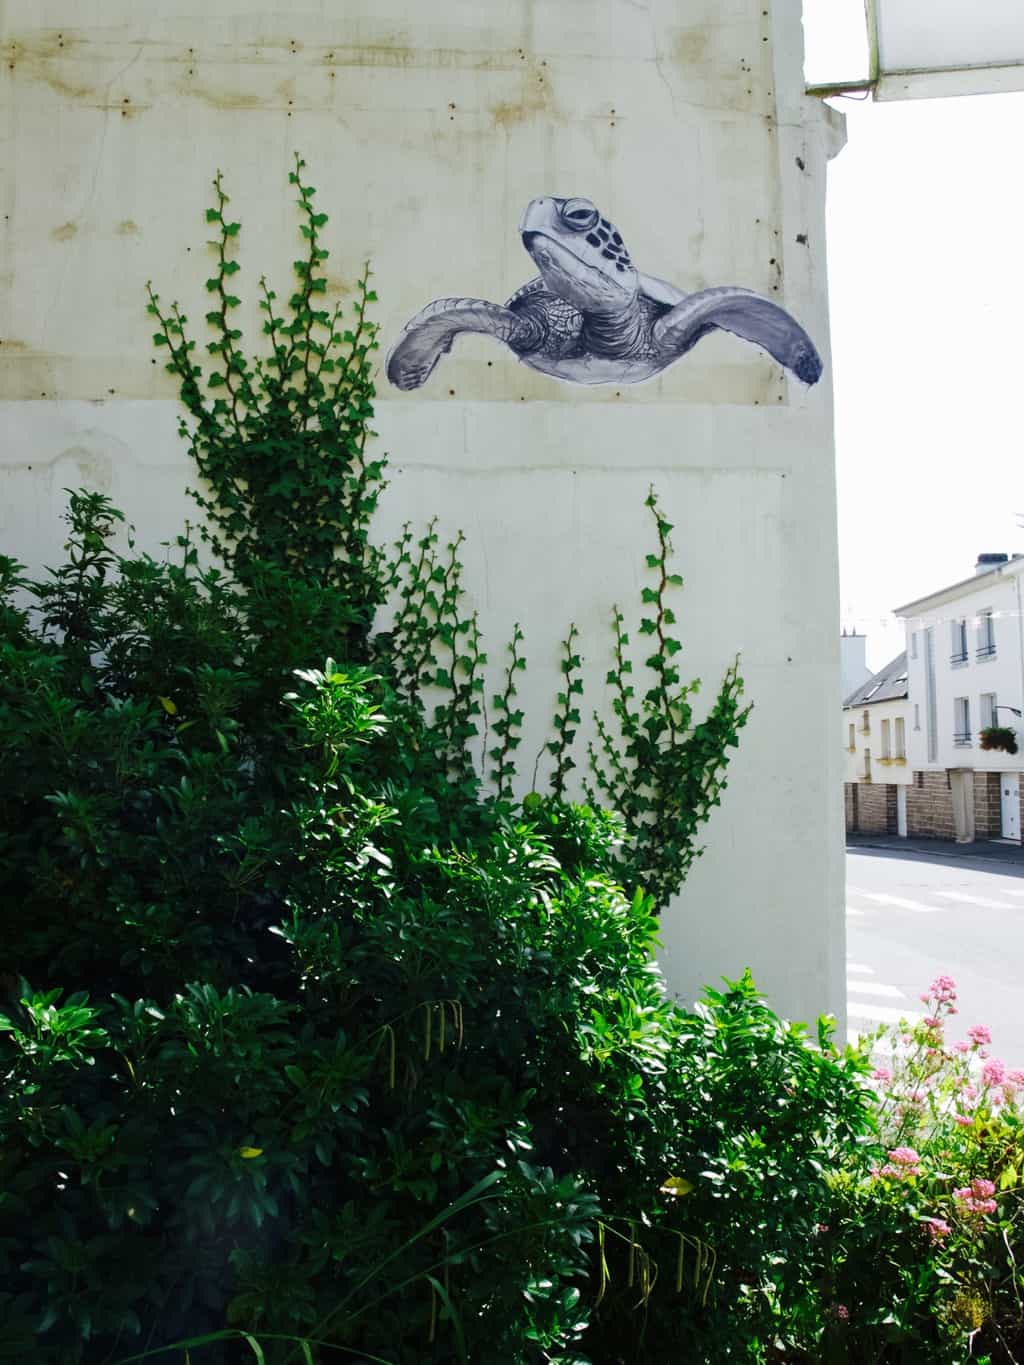
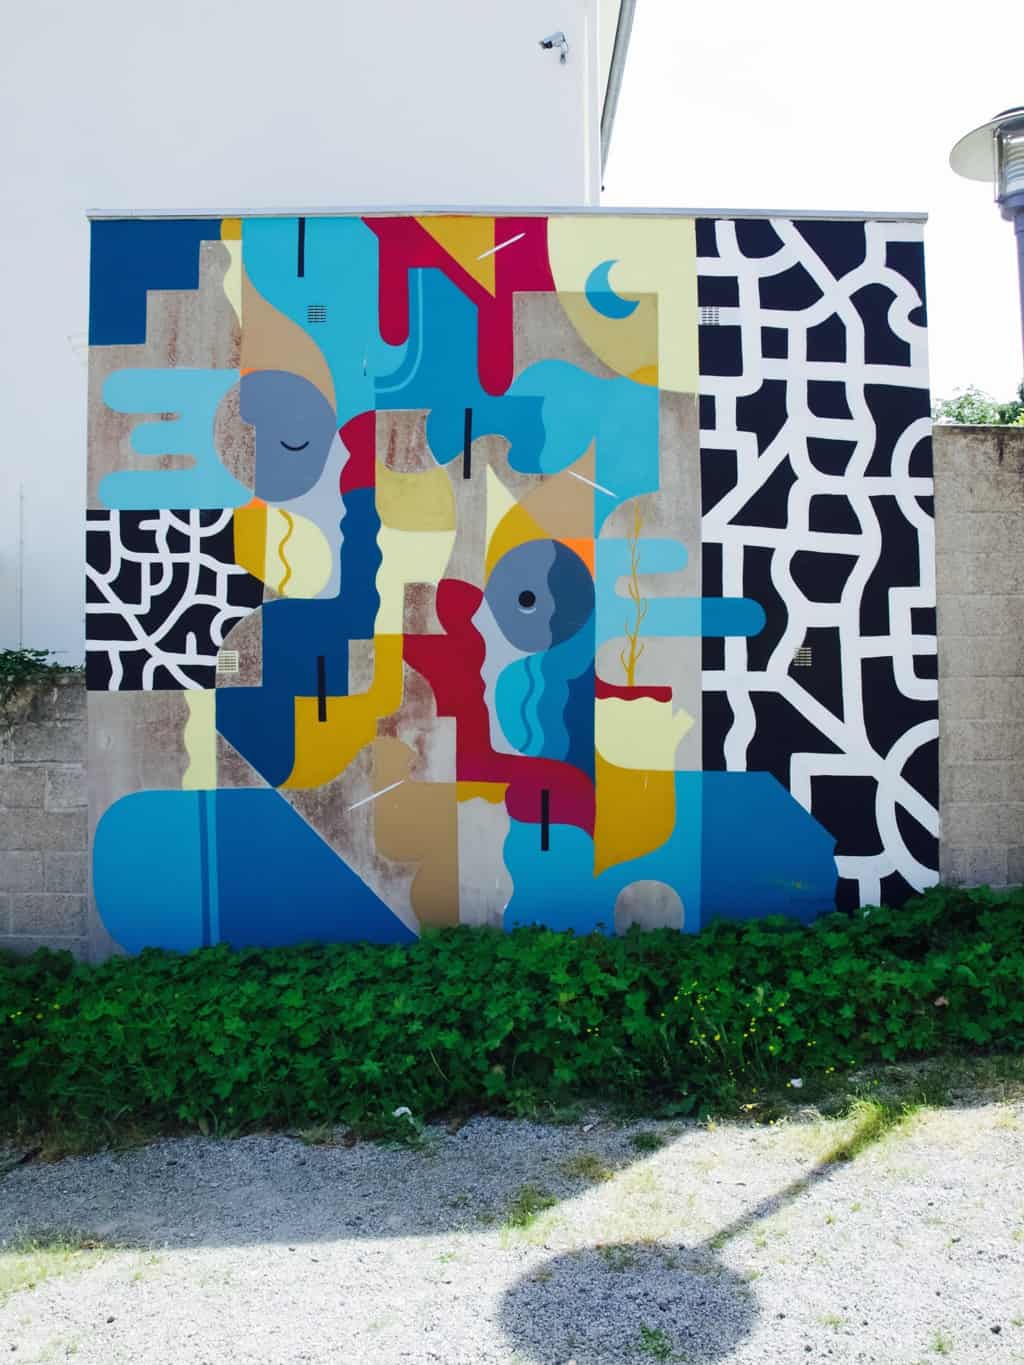
One of the things I really loved about Bristol are the mural art displays. Unfortunately I did not take that many photos of them.Our city break in Bristol with kids
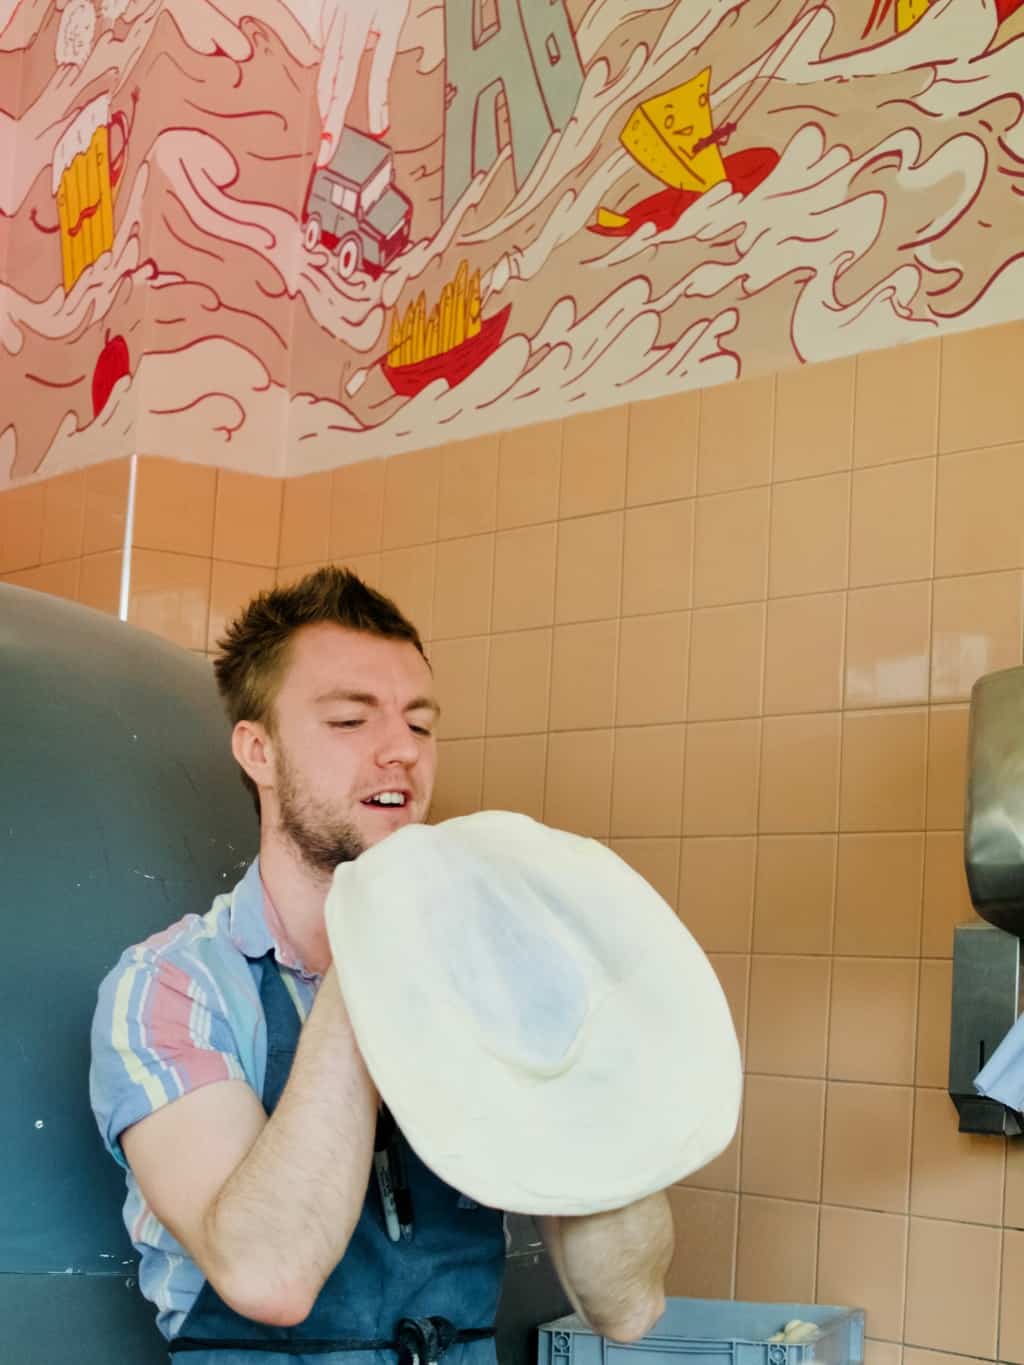
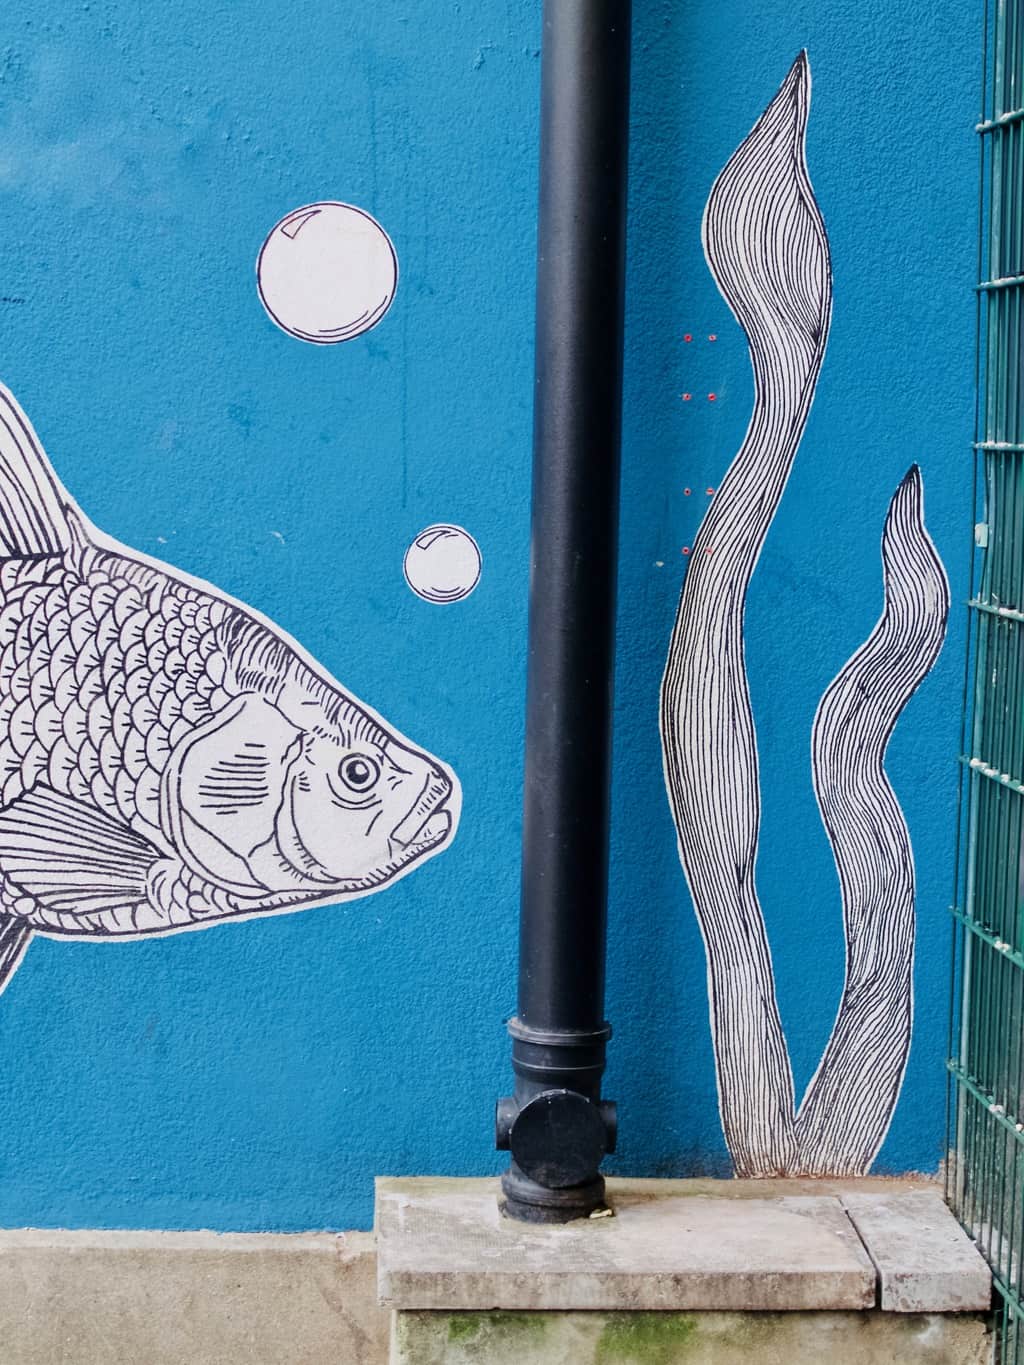
For lunch we went to Pizzarova where we stuffed our faces with the artisan type pizzas. Ours had a béchamel sauce which was lovely… hmmm. I also liked the deco! Another inspiration for my cafe one day ;-). Our city break in Bristol with kids Our city break in Bristol with kids Our city break in Bristol with kids Our city break in Bristol with kidsNow more about our Airbnb, it was our first time to do it with kids. And I think I would do it again! So much more flexible than staying in a small hotel room. The only thing I would have done differently next time is not be afraid to rearrange the rooms to fit our needs. You can always put everything back when leaving. On the first night kids were sleeping in a large bedroom while me and Joni were crammed in a small one because it had more plant pots that could be knocked down by kids. On the second night we decided not to suffer and move all the plants to the bigger bedroom. We all slept so much better that night!Airbnb in Bristol
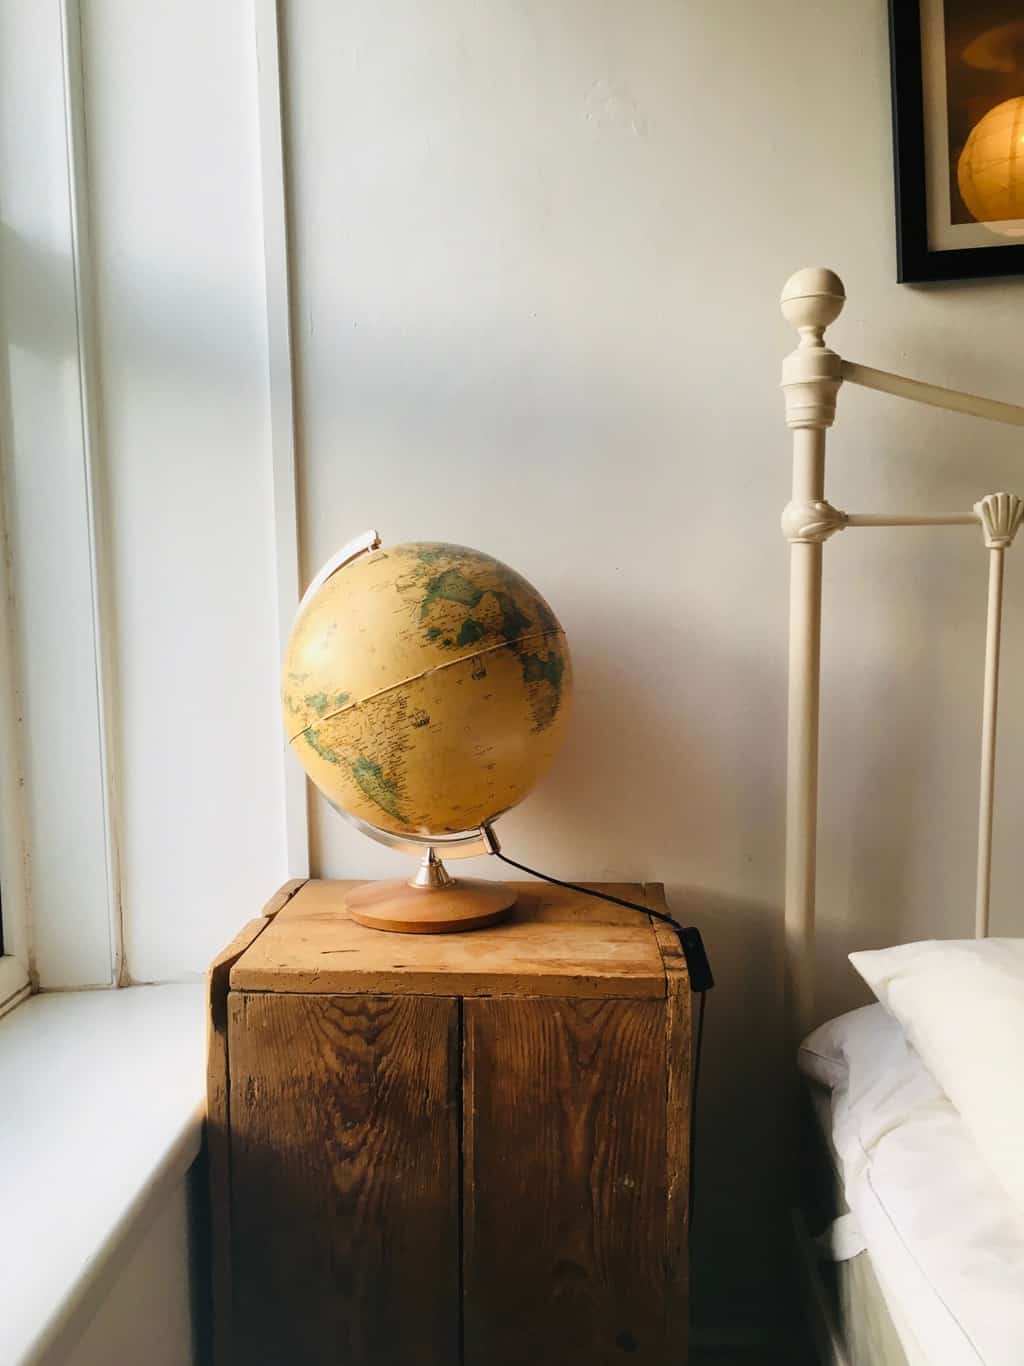
I generally love staying in Airbnb’s (I used to host on Airbnb), not only flexibility. I like seeing different ideas on how to decorate my own house as well as wondering about the host personality (if they live in the property themselves). This time round It was a lovely host who likes to travel and I am guessing he rents the whole place when he is on holiday. What a great way travel!Airbnb in Bristol
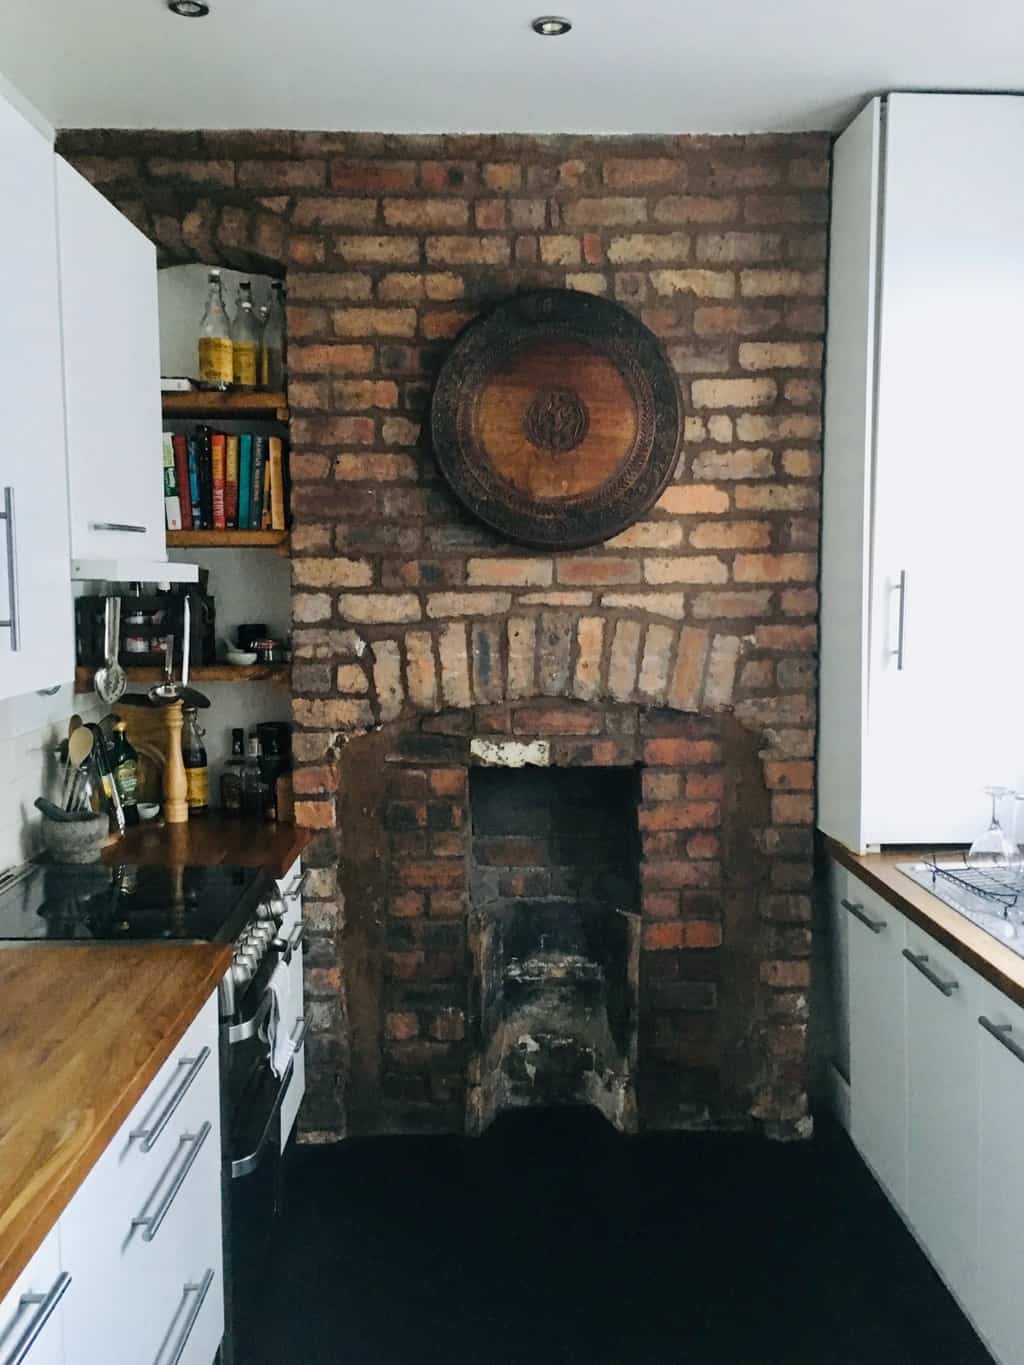
On our way home we saw this Clifton Suspension Bridge, which was grand!!Our city break in Bristol with kids
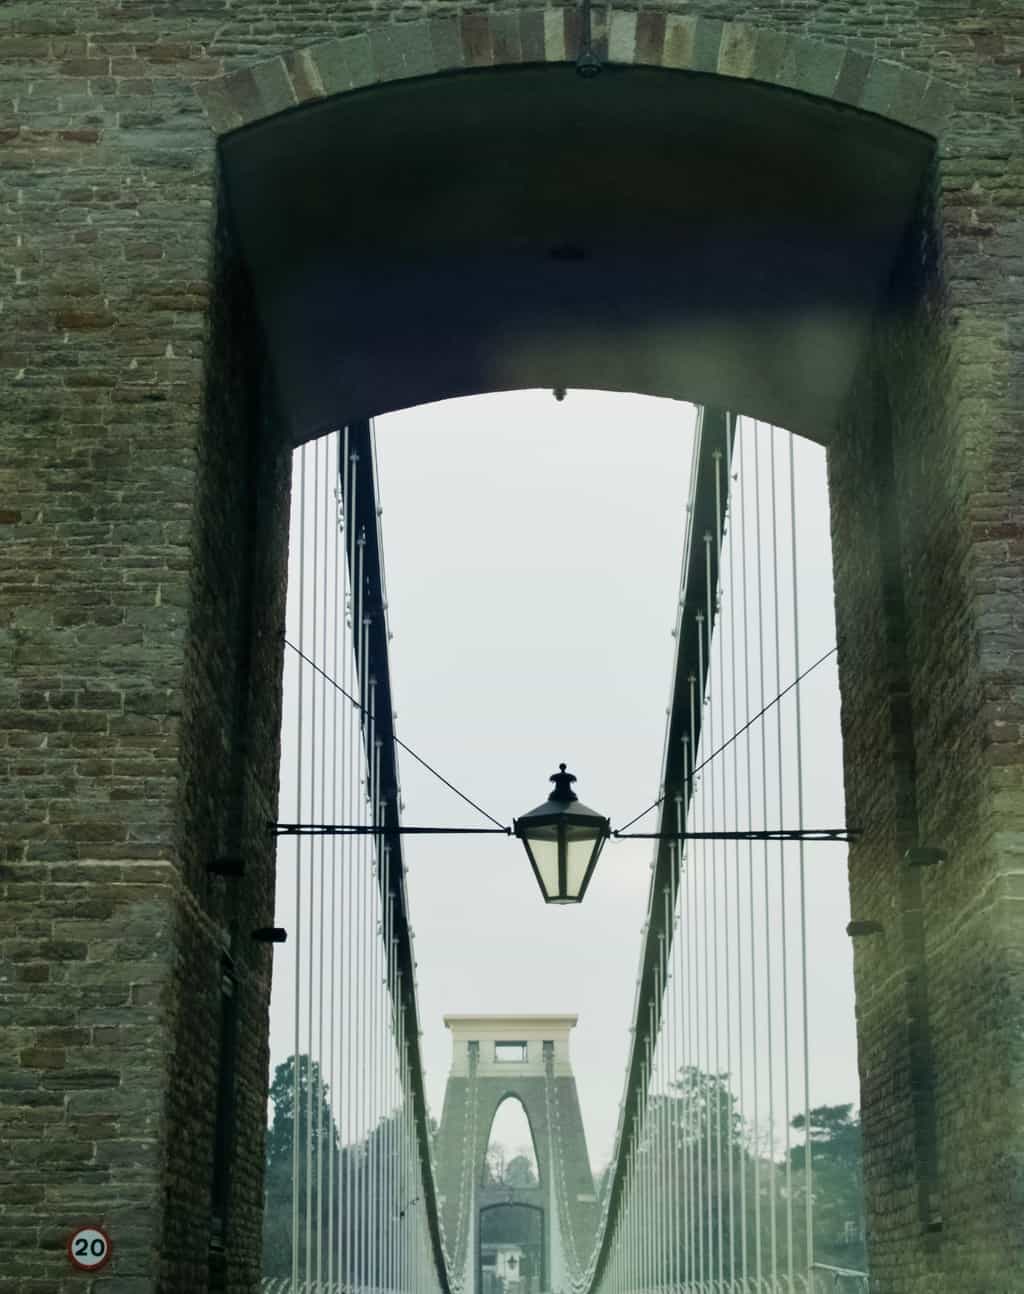
Hope you got inspired to travel ;-)

Rasa xoxo

0

Pinterest challenge: parsley cheese crackers

Parsley cheese crackers recipeFirst of all I would like to inform you that I won’t be doing any “Pinterest challenge” posts anymore (Booo! I know!). I feel like I have been doing this for ages (4 and half years to be more specific) and I felt these lack of creativity on my part. Yes, I have learned a lot, I have made my own alterations on some of the recipes, I tried many recipes that just have been sitting there on my boards and I use some of these recipes again and again… BUT I feel it’s time to move on! I realised I need to start creating more of my own recipes as well (which I have been doing already).

Now coming back to my final “Pinterest challenge” post. I have been doing a lot of cupboard clearing lately. This included me going through my cupboards and using up all these leftover flours and grains etc. Although these crackers does not call for any special flour, I baked them anyways as these make good lunch box fillers (Lukas calls them lunch box stars) and they make as a tasty snack on the go too! I tweaked the recipe a little bit to add some parsley. I feel better when this adds some green into the kids lunch boxes, even though I am not too sure how many nutrients from the parsley survive the process. Either way at least the parsley give some work out for the taste buds ;-). Parsley cheese crackers recipe PARSLEY CHEESE CRACKERS adopted from Winter Monroe

  • 200g flour
  • 1/2 tsp garlic powder
  • 85g butter
  • 200g cheese, finely grated
  • 1 egg
  • handful parsley + 2tbsp water, whizzed to a paste

1. Add the garlic powder into the flour and mix to combine. Rub the butter into the flour mix with your fingertips until the mixture looks like moist breadcrumbs.

2. Add the rest of the ingredients and mix well to combine.Parsley cheese crackers recipe3. Roll the pastry out, 7mm thick. Using a cookie cutter cut out the shapes and place them on ready lined baking tin or tray. This part is fun to do with kids!Parsley cheese crackers recipe 4. Bake the crackers in 180C preheated oven for 10-15min.Parsley cheese crackers recipe Parsley cheese crackers recipeEnjoy!

Rasa xoxo

0

It’s not too late to knit a hat!

kids bear hat knitting instructionsFirst of all, Happy New Year everyone!

Secondary, just because it’s winter, that does not mean it’s over very soon. I hope I am not sounding too negative for some (I know some of you are really looking forward to Summer already), but we only had one winter month and there are two left to go. My point is that we should enjoy this weather and make the most of it!

I personally love love January (I learned to love every season), because it’s time for refocusing, spring cleaning (would like to call it winter cleaning but it sounds weird), detoxing (If you are into it) and knitting of course. I love January because it is a beginning of the year and the plans are not strictly set therefore it is often not a busy month.kids bear hat knitting instructionsOver holidays I have started knitting because we have gone away and I was free from doing all the house tasks. I find knitting (or any other crafting) is something I can do while chatting or watching a movie. I find it very relaxing! I knitted this hat for my nephew that Tomas is modelling here, hence blurry pics because he can’t stay still. If you fancy knitting this hat then you can access the project here!kids bear hat knitting instructionsHave an enjoyable January!

Rasa xoxo

0

Origami advent calendar

Origami advent calendar DIYSo here it is, our advent calendar for this year :). Very very simple to make and I have already received many compliments from friends! I simply used some pattern designs that I created for watercolour challenge few months ago and it brighten up our living room already. Yey!

Each package contain origami idea which is great for me (I love learning something new!) and great with involving kids. I am planning to either teach Lukas how to make stuff by folding paper (for easy ones) or let him decorate completed origami item. I am also considering not to be stuck with using only paper. The possibilities are endless, regular blanket could turn into star for all you know. For those who are following me on social media be prepared for daily dosage of origami!Origami advent calendar DIY You ready to make your own origami advent for this year? Then let’s crack on!

You will need:

  • A4 or square size patterned paper, either printouts or shop bought gift wrapping paper
  • number tags
  • origami idea “ribbons”
  • scissors
  • treats to add into the packages (optional and we decided to go without this year)
  • a hanger
  • string or slim ribbon

First, cut out all the tags and origami idea “ribbons”.Origami advent calendar DIYMake all the packages for every 24 days. Begin with folding in corners (1.), then fold in the sides and insert all the contents (2.). Finally fold in the pointy corners once again on both sides (3) and secure it using double sided tape. Use a string or a ribbon to wrap the package like a gift (4.). Don’t forget to insert the tag before tying the knot.How to fold an envelope from A4 Once all the packages are complete, then all you need to do is tie them on the hanger and hang it on the wall.Origami advent calendar DIY Origami advent calendar DIYHappy Christmas waiting!

Rasa xoxo

0

Aeroplane themed birthday cake

Aeroplane themed birthday cakeSo here it is, my vision became a reality. This year I made Lukas birthday cake aeroplane themed which he really enjoyed. I have been dreaming about this cake for ages (not really I practically copied the idea from here). The only thing I wanted to do differently is to try and dye the frosting with natural dyes….

But as you may know the colour blue is hard to find in nature! I know i know, the sky is blue, but you can’t exactly put that in the icing. With a bit of research and friends recommendation I went with butterfly pea tea that is sort of blue. You see I had fun with experimenting and realised that butterfly pea tea changes colour according to the ph of the liquid you mix it into. With a bit of lemon it turns to a burgundy violet and with milk it turns into bluish sky blue. Although this might sound easy, the blue that I get from mixing the tea with milk is not concentrated enough for what is needed when you try to dye large amounts of frosting. I ended up using it in soft cheese frosting and it turned out a little more lilac then sky blue. Shall we imagine that the planes are flying over a sunset sky?Aeroplane themed birthday cake BLUEBERRY YOGURT CAKE WITH BUTTERFLY PEA FROSTING

(for the cake)

  • 3 eggs
  • 350g caster sugar
  • 450g greek yogurt
  • 180g rapeseed or olive oil
  • 300g ground almond
  • 250g plain flour
  • 1 tsp vanilla extract
  • 3tsp baking powder
  • 2 handful blueberries

(for the meringue)

  • 3 egg whites, room temperature
  • 100g icing sugar, sifted
  • few drops of lemon
  • pinch of salt

(for the frosting)

  • 600g soft cheese
  • icing sugar to taste, sifted
  • butterfly pea tea, brewed in little water

(for the “aeroplanes”)

  • cocktail sticks
  • wafers in the finger form

1. To make the cake beat the eggs with sugar. Add the rest of the ingredients and mix again to combine. Pour equal amount of cake mixture into two lined baking tins. Bake in 180C oven for 40-45min.Aeroplane themed birthday cake 2. Meanwhile prepare the meringues for baking. Baking these will take few hours on the low heat once the cake is baked presuming you don’t have two ovens. Mix the egg whites with drop of lemon, salt and half of icing sugar. Start whisking the mixture while gradually adding the rest of icing sugar. In the past I struggled to make meringues and later I realised that all it needs a little patience. It takes really long time to achieve stiffly whisked egg whites, so bear with it till you can see the results. Don’t worry you can’t over mix it ;-)! Pipe the meringues on the baking sheet into cloud shapes using large round nozzle or no nozzle at all. Bake in C60 preheated oven for 3-4h. I find the longer the baking the whiter the meringues!Aeroplane themed birthday cake with merengue clouds  3. To make the frosting whisk soft cheese with icing sugar (I like it less sweet so I don’t add much). Gradually mix in the butterfly pea tea till you like the shade. Aeroplane themed birthday cake 4. For the plane, cut the wafer finger into aeroplane body shape and small triangle for the fin. Glue the plane using icing sugar and water mixture. Use the cocktail sicks to hold the plane together.Aeroplane themed birthday cake Aeroplane themed birthday cake5. To assemble the cake apply the frosting starting from the top and working your way to the bottom. Arrange the “the clouds” and “the planes” as closer to serving as you can. Sadly, the meringue have a tendency to go soggy.Aeroplane themed birthday cake Aeroplane themed birthday cake Aeroplane themed birthday cake I especially liked the cake. Although it was difficult to apply the frosting due to it being crumbly and moist, I feel it was worth it!Aeroplane themed birthday cakeHope you enjoy it!

Rasa xoxo

0

Bake-with-kids yogurt cake

Bake-with-kids yogurt cake recipeEver since reading Bringing up bebe and French kids eat everything I got the notion that the kids and I could bake things one day. Maybe even experiment with different flavours and help them grow to love food. This sounded like a fairy tale when we were going through terrible-twos and all Lukas would eat was pasta or toast. Thankfully this was just a phase! Things are changing dramatically as we speak. So hang in there if you are struggling with the toddler fussiness, it will all pass ;-).

I mean Lukas still don’t eat salad, but he will occasionally ask me if he could taste something from my plate (such as beetroot or even smoked salmon). And you know I like my food colourful and flavoursome. I really hope that one day this passion will pass onto him.

So when we went blackberry picking last week I thought why not introduce him to baking. Lukas, like any other kids likes cakes and baking goes nicely with blackberry. I suddenly thought I could try the yogurt cake that I read french kids like to make. Blackberries on top does make it lovely!Bake-with-kids yogurt cake recipe This recipe uses yogurt containers (150ml) as a measuring device. A bit simpler to understand for little helpers.

BAKE-WITH-KIDS YOGURT CAKE

  • 2 x containers (300g) natural yogurt (full fat preferably)
  • 2 x eggs
  • 2 x containers sugar (270g) (although I preferred adding just one)
  • 4.5 x containers  plain flour (360g) (we used almond flour for gluten free version)
  • 1 x container (120g) vegetable or olive oil
  • 1 tsp vanilla extract
  • 2 tsp baking powder
  • berries or chocolate chips for the filling (optional but nice!)
  • extra yogurt or creme fraiche for serving (optional)

Bake-with-kids yogurt cake recipe 1. Measure all ingredients into the bowl. It is very important to clean and dry the containers after emptying them as I find that other ingredients stick to any lingering yogurt and therefore don’t come out fully when measuring. The first time we baked this cake it came out too gooey due to not enough of flour as you could imagine. When making it a second time I realised it was due to wrong amounts.

2. Mix mix mix! Lukas favourite part ;-).Bake-with-kids yogurt cake recipe3. Spoon out the cake mixture into the baking tin. I like using silicone type as it needs no greasing.Bake-with-kids yogurt cake recipe4. Arrange berries or chocolate chips on top. Press them in so they sink a bit.Bake-with-kids yogurt cake recipe 5. Bake for 35-40min in 180C preheated oven. Check with toothpick if it is baked thoroughly before removing the cake out of the oven.Bake-with-kids yogurt cake recipeEnjoy baking ;-)

Rasa xoxo

0

French holiday with friends

French holiday with friends (in Brittany)Back from French holidays last week and I can honestly say these were the best holiday so far since having kids. Although I thought I learned so much already how to do relaxing with kids, I still keep learning on the job. For those who are still struggling to holiday with babies here are my post from few years ago, I can only encourage you that things gets better with kids age.

With older kids you can create play area where they can play independently. Which is why it is so important to pick a place that is child friendly and safe. Self catered houses/villas are the best! Not only that they provide more space for your children, but it also come up much cheaper than hotels. French holiday with friends (in Brittany)We loved eating in as it was so much more relaxing in the evening and that meant we could relax outside while kids are sleeping near by. I have learned (thanks to our friends that went on holidays with us) how simple is to pack lunches which saved us money and time (no need to find a restaurant and wait for a food with impatient kids). It was so much more relaxing just to picnic outside. We were so lucky to have such a good weather!French holiday with friends (in Brittany) We loved local activities such as kayaking and walks by the cannel. So my advice is to pick a location/house that comes with activities you like. That way you can exchange with baby sitting and do fun things in turns!French holiday with friends (in Brittany) French holiday with friends (in Brittany) French holiday with friends (in Brittany) French holiday with friends (in Brittany)French holiday with friends (in Brittany) We stayed in Brittany, near Carhaix-Plougue. It is a very cute and creative town with lots of wall murals around (I am so into #wallmurals right now!!!).French holiday with friends (in Brittany) French holiday with friends (in Brittany) French holiday with friends (in Brittany) French holiday with friends (in Brittany) French holiday with friends (in Brittany) French holiday with friends (in Brittany) French holiday with friends (in Brittany) French holiday with friends (in Brittany) French holiday with friends (in Brittany) French holiday with friends (in Brittany) There was this crochet doily artworks all around the town centre and library. Feeling very inspired just remembering it!French holiday with friends (in Brittany) Of course we also visited the lake and local sea side which was the highlight I think.French holiday with friends (in Brittany) Amber water is not what people tend to get excited about lol, but I did!French holiday with friends (in Brittany) French holiday with friends (in Brittany)Have you started the holiday season yet? Hope my tips help ;-)

Rasa xoxo

1

Watercolour challenge: toddler doodles

Toddler doodles turned into abstract artSo this month for my watercolour challenge I decided to collaborate with my own 2 year old toddler (Eek!!). I enjoyed watching Lukas do art so much that I thought it would be very cool to create some careless abstract art inspired by his doodles and fill our kids room walls with it. Isn’t that the greatest idea you ever heard? Well, not quite! Although it did not work out exactly how I imagined (no artwork on the walls yet), working with the toddler thought me one thing or two. Before I tell you all about it, shall I explain how we did go about it first? If you agree then read on to hear my full story below. For our first arty session I set out with all material I had in stock. Although I don’t have crazy amount of art material, it was still little too much. This was my first lesson on how to make art with the toddler. Never give too much choice or you will be overwhelmed or (what happened in our case) he will be obsessed with one art media. I started by painting large rainbow on the page and Lukas joined in as soon as he noticed me painting. He picked a brush and kept dipping it where ever he could find: acrylics and water paint. The result was as I was expecting although I am not sure about the colour combo here, it did not go with our house interior at all.  Because I noticed Lukas likes to spread a paint with the brush, I realised watercolour was too watery. This is why I mixed up few watercolours with white acrylic paint to get thicker paint. But that meant the colours ended up very pastel. If you like pastel colours than this is fine, but I was not a big fan of this as I LOOOOOVVEEE bold colours.Toddler doodles turned into abstract art Toddler doodles turned into abstract artBut why I did not like Lukas using water colour straight? Well… a 2 year old did not quite understand the concept of using it. To use watercolour you need to constantly dip your brush into water between colour change and before to moisten the paint as well. To fix this problem I tried to dilute some watercolour pigment in little water. Here it is, I made a palette that I though would work.  Toddler doodles turned into abstract artExcept, yellow soon got mixed with green, created lime colour and other colours got mixed up as well. Did I tell you how easily watercolour mixes? You get the image: lots of grey/brown paintings. The pic below was the least overdone (lol).

I also tried placing few drops of watercolour ready on paper. You can blow on those drops to create pretty lines and patterns (this is my fave painting technique!!!). However this did not work out with 2 year old, he just did not quite get what exactly I wanted him to do with the straw I gave him (although I gave him plenty of demonstrations). Toddler doodles turned into abstract art Eventually I let him scribble away with crayons. Toddler doodles turned into abstract art I used Lukas scribbles to make my own abstract art which I much preferred. However I realised that this does not go with our house or my style. Toddler doodles turned into abstract artThe artwork with alphabet is my fav, however it does not have so much input from Lukas. I am thinking maybe for my next watercolour challenge I should do something alphabet themed (I really really enjoyed painting letters). Will see ;-).Toddler doodles turned into abstract artHope you have been inspired ;-)

Rasa xoxo

0

Savoury pesto crepes (cheese filling is the best!!!)

Pesto crepes filled with cheese recipeTruth to be told I recently started to dislike mealtimes with my kiddies. Lukas has reached such a fussy age that I can’t predict if the food I make will meet his standards. Can anyone relate to this? And guess what, it’s not a gourmet food he is after. It’s pasta and pancakes that makes him really happy. Ok, we recently found out that he also likes curry, but I shall keep this story for another post. Ok? For now lets talk pancakes… hmmm

I came up with pesto crepes on one of those days when I wanted to keep lunch time casual. You see, sometimes Tomas goes for a nap in the middle of the day, which is why I started using this time to sort the meals out. I prep the dinner (often in slow cooker) and then me and Lukas casually lunch in the kitchen. I sit Lukas up on the counter while I fry some pancakes for him. I find this totally relaxing as I love nibbling on pancakes myself (with a cup of coffee on the side of course). This week I added pesto into the crepe batter which was a game changer. I started imagining how I could add different herbs next time as well  because it is so easy to make your own pesto using different kinds of bases (it can even be spinach!!). And most of all Lukas liked these “pancakes” equally as the plain ones. I made these savoury and filled it with cheese and tomato which was even better.

PESTO CREPES

  • 200g flour
  • 2 eggs
  • pinch of sugar
  • pinch of salt
  • 1 tbsp butter, melted (+ more for frying)
  • about 350ml water or milk
  • 4-6 tbsp pesto (doesn’t have to be basil pesto)

1. Place the flour into the bowl together with eggs, sugar, salt and butter. Whisk everything together into a dry mass. While whisking begin pouring the water gradually into the flour mass (not all in one go because you might not need it all). You are aiming for a batter consistency that easily drips down the whisk when held up but still leaves temporary traces when whisked. Pesto crepes filled with cheese recipe 2. Add pesto and mix again to combine.Pesto crepes filled with cheese recipe 3. You will need to fry pancakes in a well heated pan with a little butter. Pour one spoonful of batter into the pan and immediately start swirling round the pan to get a nice even layer. If you are having a cheese filling then add it at this stage as it needs to melt while the crepe is still frying. Pesto crepes filled with cheese recipe Just roll the crepe once the cheese is slightly melted.Pesto crepes filled with cheese recipe Best eaten warm!Casual lunch me and a toddler!Enjoy!

Rasa xoxo

0

How to make a baby mobile

Jumping bunny baby mobile diy No no, I am not expecting again! This baby mobile I made last week is for my new nephew Alexi. Although I do think this is a perfect project when you expecting… hmm. Think of all that time you have when the baby is not out yet (only kidding there is always another one near by to pester you about his needs lol).

Anyhow if you would like to make a baby mobile then you will need something to hang on it. I prefer soft mini animals or shapes and this time I chose these crochet jumping bunnies (because that was the theme), but you can hang on it anything else suitable such as this knitted bird or this felt bird.Jumping bunny baby mobile diy Jumping bunny baby mobile diy To make the baby mobile you will need a hoop (around 12 inches), some thread (strong enough to handle hanging weight), some mini jingle bells (or beads) and 5 jumping bunnies (or any other mini stuffed animal or shapes).Jumping bunny baby mobile diy Attach five threads to the hoop together with the jingle bells.Jumping bunny baby mobile diy Join all five threads leaving lots of space on top for hanging (you might want to hang it onto the ceiling).Jumping bunny baby mobile diy Hang the mobile and carefully attach all the bunnies onto each thread at the bottom while trying to keep it all level (its very challenging I know!).Jumping bunny baby mobile diy Ta-da!!Jumping bunny baby mobile diy Jumping bunny baby mobile diyHope your baby likes this mobile although I believe it is more for mummy to enjoy ;-)

Rasa xoxo

0

Kids art Easter biscuits

Kids art Easter cookies diyHands up who is really really looking forward to Easter! We do! Me and kids are in Devon with the grandparents already and we are pretty much ready here (its easy when you are not hosting).

Me and Lukas has been drawing and painting lots recently so I initially thought we will do good old Lithuanian tradition and paint some eggs, but then I decided against it when I thought of shortbread biscuits… hmmm! I thought if I make the biscuits into egg shape then it will be like painting eggs but on the flat surface rather than the round surface (a little less messy I thought). Plus, I thought this is a very good opportunity to try out more of natural food colouring :-).Kids art Easter cookies DIYKIDS ART EASTER BISCUITS

(for biscuits)

  • 240g butter, softened
  • 200g sugar
  • 1 egg
  • 500g flour
  • 1tsp baking powder
  • 4tbsp milk

(for the “paint”)

  • 4tbsp icing sugar, sifted
  • water
  • 1tsp beetroot powder for pink
  • 1/2tsp turmeric powder for yellow
  • 1tsp matcha powder for green

1. Place all the biscuits ingredients into the mixer and switch it on for few min till everything turns into nice soft dough. At this point you can wrap the dough and place it in the fridge for the next day or freezer for whenever you need it in the future.

2. Flour the surface and the rolling pin and roll the dough about 7 mm thick. Using biscuit cutter or a cup/glass cut the circles in the dough. Once the circles are out of the dough roll it once more again (only one way) to make an oval shape.

Kids art Easter biscuits DIY 3. You can involve your kid at this point. Lukas was treating the dough as he would the play-dough.

4. Place all the dough shapes into lined baking tray and bake them in C200 preheated oven for 10min.Kids art Easter biscuits DIY 5. Meanwhile make the “paint”! gradually add water into the icing sugar until you are happy with the consistency. Split the icing into four cups so you can make up few different colours. Add each colouring to the separate cup and mix. Kids art Easter biscuits DIY 5. Initially I showed Lukas how to brush the “paint” onto biscuits…Kids art Easter biscuits DIY but soon after he realised it is so much more fun to drizzle and splatter the paint over the biscuits. I totally agree, these remind me of Jackson Pollock paintings.Kids art Easter biscuits DIY Kids art Easter biscuits DIY Kids art Easter biscuits DIYHave a very lovely Easter everyone xx

Rasa xoxo

0

Breakfast banana bread

Breakfast banana bread recipeI am not going to lie, last week was a bit difficult. Coming back from holidays straight to real word is overwhelming! And we are going for another holiday again next week so not sure how I am going to cope to do this all over again. One thing is certain, I am trying to prepare as much as I can for it. Last week I had a meltdown when I find out we have no bananas left for breakfast. This is why this time round I am making banana bread to put in the freezer just in case so I can toast it if I am in banana emergency again (sounds funny, but it was seriously an emergency because banana is a very important staple in our house). I made this banana with porridge oats and replaced sugar with honey, so it is sort of healthier than regular banana bread. It’s not like I am giving cake to kids for their most important meal!

BREAKFAST BANANA BREAD

  • 160g honey
  • 100g butter
  • 2 eggs
  • 2 tbsp yogurt
  • 500g ripe bananas (4-6 bananas) + 1 for the decoration
  • 100g porridge oats
  • 150g plain flour
  • 2tsp baking powder

1. in the blender or food processor cream butter with honey then add eggs and yogurt and whizz once again.Breakfast banana bread recipe2. Add remaining ingredients, including pealed bananas and turn the food processor on to make a smooth banana bread mixture. Breakfast banana bread recipe 3. Pour the mixture into the prepared baking tin. Top it with sliced banana and bake it in preheated 180C oven till it is baked through.Breakfast banana bread recipe 4. Don’t slice baked banana bread while it is still hot like me here. It wont cut well as it is a very very moist banana bread. Once it’s cool it can be eaten straight away or frozen ready sliced.Breakfast banana bread recipeHope January is treating you well!

Rasa xoxo

0

Woodland themed birthday cake

Woodland themed chocolate birthday cake (dairy and gluten free version) recipe Although we celebrated Lukas birthday together with Granny birthday last weekend he is officially turning 2 today (wow, where does the time go!). It was good to get together with the family in Devon, staying here a little longer with the kids while Joni is sorting out our new kitchen (hopefully will share about it more soon).

As for a birthday cake I am very very pleased that I was not asked to bake him a cake in Paw Patrol theme (or something along those lines), so I chose to make woodland themed one. Which is much prettier and tasteful in my opinion. I really dislike heavily iced cakes! I also decided to keep it simple as I am quite busy these days (bringing up baby and toddler at the same time is no joke).

DAIRY AND GLUTEN FREE CHOCOLATE BIRTHDAY CAKE

(for the cake)

  • 6 eggs
  • 300ml oil (I used olive oil)
  • 400g caster sugar
  • 300g ground almonds
  • 3tsp baking powder
  • 50g cocoa powder mixed with 125ml boiling water

(for the frosting)

  • 1 avocado
  • 85g dairy-free sunflower spread
  • 200g dairy-free chocolate, melted (do it carefully if doing in microwave)
  • 50g cocoa powder mixed with 125ml boiling water
  • 150g icing sugar, sifted (+100g extra for thicker frosting)

(for the decoration)

  • woodland themed gingerbread cookies
  • rosemary stalks

1. First bake a cake. Whisk the eggs with sugar and oil until you have custard like consistency. Add almonds, baking powder and cocoa powder liquid. Mix everything again to combine. Woodland themed chocolate birthday cake (dairy and gluten free version) recipe 2. Pour equal amount of cake mixture into two lined baking tins. Bake in 180C oven for 40-45min.Woodland themed chocolate birthday cake (dairy and gluten free version) recipe3. While waiting for the cake to bake, prep gingerbread cookies. You may be able to buy yours in store, but I needed dairy free ones at least so I ended up baking my own. I used this recipe and replaced butter with sunflower spread. Woodland themed chocolate birthday cake (dairy and gluten free version) recipe 4. Finally, time to make the frosting. Place all the ingredients (only 150g icing sugar at this stage) into electric mixer/processor and whizz. The mixture should turn into smooth frosting .Woodland themed chocolate birthday cake (dairy and gluten free version) recipe Spread half of the frosting in between the cake layers, top and sides.Woodland themed chocolate birthday cake (dairy and gluten free version) recipe Use pallet knife to smooth the frosting on the cake.Woodland themed chocolate birthday cake (dairy and gluten free version) recipe 5. To decorate add 100g more icing sugar into the remaining frosting to make it thicker. Pipe it on top to make a decorative texture. Top the cake with woodland themed cookies and rosemary stalks to represent trees/bushes. Woodland themed chocolate birthday cake (dairy and gluten free version) recipe Woodland themed chocolate birthday cake (dairy and gluten free version) recipeHope I inspired you ;-)

Rasa xoxo

0

My favourite kids lunch on the go

Full of veg savoury muffins recipe We have been traveling lots lately (I am talking day trips not an actual holiday) and to have something handy for lunch is essential (unless you want to spend the money at the cafe or something). This is why these muffins are amazing for obvious reasons. They are dry meaning the mess don’t stick to clothes, they are full of hidden veg (so hard to make Lukas eat veg these days) and they can be frozen for whenever you need them. Besides, they are carbs that children love to eat, su no fuss here ;-). Full of veg savoury muffins recipeFULL OF VEG SAVOURY MUFFINS

makes 12 muffins

  • 2 handfuls of chopped veg of your choice (I had broccoli and cherry tomatoes)
  • 230g plain flour
  • 3tsp baking powder
  • 140g grated cheese
  • 200ml milk
  • 3tbsp olive or sunflower oil
  • 1 egg, beaten

1. First, finelly chop all the veggies. Especially broccoli as it needs to cook through when baked.Full of veg savoury muffins recipe Full of veg savoury muffins recipe 2. Combine the veggies with the rest of ingredients.Full of veg savoury muffins recipe 3. Mix everything well before spooning the mixture into 12 hole muffin tin (all lined and ready). Bake for around 30min in 180C preheated oven.Full of veg savoury muffins recipe Full of veg savoury muffins recipeEnjoy your lunch!

Rasa xx

0

Baby friendly birthday cake

Baby friendly birthday cakeLast week we celebrated Lukas birthday and today I would like to share with you the recipe of the cake I made for him. I aimed for something sugar free of course that is suitable for a baby. I made sure to include banana in it just because Lukas loooovesss banana very much (maybe he is a minion who knows :D) and also because it adds some sweetness. The cake of course wasn’t very sweet. I would say it was a brioche sweetness level. I also thought that it is better eaten warm, but I had to cool it down unfortunately to decorate it and make it look a little bit more festive ;-). For “butter cream” I just used whipping cream, so it wasn’t sweet at all, but actually Lukas liked it very much so I guess it’s ok ;-).  Baby friendly birthday cakeBABY BIRTHDAY CAKE

(for the cake)

  • 150g banana (about 1-2 bananas depending on size)
  • 1 egg
  • 60ml oil (I used refined olive oil, but rapeseed oil would probably be better)
  • 330g plain flour
  • 27g oats (I used pack of portioned porridge oats that actually comes in 27g)
  • 2tsp baking powder
  • 125ml milk
  • 3tbsp yogurt (I used greek style yogurt, but natural yogurt would work fine too)

(for decorations)

  • whipping cream, whipped till stiff (one tube of 300ml will do)
  • no added sugar chocolate (there is no such thing as sugar free chocolate my friends!)
  • blueberries (or any type of other berries that are sweet)

1. Whizz bananas, egg and oil in the food processor. Add all other ingredients and mix everything to combine.

2. Spoon the cake dough into small lined spring form tins (mine filled 4 tins).

3. Place the tins into preheated 180C oven and bake the cakes for 20min or so.

Baby friendly birthday cake4. Meanwhile I made chocolate cake decorations. I must admit I got little rusty, because I have not done it for aaaaages! I melted some chocolate, poured into pouch I made out of backing paper and cut the hole in it so I could pipe the chocolate out. I lined a metal baking tin with backing paper and piped chocolate on it in the leaf shapes. Placed it in the freezer for few minutes to set. Done!Baby friendly birthday cake5. Next up is decorating! Sandwich the cake by spreading whipped cream in between and then spread more on top and around to ice the cake. My tip is to really wait till the cakes are cool and trim the tops off, that really helps to make the cake square and therefore easy to ice.Baby friendly birthday cakeOnce the cake is iced, decorate it by piping some more whipped cream on top, sprinkling with blueberries and arranging some chocolate decorations on top if you wish.Baby friendly birthday cakeBaby friendly birthday cakeHope your baby likes it too ;-)

Rasa xx

0