Top

Quick Jewellery

As Vickie was moving away from London to Twickenham (she has started there her new job with children) there was lots unwanted items to give away. Jewellery was one of them. Do you have any unwanted jewellery that you no longer wear? If yes, this post is for you. That’s because here I will share how I have made some simple jewellery by reusing Vickie’s beaded accessories! I started by breaking some necklaces down and then just playing around with ribbons and other beads that I had. That was quite fun, which kept me occupied for couple of days.

This necklace was one of the first. I made it by incorporating large beads with ribbon and some elasticated see-trough string.

The other necklace I made after seeing this on Pinterest.
Have fun with beads!
Rasa xo
0

Special guest in my garden!

I get many guests visiting my little city garden (welcomed and unwelcome). However I am impressed that many of these urban animals aren’t scared of humans! This cute squirrel for instance did not mind picking nuts from my hands…
I quite enjoyed sharing my walnuts and hazelnuts with squirrel! But if you prefer, bake carrot cupcakes with walnuts.
Or when the weather seems more promising, this ice-cream recipe is great way to use up all those nuts and seeds.
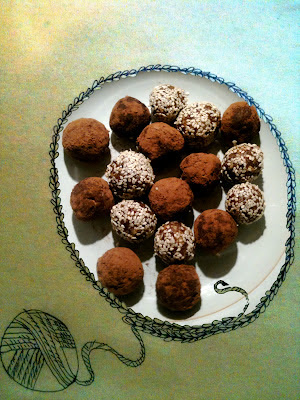
Or even better! These healthy dried fruit and nut truffles taste great ;-)
Rasa xo
0

Cat pillow DIY

I don’t know about you but having a pet in London is quite a difficulty, especially if you are renting. I once wanted a cat, but came across other issues. This is quite a long story… ok, ok, I will say it quick: I wanted to adopt, but RSPCA was so concerned about me not working full time that they did not even bother to visit my place. I am still confused if I wasn’t adopting a child instead of pet, because part time job = can’t support a cat financially! Really? Anyways, I am happy I was not considered, because I don’t know how I would be baking now? Imagine all those hair all over the place. Maybe next time! 
Vickie’s flatmate, Fränzel would also like a cat, but can’t have it in rented place :-(. So as a gift (Vickie is leaving the house, so she wanted to give something nice to remember), we decided to make a stuffed cat! I know I know this might not replace a real cat, but look at those extra uses for it. You can have it as a cushion or a decoration, or a neck pillow! So don’t be sad if you are not able to keep a pet, make a stuffed one to cheer you up! ;-)  
Here are the instructions!
When your stuffed cat is finished, you can….
Are you relaxed?
Rasa ;)
0

Lentil Moussaka: Something really tasty from Alex Mackay’s cookbook

Just wanted to say how surprisingly amazing this book is! I cooked couple of things from it and whatever I was eating I was never disappointed. Today I cooked this lentil ‘moussaka’… hmm!

LENTIL MOUSSAKA

For the braised lentils

  • 1 onion
  • 2 garlic cloves
  • 1 tbsp extra virgin olive oil
  • 350ml water
  • 2 tbsp tomato puree
  • 200ml red wine (I used white wine as red one could not be found!)
  • 115g Puy lentils (used basic greens, but I am sure Puy lentils are better)
  • 200 tinned chopped tomatoes
  • 1 bay leaf
  • salt, pepper, sugar (used dark brown and quite a lot by accident, but turned out really really great)
  • 2 tbsp orange juice (oopst! I missed read that! I used the whole orange juice… oh never mind!)
For ‘moussaka’
  • 1 large aubergine
  • 2 tbsp extra virgin olive oil
  • 2tsp wine vinegar (I used balsamic vinegar as I am just little addicted to that)
  • 1/2 orange zest
  • 2 tbsp chilly powder
  • 2 tbsp ground coriander seeds
  • 125 mascarpone
  • 60g grated cheddar cheese
  • some parsley for deco (my own touch)
So I began with the lentils as that takes more than an hour…
I started with frying the onion and garlic, then added tomato puree after 7min or so. Then added wine and lentils.
Then I added tinned tomatoes, bay leaf and water and put it into the preheated oven (170C) covered (had to switch the pots as the one pictured above was not suitable for oven, one more reason why I should read the recipe before cooking!). After 30 min I have removed the lid as instructed and carried on cooking it in the oven for another 30min. When finished I just added sugar, salt, pepper and orange juice. This is the result…
Next, I cut the aubergine in four slices (lengthwise) and brushed it with vinegar and olive oil which then got baked for 20min in oven at 230C.
Meanwhile I prepared all the little things like ‘cheese sauce’ (mascarpone and cheddar cheese mix) and orange zest mixture (zest, chilly and coriander).
Oh,  and you might be asking why I still have orange juice in this picture, did’t it go into the lentils? Well… I made this mixture way before everything (sorry to be so confusing).
So, once I got the aubergines out of the oven I started layering. This went like this: first two aubergine slices, than the lentils, then orange zest sprinkles, then the second aubergine slices, then the cheese mix, then the orange zest mix… got the picture? Really useful tip from Alex Mackay in regards to spreading cheese mix: heat the butter knife in the hot water as this makes the spreading much easer!
And now into the oven for 20 min.
Enjoy!
Rasa :)
0

Pickled Cucumbers (the Lithuanian Way)!!


As the barbecue season is soon approaching I felt like making cucumber pickles. I pickles in my burger!  Anyway, what I really like is the Lithuanian version as there are no vinegar used in the process, therefore it taste really yummy without any harsh taste. I called my dad for the tips and here is what I did…

PICKLED CUCUMBERS

Ingredients5 cucumbers (I bought them from green groceries as the long
                                          cucumbers in the supermarket would not work)
                   2 handfuls of dill (very important)
                   1 handful of blackcurrant leaves (my dad said this is important, 
                                                                       but I could not find so I did not add)
                   1 handful of cherry leaves (optional and I did not have any anyways)
                   1 hanful of oak leaves (optional, do you know any oak tree in London?)
                   1 sprinkle of fennel seeds (optional)
                   5 pepper corns
                   3 garlic cloves
                   lots and lots of salt
                   1l boiled water, cooled down to lukewarm 

So first thing first (very simple), put all the ingredients into one pot, glass jar or a bucket (I used a vase actually)… whatever!

I used ceramic baking beans on the saucer to weigh the contents down (the cucumbers tend to float). My dad usually use a stone, but I did not find any suitable. The important thing is not to seal them as it might explode due to gases passing through (I know that sounds creepy, but it’s worthy!). After just a few days here come the results!
Now you only need other components for the burger like coleslaw (try sunflower oil with caraway seeds instead of mayonnaise), sliced tomatoes with sour cream and chives + most importantly fried onions (I like it caramelised with some balsamic vinegar and sugar).
As for buns I baked them all from scratch sprinkled with some caraway seeds again (can’t have too much of it!)
 And finally the burgers – have them which ever way ;)
Rasa xo
1

My mum’s favourite apple tart

I am having such a relaxing day today by doing absolutely nothing (except writing this post perhaps)!!! And this is is much needed after baking so many samples to supply to cafes. After all this have been really successful as I am baking for one more cafe with few other really interested!

My mum’s favourite is the apple tart, however the credits go to Ramune who introduced this lovely recipe to our family. I love this too as it is such a freestyle cake! Although in theory the base is a sweet pastry, the amounts however are rough, there are no blind baking involved and you can pick any filling (I mean any but for now I am of course only adding apples).
APPLE TART
Ingredients: 200g unsalted butter
                   6-8 tbsp sugar
                   2 egg yolks
                   15-20 tbsp flour
                   3 sliced apples
                   3tbs brown sugar
1. Preheat the oven to 170C.
2. Cream butter with sugar and mix it together with egg yolks.
3. Gradually add flour (I usually start with 15 tbsp and then see how the dough is reacting to it). The goal is to get the dough soft but not too sticky. So the less flour you can handle the better!
4. Split the dough in two and roll out flat on floured surface: one for the base and other for the top. Line  baking tin with the dough (line baking tin with baking paper first if needed or just a butter is enough).
5. Coat slices apples with brown sugar and arrange them in the tart.
6. Cover the tart with the second part of the dough. If you want you can cut out little shapes on top with the biscuit cutter. But that is up to you – it won’t effect the taste ;)
7. Bake (I never take the time) until the top looks slightly golden. But be worn! As Ramune says: “it is better to under-bake than over-bake it”.
I hope you like it!
Rasa :)
1

That place on the corner…

And this is an actual name for a cafe… and not any cafe, this is a kids cafe! Here the kids can play, attend fun classes and parents can mingle with family and friends.  I am not a parent myself, but sure I would enjoy that (the last bit).
Anyway, just wanted to say that I started baking for “That place o the corner” (not a lot, but this is a start). I baked gluten free lemon drizzle cake yesterday which felt great! I would love to bake more! Let me know if you require any cakes supplied ;)
Rasa :)
0

Berry Meringue Tartlets – The Tartlet for Easter

I love tartlets! I probably said this so many times before… they are sooo cute! This one is perfect for Easter! Not only it has a spring appeal (contains refreshing wild berries with crunchy meringue topping), but it also can be made in any season as frozen berries are totally expectable. Have a lovely Easter weekend!

BERRY MERINGUE TARTLETS
Makes  6

For the sweet pastry:

110g softened unsalted butter
80g caster sugar
1 small egg
210g plain flour
a pinch of salt

For the berry filling:

Half cooking apple
4 tbsp frozen mixed berries
60g caster sugar

For meringue:

4 egg whites
200g caster sugar
poppy seeds for deco

1. Make the pastry in a food processor, if you have one, by placing all the ingredients in the machine and pulsing gently until they form a soft but not sticky dough. If you are making the pastry by hand, lightly cream the butter and sugar together with a wooden or plastic spoon. Beat the egg and to the creamed mixture a little at a time, beating well between each addition. Sift the flour and salt on to a piece of baking parchment and add to the creamed mixture all in one go. Bring the paste together gently to form a soft but not sticky dough. Do not over-handle it.
2. Wrap the dough in cling film and chill for 2hours. Then roll it out on a lightly floured work surface to about 5mm thick and use to line six 10cm loose-bottomed tartlet tins. Leave the lined tartlet tins to rest in the fridge for 30min.
3. Preheat the oven to 170C. To bake the pastry cases blind, line it with cling film and fill with baking beans . Bake for about 15min, until the pastries have started to colour and bases are firm to touch. Remove the packages of beans and return the pastry cases to the oven for about 10 min, until the pastries are golden brown. Leave to cool completely.
4. Turn the oven down to 150C.
5. To make the filling shred apple into the saucepan and heat it together with the berries and sugar. When the sugar is completely melted spoon the filling into the baked cases.
6. Finally, prepare the meringue topping by whisking the egg whites in a clean bowl until stiff (it’s best to use an electric mixer for this as it takes a while). Add the sugar a little at  a time until it is fully incorporated. The meringue should be stiff and glossy.
7. Spread the meringue over the berry filling and bake for 40min.
8. Sprinkle some poppy seeds (for deco purposes only)

Enjoy!

Rasa :)

0

Soap making (from scratch)

I love creating, crafting and DIY projects! I would like to think that I buy less (and spend less by being really really frugal) and make more, however this is still not truth. I started making my own cosmetics and soap so hopefully this will take towards my goal (to live homemade lifestyle of course).

To make this soap you will need:
610g olive oil
85g caustic soda (I bought mine in B&Q and I have seen some sold in Boots)
230ml water
2 tsp lemon balm or citronella essential oil
zest of 3 oranges
zest of 2 lemons
Safety googles
Rubber gloves
Scales
A stainless steel or enamel (not aluminum) pot
A glass or plastic pitcher to hold the water and caustic soda
A glass or plastic measuring jug
Plastic or wooden spoons (that you are not going to use for food again)
A stick blender/hand processor
Two thermometers with the prong (I used one, but had the kitchen towel paper at hand to wipe after each use)
Kitchen towel paper for clean ups
1. Prepare the workspace and gather all the ingredients ( you will be working with caustic soda, dangerous chemical, so make sure children and pets are not underfoot while you work). Make sure you have googles (I used my own spectacles which was safe enough) and rubber gloves at hand, because caustic should never touch your skin, as it would burn you (for more info read on how to work with caustic soda (sometimes called lye) safely.
2. Pour 230ml cold water (around 20C) into the pitcher. Measure 85g caustic soda and pour it into measuring jug. Add caustic soda into the water (not the other way round; don’t add water into the caustic soda) and as you doing that keep your face turned away to avoid inhaling the fumes. Set the mixture aside as it is cooling down and fumes dissipate.
3. Weigh out 610g of oil and pour it into pot. When Caustic soda water is around 45C start slowly heating the oil. When both oil and caustic soda are at the similar temperature (around 35C-39C), gradually pour caustic soda mixture into the oil while mixing (do not use metal spoon for this).
4. Use stick blender to mix the mixture for 5-10 min until “tracing” occurs (you should see the spoon leaving visible trace behind it, like in the pudding). If you don’t see any tracing, be patient and try again after 10-15min rest.
5. Add essential oil and orange/lemon zests in to the mixture, mix and then pour it into the moulds. I used celicon loaf baking tin, but if you are using regular baking tin do line it with baking paper as well. Be sure you are still wearing your rubber gloves at this stage, since raw soap is caustic and can burn skin.
6. Leave the soap in the tin/mould for 36hours before unmolding.
7. To unmold the soap turn tin/mould over and allow it to fall on a towel or clean surface. Cut the soap into desired size pieces (I used cookie cutters to cut out these lovely heart shaped pieces).
8. Allow the soap to cure before packaging or before use for min of 3 weeks.
Rasa xo
2

At my grandma’s!

Happy Mother’s and Grandma’s day (if I can add that just because I feel this is fair)!

So… this lovely lady is my grandma and I had such a wonderful time visiting her today. As I mentioned before, her home is my paradise as so many cool old-fashioned things can be found there. Although my dad warned me today once more that I should not “steal” my grandma’s stuff (well… she gives everything with joy, so never considered to call it stealing), I took a lot of pictures to show you how lovely her home looks….

Don’t you just love her style!
Rasa :)
1

Make your own apron

I made this apron for my friend Vickie (late birthday gift) who is wonderful in cooking (great chopping skills may I say). This was also a good chance for me to try out my new vintage sewing machine which works like a dream and it was quite affordable on e-bay.  Few things had to be fixed of course, but I still recommend old fashioned machine to anybody who wants to sew (not manual however, unless you want to be making apron for one month). And if you do get a vintage machine I really recommend Jennie (from London) who was really really helpful (and positive), it was so lovely to meet her!

Anyway I made the apron… happy happy! (I used to sew a lot in the past when I studied Fashion at Uni, so was feeling a bit nostalgic, missing all this sewing experience)…. And this is how I wrapped the gift…

So how did I make it? Well… try it for yourself! Here are the instructions.

Let me know how it goes ;)

Rasa xox

0

Thyme and Lemon Tartlets

I just made these tonight, so writing this post while I am eating one of them. Absolutely yamm…!
I like the cinnamon/cornmeal crust (I know! odd! But it defiantly works) and really impressed with my new sugar crusting skills (this is my first time to use cooks torch) as I managed without burning the house down! Try it for yourself, the recipe is here.

Enjoy!

Rasa xox

1

By the way…

Hey all, thanks for reading my blog so far!
Just been thinking that I have not told you the important news (not news for some people, but I thought I will make this official), that I am getting help from Prince’s Trust…. Yea!!!
So watch out for this space as there will be new exciting things coming up! (Can’t tell you what it is yet)

Rasa ;)

0

Earl Grey Poppy Seed Tea Cakes

I hope everyone is enjoying the snow in London like I do. I am Lithuanian after all!

Anyway (change of the subject), around to weeks ago I came across this recipe on SprinkleBakes website that blew my mind. I honestly get excited when I see nontraditional  ingredients matched together. So I made it! I changed the the deco to more “natural” looking and it came out like something really suitable to serve on St. Valentines day (very dainty as my flatmate said). But I could not wait until February… so there you go!

EARL GREY POPPY SEED TEA CAKES
Makes 6

For the cake:

  • 170g caster sugar
  • 6 Earl Grey tea bags (removed from the bags)
  • 2 tbsp poppy seeds
  • 4 eggs
  • 1 1/2 tbsp. rapeseed oil
  • 2 tbsp buttermilk
  • 1 tsp vanilla extract
  • 125g plain flour
  • 1 tsp baking powder
  • 1/2 tsp salt
  • sugar for dusting
For the Earl Grey syrup:
  • 170g caster sugar
  • 180ml water
  • 4 Earl Grey tea bags
For buttercream:
  • 115g unsalted butter, softened
  • 250g icing sugar
  • 1 tsp orange extract
  • Juice of 1 small lemon
  • Zest of 1 small orange
  • Zest of 1 small lemon
  1. Preheat oven to 180C.  Grease an 11×14-inch pan (I used oven shelve pan) with butter and line with baking paper (grease the paper as well).
  2. In a large bowl beat the eggs, then add sugar, tea leaves (from the tea bags), poppy seeds, oil, buttermilk and vanilla extract. Mix well!
  3. Sift together flour, baking powder and salt.  Slowly add to the liquid ingredients.  Mix until well combined.
  4. Pour mixture into prepared pan and tilt pan to distribute the mixture evenly.
  5. Bake for 12-15 minutes. Check at 12 minutes. Cake is done when it springs back when pressed with fingers.
  6. Turn cake out and dust surface with powdered sugar.  Let cool completely.
  7. Use cookie cutter rings to cut out about 18 cake circles.  Set aside.
  8. To make the syrup stir together sugar and water in a small saucepan.  Place over medium-high heat and bring to a bubble. Stir to make sure all the sugar is dissolved.  Remove from heat and place the teabags in the hot sugar syrup to steep.  Infuse for 5-7 minutes, then remove and discard tea bags.  Set aside to cool.
  9. To make buttercream cream butter together with sugar. Add orange extract and lemon juice; beat again for another minute until light and fluffy.  Add zests and mix until smooth.  Transfer to a piping bag or zip-top bag with the end snipped (no decorator tip necessary)
  10. To assemble brush each cake circle with the syrup and apply some buttercream on top of 12 of them. Join three together leaving the one for the top without the cream. Dust the tops with icing sugar. I used small heart shaped cookie cutter as a stencil to make poppy seed deco on top.

Enjoy the snow!

Rasa :)

0

Happy New Year’s day!… Waffles anyone?

I have finally got an old fashion waffle pan that I have been searching for quite a while now! Luckily my grandma had it in her attic, perfect for my new “culinary” experiments…. So since I came back to London I have been making waffles like mad: starting from basics until I got carried away with the most random ingredients (good combinations however!). The beginning have been quite challenging of course as you would expect. In fact we have a saying in Lithuanian that sounds something like this “first pancake never comes out right”, which describes my trial very well. Now when I nailed it I can make waffles (on the old fashioned cast iron waffle pan), while chatting or playing Sims online (really embarrassed by that). So far I made plain waffles, blueberry waffles, bacon cornmeal waffles and rosemary-garlic potato waffles. My friends loved bacon cornmeal waffles that taste like America. However I am voting for the rosemary-garlic potato waffles which reminds me of Lithuanian potato pancakes with the Italian twist. Try it for yourself (regular waffle maker will do)!

ROSEMARY-GARLIC POTATO WAFFLES
Serves 3-4 people

Ingredients: 2 medium sized potatos
2 eggs
125g plain flour
60ml olive oil
1 onion (peeled and finely chopped)
160ml milk
4 garlic cloves (peeled)
1/2 tbsp rosemary
salt and pepper to taste

1. Peel, wash and cut the potatoes into uniform small pieces. Put potatoes and garlic in a large pot with cold water to cover. Add a pinch of salt and bring to a boil. Then lower heat and cook until potatoes can be pierced easily with a fork drain, reserving about 60ml of potato/garlic water.

2. While potatoes cook, heat olive oil, rosemary and chopped onion in a small frying pan over low heat just until onion softens a bit. Transfer potatoes to a large mixing bowl. Pour oil and onion over drained potatoes.

3. Add milk to still-warm frying pan – just to take chill off – then pour milk over potatoes. Using a fork, a potato masher or a spatula, mash potatoes with oil and milk.

4. Add potato/garlic water and continue to mash until mixture is smooth.

5. Taste potatoes and season liberally with salt and freshly ground pepper. Preheat waffle iron and finish batter by beating eggs into potatoes with a whisk or handheld mixer. Combine together flour and potato mixture.

6. Lightly butter or spray waffle iron grids. (You can skip this step with well-seasoned or non-stick materials.) Scrape batter by half-cup measure onto hot iron, smoothing batter evenly almost to edge of grids.

7. Close iron and bake until brown and crisp.

I suggest you serve it with cream fresh to make it more Lithuanian-ish ;)

Rasa xox

1