Top

Archive | Blog

Poppyseed lady fingers

Poppyseed lady finger recipe
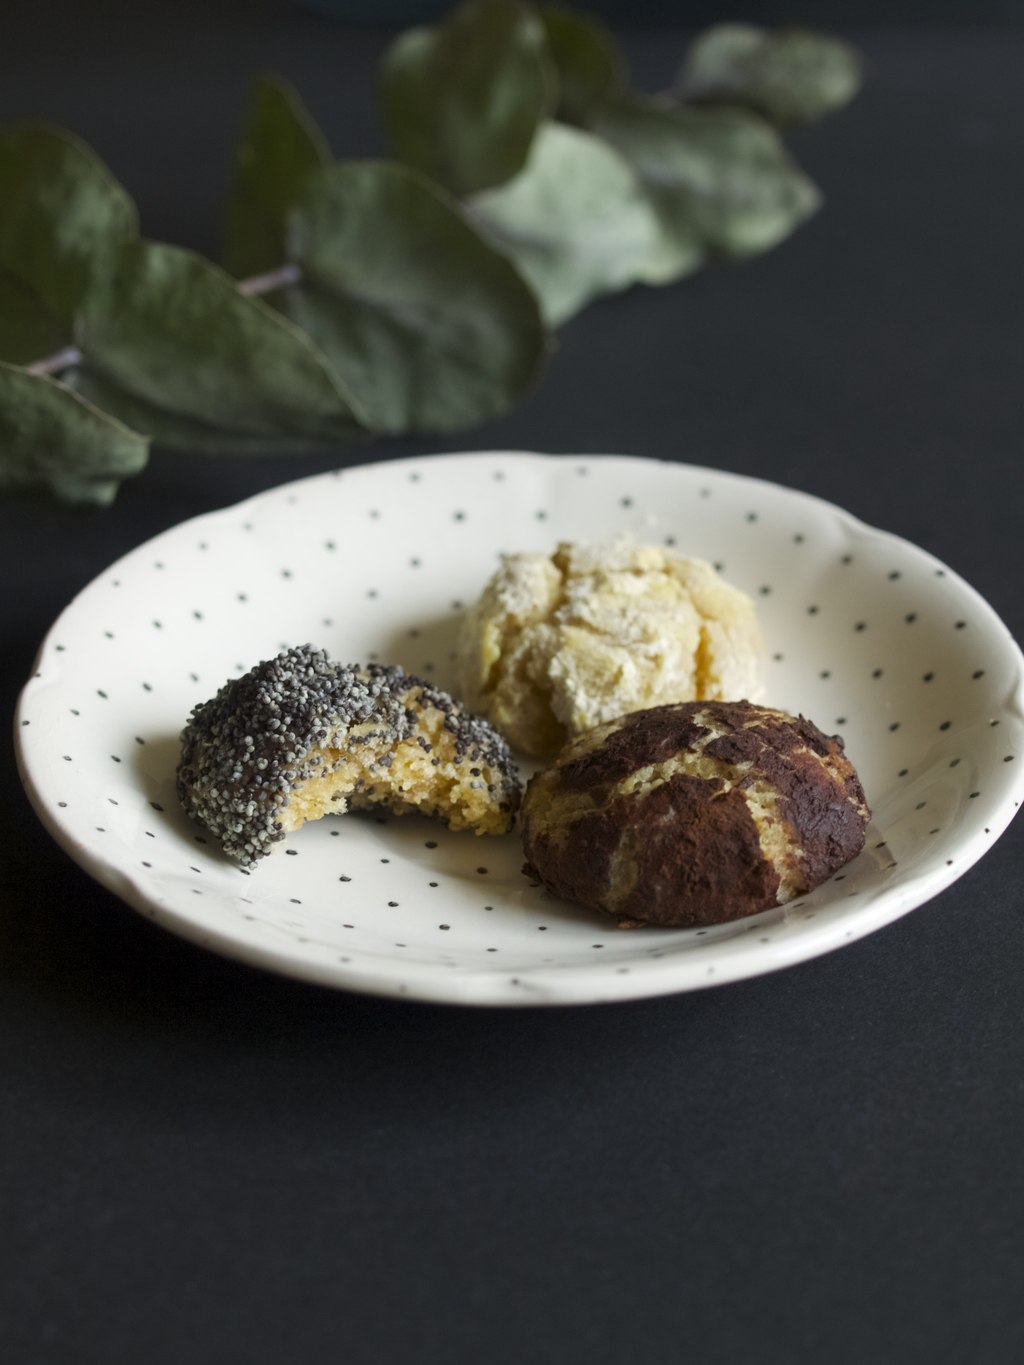
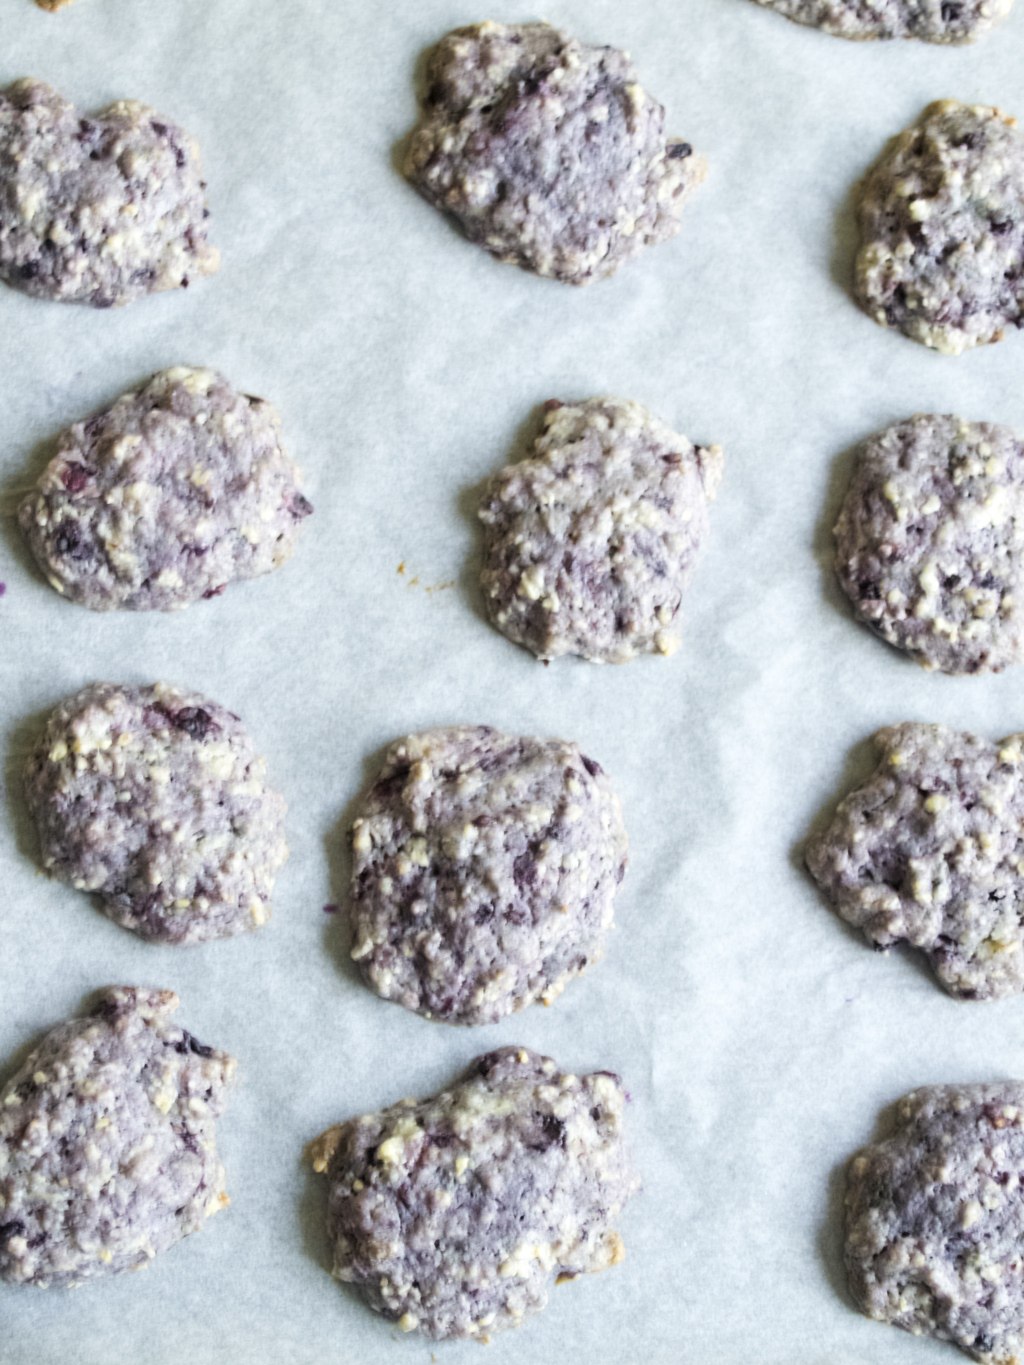
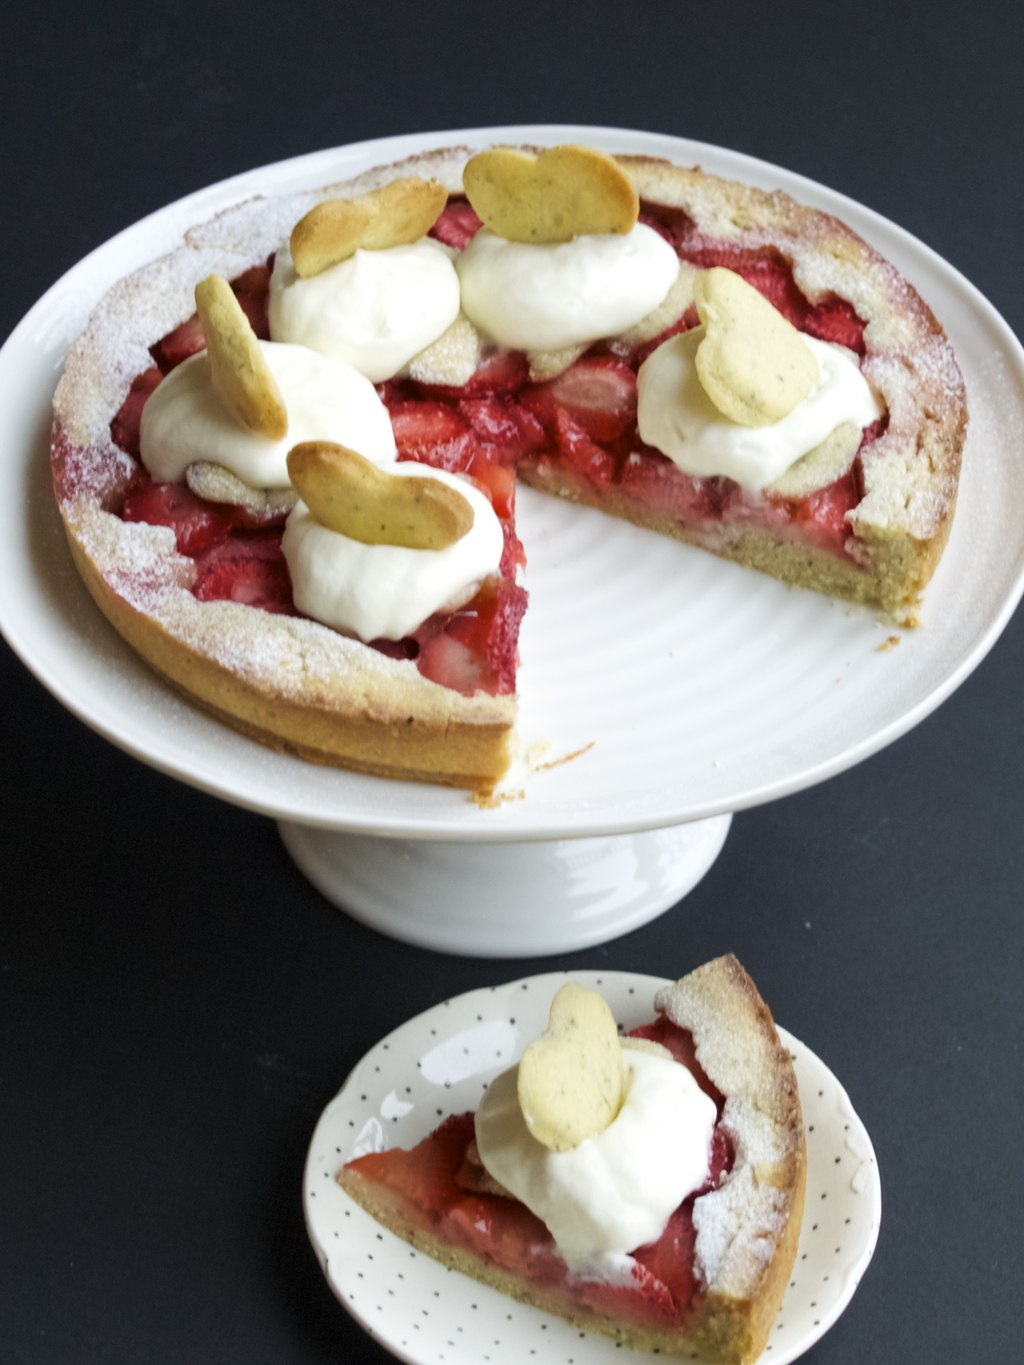
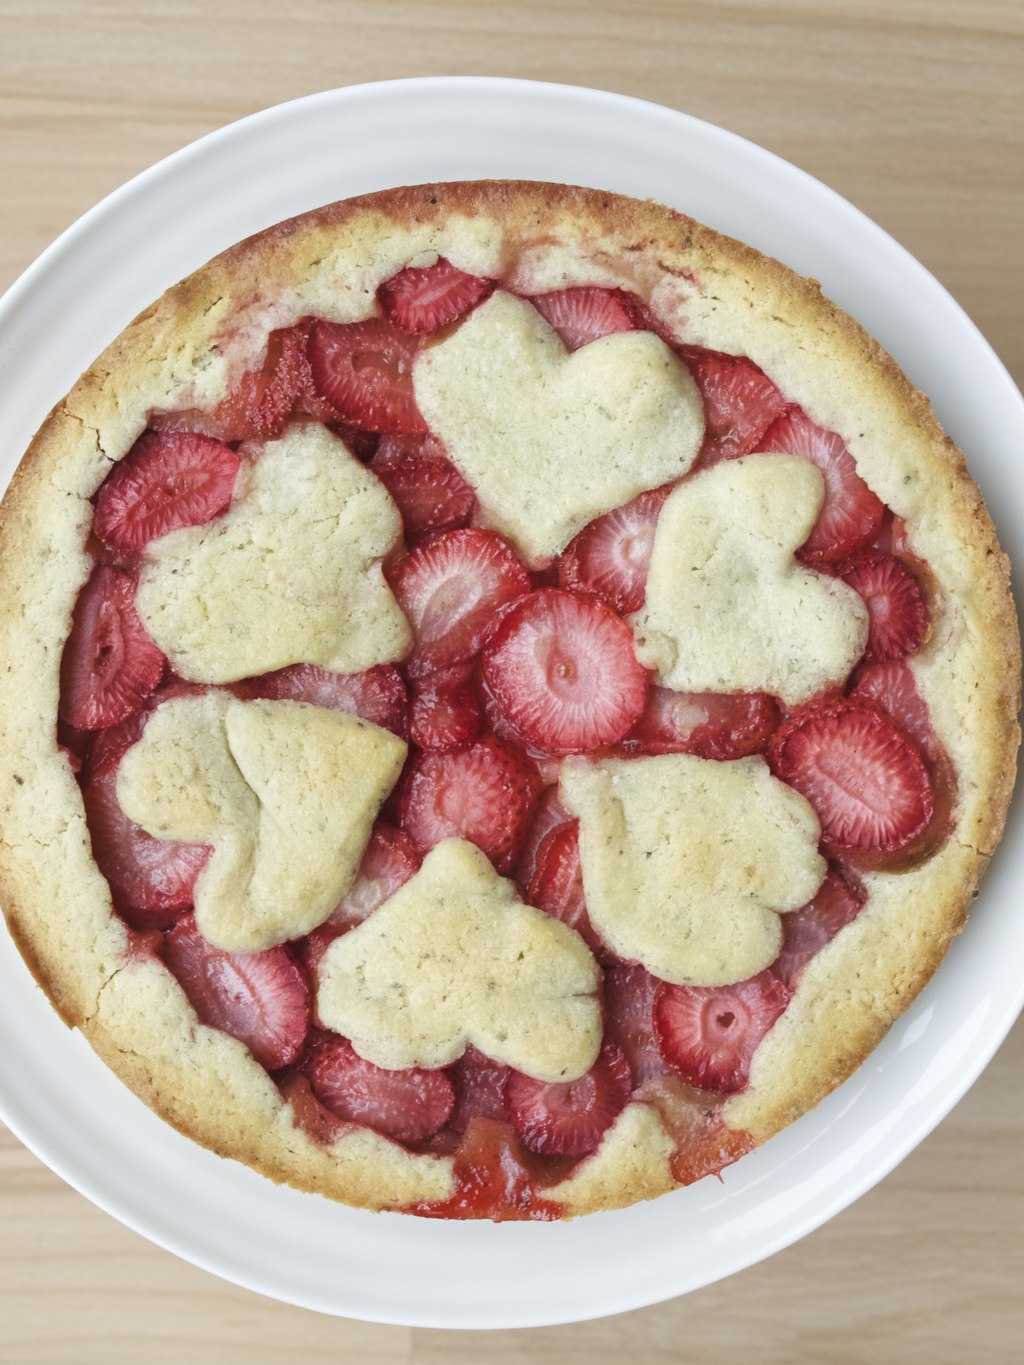
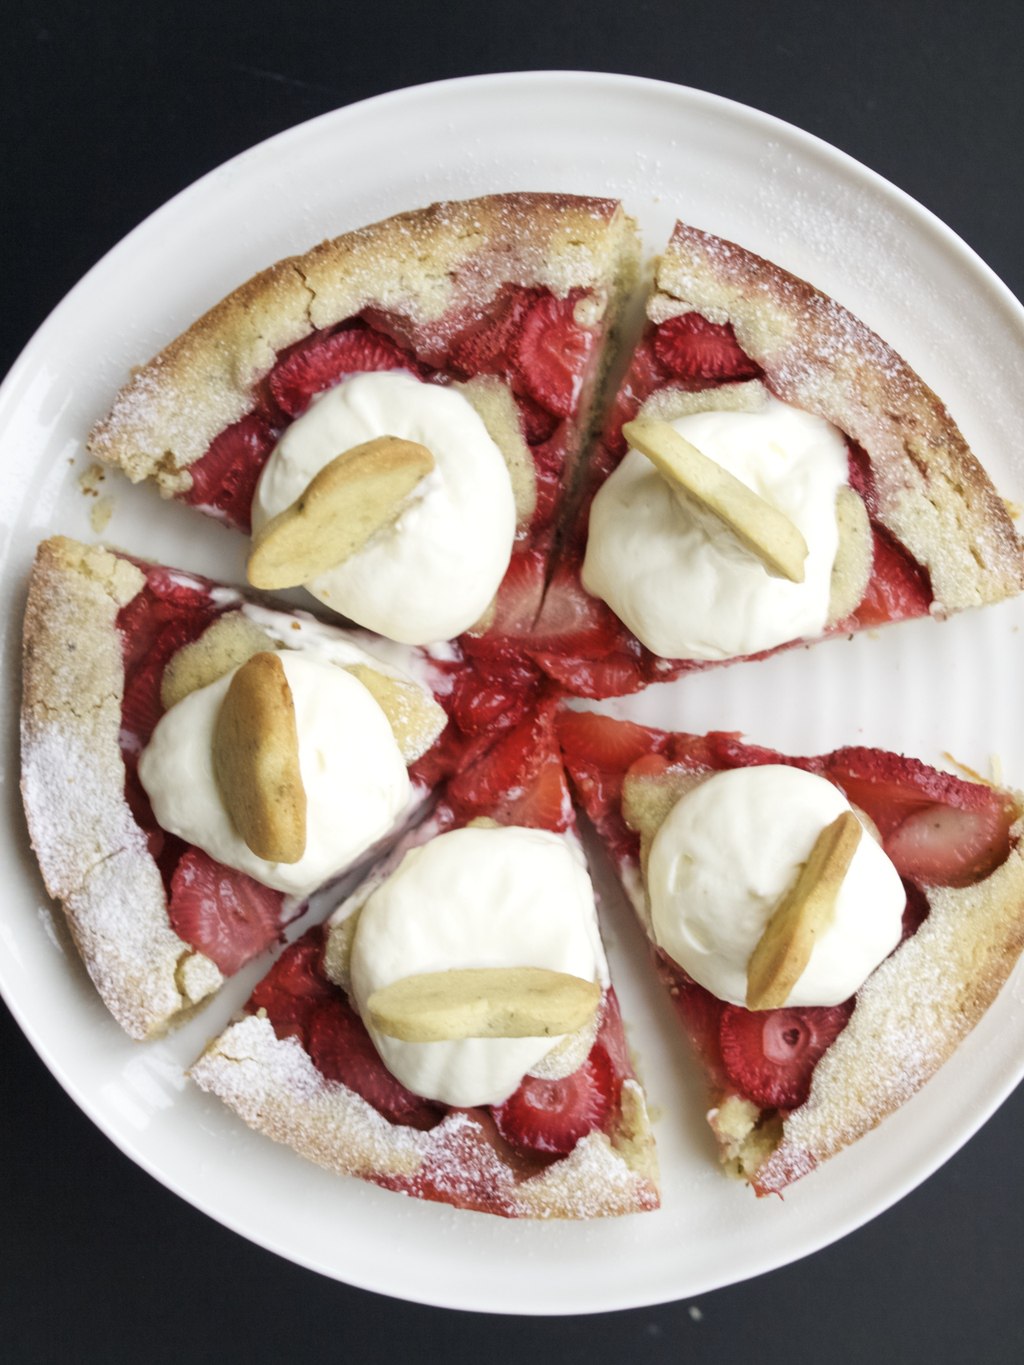
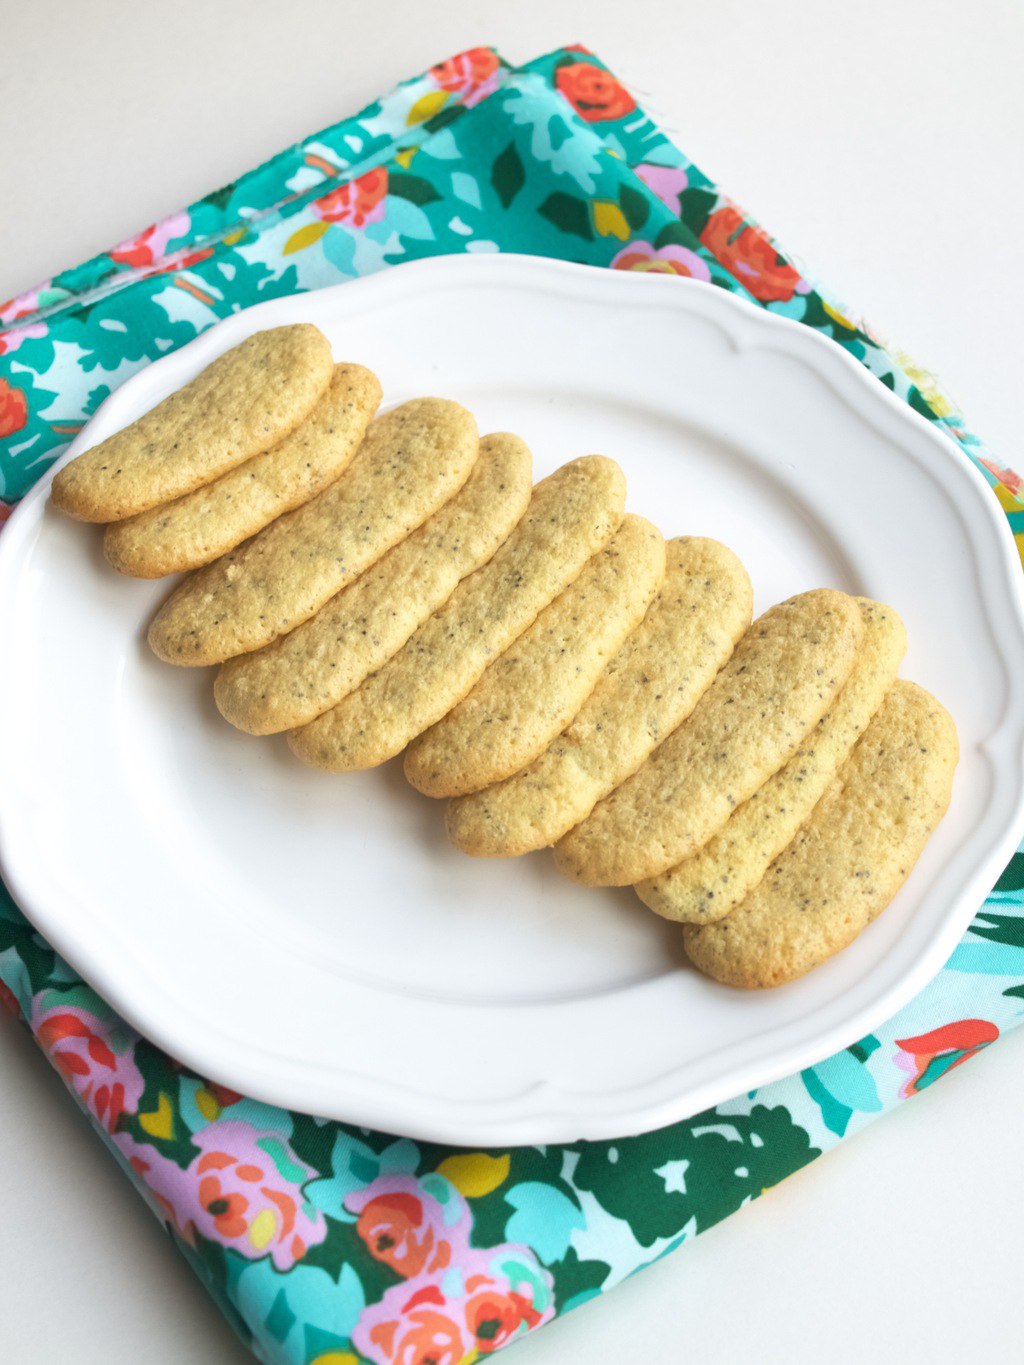
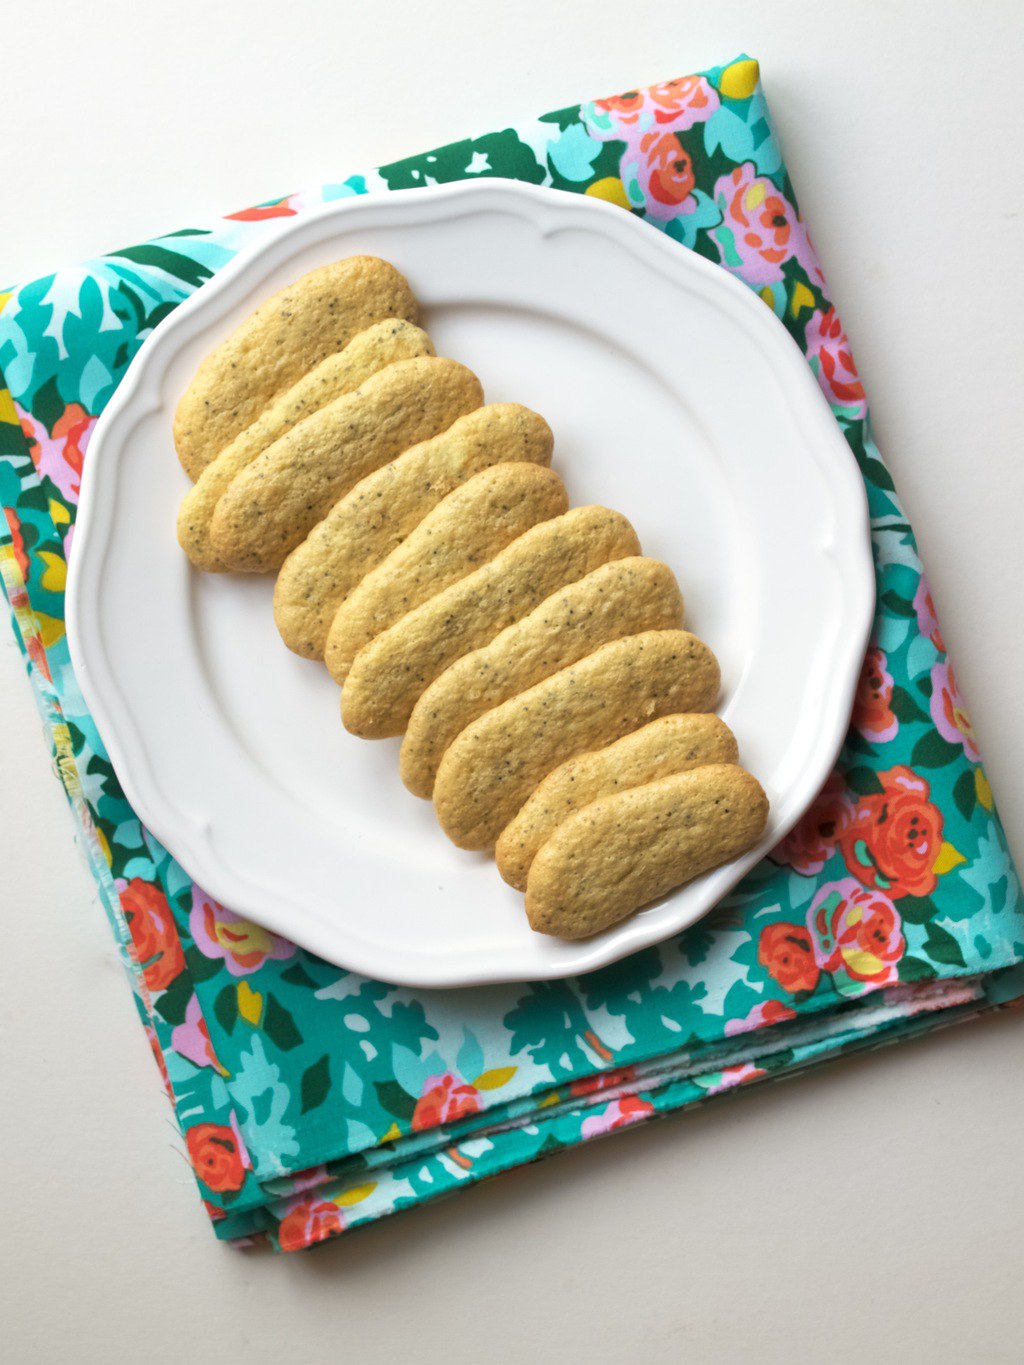
I decided to try and bake these crispy and light biscuits because I had few ideas on cake decorating with it (although they may not look suitable for decorating yet). Lady fingers (so they called) taste quite plain, but because of it’s consistency they are perfect for making fresh summer desserts such as very famous tiramisu. This is my first time making these macaroon like biscuits and I am quite pleased with the outcome even if they did not come in the perfect uniform shape (more practicing needed I guess!). Overall I prefer these to compare to shop bought as they taste better and it can be custom made such as these – with poppyseed!

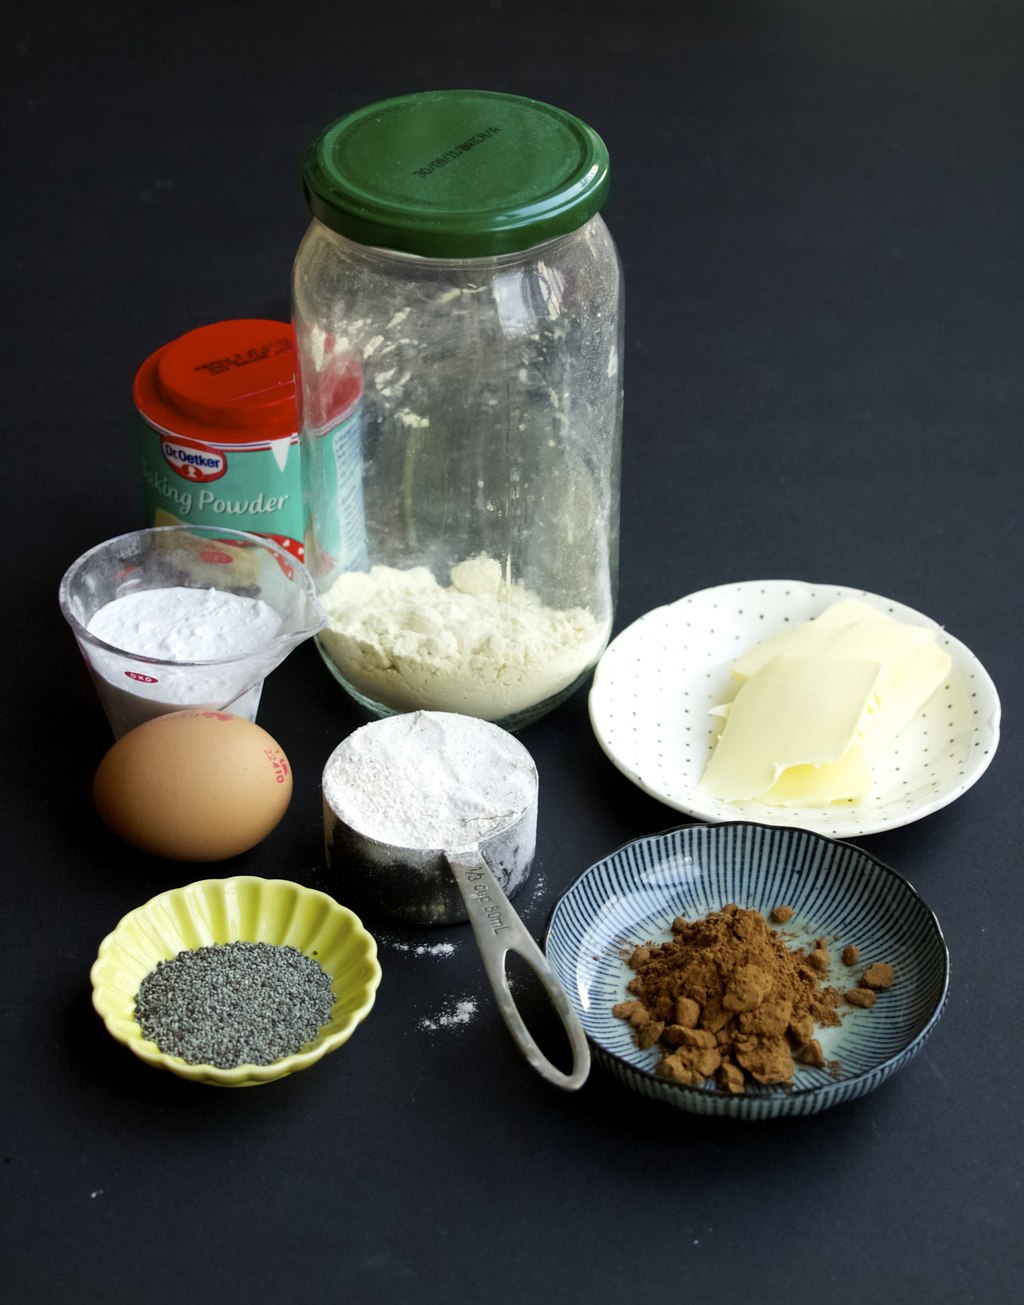
POPPYSEED LADY FINGERS makes about 24 lady fingers

  • 2 eggs, separated
  • 70g caster sugar
  • 55g plain flour
  • 2 tbsp poppyseed
  • a pinch baking powder (for cheating)

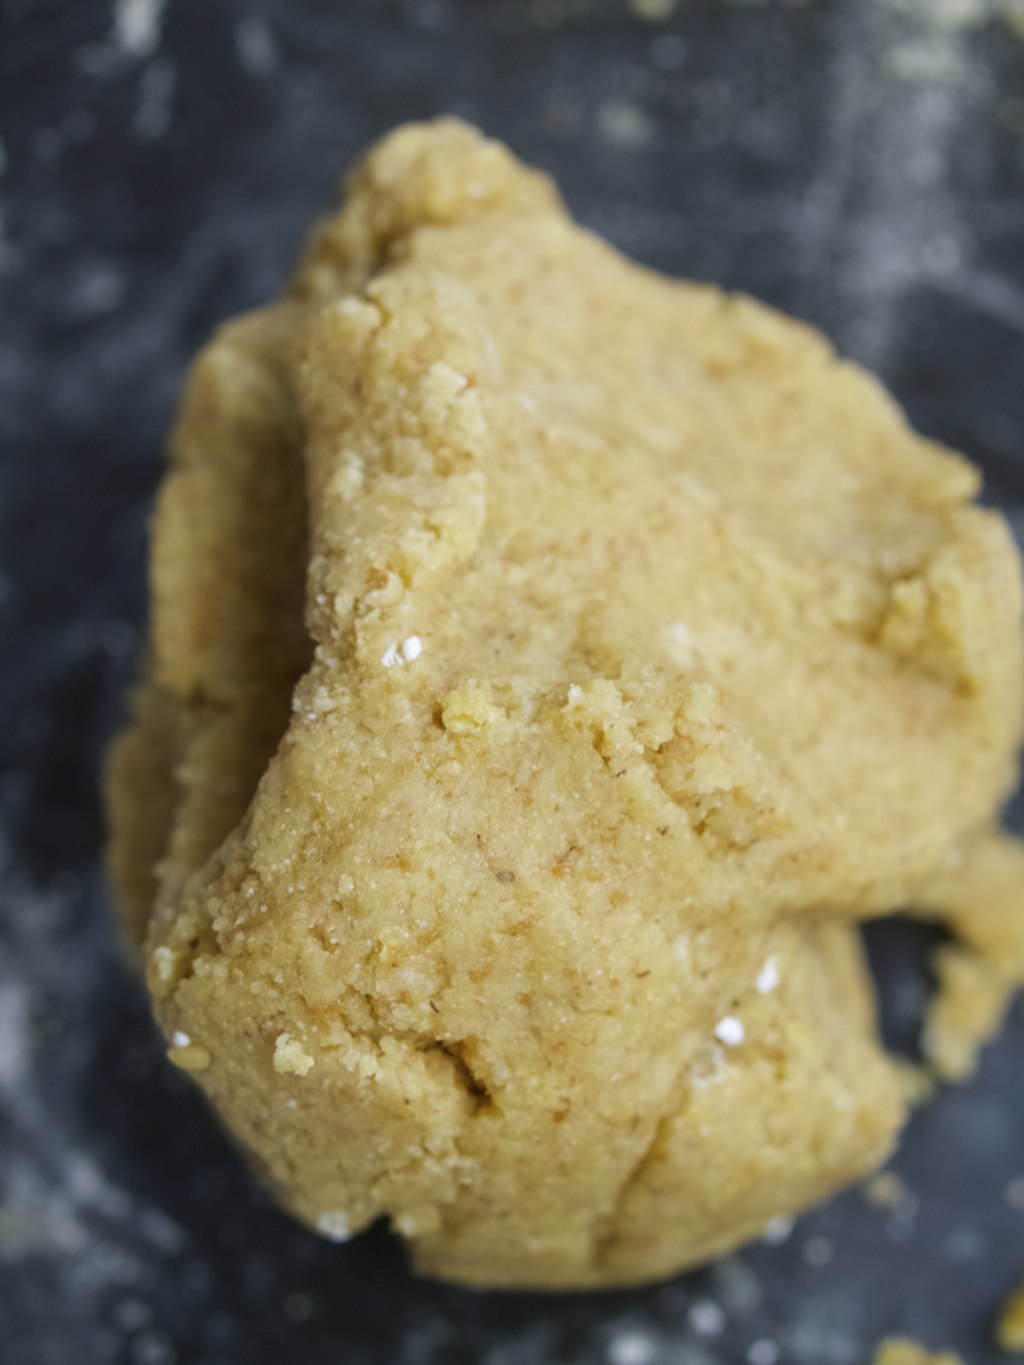
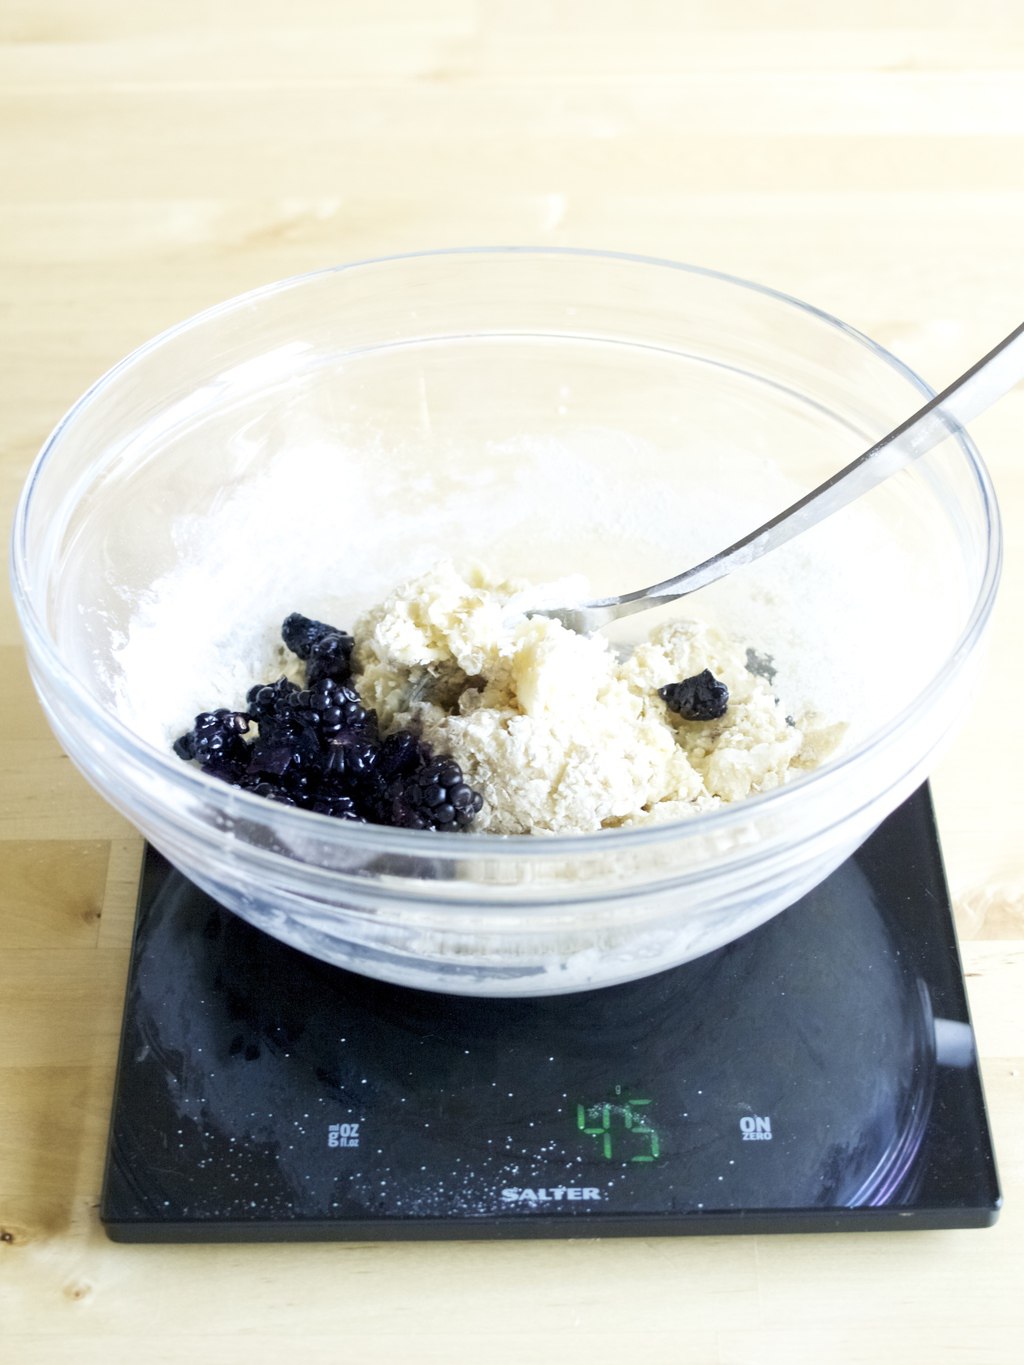
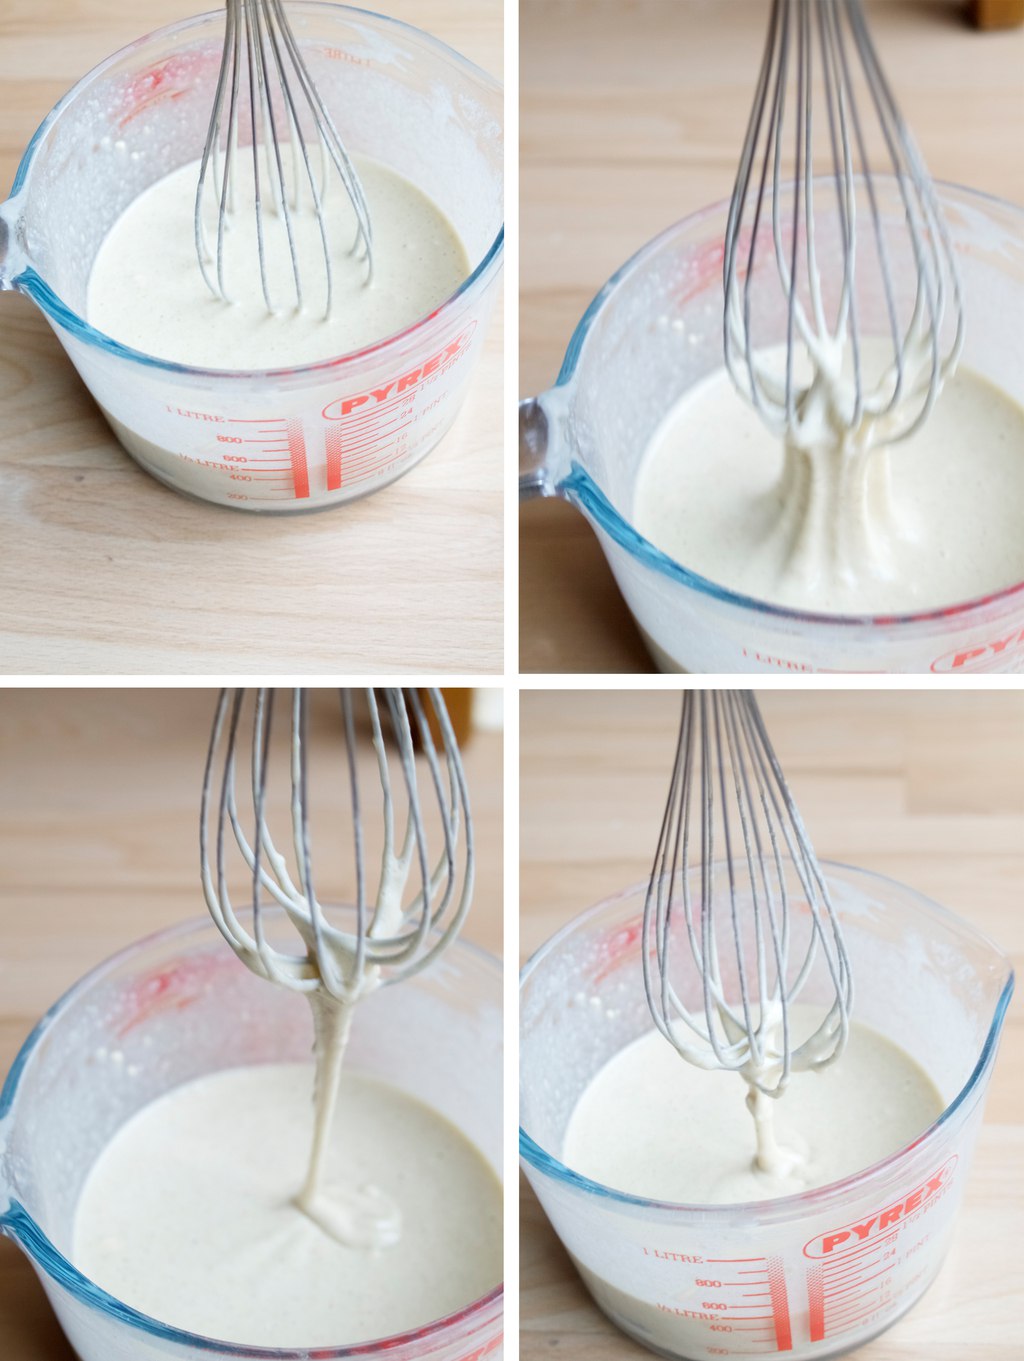
1. First whisk the egg white. Make sure eggs are in room temperature before whisking. Add 2 tbsp sugar into egg whites gradually while whisking. Well whisked egg whites should be stiff and shiny. Poppyseed lady finger recipe
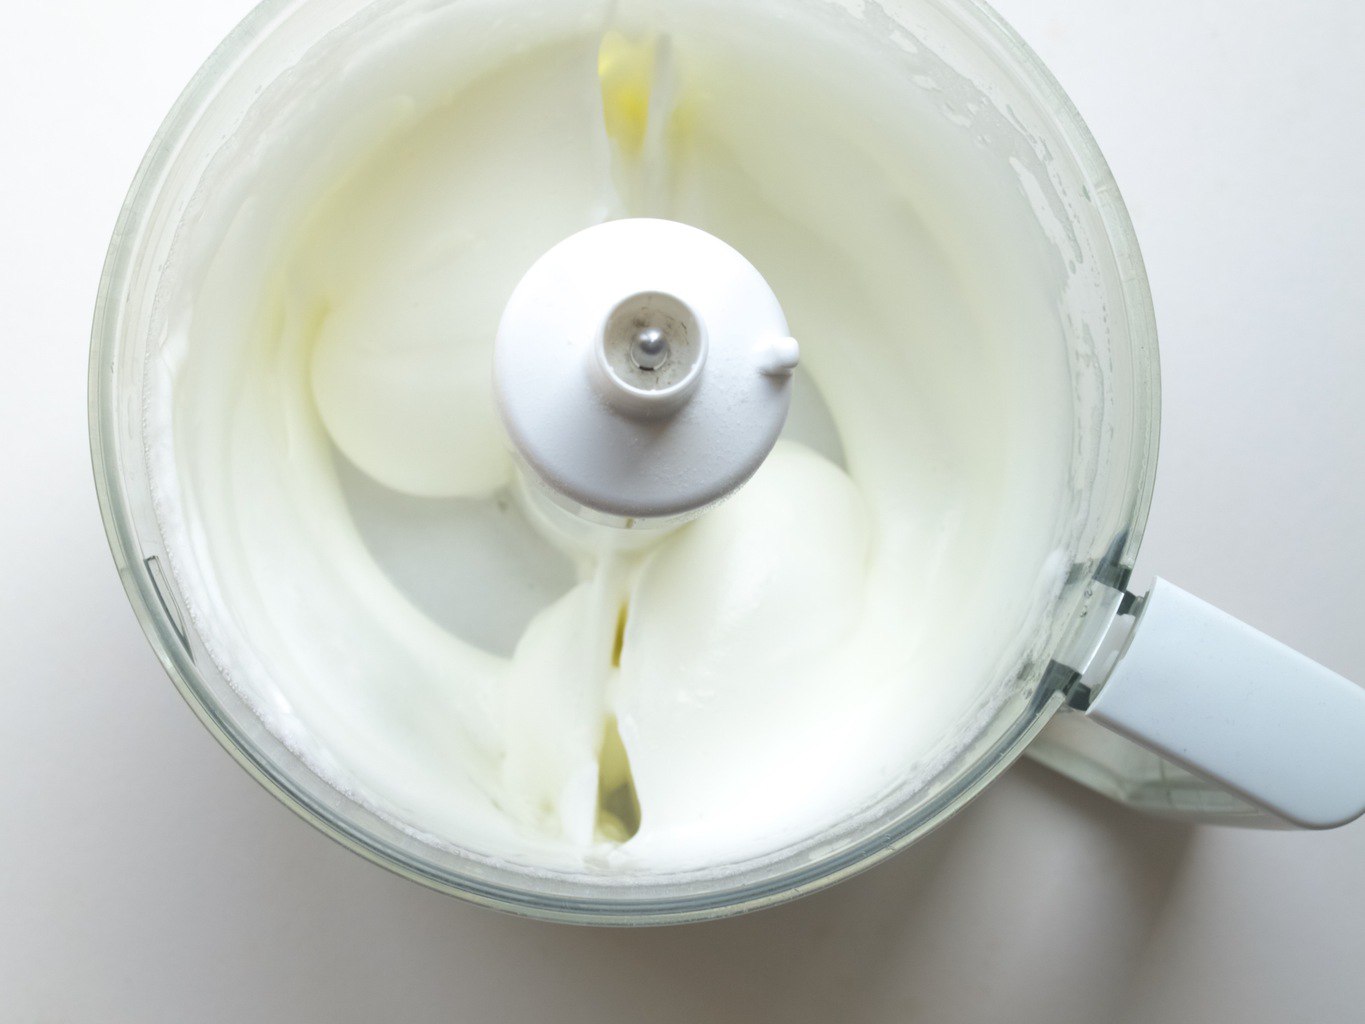
2. In separate bowl whisk egg yolks with the reminder sugar untill pale and creamy. Gradually fold in egg white as well as flour mix (with poppyseed and baking powder) till everything is well incorporated.

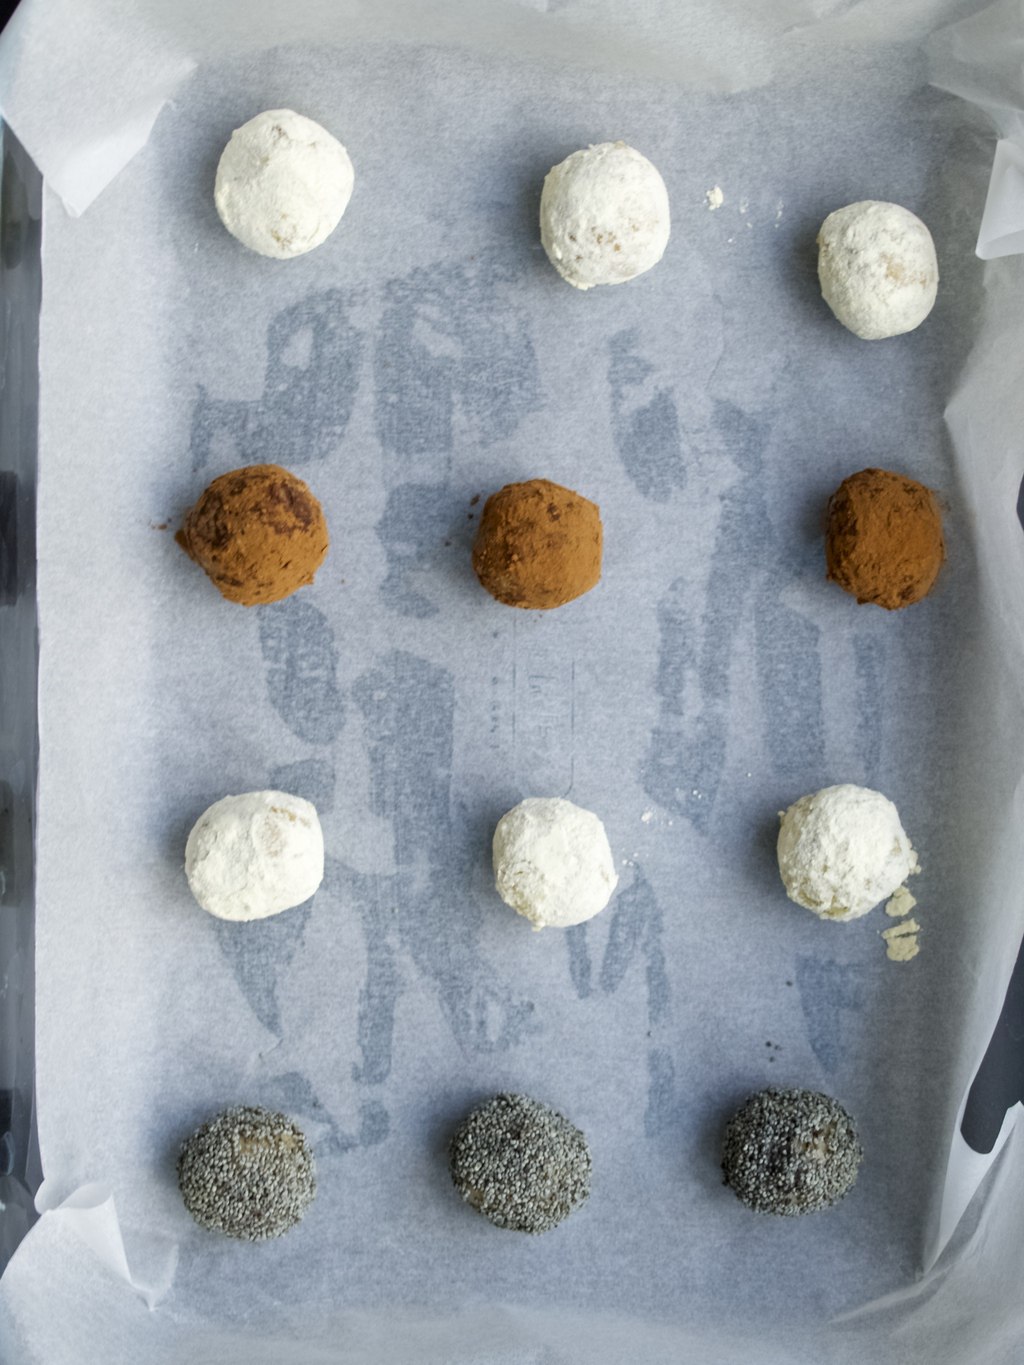
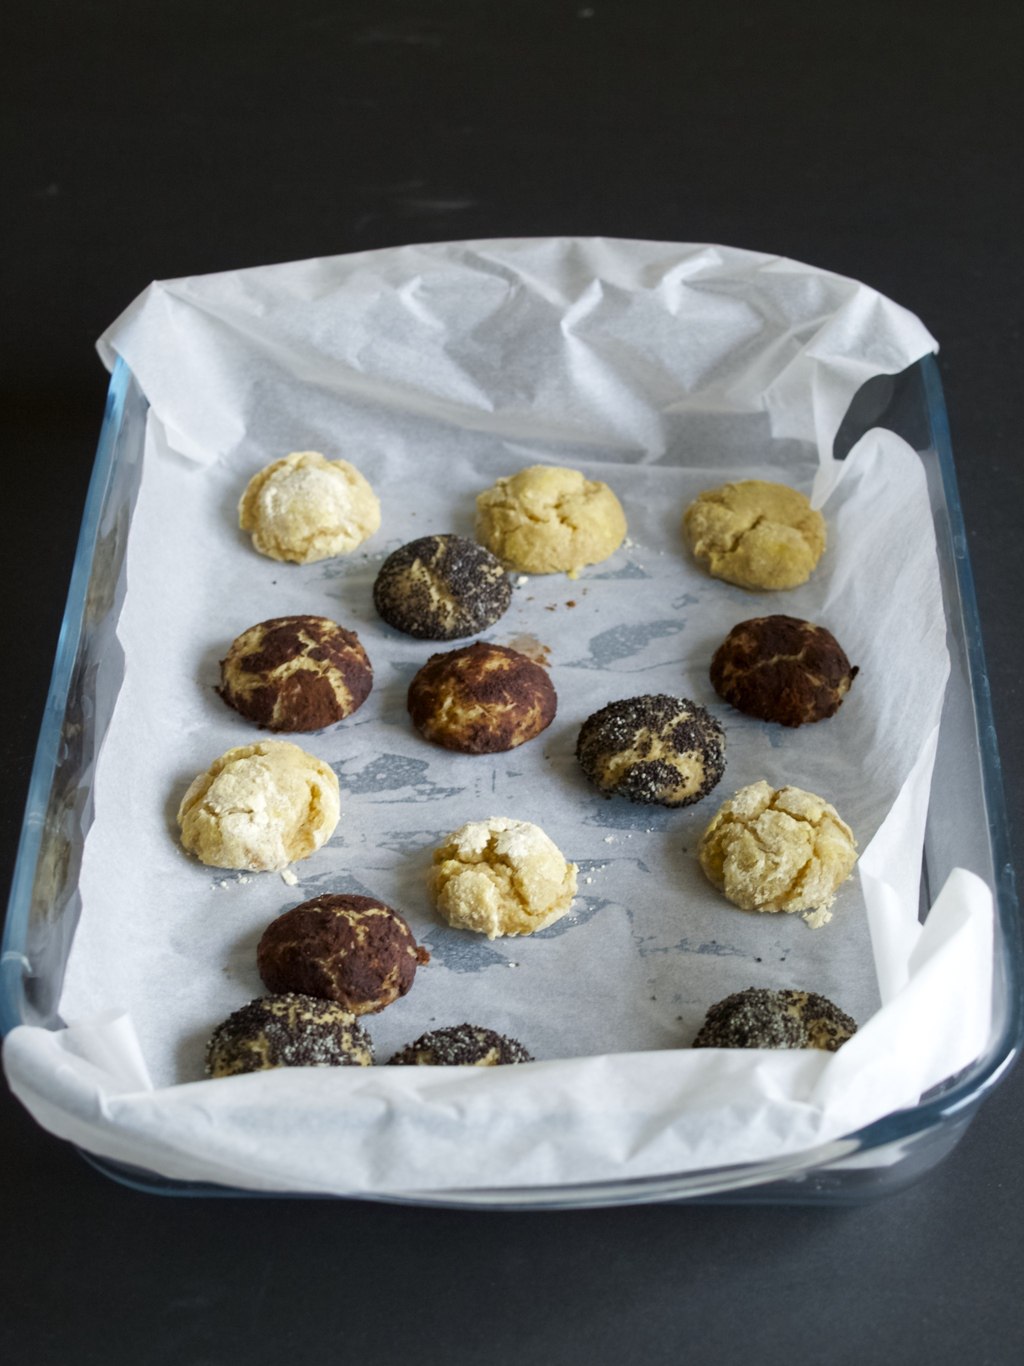
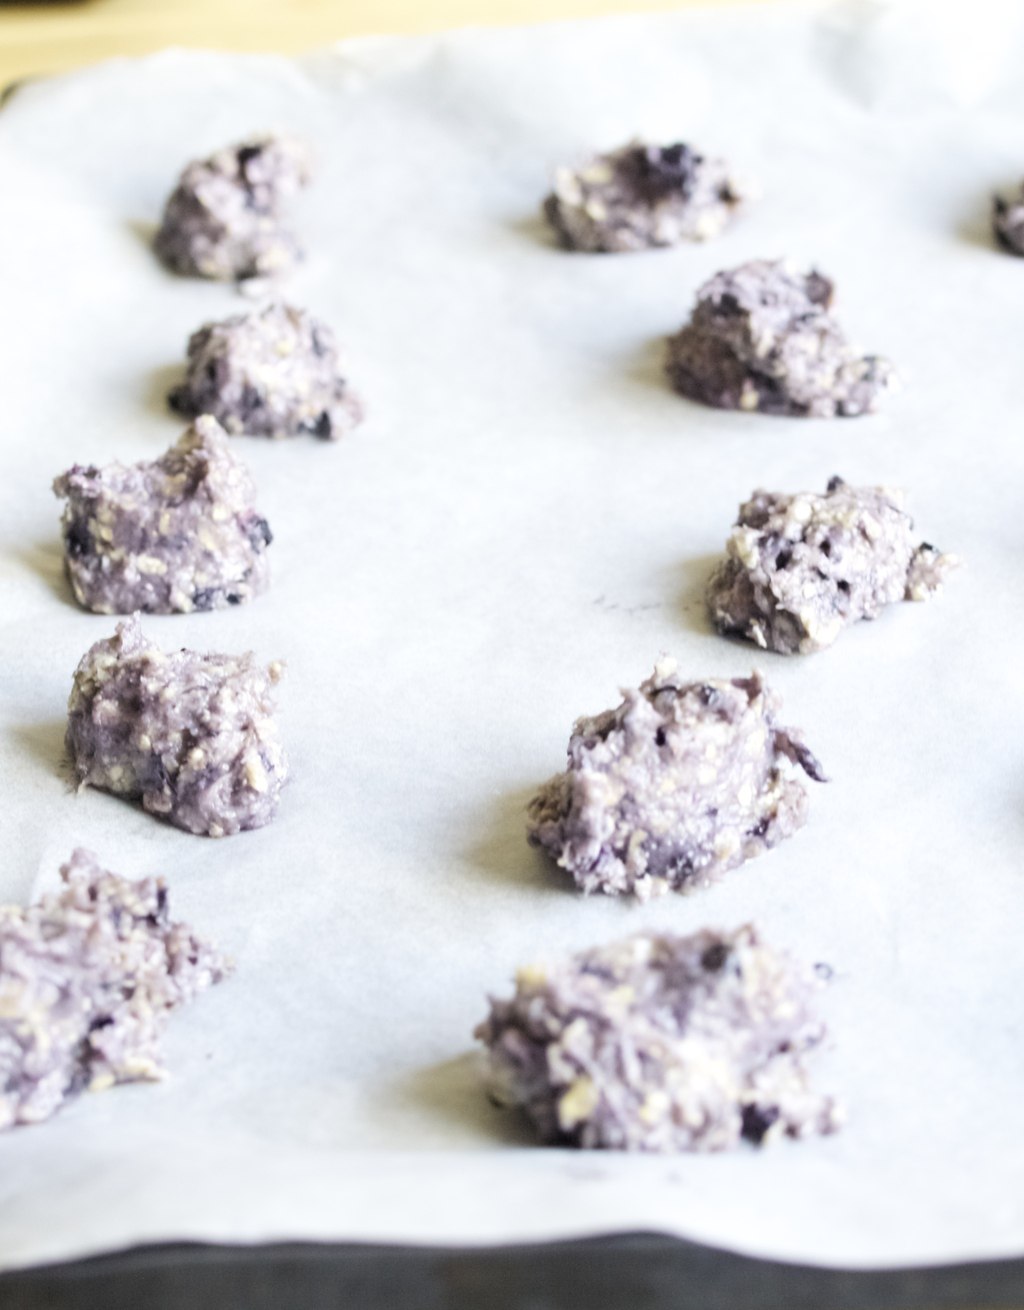
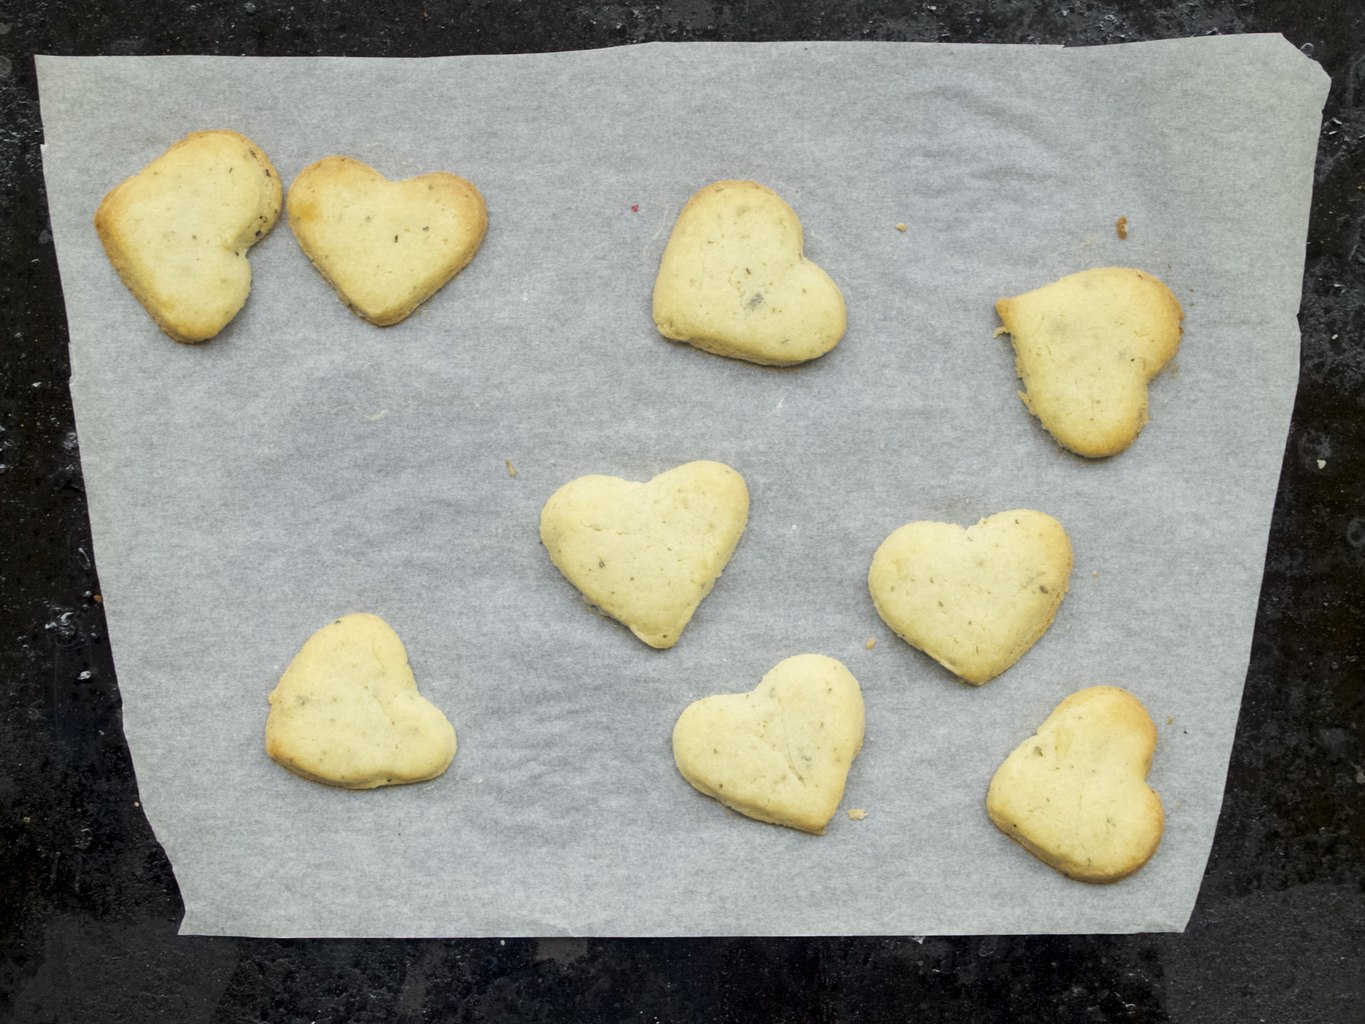
3. Next, transfer the mixture into the piping bag. On lined baking tray pipe 1 cm thick and 5cm long lady fingers. My first batch was unsuccessful as I piped 2 cm thick and too close together (these biscuits do expand when baking!). Bake in preheated C200 oven for 10-15min. Very important not to under-bake as they need to come out crispy and not spongy! Let it cool for further 10 min or so while on baking sheets.
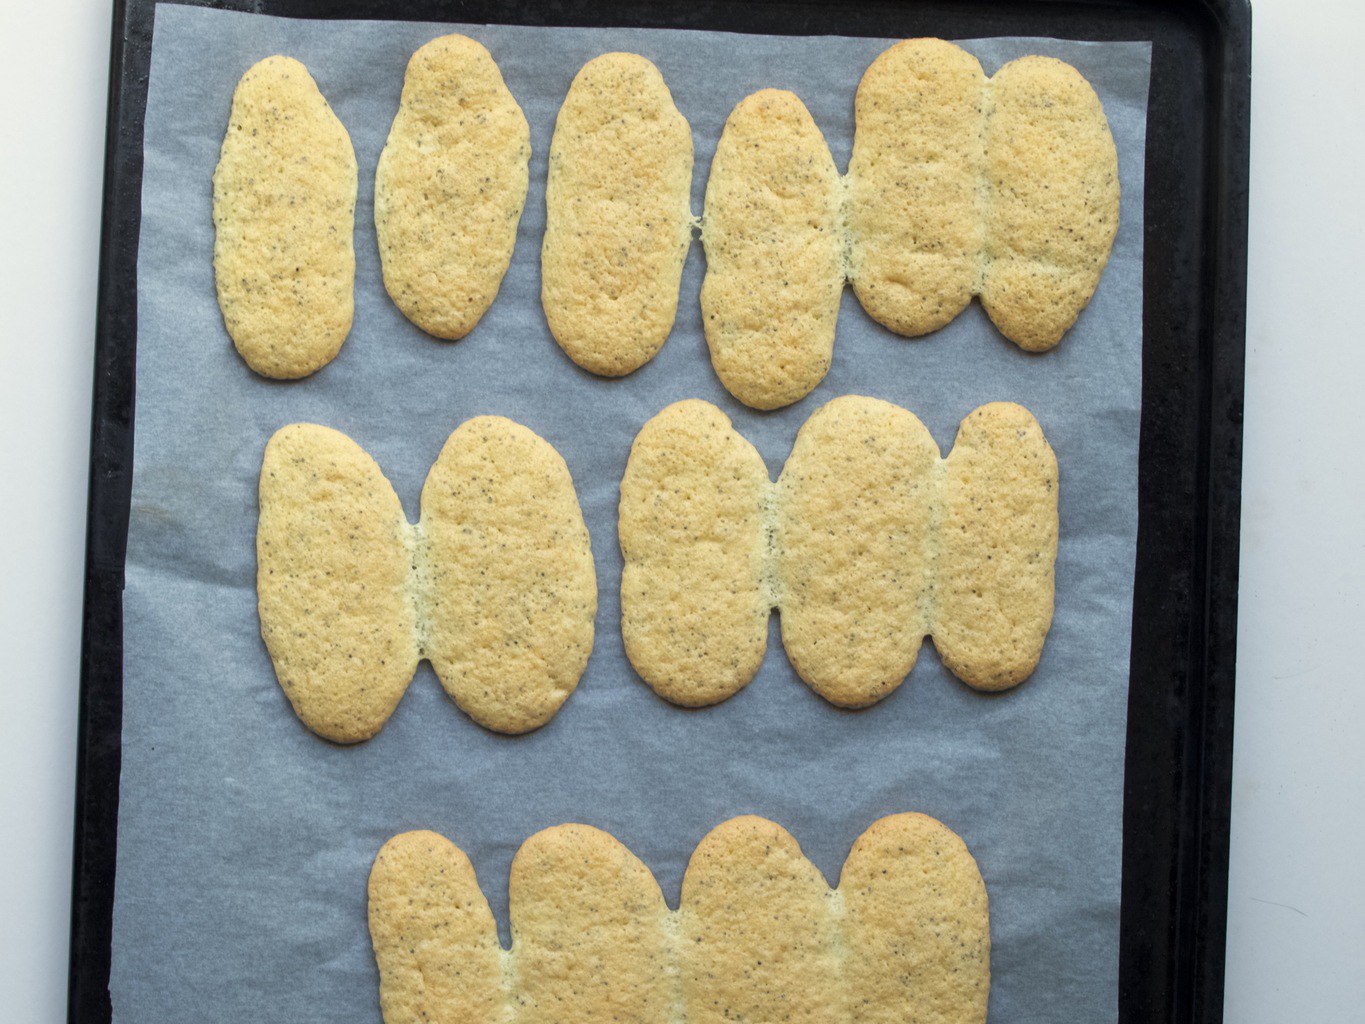
My second batch looked better, but practicing is still needed as some are still wonky :-D. Poppyseed lady finger recipe
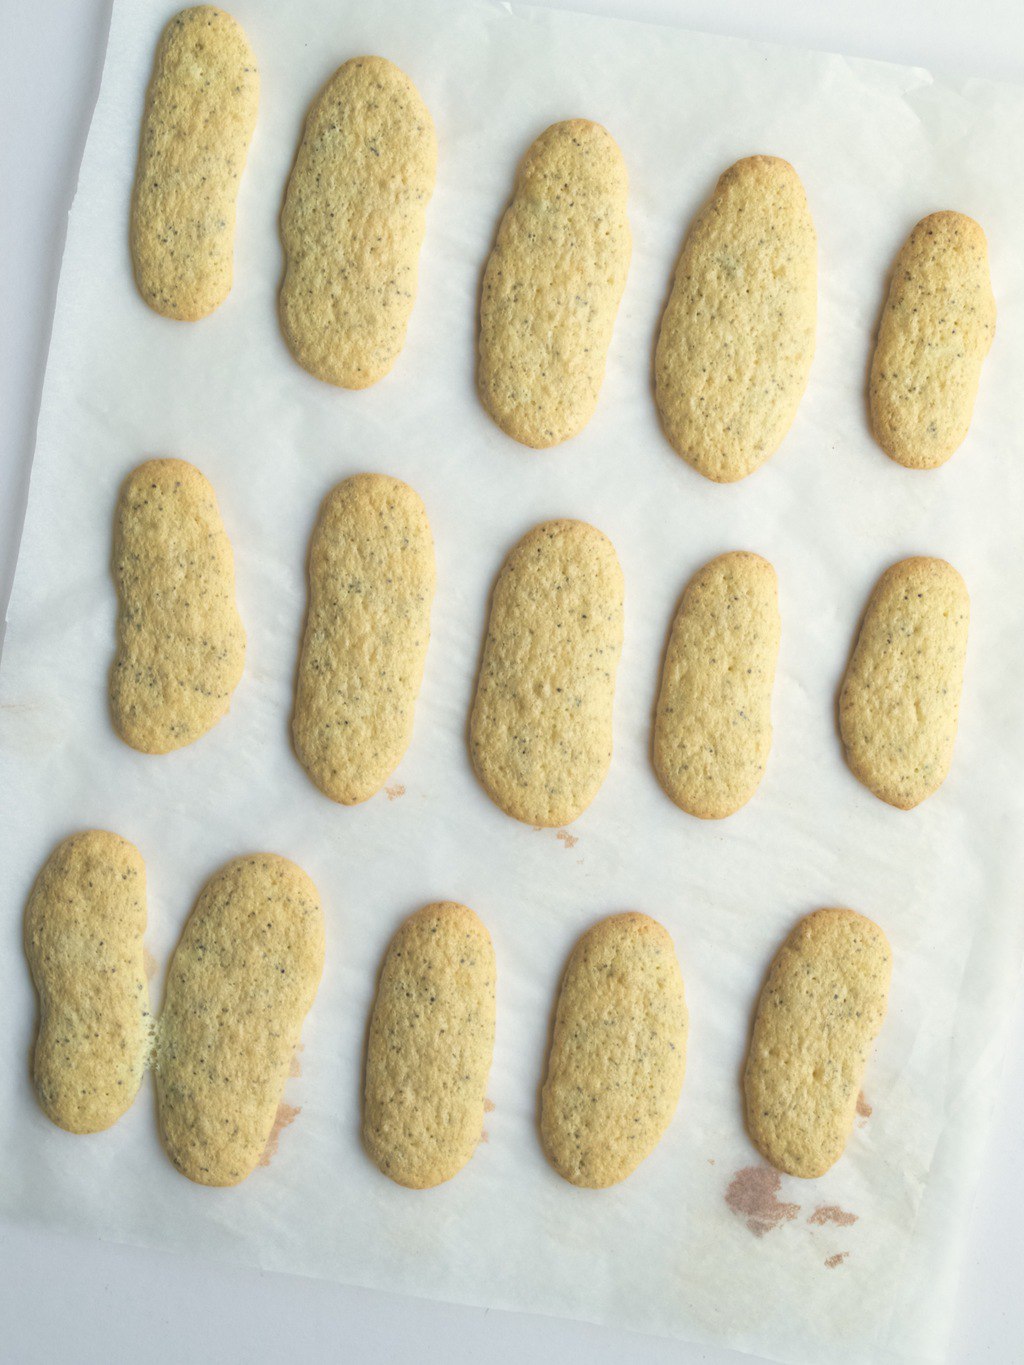
Hope my experience with these helps you ;-)

Rasa xoxo

0

Orange and white chocolate cake with raspberries

Orange and white chocolate cake with raspberriesAs I am writing this post I am munching on this cake for breakfast. It’s actually not such a big disaster after all as it taste quite nice. However there are few things  I would do differently now.

One year ago, on my hen do I tasted a very similar cake and I promised to myself to recreate it. So this is how I got on…Orange and white chocolate cake with raspberriesFor the sponge I chose a gluten free option (I am on trial now to find out if I am actually gluten intolerant), very similar to this chocolate orange cake. I boiled three pealed oranges and pureed them. Whisked 375g sugar with 9 eggs (I know I am CRAZY!!!). Then I added pureed orange, 375g ground almonds, 2tsp baking powder and mixed everything until mixture became well incorporated. I divided the cake mixture into lined baking tins and baked them in 180C oven for 1hour. The cakes came out great, but If I did it again I would have added orange zest into the mixture as well to make it more orangey (you know what I mean!). Orange and white chocolate cake with raspberriesI made pastry cream for the filling (my first time ever making it!!). I followed this recipe from BBC food, so it must be trustworthy. However I think I poured hot milk into egg mixture too quick, because I could still taste the egg in it (only slightly). I spooned the pastry cream on the bottom cake and decorated it with raspberries. Yum!Orange and white chocolate cake with raspberriesFinally I have covered pastry cream and raspberries with the second cake. I covered the top of the cake with white chocolate glaze (or ganache some may call it) that was obviously too thin and runny. This is where I messed up most! I followed my original dark chocolate glaze recipe here which worked on so many occasions. I guess with white chocolate I need to add more of it to compare to dark chocolate glaze cream:chocolate ratio. Maybe 200g of white chocolate into 90ml double cream?Orange and white chocolate cake with raspberries Orange and white chocolate cake with raspberriesHope my mistakes helped :-)

Rasa xoxo

0

Easy rhubarb and almond cake squares

Rhubarb and almond cake squares recipeApparently rhubarb is in season (how would I know, I no longer have my garden to refer to) and my mum started using it in her bakes. This very simple rhubarb and almond cake is very popular. My mum says that a lot of people are already asking for the recipe. So today I thought I will try. Rhubarb and almond cake squares recipeAfter baking this cake I can confirm that it is very easy and uncomplicated to make. Although I did find it little tart (maybe a little bit too tart). So do try it out and be generous with sugar since it’s very low in fat (no butter or oil found).

RHUBARB AND ALMOND CAKE SQUARES

  • 3 eggs
  • 1 cup icing sugar/125g icing sugar (I used 225g golden caster sugar) + some for dusting
  • 1 cup plain flour/125g plain flour
  • 450-500g rhubarb stalks
  • 1 tsp vanilla extract (I used one vanilla pod seeds instead)
  • 3-5 tbsp almond flakes

1. Whisk eggs with sugar till pale.

2. Add flour, finely chopped rhubarb and vanilla extract. Mix everything to combine well. Rhubarb and almond cake squares recipe 3. Empty the cake mixture into lined baking tin. Scatter almond flakes all over the top.

4. Bake in preheated 180C oven for 40-50min. Check if the cake is baked with the skewer (it should come out clean).

5. Let the cake cool before slicing it into squares. Remember to dust it generously with icing sugar!Rhubarb and almond cake squares recipe Rhubarb and almond cake squares recipeEnjoy!

Rasa xoxo

0

Clean-out-the-cupboard granola

Clean-out-the-cupboard granola recipeOnce in the blue moon I like to organise my cupboard so it is easy to find stuff I need. The cupboard gets usually cluttered with small random packages of of seeds, nuts and dry fruits (all that just from trying many baking recipes). But once in the while I feel like cleaning it all out by using it up on one something big. That tends to be granola!Clean-out-the-cupboard granola recipeI must admit that granola is not the healthiest breakfast item (even though some people consider it to be on the healthy side), but it so tasty! It transforms a very boring yogurt and fruit into something more pudding like. And it is soooo useful when you run out of your regular cereal!Clean-out-the-cupboard granola recipeSo here is what you can use up and how to make your Clean-out-the-cupboard granola…

CLEAN-OUT-THE CUPBOARD GRANOLA

  • 500g oat flakes (or any other flakes, I used barley flakes here)
  • 450g seeds, nuts and fruits (will try to mention as much as I can remember):
    • sunflower seeds
    • poppy seeds
    • sesame seeds
    • pumpkin seeds
    • hazel nuts, chopped
    • walnuts, chopped
    • pecan nuts, chopped
    • almond flakes
    • coconut flakes
    • raising
    • apricots, chopped
    • dried cranberries
    • dried mango, chopped
  • 200ml coconut oil (or any other oil that does not taste strong and overpowering)
  • 300g honey (or golden syrup or brown caster sugar)
  • 1/2 tsp salt
  • spices (I used 1tsp cinnamon, but you can use ground cloves, nutmeg or few tbsp cocoa power)

1. Place all ingredients (except dried fruit if using) into the pot and “cook” it on the low heat for 5-10min till honey disappeared into the mixture and everything is well combined.Clean-out-the-cupboard granola recipe2. Now spread the mixture onto large baking tray (use two trays if possible so it bakes evenly) and bake it in 180C oven for 30-40min. Check granola every 15 min to check if it’s not burning and mix it to turn around. Add dried fruits 20min before the finish. The granola should be golden colour, it will become crunchy once it cools down.Clean-out-the-cupboard granola recipe3. Once it cools down store it in jars and enjoy it with yogurt (or milk) and fruits.Clean-out-the-cupboard granola recipe Clean-out-the-cupboard granola recipeHave a lovely weekend!

Rasa xoxo

1

One ingredient ice cream (well… almost)

One ingredient ice cream (well... almost) Although I eat ice cream any time of the year, I think today is a special ice cream day. For a long time I wanted to make one of those one ingredient ice creams, so I had a look here and there and realised it is quite quick and simple to make! So here is ho I made it…One ingredient ice cream (well... almost) So if you have not checked the links above maybe you have already guessed what this one magical ingredient is? Yes, it’s just a banana! I have been freezing my unused bananas for quite some time now so I had a good amount to play with.

ONE INGREDIENT ICE CREAM

  • Frozen bananas, chopped

1. All you need to do is put the frozen bananas into the food processor and blend it!One ingredient ice cream (well... almost) It takes some time for the bananas to blend but eventually it turns into this creamy mass that can be enjoyed straight away. One ingredient ice cream (well... almost) Unless you want to play with some other flavours!

You can add any of the following

  • peanut butter
  • Nutella
  • chopped nuts
  • biscuits
  • honey
  • caramel
  • cocoa powder
  • cinnamon, cardamom or ginger
  • frozen berries

I tried out few flavour combinations myself

  • Peanut and chocolate chip (our favourite!)
  • Nutella with chopped hazelnuts (I loved it even when I dislike chocolate ice cream)
  • Digestive and caramel (almost like banoffee pie)
  • Pecan and honey (we found this tasting a bit plain)
  • Cherry and almond (we liked the least as we could taste the banana which did not suite the overall taste)

One ingredient ice cream (well... almost)

Enjoy hot weather!

Rasa xoxo

1

Pinterest challenge: Chickpea flour cookies (not gluten free)

Chickpea flour cookies recipeHey everyone and welcome to my Pinterest challenge! Have not had one for a while so I though I will do it today. I picked this recipe for few reasons. One was that I had some chickpea flour left in my cupboard. I was experimenting with different flours to make a gluten free brownie while ago and chickpea did not work quite well there as the flavour of it is quite strong. But I definitely think that chickpea go well in these cookies, although you might find it a bit overpowering. Do you like chickpeas? Now imagine them sweet. Nice thoughts? Then definitely make them! Another reason for going for this challenge is because these cookies seemed so Easter-friendly. I am saying that because Easter do relate with truffles to me. And making these cookies felt a bit like making truffles!

I made a small batch of them as I did not know how successful will they be. Also because I did not have THAT much of chickpea flour! Anyways if you want to make more of them feel free double or triple the recipe.

CHICKPEA FLOUR COOKIES adopted from Give Recipe

(for the dough)

  • 25g chickpea flour
  • 45g whole wheat flour
  • 30g icing sugar
  • 1 egg yolk + some egg white if needed
  • 35 butter
  • 0.5 tsp baking powder

(for coating)

  • 1 egg white, whisked
  • 3 tsp chickpea flour
  • 3 tsp cocoa powder
  • 3 tsp poppy seeds

Chickpea flour cookies recipe1. Mix all ingredients of dough and combine them very well with your hand. Add extra egg white if needed to form smooth and soft dough like in the picture bellow. Chickpea flour cookies recipe2. Make mini balls from the dough. Dip them into whisked egg white first and then coat them with cocoa powder, poppy seeds and chickpea flour. Place them into lined baking pan.

3. Keep the cookies in the fridge for an hour before baking.Chickpea flour cookies recipe4. Bake them in preheated 180C oven for 10-15 minutes. Let it cool before eating ;-).Chickpea flour cookies recipe Chickpea flour cookies recipeEnjoy!

Rasa xoxo

0

Panemunė forest

I just came back from Lithuania and i could not wait until I can share about our forest. Me and my mum went for a walk everyday here because it is just outside my parent’s house. I know it may look dull as it is still an early spring but it is magical in winter or summer. Sadly, one thing I could not transfer into the pics is the smell of pines and oaks :-).Panemunė ForestAlthough there was a storm 4.5 years ago that destroyed 1/3 of forest, the consequences of it are still apparent today. Panemunė ForestEven if mini forest is growing to replace the lost one (It’s a looooong process)Panemunė Forest Panemunė ForestAnd there is a river! (the biggest river in Lithuania called Nemunas)Panemunė Forest Panemunė Forest Panemunė Forest Panemunė ForestI hope you liked our mini forest tour ;-)

Rasa xoxo

1

Blackberry breakfast biscuits

Blackberry breakfast biscuits recipeLately I haven’t been feeling well, so blogging did not come easy (especially blogging about food). Eating became a chore (can you believe that?), so my favourite meal of the day have been replaced with some biscuits that are the only enjoyment I get these days from food. I will have to admit that I have been a good and loyal “Belvita” customer these days, until I thought I could make my own batch of breakfast biscuits! I baked my biscuits with blackberries, very low in sugar and no butter (no wonder why they do feel quite light and moreish).

BLACKBERRY BREAKFAST BISCUITS makes about 25-30 biscuits

  • 110g coconut oil
  • 80g golden caster sugar
  • 1 egg
  • 160g flour
  • 80g oats
  • pinch of salt
  • 1/2 tsp baking powder
  • 100g blackberries, chopped into smaller pieces

1. First make the dough (of course). Mix coconut oil with sugar then add egg and mix again. While mixing gradually add flour, oats, salt and baking powder. Finally add blackberries! Combine everything well (don’t worry when it all becomes slightly purple, it’s how it should be!). Blackberry breakfast biscuits recipe2. Using a large-ish teaspoon spoon the dough mixture on to the baking sheet. It really helps to have another teaspoon in hand to scrape the dough off the main teaspoon (if you know what I mean). Blackberry breakfast biscuits recipe3. Bake the biscuits for good 15 minutes in preheated C180 oven until the edges of the biscuits become lightly golden. Blackberry breakfast biscuits recipe4. Let it cool and enjoy!Blackberry breakfast biscuits recipeHappy weekend everyone! xx

Rasa

0

Pinterest challenge: spanakopita mini tarts

Spanakopita tarts recipeThis time round on my weekly Pinterest challenge I have decided to have a look at the pins that I liked long time ago. In fact I went back to the pin that I saved when I just joined Pinterest almost three years! This recipe is cool, because it needs filo pastry, which I don’t have much experience with. I made filo pastry once from scratch for a layered Slovenian pie where the dough were concealed in between the fillings. With these Spanakopita mini tarts (I changed from strudels to tarts as I find that easer and prettier) the filo pastry is coating the filling therefore the effect is completely different. And this is what I wanted to challenge myself with. The turnout was great and crispy. Joni loved it of course and I thought this would be great served at the party!Spanakopita tarts recipeSPANAKOPITA MINI TARTS makes 12

  • 115g cottage cheese
  • 150g (or more) frozen spinach, defrosted
  • 170g feta cheese
  • 3 eggs, beaten
  • 1 roll of filo pastry (although you will only need about half of it)
  • 50g butter, melted in cup or mug

1. First make the filling by combining cheeses with spinach and eggs.Spanakopita tarts recipe Spanakopita tarts recipe2. Set up your work station: muffin baking tray, melted butter with pastry brush, filling and ready cut pastry into 10cmX10cm squares.Spanakopita tarts recipe3. Push one dough square at the time into the muffin hole and brush it with melted butter. Repeat this for about 5 times (which makes about 5 layers of the dough with butter in between).  Spanakopita tarts recipe4. Spoon enough of filling into each tart and press the dough sideways to close.Spanakopita tarts recipe5. Bake the tarts in preheated 180C oven for about 30min until golden and crispy.Spanakopita tarts recipe Spanakopita tarts recipeEnjoy!

Rasa xoxo

0

Skillet scones

skillet scones recipeLast month I have baked really basic scones so this time round I decided to experiment. However I experimented not with ingredients but with the method. Basically I tried “frying” scones in the skillet instead of baking them in the oven. I thought what if  your oven breaks and you don’t have any bread anywhere found (because I find scones are great replacement for bread, even if they are crumbly)? This method worked for me well once for breakfast when I could bother with oven and I used the same skillet to fry bacon as well (easy peasy!).

ROSEMARY SKILLET SCONES makes ones small skillet scone

  • 150g plain flour
  • 1 tsp dried rosemary
  • 1 tsp baking powder
  • 50g butter, soften
  • 30 ml milk
  • 1 egg

1. Mix all the ingredients together (mix flour and baking powder separately first) until everything combines well and shapes non-stick dough.

2. Roll the dough 1 cm thick (try to roll into the round) and place it into the skillet.skillet scones recipe3. “Fry” the scone while turning over so it cooks on both sides. skillet scones recipeWe had it with bacon, hard-boiled eggs, mayo, avocado tomato and sliced apples (on the side). But I would recommend buttering it generously or serving it with lots of sauce, because it can be dry as it’s very crumbly.skillet scones recipeEnjoy!

Rasa xoxo

0

Savoury or sweet pancake day (depending on the filling you choose)

Buckwheat batter pancakes recipeOh, and happy Pancakes Day once again! This day is never to be missed! Last year I have made unconventional Lithuanian pancakes and they were delicious (almost made a proper meal!) . This year however I decided to keep it simple. I went with the recipe that I often make. Whenever I have some buckwheat flour in the house I would throw some in to otherwise very basic pancake batter. The cool think about these pancakes is that you can eat them savoury or sweet depending on the filling you choose.Buckwheat batter pancakes recipeBUCKWHEAT PANCAKES

  • 80g buckwheat flour
  • 120g plain flour
  • 2 eggs
  • 1 tbsp sugar
  • 1 tsp salt
  • 1 tbsp coconut oil + more for frying
  • about 350ml water or milk

1. Place the flour into the bowl together with eggs, sugar, salt and oil. Whisk everything together into the dry mass. While whisking begin pouring the water gradually into the flour mass (not all in one go because you might not need it all). You are aiming for a batter consistency that easily drips down the whisk when held up but still leave temporary traces when whisked. making the pancake batter2. You need to fry pancakes in well heated pan with oil (although to fry without oil is quite possible after much practicing). Pour one spoonful to the pan and immediately start swirling round the pan to get nice even layer.Buckwheat batter pancakes recipePancakes then can be eaten savoury. I like it with ham or bacon with cheese. I usually serve it with cream fresh and dill (this is such a Lithuanian thing to do!)Buckwheat batter pancakes recipeOr if you prefer it sweet then blueberries, banana, and maple syrup ticks my boxes ;-).Buckwheat batter pancakes recipeBuckwheat batter pancakes recipeHappy Pancake Day!

Rasa xoxo

1

Valentine’s day strawberry tart

As Valentine’s day is soon approaching I thought I will make a tart full of hearts. Strawberries and cream popped into my mind first (I know I know, that’s not very imaginative of me!). But then I thought how can I twist this classic dessert into something more creative and thats when I thought to add basil to it. Basil? Oh, it totally works! Remember how I made marmalade tart with rosemary crust? Well this one has a very similar concept except more hearts!Care to try?Valentine's day strawberry tart recipeBAKED STRAWBERRY TART WITH BASIL CRUST

  • 200g unsalted butter
  • 6-8 tbsp sugar
  • 2 egg yolks
  • 15-20 tbsp plain flour
  • 1 tsp dried basil
  • at least 200g strawberries, sliced (+ 2 tbsp sugar if you like them sweet)
  • icing for dusting
  • 300ml whipping cream
  • 2 tbsp sugar

1. Make the pastry dough by creaming butter with sugar. Gradually add egg yolks, flour and basil. Wrap the dough into cling film and let it rest in the fridge for 15 min or so (it will be easer to handle it later). 

2. Roll out the dough and line prepared baking tin with it (lined with baking paper prior that).

3. Fill the tart with sliced strawberries as evenly as you can. Sprinkle some sugar on top if using. I did not use any sugar and I wish I did! However Joni said that he liked  the tart’s sweetness as it is. So your choice ;-).Valentine's day strawberry tart recipe4. I tried decorating the top of the tart with the heart shapes, although I was suspecting that it won’t survive the baking. There is always a risk if you bake sweet butter pastry on uneven surface such as sliced strawberries!Valentine's day strawberry tart recipeTherefore I baked some hearts using the same dough separately on baking sheet.Valentine's day strawberry tart recipe5. I baked the tart in preheated 170C oven for 40min (other ovens varies so don’t wait if you see the crust is already golden after 30 min).  You see! The hearts came out all wobbly! Exactly what I predicted :-S.Valentine's day strawberry tart recipeSo after some dusting…Valentine's day strawberry tart recipe…and whipped cream with baked dough heart biscuits. Voila! I think it turned out quite alright :-). Valentine's day strawberry tart recipe6. To whip the cream all you need to do is mix some sugar with cream and whip away!(be careful and don’t over-beat it though)Valentine's day strawberry tart recipe Valentine's day strawberry tart recipeAnd have fun celebrating Valentines day ;-)

Rasa xoxo

0

Anatomy of pesto

How to make a pesto, any pesto!Pesto is a great addition to many meals, not only pasta. You could use it to spread on toast or season a very bland chicken roast. And it does not have to be made only from basil! You could use other herbs! Essentially if you follow a basic anatomy of pesto you could create many flavour pesto.

I wanted to draw the anatomy of pesto, but realised I am not as good in drawing like Vicki. So instead I will try to write it out. So here it goes!

Pesto made out of: HERBS OR GREENS + NUTS OR SEEDS + GARLIC + OIL + CHEESE + EXTRAS

HERBS can be parsley, dill, coriander leaves, mint and so on

GREENS include spinach, kale, beet greens or even broccoli!

NUTS not only pine nuts, but also almonds, walnuts, pecans, hazelnuts, cashew nuts and list goes on….

When it comes to SEEDS I only tried sunflower seeds, but I am sure there are many more to try out!

GARLIC can only be garlic unfortunately

For OIL I generally use olive oil, but I am sure other oils could work as well!

The best CHEESE for pesto is hard cheeses such as parmesan or pecorino romano. However I use cheddar cheese when I run out of the other cheeses and it still works out ok.

EXTRAS can be red pepper, sun dried tomato, lemon juice…. Why don’t you just go and experiment ;-)

To make pesto all you need to do is whiz all the ingredients in small food processor until it forms pesto consistency. Thats all!How to make a pesto, any pesto!Here are few flavours of pesto that I tried the other day!

ROASTED RED PEPPER & PARSLEY PESTO

I tried this one with pasta. Got the recipe from BBC Good Food actually. Worked a dream!

  • 290g jar roasted red peppers, drained
  • large handful parsley
  • 75g cashews
  • 1 garlic clove
  • 2 tbsp extra virgin olive oil
  • 50g parmasan

How to make a pesto, any pesto!BROCCOLI PESTO

I used this recipe for quite a while, but don’t quite remember where I got it from

  • 1 head broccoli, chopped and boiled
  • 80g pine nuts
  • 1 garlic cloves
  • 2 tbsp olive oil
  • 60g cheddar cheese
  • juice from 1/2 lemon

How to make a pesto, any pesto!DILL PESTO

  • 2 bunches of dill
  • 1 bunch of parsley
  • 30g sunflower seeds
  • 1 cloves of garlic
  • 3 tbsp olive oil
  • 30g parmesan cheese

How to make a pesto, any pesto! How to make a pesto, any pesto!Enjoy pesto making ;-)

Rasa

1

My favourite breakfast smoothie

Blueberry Breakfast SmoothieA long long time ago I got this Juice recipe book from a sale and for a while I was following it religiously (sometimes I set myself a goal to try every recipe in the book). Unfortunately I never managed to try all the juice and smoothie recipes (one of the reason was that I did not have all the needed juicing equipment for it), but I did find some smoothies that I still make sometimes these days. The Blueberry breakfast smoothie is one of them, because the flavours are not what you get in a regular berry smoothie. So please have a try!Blueberry Breakfast SmoothieBLUEBERRY BREAKFAST SMOOTHIE adopted from Juice! by Pippa Cuthbert & Lindsay Cameron Wilson

  • juice of 1 orange
  • 2 handfuls blueberries (fresh or frozen)
  • 4 tbsp plain yogurt (love Yeo Valley natural yorgurt, not promoting just saying!)
  • 2 tbsp quinoa
  • 1 tbsp extra virgin olive oil
  • 1 tbsp runny honey

Blueberry Breakfast SmoothieBlend the blueberries with orange juice, yogurt, quinoa, oil and honey! Thats all! If you want to make it pretty then sprinkle the smoothie with some quinoa and blueberries.Blueberry Breakfast Smoothie Blueberry Breakfast SmoothieEnjoy!

Rasa xoxo

0

Pinterest challenge: “love it or hate it” vietnamese beef stew

Vietnamese Beef StewThis may have been the love of first sight but definitely not the love of the first taste. As soon as I saw One-pot Vietnamese Beef Stew pic on Pinterest I was sure I wanted to try it straight away. I was particularly interested in trying all those spices that I have never used before (such as lemon grass or kaffir lime leaves), so I followed the recipe quite literally (not substituting a thing!). The result? Well, it was something that me and Joni was not quite prepared for! Aniseed taste took over the overall flavour. Maybe I have overdone with star anise? So my initial response was to add more sugar to reduce that strong flavour, but nothing helped. Eventually realised that if you eat it on toast with some soft cheese on top then the stew taste blends in quite nicely. So you could say that we got used to taste! I cooked quite a lot of that stew so had a chance to eat it in many ways although I was so tempted to throw it away (even if I hate waste). So there you go, thats my feedback. So if you like that kind of flavour, then go ahead, it was fun cooking it!Vietnamese Beef StewVIETNAMESE BEEF STEW practically copied from Supergolden Bakes

  • 900g beef, cut into cubes
  • 2 tbsp plain flour
  • 1 tsp Chinese five spice powder
  • 1 tsp ground pepper
  • 2 lemongrass stalks, finely chopped
  • 3 large garlic cloves, minced
  • 2 tbsp soy sauce
  • 1 tbsp palm sugar (or dark brown sugar)
  • 4 banana shallots, peeled and roughly chopped
  • 2 green chillies, finely chopped
  • 4 large tomatoes, chopped
  • 2 tbsp tomato paste
  • 4 carrots, peeled and chopped
  • 1 cinnamon stick
  • 2 star anise
  • 2 kaffir lime leaves
  • 625ml | 2 1/2 cups hot beef stock
  • 450g | 1lb butternut squash, peeled and cubed
  • 2 tbsp rapeseed oil
  • Basil leaves, chopped to garnish

1. Combine the beef, flour, spice, pepper, lemongrass, garlic, soy sauce and sugar in a bowl and mix well. Leave to marinate for an hour.Vietnamese Beef Stew2. Preheat the oven to 160C and have all your vegetables prepared. Place chopped chillies and shallots separately from tomatoes and carrots (you don’t have to, but it helped me to keep organised as these were going to the pot at separate times). Vietnamese Beef Stew3. Put the oil in the frying pan and heat over medium high heat. Once the oil is hot, lower the temperature to medium-low and brown the beef cubes. Add the shallots and chillies and fry for a couple of minutes.

Vietnamese Beef Stew4. Add the tomatoes, tomato paste, carrots, cinnamon stick, star anise, kaffir lime leaves and stock and bring slowly to a rolling simmer. Transfer to the casserole and to the oven.Vietnamese Beef Stew5. Cook for an hour then add the butternut squash (be careful the pot will be very hot) and give the stew a stir. Return to the oven and cook for a further 45 minutes to 1 hour until meat is very tender.Vietnamese Beef Stew6. Add some chopped basil leaves, check the seasoning and serve with crusty bread.Vietnamese Beef StewAnd try it on top of the bread with some crumbled soft cheese on top!Vietnamese Beef StewHave a lovely week!

Rasa xoxo

0