Top

Archive | Organisation

A year to find my style again: wardrobe detox

How I did my first wardrobe detox
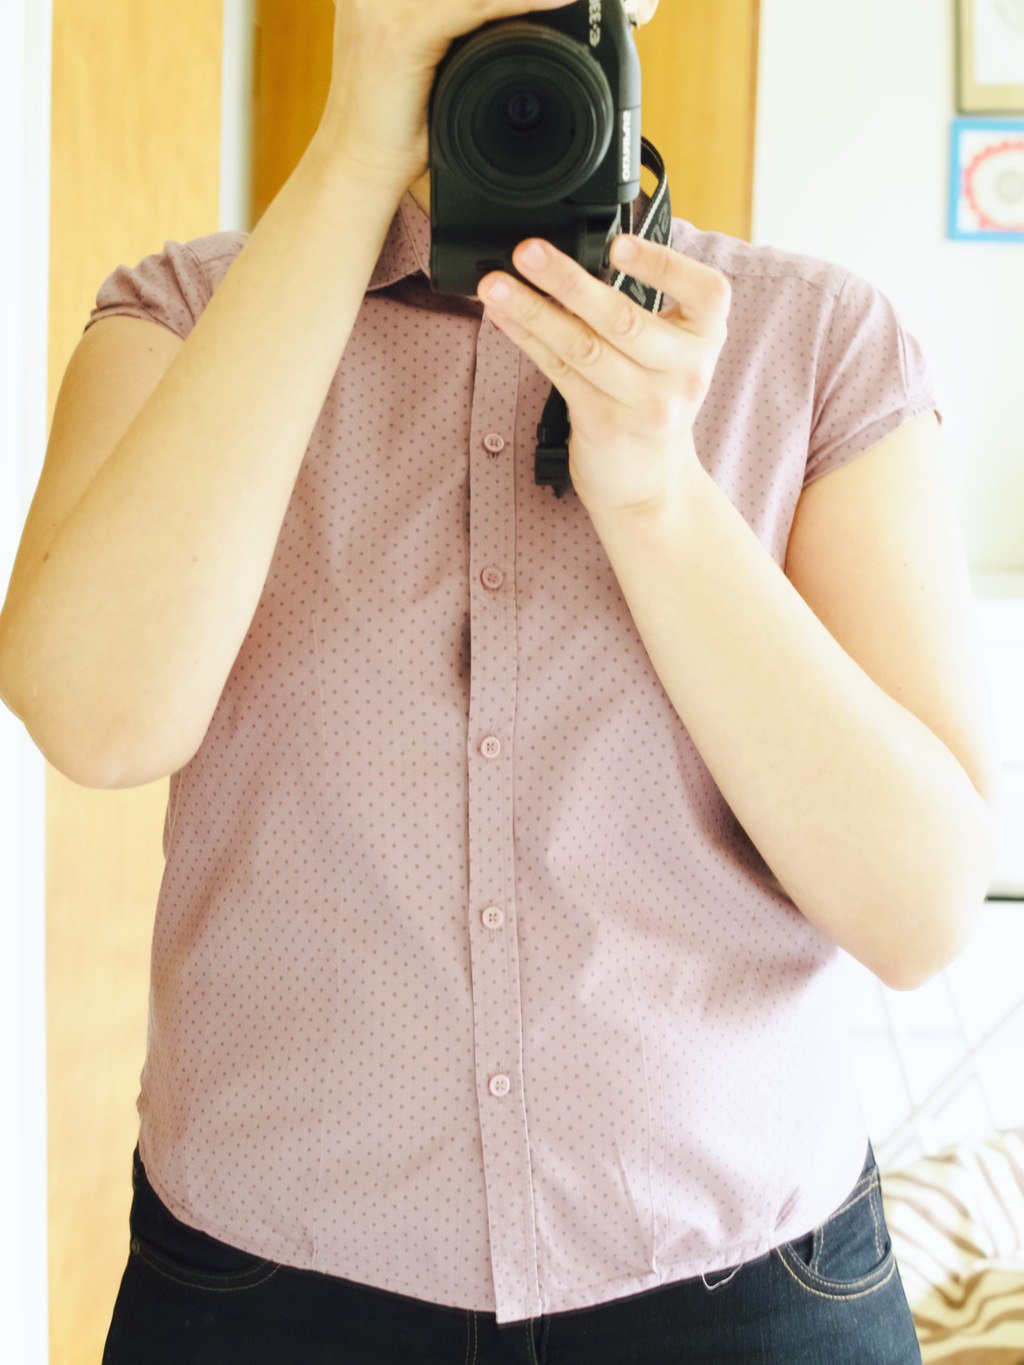
Once upon a time I knew my style. Yeah sure, I did not always wear the most exciting piece of clothing all the time, but I did know what suited my body shape. After having kids this changed dramatically. Yes I gained lots of weight (and lost some too), but my figure (my bust to be specific) has changed a lot which made me a little confused for a while. I could not understand why some of my clothes just don’t look right even though I do fit them. It took a while to figure out that because of my bust changes the overall balance of my figure changed too. Things that suit a flatter figure simply do not look the same on a fuller figure. I decided I need to find my new style and I couldn’t wait to start.  Now I have lost some weight finally the time is now!

On this journey I am planning to share my top findings on how to organise your wardrobe, how I do some alterations to old clothing to better fit my new figure, how to dress effectively (thinking to try creating one of those capsule wardrobe collections). I am going to invest in new clothing and maybe make some myself too! So watch this space girlies ;-).

So where do I start now? My obvious though is to first clear my wardrobe. I am not starting from scratch however! Over these past few years I bought some basics that fit and also some clothing pieces from the past does not do any harm in my wardrobe either. I decided to do a simple wardrobe detox where I remove all the clothes that no longer fit within the strict criterions I set out. So let’s get brutal, shall we?How I detoxed my wardrobe
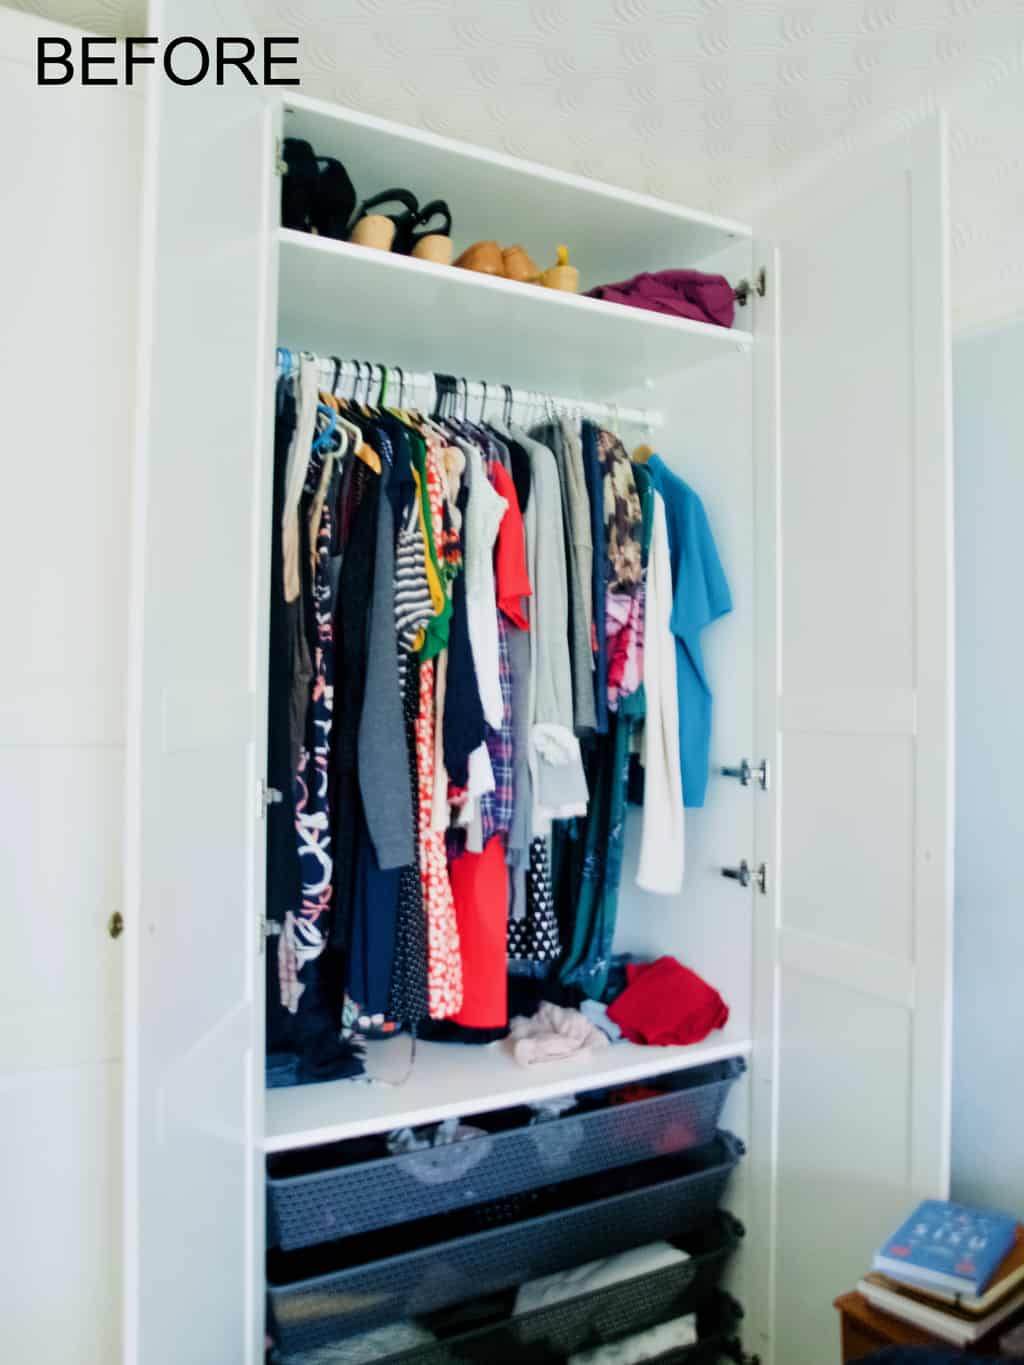
My criteria for clothes that stay in the wardrobe were:

  • I have to like them (obviously), similarly to Mary Condo’s saying “it needs to give me joy”.
  • Have to fit me well, lots of time spend trying everything on!
  • Have to go with my style board, I have one on Pinterest.
  • Have to suit my body shape, probably the most important criteria!

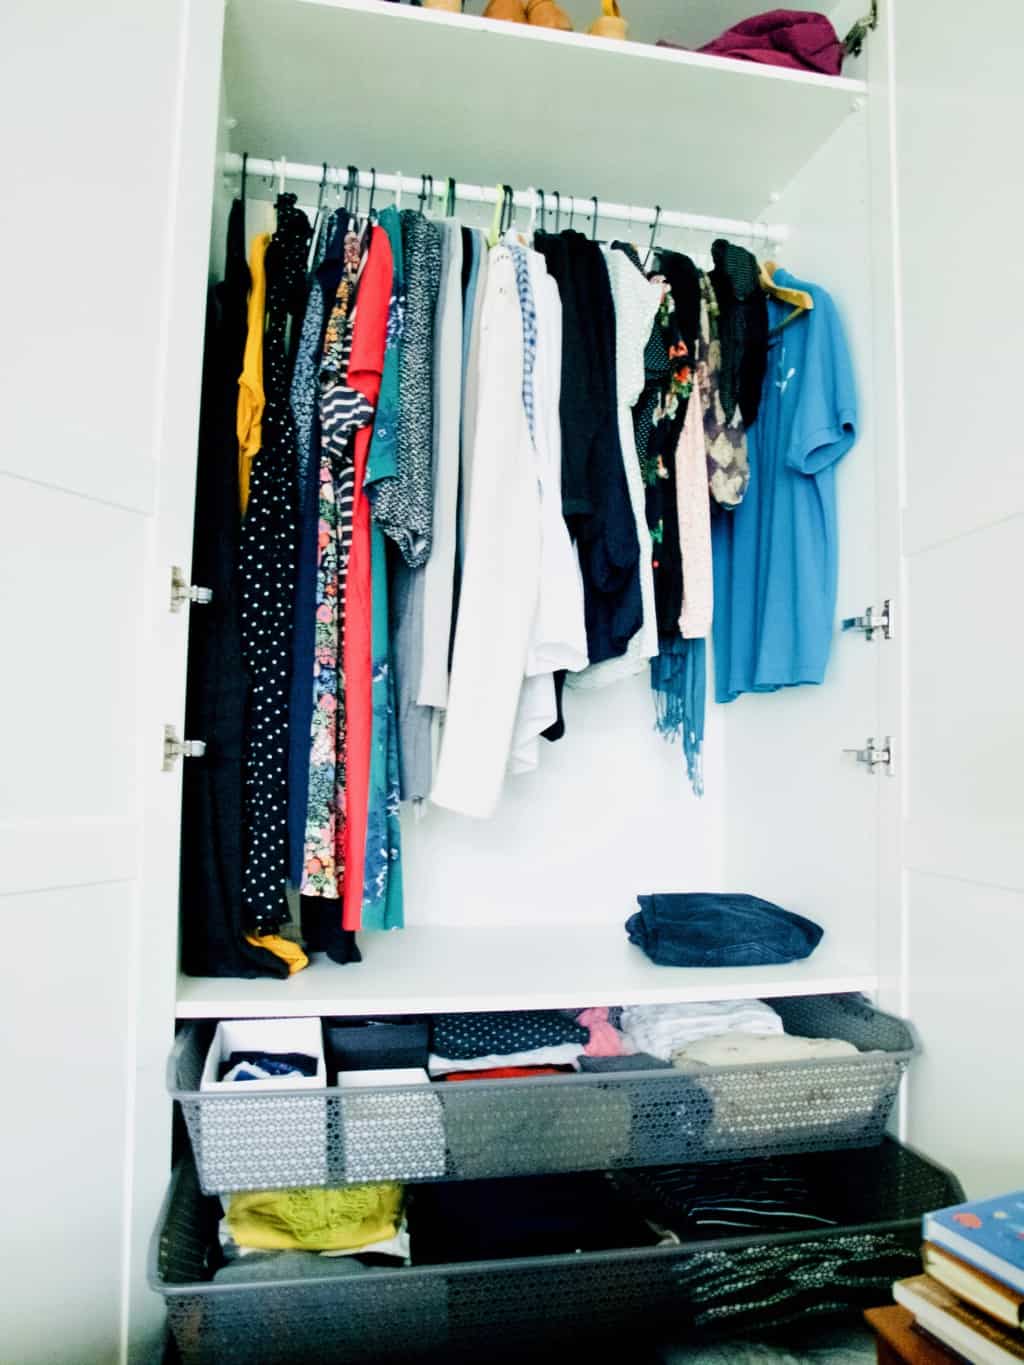
With this I probably got rid of like at least 40%, my wardrobe looked a bit empty to begin with, but then I hang some stuff that could be hung from the drawers and that fixed it. Plus my drawers are much less crammed!

I did not empty the whole wardrobe and then put back what I am keeping (this is what Mary Condo does), instead I removed only the items that I am not going to wear straight away. When you have kids running around I find this is much more practical.
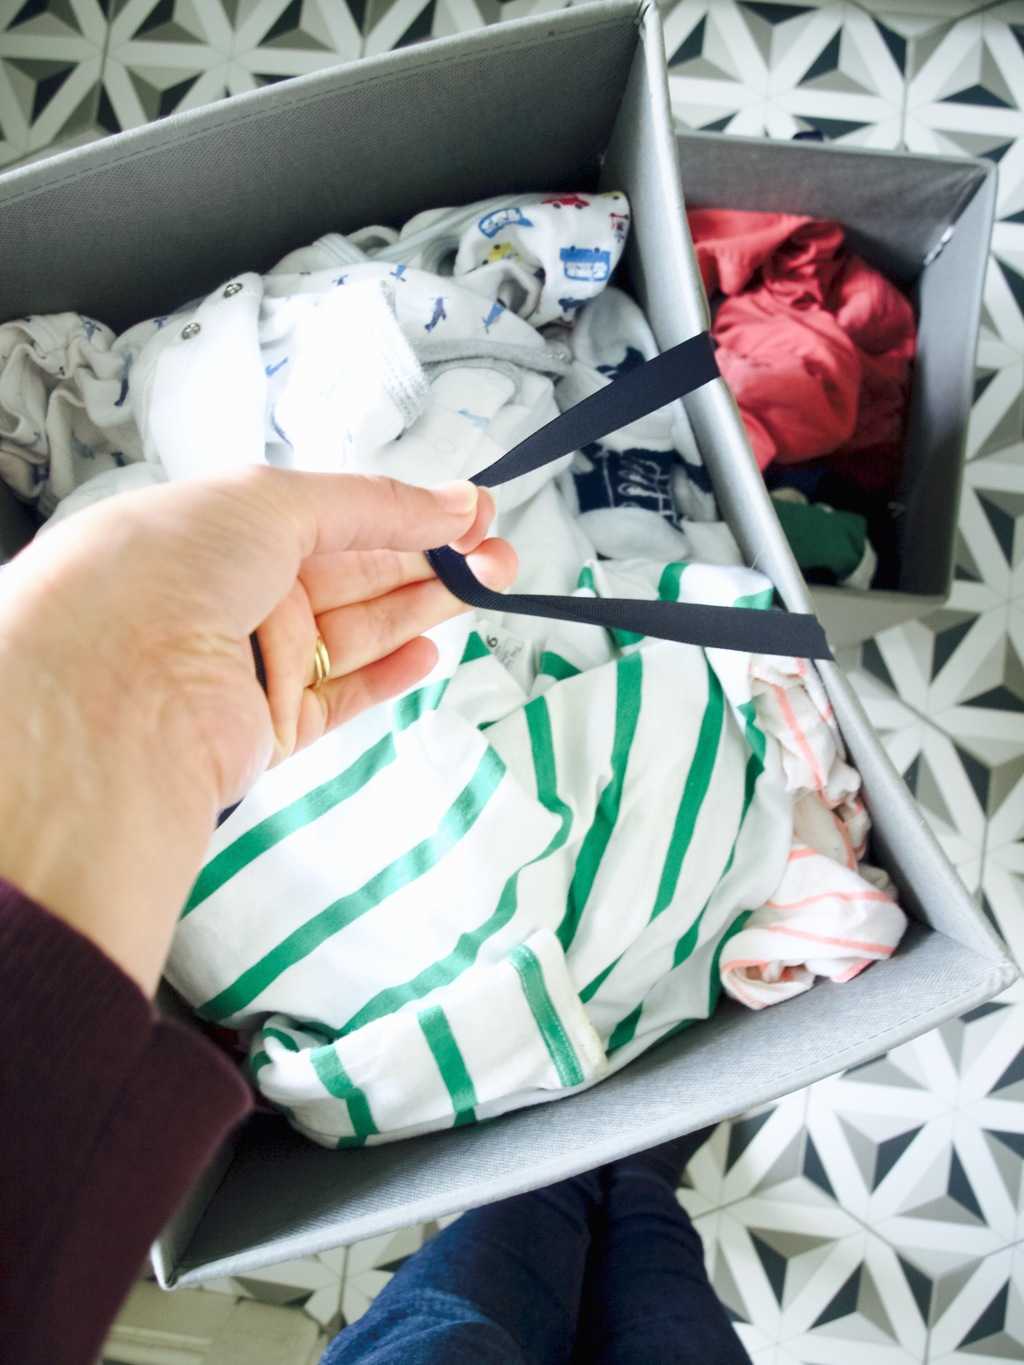
I made three piles:

  1. clothes that I am getting rid off
  2. clothes that I am passing on to my friend Vicki (we did lots of clothes switching in the past)
  3. clothes that need some alterations.

How I did my first wardrobe detoxEventually the pile of clothes that I am getting rid off ended up being the largest of course. That has been bagged ready to go to the charity shop.How I did my first wardrobe detox How I did my first wardrobe detox 
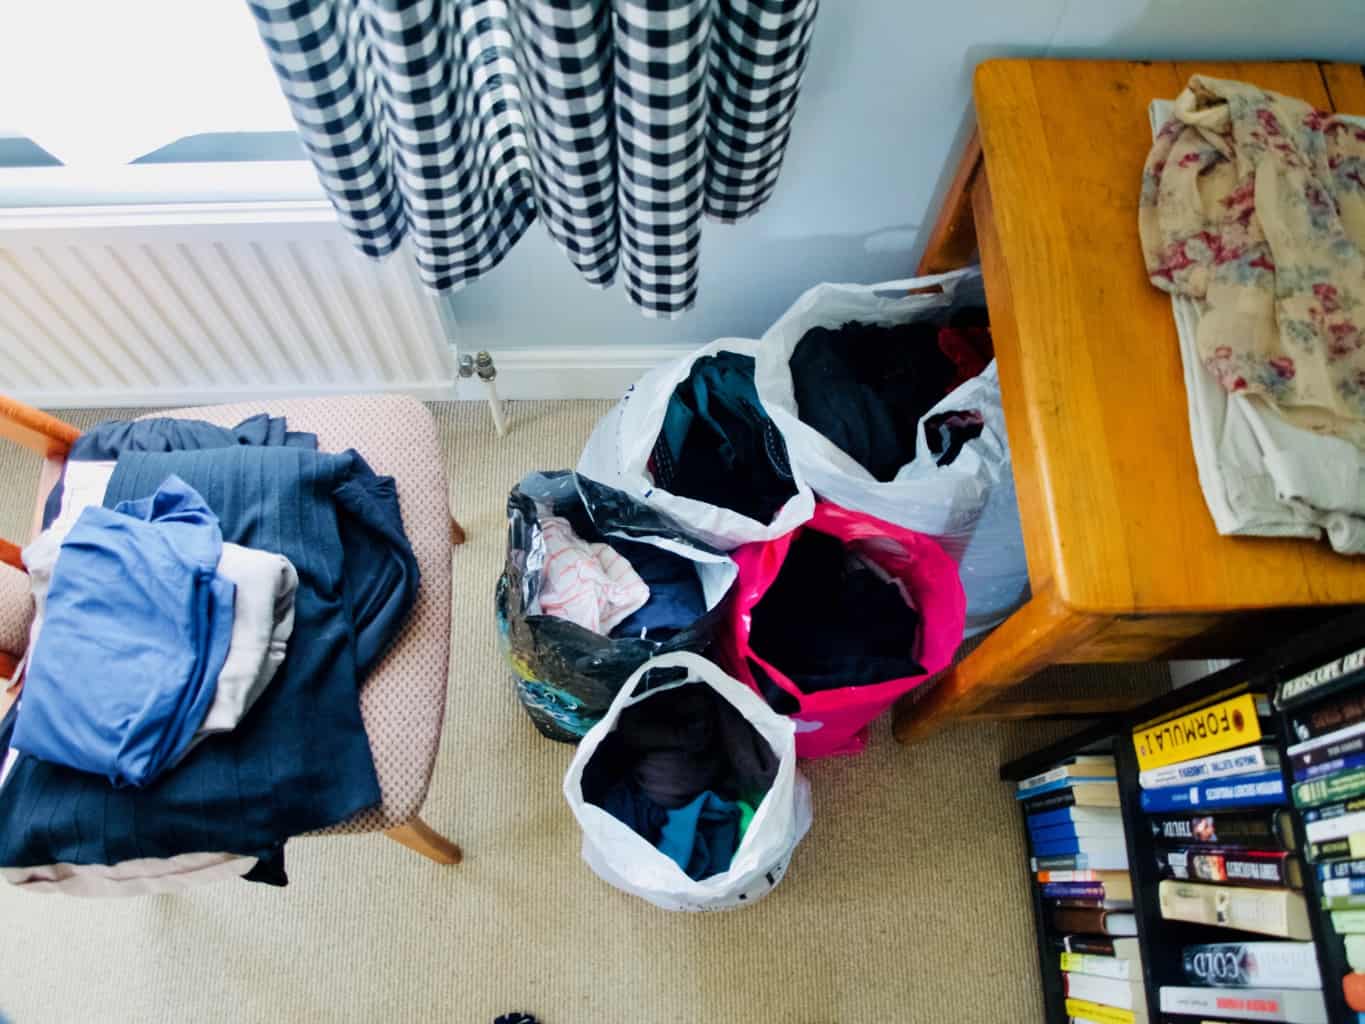
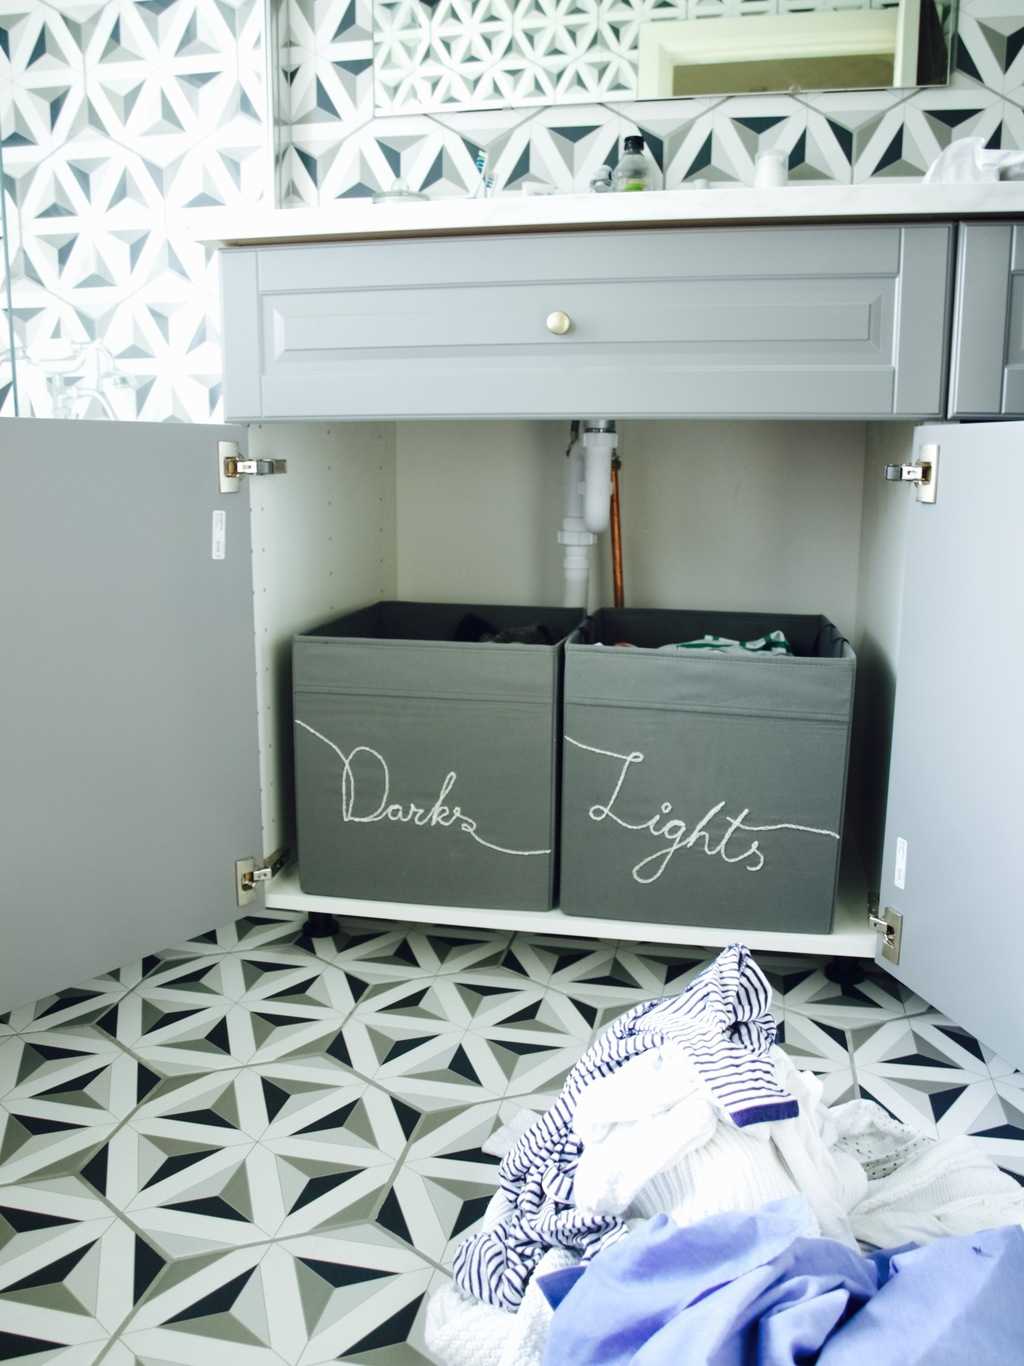
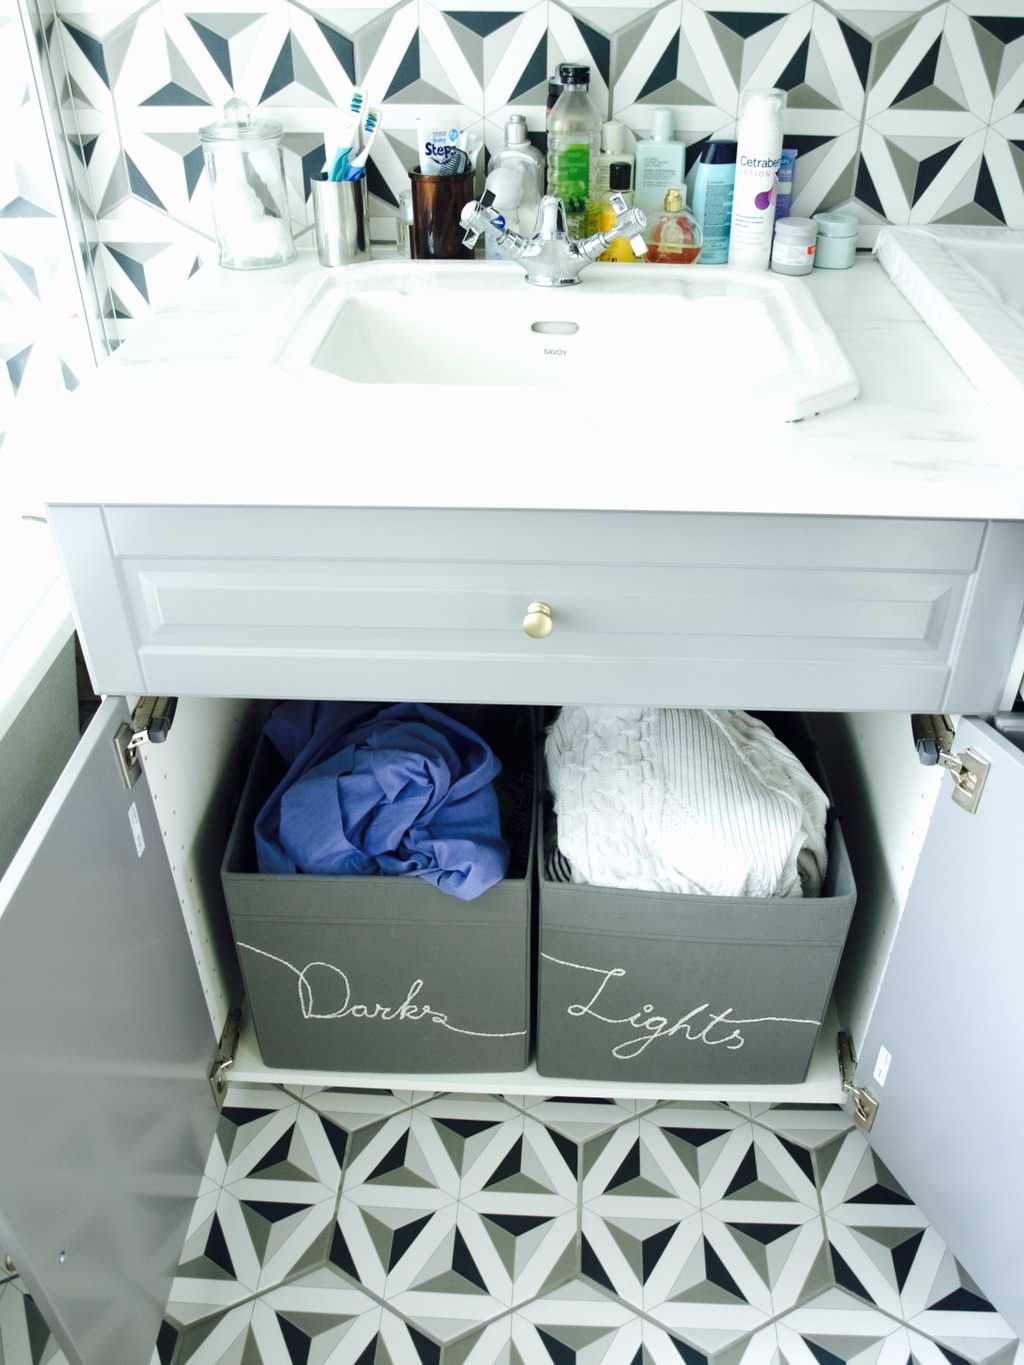
The drawers! I wish I took a picture of how it looked before. It was very very crammed. Although I am generally quite organised and I would not describe myself as a hoarder, because of a busy season in my life I let myself go a bit. My clothes were not only crammed, but also as hard as I find to say it; they were in chaos. I did not know what clothes I had and were mostly wearing a couple of items over and over again that were on the top. With the clear-out I gained the space where I could insert clothes organisers/dividers and fold everything in a way that is visible. I have been using my new organised wardrobe for few days now and I can’t describe how happy it makes me every time I open it :-).How I did my first wardrobe detox
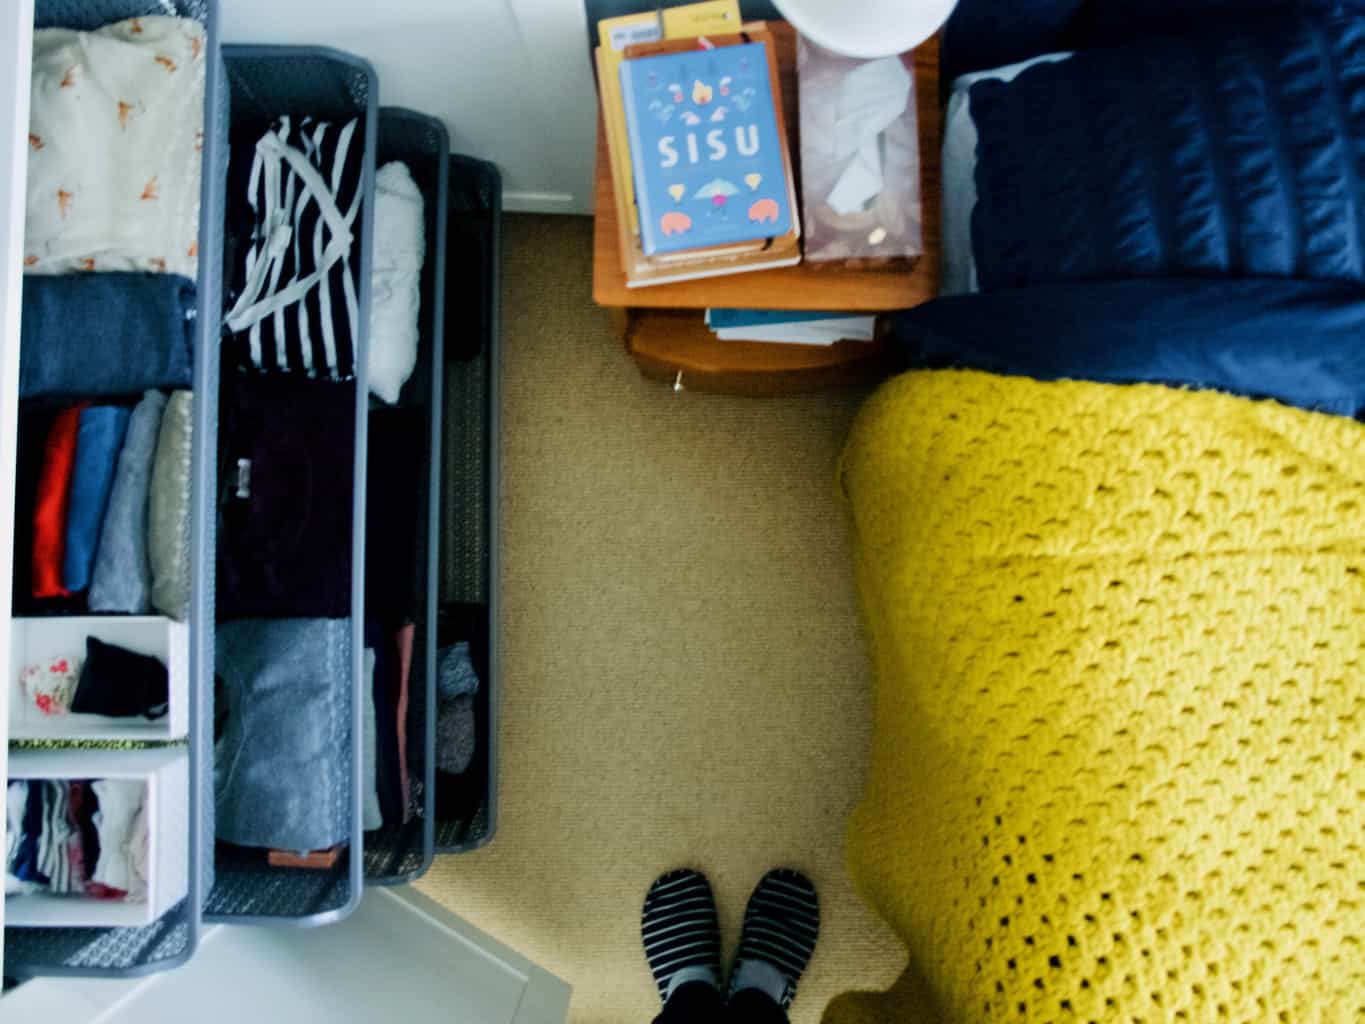
Hope you find this helpful if you are also going to do a wardrobe clear-out.

Rasa xoxo

1

Our new kitchen reveal

Our new kitchen revealIf you knew how long it took us to build this kitchen then you would understand how excited I am right now when it is finally finished! We started this project two years ago, just few months before Tomas was born.

Originally this was a study or a front room (pic bellow). We have our office upstairs so this has been used for various things such as storage, laundry, Lukas playpen and Joni desk was kept here at some point too. From very early on we have decided this space was perfect for the kitchen. We pretty much copied this idea (but not the layout) from next door neighbours who also transformed their so called front room into the kitchen.

Initially the chimney has been knocked down that took over so much space and then of course there were a break when Tomas was born. Once Tomas turned five months Joni started fixing floor and then we both were tiling (hexagonal tiles again). Then Joni’s dad helped us out to build the kitchen and then we got somebody to install the worktops. After that very hot summer came and I have been doing more gardening then DIY. I came back to painting and tiling walls by the end of summer thankfully. Only recently Joni finished installing shelves and now I am working on the organisation. If you think moving into new kitchen is easy, think again! Through this time we have been using our old kitchen and now we are so used to it that it is hard to change and start using our new kitchen. I am sure we will get into the habit very soon!Our new house tour: front room aka studyOur new kitchen revealI always liked the idea of shelves in the kitchen. I think above counter storage needs to be clear to see and because it is not hidden by the doors this storage needs to be ascetically pleasing too. This is why I organised my dry ingredients into jars (read how I did that here) and then I had cook books stored on other shelves. If you have any space left then you can always add little things such as vases or potted plants. I love my Fittonia that my friend gave, it does really well in the warm kitchens I think. Our new kitchen revealOn the shelves that are little hidden by the fridge we stored our microwave and other essentials for microwaving kids milk and porridge. It felt only natural to also store plates, bowls and glasses here too!Our new kitchen reveal My new planner is also ready for the next year ;-).Our new kitchen revealNow we probably need to work on our dining room which happened to be in the same room as kitchen. Painting walls are in order hopefully soon!Our new kitchen revealThanks for letting me share!

Rasa xoxo

0

2019 planner + giveaway

Free printable 2019 plannerAfter trying out bullet journaling I had and idea… to use this organisational system to create my own wall planner. And here it is!! Tam tam taram tam (intro music sounding)!! Hope you like it and I am looking forward to your feedback. But more about it later. Let me go through this wall planner so you can have a better understanding of it.

Like every year, I create my own planner that fits my needs, then following year I review it and make even better for the next year. Therefore 2019 planner does have a lot in common with the 2018 planner. The major difference is the fact that is organised like a book. And like any other book this planner starts with the index. Index page is is a very good page to come back to when you make different notes through the year and want to find it again later. I will show you how this works in just a moment.Free printable 2019 plannerBut first I would like to talk about sweet nothings about the Year Goals page. This is my favourite part of the whole calendar! Identifying annual goals really helps me to achieve big dreams and stay on track with my bigger plans. I urge you my friends to set your dreams/goals on paper and review your set out tasks once in the while through the year. Tip: Don’t overdo with too many goals, you want to set achievable goals! Free printable 2019 plannerMonthly Log page is essentially an overview of the whole year. Did someone send you “save the date” card for their Wedding? Well this is where you can record. It’s so much easer to see the date in a bigger picture then scrolling through the whole calendar. I also like to put monthly tasks into one place and then distribute them weekly onto my Weekly Planner.Free printable 2019 plannerNow about the Week page. This is the main area where you will be actioning most of the tasks. This is where you set the timeline for every task.  Failed to complete the task on the set week? Not to worry! With symbol system this planner can be flexible and forgiving as much as you want.

Let me introduce you to the bullet planning symbols. Events are marked with “” and located on the left of the Week page while tasks are located on the right and marked with “.“. When I complete the task I mark it with “X“. At the end of the week I review my uncompleted tasks and mark it with “>” if moving tasks to the next week, “<“if moving the task back to Monthly Log and I cross the task off completely if I decide the task is no longer relevant or needed.

Meals and Shopping List worked well past few years so I am leaving this tool here unchanged. First timers, check this out!Free printable 2019 planner Finally if you have any notes, like recipes, party plans etc etc, all of this can be stored on the Notes page that is located after each Week page. These then can be recorded onto the Index page.Free printable 2019 plannerWhen you need to find a particular note (that you hopefully recorded) then all you need to do is look up on Index page. Amazing, right? You won’t need to search for it through the whole planner again.Free printable 2019 plannerHopefully I got you inspired to be more organised/productive/and more for the next year? Then go get your printable planner here. I would recommend to get it printed by the printers as there are lots of pages and it is in A3 format.

Now if you like, I am giving away three planners to three lucky winners. All I need in return is your feedback. Be quick as there are a lot of interest already! Just send me a quick shout to rasa@friendlynettle.com

Rasa xoxo

2

Kitchen organisation ideas: jars

Kitchen organisation ideas: jarsOur kitchen completion is so so close that I can almost taste it! It’s those small little details that takes forever to finish, I don’t know why is it often like that. In order for us to move into our new kitchen (we are lucky to have an old kitchen in other part of the house), we still need to fill some gaps, touch paint, silicone and fit the shelves.

I am so excited about the shelves though! I love the open display plan. I already started preparing storage solutions that looks good and is a decoration itself. You guessed it right, jars are going to be my focus!

Jar storage solution is not a new invention, it’s just got really trendy in recent years. You can buy mason jars easily anywhere, however I don’t believe you need them to achieve the look. Although I do own few mason type of jars, majority of my jars comes from recycling. That’s right! I use a lot of jars that had were storing pickles in their past life. I think reusing these type of jars is so much better than recycling itself. It’s better for your pocket too!Kitchen organisation ideas: jarsTo begin with I started sorting out our grains, sugar, flour, seeds etc etc. I looked through lots of loose bags and I was little surprised to find some stuff that I did not even know I had (like quinoa). I stored these into right size jars according to the amounts, the use and the size I tend to buy them in the shop. For example, I hardly ever eat quinoa (don’t really like the taste of it) so it ended up in the tiniest jar the whole lot could fit. It’s different with the brown sugar and although I had a tiny amount of it left I stored it in a lager jar.Kitchen organisation ideas: jarsAs for labels I decided to go paperless. I got inspired by these and since my handwriting improved I thought I will give a go. I used basic black permanent pens instead of oil based paint pens. I experimented on the paper before going ahead and scribbling on the jar.Kitchen organisation ideas: jars Although the pens are permanent, it can be easily wiped out with some acetone or other type of solvent.Kitchen organisation ideas: jarsKitchen organisation ideas: jarsHope you like my jar organisation idea and get to adopt it at your home.

Rasa xoxo

1

My review of bullet journaling

my review on bullet journalingAt the beginning of this year I tried bullet journalling, so how did I get on? Well… my opinion about it has not changed much. I think this system is best suited for a single person who loooooves stationary. However the system itself is cool and it can maybe be applied to a wall organiser. Or at least this is what I am hoping to do.

First I will start with positives of bullet journalling (need to be positive!).

1. I loved how this diary is like a book. It almost feels like writing a book! You know how they say that everyone has a book in them?  Well, here is your chance to sort of practice and write it. It has page numbers, an index page, and more. my review on bullet journaling 2. The BUJO system itself is very practical. It’s all about tracking your tasks, organising them in advance and moving them around to different time slots. The “future log” creates an area where you can store events and tasks that needs to be done sometime in the future. The symbols lets you identify if the task is completed, moved or canceled. If only I could somehow translate this system into the wall diary/organiser…. hmm.my review on bullet journaling 3. My favourite part however is my new years goals pages. Although I feel I am slightly behind I feel splitting goals into tasks helped me to see the progress which itself is very uplifting. I know I know, if I do maths here I probably have almost half of the tasks completed, but only one third of the year left. So I am guessing I wont be able to complete all the tasks by the end of the year. But its ok, I can always review these tasks and forward some to the new year ;-).my review on bullet journaling 4. Additionally to all the fab parts of bullet journalling, I can store project patterns,my review on bullet journalingdetailed event hosting plan with drawings and recipes,my review on bullet journaling my cycle charts (embarrassed to say) and many more. Basically whatever floats your boat ;-). my review on bullet journalingWhen it comes to negative points of using BUJO is that it is not easy to access for whole family. Yes bullet journal is perfect for storing personal stuff like charts etc, but other then that when it comes to family planning this needs to somehow to transfer to a wall organiser.

And btw, I mentioned before that I was very excited to use my fountain pen with this journaling business. However this proved unpractical as I often had to wait till my writing dries before going onto next page. Also I made so many mistakes that by now I am not too bothered about my handwriting in this journal.

That is it for now, hope you found my review useful

Rasa xoxo

0

How to make reusable food wraps (to replace cling film)

Reusable food wrap DIY (with wax and resin)The thing is that I always dreamed of living sustainably, even before it be became popular. Sometimes I succeeded and sometimes business just took over my life and I had to cut some corners. The bottom line is I passionately hate waste and I feel like my heart bleeds when I see stuff wasted when it could have had another life (hope I don’t sound like a hoarder, because I am definitely not!!).

When it comes to sustainable living I believe it comes to choosing the products that should also benefit us directly (not only the earth). You see I dislike wasting money too (or even seeing somebody else wasting theirs). Which is why I always look out for things I could make myself and save money that way. For instance, last week I made some reusable food cloths, because I thought it would be lovely not to use as much cling film. I know, I know, this is not our biggest household waste (nappies and baby wipes are), but you’ve got to begin somewhere! I researched quite a few recipes and methods, so trust me you are getting the best here! Although after making some wraps I had a few other ideas how to make it even easier and cheaper.

To make these reusable food wraps you will need:

  • 130g wax (I used some wax thats been given to me by my mother in law who keeps the bees)
  • 26g pine rosin (or any other tree resin)
  • 4tsp jojoba oil
  • about 5-7 squares of light, woven cotton
  • pinking shears
  • old pot
  • old paint brush (optional, you will only be using it just for this)
  • baking paper
  • iron with the ironing board

Reusable food wrap DIY (with wax and resin)First cut your fabric to size. I used pinking shears as this really helps to stop fabric from fraying

Put the wax, rosin, and oil into the pot and while stirring heat all the ingredients till melted. I think because I used not well filtered wax it had few black bits in it. It did not cause too many problems in the end result but it did leave a few black speckles on the cloth.Reusable food wrap DIY (with wax and resin)As you brush the wax mixture onto the fabric it hardens very very quickly. I think I was too generous with it (so be stingy). The excess wax created lots and lots of mess later. I felt like a brush is not necessary here as the wax hardened after few strokes. I think I will try just dipping the fabric straight into hot wax next time. I imagine that should give good coverage without the wax hardening onto the surface. But of course I could be wrong!Reusable food wrap DIY (with wax and resin)So here comes the mess I was talking about. In order to impregnate the fabric with the wax mixture completely, the fabric needs to be reheated. When I researched how to make reusable food wraps it seemed that one of the most popular methods to reheat the wax in the fabric is to stick it into the oven. That seemed a bit limited by oven size and I imagined it would be messy (plus the oven tray to clean up). I guess I failed to avoid the later! I used baking paper to sandwich the waxed cloth and heated the wax and the fabric once again by ironing it. In my case the excess wax spilled everywhere: the floor, another layer of baking sheets (I wasted whole roll!!), and the ironing board (thankfully not the iron itself). This wax mixture was very sticky to clean because of the resin (special ingredient to make the cloths clingy). Definitely NOT applying that much wax liquid on the fabric next time!!!Reusable food wrap DIY (with wax and resin) The cloth cools almost immediately and can be used a few minutes after making it.Reusable food wrap DIY (with wax and resin) As I mentioned before the resin mixed in with the wax makes the wrap slightly sticky against itself which is why you can use this exactly as you would use cling film.Reusable food wrap DIY (with wax and resin)Hope you found this very useful and you can learn from my mistakes.

Rasa ;-)

2

My reflections on 2017

Our biggest project of 20172017 is about to be over and as usual I thought I will quickly reflect on it before I get into 2018. And what a year it has been! Tomas birth made it both very very challenging and exciting at the same time. I struggled lots, had lots of back pain, got really overweight, took sleeping pills and was almost considering taking antidepressants at one point. Thankfully it is much better now and I can see how amazing Tomas is becoming. I love his little character that is coming more and more everyday. Now I can finally say “babies gives you wings” like one of the mums I follow on Instagram :-DQuick toy storage label ideaNow, did I achieve my 2017 goals? Mostly! Because I did not expect to achieve much this year I only had one goal. This one goal was to organise our family life. I started organising everything in May one room at the time and now I at least know where everything is. You see, we moved into our current house one month before Lukas was born and from then on we were constantly doing DIY’s and then Tomas was born as well. It was crazy two years, so for me to have the house organised is a  very very big achievement. What helped me to organise is the planner, storage boxes and the big shelved wall in the spare room (also kids napping ha ha!).My reflections on 2017To organise the toys (it seems like our toy collection is expanding all the time!!) I used the idea from loundry basket project. I used 3D fabric paint instead of embroidery because I needed a quick fix. Besides I don’t think fabric boxes will last very long with kids (lol).Quick toy storage label ideaHappy New Year everyone!

Rasa xoxo

0

Printable 2018 planner

OLYMPUS DIGITAL CAMERAI love love planning and as new year is approaching I have so many dreams and plans that I wanted to add to a 2018 calendar. Except I did’t have a new calendar… Until now!

I loved the layout of 2017 planner so much that I almost copied it to make the new one. If you loved it as much as me that read on to see how I use it in practice.

Click here to upload your 2018 planner.Printable weekly 2018 plannerI picked a second week (because who plans anything for the first week in new year?) in 2018 to illustrate how I use it in practice. Of course I could not fill it too much in detail because some stuff is difficult to know so far ahead in the future.

Calendar comes first as everything is connected to it. From it you find out what appointments or events are on. I also often use this part to jot down the task I want to get done on specific day. For example, I wrote down that I need to buy yellow and black printer cartages on the 8th and need to close certain current account on the 12th. However, it’s important to be reasonable with the daily tasks and not to add too many in one day. Otherwise nothing gets done. Trust me! I have done this mistake too many times in my past ;-).

To do list one of my favorite parts. I prioritize my tasks by category and then I am always in the know what to do as soon I have a break from kids. In my case blogging comes first and then DIY. I added what DIY’s I need to get done in that week as we need to get house ready for the big party in February. Of course unfinished tasks can be forwarded to next week, so no pressure. At least priorities are there to focus on.

Meals is essential for meal planning. Just list all the meals you are going to have for the week including dishes for hosting if you are planning to have guests that week. I usually cook three main dinner meals for the week that last 2-3 days. I also cook soup that I split into 7-12 kids portions for the freezer. I usually make myself a toast and we have porridge for breakfast.

Shopping list is useful when making a list of items that you need from the shop. When I go about my business I quickly jot down things I run out of or things I notice we will need. When I make the meal plan I often go back to shopping list to add the ingredients I need for the cooking. Milk, bananas and eggs are our family food staples so you would find these are often on my shopping list ;-).Printable weekly 2018 plannerHope you found this inspiring and you will find the 2018 planner useful next year xx

Rasa :-)

1

How I saved my yarn stash from a moth infestation

How I saved my yarn stash from a moth infestationSo as you may know for me this year was all about organising. Because there are lots to tidy up after doing (still doing) so much DIY! Few months ago I started working on my craft supplies and sadly I came across a horrifying moth infestation which made things a little bit more complicated… arghhhh!  Not only did I have to untangle my very messy yarn I also had to get rid of these unwanted creatures… yuck! This is how my yarn basket looked like when I discovered the sad reality…How I saved my yarn stash from a moth infestationFirst I googled if it was really moths I was dealing with. Pictures online matched with mine which confirmed that it was indeed what I feared most.  I realised I had to just get on with it, quick! So I read and I read about different methods how to kill the moths, larvae and it’s eggs (this article was my favourite), but the only one that seemed practical to me was to freeze all my yarn. Hmm… that will need lot’s of freezer space! So I did it in batches which caused some problems with the yarn that was waiting in the queue. You see these evil moths are very quick to breed! I started with eggs and one moth and after just a day it turned into more eggs, moth and larvae…arghhhh!!! I ended up freeing up as much space as I can (that meant using up some of the frozen food) so I can stuff leftover yarn into freezer. Luckily we were going on holidays so I could just leave it there and forget it for a bit and deal with it later… phew!How I saved my yarn stash from a moth infestationHow I saved my yarn stash from a moth infestationOnce I was back from holiday (all relaxed and all) I went back to sorting out my precious yarn. I cleaned the basket where I store my yarn with vinegar. I ordered some moth cedar and distributed it around the house. I organised the yarn and I think is so far so good. I think I won!  How I saved my yarn stash from a moth infestationHow I saved my yarn stash from a moth infestationHope you found my story comforting if your yarn got infested (to be honest I just hope it does not happen to you).

Rasa xoxo

2

IKEA hack: custom laundry baskets

Ikea hack: custom laundry basketsWell…. hello here looking through my never ending laundry pics. I never quite manage to have all baskets empty completely! This is why I was looking for ways to organise my dirty clothes while I work my way through it if you know what I mean. I thought under the sink in the bathroom would be the most convenient for them since this is where we get undressed and changed most often. Except I struggled for a while to find a right size baskets…. until one day it occurred to me that the storage boxes from Ikea we already have fit perfectly! I know I know, they are storage boxes, not a laundry baskets, but I saw a vision how I could alter them a little. All it needed are some handles, a little bit of lettering embroidery and its done! Yey!Ikea hack: custom laundry baskets Ikea hack: custom laundry baskets So this is how I did it. I purchased some fabric storage from Ikea. I know I know I said I had them already, but wanted in different colour and it’s not like £2.50 breaks the bank! Then I found my fabric pencil, embroidery tread & needle + some ribbon to match. Ikea hack: custom laundry basketsFirst I marked the writing I wanted to embroider. You don’t have to use special pencil for it, but it helps since you can rub it off if you make mistake. Otherwise regular pen mark would be hidden behind the stitches (I have gone this risky route too many times before).Ikea hack: custom laundry basketsFor embroidery I chose my favourite stitch which is the chain stitch. You can get more inspiration for your embroidery here.Ikea hack: custom laundry baskets Next I stitched the handles. I folded the ribbon at the ends so it does not fray ;-).Ikea hack: custom laundry baskets Ikea hack: custom laundry baskets Ikea hack: custom laundry baskets Ikea hack: custom laundry baskets Ikea hack: custom laundry basketsHope you found this inspiring

Rasa xoxo

0

My New Year goals + free printable 2017 planner

printable 2017 planner/calendarAfter reflecting on 2016 I decided to make 2017 goals a bit differently this time. I made only one main goal this year which is to organise our family life. Let’s be honest, I don’t exactly expect to achieve 5-7 goals when we have so much on this year. Even one goal is big enough for me considering we have a little one coming up very soon! So I did count in three months of “cloud phase” (no firm schedule period)  after new baby is born.

When it comes to organising I find planner or basic calendar is essential. I did not find a good one to buy so I ended making one myself. Because I wanted lots of space for scheduling I decided to make the calendar weekly. I also included goals page with the to do lists, because I realised that some plans cannot be scheduled even if it is beneficial to schedule. We all know that things change so quickly and you end up just cancelling and scheduling. This is why I made the goal page which can be attached to each week! So all to-dos are planned in the specific week, but not specific time or day. Fingers crossed that works!   printable 2017 planner/calendar printable 2017 planner/calendar

Click here to upload your 2017 planner.

You can either print the page for one week as it comes and attach it on the wall or fridge. Or like me you can print all of it and tie it with the string so it can be hung as a one piece. printable 2017 planner/calendar printable 2017 planner/calendar printable 2017 planner/calendarHappy organised 2017 to you all xx

Rasa :)

2

My reflections on 2016

My reflections on 2016Can you believe it? Tomorrow we are entering 2017! (I personally feel its going to be the best year ever).

But for now I would like to reflect on 2016. I must admit it was’t the easiest year, but I guess you need those type as well sometimes ;-). Don’t get me wrong, there were plenty of good times such as finding out we are expecting a new baby and having own house to DIY. But if you look from the other side (more negative one) it has been very challenging. The house has been chaotic while I am gradually getting less and less energetic due to pregnancy. Having no basic bathroom for few weeks has been very hard to cope with. We went on holidays of course, but then I realised its not the same anymore when we have a baby on board. But then again, it has been a learning processMy reflections on 2016 When reviewing my 2016 resolutions I realised that they were a little ambitious. But how do you know whats in store in the future? Things happen completely differently to what you expect sometimes!

1. I was planning to upgrade Friendly Nettle website, but who was I kidding? I was lucky to find some time to blog. Instead I was busy with Lukas helping him to discover food, playing and singing. My reflections on 2016 2. I hoped to turn our house into home, but instead we got a chaos. Few projects in one go and doing almost everything by ourselves has never been a good idea. Well at least we got few rooms almost finished such as Lukas bedroom :). My reflections on 2016 3. I wanted to learn to take better pictures and thankfully I did have some luck with it! I used up a lot of Lukas nap times practicing with the camera which has been very useful. Now when I take pictures I often apply the tricks I learned. My reflections on 2016 4. I hoped to teach Lukas to swim, but yet again I failed here. Have you ever tried to go swimming pool alone when you need to get the baby and yourself dressed in a tiny dressing room? After many tries I realised we missed the window when swimming should come natural to the babies. Lukas is a toddler now! My reflections on 2016 5. We said we would grow cucumbers as a joke, clearly this is not the most important goal :D. However, this was successful, look at those funny shape cucumbers!My reflections on 2016So of course I am looking forward to tomorrow (as I am certainly not staying up till midnight tonight), 2017 I am ready :).

Rasa xoxo

0

My reflections on 2015

Look who is swimming already :-)It’s almost 2016 and I am very excited to share my reflections on 2015 ;-). What a year it has been! In the beginning of 2015 I have created 7 new year resolutions that most have been achieved and on top of it some dreams came through that I did not imagine it would happen so soon. 

Two major things have happened this year: we now are a family of three (Yes, Lukas is our new addition!) and we bought our first family house. Ok, we hoped for both to happen, but we were not sure if it would happen so we are really really happy that it did. We just need to fix that house and it will be totally great(something for the next year)!Our dream house!We also had an opportunity to visit Iceland which was my dream for many years. It exceeded my expectations!Me and Blue LagoonNow, back to 2015 resolutions…

1. I hoped to upgrade Friendly Nettle website. I will be honest I fail on this! I have not changed one bit about the website or learned coding. Sadly just did not find the time (hopefully in 2016 I will be able to achieve it). On the positive note I did manage to successfully run a crafty group here in Bedford!  Live in Bedford? Then join us here ;-).Craft group leaflets

2. I am really pleased to say that I did create amazing new products and bakes for a new website this year! I just need to keep it coming somehow… Here it is!Friendly Nettle Bakery 3. Updating budgets comes naturally to me. I mentioned already I really like keeping our finances organised. All I need to do now is to update it again as our needs keep changing all the time (we now need to save for house upgrades and Lukas future). Here are my 5 steps to basic budgeting if this is something you are struggling with.Budgeting4. I totally nailed it and read more books this year! In fact this goal was the most enjoyable :-). In the beginning of this year I preselected 6 books to read and guess what, I finished reading all of them!A year with books, 20155. When it comes to taking better pics, I did not do much about it! I did not even manage to read the manual of my camera :(.My reflections on 20156. In the beginning of this year I did eat healthier and I think I would have carried that on if I did not become pregnant. The fact that it almost did not matter how much weight I would gain loosened up my standards a bit (if you know what I mean!).My reflections on 20157.  Swimming is what became my fun sport (it was practically the only sport I could do)! Now I am onto teaching Lukas how to swim ;-).My reflections on 2015Now when I had some time to reflect on 2015 I can welcome 2016 :-)

Rasa xoxo

1

Clean-out-the-cupboard granola

Clean-out-the-cupboard granola recipeOnce in the blue moon I like to organise my cupboard so it is easy to find stuff I need. The cupboard gets usually cluttered with small random packages of of seeds, nuts and dry fruits (all that just from trying many baking recipes). But once in the while I feel like cleaning it all out by using it up on one something big. That tends to be granola!Clean-out-the-cupboard granola recipeI must admit that granola is not the healthiest breakfast item (even though some people consider it to be on the healthy side), but it so tasty! It transforms a very boring yogurt and fruit into something more pudding like. And it is soooo useful when you run out of your regular cereal!Clean-out-the-cupboard granola recipeSo here is what you can use up and how to make your Clean-out-the-cupboard granola…

CLEAN-OUT-THE CUPBOARD GRANOLA

  • 500g oat flakes (or any other flakes, I used barley flakes here)
  • 450g seeds, nuts and fruits (will try to mention as much as I can remember):
    • sunflower seeds
    • poppy seeds
    • sesame seeds
    • pumpkin seeds
    • hazel nuts, chopped
    • walnuts, chopped
    • pecan nuts, chopped
    • almond flakes
    • coconut flakes
    • raising
    • apricots, chopped
    • dried cranberries
    • dried mango, chopped
  • 200ml coconut oil (or any other oil that does not taste strong and overpowering)
  • 300g honey (or golden syrup or brown caster sugar)
  • 1/2 tsp salt
  • spices (I used 1tsp cinnamon, but you can use ground cloves, nutmeg or few tbsp cocoa power)

1. Place all ingredients (except dried fruit if using) into the pot and “cook” it on the low heat for 5-10min till honey disappeared into the mixture and everything is well combined.Clean-out-the-cupboard granola recipe2. Now spread the mixture onto large baking tray (use two trays if possible so it bakes evenly) and bake it in 180C oven for 30-40min. Check granola every 15 min to check if it’s not burning and mix it to turn around. Add dried fruits 20min before the finish. The granola should be golden colour, it will become crunchy once it cools down.Clean-out-the-cupboard granola recipe3. Once it cools down store it in jars and enjoy it with yogurt (or milk) and fruits.Clean-out-the-cupboard granola recipe Clean-out-the-cupboard granola recipeHave a lovely weekend!

Rasa xoxo

1

Organised bags are happy bags! (make custom handbag organiser)

Make your own custom bag organiser insertToday I wanted to share about my most favourite handbag and a little project with it. My “Zatchel” is what I use most of the time as it looks good (get so many praises from everyone!) and it fits only the most important things. So I never end up carrying too much which means I could go cycling with it any time!Make your own custom bag organiser insertAnother cool thing about “Zatchels” is that it is quite hardwearing. I worn it almost every day for the past two years and everything seem to be still intact! The top that is slightly crinkled and few pen marks inside adds up to that rustic vintage appeal in fact!Make your own custom bag organiser insertThe only negative thing about this bag is that stuff don’t stay organised inside. I had numerous incidents where I lost my keys in the worst situations! Small things slide out when the inside surface of the bag is hard. So for quite a long time I have been thinking of the solution for this. Make your own custom bag organiser insertMy solution was an insert that would have a zipper where I could put the keys and other stuff in. I know it may not be the most equipped bag organiser insert, but it really works with the small handbag like mine. Do you have a small bag like this without a lining? Then help yourself to this quick project here!Make your own custom bag organiser insert Make your own custom bag organiser insert Make your own custom bag organiser insert Make your own custom bag organiser insertHappy organised bag :-)

Rasa

0