Top

Archive | Home-sweet-home

Cushion cover inspired by Liz Payne work

Embroidery inspired by Liz Payne artwork
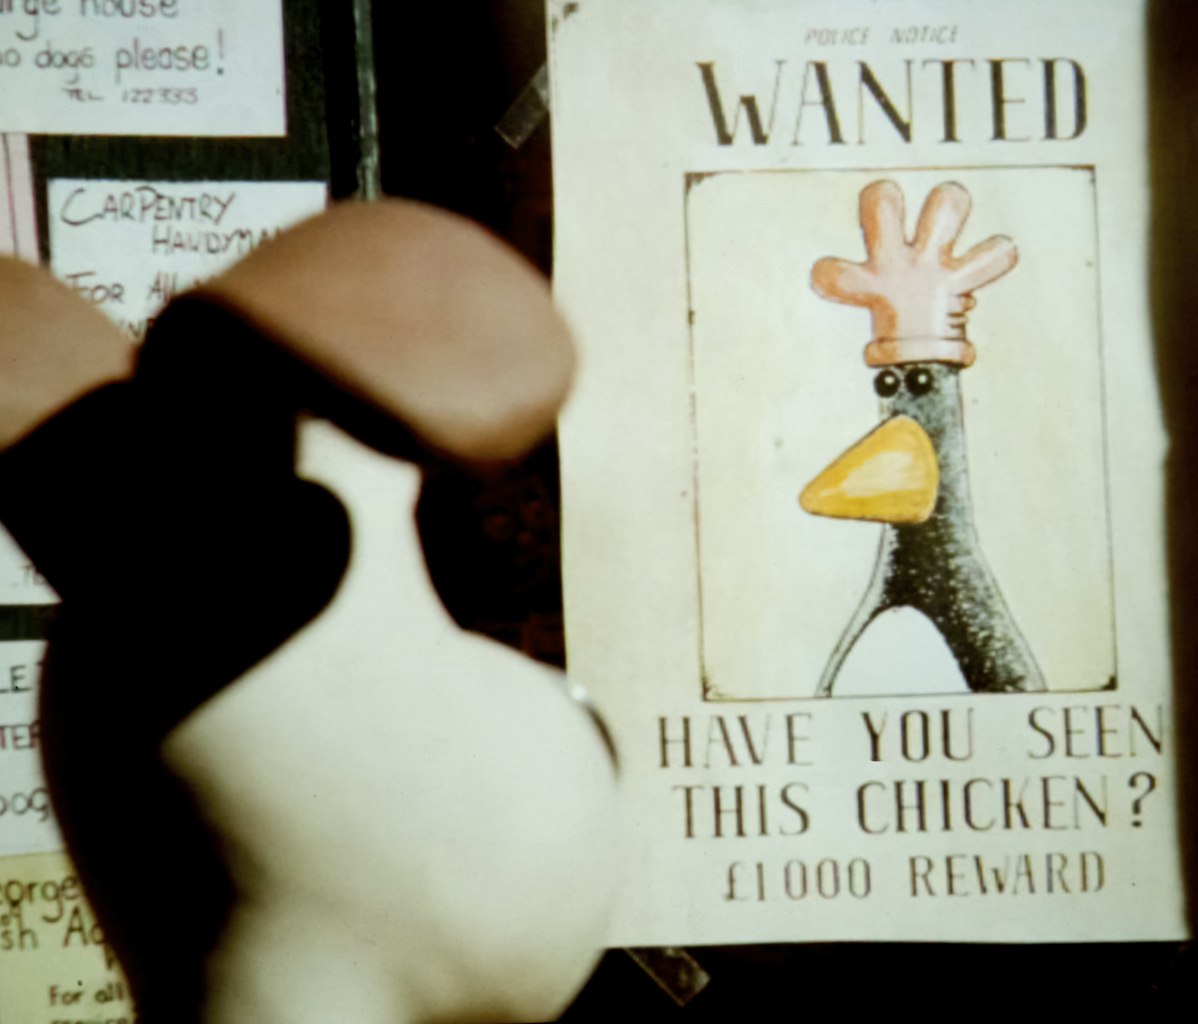
I loved Liz Payne’s work for quite some time now. I first came across it on Pinterest and I was completely mesmerised for it. Only recently I have decided to make something that is inspired by her work. Ok, not exactly in same colours, but still used similar technique! Easy removable cushion cover DIY
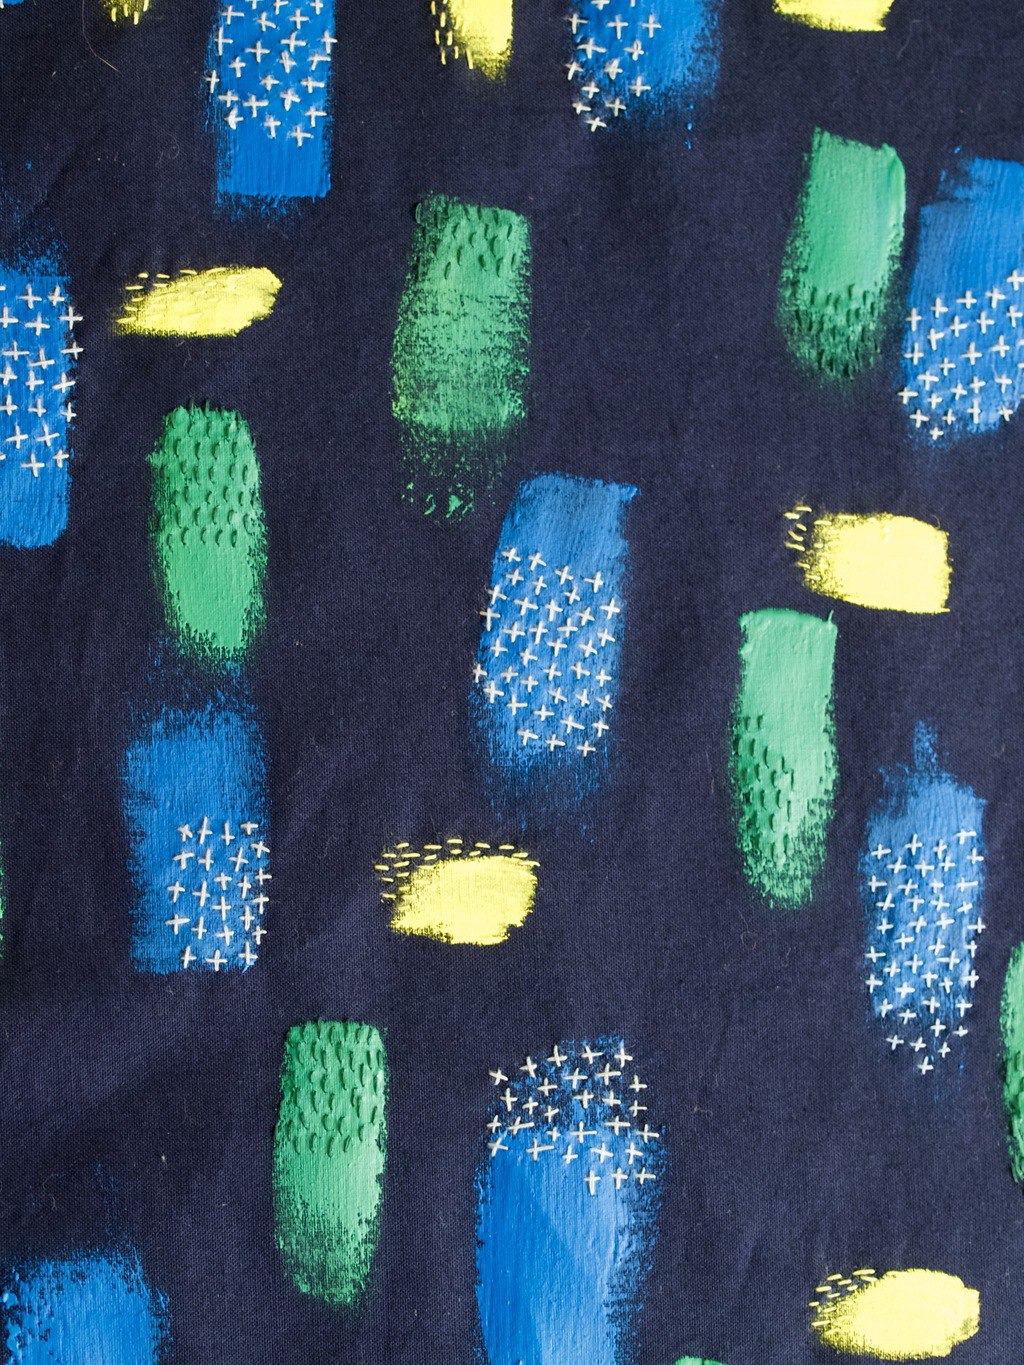
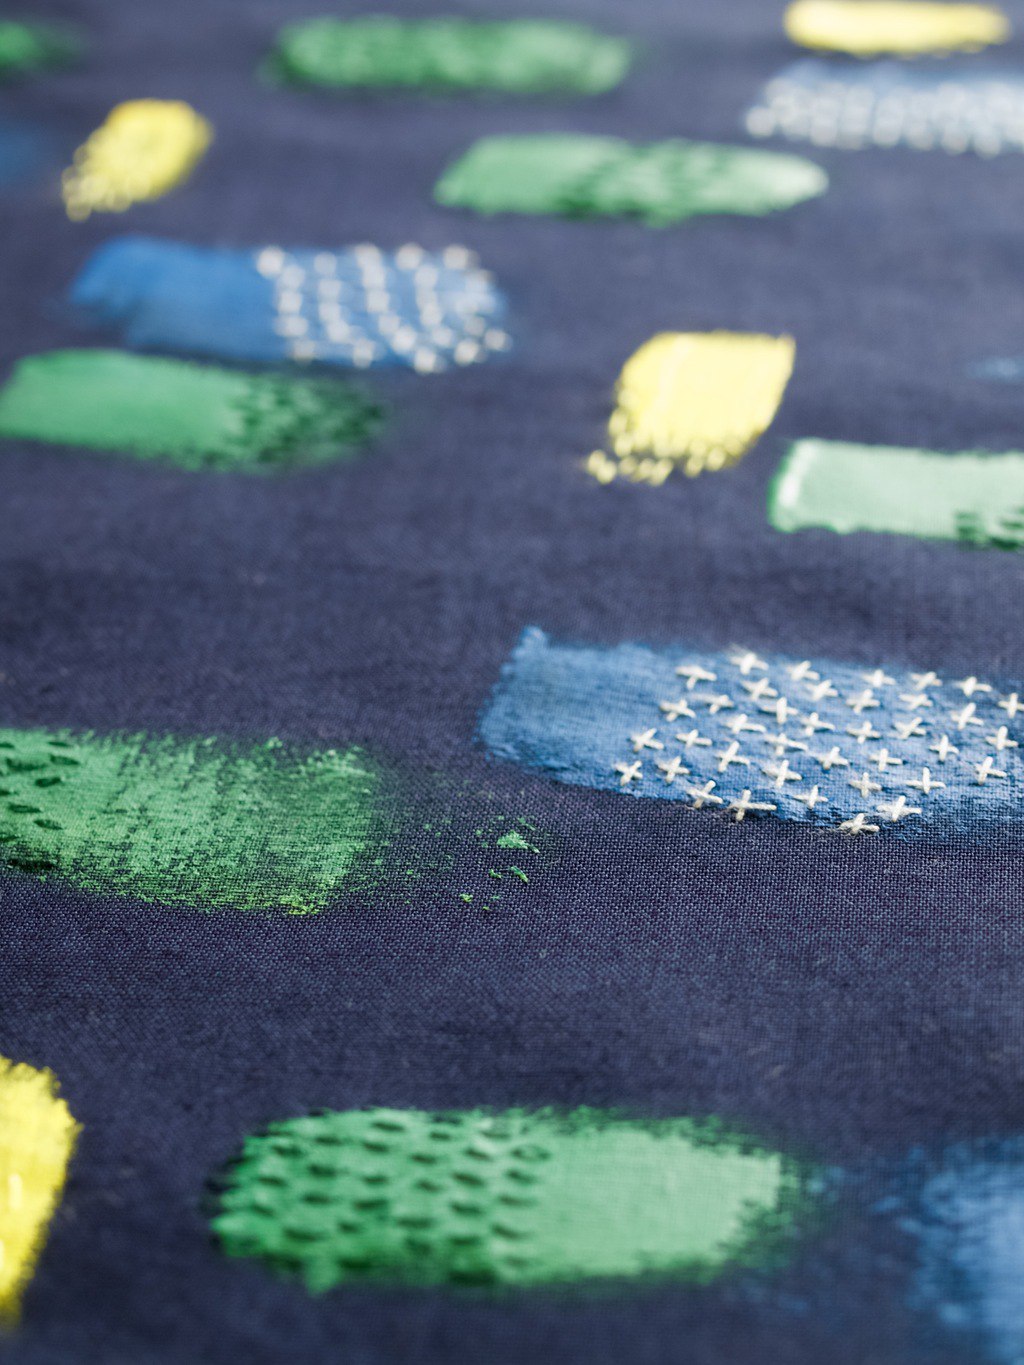
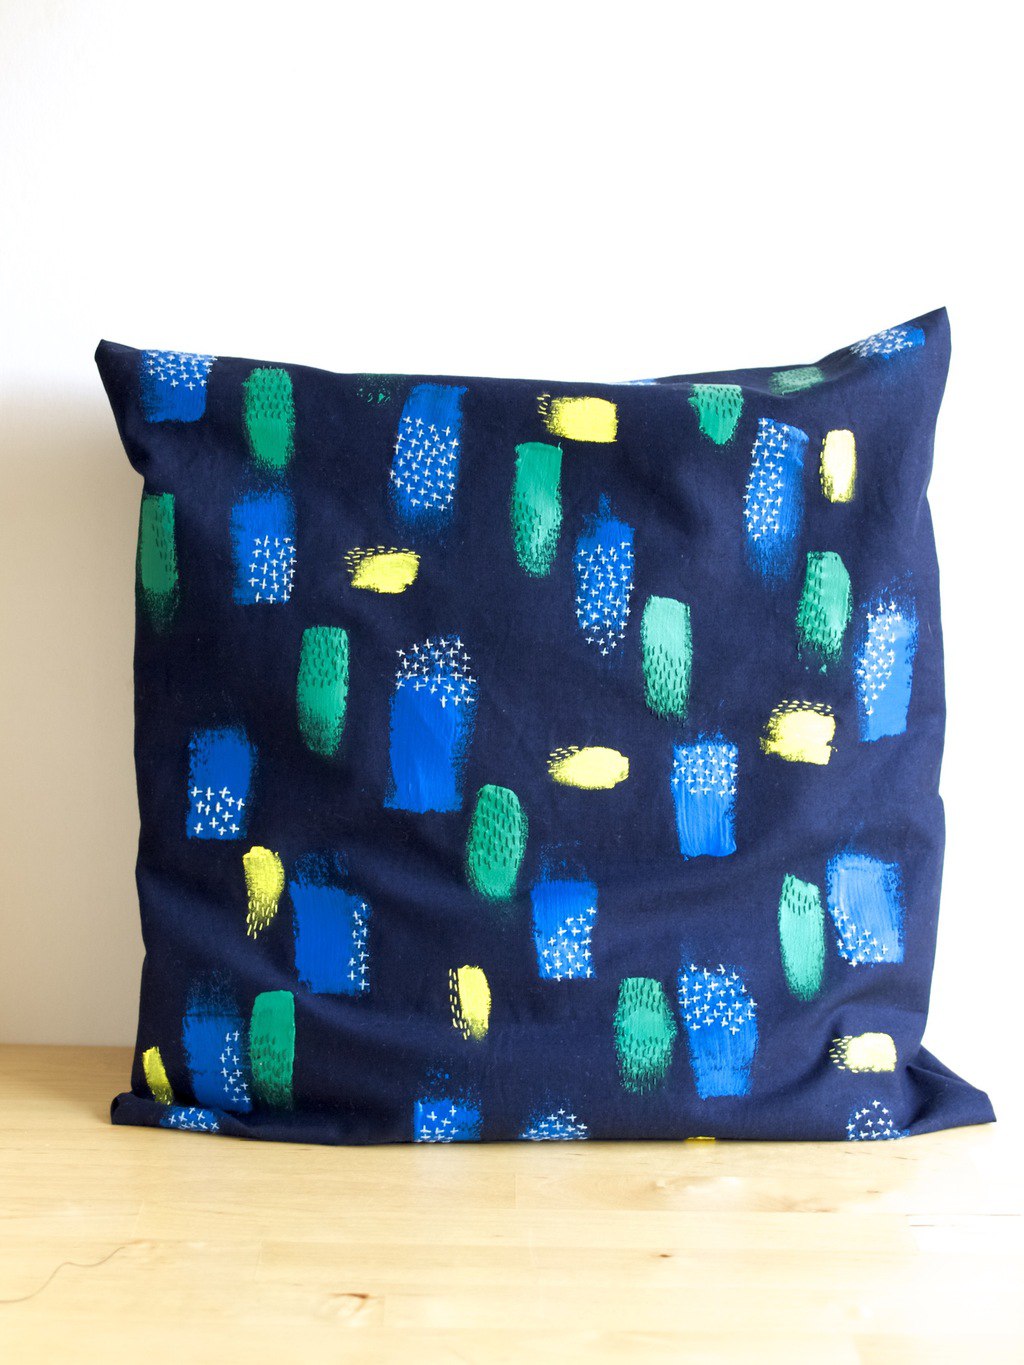
To make this cushion cover I first cut out the pattern needed and then painted it over with some oil based fabric paint (you can use any other fabric paint, but since I did it on dark fabric I wanted the paint colour to really stand out).Embroidery inspired by Liz Payne artwork
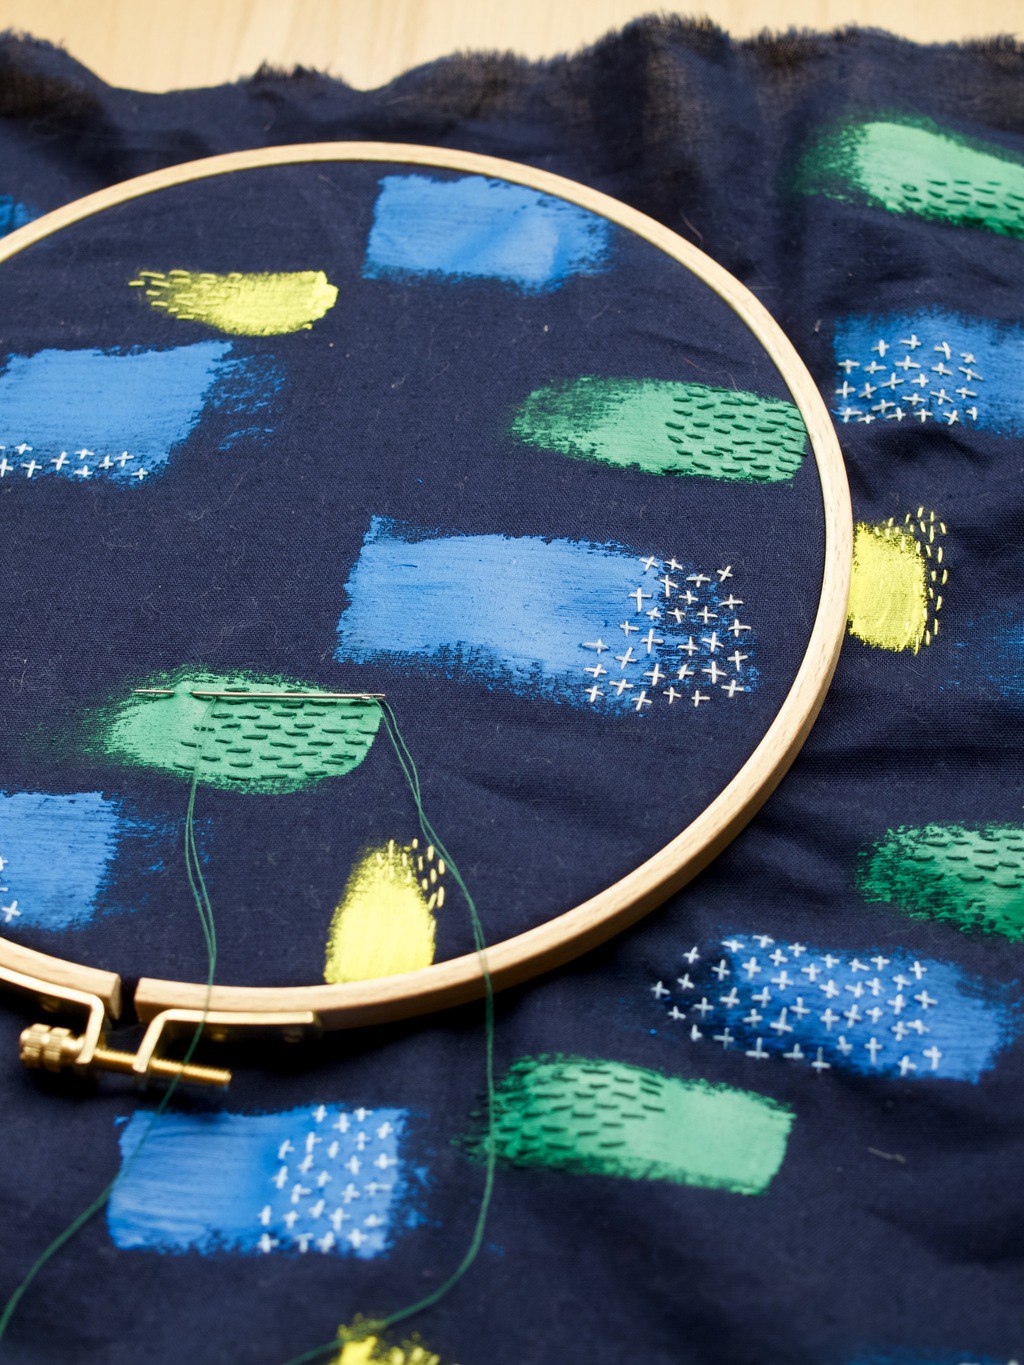
Then I picked 3 thread colours to match the paint and started embroidering all over mostly using straight/basic stitch. I wanted to do other stitches such as fly stitch or even french knot stitch but realised that it would have taken up a lot of time (Liz Payne must really have a lot of patience!).Embroidery inspired by Liz Payne artwork Embroidery inspired by Liz Payne artworkEmbroidery inspired by Liz Payne artwork Embroidery inspired by Liz Payne artworkEmbroidery inspired by Liz Payne artworkThere you go, my finished cushion cover! For full DIY click here.Easy removable cushion cover DIY
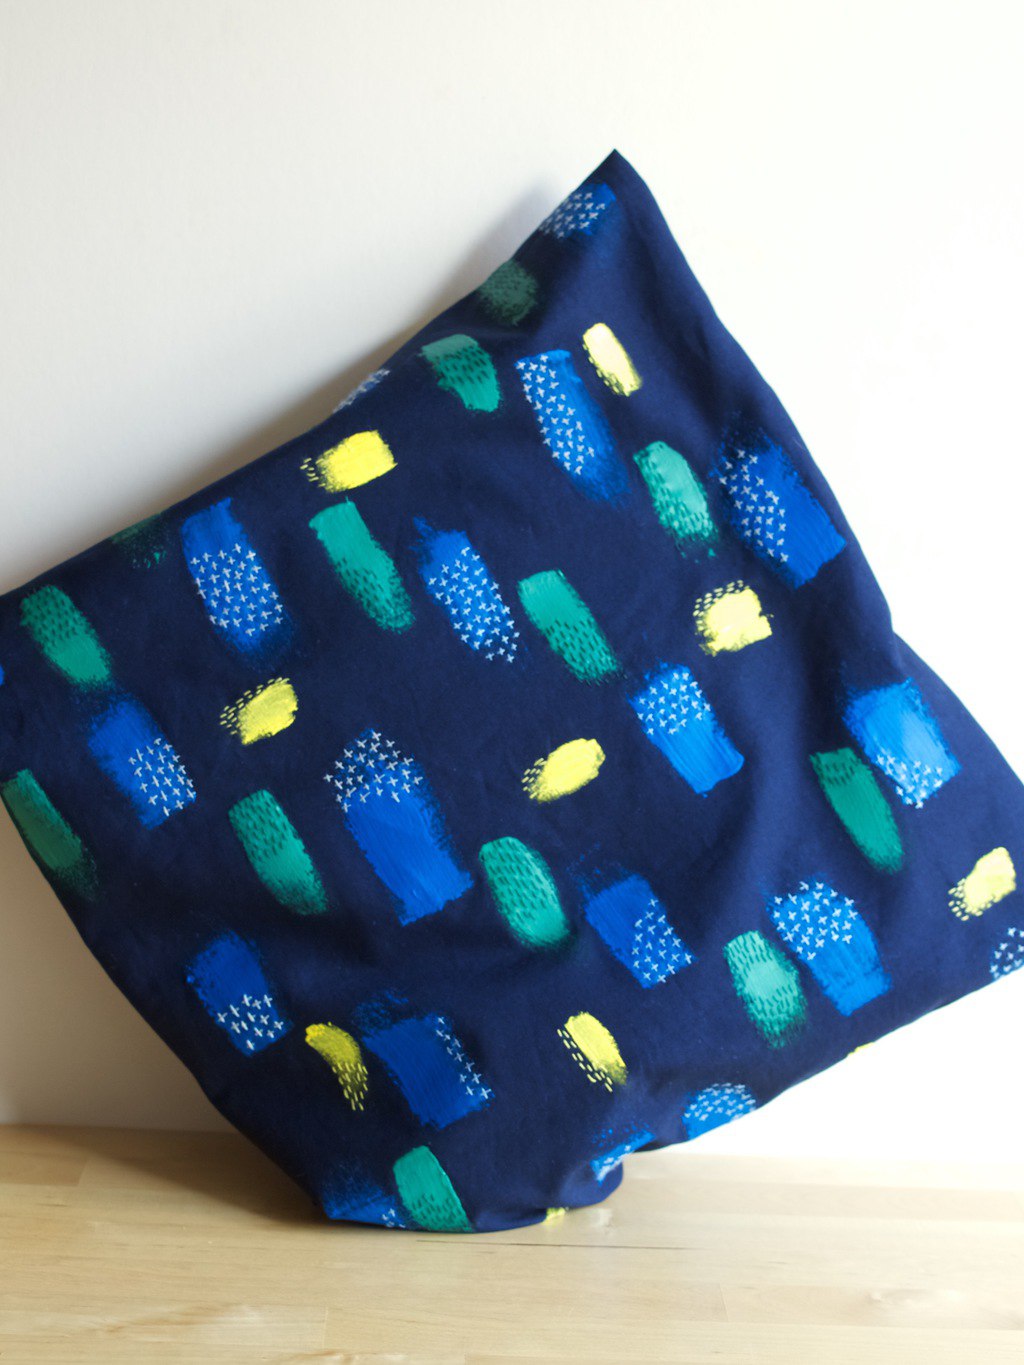
I hope you feel inspired too x

Rasa

0

Never ending, upcycled crochet rug (made of socks!)

Upcycled crochet rug made of socks DIYHi there and here are my olds socks! You are probably wondering why I am showing my colourful collection of socks that I no longer wear. Well… I kept them for very very long for the day like this when I finally go ahead and do the upcycling project that I had thought of ages ago. To be honest what really prompted me to do it is finding out that my friend is also on the same idea and well ahead of me ( I am quite competitive and everything tend to be a race for me even if the other person have no idea that I am racing with them), I went ahead and did it.

So today I will share how it all went. I essentially made a mini rug (still in process to get bigger and bigger) out of socks that are too worn to wear but too pretty to throw away. Upcycled crochet rug made of socks DIYTo make the ‘yarn’ I have cut the sock in spiral direction,Upcycled crochet rug made of socks DIYthen joined it with other socks by tying the knot.Upcycled crochet rug made of socks DIYI ended up with a ‘yarn’ ball that was big enough to start crochet. I started with the chain stitch!Upcycled crochet rug made of socks DIYThen formed a circle. For the tutorial video click here!Upcycled crochet rug made of socks DIY Upcycled crochet rug made of socks DIYWhen the ‘yarn’ ball is finished you can always attach another sock to it. It can be never ending, always expanding circle rug!Upcycled crochet rug made of socks DIYHide all the knots on the wrong side (that side that faces the floor, which is not visible).Upcycled crochet rug made of socks DIYMy rug is tiny at this moment, but don’t you worry it will soon expand when I add all Joni’s old socks in it :-D.Upcycled crochet rug made of socks DIY Upcycled crochet rug made of socks DIYI hope you found this inspiring!

Rasa xoxo

0

It’s a hold up! Feathers McGraw strikes again! (as a door stopper)

Feathers McGraw door stopper DIYDo you remember this from Wallace & Gromit “The Wrong Trousers”? If not then I really really recommend watching it! I love every detail of this stop motion movie. Joni and I particularly like the Feathers McGraw character, notorious criminal mastermind and bird of many faces. He is so mysterious and funny at the same time! Joni suggested that  I should make my next door stopper just like him :-). Feathers McGraw door stopper DIY Feathers McGraw door stopper DIY

Feathers McGraw Door Stopper temporary patternI wanted to make Feathers McGraw in his chicken disguise, but sadly making his comb (aka the rubber glove on his head) did not quite work out. The fabric I used (PVC sort of fabric as I thought this would represent rubber glove best) did not invert back well after stitching on the wrong side. Maybe you have better ideas for this? Maybe thinner fabric? Anyways, the pattern above is an initial pattern that worked well, minus the chicken comb. Click HERE to see how I made it!Feathers McGraw door stopper DIYFeathers Mcgraw turned out quite friendly after all, he serves as a perfect door stopper :). Really pleased with this project!Feathers McGraw door stopper DIYI hope you will enjoy this project too!

Rasa :)

0

How to transform a stuffed toy into a door stop

How to transform a stuffed toy into a door stopper, step-by-step DIY guideSince we have moved to our new home we have been missing doors kept open everywhere. The issue is that it’s not easy to keep a heavy door open. The door stopper seems like the only solution. If only we had one door to stop! We have at least three doors that we would like to keep open and we have been stopping it with random stuff such as old laptops (the ones that no longer work, but Joni is keeping them for further experiments). Anyhow, only yesterday I thought of the idea to easily make a door stopper from a stuffed toy. I am thinking to make more door stoppers in the future of course (well… at least one more), but for now this seemed like a great idea! I used this stuffed bird toy that I made last year as a pillow initially, but then it became a shelve deco instead. The only other material/tools I needed to make this transformation is a seam ripper, matching tread & sewing needle and ceramic baking beans (general gravel stones, rice or beans can be used as well, although if you are using grains you probably would need it in bigger quantities). How to transform a stuffed toy into a door stopper, step-by-step DIY guideTransforming a stuffed toy into a door stopper is easy. All you need to do is open a seam at the bottom of the toy by using a seam ripper(1.), remove some of the stuffing (not all as you need some to keep a soft shape)(2.) and fill it with the heavy filling such as ceramic baking beans (3.). Don’t forget to stitch the seam back to how it was ;-) (4.).How to transform a stuffed toy into a door stopper, step-by-step DIY guideIt’s important to remember that you choose a stuffed toy that have a good/wide bottom base. This bird only managed to keep the lighter door open. This is because it has a very slim base with only one seam at the bottom.  In this case I would add more weight by inserting more of ceramic bean filling. I am sure you can play around with the different types of heavy fillings to make it work for you ;-). How to transform a stuffed toy into a door stopper, step-by-step DIY guideDoor stopper works the best when it is placed at the edge of the door. It also depends on what surface you are placing it on. It worked really well on the carpet, whilst on the tiles or wood floor the door stopper might slide. How to transform a stuffed toy into a door stopper, step-by-step DIY guideHope you found this helpful ;-)

Rasa xoxo

0

Painting terracotta pots

Painted terracotta pots DIYI don’t know about you, but I really like having variety when it comes to plant pots. I recently have found few terracotta pots in my front garden, so I thought I should paint them since I already had one naked terracotta pot ;-).

Painted Terracotta Pots DIY

All I did was paint the pot with the interior paint (I mixed ivory colour with black to get this lovely grey). Let it dry between each colour (1-2). I lightly brushed the dry paint with sand paper to get the vintage effect (3). Finally, I have sealed the paint with PVA (4): that is 5 parts water and 1 part PVA.

Painted terracotta pots DIY Painted Terracotta pots DIY

I hope you enjoyed this little upcycling technique :-)

Rasa x

1