Top

Archive | Savoury Delights

Basic potato pancakes

Basic potato pancake recipe
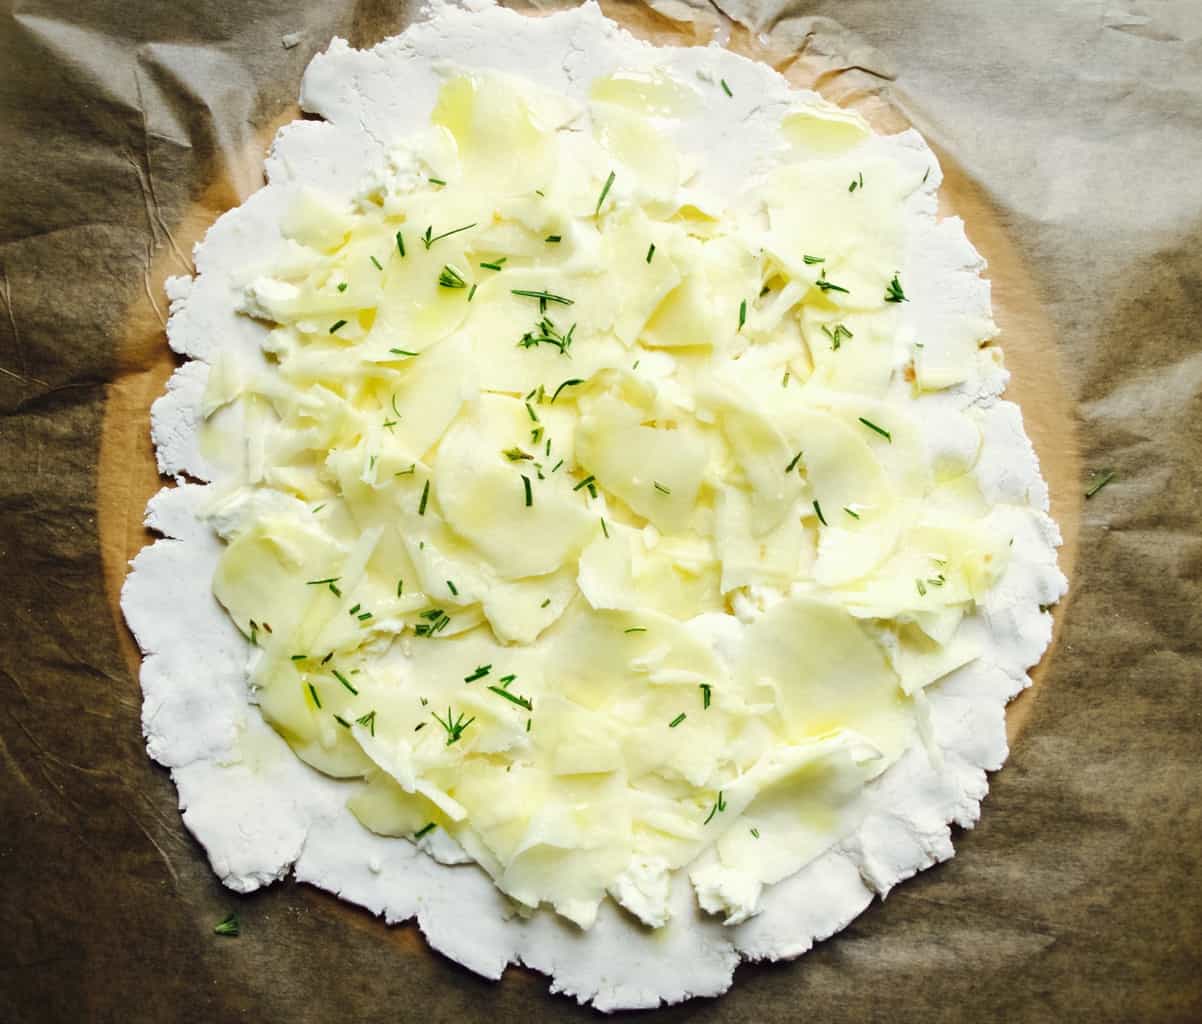
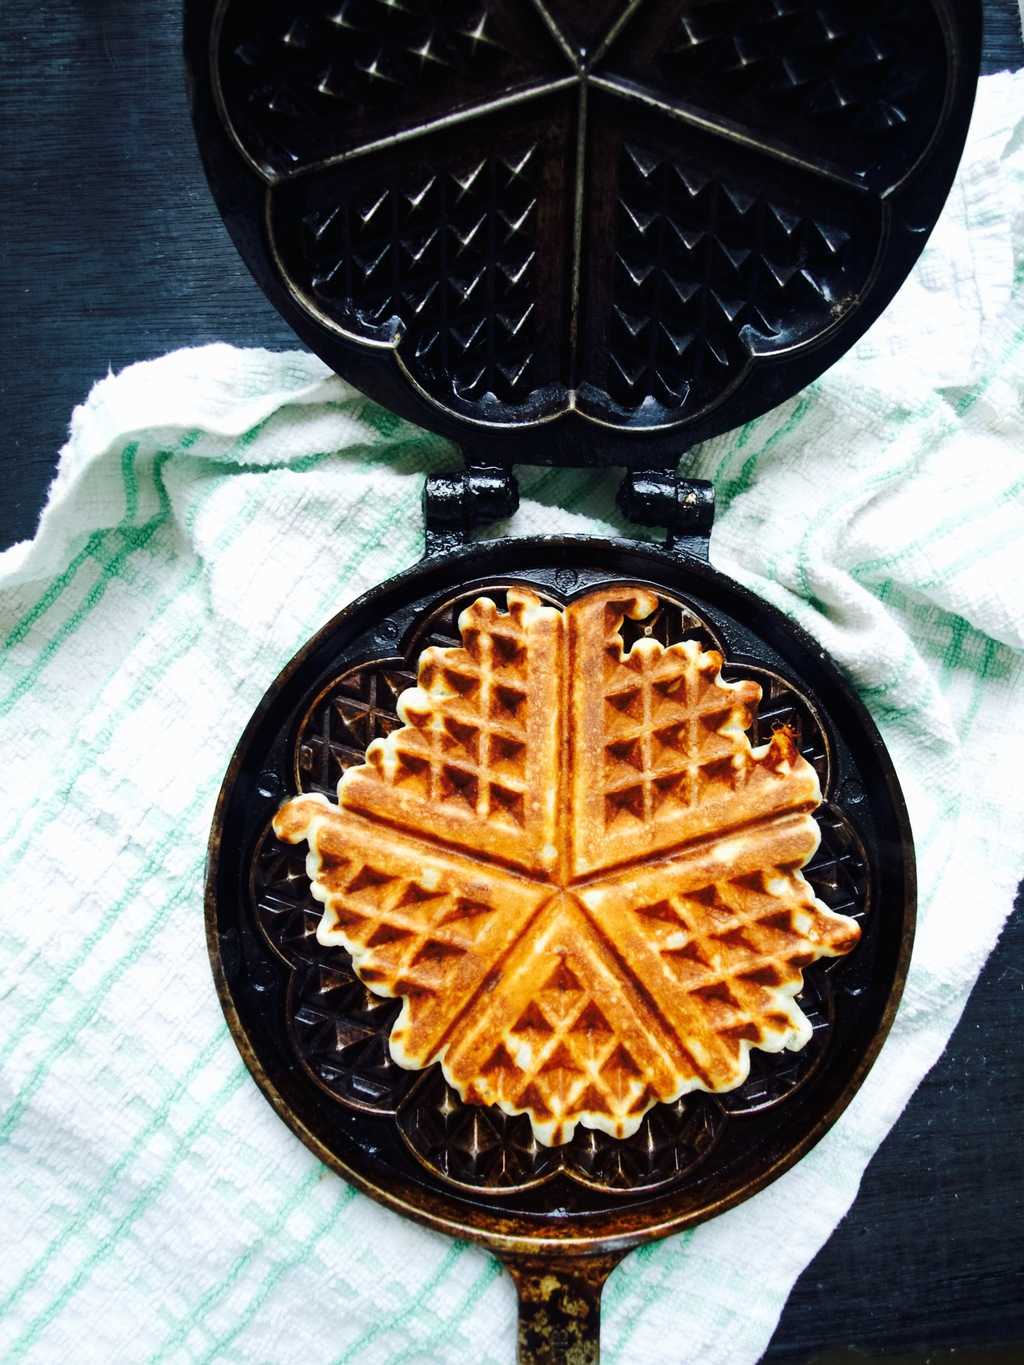
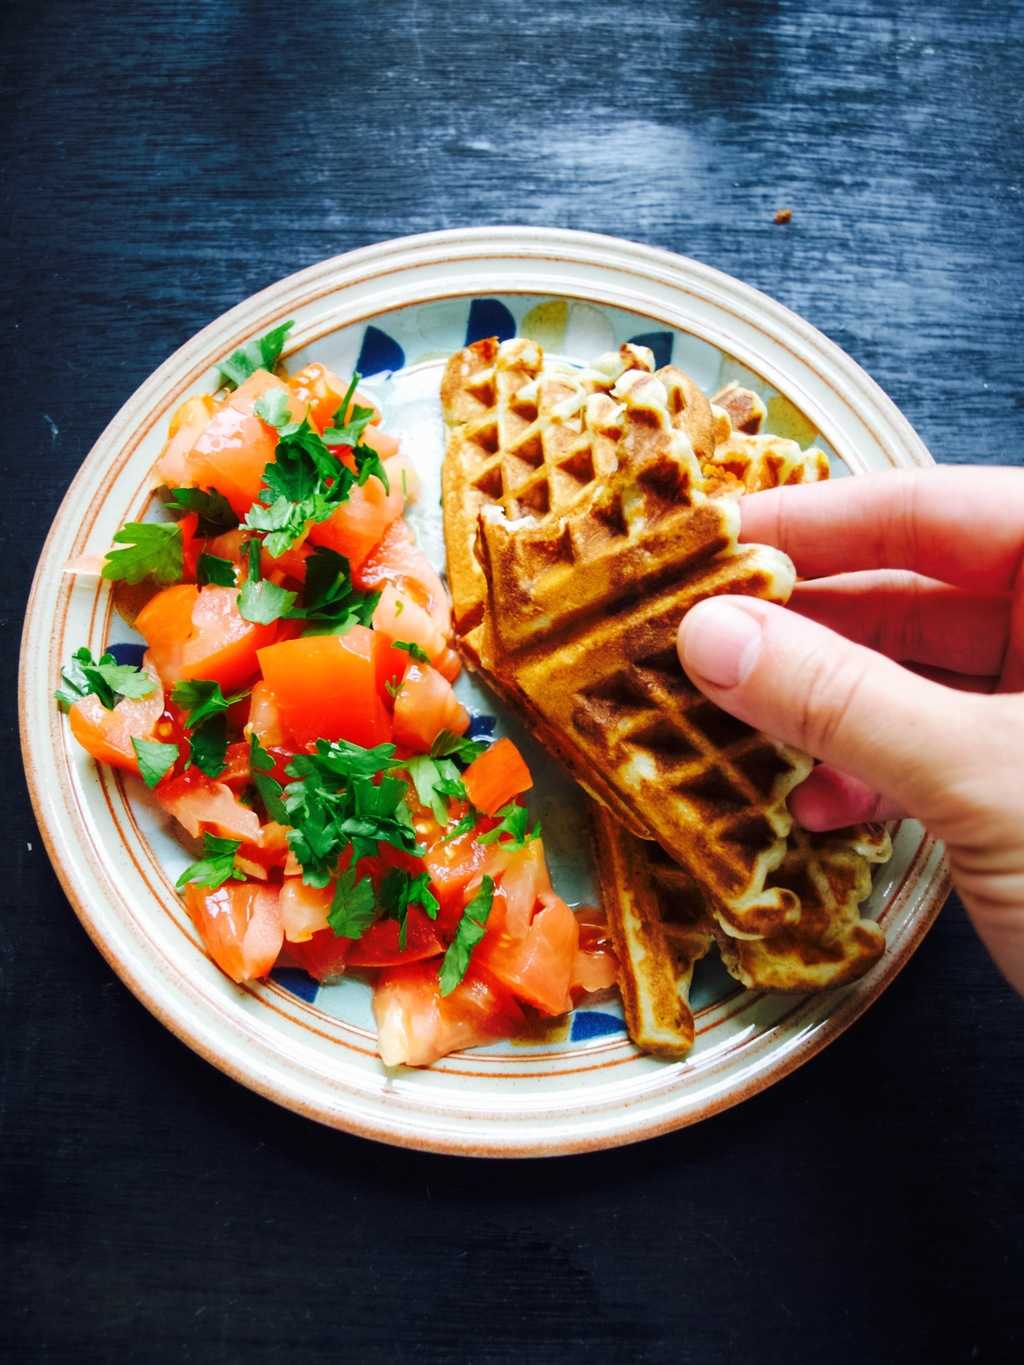
Yey! The pancake day is here! I thought I will share one of my savoury pancake recipe for this occasion ;-). It’s a potato pancake but not how you imagine. It’s not an Eastern European type of pancake that taste a little like a hash brown (although they are very tasty too) and it’s not a vegan type of pancake either. However it is a very versatile pancake that is tasty on it’s own or with the filling. I adapted this recipe from this waffle recipe. I loved it too much, but now in the pancake form I think I can enjoy it more frequently. Yum! Basic potato pancake recipeBASIC POTATO PANCAKES

  • 2 medium sized potatoes, cut into small uniform pieces
  • 2-4 garlic cloves
  • 1 onion
  • 1 tbsp fresh rosemary leaves (optional)
  • 60ml olive oil
  • 160ml milk
  • 2 eggs, whisked
  • 125g plain flour
  • salt and pepper to taste

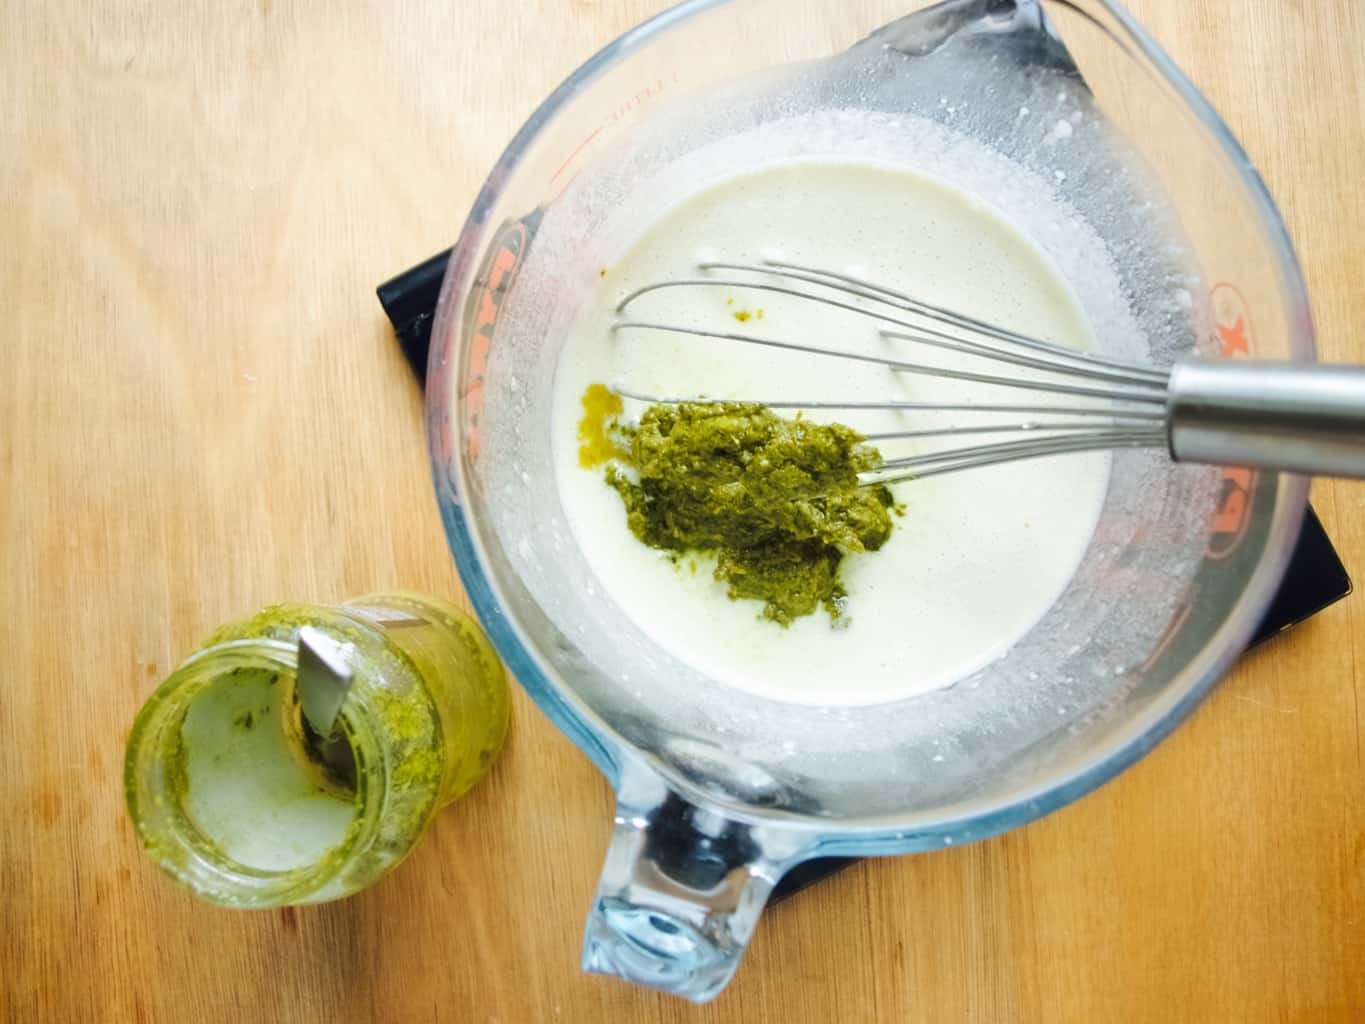
1. Put potatoes and garlic in a large pot with cold water to cover. Add a pinch of salt and bring to a boil. Then lower heat and cook until potatoes can be pierced easily with a fork drain, reserving about 60ml of potato/garlic water.Basic potato pancake recipe 
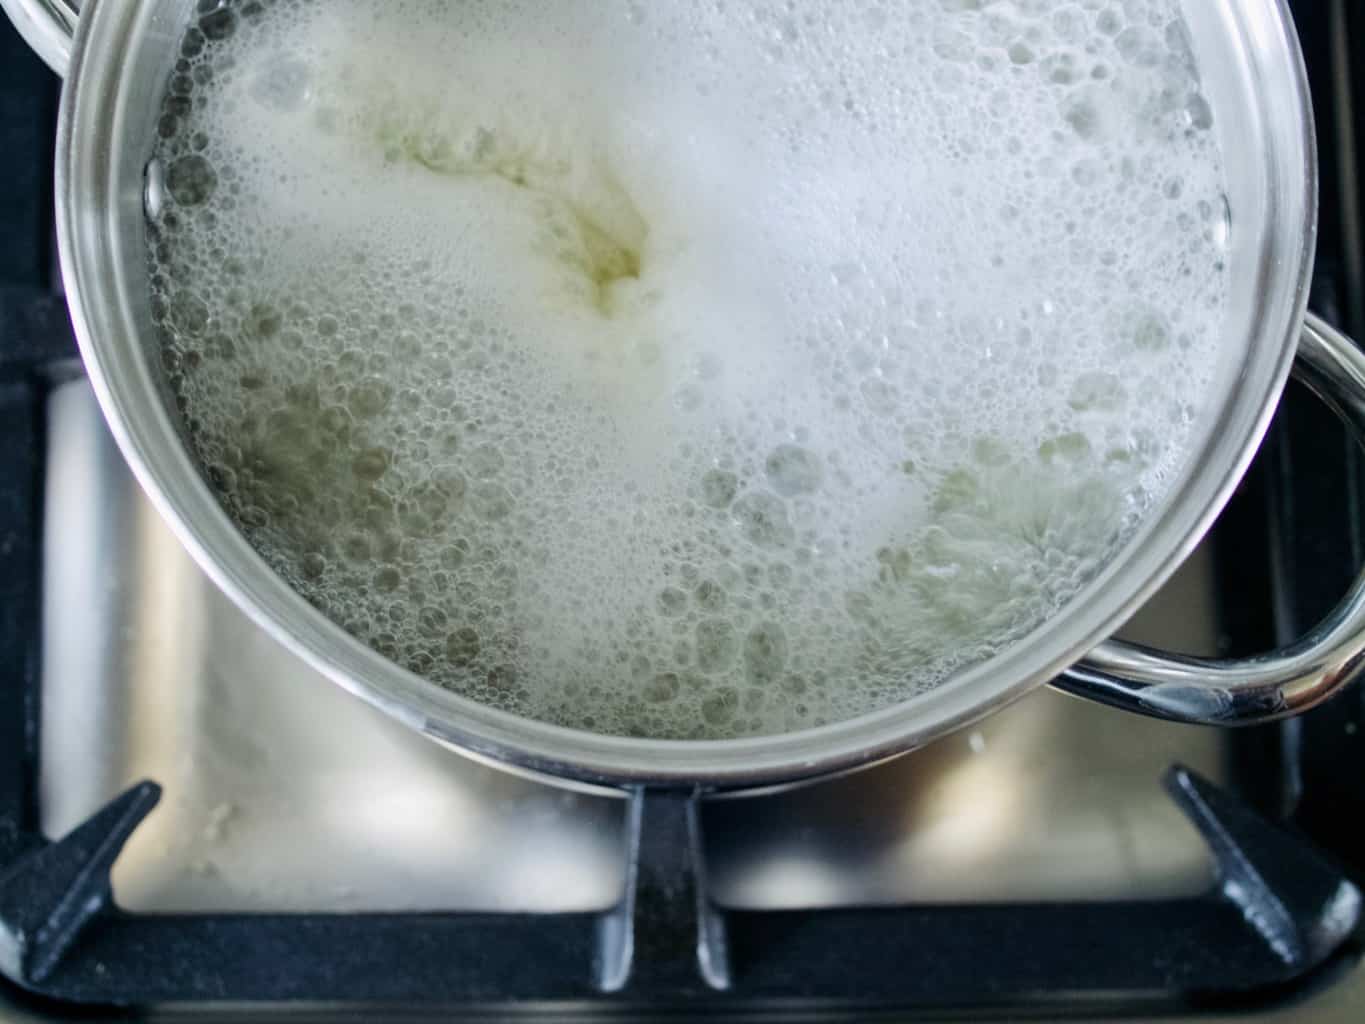
2. While potatoes cook, puree onions with rosemary leaves if using. Heat olive oil and fry onion in a frying pan over low heat just until onion softens a bit.Basic potato pancake recipe
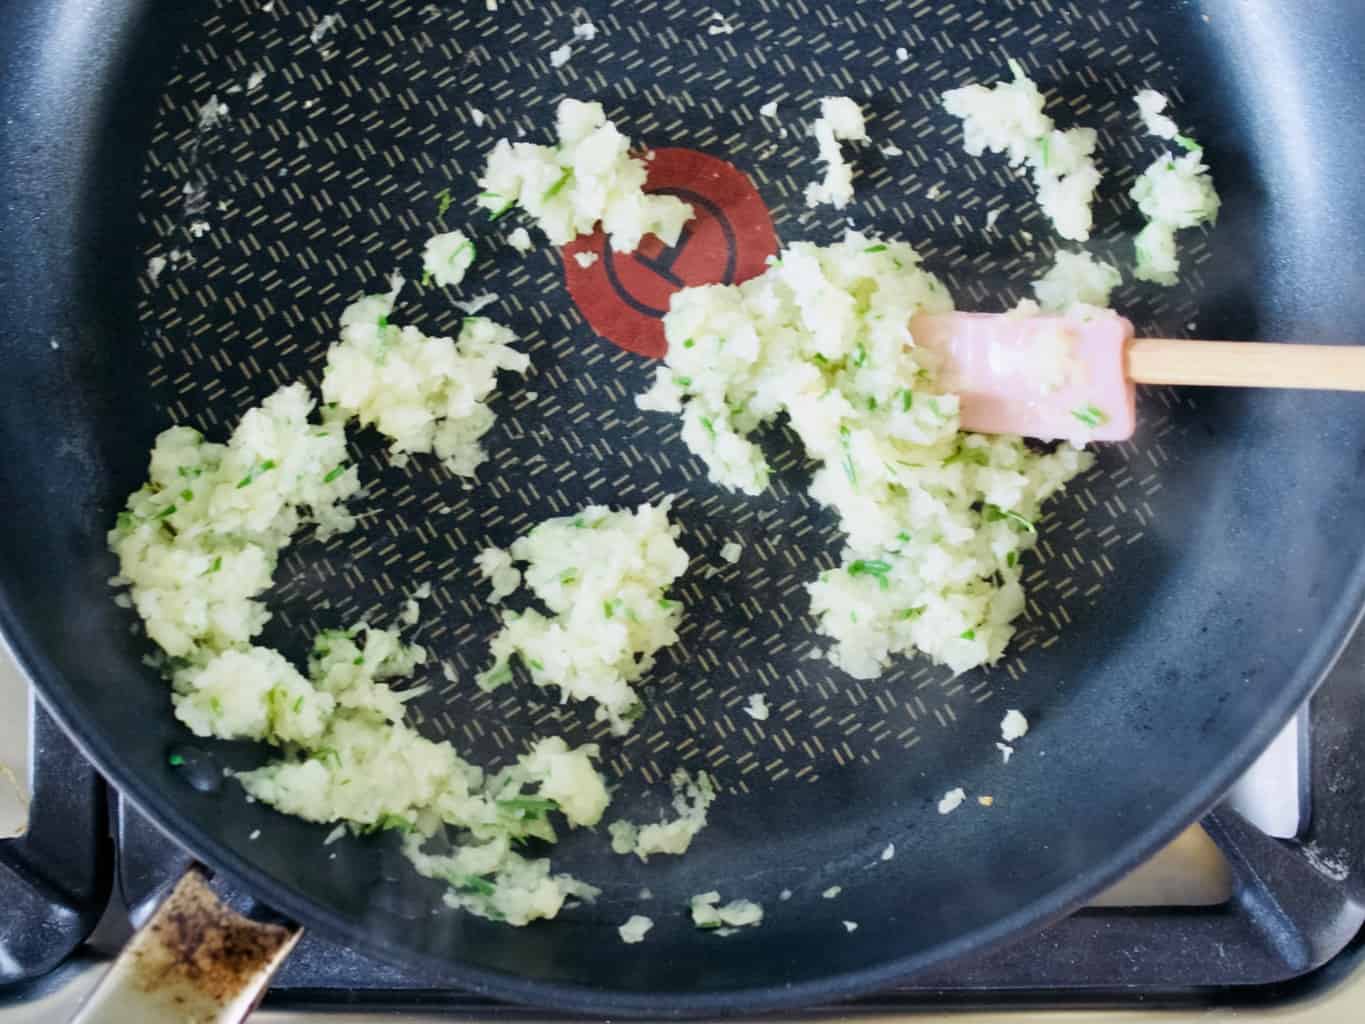
3. Transfer the potatoes and garlic into the bowl or large mixing jug. Mash it and mix it together with onions.

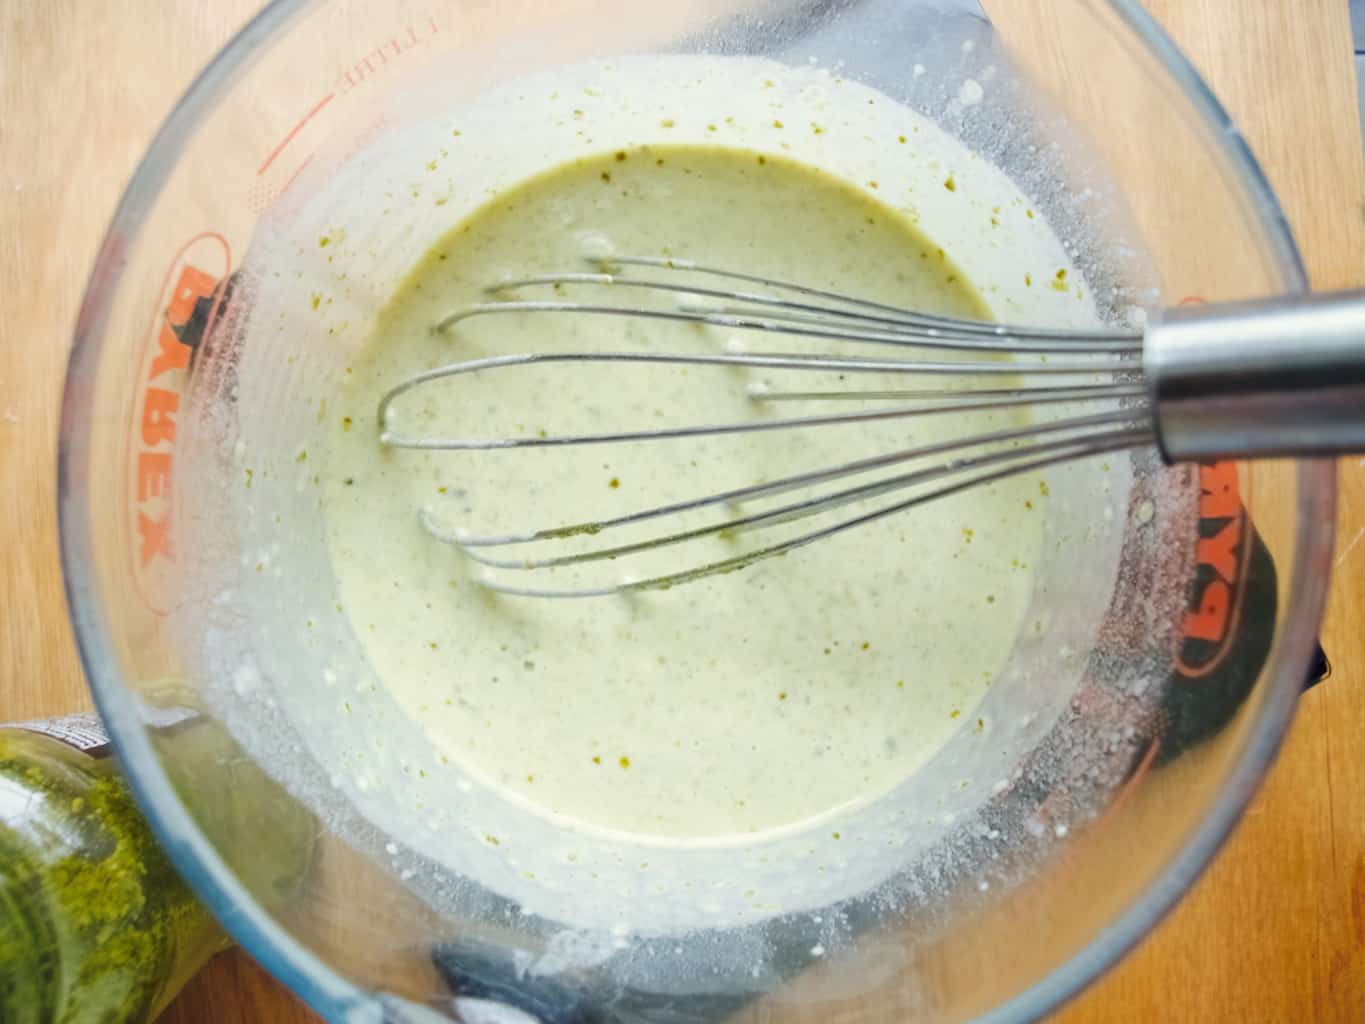
4. Gradually add garlic/potato water, oil, milk and eggs while constantly mixing so it all combines well. Eventually add flour and seasoning and give a last mix. Basic potato pancake recipe 
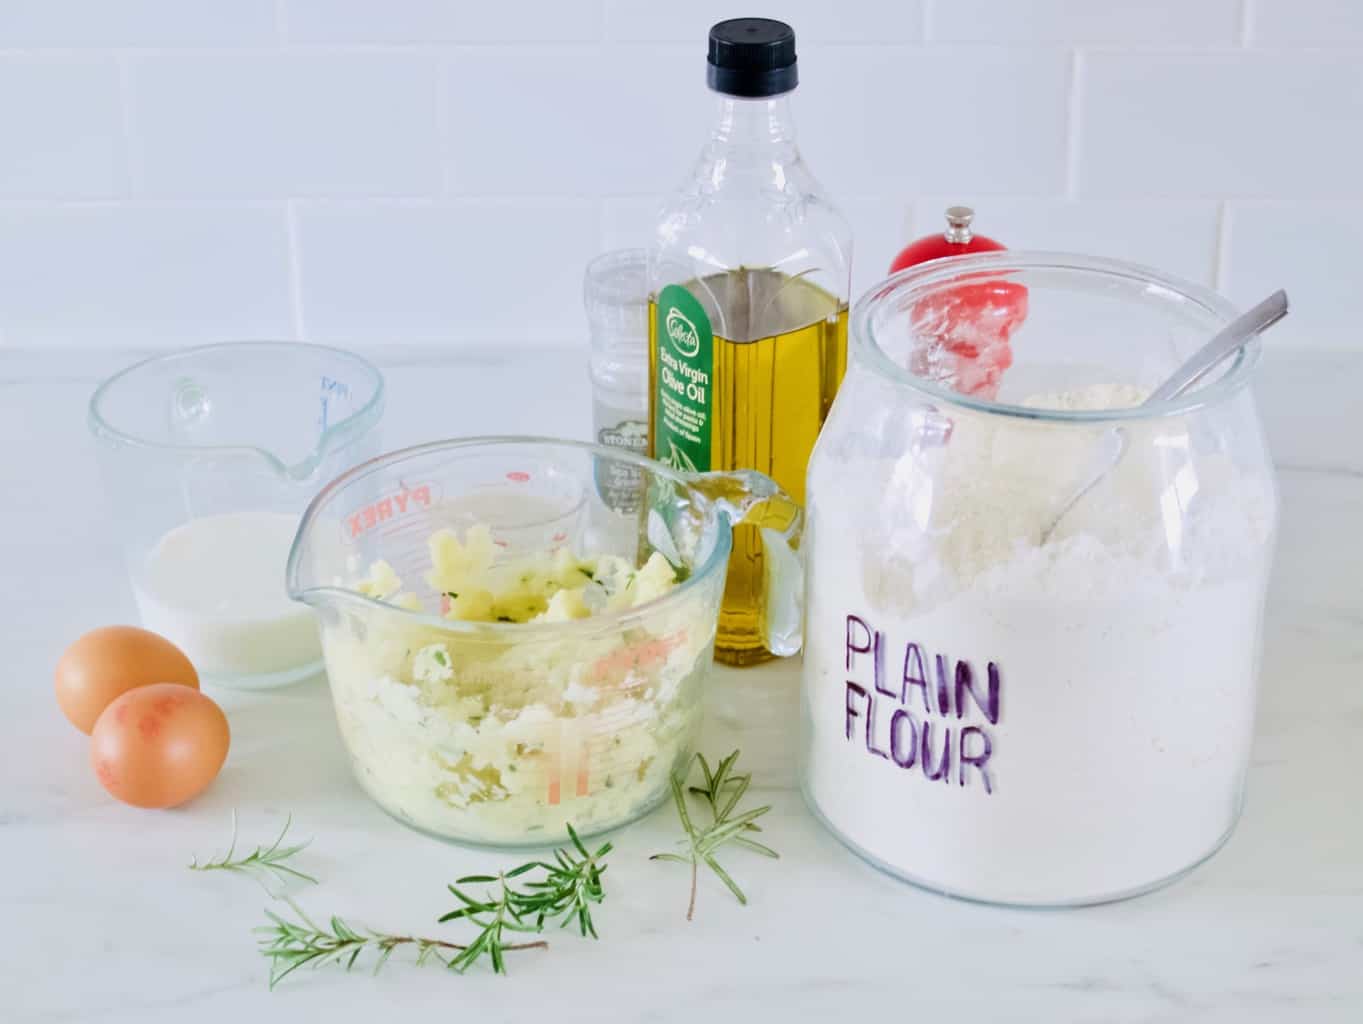
5. Fry pancakes in well heated pan with little oil. Pour one spoonful to the pan and immediately start swirling round the pan to get nice even layer. Lift the pancake to flip and cook the other side as well. Basic potato pancake recipe 
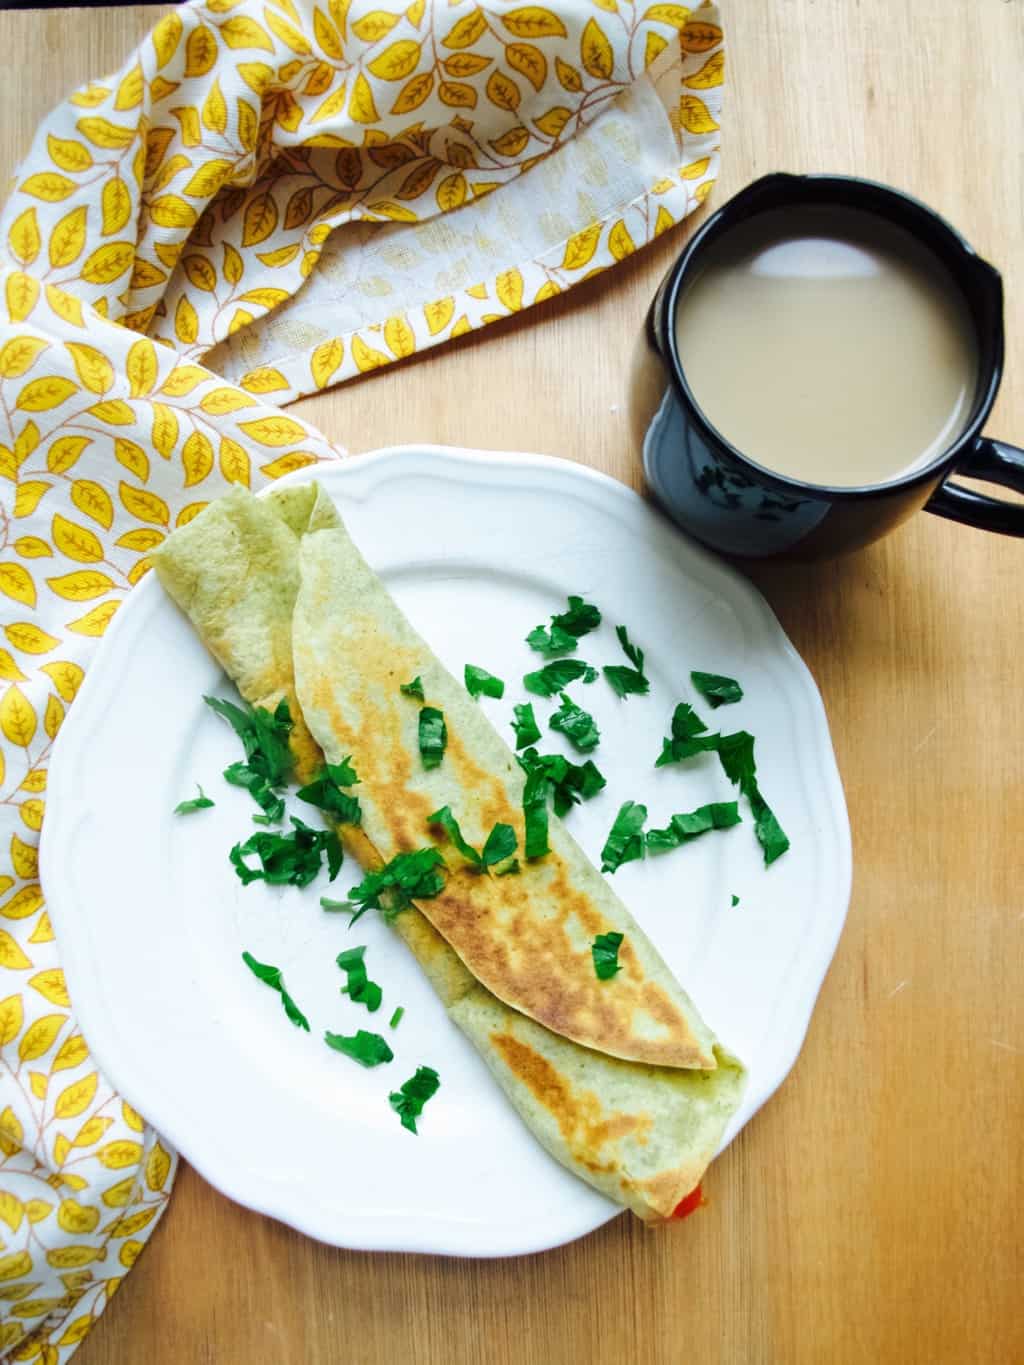
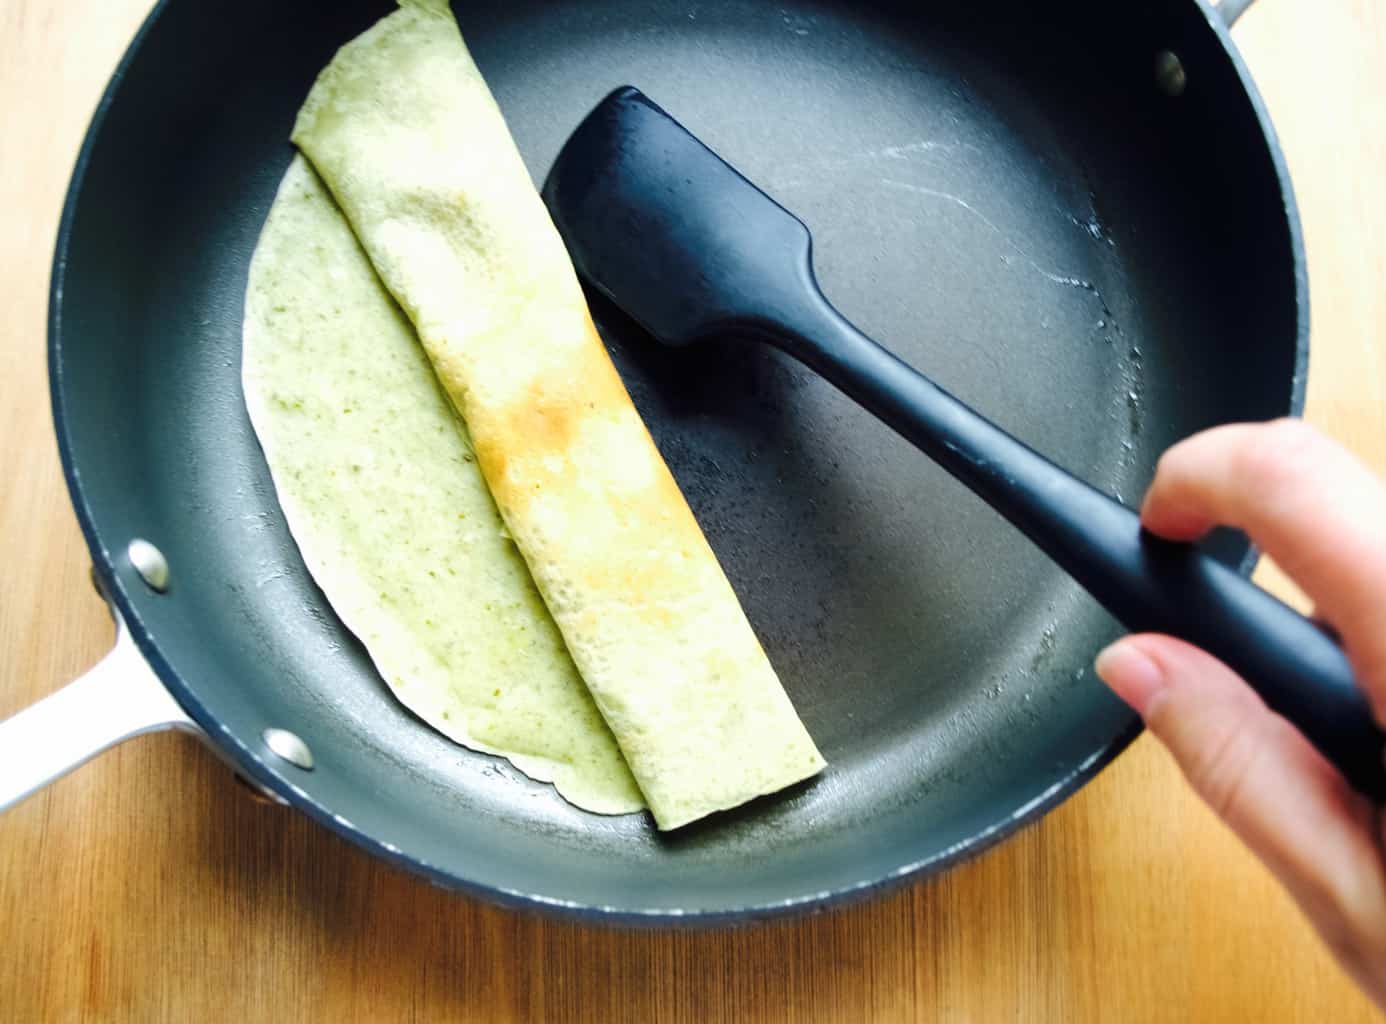
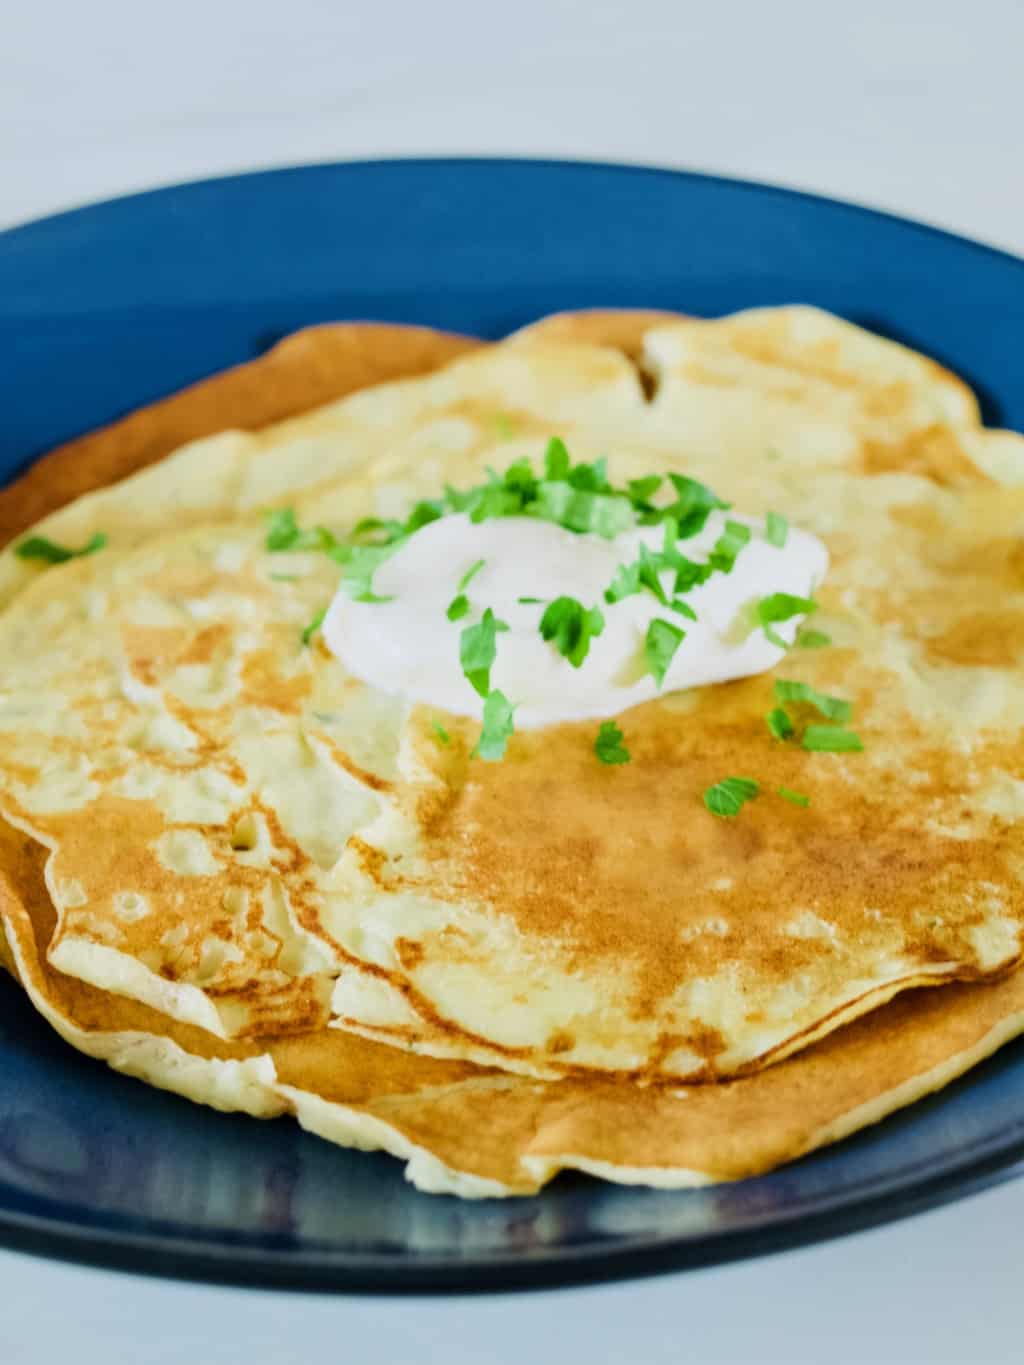
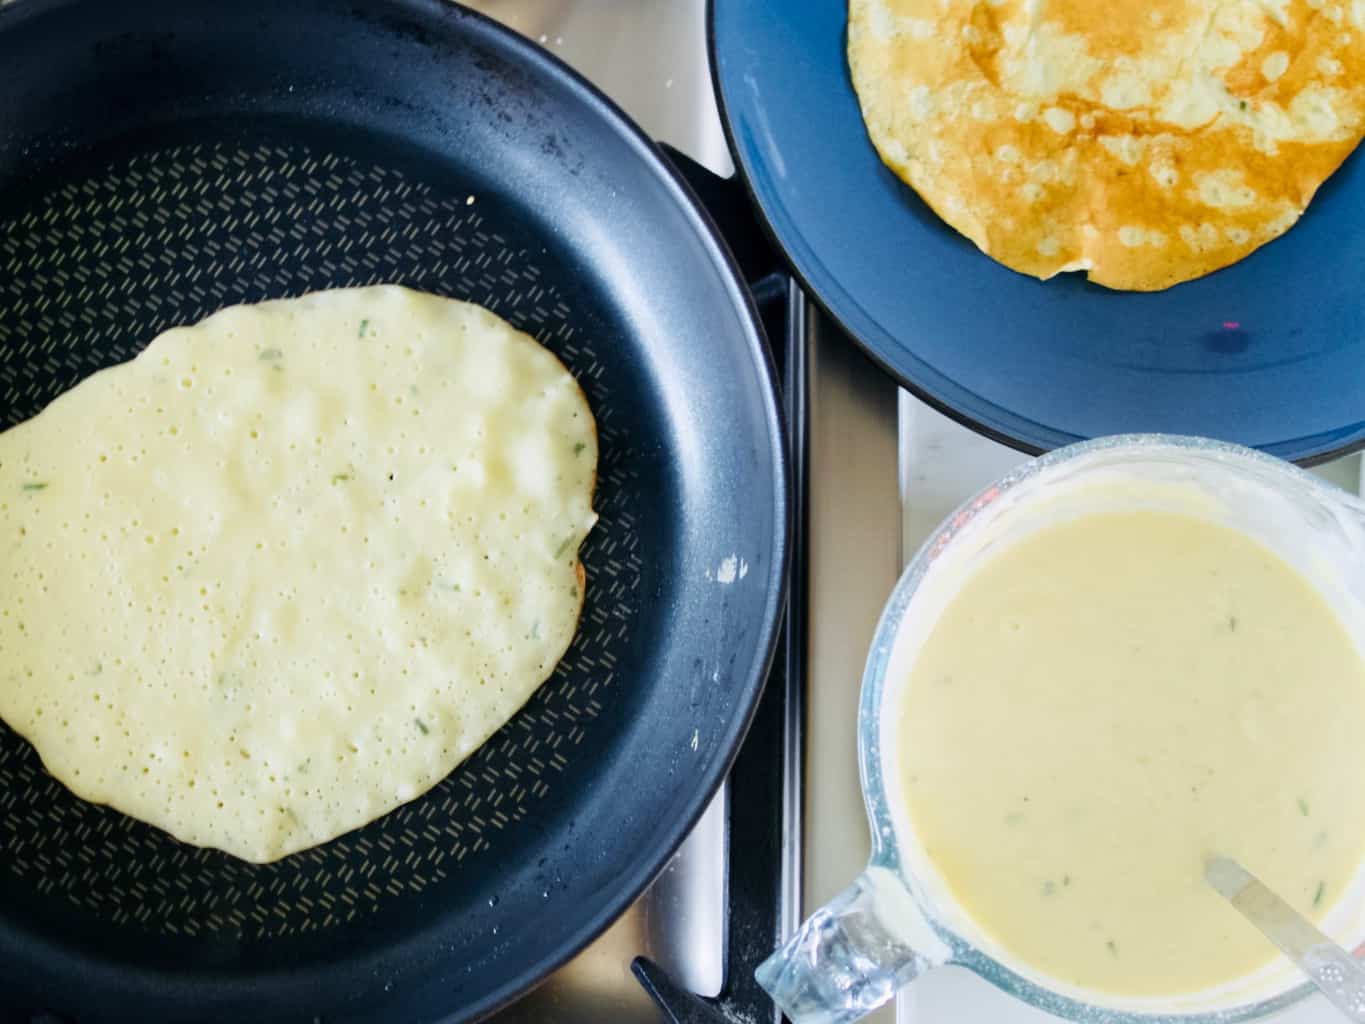
Serve it either with a dollop of creme fraiche  and parsley. Basic potato pancake recipe
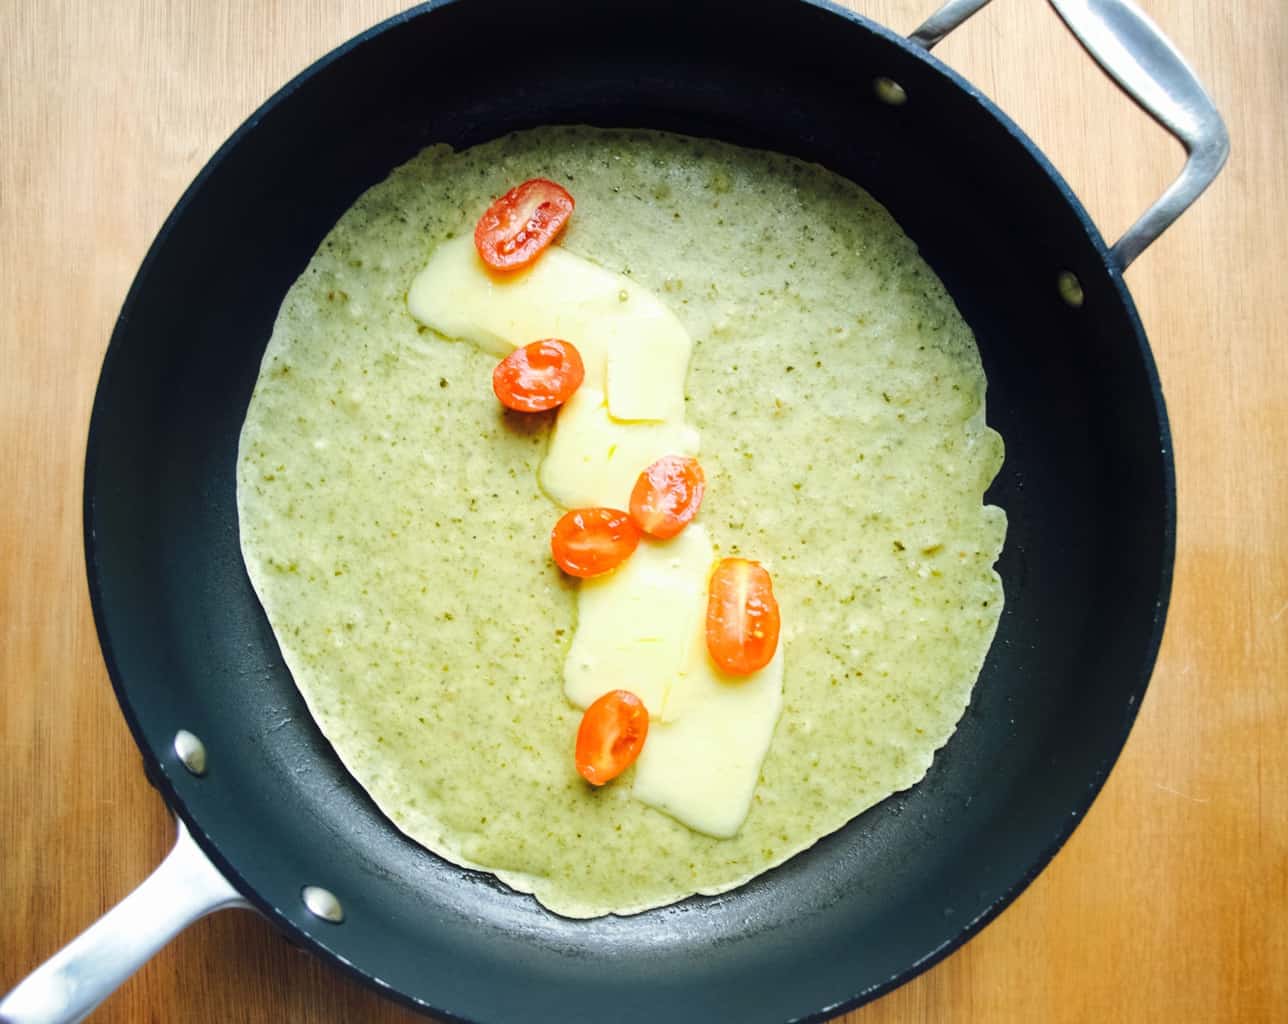
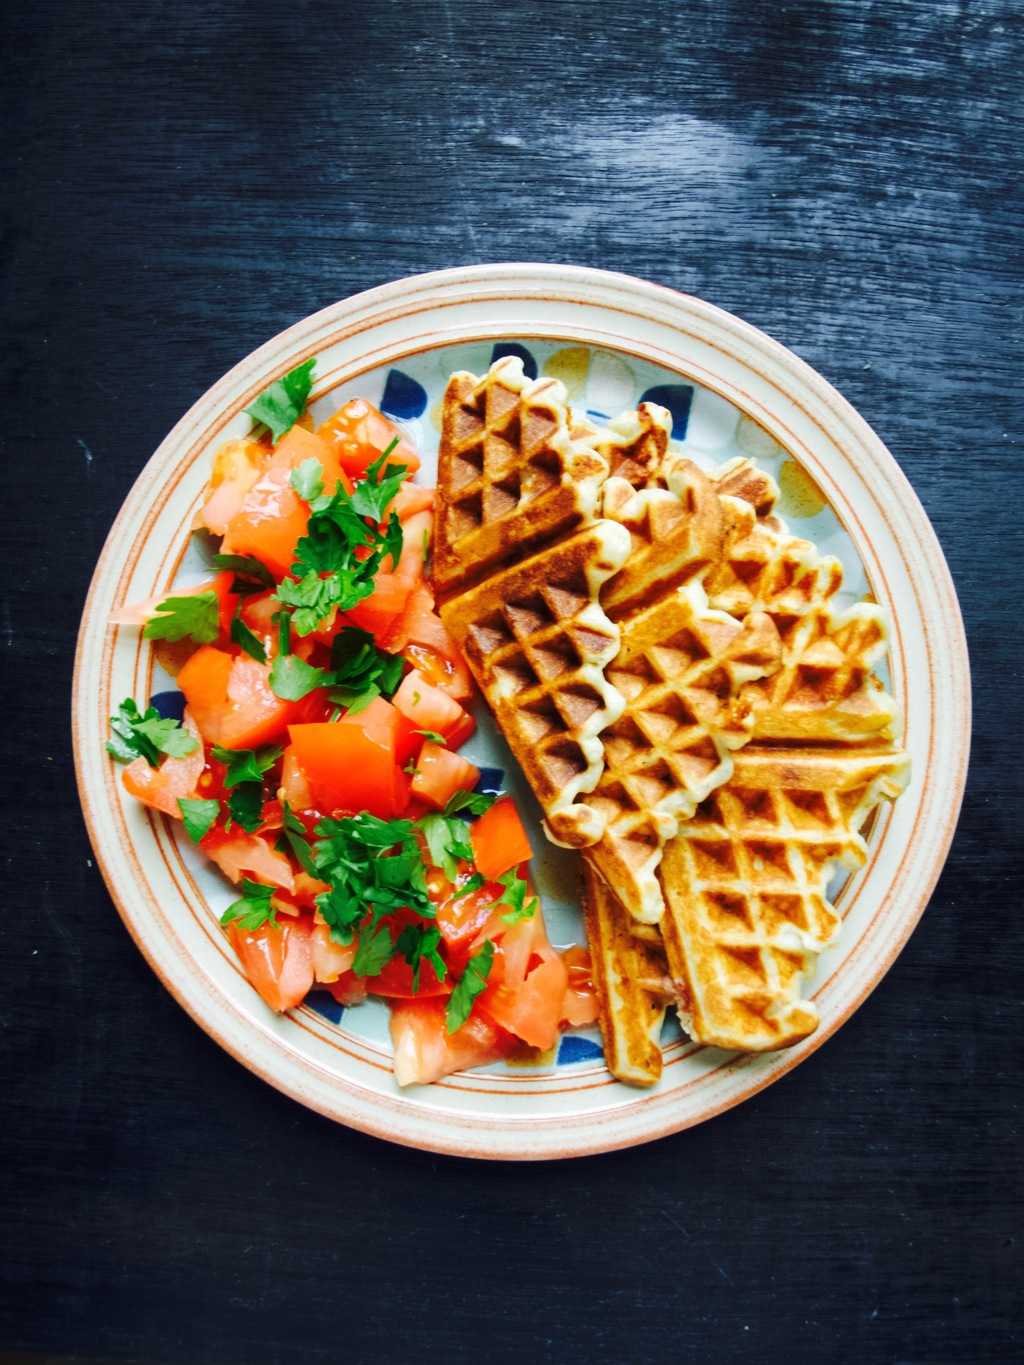
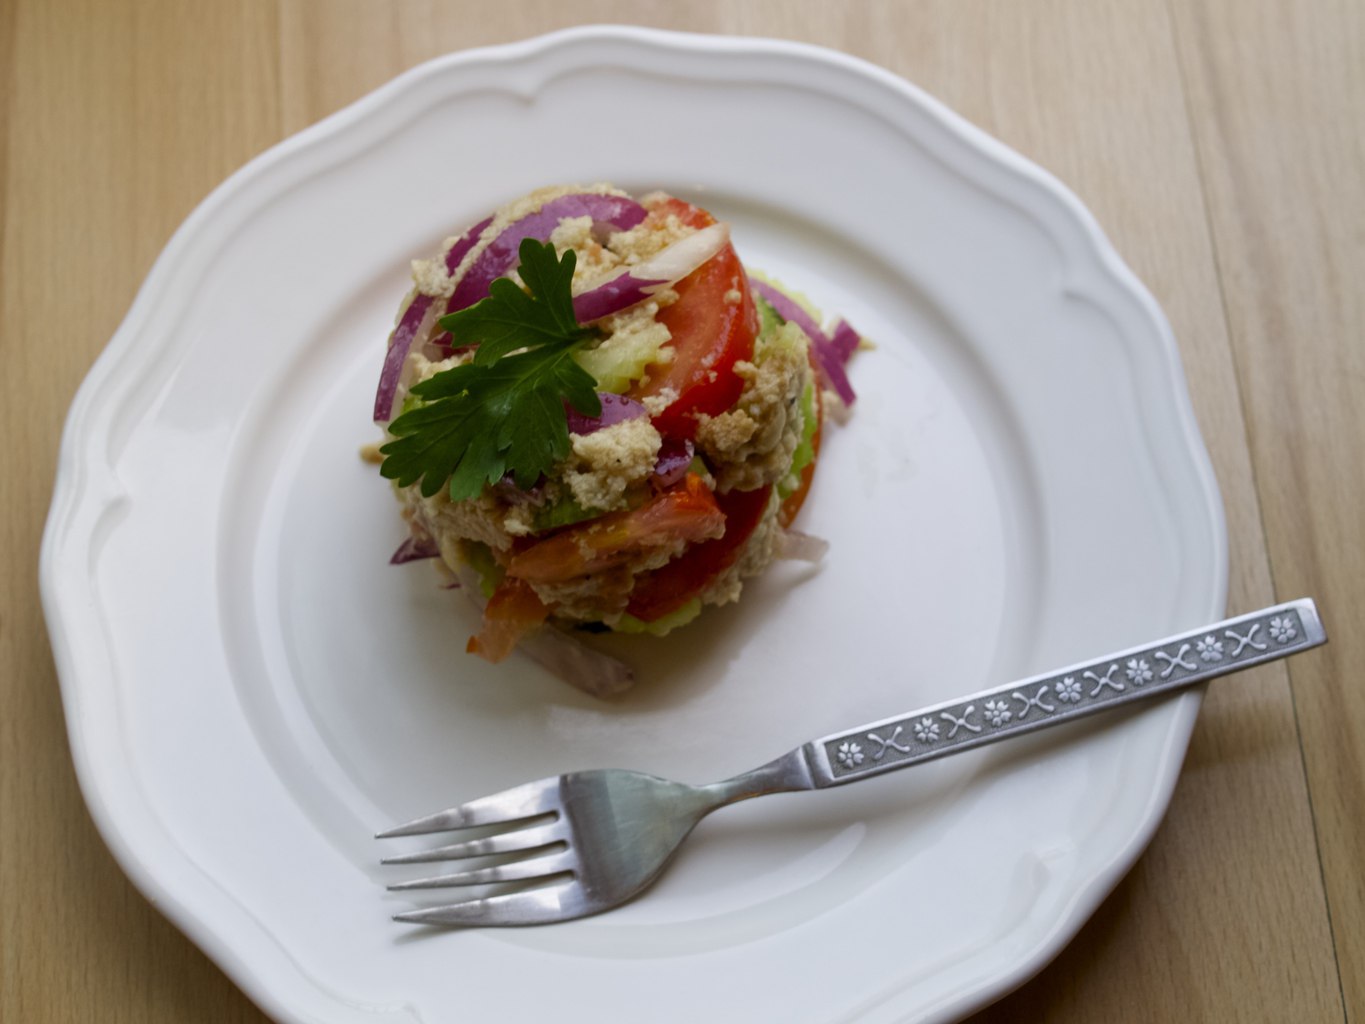
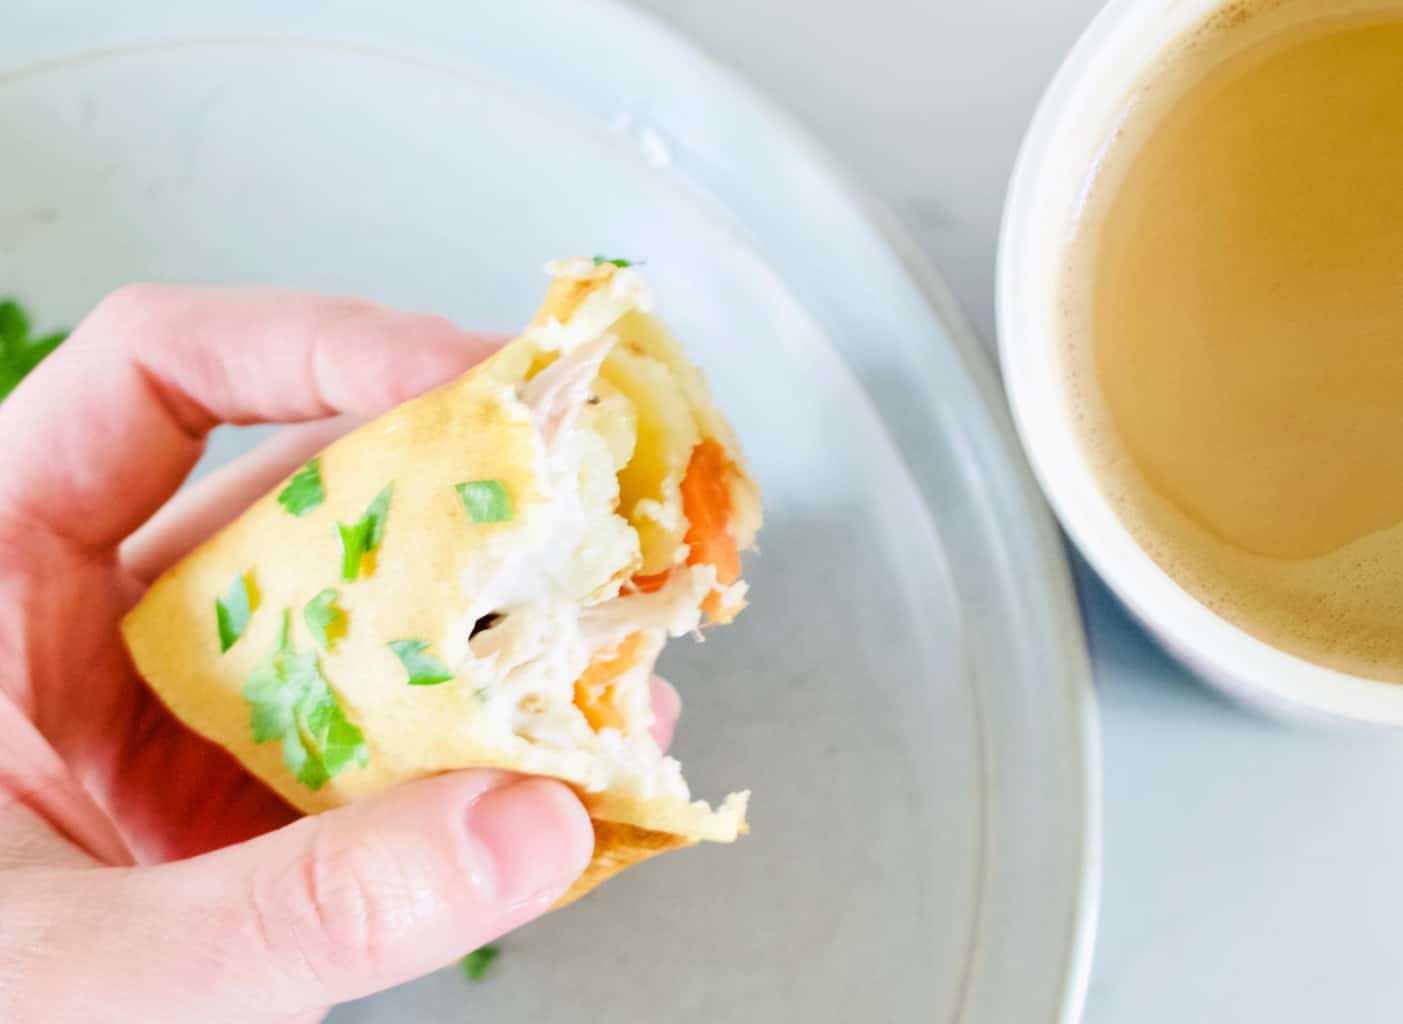
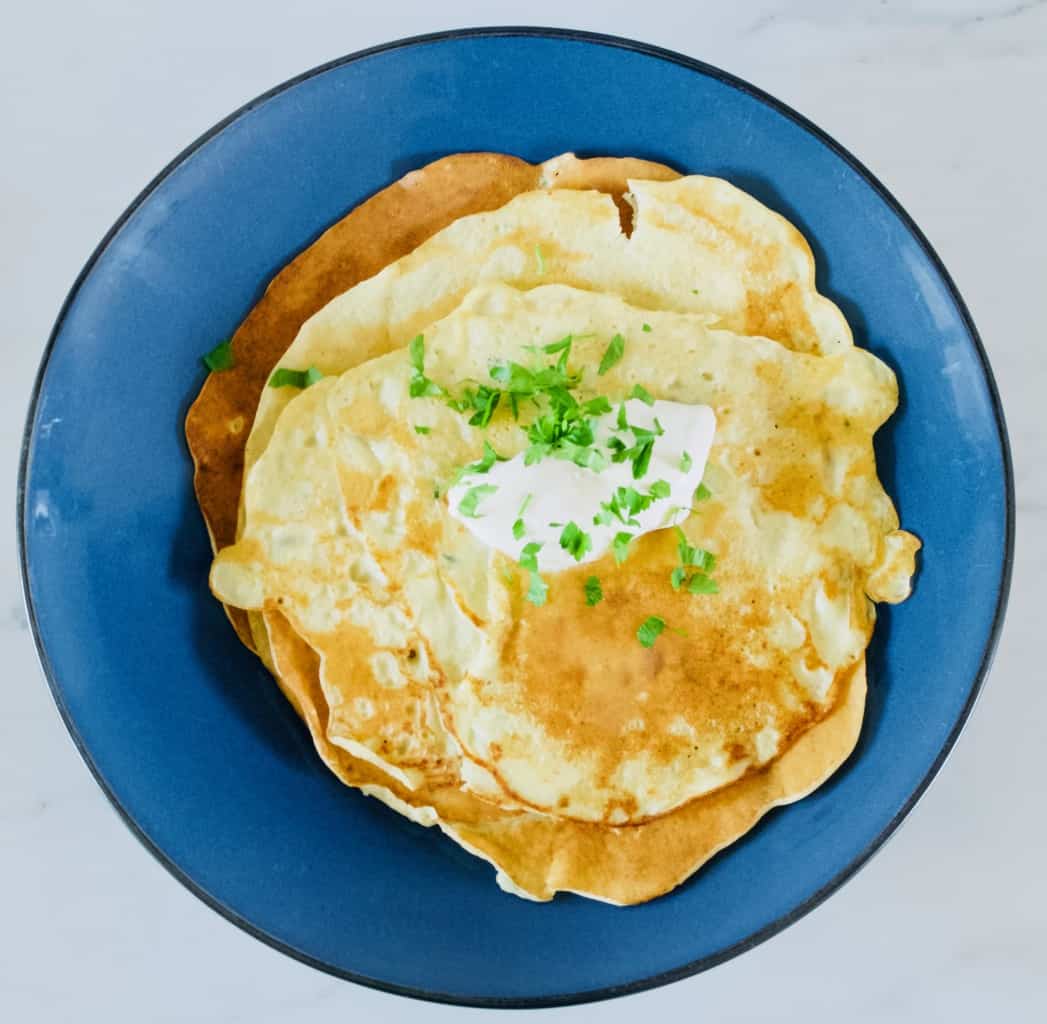
Or if you like you can use these pancakes as a wrap. There are quite many fillings to experiment with. We had chicken roast the other day so that went really well with it!
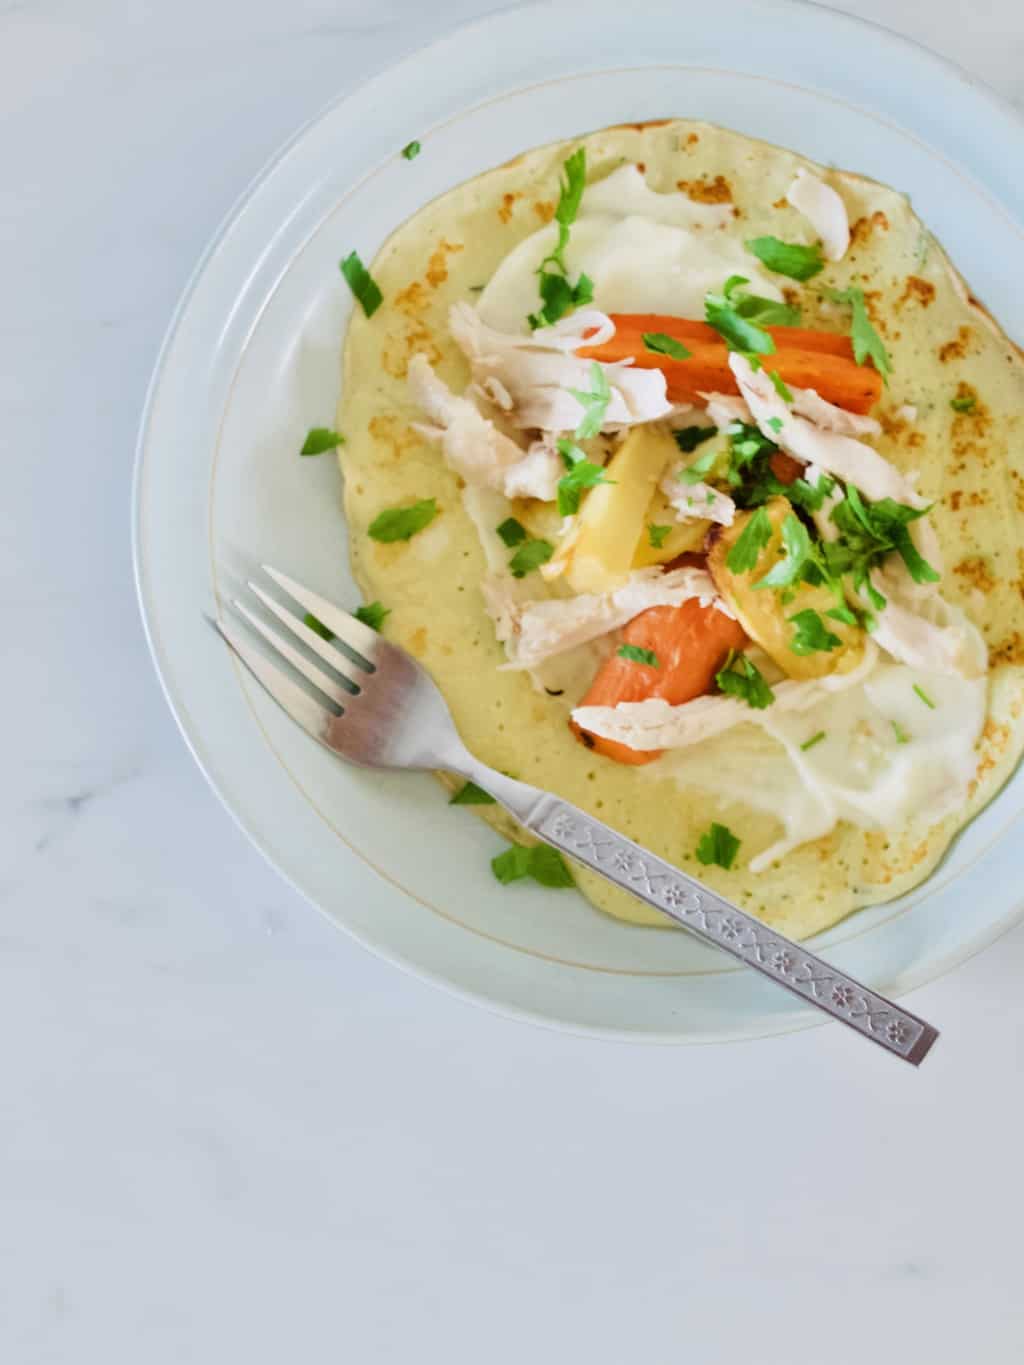
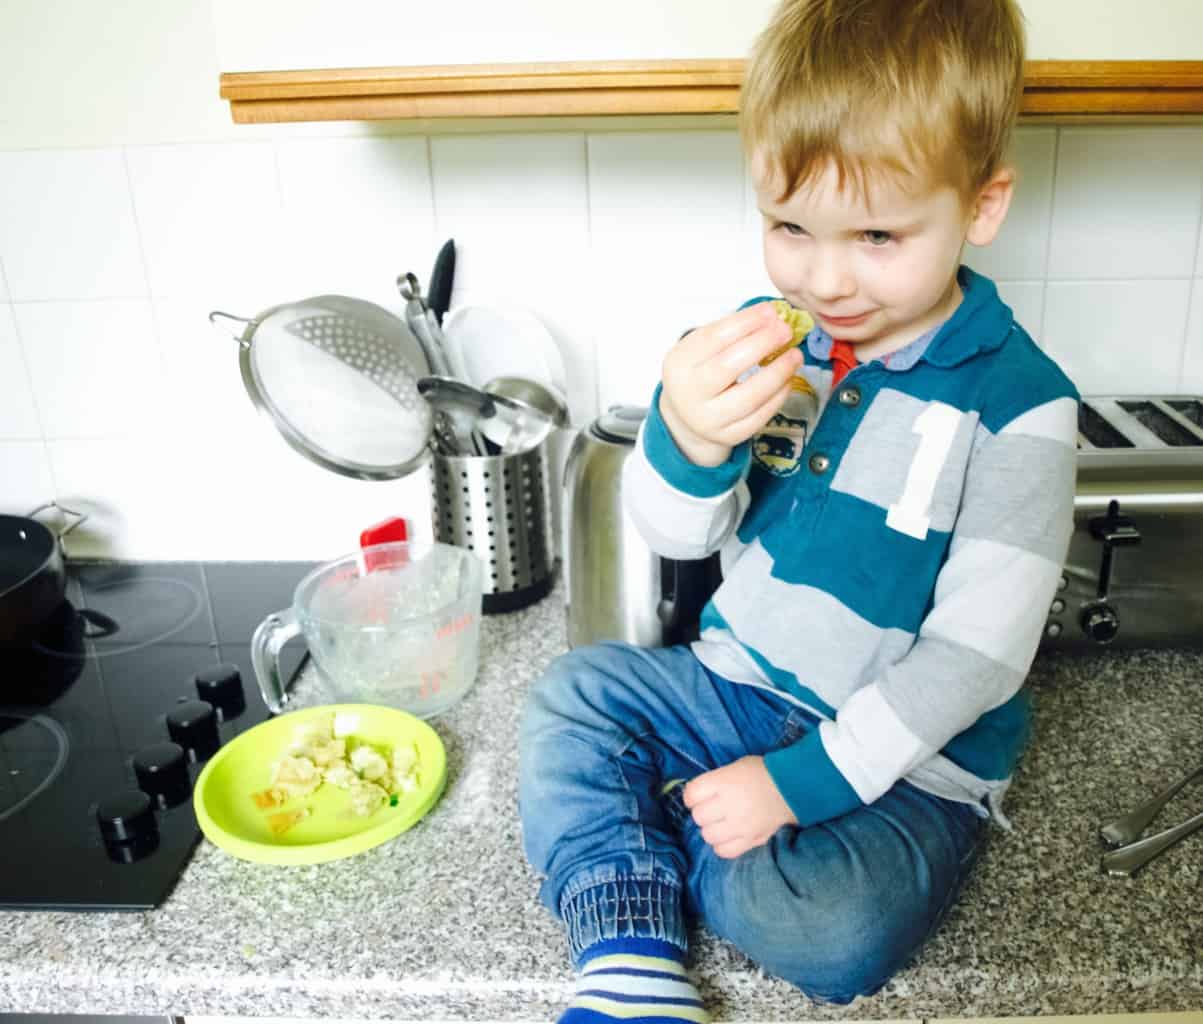
Basic potato pancake recipe Basic potato pancake recipeEnjoy!

Rasa xoxo

0

Pinterest challenge: parsley cheese crackers

Parsley cheese crackers recipeFirst of all I would like to inform you that I won’t be doing any “Pinterest challenge” posts anymore (Booo! I know!). I feel like I have been doing this for ages (4 and half years to be more specific) and I felt these lack of creativity on my part. Yes, I have learned a lot, I have made my own alterations on some of the recipes, I tried many recipes that just have been sitting there on my boards and I use some of these recipes again and again… BUT I feel it’s time to move on! I realised I need to start creating more of my own recipes as well (which I have been doing already).

Now coming back to my final “Pinterest challenge” post. I have been doing a lot of cupboard clearing lately. This included me going through my cupboards and using up all these leftover flours and grains etc. Although these crackers does not call for any special flour, I baked them anyways as these make good lunch box fillers (Lukas calls them lunch box stars) and they make as a tasty snack on the go too! I tweaked the recipe a little bit to add some parsley. I feel better when this adds some green into the kids lunch boxes, even though I am not too sure how many nutrients from the parsley survive the process. Either way at least the parsley give some work out for the taste buds ;-). Parsley cheese crackers recipe PARSLEY CHEESE CRACKERS adopted from Winter Monroe

  • 200g flour
  • 1/2 tsp garlic powder
  • 85g butter
  • 200g cheese, finely grated
  • 1 egg
  • handful parsley + 2tbsp water, whizzed to a paste

1. Add the garlic powder into the flour and mix to combine. Rub the butter into the flour mix with your fingertips until the mixture looks like moist breadcrumbs.

2. Add the rest of the ingredients and mix well to combine.Parsley cheese crackers recipe3. Roll the pastry out, 7mm thick. Using a cookie cutter cut out the shapes and place them on ready lined baking tin or tray. This part is fun to do with kids!Parsley cheese crackers recipe 4. Bake the crackers in 180C preheated oven for 10-15min.Parsley cheese crackers recipe Parsley cheese crackers recipeEnjoy!

Rasa xoxo

0

Gluten free pizza topped with fresh ingredients (two ways)

Gluten free pizza topped with fresh ingredientsSo we started a new diet for Tomas this month. We (which is really me) decided that his eczema may be caused by gluten intolerance. Like with any other diets we tried this includes a long 6 weeks trial where we change our menu to avoid the ingredient in question. I found gluten is not that difficult to avoid. Unlike dairy gluten mostly can be found in carbs. So essentially I thought I need to start baking my own bread, but then I was putting that off as bread baking involves quite a lengthy process…. however without gluten it is not so lengthy. The trouble with gluten free bread is that is difficult to bake a nice bread, but it does not take that much time to make it since we don’t need to kneed the dough to get the gluten to stretch. So all and all no gluten means hello quick bread!

I have been recently inspired by fresh tomato toast recipes from Half Baked Harvest blog. Fresh tomatoes in summer are just amazing! I don’t have such a big harvest of tomatoes (yet) this year, but I thought it would be lovely to make fresh tomato pizza anyways. I made pizza with cucumber as well (I have started getting them in my green house too!!).Gluten free pizza topped with fresh ingredientsGLUTEN FREE PIZZA TOPPED WITH FRESH INGREDIENTS

Makes two pizzas

(for the base)

  • 600g gluten free flour mix (mine consisted of rice, tapioca and potato starch)
  • 25g xanthan gum
  • 1 tsp garlic salt
  • 2tsp brown sugar
  • 3 tsp baking powder
  • 10g quick acting dry yeast
  • 350ml warm water

(for the fresh tomato pizza)

  • 125g mozzarella cheese, torn into pieces
  • 100g cheddar cheese, grated
  • 1 clove garlic, smashed
  • ground pepper
  • 1 tbsp olive oil
  • 3-5 tomatoes, sliced
  • basil

(for the potato and cucumber pizza)

  • 125g mozzarella cheese, torn into pieces
  • 1 potato, pealed and thinly sliced (I used a grater)
  • salt and pepper to taste
  • 1tbsp olive oil
  • chives, finelly chopped
  • 1-3 cucumbers, sliced

1. Mix together the flour, xanthan gum, garlic salt, sugar, baking powder and yeast in a large bowl. Make a well in the middle. Pour the water into the well and mix everything to form two balls. Roll out the dough onto the baking sheet until it is 5mm thick.Gluten free pizza topped with fresh ingredients 2. To make the cheese and fresh tomato pizza sprinkle the garlic, mozzarella and cheddar cheese over the base. Season it and drizzle some olive oil on top. Bake the pizza in the preheated 200C oven for 20-30min. Once baked top the pizza with sliced tomato and fresh basil.Gluten free pizza topped with fresh ingredients 3. For the potato and cucumber pizza sprinkle the base with mozzarella, potato and chives. Heavily season it (potato requires more salt) and drizzle some olive oil on top. Bake the pizza in the preheated 200C oven for 20-30min. Gluten free pizza topped with fresh ingredients 4. Once baked, top the pizza with cucumber and more chives (and maybe salt if needed). Gluten free pizza topped with fresh ingredientsEnjoy!

Rasa xoxo

0

Savoury pesto crepes (cheese filling is the best!!!)

Pesto crepes filled with cheese recipeTruth to be told I recently started to dislike mealtimes with my kiddies. Lukas has reached such a fussy age that I can’t predict if the food I make will meet his standards. Can anyone relate to this? And guess what, it’s not a gourmet food he is after. It’s pasta and pancakes that makes him really happy. Ok, we recently found out that he also likes curry, but I shall keep this story for another post. Ok? For now lets talk pancakes… hmmm

I came up with pesto crepes on one of those days when I wanted to keep lunch time casual. You see, sometimes Tomas goes for a nap in the middle of the day, which is why I started using this time to sort the meals out. I prep the dinner (often in slow cooker) and then me and Lukas casually lunch in the kitchen. I sit Lukas up on the counter while I fry some pancakes for him. I find this totally relaxing as I love nibbling on pancakes myself (with a cup of coffee on the side of course). This week I added pesto into the crepe batter which was a game changer. I started imagining how I could add different herbs next time as well  because it is so easy to make your own pesto using different kinds of bases (it can even be spinach!!). And most of all Lukas liked these “pancakes” equally as the plain ones. I made these savoury and filled it with cheese and tomato which was even better.

PESTO CREPES

  • 200g flour
  • 2 eggs
  • pinch of sugar
  • pinch of salt
  • 1 tbsp butter, melted (+ more for frying)
  • about 350ml water or milk
  • 4-6 tbsp pesto (doesn’t have to be basil pesto)

1. Place the flour into the bowl together with eggs, sugar, salt and butter. Whisk everything together into a dry mass. While whisking begin pouring the water gradually into the flour mass (not all in one go because you might not need it all). You are aiming for a batter consistency that easily drips down the whisk when held up but still leaves temporary traces when whisked. Pesto crepes filled with cheese recipe 2. Add pesto and mix again to combine.Pesto crepes filled with cheese recipe 3. You will need to fry pancakes in a well heated pan with a little butter. Pour one spoonful of batter into the pan and immediately start swirling round the pan to get a nice even layer. If you are having a cheese filling then add it at this stage as it needs to melt while the crepe is still frying. Pesto crepes filled with cheese recipe Just roll the crepe once the cheese is slightly melted.Pesto crepes filled with cheese recipe Best eaten warm!Casual lunch me and a toddler!Enjoy!

Rasa xoxo

0

My favourite kids lunch on the go

Full of veg savoury muffins recipe We have been traveling lots lately (I am talking day trips not an actual holiday) and to have something handy for lunch is essential (unless you want to spend the money at the cafe or something). This is why these muffins are amazing for obvious reasons. They are dry meaning the mess don’t stick to clothes, they are full of hidden veg (so hard to make Lukas eat veg these days) and they can be frozen for whenever you need them. Besides, they are carbs that children love to eat, su no fuss here ;-). Full of veg savoury muffins recipeFULL OF VEG SAVOURY MUFFINS

makes 12 muffins

  • 2 handfuls of chopped veg of your choice (I had broccoli and cherry tomatoes)
  • 230g plain flour
  • 3tsp baking powder
  • 140g grated cheese
  • 200ml milk
  • 3tbsp olive or sunflower oil
  • 1 egg, beaten

1. First, finelly chop all the veggies. Especially broccoli as it needs to cook through when baked.Full of veg savoury muffins recipe Full of veg savoury muffins recipe 2. Combine the veggies with the rest of ingredients.Full of veg savoury muffins recipe 3. Mix everything well before spooning the mixture into 12 hole muffin tin (all lined and ready). Bake for around 30min in 180C preheated oven.Full of veg savoury muffins recipe Full of veg savoury muffins recipeEnjoy your lunch!

Rasa xx

0

Pinterest challenge: savoury waffles with blue cheese and bacon

Savoury waffles with blue cheese and baconLately we have been very tired. One moment I thought we were handling our lot as parents of two really well, the next day I feel like I am back at square one. Tomas is going through a bad sleep patch (hope thats temporary) and I for the first time ever have got a painful back.

At least one thing have not changed! We are still having our luxurious breakfast every Saturday that have become a tradition in our family. We always start our weekend with something special ;-). Here is what we had last weekend, savoury waffles with blue cheese and bacon, from Pinterest of course! I thought they were little rich so serving it with tomato salsa or salad is perfection.Savoury waffles with blue cheese and bacon SAVOURY WAFFLES WITH BLUE CHEESE AND BACON adopted from What Should I Eat for Breakfast Today

serves two exhausted parents

  • 130g flour
  • 1 egg
  • 250ml buttermilk (or 125ml milk mixed with 125ml yogurt)
  • 3 slices bacon, fried and cut into small pieces
  • 50g blue cheese, cut into small pieces
  • 1 tbsp maple syrup
  • 3 tsp baking powder
  • 30g butter, melted
  • tomato salsa or salad to serve (optional)

1. Mix all the ingredients in the bowlSavoury waffles with blue cheese and bacon2. Heat the waffle iron pan or the waffle maker, grease it liberally (I do it with butter) and pour the waffle mixture in ready to fry (1-2 spoons at the time). I use fork to detach the waffles from the pan but this probably would not work with the non stick pans, so be careful.Savoury waffles with blue cheese and bacon Savoury waffles with blue cheese and baconHope you all have a fab weekend!

Rasa xx

0

Garlic rye bread and bean salad

Rye garlic bread and bean salad recipe It’s becoming to look like Christmas and I decided to share a recipe for a salad that is traditional to have for Christmas Eve. It is that simple and tasty that my brother used to voluntarily go on salad making duty because of that. Hope you like it as much as we do! Rye garlic bread and bean salad recipe GARLIC RYE BREAD AND BEAN SALAD

Makes one medium serving bowl (I made half portion here)

  • 1 medium rye bread loaf
  • 6 cloves of garlic, crushed and chopped
  • generous amount of oil for frying
  • salt and pepper to taste
  • 2 onions, finelly chopped
  • 2tsp caraway seeds, soaked in water
  • 2 cans of butter beans or cannellini beans, rinsed under cold water
  • bunch of parsley, finelly chopped (optional)

1. Slice the bread and then chop the slices into 1cm cubes.Rye garlic bread and bean salad recipe2.Fry the bread together with garlic in generous amount of oil (very necessary, sorry for dieters). Season to taste and put it aside.Rye garlic bread and bean salad recipe3. Fry the onion together with caraway seeds until onions are nice and slightly transparent. Add the beans and take the pan off the heat.  Rye garlic bread and bean salad recipe4. Mix everything together.Rye garlic bread and bean salad recipe Rye garlic bread and bean salad recipeHope you don’t miss this humble salad at your Christmas table ;-).

Rasa xx

0

Pinterest challenge: spanakopita mini tarts

Spanakopita tarts recipeThis time round on my weekly Pinterest challenge I have decided to have a look at the pins that I liked long time ago. In fact I went back to the pin that I saved when I just joined Pinterest almost three years! This recipe is cool, because it needs filo pastry, which I don’t have much experience with. I made filo pastry once from scratch for a layered Slovenian pie where the dough were concealed in between the fillings. With these Spanakopita mini tarts (I changed from strudels to tarts as I find that easer and prettier) the filo pastry is coating the filling therefore the effect is completely different. And this is what I wanted to challenge myself with. The turnout was great and crispy. Joni loved it of course and I thought this would be great served at the party!Spanakopita tarts recipeSPANAKOPITA MINI TARTS makes 12

  • 115g cottage cheese
  • 150g (or more) frozen spinach, defrosted
  • 170g feta cheese
  • 3 eggs, beaten
  • 1 roll of filo pastry (although you will only need about half of it)
  • 50g butter, melted in cup or mug

1. First make the filling by combining cheeses with spinach and eggs.Spanakopita tarts recipe Spanakopita tarts recipe2. Set up your work station: muffin baking tray, melted butter with pastry brush, filling and ready cut pastry into 10cmX10cm squares.Spanakopita tarts recipe3. Push one dough square at the time into the muffin hole and brush it with melted butter. Repeat this for about 5 times (which makes about 5 layers of the dough with butter in between).  Spanakopita tarts recipe4. Spoon enough of filling into each tart and press the dough sideways to close.Spanakopita tarts recipe5. Bake the tarts in preheated 180C oven for about 30min until golden and crispy.Spanakopita tarts recipe Spanakopita tarts recipeEnjoy!

Rasa xoxo

0

Biscuits or scones?

Biscuits or scones? Basic coconut oil scone recipeWe recently have visited States and I finally had a chance to taste a biscuit… for breakfast, with the gravy!!! What? If you come from America than this might not be that surprising to you. But here in England biscuit has a complete different sense and purpose. It even looks different! The biscuit that I had in States reminded me of scone that we have over here. Maybe we don’t eat scones with the gravy, but we certainly have cheesy types as well. I must admit eating the biscuit with gravy inspired me to try and marry the scone with the soup! Not just any soup, but the most british one: broccoli & stilton soup.Biscuits or scones?I of course tried to determine the differences between american biscuit and british scone, but did not found that many. Although the ingredients are practically identical, the scone recipe might call for buttermilk, oatmeal or even barley (especially the most traditional recipes). So I guess the choice is yours how to call this baked delight ;-).Biscuits or scones? Basic coconut oil scone recipeI often bake these basic type of scones, because they are that basic that you can add any flavour you want to them. You want them sweet = add a 1-2tbsp sugar and handful of dried sultanas, you want them cheesy = add any cheese you want! I replaced butter with coconut oil, just because I believe that make the scones feel a little bit less naughty. And it works every time! Oh, I just love the consistency and the benefits of the coconut oil!

BASIC COCONUT OIL SCONES

  • 150g flour
  • 1 tsp baking powder
  • 45g coconut oil
  • 30ml milk (can be substituted with coconut milk)
  • 1 medium egg (or add another 25ml of milk if you want to keep it even more basic)

1. Mix all the ingredients together (mix flour and baking powder separately first) until everything combines well and shapes non-stick dough.

2. Roll the dough 1 cm thick and by using cookie cutter cut the dough into the circles.

3. Bake the scones for about 10-15 in the preheated 180C oven. Biscuits or scones? Basic coconut oil scone recipe Biscuits or scones? Basic coconut oil scone recipeEnjoy!

Rasa xoxo

1

Savoury sweetcorn muffins

Savoury sweetcorn muffins: perfect for soup dippingI’ve wanted to make these since the first time I tasted them. Once while out with the girls we ordered them at this american style restaurant (don’t remember the name). Now when it’s getting wintery outside (almost), I thought these muffins would be perfect with soup. We dipped them in spicy Mexican soup and we absolutely loved them (especially Joni).Savoury sweetcorn muffins: perfect for soup dippingSAVOURY SWEETCORN MUFFINS makes 12 muffins

  • 245g superfine cornmeal
  • 3 tbsp caster sugar
  • 2 tsp baking powder
  • 0.5 tsp salt
  • 1 egg, beaten
  • 4 tbsp coconut oil
  • 250ml milk
  • 50g grated cheddar cheese
  • 100g sweetcorn kernels (used frozen ones)

1. Measure all the ingredients into the mixing bowl and combine everything well.

2. Spoon the mixture into lined cupcake tinned. I used silicon cupcake baking pan this time, so did not need to use any liners. Bake the muffins in preheated 180C oven for 20 min.Savoury sweetcorn muffins: perfect for soup dippingServe warm! Oh, did I mentioned that it tastes heavenly with soup? Should definitely try that out!Savoury sweetcorn muffins: perfect for soup dipping Savoury sweetcorn muffins: perfect for soup dippingEnjoy!

Rasa :)

0

Life in UK

London in dimmed lightLove the pic above taken by my friend Jacolien from Stuff to Love! It reminds me of what a great multicultural city I used to live. This is where I lived most of my time while in UK!

Yesterday I passed my life in UK test!!!!! I just thought that I might as well become a british citizen after living here for 14 years and after getting married to my most wonderful english husband. Here are few fundamentals I learned while living in UK.

1. BEEING PART OF COMMUNITY, and this what we are trying to create at Friendly Nettle, a craft community that inspires you to craft :).

Online Cafe Community2. COOKING. Now, I know Britain is not famous for it’s cuisine, but you would be surprised there are many english dishes you can enjoy! Here are few I have tried: Steak and Ale PiesSteak and ale piesEnglish BreakfastBaked English Breakfastand Plum Steam Puddinga healthier plum steamed pudding3. GARDENING. I know that not many of us can enjoy this, but there are plenty of allotments available to rent! Here is how I grew tomatoes this yeartomatoes 101Enjoy your weekend!

Rasa xoxo

0

Tuscan bread salad

Tuscan bread salad recipe While in Tuscany we took some classes in cooking. Although the most intricate food we learned to make was fresh pasta, my favourite thing to eat and to make was bread salad (otherwise called Panzanella). It’s a perfect summertime appetiser and in my opinion this can be served with meat dishes as well!

TUSCAN BREAD SALAD

  • 3 slices harden stale bread (good quality, home baked not the regular shop bought sliced bread)
  • 3 medium sized tomatoes (my favourite is beefsteak tomato if you can find them in stores)
  • 1/2 red onion
  • 1 cucumber
  • 1-2 celery sticks
  • Balsamic vinegar
  • Extra-virgin olive oil
  • Salt

Tuscan bread salad recipe 1. Soak Bread in water for about 15 min. I recently have been trying to bake focaccia bread so this is what I used to make the salad this time. Tuscan bread salad recipe 2. Meanwhile slice tomatoes, cucumber, onion and chop celery. Place everything in one salad bowl. Tuscan bread salad recipe 3. Drain the bread and squeeze out the excess water and coarsely crumble with your hands. Place in a bowl with vegetables.Tuscan bread salad recipe 4. Season with salt and pepper and drizzle with vinegar and olive oil.

Tuscan bread salad recipe 5. Mix carefully and refrigerate.Tuscan bread salad recipe Tuscan bread salad recipe Tuscan bread salad recipe


Buon Appetito!

Rasa xoxo

0

Pickled radish spread

Pickled radish spreadIt is not exactly pickling or preserving season, but I totally had to do that with my homegrown radishes. This spread is perfect for a quick toast, a cracker or cheddar cheese. I even tried it as a salad dressing, that was really yum!pickled radish spreadPICKLED RADISH SPREAD

  • 2 handfuls of radish
  • 1 cucumber
  • 6 garlic cloves
  • 2 tbsp brown sugar
  • 4 tbsp apple cider vinegar
  • 2 tbsp olive oil
  • salt to taste
  • chives (or other of your favourite herbs)

pickled radish spread1. Grate the radishes, cucumber and garlic. pickled radish spread2. In separate bowl or glass mix sugar with vinegar and oil. Pour it over the radishes.

3. Add salt to taste and sprinkle some chives on top (I added chive flowers to complete the prettiness!). pickled radish spread4. Jar it or eat it straight out, decision is yours ;-)

Rasa xoxo

0

Savoury tea cakes

Savoury tea cakes

Sometimes, don’t you want savoury food looking as pretty as cakes? Well, here is your solution making sandwich cake like ;-).

savoury tea cakes

SAVOURY TEA CAKES

  • sliced bread (I used German style rye bread)
  • your favourite sandwich filler (I chose simple egg mayo)
  • edible flowers such as pansies or chive flowers

1. Using cookie cutter cut out even circles out of the sliced bread

Savoury tea cakes2. Prepare the sandwich filler you likeSavoury tea cakes Savoury tea cakes Savoury tea cakes3. To assemble the cake just spread the sandwich filler on each bread circle and stack it upSavoury tea cakes4. Decorate the cake with edible flower

Savoury tea cakesSavoury tea cakes

Enjoy!

Rasa xoxo

0

Deviled eggs

devilled eggs with sprats

If you did paint a lot of eggs for Easter like I did, then this snack is perfect to use up all those unwanted boiled eggs. This is big thing in Lithuania and it comes with many type of fillings. I like the ones with sprats (little fish that comes in the tins packed with sunflower oil). These are the simplest of all! If you can’t find sprats, then skippers will be as nice ;-).

devilled eggs with sprats

DEVILLED EGGS WITH SPRATS

  • 4 boiled eggs
  • 1 tin of sprats or kippers in oil
  • 1 tbsp mayonnaise
  • Salt and pepper to taste
  • 4 cucumber slices to decorate

1. De-shell the eggs carefully. Cut the eggs in half and remove the egg yolks.

devilled eggs with sprats

2. Crumble the egg yolks and mix it together with fish, it’s oil and mayonnaise. Add salt and pepper to taste.

devilled eggs with sprats

3. Pipe the filling onto the egg halves.

devilled eggs with sprats

4. Decorate the eggs with the cucumber slices.

devilled eggs with sprats

devilled eggs with sprats

Enjoy and Happy Easter!

Rasa xoxo

0