Top

Friendly Nettle Giveaway! (CLOSED)

crocheting kit with cookies

Have you started a prep for winter? If not, this giveaway competition is for you! One lucky reader will win this crochet a scarf kit box that not only contains everything you need to get started (enough yarn, crochet hook, DIY instructions) but also a selection of freshly baked cookies to get you going ;).

crocheted infinity scarf

To enter for a chance to win, REGISTER and activate (e-mail will be sent after registration) to join our community. One entry per reader please. Giveaway will be open until 1st November, winner will be chosen at random and announced in this article shortly after.

Good luck!

Rasa xox

8

Easy chickpea crepes

chickpea crepes

Today I had chickpea crepes for brunch (I know I know, but sometimes it is just nice to start late). I make crepes quite often in general as it is great with many fillings, can be served sweet or savoury and it is quite instant. However today I am going to speak about the chickpea crepes that have an interesting flavour twist and go really well with fresh salad, yogurt, guacamole, hummus and so on… the possibilities are endless! To make proper chickpea crepes is not that easy and quick as it is egg and gluten free and has to be prepared the night before. Therefore I did come up with this quick and easy recipe that is halfway a regular crepe and socca (chickpea crepe in french). Of course if you want to do it the proper way than check out this website, but if you want quick breakfast or lunch then continue on ;)

chickpea crepes

EASY CHICKPEA CREPES

  • 50g chickpea flour
  • 50g plain flour
  • 1 egg yolk
  • 1 tbsp olive oil
  • 1 tsp salt
  • 1 tsp ground cumin
  • about 200ml water

1.  Mix the flours, egg yolk, oil and seasoning together.

2. Gradually add water while mixing it until it becomes runny, but not too watery (something like double cream).

3. Heat up the oil in the frying pan. Tip: make sure you heat the pan properly as the crepes mixture will stick less to it.

4. Pour a spoon of the mixture to the pan and spread evenly around with the spatula (use the silicon one if you have it). Otherwise if you find it easer then swirl the whole pan to make the mixture run evenly to cover the whole pan.

5. Once the top surface is dry (nothing runs on top) then the crepe is ready to turn. I carefully slide the spatula under the crepe and flip it. You may want to try to flip it in the air by tossing the pan, but that’s if you feel brave enough…ha ha

Have fun and enjoy!

Rasa :)

2

Halloween decoration idea

leaf garland

I must admit I am not the biggest fan of halloween decoration, just because it is hard to make it pretty… well its not meant to be pretty anyways, it’s suppose to be scary ha ha :D.

Regardless my feelings towards the halloween deco, I had a go at it this year. And I am quite pleased with this Halloween decoration idea! I especially like that this painted leaf garland can be used in any occasion. Just think of using different colours and letters!

Check out the detailed painted leaf project DIY here.

desk halloween decoration

Rasa :)

0

Chilly evenings need cookies with tea!

When it comes to chilly evenings I love dipping cookies into the hot tea and eating them like that. I also like the idea of stocking up on homemade sweet treats so I have it whenever I have a sweet tooth. And cookies are perfect for that! So this is exactly what I did today: baked cookies while experimenting with different flavours. I experimented with pumpkin spice, white chocolate, orange, almond and even matcha. However my favourite combination is peanut butter with jam :b.

PEANUT BUTTER & JAM COOKIES

  • 200g softened butter
  • 160g peanut butter
  • 100g icing sugar
  • 2 eggs
  • 240g plain flour
  • strawberry jelly (for filling)

1. Gradually add all ingredients into the mixing bowl (except the jelly) and mix until everything is combined well.

2. Add the cookie mixture into the piping bag with the wide round nozzle tip. Then pipe small circles on the tray lined with the baking sheet leaving big enough gaps to expand in between.

3. Bake at preheated oven 180C for about 13min.

4. Cool on wire rack then spread some jam on the flat side and join two cookies together.

Enjoy!

Rasa xox

0

A candy day!

Candy

Today I have been making candy as I heard that today is a “Sweetest Day” (not in London, but in some parts of America)… Aww! Although I prefer a biscuit or a cake before eating any sweets, I still love it when it is made with the interesting flavours. This is why making a candy is soo much fun. My favourite one I came up with is vanilla and peppercorn candy. Love the sweet with the bite and this is perfect for halloween trick or treat!

vanilla and peppercorn candy

VANILLA AND PEPPERCORN CANDY

vanilla and peppercorn candy

  • 60ml water
  • 200g sugar
  • 40g golden syrup
  • 1tsp vanilla essence
  • a drop of black food colouring
  • 1 tsp ground black pepper

1. Prepare for everything! line a baking tray with baking paper and spray oil on it. Have the thermometer and lollypop sticks ready (I cut down some wooden skewers for this). Fill frying pan with some cold water and set aside.

2. In small saucepan combine all ingredients except black pepper and place it on the medium heat.

3.  Bring it to boil and insert the thermometer in the pan. Stir occasionally until the sugar reaches 143C temperature.

4. Remove the pan from the heat and immediately dip the bottom of it into the pan filled with cold water, removing quickly before the mixture gets too cold. Stir in black pepper into the candy mixture.

5. Using a table spoon, immediately spoon out pools of syrup on prepared baking sheet. Lay one end of the lollypop stick in each pool of syrup while still soft and push gently to secure in place.Let cool at room temperature until completely set, about 2 hours.

Have a sweet day!

Rasa xox

2

Tatting

how to tat

Recently I could not put my tatting work down… I have finally nailed it! Thanks to CRAFTSY online classes and their really easy to follow step by step videos. I especially love the fact that the teacher is really positive as that makes you feel like you can defiantly do it, regardless how complicated it looks. I can’t wait until I create new projects using this skill that I have learned (hopefully soon you will be able to make it too!). It’s like making friendship bracelets, but prettier ;).

how to tat

This is my first time ever signing up for e-course! Have you had good experience with online classes before? Would love to hear your story :).

how to tat

Finally, just wanted to mention that Craftsy offers a wild variety of courses to do with crafts and a little bit more (e.g baking). So pick yours HERE ;).

Happy e-learning!

Rasa

1

Butternut squash cupcakes

Butternut squash cupcakes with cinnamon icing

Ok, I have a story! Do you remember I was baking autumn themed cupcakes sometime last year at “Canvas” event? And if you were there than you should remember pumpkin cupcakes that were everyone’s favourites!? Well… they were not a pumpkin cupcakes, they were actually butternut squash cupcakes. You see in the America it seems that pumpkin is much loved for the sweet puddings, but here in UK pumpkin is so hard to find in stores (except Halloween season of course). So I used butternut squash as a substitute! I think it worked well and in fact I grew one in my garden this year (in picture bellow together with my Halloween decorations).

butternut squash in halloween

BUTTERNUT SQUASH CUPCAKES

Makes 12 cupcakes

(for the base)

  • 225g brown caster sugar
  • 115g butter (softened)
  • 2 eggs
  • 215g butternut squash (cored, pealed, cooked and pureed)
  • 125g flour
  • 2 tsp baking powder
  • pinch of salt
  • 1tsp ground cinnamon
  • 1tsp ground ginger
  • 1tsp ground nutmeg

(for the frosting)

  • 200g soft cheese
  • 50g butter (softened)
  • 400g icing sugar
  • 2tsp ground cinnamon

butternut squash

1. Cream sugar with butter and gradually combine it with the rest of the ingredients.

2. Spoon the mixture into prepared muffin pan.

butternut squash cupcakes

3. Bake in preheated 180C oven for 20-25min.

butternut squash cupcakes

4. Meanwhile make a frosting by mixing all ingredients into one (butter and cream cheese first).

5. When the cupcakes are baked and cooled, pipe out the frosting in the swirl motion so they look like roses… aww

butternut squash cupcakes with cinnamon cing

Enjoy autumn!

Rasa :)

1

Ghost meringue cake

halloween cake topper

As Halloween is fast approaching I thought I will bake Beetroot chocolate meringue cake for today’s knitting group meet up. I made the meringues on the cake look like little ghost! The base recipe is adopted from “A Tiny Bit Marvellous” by Dawn French (surprisingly not a recipe book, but a novel).

beetroots

BEETROOT CHOCOLATE MERINGUE CAKE

(for the base)

  • 180g caster sugar
  • 3 eggs
  • 180g plain flour
  • 180g ground almonds
  • 50g cocoa powder
  • 1 tsp baking powder
  • pinch of salt
  • 200ml yogurt
  • 1tsp vanilla extract
  • 200g raw, peeled and finely grated beetroot

(for the meringue)

  • 100g egg whites (about 3)
  • pinch of citric acid, tartar or 1tsp of lemon juice
  • 125g icing sugar
  • 6g dark chocolate

1. Whisk sugar with eggs until light and slightly fluffy.

2. Mix the egg mixture with the rest of the ingredients and combine well.

beetroot chocolate meringue cake

3. Pour the mixture into the prepared baking tin and bake it for 30min in the preheated 180C oven.

beetroot chocolate cake mix

4. Meanwhile whisk the egg whites with a pinch of citric acid until it forms soft peeks. Slowly add sugar and combine it carefully.

5. Using  a piping bag pipe out the meringues onto the half baked cake. Continue baking for another 30 min.

beetroot chocolate meringue cake

6. Once the cake is cooled, melt some chocolate and carefully “paint” the eyes onto the meringues with the toothpick.

ghost meringues on cake

Enjoy!

Rasa ;)

1

Make your own tea bags

Bird tea

When I used to dream about opening my own cafe (still dreaming about it), I had this idea of serving tea with these teabags that had a little bird sitting on the cup rim. You never know I might still use this idea, but for now I thought it would be a waste not to share it! Here are the printable bird tags.

So first you need to find a loose tea mix to package it. Or you can make your own! Here is one of my favourite: camomile chai tea that is naturally decaf (good for chilly autumn evenings!). This recipe has been given to me by my friend’s Amy’s flatmate Gurmit. She usually “cooks” the herbs in water to really infuse the tea, but after doing some testing I realised that the teabags work just fine.

CAMOMILE CHAI TEA MIX

(makes 15-20 tea bags)

decaf chai tea mix

  • 1 cup dried camomile flowers
  • 1 tsp fennel seeds
  • 1 tsp cardamon seeds
  • 1 tsp cinnamon
  • 1/2 tsp ground cloves

(other things you will need to make the tea bags)

  • bird tags (printed and folded)
  • tea filters (you can get those from e-bay)
  • cotton embroidery tread (thick and smooth)
  • stapler
  • scissors

Things you will need

1. make the tea herb mix.

2. package the tea mix into the tea bags. Insert 2 tsp of mixture into one tea filter, fold it to close, staple it together with the tread. Staple the other end of the tread onto the bird tag, tie it with the knot.

making tea bags

8. You can make as many tea bags as you want to package it as a gift or for future tea drinking!

gift teabags

decaf chai

Enjoy the tea drinking and a lovely weekend!

Rasa :)

1

✄ The Knitting & Stitching Show ✄


I had such an inspiring day yesterday at The Knitting & Stitching Show :) in London. It was defiantly worth to visit! This event is for everybody who loves crafts as it has many exhibitors who offers classes, supplies, books or ready crafted goodness to sell. Although it was quite overwhelming to see so much in one day, I have few favourites: Sheep Of Steel hand-spins this lovely yarn (pictures above and bellow)

Fabric Affair

Really pretty Irish fabric (Fabric Affair picture above and Magee Of Donegal picture bellow)

Maggee of Donegal

And some work with Liberty fabrics. I love Liberty fabrics!

IMG_5068

I was quite tempted to buy everything, but I settled for something that was on sale (lots and lots of yarns that I am looking forward to work with!), a pair vintage plastic needles (I so want more of them), and tatting shuttles (I will tell you more about it next time).

IMG_5121

You wish you were there? Well, you are not too late! It is on for this weekend in Alexander Palace, London.

Have a lovely weekend then!

Rasa :)

2

Tutorial with Febrero es asi: granny squares!

Febrero es asi

Today I am really excited to present a new granny squares tutorial with Febrero es asi (a lovely blog written by Isabel). Granny squares (as you know) are fun to do and there are so many things you can make out of them starting with the most obvious of course – the blankets. You can crochet granny squares in different colours and make pillows, rugs, table runners and so on. The possibilities are endless! Oh… and before I forget, here is where you can access the tutorial for it!

Granny squares in steps

So tell us, what are you going to make with your granny squares?

Rasa :)

0

Virtiniai (Lithuanian dumplings) with potato and bacon filling

Virtiniai:dumplings

My friends kept asking me for the Lithuanian dumplings (virtiniai) recipe.  So here it is! Although there are many fillings (the most classical is with minced beef called koldunai) , I have chose to go with potato and bacon filling, because…. well, I had all the ingredients for it here at home! But there are many more exciting fillings, including sweet ones that hopefully I will cook next time. The thing is, we usually buy it frozen as it is very convenient and quick, but making from the scratch is really fun!

VIRTINIAI WITH POTATO AND BACON FILLING

Serves 2 people

(for the dough)

  • 250g plain flour
  • 1 egg
  • pinch of salt
  • 120ml water

(for the filling)

  • 1 tbsp butter
  • 2 bacon slices (chopped)
  • 1/2 medium onion (diced)
  • 2 medium potatoes (pealed and grated)
  • pepper and salt  as desired

(for topping)

  • 1 tbsp butter (if you dare)
  • 2 tbsp sour cream
  • small bunch of chives (chopped)

1. To make the dough mix all the ingredients together and knead to combine. Set it aside to rest for at least 30min.

2. Meanwhile make a filling. Melt butter in the pan and fry onions together with the bacon. When onion is golden in colour add grated potato and fry it for a minute. Remove everything from the pan and season as desired. Let it cool.

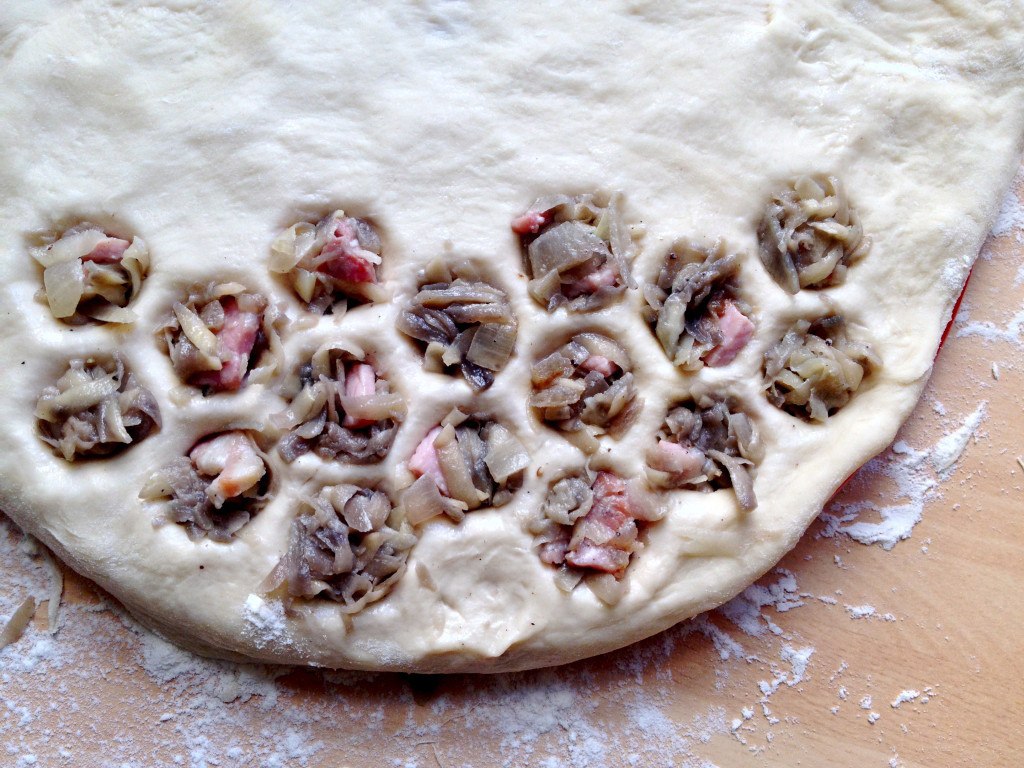
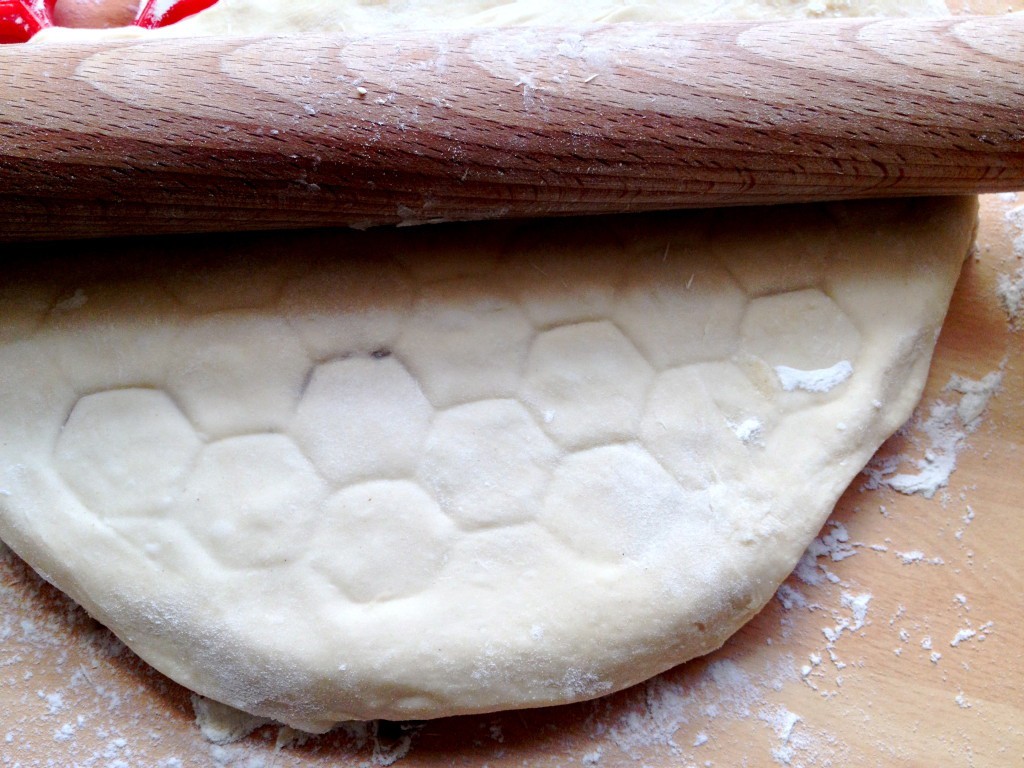
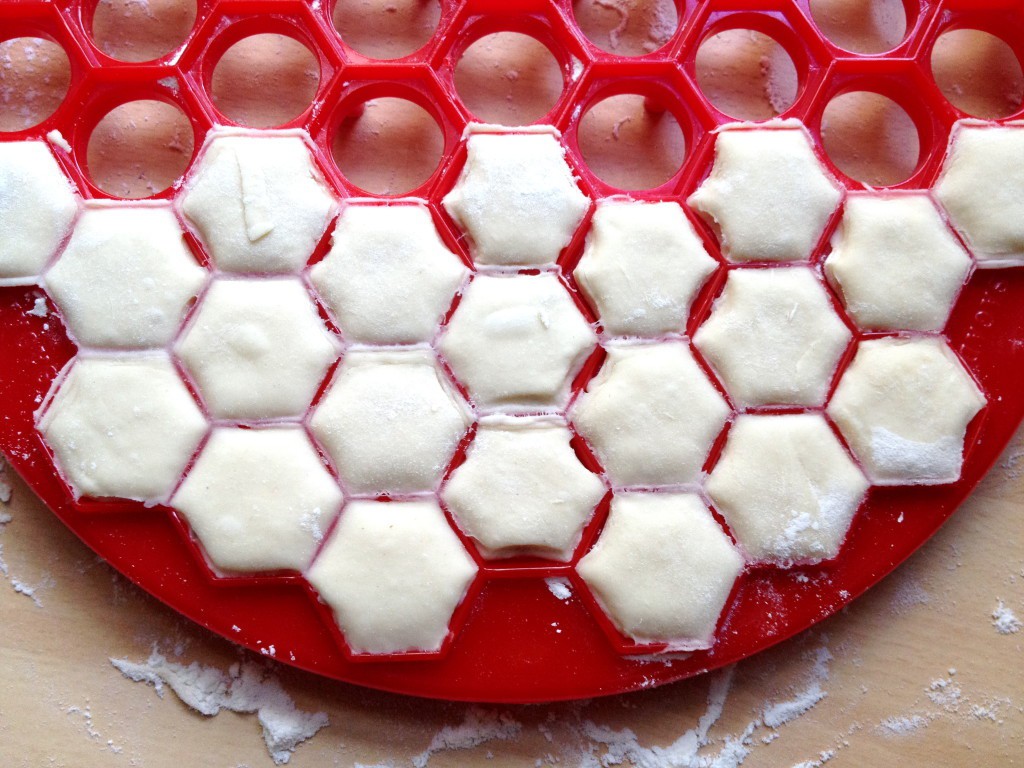
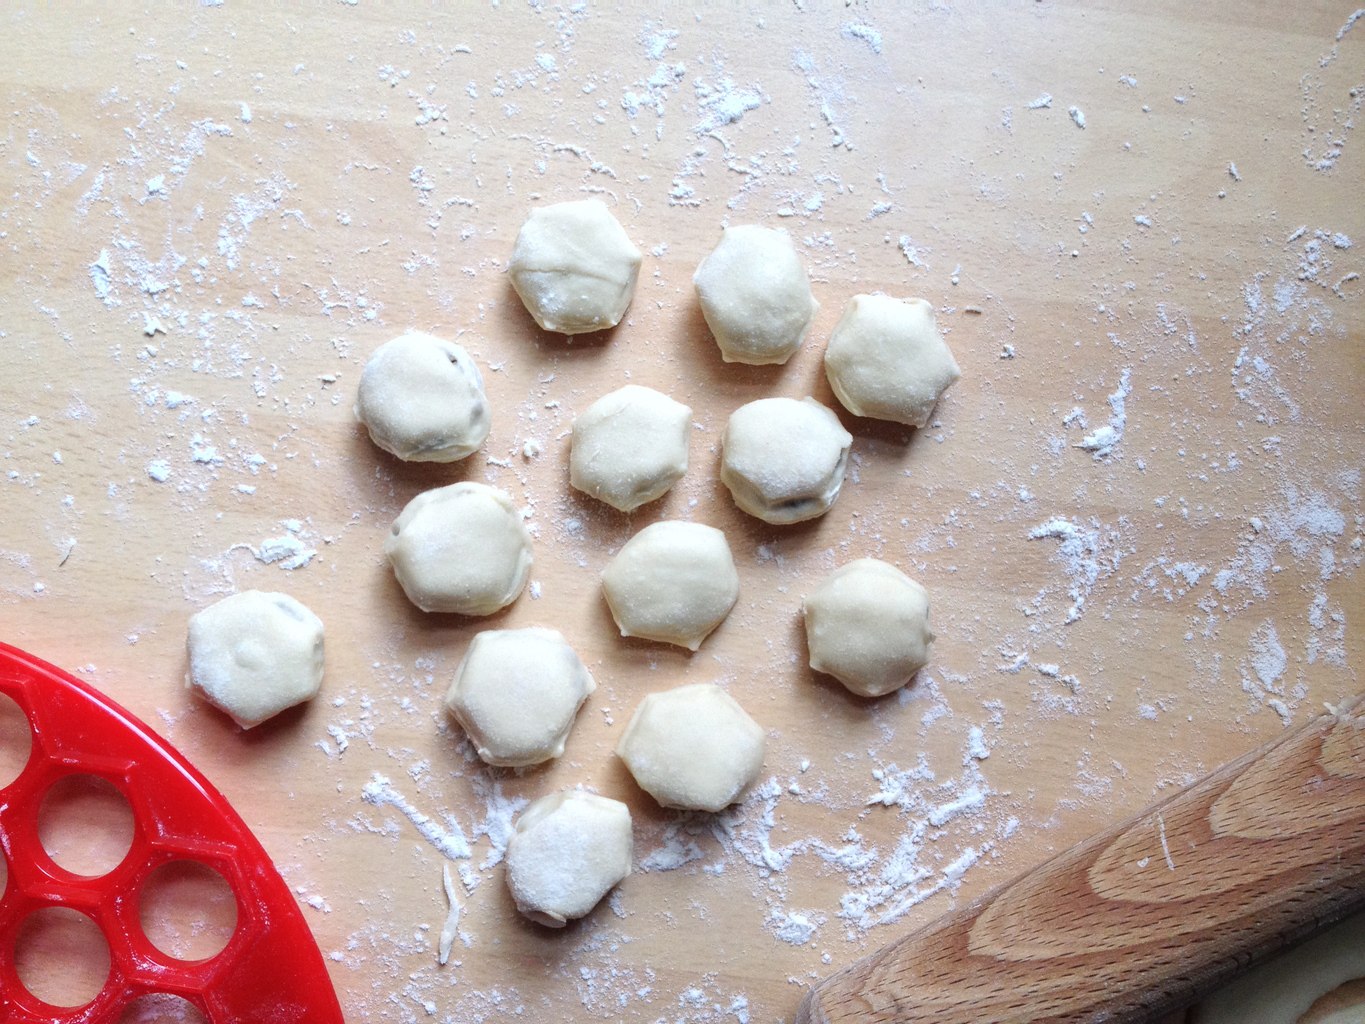
3. Now is the time to make the dumplings. I am very lucky as I have ravioli/dumpling maker mold! So making dumplings with it is a real ease. Just roll the dough, cover the mold with half of it. Fill each “cell” with the filling, cover everything with the rest of the dough. Press everything with the rolling pin and “pop” all the dumplings out. If you don’t have this handy ravioli/dumpling maker, don’t worry as there is an alternative method…

forming dumpling1 forming dumpling2 forming dumpling3 forming dumpling4

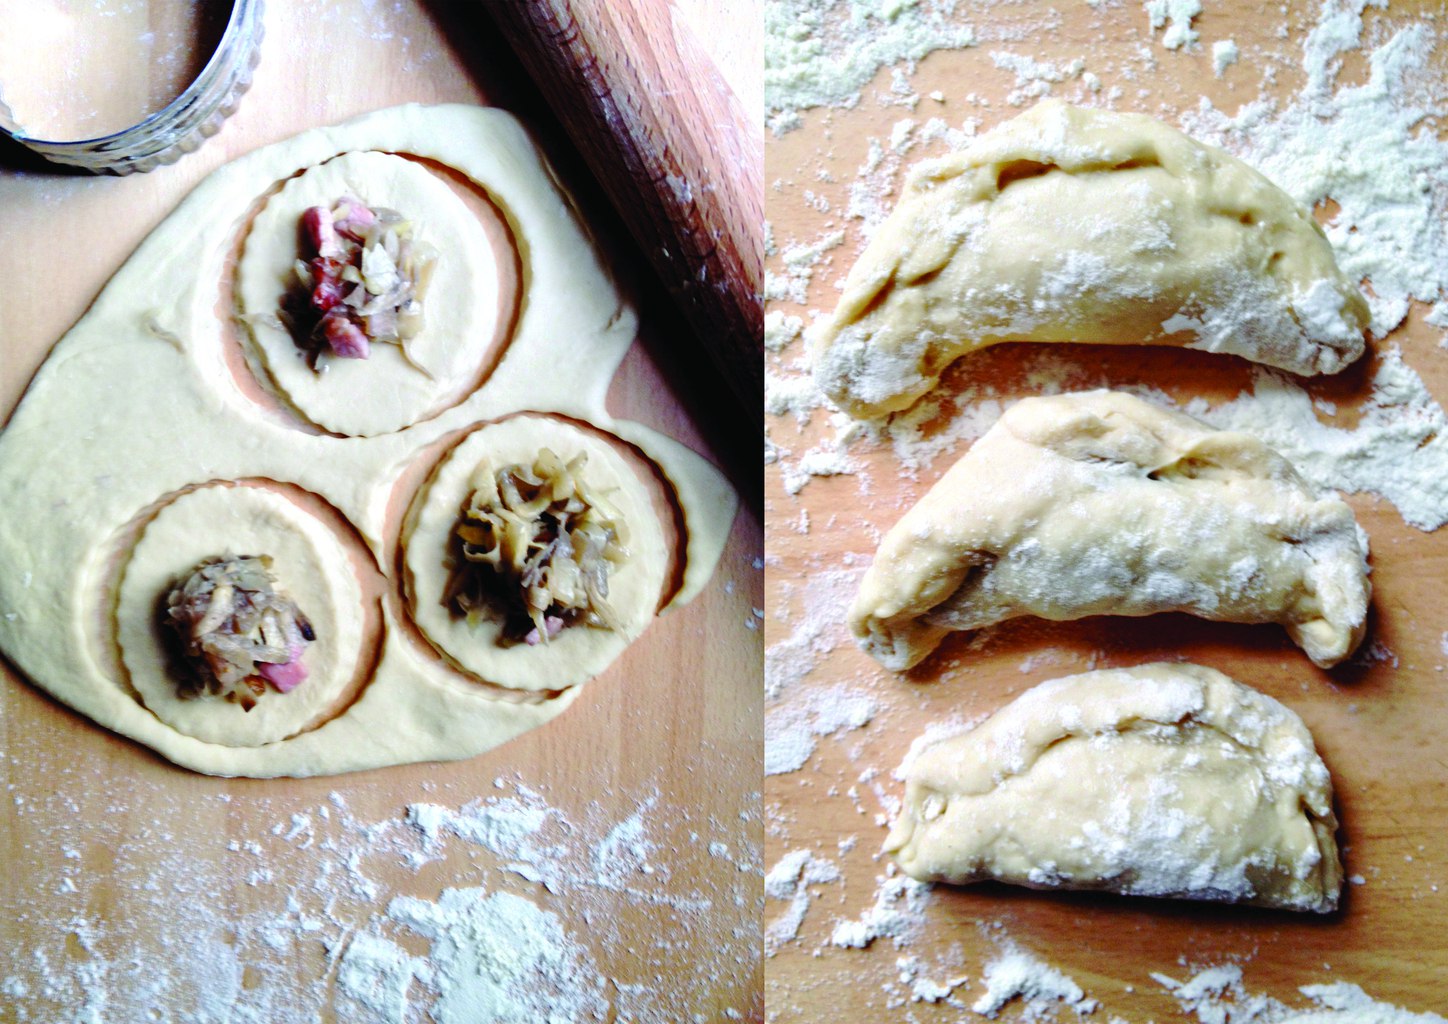
The alternative method to make the dumplings is to roll the dough and cut it with the cookie cutter. I must say that it is quite tricky to go this way as the dough doesn’t seem to want to roll thin as it keeps shrinking back! I suppose the more often you do it the better you can handle it. So divide the filling into the cut circles and close them by folding the edges (like a pie).

alternative dumpling forming

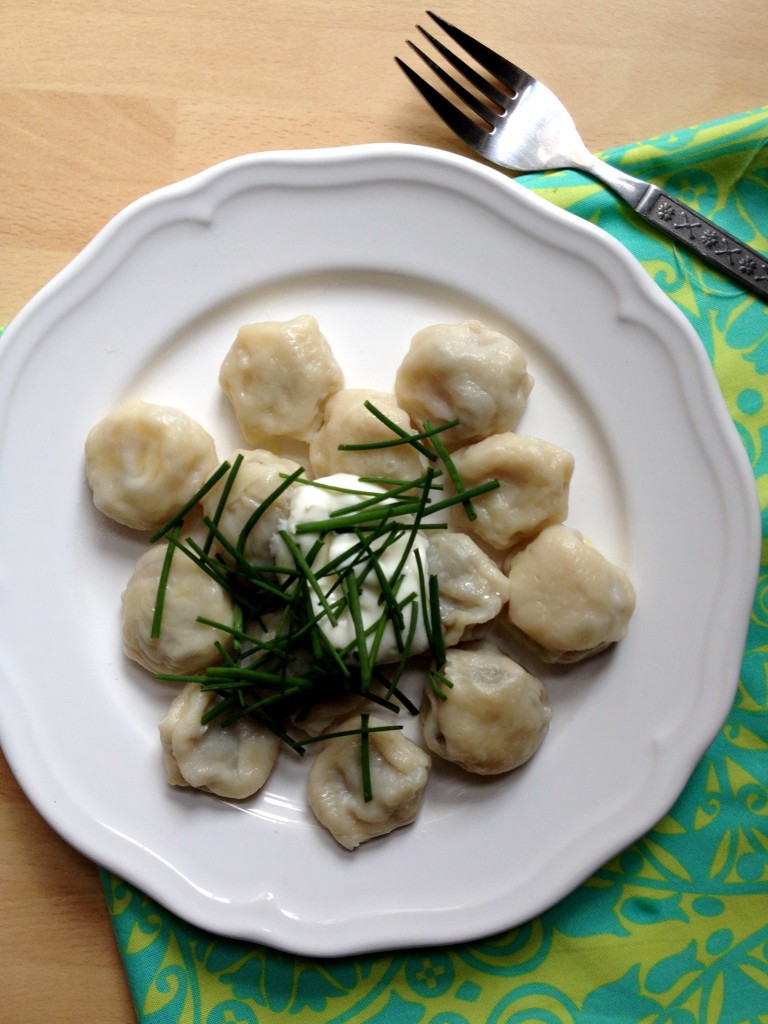
4. Cook the dumpling in salted boiling water for 10min, then drain them and add little butter so it does not stick.

5. Serve the dumplings while still hot, topped with sour cream and chives.
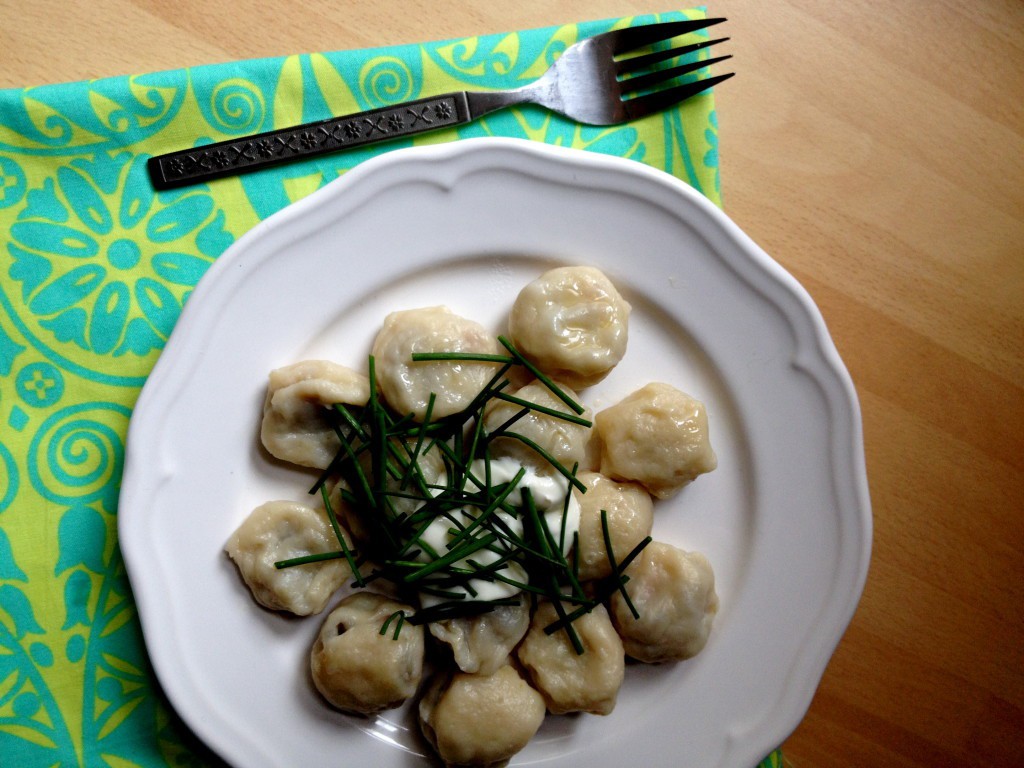
virtiniai with potatoes

Enjoy!

Rasa :)

13

Inspirations: Vicki’s illiustrations

Vicki's art

Today I have decided to share about what inspires me to be crafty. The biggest inspiration right now is my best friends illustrations! I love Vicki’s painting style, colours and messy lines. Aww… and I am really inspired by this autumn nature theme (above).

Vicki'e art*

What is your inspiration?

Rasa :)

0