Top

Author Archive | Rasa Pelham

Evangeline’s birthday cake

Chocolate sponge and Vanilla Cranberry cheesecake in oneThis cake that I baked for Evangeline’s birthday almost two weeks ago was received with the “awww…” wow!” and “that’s amazing” praises. Little did the know that this cake did not come out exactly how I imagined! I was experimenting with baking cheesecake on the top of the sponge (something like this). I took two of my favourite recipes and combined, the cheesecake unfortunately went under the sponge. I guess I will have to do more experimenting in the future! Chocolate sponge and Vanilla Cranberry cheesecake in one
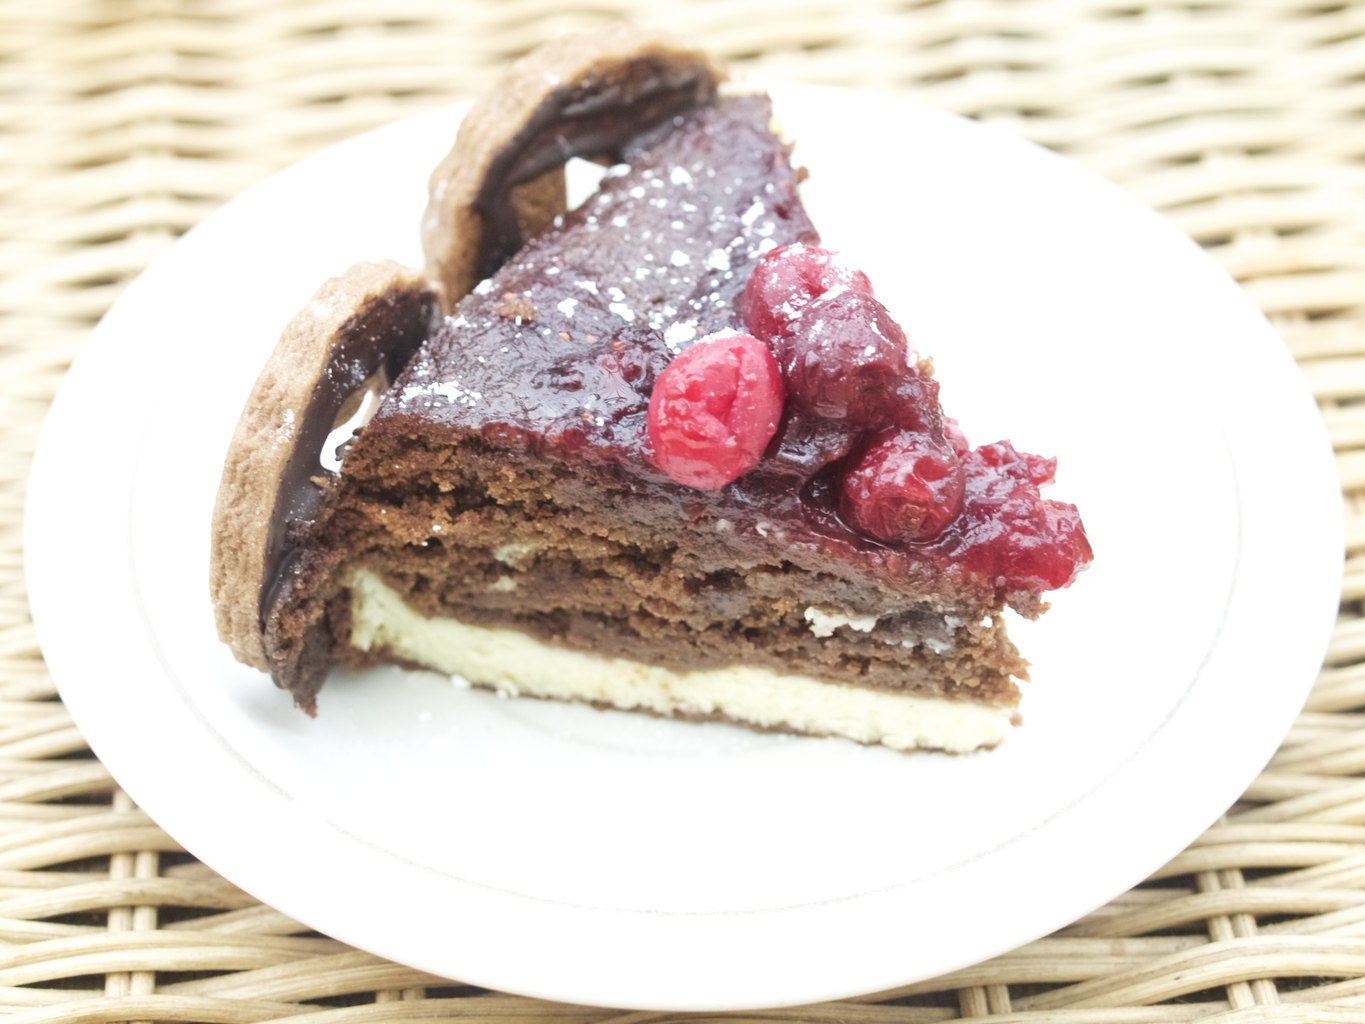
CHOCOLATE SPONGE & VANILLA CHEESECAKE WITH THE CRANBERRY TOPPING

(for the sponge)

  • 50g dark chocolate
  • 55g butter
  • 100g golden caster sugar
  • 1 egg
  • 2tbsp milk
  • 2tbsp yogurt
  • 70g plain flour
  • 2tsp baking powder

(for the cheesecake filling)

  • 400g soft cheese
  • 120g caster sugar
  • 1 tsp cornflour
  • 3 eggs
  • vanilla seeds scraped from one pod
  • 1/4 tsp lemon juice or white vinegar

(for the topping)

  • 200g cranberry sauce
  • 300g fresh cranberries
  • 50g sugar

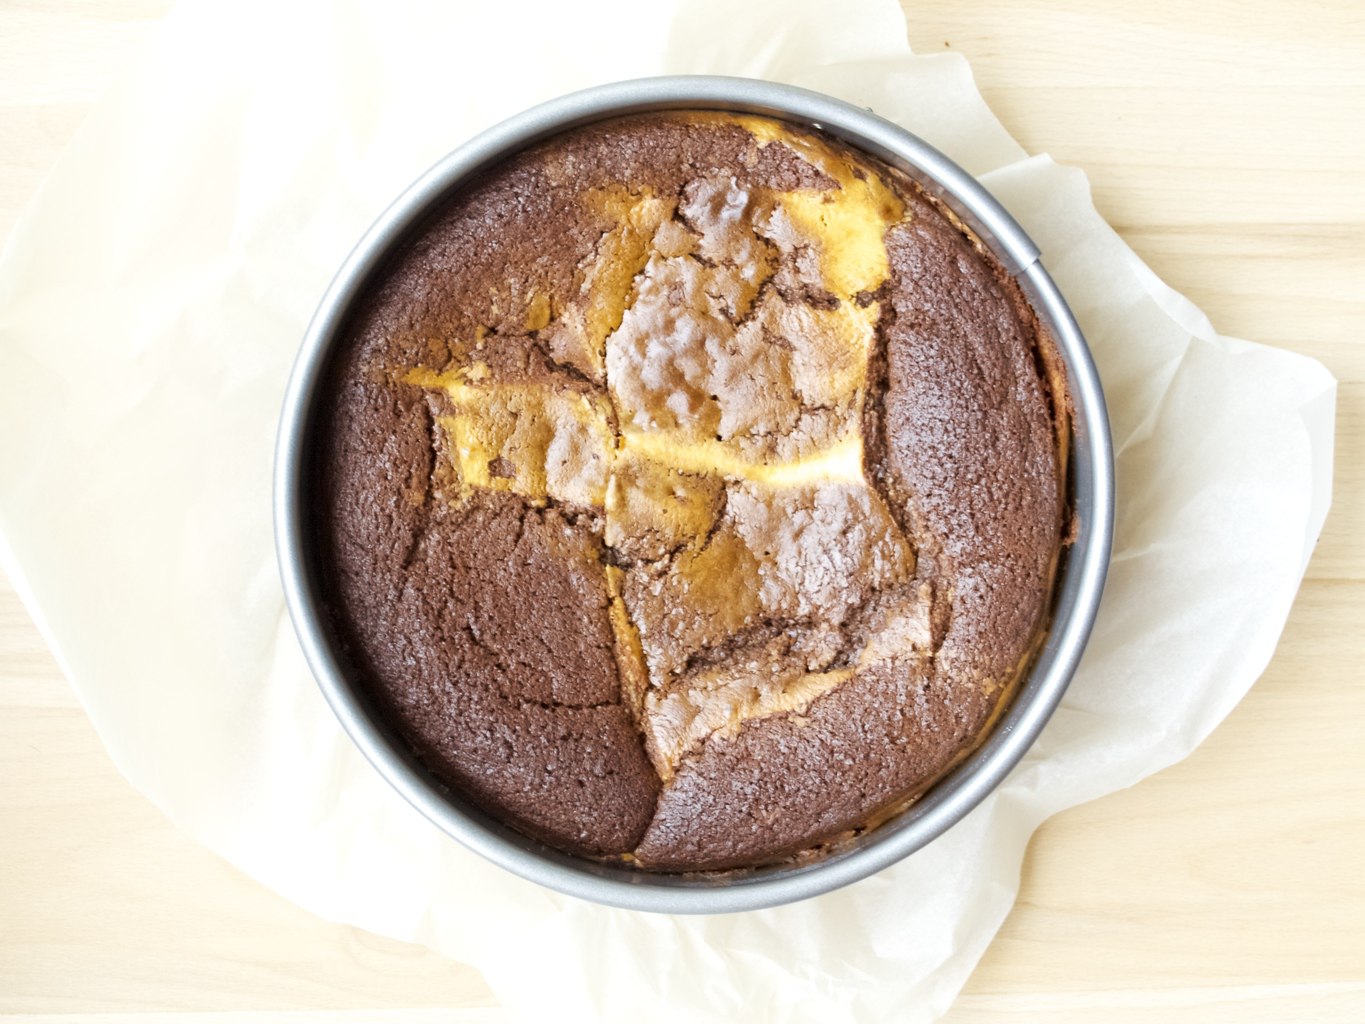
1. First make a chocolate sponge cake mix. Melt the chocolate in a heatproof bowl set over a pan of simmering water, then remove from the heat and set aside.

2. In Another bowl, cream the butter and sugar together until pale and fluffy. Add the rest of the ingredients gradually (including melted chocolate) and mix to combine. Spoon the mixture into the prepared baking pan.

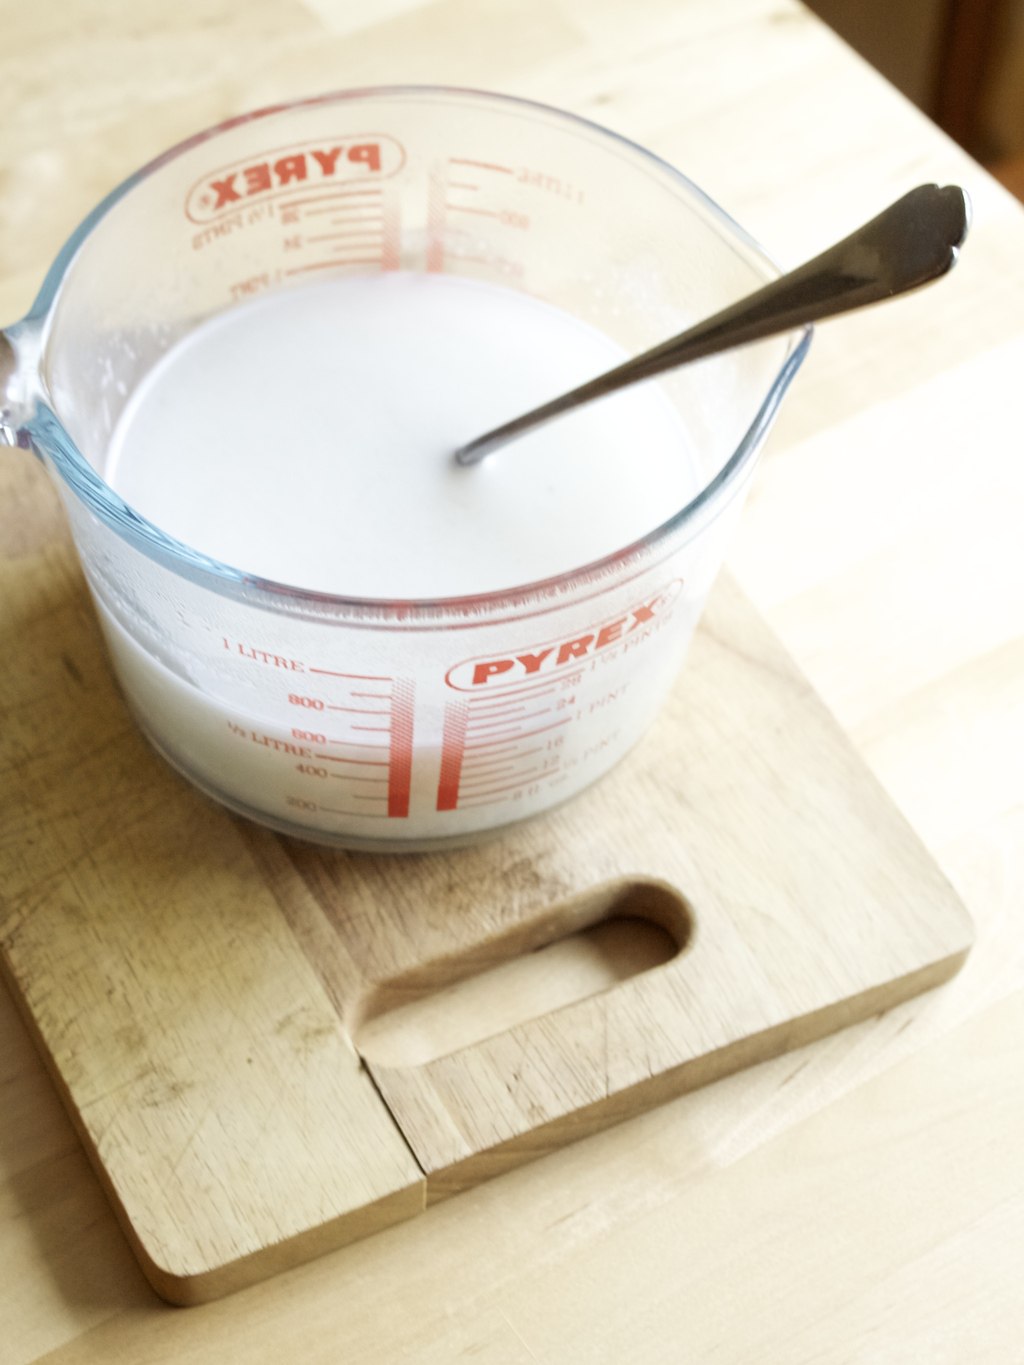
3. Next, make a cheesecake filling. Place all the ingredients into the bowl or large measuring jug and mix everything well with the hand processor (I find this method the quickest!).  Chocolate sponge and Vanilla Cranberry cheesecake in one
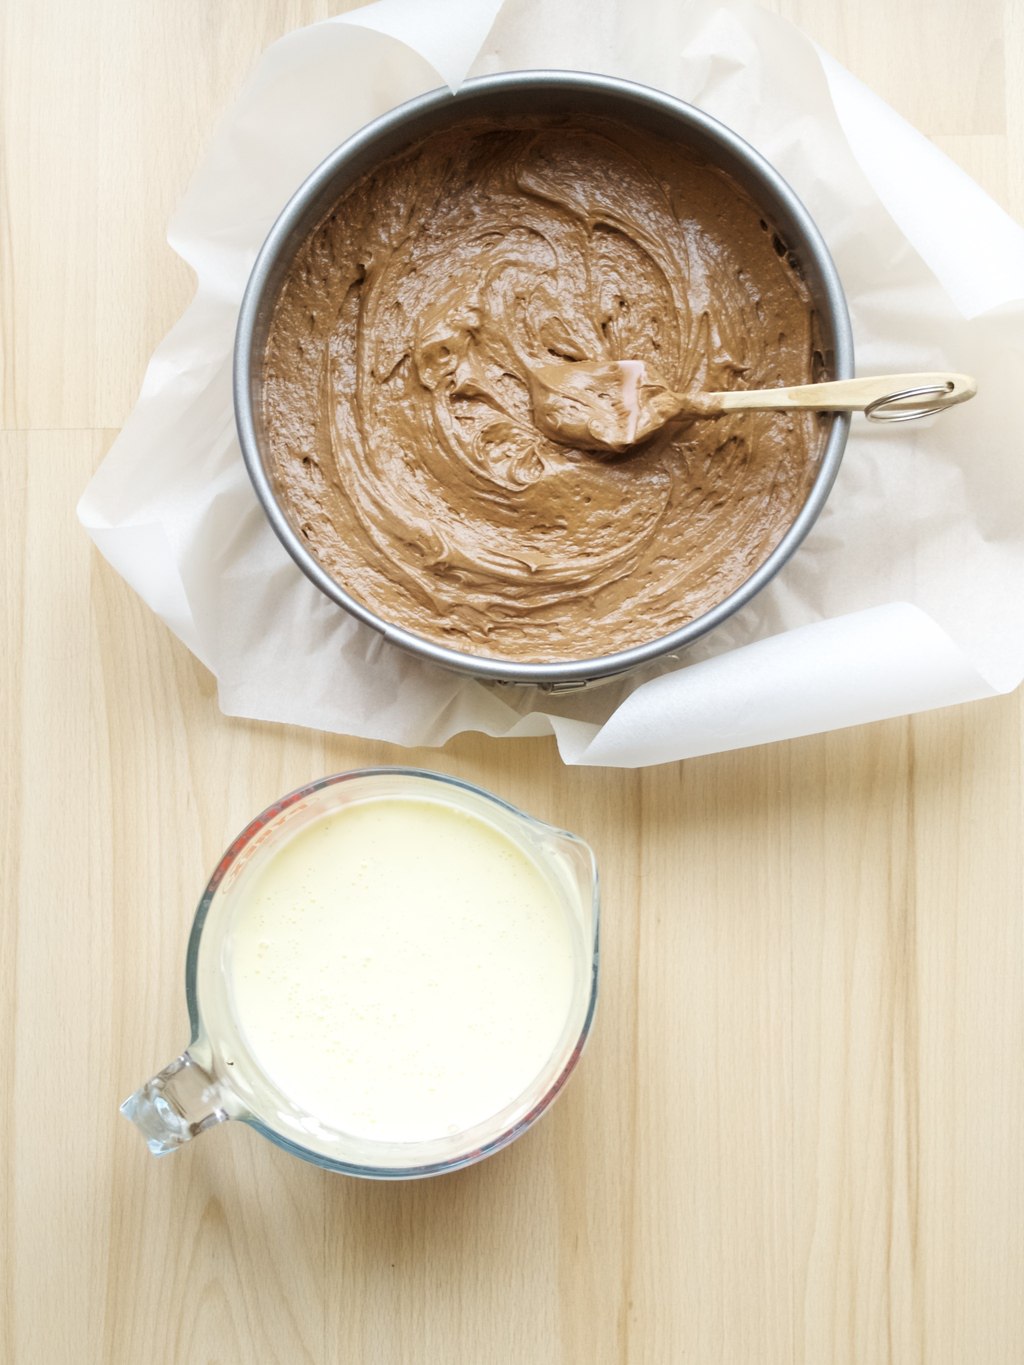
4. Pour in the cheesecake mixture on top of the sponge cake mixture. Pop the baking tin into the preheated 170C oven and leave there to bake for about an hour or hour and half. The cheesecake has to be not too wobbly!Chocolate sponge and Vanilla Cranberry cheesecake in one
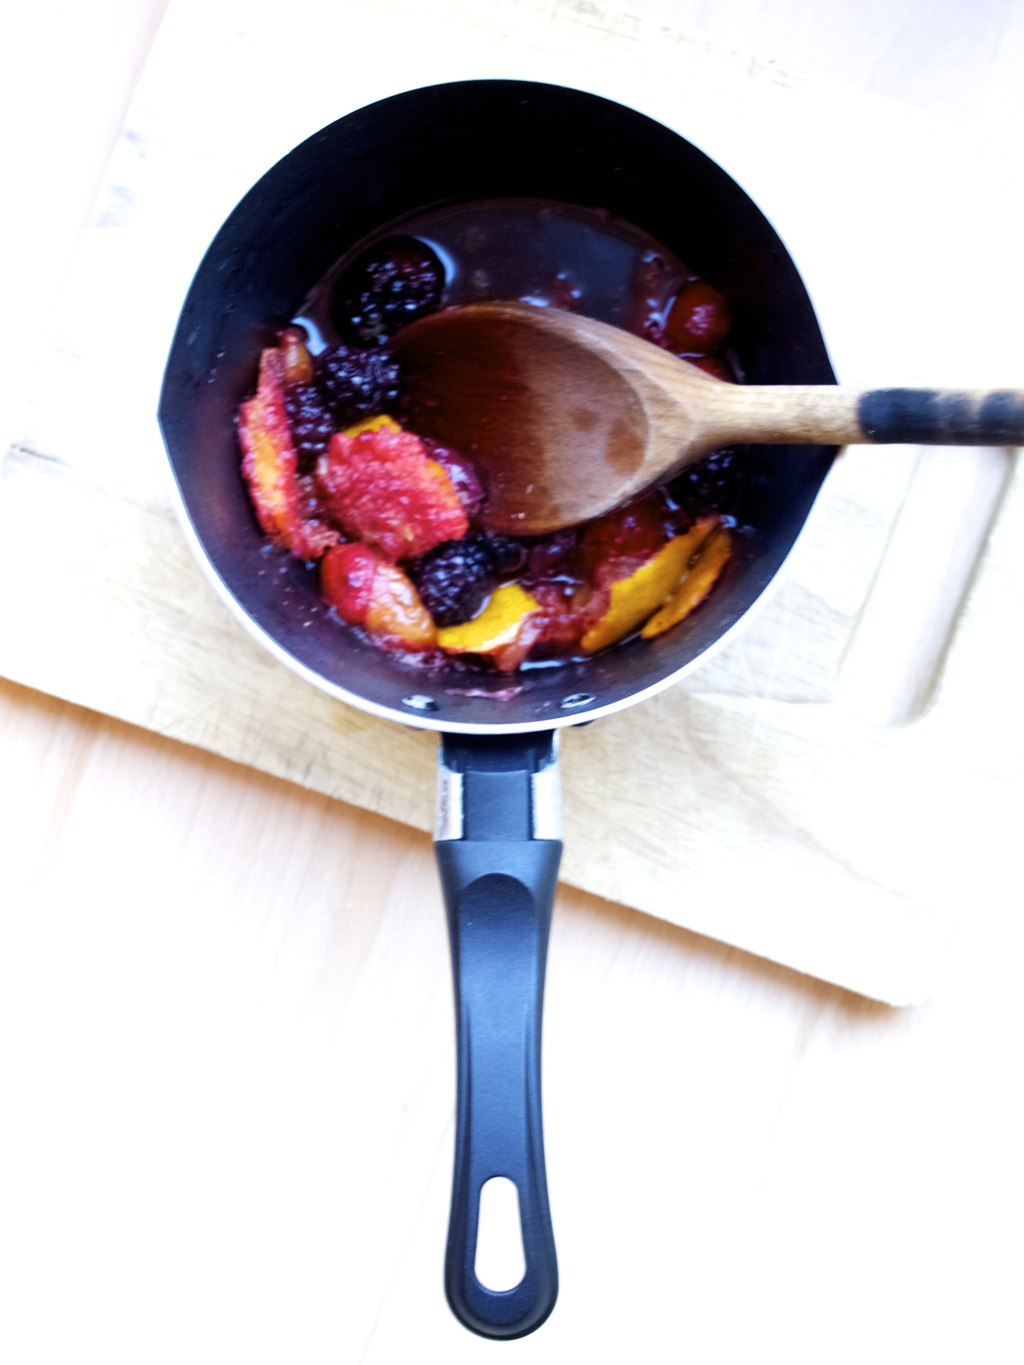
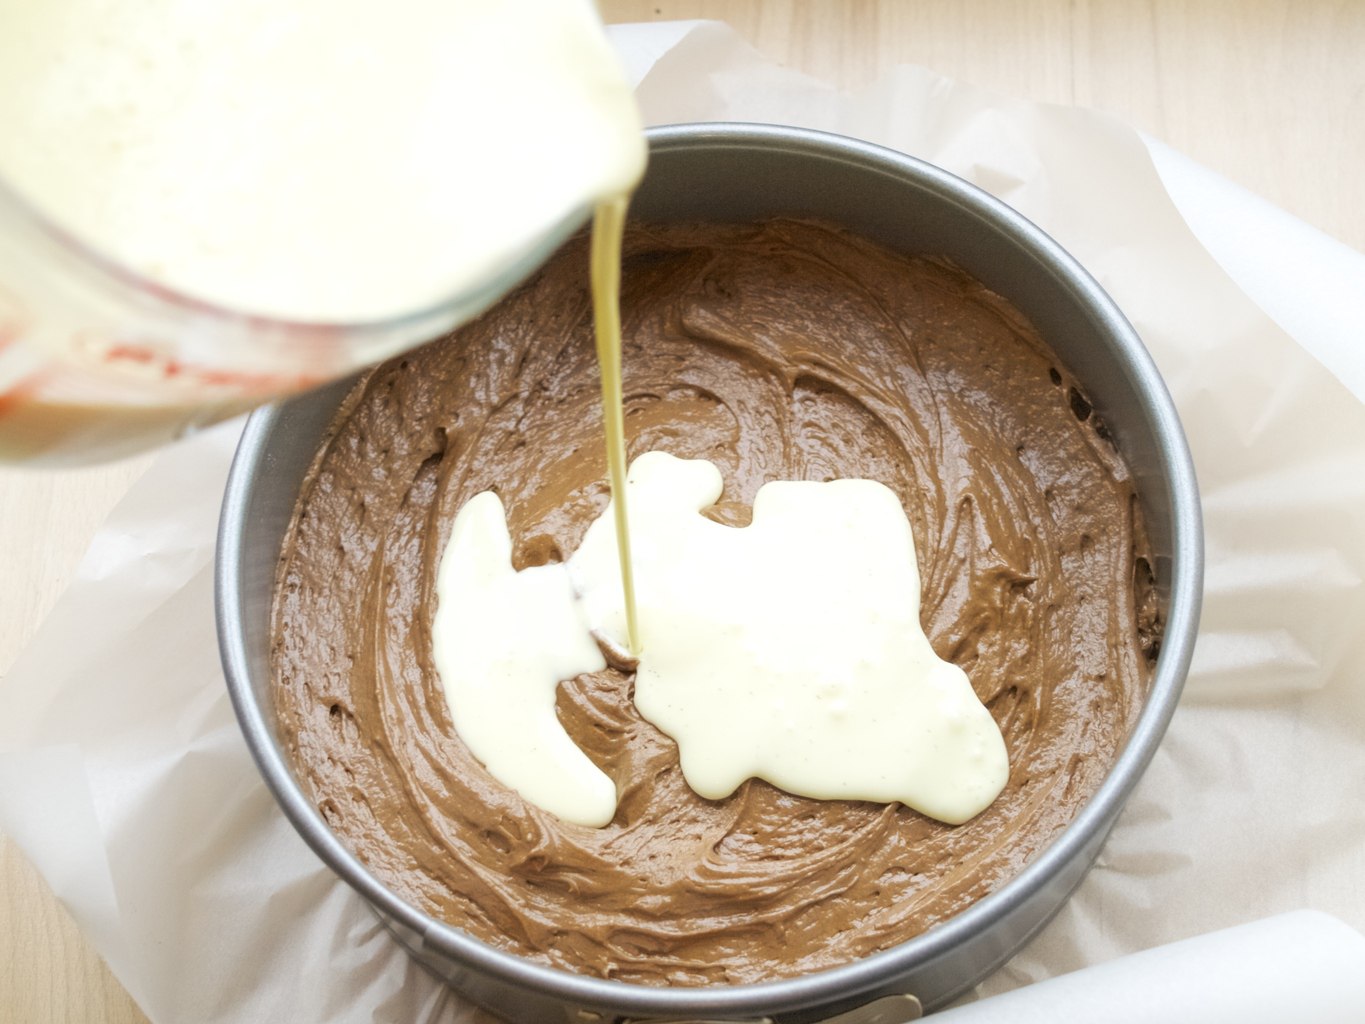
5. While cheesecake is baking, prepare the cranberry topping. Put cranberries, sugar and cranberry sauce into the small saucepan. Heat everything and mix until the sugar dissolves and cranberries bruise slightly.

Chocolate sponge and Vanilla Cranberry cheesecake in one6. Once cheesecake is cooked and cooled top it with the cranberry topping and let it set in the fridge for at least 2 hours.

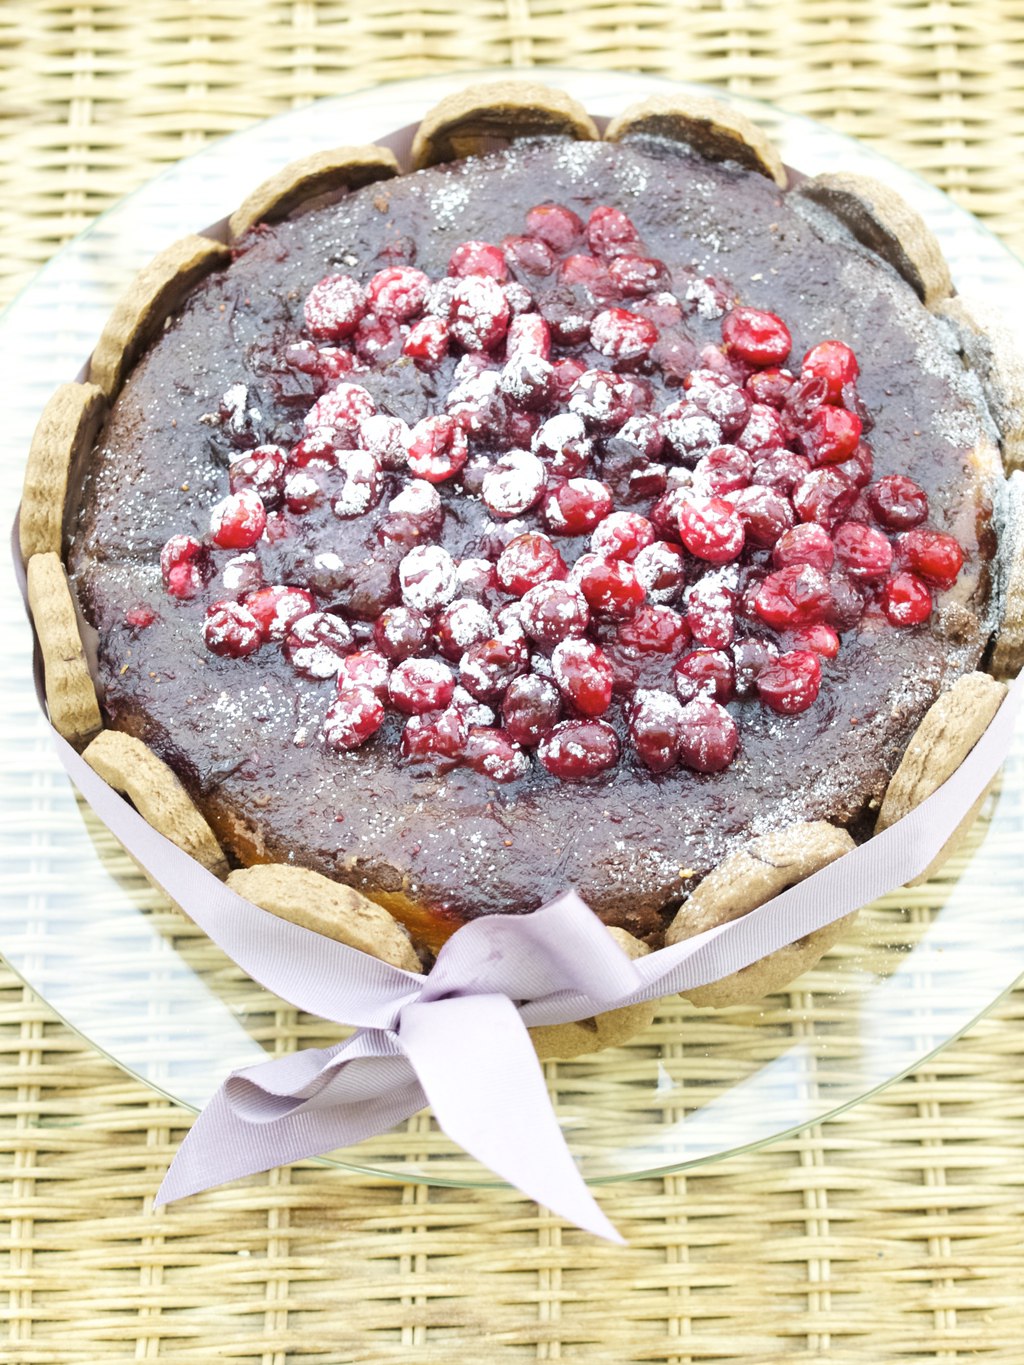
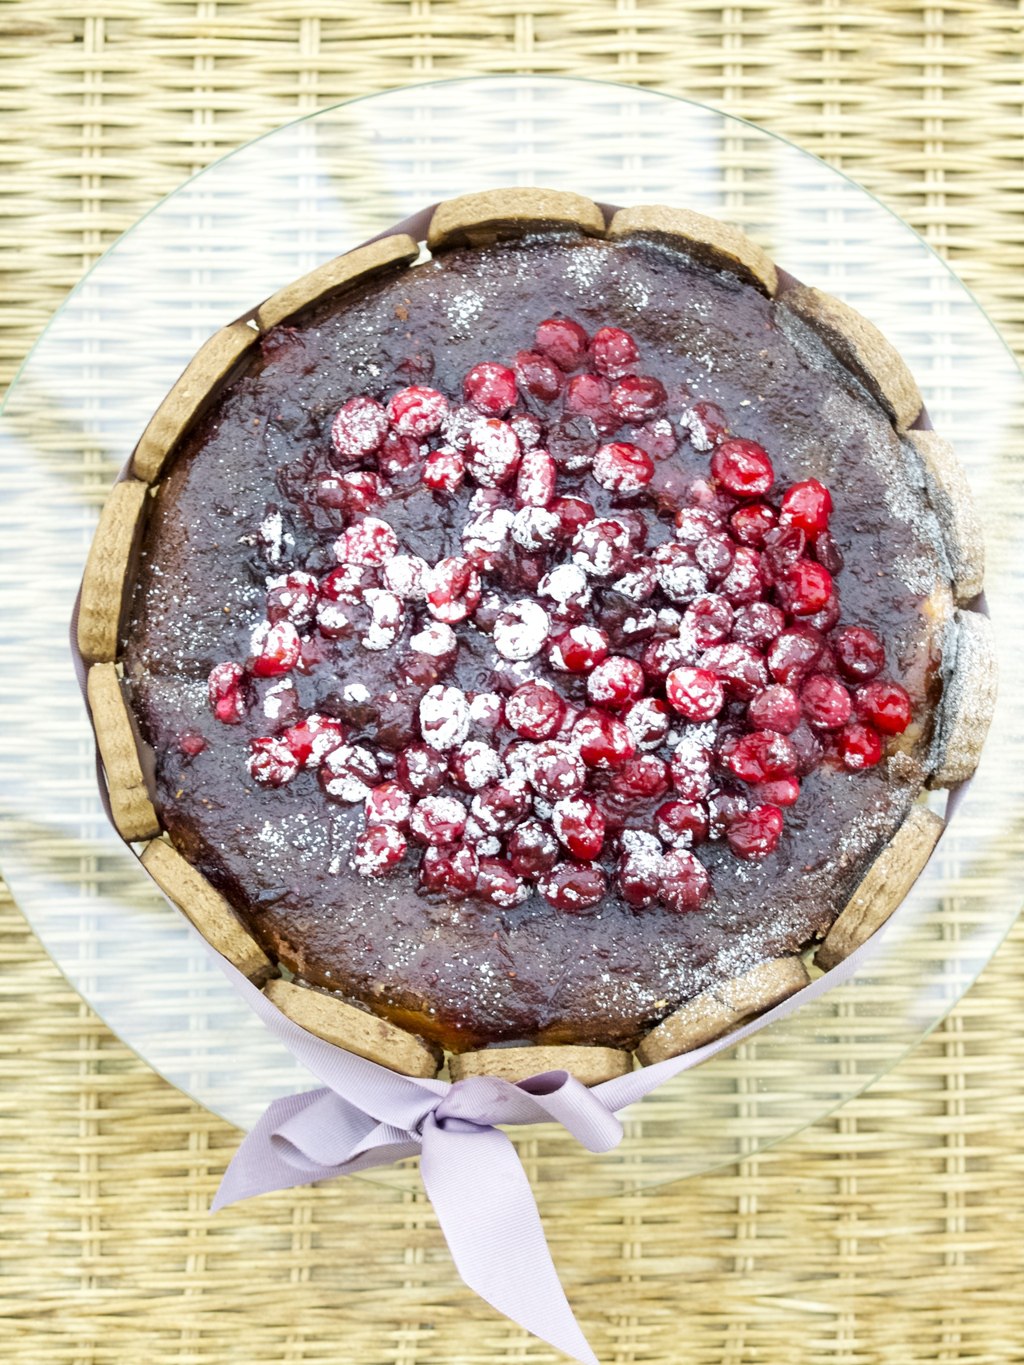
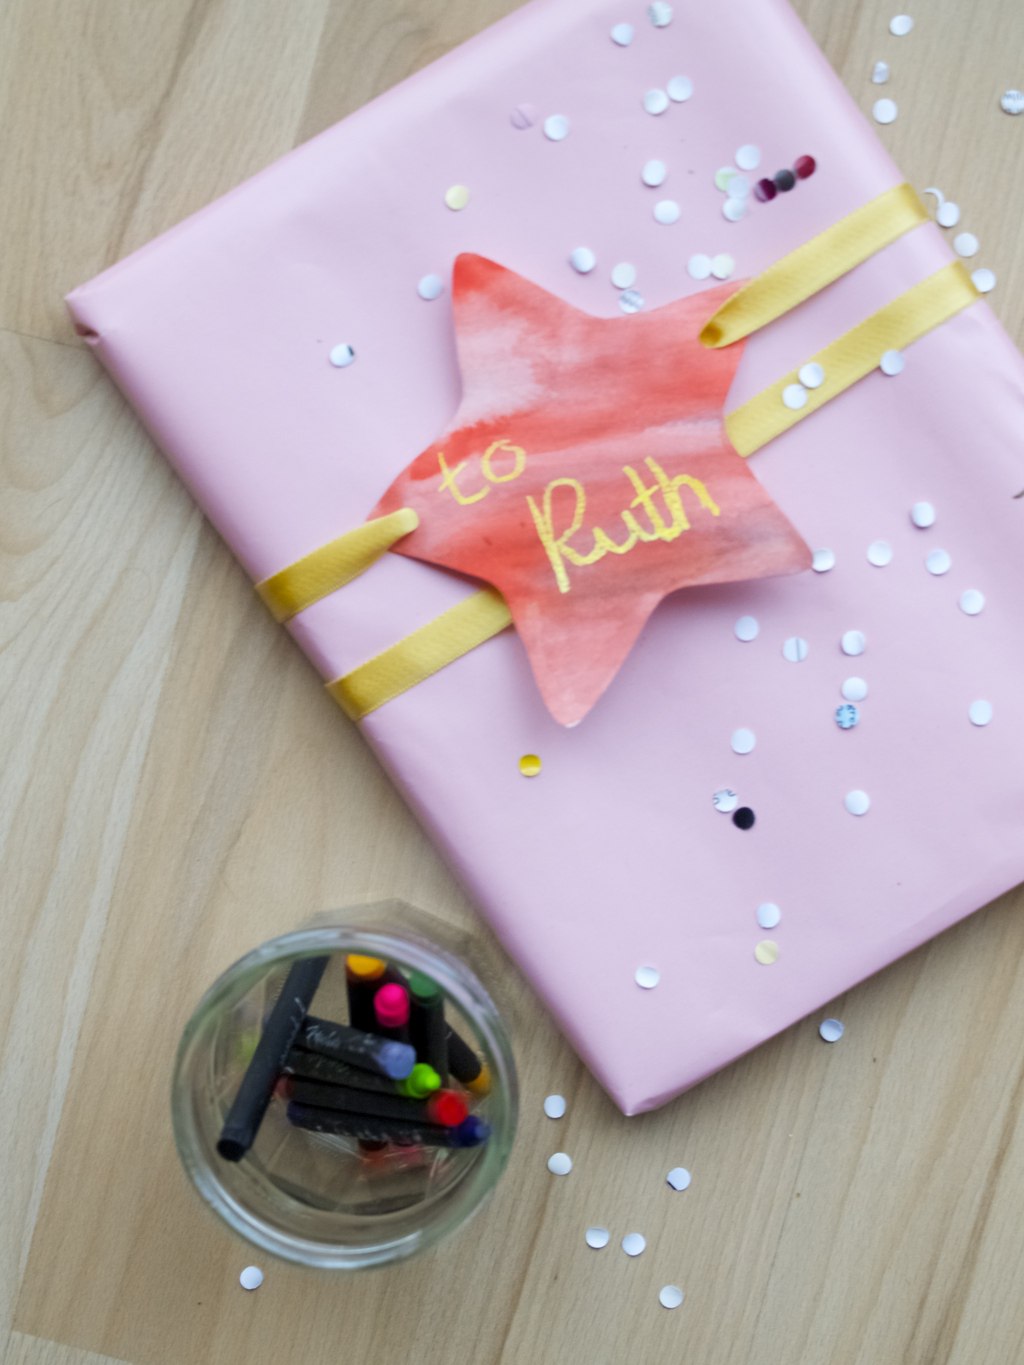
7. Decorate this cheesecake with biscuits. I used some melted chocolate as a glue!Chocolate sponge and Vanilla Cranberry cheesecake in one
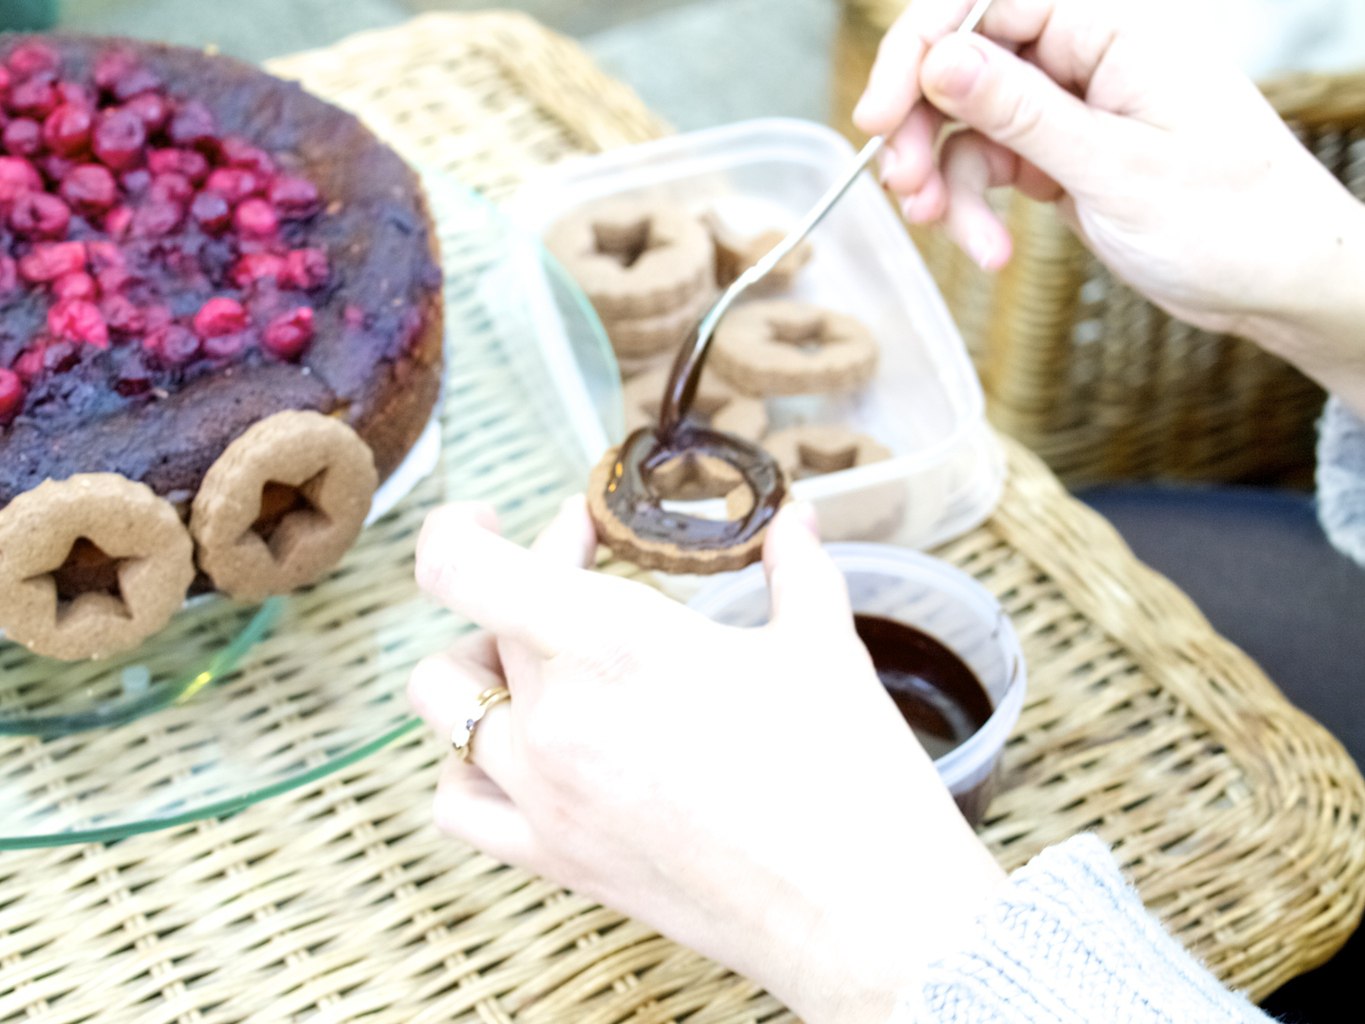
A nice ribbon holds everything in place and it makes the cake look so cute!Chocolate sponge and Vanilla Cranberry cheesecake in one
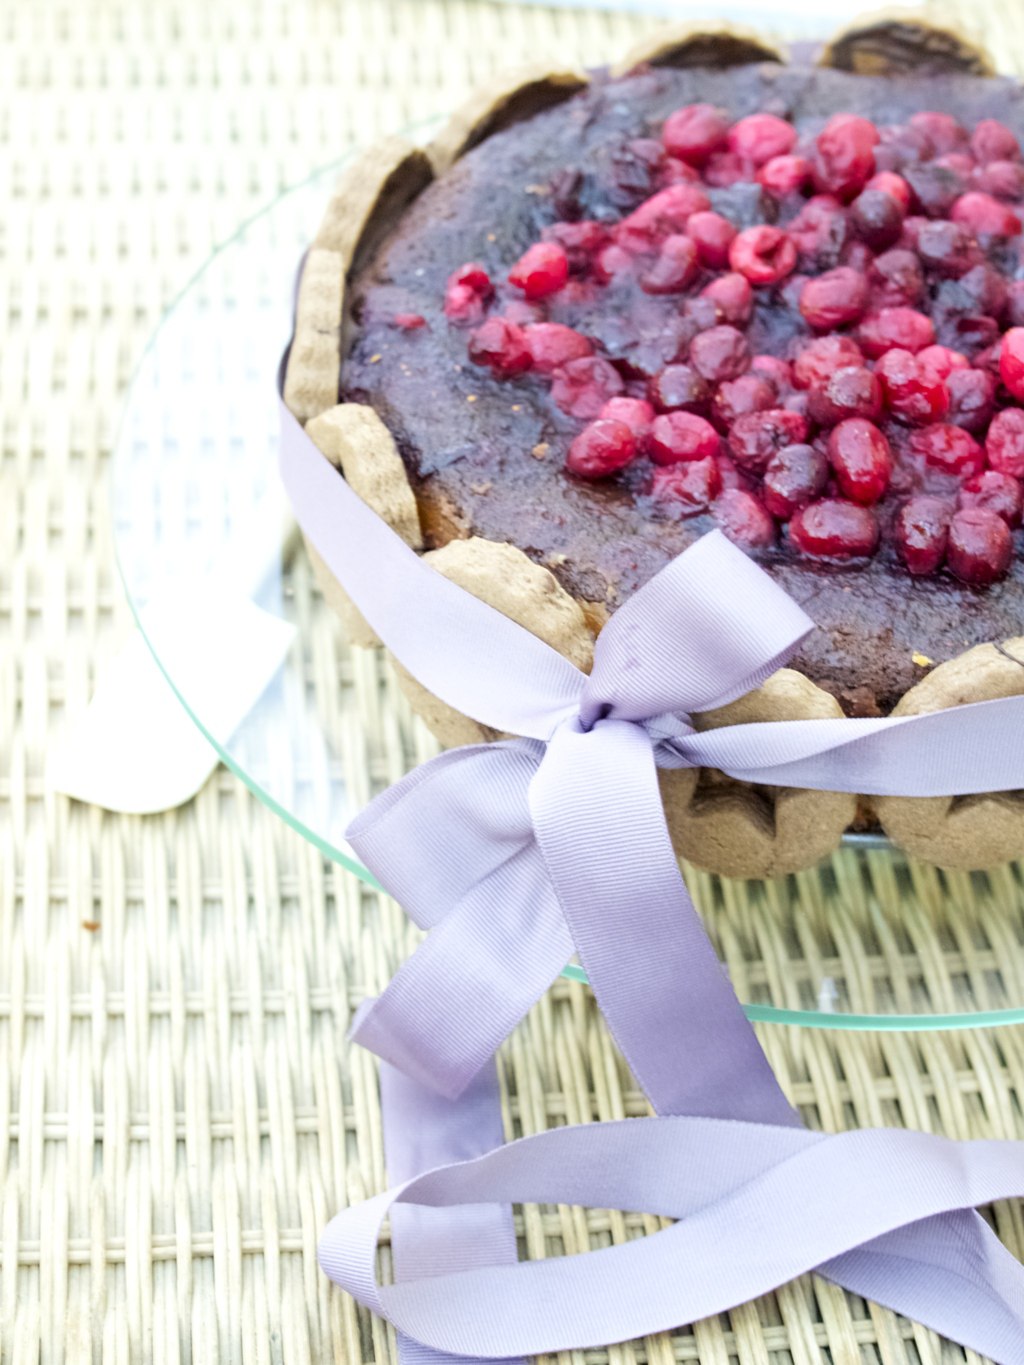
You can dust the cake with some icing sugar, but be warned! This lovely frosting effect does not last very long time :-(OLYMPUS DIGITAL CAMERA OLYMPUS DIGITAL CAMERA
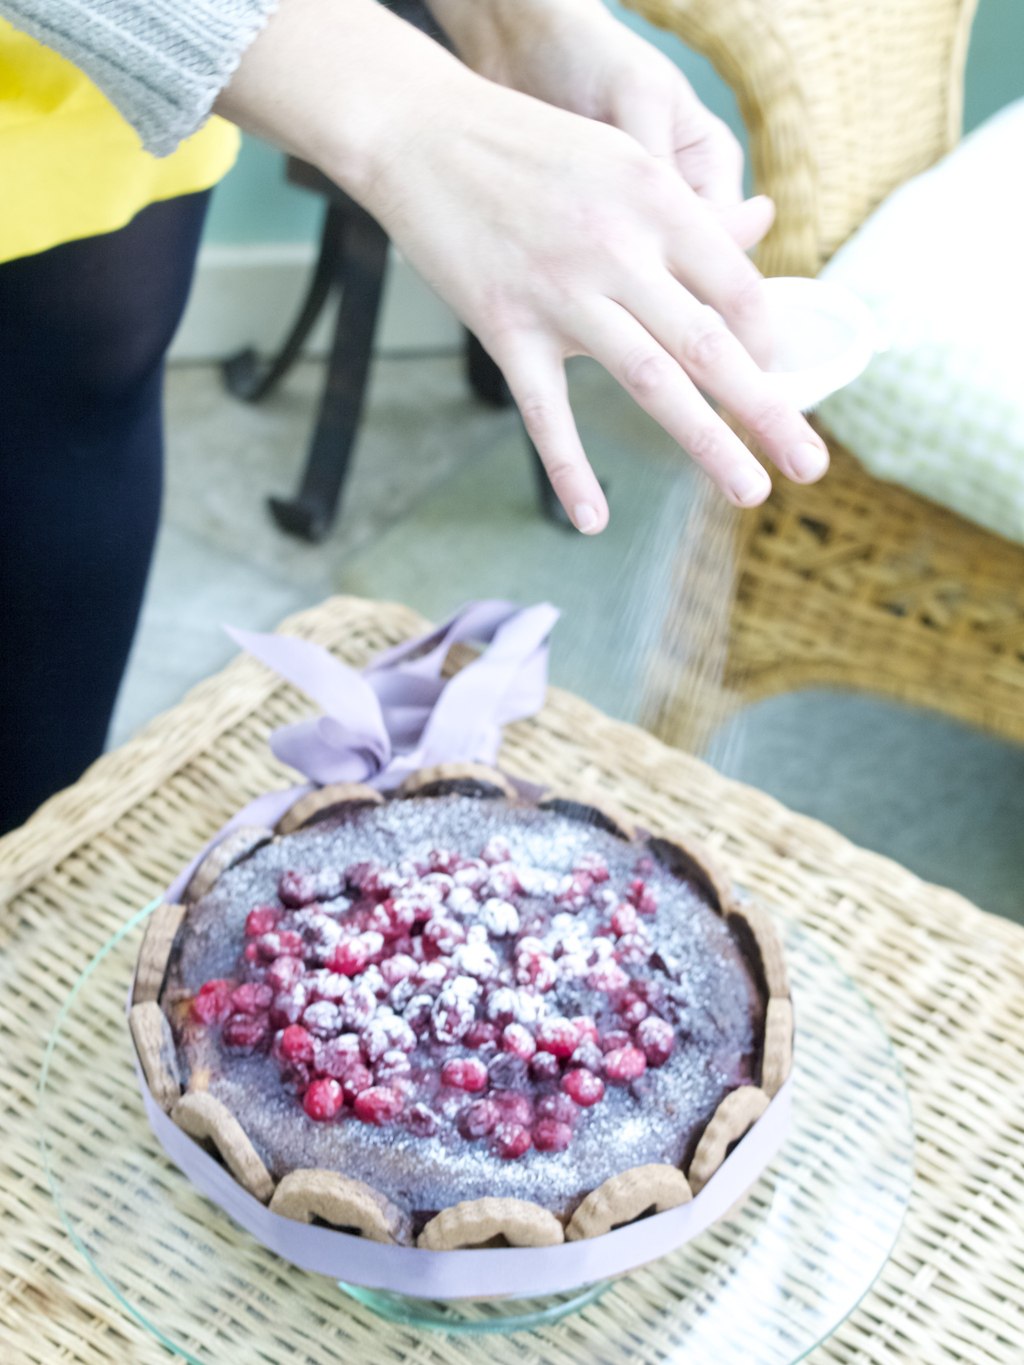
Enjoy cake decorating :-)

Rasa xoxo

0

Cut-out paper layered gift wrapping

Cut-out paper layered gift packaging ideaMy Sunday has been spend on the gift wrapping. Which I love most when it comes to gift giving! Fortunately this year my family have expanded so I have even more gifts to give. So here is my another idea on gift wrapping. It includes layering like many others I have done in the past ;-). Cut-out paper layered gift packaging ideaTo begin you will need wrapping paper in two colours (one of them can be a sheet of colour paper), Sellotape, double-sided tape, scissors, pencil, scalpel and cutting mat.

1. Cover the gift with the piece of paper and secure it on with the Sellotape.

2. Measure enough of wrapping paper for the second layer (this one has to cover all around the gift). Mark the outskirts of the gift itself using the pencil.

3. Inside the marked area draw what you would like to cut out. I used star cookie cutter to draw lots of stars! But you can also draw other shapes as well as the letters to complete the words and phrases ;-). Cut-out paper layered gift packaging idea4. Cut out what you have drawn!Cut-out paper layered gift packaging idea5. Wrap the cut out paper around the gift, making sure the cut-outs cover the other paper layer. Cut-out paper layered gift packaging ideaCut-out paper layered gift packaging ideaFinish off the gift with some washi tape, ribbon or a matching gift tag!Cut-out paper layered gift packaging idea Cut-out paper layered gift packaging idea Cut-out paper layered gift packaging ideaHappy gift packaging!

Rasa xoxo

0

12 days of overnight porridge

My mornings are sleepyI am not always a morning person and very often I just prefer to snooze instead of having more time to eat breakfast. And I do LOVE breakfast! But since I have tasted overnight porridge at grannies, I have started experimenting with different types of grains for a simple morning breakfast. My mum also makes porridge a lot and I did grow up on that type of breakfast. And porridge does’t just stop with oats! You can also use barley, rice, quinoa, buckwheat and many more. I only tried out few and I am really glad I did. I feel much more organised when I prep my breakfast the night before :-).

And this is how my lovely warm porridge breakfast journey went:

Day 1: I have mixed steel cut (pinhead) oats with 3 parts of water (1:3 ratio) and added a pinch of salt. Next morning I added yogurt, mixed berries, seeds and honey. The best oats ever!12 mornings of overnight porridge Day 2: It’s a spiced apple morning. The night before I have added one cored and sliced gala apple into 1:3 ratio oats (you can try other apple types, but if you pick a cooking apple such as bramley or granny smith then your porridge might need some sugar). I also added some ground cinnamon together with the pinch of salt. This also came out wonderfully well! I had it with some yogurt and honey :-).

Day 3: I don’t know what came to me, but I got attracted by the idea of adding spinach into the porridge (crazy, I know!). I have seen this “green monster” overnight oats recipe and I just wanted to try it in porridge form. I mixed oats with almond milk, added chopped banana and some frozen spinach. Little did I know that in heat banana discolours and spinach turns all khaki. So if you can guess, we could not eat it, even if it had a wonderful banana aroma…

Day 4: Another unlucky day. I decided to try out rice pudding grains, so I mixed 1/2 cup of rice with 3 cups of almond milk as I would with oats. Turns out rice requires more liquid when slow cooked, so rice burned in the slow cooker by the next morning!

Day 5: I mixed 1/2 cup pudding rice with 4 cups of almond milk.The consistency turned out great! Served it with cherries, yogurt and almonds. Although I think this would be soooo nice with some condensed milk and cherries. But then this would be a pudding, not a breakfast. But maybe pudding for breakfast is not that unacceptable?

Day 6: This time I used a regular milk instead of almond milk and mixed it with some molasses. I suggest you don’t do it! It’s too rich while maple syrup would compliment this sooo much better. Anyways sliced banana and pecan nuts are good match! Don’t you think?

Day 7: I used my mum’s recipe. I finely chopped 1/5 butternut squash, added 1/2 cup rice, 1/2 cups raisins, 4 cups of milk, 1tbs sugar and pinch of salt. It’s lovely just as it is as it has sweetness of it’s own! 12 mornings of overnight porridge Day 8: Tried out barley grains today! But not pearl barley, but the flaked ones. We usually have them savoury in Lithuania, but decided to have sweet this time. I mixed 1/2 cup barley with 2 cups of water and a pinch of salt. In the morning I had it with some yogurt, pouched pear, honey and some poppy seeds. I loved pouched pear, even if I don’t like pears in general!

Day 9: Decided to have barley the traditional way: savoury! In Lithuania we usually add fried onions and carrots on top of cooked barley porridge. But I wanted to keep it simple and healthy! So I added some butter (butter has lots of goodness in it!!) and sprinkled with some chopped carrot and cucumber. Indian or moroccan spices go really well here too!

Day 10: tried out quinoa. I have mixed quinoa with 3 parts of water (1:3 ratio) and added a pinch of salt. Next morning I added yogurt, chopped pineapple, seeds and honey. I found quinoa tasting dry and a bit bitter. 12 mornings of overnight porridge Day 11: Went all Christmasy! I mixed 1/2 cup quinoa and 2 cups of milk with some dried cranberries. Next morning I added a little bit more milk, pecan nuts, clementines and maple syrup. It was fab!

Day 12: Had the best of all! I mixed 1/4 cup steel cut oats, 1/4 cup quinoa and 2 cups of milk. In the morning I had it together with cherries, extra milk and some maple syrup. It was quite filling indeed!12 mornings of overnight porridge So I tried overnight porridge with steel cut oats, rice, barley and quinoa. I loved oats the best. No wonder it’s the most popular. But I guess it is nice to have some variation sometimes. I really hope you found this inspiring!12 mornings of overnight porridge Enjoy healthy breakfast running up till Christmas :)

Rasa xx

0

Friendly Nettle shop is re-open! Yey!

New in Friendly Nettle Shop: Crochet Star kitHey dear friends! I have a very good news. The Friendly Nettle shop is re-opened and updated as it should be! There is always room for improvement, but I am really happy with the progress!New in Friendly Nettle Shop: Hanging birdie kitWith this store relaunch we are happy to add craft kits to our range. These include everything you need to make a thoughtful gift for a friend or a loved ones as well as some biscuits to enjoy while you do.New in Friendly Nettle Shop: Crochet Star kit New in Friendly Nettle Shop: Hanging birdie kitIf you are not a maker type then you can gift this to someone who like crafting themselves. The kits come nicely packaged, so you don’t need to do a thing! Maybe just add a gift tag or a simple wrap and that’s done!New in Friendly Nettle Shop: Hanging birdie kitEnjoy Christmas shopping!

Rasa xoxo

0

My favourite mulled wine recipe this year

jam mulled wineI lost the count how many mulled wine glasses (or bottles) I drank this year. Many many glasses for sure! That’s because I like mulled wine very much. So of course I have experimented with it a lot. Because I don’t always have ready mulled wine in hand, I often make my own when in need. I have been inspired by Jamie Oliver mulled wine recipe this year. I came up with very smooth and thick mulled wine because of that. It almost taste like a spiced jam! jam mulled wineJAM MULLED WINE

  • 2 clementines, cut in half
  • 2 handfuls of mixed berry mix (frozen works well)
  • 100g sugar
  • 3 cloves
  • 1 star anise
  • 1 cinnamon stick
  • 1 bottle of red wine (I like merlot most)

1. First heat sugar with clementines, berries and spices. Mash clementines and berries so the juice come out and the sugar dissolves in it.

jam mulled wine2. When everything dissolves, pour the wine in. Heat further till it warms but does not boil (you want to make sure that alcohol does not evaporate!). jam mulled wine Pour the mulled wine into the glasses and enjoy Christmas!

Rasa xoxo

0

Things I look forward to in December

Things I look forward in December, Christmas of course!

Well, could I be even more obvious? Of course I am waiting and anticipating for Christmas most! It’s day 6 and 18 more to go!

1. CHRISTMAS DECORATION. I had a branch set up with these bird decorations (soon you could be making them yourself!). Right now I am loving my advent calendar (see the previous post)!Make your own birdie decorations!2. ONLINE SHOP RE-OPENING. We had our market last saturday where we were selling sewing and crocheting kits together with biscuits! If you missed it, not to worry! They are coming on to our online shop ;-). At Christmas market stall, online shop to be updated soon!3. TIME AWAY WITH FAMILY. We are going to Lithuania and back to UK. So lot’s of upcoming traveling. We are currently deciding if we should take Leia with us so we are testing her on a short trip (Yesterday she took her first car ride!).Princess Leia4. VISITING SEASIDE IN WINTER. I wrote last year about one of my favourite seasides in the world. This year we are visiting it in winter while snowing (hopefully, fingers crossed). Can you imagine this in snow? I bet it will look magical!Seaside in Kursiu NerijaHappy December!

Rasa xoxo

0

Star advent calendar

Star advent calendar DIYI know, I know this might be a bit too late to make, but I really love how it decorated our house all Christmassy! I also like 1 candy a day diet very much, at least for now it’s not harming anyone. I got this idea from here (even if it looks completely different, my lightbulb lighted up as soon as I saw that raindrop decoration). Star advent calendar DIYSo, to make your own star advent calendar cut out star pieces out of felt material.Star advent calendar DIY1. Embroider the number of the day on one felt star piece. I found chain stitch is the best for that!

2. Join two felt star pieces together by using buttonhole stitch.

3. Once you finished stitching two star pieces together make sure not to cut the string. It will be useful late on!

4. In the back cut the star open so the candy could be inserted. You can finish the edge off with buttonhole stitch as well. Star advent calendar DIY Star advent calendar DIY Star advent calendar DIYOnce all 24 stars are made then get a wire hanger and wrap it with pine branches (or fir or spruce or even cypress and cedar). I used a string to keep the branches tight on the wire. Star advent calendar DIY Star advent calendar DIY Star advent calendar DIYLast thing to do is to tie all the stars onto the hanger ;-). Enjoy!Star advent calendar DIYHappy Christmas waiting!

Rasa xoxo

2

Soda bread baking

Soda Bread with Spelt recipeI always try to bake my own bread, but to be completely honest here I don’t get to do that very often. Who has the time to wait for at least 3 hours? I guess I could be more organised and think in advance when bread is need for dinner. But that is not always possible either. Thanks to the Irish, there is a quicker solution for home bread baking. Soda bread as the title suggest uses baking soda instead of yeast, therefore the rising process is faster. So no waiting time! Great! Over a week ago I baked these little soda bread buns for dinner (we had burgers) that had spelt. You see, I really wanted to try Leatheringsett Watermill spelt flourSoda Bread with Spelt recipeWHOLESOME SODA BUNS makes 8-10 buns

  • 250g spelt flour
  • 250g strong white flour
  • 10g salt
  • 4tsp baking powder
  • 150ml milk
  • 150ml yogurt
  • 1 egg, whisked
  • seeds of your choice (optional, I used sesame seeds)

1. Combine all the ingredients in the bowl (except egg and seeds) and kneed briefly to make a dough. Soda Bread with Spelt recipe2. Divide the dough into 8 or 10 balls. Place them on a baking tray and cut a cross in the top f each bun. Brush some whisked egg on top and sprinkle with seeds.Soda Bread with Spelt recipe3. Bake these buns in preheated 200C oven for about 20 min until they sound hollow when tapped on the base. Soda Bread with Spelt recipe4. Let the buns cool for few minutes before enjoying them ;-) .Soda Bread with Spelt recipeHave a lovely week!

Rasa xoxo

0

Sewing: back to the basics

Back to basics: sewing seamsWhen I was at Uni I had made this file filled with production samples. It has all sort of stuff from basic seam sewing to collar attachment. So I found really good to come back to it. I feel quite embarrassed by a lot of samples as they look a bit wacky, but overall really useful. Some of the techniques I used more than I need, while some were left out unused. Either way I am really glad I revisited my old folder.Back to basics: sewing seams

Basic seam samplesWant to have a better look at my folder? If yes, I am happy to share! Just click away here ;-). There you can find pics of some samples like above, but with more detailed information and step-by-step instructions.Back to basics: sewing seamsI hope you find this useful ;-)

Rasa xoxo

0

Pinterest challenge: slow cooker coconut ginger chicken & vegetables

Slow cooker coconut ginger chicken & vegetablesI had this recipe saved on Pinterest for sooo long. Almost as long as Pinterest existed actually! Back then I did not have a slow cooker or a casserole dish, so this was never an option. And I am glad that I got it out of my system now! Don’t get me wrong, it was nice. But I guess I had very high expectations of this and this did not turn out to be amazing. I think I should have doubled on ginger and added some chilly flakes as suggested in adult version. I can’t believe, I never even liked spicy food! Anyway, try it for yourself… you never know, maybe this is going to be your favourite dinner!Slow cooker coconut ginger chicken & vegetablesSLOW COOKER COCONUT GINGER CHICKEN & VEGETABLES adapted from Simple Bites

  • 4 garlic cloves
  • 2cm cube ginger (wished I doubled here)
  • 2 shallots, roughly shopped
  • 1 tbsp coconut oil (this is the oil I usually use for cooking these days)
  • 0.5 tsp ground pepper
  • 0.5 tsp ground cumin
  • 0.5 tsp ground coriander
  • 1tsp ground turmeric
  • salt to taste
  • 1tsp chilli flakes (optional, but I wish I added that in mine)
  • 700g pack skinless boneless chicken fillets, sliced into chunks
  • 100g creamed coconut, finely grated
  • 1 tbsp corn flour mixed in little cold water
  • 1 cup vegetables of your choice (can be frozen)

1. in small food processor combine garlic, ginger and shallots. Slow cooker coconut ginger chicken & vegetables2.Fry the garlic mixture together with the dry spices until it softens. Add the chicken chunks and fry to cover it in spices.3. Transfer everything from the frying pan into the slow cooker. Dissolve creamed coconut in 400ml boiling water and pour it over the chicken. Cook it for 4 hours or so on medium or depending on your slow cooker settings.  Slow cooker coconut ginger chicken & vegetables2. After 4 hours add vegetables and cornstarch and cook for extra 1 hour or so.Slow cooker coconut ginger chicken & vegetablesServe it with rice or with couscous (everything goes with couscous!)

Rasa :-)

0

Let’s make some gift tags

handmade gift tags DIYA week or so ago I shared an idea on how to package the gift. Today I am hoping to inspire you on how to make some gift tags! It’s easer than you think and it gives a personal touch to the present you are giving. I made these using watercolour technique over wax (over waxy crayon to be specific).

So i drew the star shaped tags on the paper (sketch or watercolour paper is well recommended!). If you are into stars like me right now, then click here for the template ;-). I used yellow crayon to write the names in, but you can use any colour you want. However the lighter colour you choose, the better the effect will be . So if you got a white crayon (sadly I did not have any), then this maybe your perfect choice!handmade gift tags DIYThe next step is to paint over with water colour. The water colour pigment won’t stick to the area where you drew with crayon, leaving it to stand out even more! For more dramatic look try wetting the paper with the brush before applying any water colour. handmade gift tags DIYOnce the paint is dry (and it dries quicker than you think) you can cut the star shapes out. Using a punch hole make some holes for the ribbon or a piece of string. handmade gift tags DIY handmade gift tags DIYWrap the ribbon around the gift. Ta-dah!!handmade gift tags DIY handmade gift tags DIYHappy gift wrapping and Christmas waiting! Got your Christmas tree out yet?

Only joking (not)!

Rasa xoxo

1

Mugs of joy!

Peanut butter and white chocolate cookie in the mugOh dear! And this is where I slip when it comes to dieting. No matter how unavailable I make all the sweet treats, I always find enough of ingredients to make something quick and satisfying. For instance, these peanut butter and white chocolate cookies in the mug are quite dangerous! They are quick to make and they do remind me of Ben’s peanut cookie. If you ever had Ben’s cookies than you would know that the texture is dreamy! Hmm… how shall I put this… Well, It taste like cookie, but it is so soft and moist so it feels like you eating a fudge cake. Tempted? See the recipe bellow ;-). Peanut butter and white chocolate cookie in the mugPEANUT BUTTER & WHITE CHOCOLATE COOKIE IN THE MUG

  • 25g butter
  • 1 egg yolk
  • 2 tbsp sugar (dark brown preferably)
  • 3 tbsp flour
  • 1 tsp penut butter
  • 1 brick of white chocolate

Peanut butter and white chocolate cookie in the mug1. Melt the butter in the mug by microwaving it for 25 sec. Make sure don’t overheat it!Peanut butter and white chocolate cookie in the mug2. Add sugar, egg yolk and flour and mix to combine.

3. Spoon the peanut butter in and press it down with the white chocolate brick all the way down.Peanut butter and white chocolate cookie in the mug4. Microwave the mug cookie for 1-2min (again, check while ‘baking’). eat it as it is or serve it with some ice-cream. Yum!Peanut butter and white chocolate cookie in the mugHave a lovely weekend!

Rasa :-)

0

Quick to make no sew crochet edge scarf

Lace edge scarf DIY with crochet trim chardAutumn is ending and soon we will be entering winter season… brrr, hopefully it won’t be so cold this year! Because this scarf might not be the most perfect one to wear when is chilli outside. On the other hand it’s really pretty and it’s so easy to make (that is if you know your way round lace crocheting).

Last weekend we took Leia (our beloved cat) to the vets and this scarf was just enough to accessorise my otherwise plain top. In case you are wondering… our kitty had an infection after spaying, but she recovered really quickly. Her stitches came out last weekend and today we are removing her cone of shame (as Joni calls it). Yey!auntumnAnyways, if you fancy making this scarf, here is the place to click for crochet chart and more ;-)Lace edge scarf DIY with crochet trim chard Lace edge scarf DIY with crochet trim chard Lace edge scarf DIY with crochet trim chard Lace edge scarf DIY with crochet trim chardEnjoy your last weeks of autumn :-)

Rasa xoxo

0

Pinterest challenge: honey salmon in a pouch

honey salmon cooked in the pouchHey lovely readers! Are you ready for Monday? I think this recipe is a good one to make for lunch or dinner ;-). I am trying to come back to my healthier eating habits as I slipped down from the previous week. I cooked a fish in a pouch last month or so, but this one taste so much better! You can hardly feel you are on the diet with this one! Anyways… check out the recipe below ;-). honey salmon cooked in the pouchHONEY SALMON IN A POUCH adapted from Damn Delicious

(for single portion)

  • 2tbsp runny honey
  • 1 garlic clove, crushed and finely chopped
  • 1tsp olive oil
  • 1 tbsp apple cider vinegar (I like this one better)
  • salt and pepper to taste
  • 1 salmon fillet

1. first things first, make the honey glaze by mixing all ingredients (except salmon) together.honey salmon cooked in the pouch2. Place the salmon fillet onto the baking paper or foil and drizzle the honey glaze on top.honey salmon cooked in the pouch3. Close the baking sheet around the salmon and shape it into the pouch. It’s easer with foil, but with baking paper you would need a string to properly close the ends.

honey salmon cooked in the pouch4. Bake the pouch in preheated 180C oven for 20min. Don’t overcook it!honey salmon cooked in the pouch5. Serve this salmon with rice or couscous together with some vegetables. I had mine with sliced avocado for lunch!honey salmon cooked in the pouchEnjoy!

Rasa xoxo

0

Confetti gift wrapping idea

Confetti gift packaging ideaAs we come closer to Christmas we all need a bit of inspiration about how to wrap our gifts. I find packaging gifts to be very therapeutic! The gift wrapping is someones first impression and first impressions count. Right?

I made this confetti style packaging last week. The packaging technique is very similar to the one I used for my valentine’s gift packaging. All it needs is some confetti inserted in between the layers. See-through layer this time of course!Confetti gift packaging ideaAll you need to do is wrap the gift like you would usually do. Bright wrapping paper is highly recommended! Confetti gift packaging ideaThen throw some confetti in! I used some punched heart shapes here :-)Confetti gift packaging ideaIt’s easiest when you keep the confetti behind the gift while packaging as it won’t get in your way when sealing second layer of wrapping.Confetti gift packaging ideaI used baking paper for my second layer. Could you have guessed? Sometimes the most creative ideas come from the kitchen ;-).Confetti gift packaging ideaShake the gift so the confetti spreads evenly all over.Confetti gift packaging ideaTie the ribbon or whatever gift topper you want.Confetti gift packaging idea Confetti gift packaging ideaHappy gift giving

Rasa xoxo

1