Top

Author Archive | Rasa Pelham

Our new house tour

Our new house tour
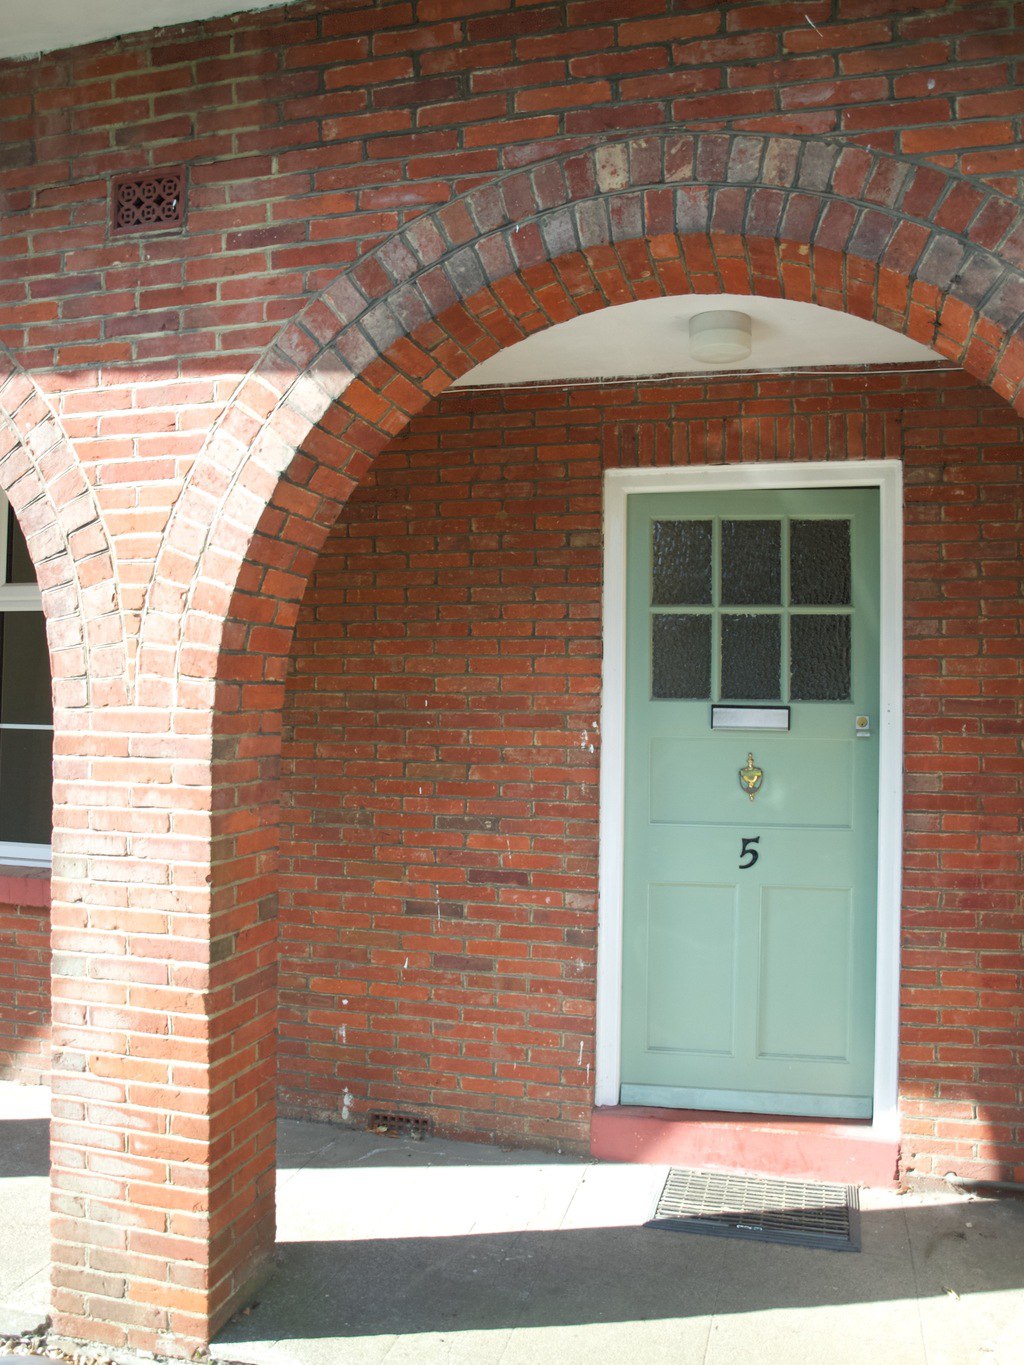
I am happy to announce that we have finally bought a house here in Shortstown (sounds a bit American, but be reassured this little town is in England very close to Bedford).  Me and Joni fell in love with the architecture and location of it as soon as we saw it advertised. It was love from first sight! Yes, it needs loads of work, but we thing it has a great potential. The house is very large and spacious with a good size garden. It kind of makes me feel like I am about to live in councillor’s house because of it’s large windows and arched front porch.Our new house tour: front room aka study
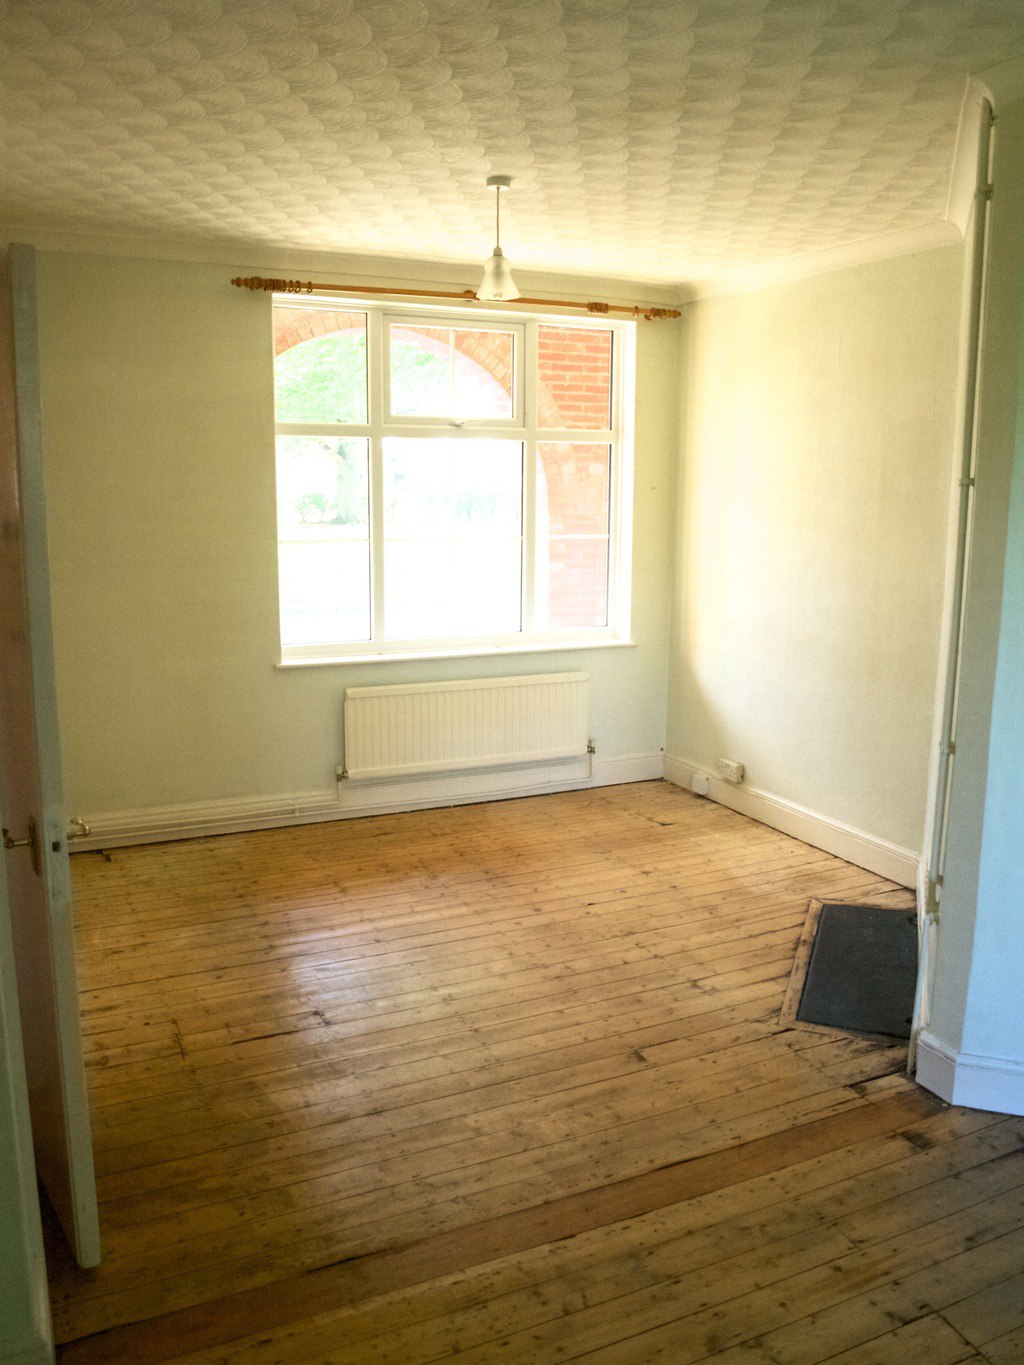
So watch this space for lots of interior DIY’s, because this time I am recording everything! It will of course won’t happen overnight, but we are hoping to at least decorate master bedroom very soon. The other parts of the house might take a while because of new baby joining us soon :-).Our new house tour: dining room
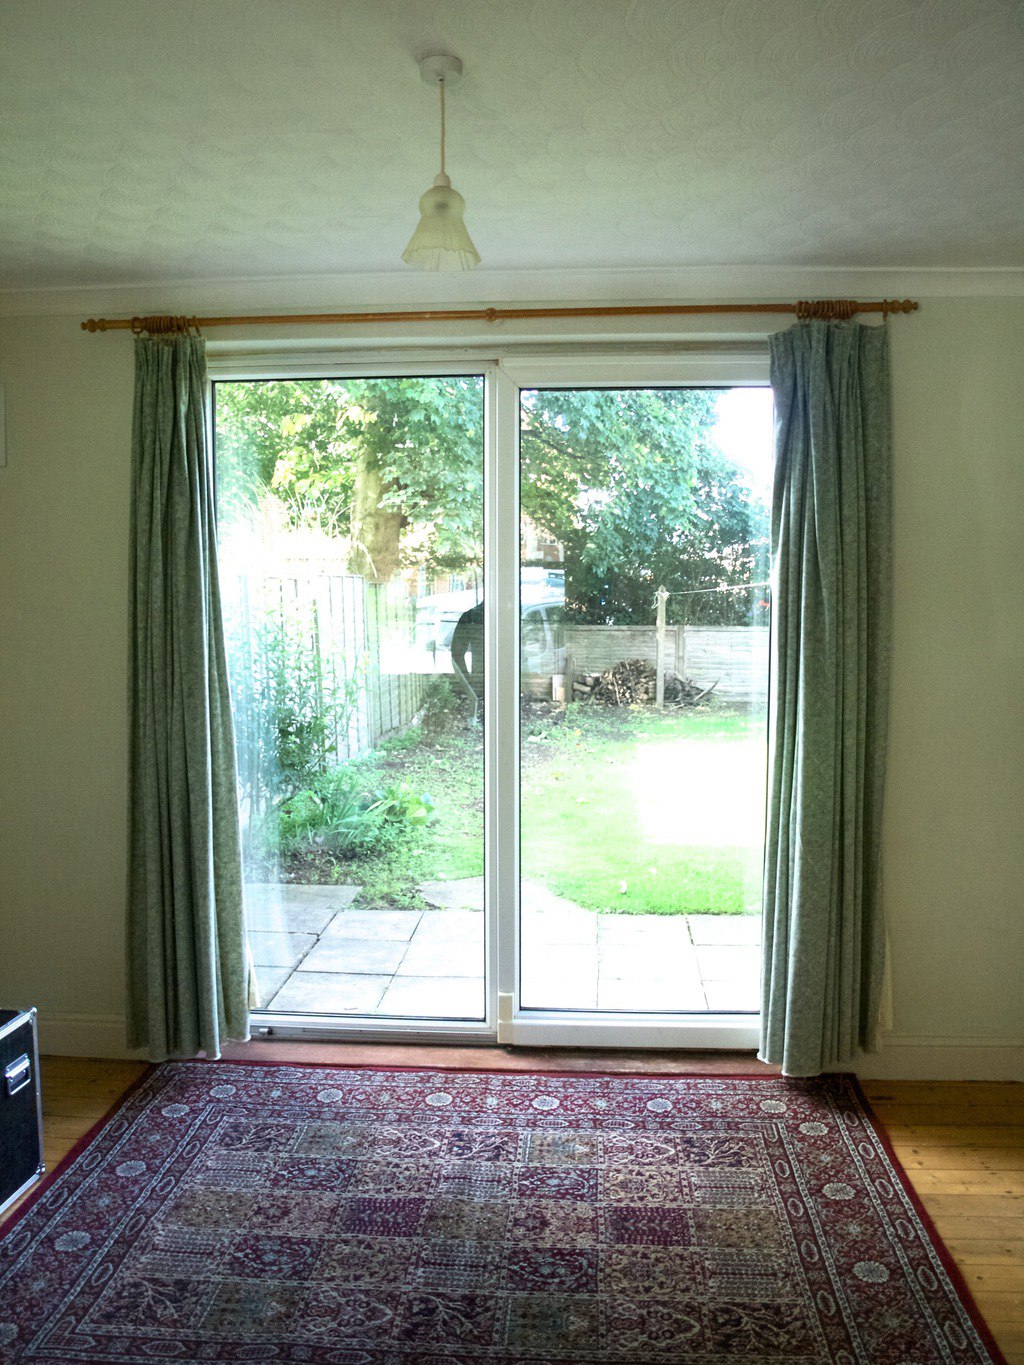
One of our plans are to build a conservatory into the garden as well as extending this very small kitchen (pic bellow).Our new house tour: tiny kitchenThis is where our sitting room with fireplace be (pic bellow).Our new house tour: sitting roomThis bathroom need complete transformation as you can see.Our new house tour: the corridor and the bathroom
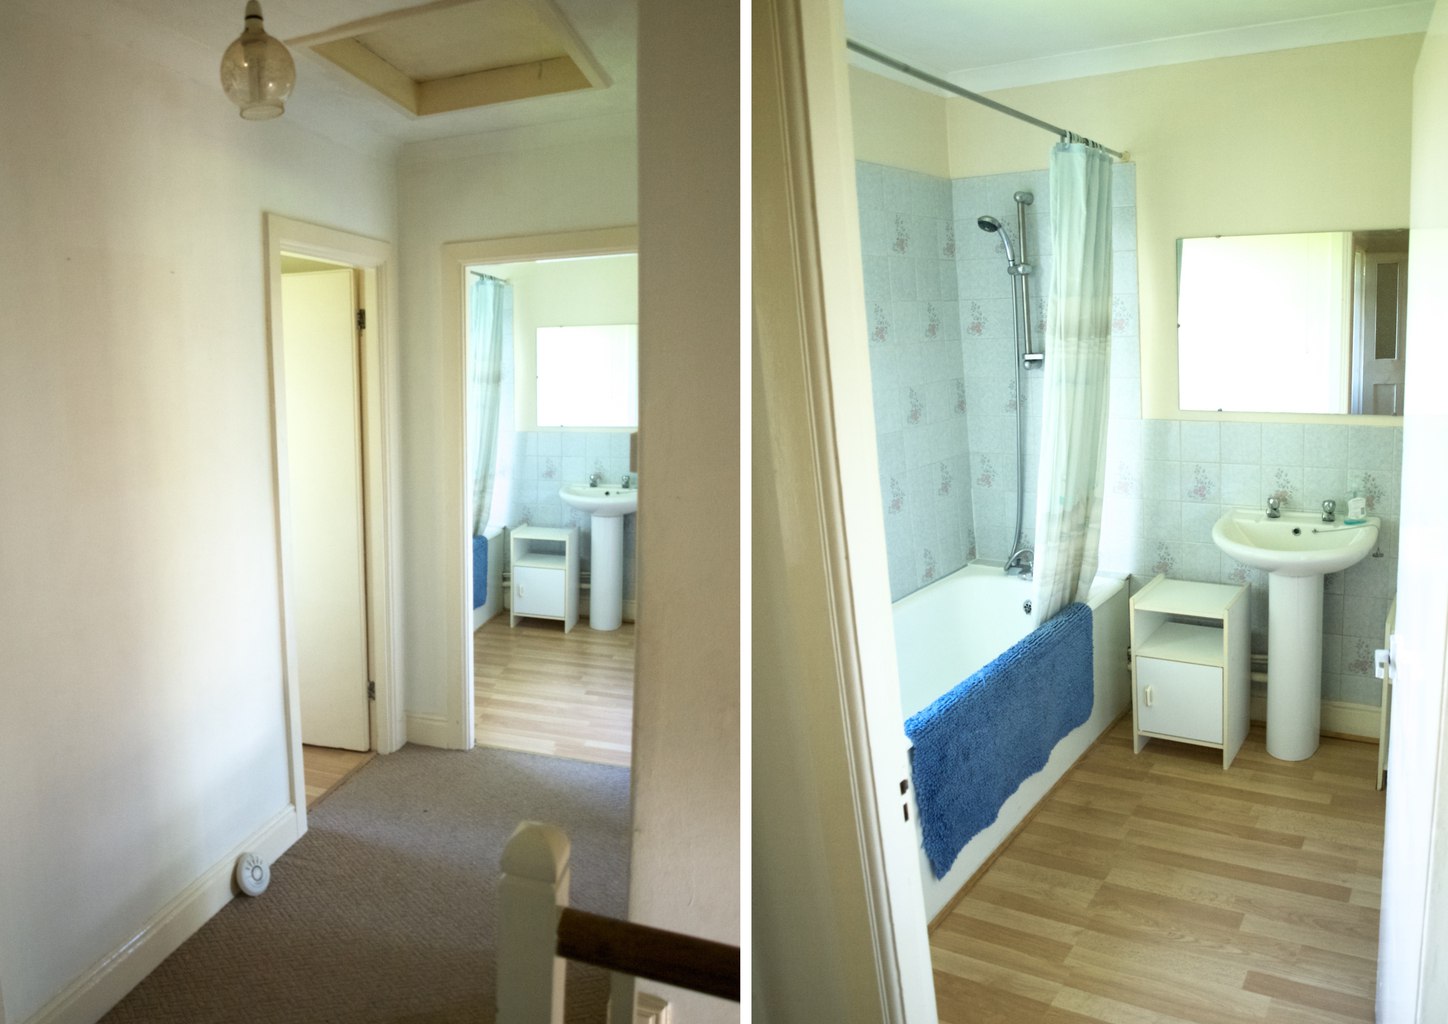
Nursery is coming to place sometime early next year.Our new house tour: baby nursery to be
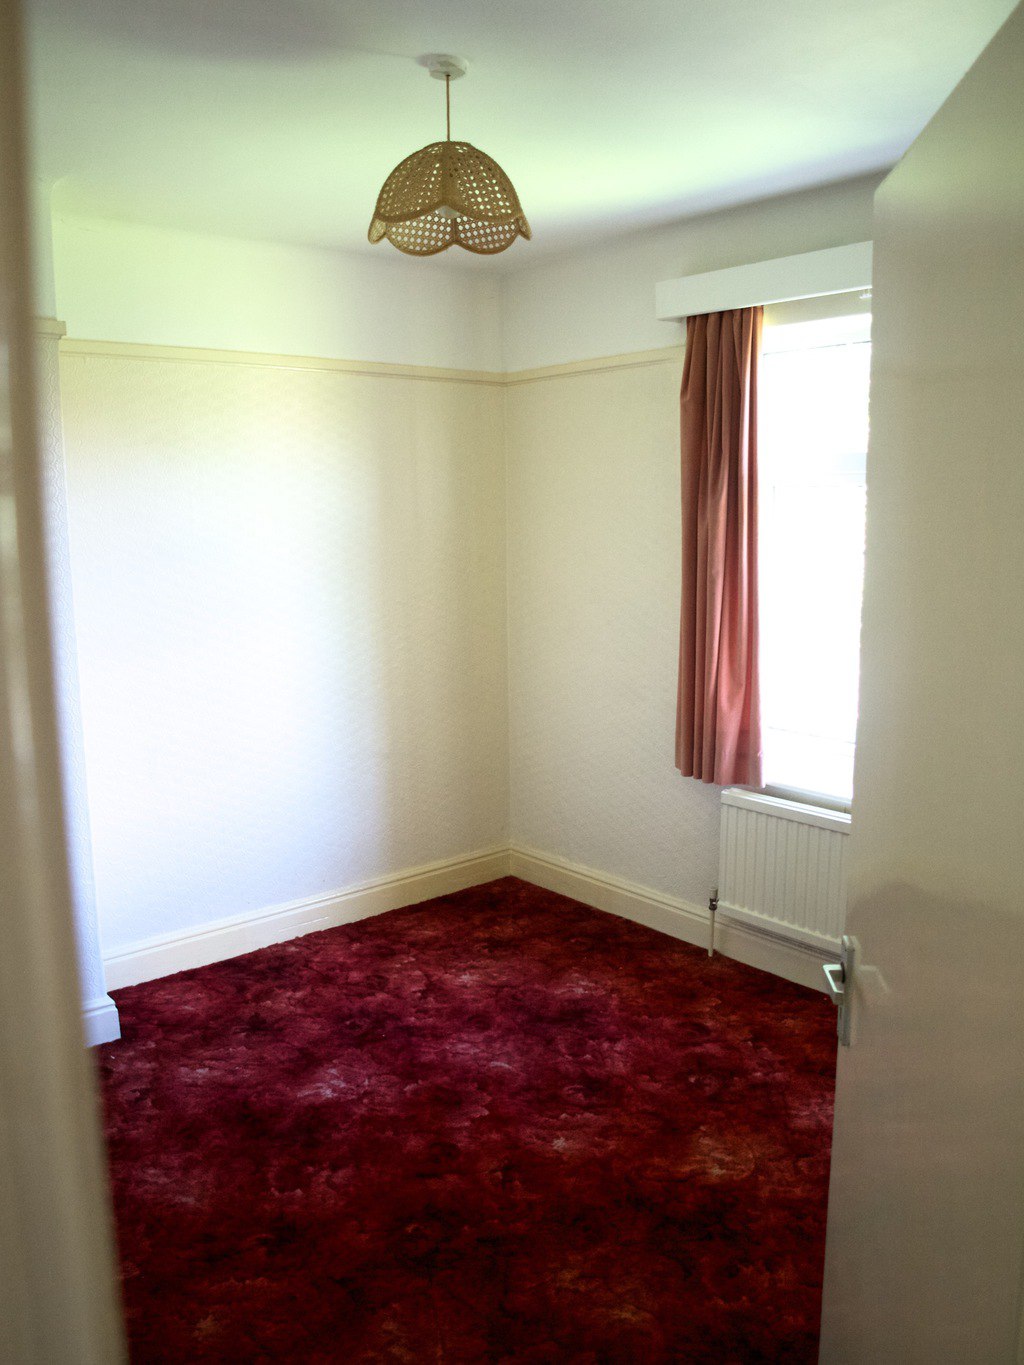
This is the master bedroom I was mentioning. It has a very cute walk through wardrobe to the bedroom no 2. We shall keep it for few years till we need more space and need to extend the stairs into the loft.Our new house tour: Master bedroom and walk-through wardobe
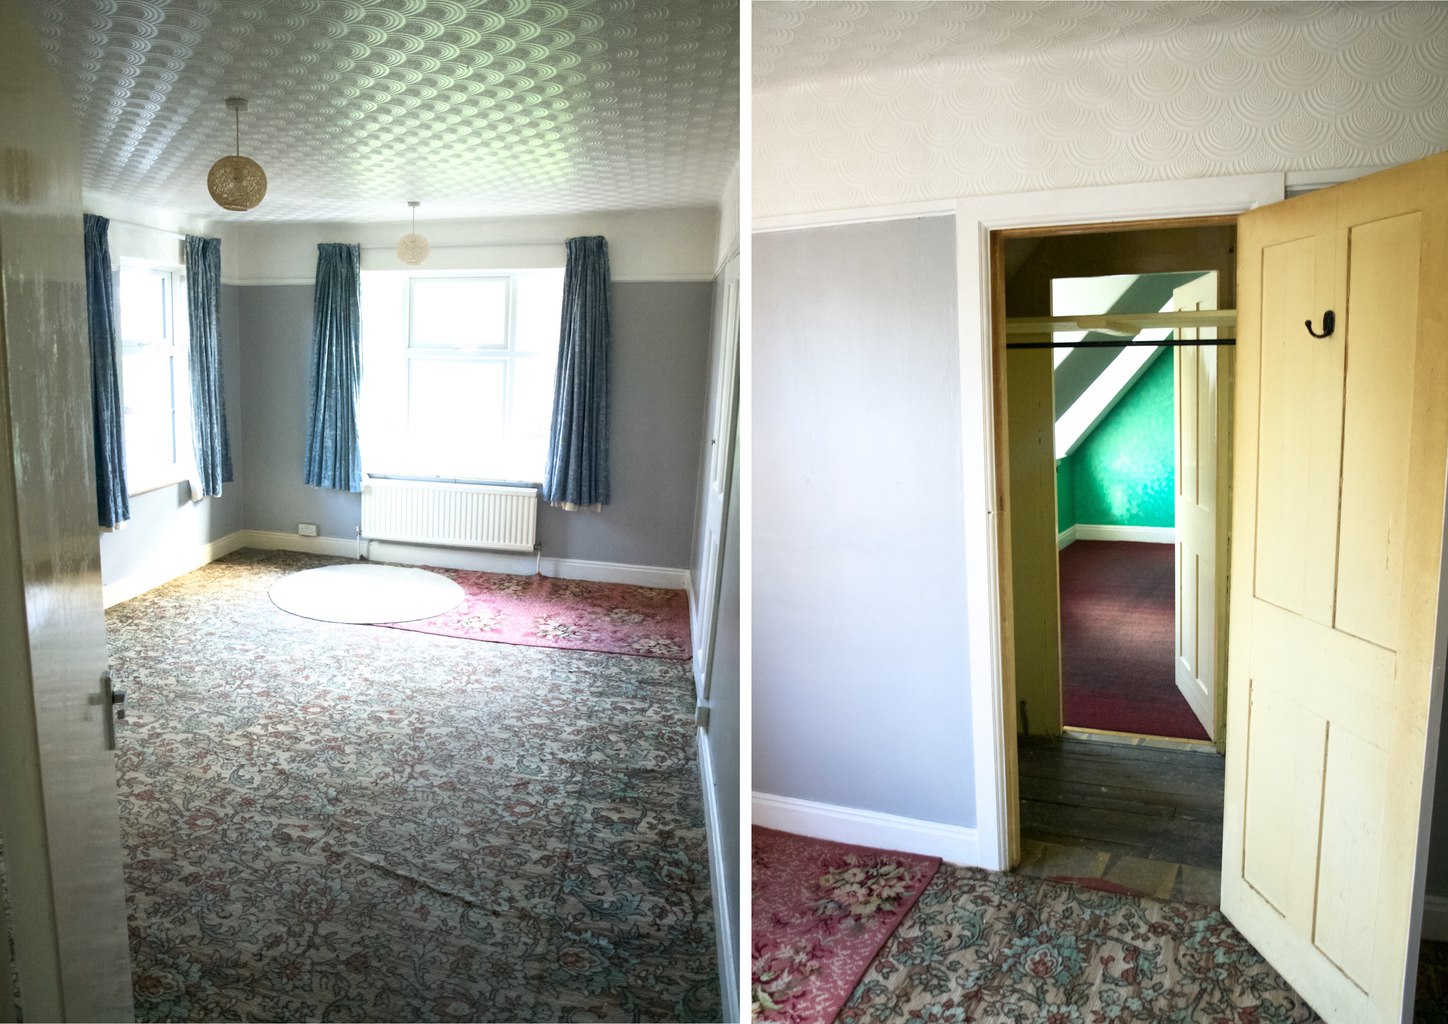
And this is bedroom no 2. Guess what we are planning to do with it! It has a very funny surprise: random shower cubical! Will be removing it soon.Our new house tour: Bedroom 2 with the surprise!
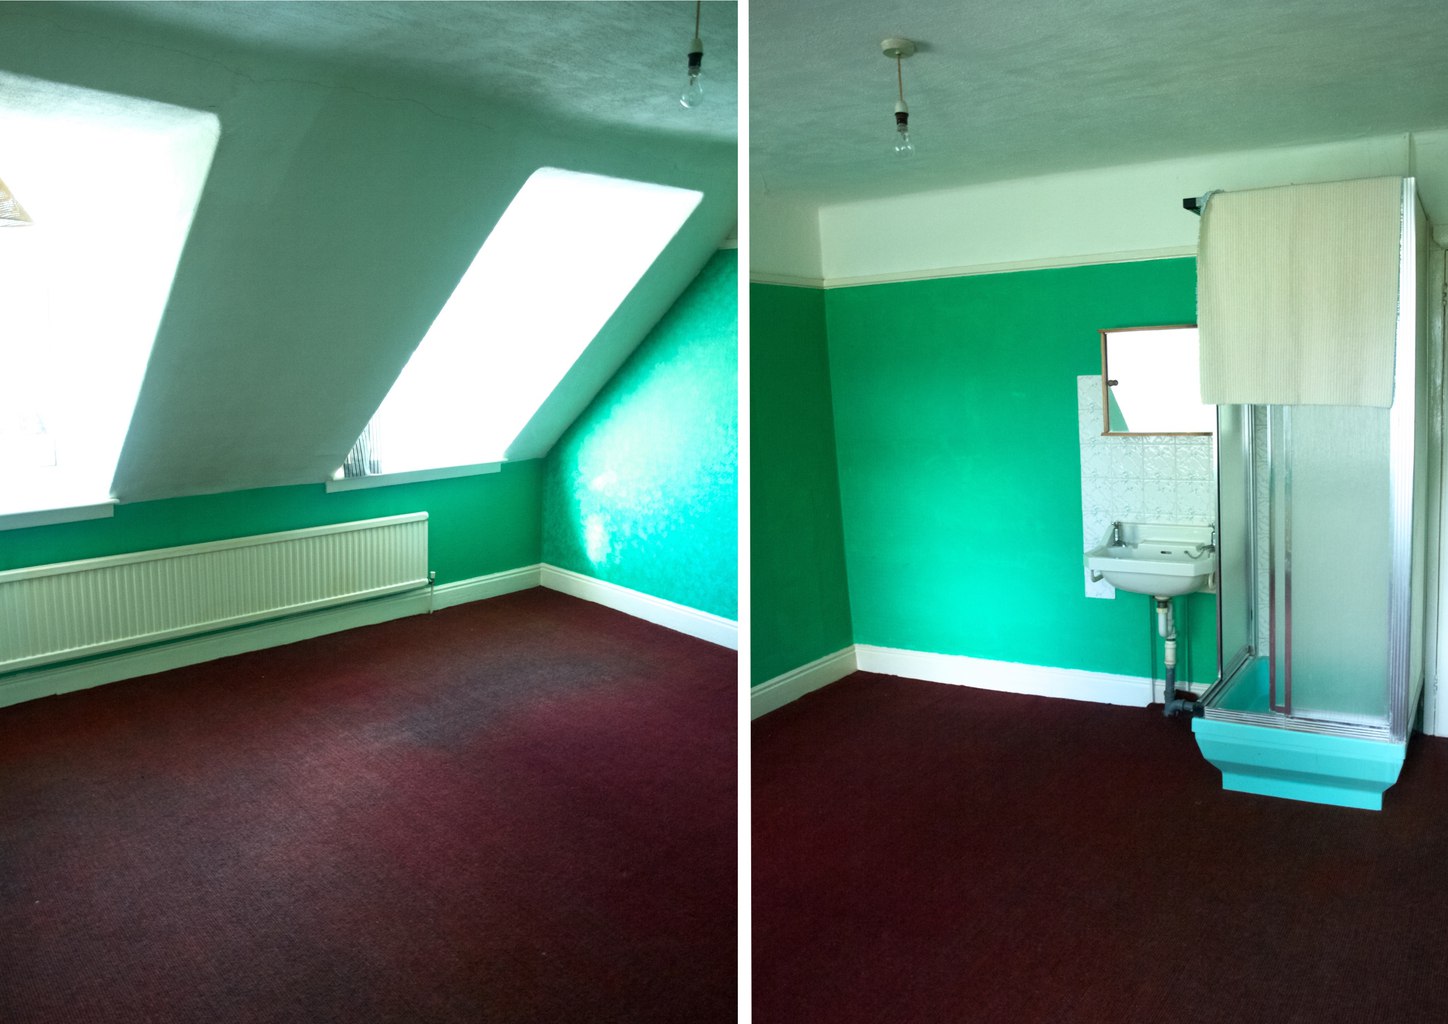
Thanks for letting me share!

Rasa xoxo

0

My attempt on altering wrap dress pattern

updated wrap dress patternI wanted to update this wrap dress pattern for quite a while now and I wanted to complete it before the summer began. However due to my pregnancy, house buying and other unexpected events I was not able to finish it on time. But I was persistent and voila! I have the dress here! Not sure if the fitting is any better now to compare to the previous wrap dress. original wrap dress pattern updated wrap dress patternI would not call this pattern complete failure, just because it’s so difficult to judge the fitting of it when my body is so different because of pregnancy. The dress looks like a block on me :D. Anyways, I will leave it till next summer perhaps till I release this pattern (that is if it fits properly).   updated wrap dress patternHave a lovely weekend :-)

Rasa xoxo

0

Spelt churros

Spelt churrosChurros are one of the things I wanted to try making that involved deep frying. And I finally did it! I made it with spelt flour. Why? Because Joni and me have lately visited the Waffle House in St. Albans (worth visiting if in that part of England) and we tasted the most wonderful savoury spelt flour waffle. So that was the reason why I though of making churros with spelt! The result was nice, but was not too sure if it matched well with honey. I would like to try it with savoury topping one day.

SPELT CHURROS

  • 60g butter
  • 240ml water
  • 2 tbsp golden caster sugar
  • pinch of salt
  • 75g plain flour
  • 50g spelt flour
  • 1 tbsp single cream
  • oil for deep frying
  • icing mixed with cinnamon for dusting (if you want to have it sweet)

1. Make the dough. Over medium heat melt butter and combine it with sugar, salt and water. Just before the mixture begins to boil, turn the heat down to low and add in the flours. Stir until a thick paste begins to form. Remove from heat and allow to cool to room temperature. Add eggs and cream gradually until it turns into something similar to butter frosting (easy to pipe through)

2. Place the dough into a piping bag fitted with a star tip . I wish I fitted a smaller piping tip as the churros really puffs up when they fry and the middle does not cook enough.Spelt Churros3. Heat the oil in a pot to 180C. Pipe the churros into the hot oil. Cook on each side for 45 seconds.Spelt Churros4. Dust churros with icing sugar and cinnamon if you want them sweet or serve them with something savoury. Spelt ChurrosI have been dipping them in honey, but was not too sure if that was the best match.Spelt ChurrosEnjoy!

Rasa

0

A colour story for our new home

Creating colour storyI want something exciting to say. We have finally exchanged with our house purchase last week! Anybody who bought the house before know what it means: we will have this house for sure and the date is set when we could move in. Yey!

Ever since we exchanged I have been dreaming how we are going to decorate the house and what alterations we are going to make. I have done this before and it was difficult and long process. But now I am not alone so hopefully we will settle much quicker, although we have baby on the way so I am interested to see how difficult it will be to do at least some DIY.

I have started planning the colours. Why? Because I really really want everything to “flow” in the house and right now I already need to buy few things that will match (such as sofa bed for my mum to sleep in when she is visiting her grandchild). I must admit last time I was decorating the house I did not put so much effort in planning the colour… because I went an easy way and chose neutral colours (mostly white). Yes, I did get many comments that it looked like a hospital to begin with, although I accessorised it with bold colours so it was cute at the end). This time I want to be braver and try darker colours (gosh, I am sooooo scared that it may make the place look small). But I so love those eccentric rooms that I see on Pinterest, so the challenge is on!

So how did I create this colour story? I am very lucky that I have gone to Uni to do fashion. During my course one of the things I have learned is exactly that, creating a colour story for a collection. It is of course very different to creating a colour story for the house, but the goal is the same: to create a set of colours that will be used through out the project (in this case the whole house). Of course I had failed many times before. One instance I remember quite clearly when my colour story looked like a rainbow just because I liked many colours and because I arranged them in colour wheel order. Another thing I learned is to identify what colours are main and which ones are for the accents. For better visualisation arrange the accent colours in small amounts that could be displayed in a item form (such as red lamp in the pic below).  Our new home colour storyThe third advise I can give is to look through some pictures of the house interiors and see what colour arrangement you like (Pinterest or Houzz have been a good source to me). For instance I like the feature wall colour in the pic below combined with bold colour picture display on it.

Lovely picture rail, pic from ilovebokkieI like red as an accent colour but I might try this and paint bigger furniture in red as well. The pic bellow comes from Apartment Therapy.

Bold red accent cabinet, pic from apartment therapyAlthough black is not a main colour in my colour story I would love to have a black board wall where we could scribble things! The pic bellow comes from IKEA website as an inspiration.Black board wall, Ikea kitchen inspirationAnd of course I would love to decorate the house with many plants! The pic bellow comes from My Attic.plant overload, pic from entermyatticI hope you found this useful :-)

Rasa x

0

Piccalilli

My piccalilli recipeHey! It’s Autumn here and what is Autumn without canning? I do like to make preserves and when Joni suggested to make piccalilli I got excited as I thought it would be really cool to make it.  Piccalilli is a great condiment that is tasty in sandwiches and pairs well with cheddar cheese. Yum!My piccalilli recipePICCALILLI

Makes about 2-2.5kg

  • 1 small cauliflower, chopped
  • 1/2 head broccoli, chopped
  • 2 courgettes, chopped
  • 5 green chillies, finely chopped
  • 200g green beans, chopped into smaller bits
  • 200g cherry tomatoes, sliced in half
  • 2 medium onions, pealed and roughly chopped
  • 50g salt
  • 2 tbsp olive oil
  • 2 tbsp mustard powder
  • 2 tbsp mustard seeds
  • 2 tbsp ground cumin
  • 2 tbsp turmeric
  • 1/2 whole nutmeg, grated
  • 4 tbsp flour
  • 600ml cider vinegar
  • 2 cox apples, grated
  • 1 mango, pealed and chopped
  • 6 tbsp runny honey
  • 3 cloves garlic, crushed and finely chopped

1. Place all the vegetables in a large bowl, sprinkle with the salt and cover it with water. Leave it in a cool place for 2 hours, then drain thoroughly.My piccalilli recipe2. Heat a large saucepan. Add the oil to the pan, then fry the mustard seeds, mustard powder, cumin, turmeric and nutmeg for few seconds. Lower the heat, add the flour and a splash of vinegar and stir to make a thick paste.

3. Gradually add the remaining vinegar while whisking all the time to make a smooth paste with no clumps.

4. Add the apples, mangoes, garlic and honey and cook for 2–3 minutes. 

5. Drain the salted vegetables and add them to the pan, stirring well to coat with the spice paste. Cook for 15 minutes until the vegetables have just softened and released juice.

6. Spoon Piccalilli into sterilised jars and close the lids tightly.My piccalilli recipe My piccalilli recipeHappy autumn canning ;-)

Rasa

0

August favourites

Can you believe it? Today is the last day of Summer…. and then the Autumn! I actually miss colder days, so all good with me ;-).

August have been great too! I spend most of it preparing for our new baby arrival (it’s getting close!).  I have knitted hat, pair of socks and now I am onto baby trousers.  Knitted baby hat and socksI made and ate sooo many ice-cream this month! Passion fruit & cream popsicles and brown butter peach ice-cream cake were my favourites.Ice cream!And finally, my little London flat is sold! I so look forward to buying our new place and new DIY journey :-).Sold: my little London flatHappy Autumn tomorrow!

Rasa xoxo

0

Pinterest challenge: brown butter peach ice cream cake

Brown butter peach ice cream cake recipeI have not done Pinterest challenge for a while now and since I was experimenting with ice cream lately, I thought I will try to make another form of ice cream – cake. Last weekend we went to friend’s B&Q, so ice cream cake was quite appropriate! I came across this recipe and I was sure I wanted to make it straight away. Peaches (although I prefer Nectarines) is something that I am addicted to right now (it’s in season!). The cake turned out to be glorious! However the only thing I would change is make half less of the cake base and double amount of the ice cream. Yum!Brown butter peach ice cream cake recipeBROWN BUTTER PEACH ICE CREAM CAKE adopted from O&O Eats

(for the ice cream)

  • 4 large ripe nectarines
  • juice of 1/2 a lemon
  • 150 g caster sugar (100g for nectarines and 50g for egg cream)
  • 300 ml double cream
  • 1/4 tsp salt
  • 2 large egg yolks

(for the cake)

  • 170 g unsalted butter
  • 150 g caster sugar
  • 3 large eggs
  • 180 g plain flour
  • 2 tsp baking powder
  • 1/2 tsp salt
  • 80 ml whole milk, room temperature


  • hand full assorted stone fruits and berries for topping

1. Peel and roughly chop nectarines, place in a medium bowl then add lemon juice and 100g sugar. Stir to combine, then cover and let sit for 20 to 30 minutes. Puree nectarines with hand blender or food processor.Brown butter peach ice cream cake recipe2. Combine remaining 50g sugar, cream, and salt in a medium saucepan. Warm the mixture over medium low heat. Whisk egg yolks in a medium bowl. While continuously whisking, slowly ladle a half cup of the warmed cream to the eggs. Scrape the egg mixture back into the saucepan with the rest of the cream and stir with a wooden spoon or spatula. Continue stirring, until the mixture thickens enough to lightly coat the spoon (this will take about 10 min). Immediately take off heat and pour over the peach puree. Stir to combine and place in fridge until completely chilled.Brown butter peach ice cream cake recipe3. While the ice cream is chilling, make the cake. Place the butter in a stainless steel saucepan or skillet. Turn the heat to medium and melt the butter. While occasionally swirling the pan, continue cooking until it becomes foamy on top. Keep swirling until the solids at the bottom of the pan take on an amber colour and the butter smells nutty, this will happen quickly so keep a watchful eye. Immediately turn off heat and transfer to a heatproof bowl to cool at room temperature for 10 to 15 minutes. Transfer to fridge and chill until solid, about 1 hour. If you wish, you can make the brown butter a day in advance.Brown butter peach ice cream cake recipe4. Preheat oven to C180 degrees. Prep a springform pan by greasing it with butter and lining the bottom and the sides with baking paper. Remove the brown butter from the fridge and place it into the mixer. Add sugar and beat it for 2 to 3 minutes until smooth. Add eggs one at a time, scraping down the sides of the bowl each time, and mix until just incorporated. Add flour, baking powder, salt and mix to combine. Transfer batter to the springform pan, level it with your spatula, and bake for 25 to 30 minutes, until golden and a toothpick inserted in the middle comes out clean. Remove the cake from the oven and let it cool to room temperature.Brown butter peach ice cream cake recipeBrown butter peach ice cream cake recipe5. Churn the peach ice cream base in your ice cream machine. Since I have no ice cream machine I placed nectarine cream mixture into baking tin and freezer and whisked it every 30 min till the ice cream has reached soft serve consistency. Spread the ice cream over the cake in one even layer and place it in freezer and let it harden for at least 4 hours.Brown butter peach ice cream cake recipe6. Place any kind of stone fruits or berries your heart desires on top, slice, serve, and enjoy!Brown butter peach ice cream cake recipeRasa xoxo

0

A year with books: “Sense and Sensibility” Review

"Sense and Sensibility" book reviewIt has been a while since I last written a book review. This book was a challenge to begin with and I was putting it off for few months. Because of it’s old language it was difficult to get into the story, but once I did, it was totally worth it! I think Jane Austin was a really talented writer. I watched the movie based on this book again and realised how much I have missed to compare with the first time I watched it. It was truly an enjoyable process!

What I like about it? The plot, the surprises that came with it and the experience of how it was like to live in Georgian era! The outlook on life and relationships are smartly written and relates to present times although the book has been written in early 18th century. To compare to the movie I thought the surprises in the plot when reading are much more dramatic as it does not warn the reader as much as the viewer in the movie. Although it was difficult to understand the old language to begin with the outcome of it was very positive to me personally. I definitely feel that my vocabulary expanded dramatically!

What I did not like about it? Initially I was annoyed at the writing language as I could not understand it. I even ended up using dictionary (did not help) and asking Joni what certain phrases meant (he is so knowledgable when it comes to history!). Eventually it turned out to be a good thing: I have learned the way of speaking in olden days (not that I practice it at this moment). So overall there is nothing that I did not like about this book!

Is it worth buying? It’s a classic, of course it is worth buying! And if you buy Vintage Classics version than the book is going to look sooooo good in your book shelve ;-).I hope you enjoyed my modest review :-)

Rasa x


0

A healthier coke float

A healthier coke floatLast week I tried making popsicles for the very first time. This week I thought I will give a try on making an ice-cream float. I have never tried a soda float that I liked, but I definitely like the idea of it! I tried root beer float in the past and I hated it, maybe it’s not my cup of tea (maybe root beer requires acquired taste). Anyhow I decided to go with coke this time and make it slightly healthier than usual recipes I have seen. Just because (I am not quite sure why I went with this challenge at all!)…

First I thought I will make diary free and low fat almond milk ice cream. I thought the taste of coke and almond would go well together, a bit like amaretto and coke! I froze some almond milk with a small amount of ground almond in the cups…A healthier coke float: attempt to make almond milk ice-creamBut when I whizzed it in the food processor (because I don’t have ice-cream maker), it turned into something of sorbet consistency.  Not something I would put on top of the coke!A healthier coke float: attempt of making almond milk ice-creamNext I thought I will make the coconut milk ice-cream (something safer as many I heard tried and made this successfully). Not as low fat, but still on the healthy side ;-). Here is the recipe!

COCONUT COKE FLOAT

(for ice-cream)

  • 1 400ml can coconut milk (choose the creamiest brand like “Chaokoh”)
  • 1 tsp stevia

(for soda)

  • coke life

1. First make the ice-cream, strain the coconut milk loosely so liquid separates from cream as much as it can. Mix the stevia into the cream and freeze the mixture for 3-5hours.A healthier coke float: making coconut milk ice-cream2. Once the cream is frozen (in shallow container preferably), break it up and whizz it in food processor. A healthier coke float: making coconut ice-cream3. The mixture will become chalk like, but don’t worry! Once you start mixing it, the ice-cream should loosen up and gain cream texture (which is what we want! right?). A healthier coke float: making coconut milk ice-cream4. Finally, time to enjoy this ice-cream float! Pour the coke into the glass and then scoop the ice-cream on top. Alternativelly you can scoop the ice-cream first into the glass and then pour coke over it.A healthier coke floatEnjoy!

Rasa xoxo

0

Make your own catnip toy for your cat

DIY catnip flower toy for catsRecently I made these flower toys for Leia and she loves them! Why flower shaped? Because I thought it would be funny (for me) and cats don’t give a s*** how their toys look like anyways. The key ingredient is catnip which makes any toy cat’s favourite toy! DIY catnip flower toy for cats DIY catnip flower toy for catsDIY catnip flower toy for catsIn the past when Leia just entered our home she has been given a gift, a snail shaped toy! A snail? I thought that was silly and that cat would not be interested in playing with it. Turns out I was wrong. This little snail toy have received so much “affection” from Leia that it could not survive any longer, the evidence is obvious in the picture bellow. After failed repair from Joni, I have decided to make another silly toy that worked out quite well. Although I am not too sure how long will those flowers survive?! As I mention before catnip is the key ingredient here, because that’s exactly why the snail toy was soooo “loved”!  DIY catnip flower toy for catsInterested in making your own catnip flower toy for cats, click here for the instructions! DIY catnip flower toy for cats DIY catnip flower toy for cats DIY catnip flower toy for catsHappy stitching!

Rasa :-)

0

Homemade Solero

Passion fruit & cream popsicles recipeIf you have been reading this blog for a while, you probably know that I looooooove ice-cream (not only in summer)! I have made many type of ice-creams in the past, although I feel there are so many types still to try. During weekend I made my first batch of popsicles! I sneakily tried to copy Solero ice-cream, because that is my favourite popsicle in the whole world (I first tasted it when I was 14 years old and I basically fell in in love with it!).

To make these popsicles was quite a challenge. I wanted plain ice-cream completely concealed in frozen fruit juice. Since I never buy special equipment to make the ice-cream I thought of first freezing cream part in smaller cups and then dip them in fruit juice that is in bigger cups. For the smaller cups I used plastic disposable cups that made it difficult to remove the ice-cream pops from them, especially when Ice-cream is softer than ice. For the bigger cups I used silicone cupcake moulds that worked so much better!

PASSION FRUIT & CREAM POPSICLES

(for ice-cream)

  • 250ml whipping cream
  • 200g condensed milk

(for fruit juice ice)

  • 60ml (1/4cup) orange juice
  • 170g passion fruit pulp (either from a can or from around 6 passion fruits)

1. First make the ice-cream part. Whisk the cream and carefully combine it with condensed milk. Spoon the mixture into the smaller cups than the cups for the final freezing (it’s best to use silicone ones for easy removal). Insert popsicle sticks into each filled cup before freezing (I used coffee stirrers instead since I had some leftover at home). For best result freeze it overnight. Passion fruit & cream popsicles recipe2. Once the ice-cream is completely frozen then prepare the second cups for the final freezing. Pour a small amount of orange juice mixed with passionfruit pulp into each cup. Passion fruit & cream popsicles recipe3. Dip the ice-cream pops into prepared cups. pour some extra fruit juice on top if it does not cover the cream completely. Freeze them for at least 3 hours.Passion fruit & cream popsicles recipeThese may not look exactly like Solero, but they taste amazing!Passion fruit & cream popsicles recipe Passion fruit & cream popsicles recipeEnjoy!

Rasa xoxo

1

Little things I am knitting for our new arrival

knitting for a babyJoni and I are expecting our new arrival very soon and lots of you have been asking what I am knitting for our new baby. To be honest I only started knitting recently and so far I finished a hat and little socks. Time permits you might see here some baby pants and maybe even a jumper.

As for inspiration I have been mostly inspired by Pinterest (of course) and the book called “What to knit when you’re expecting” that was a gift from my mum in-law (love the title of it!).You can learn how to knit baby knot hat by clicking here.And if you prefer to learn to knit socks then click here (although you might need to get your own measurements for the baby as their feet proportions are completely different to the kid’s sizes).knitting baby socks

OLYMPUS DIGITAL CAMERA baby socksI hope I inspired you ;-)

Rasa xoxo

0

Funnel cakes

Basic funnel cake recipeI wanted to try making funnel cakes for ages, but what was stopping me is the fear of deep-frying. I imagined overheating the oil and burning myself with it! It turned out it was’t the case. The oil heated quite gradually and it wasn’t spitting at me as I though it would (although I made Joni to stay the whole time with me in case of any emergencies :-D).

The process of deep-frying was so fun that I even started thinking of other things I could deep-fry. First I thought that funnel cake batter is pretty basic that could easily be manipulated for different flavours. Then I remembered Joni’s favourite deep-fried courgettes in batter (one of his favourite foods in Italy).  Then I thought of Lithuanian desert “Antfill”, donuts, cronuts, churros and so on… If only deep-frying did not cause so much oil waste :-(. Basic funnel cake recipeFUNNEL CAKES

  • 1 egg
  • 2 tbsp sugar
  • 225g plain flour
  • pinch of salt
  • 1 tsp baking powder
  • 250ml milk
  • oil for deep-frying
  • icing sugar for dusting

1. First make the batter by beating eggs with sugar until light and fluffy. Then add flour, salt, baking powder, milk and mix everything to combine.

2. Transfer the batter into the piping bag or squeeze bottle.

3. Heat a pan with 3cm of oil to 180-190C. I used a stick thermometer to make sure the oil does not overheat.

4. Cook until golden on one side then carefully using tongs turn the funnel cake over and cook on the other side until golden.Basic funnel cake recipe5. Remove and drain on paper towel, then top with powdered sugar.Basic funnel cake recipe Basic funnel cake recipe Basic funnel cake recipeEnjoy!

Rasa xoxo

0

July favourites

Goodbye JulyJuly has been a holiday month for us! We were very lucky to visit Iceland this year and of course visit my family in Lithuania. We enjoyed every bit of it!Wild strawberries in LithuaniaDuring our holiday we celebrated our 1st anniversary! Our first wedding anniversary! Iceland My finished nursing chairWe gradually getting ready for our new family member coming in October. Joni’s mum and myself have finally refurbished my old chair so it is now suitable for nursing!This is how 28 weeks pregnant looks likeHave a wonderful August!

Rasa xoxo

0

My journey in chair upholstery

My journey in chair upholsteryToday I have decided to finally share my experiences in upholstery. I know this may not be the simplest project to start with, but I have learned so much from it! Of course I did not do this alone, my mum-in-law and her friend Mariane helped me a lot with their knowledge. Now looking back, I can’t believe it is still the same chair!

I got this chair from a cafe that once I helped out at, it was about to go to the dumpster. Luckily I saved it and now it gain it’s second life as a nursery chair :-).  before and after chair upholsterySo we started the chair refurbishment with removal of old material such as top fabric, felt, foam, hessian and lots of dust (yuck!). Everything was tacked with little nails called tacks. We did stripping in this order: first we removed the bottom covering fabric, then from there we removed tacks to strip the fabric all around. removing tacks in chair upholseryThen we removed back fabric where we could access even more tacks! This allowed to remove top fabric and felt from the front of the back. I was so pleased to find that original springs were in very good condition, so we left them as they were.removing old upholsery from the back of the chairFinally we stripped the chair arms and removed the rubber webbing that stretched out over the years. Other than original back springs we left hair material on the back and hessian on the inner arms.  We removed top wooden arms to be sanded, re-stained and re-applied back once the arms are covered with the new top fabric.Complete old upholsery removalAfter the chair is stripped, I was told it is good idea to go shopping (Yey!). We made the list according to what we stripped and what needed to be added so the chair ends up all nicely padded. At the end of the project we realised that we bought too little of rubber webbing, but way too much of wadding. My shopping list for chair upholsteryWhile we did our shopping Joni’s dad fixed the chair frame. Some parts were loose and the little holes that were made by old tacks needed to be filled. Fixing chair frameFirst thing we did after shopping is stretched out the webbing onto the seat of the chair. We tacked one end of the webbing on the back of the seat and then stretched it over to the other side with this very cool tool just made for that kind of job.  Applying rubber webbing on the chairWe repeated the same technique to apply webbing from left side to the right side.Applying webbing on the chairWe started the chair upholstery with the seat. We applied hessian and calico with wadding layer in between. Applying hessian, wodding and calico on the chair seatSecured everything with the tacks….Tacking a calico layer onto the chair seatThen moved onto the front back and repeated practically the same. Except this time we used upholstery felt for extra cushioning.Applying hessian, wool felt and calicoAnd same with the arms as with the seat.Applying hessan wodding and calico onto chair armsFinally the day have came when we could apply top fabric! To choose top fabric was a hardest bit for me. Eventually I narrowed down to three pictured bellow. The blue one seemed like the most obvious choice as the check fabric is difficult to work with and the dark green fabric reminded me of those tacky furnitures at the skiing resort (you know, those green carpets matched with pine wood?). Anyway, I am really happy with my final choice as this fabric not only turned out to be versatile, but also really forgiving and easy to work with!OLYMPUS DIGITAL CAMERAApplying top fabric is almost like applying calico. With calico, I felt like practicing to upholster, therefore when it came to applying the real thing, I wasn’t that nervous!Upholstering with the top fabricUpholstering the front back of the chairWhilst doing upholstery Joni’s mum made sure that all dents from the arms went away. She used ironing technique, where she applied wet cloth and ironed it on the wood. Eventually Joni’s dad sanded it down to perfection as well as chair legs. I used antique pine stain that really suits overall chair style I was aiming for. OLYMPUS DIGITAL CAMERAUpholstering the chair arms witht the top fabricAfter we finished upholstering the chair I closed the back with the hessian (for support) and top fabric. I used invisible stitch to sew the sides (I did the same to join inner and outer arm top fabric pieces). Upholstering the back of the chairWe got the cushion foam specially cut for the size, slightly thicker than original cushion because I wanted to sit slightly higher when nursing. It came covered in stockinet that helps to insert into the cushion case and also protects it from wear. To begin with I have traced the foam shape onto the fabric as tightly as I could and then rounded the edges for extra fit. I cut two pieces out with 1cm seam allowance. pattern tracing for custom cushionThe foam measured 10cm thick, therefore I cut out long 12cm wide strip (1cm seam allowance on each side). I wrapped the strip tightly around the foam and stitched it according to the fitting. I applied one piece I cut out earlier on to of the cushion and pinned it down onto the strip. I stitched it according to where I placed the pins. pattern cutting for custom box cushionNext I turned the cushion up side down and repeated the same with the second piece as I did with the first piece. This time I left a gap so I would be able to turn the cushion cover inside out. Once the cover is finished I re-inserted the cushion and by using invisible stitch I closed the gap completely. Custom shape pattern for box cushionMy final step was to close the bottom of the chair. I used a very basic black fabric for that. I measured roughly the size and cut out the square according to that measurement. Then I stretched the fabric onto the bottom making sure the edges of the fabric are folded in.Closing the bottom of the chairI secured the fabric by neatly stapling all over the edges.OLYMPUS DIGITAL CAMERAThe end!My journey in chair upholsteryLeia is loving new chair!My journey in chair upholsteryI hope you found this inspiring!

Rasa xoxo

0