Top

Archive | Pretty patterns for crafts

Origami advent calendar

Origami advent calendar DIY
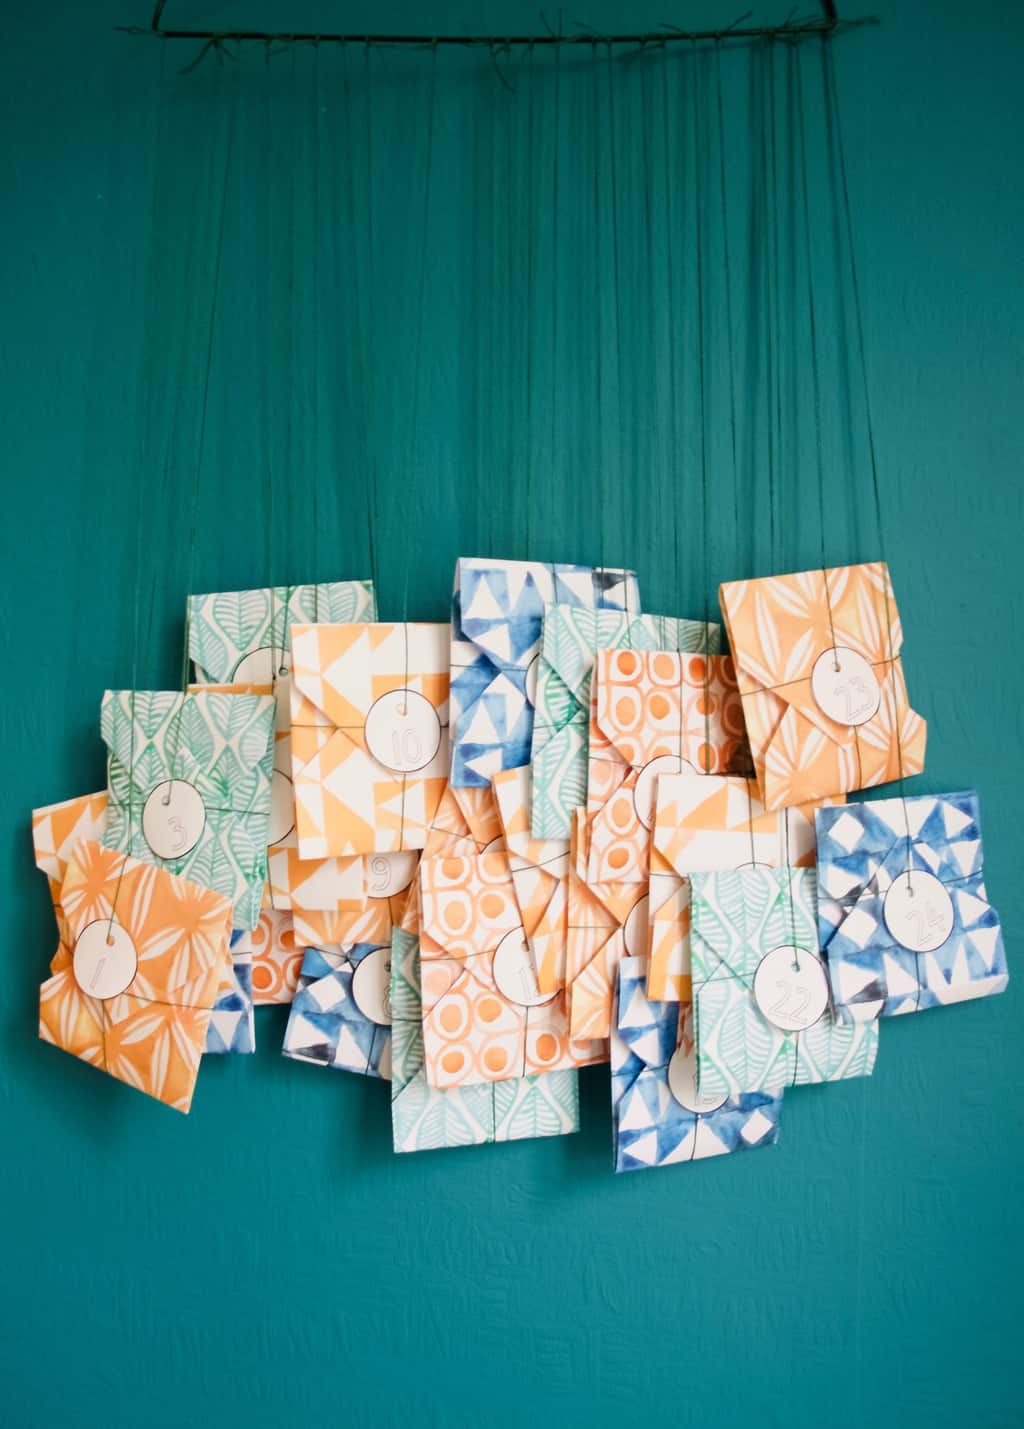
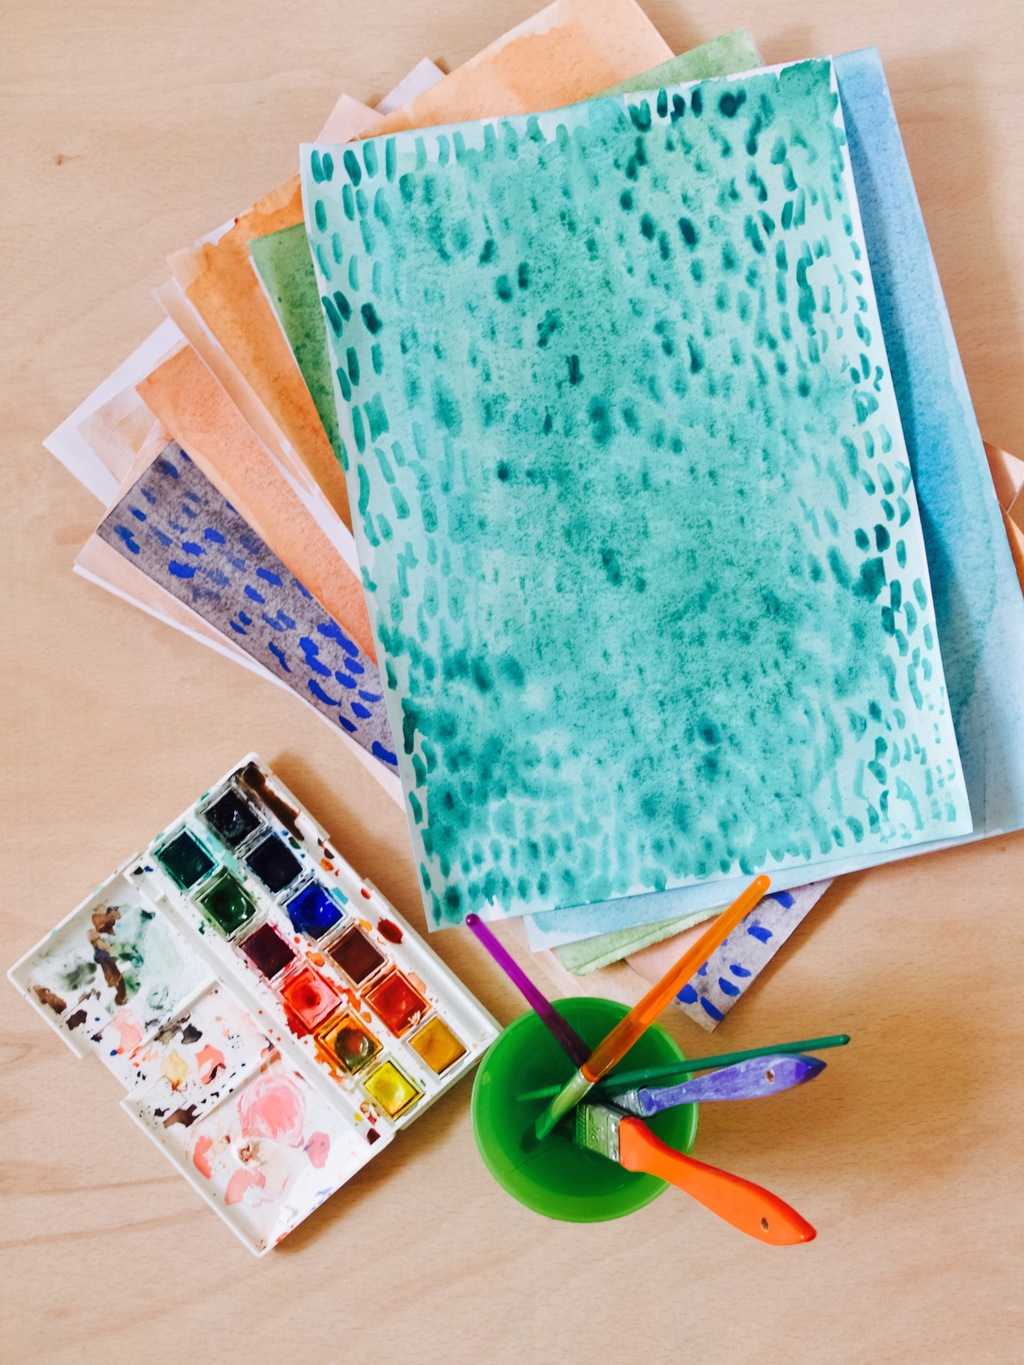
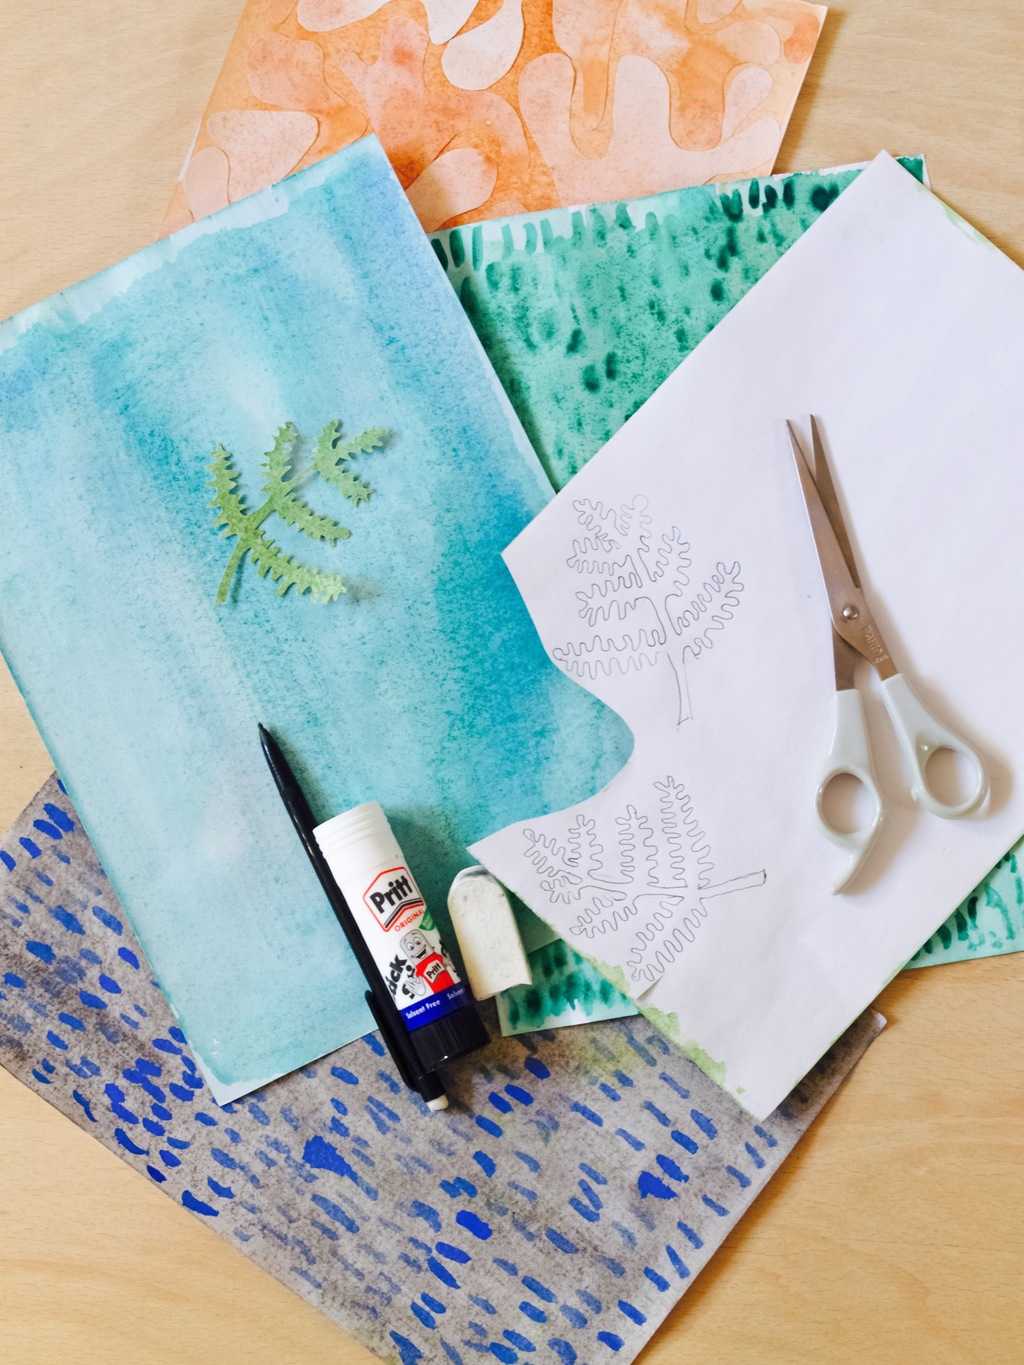
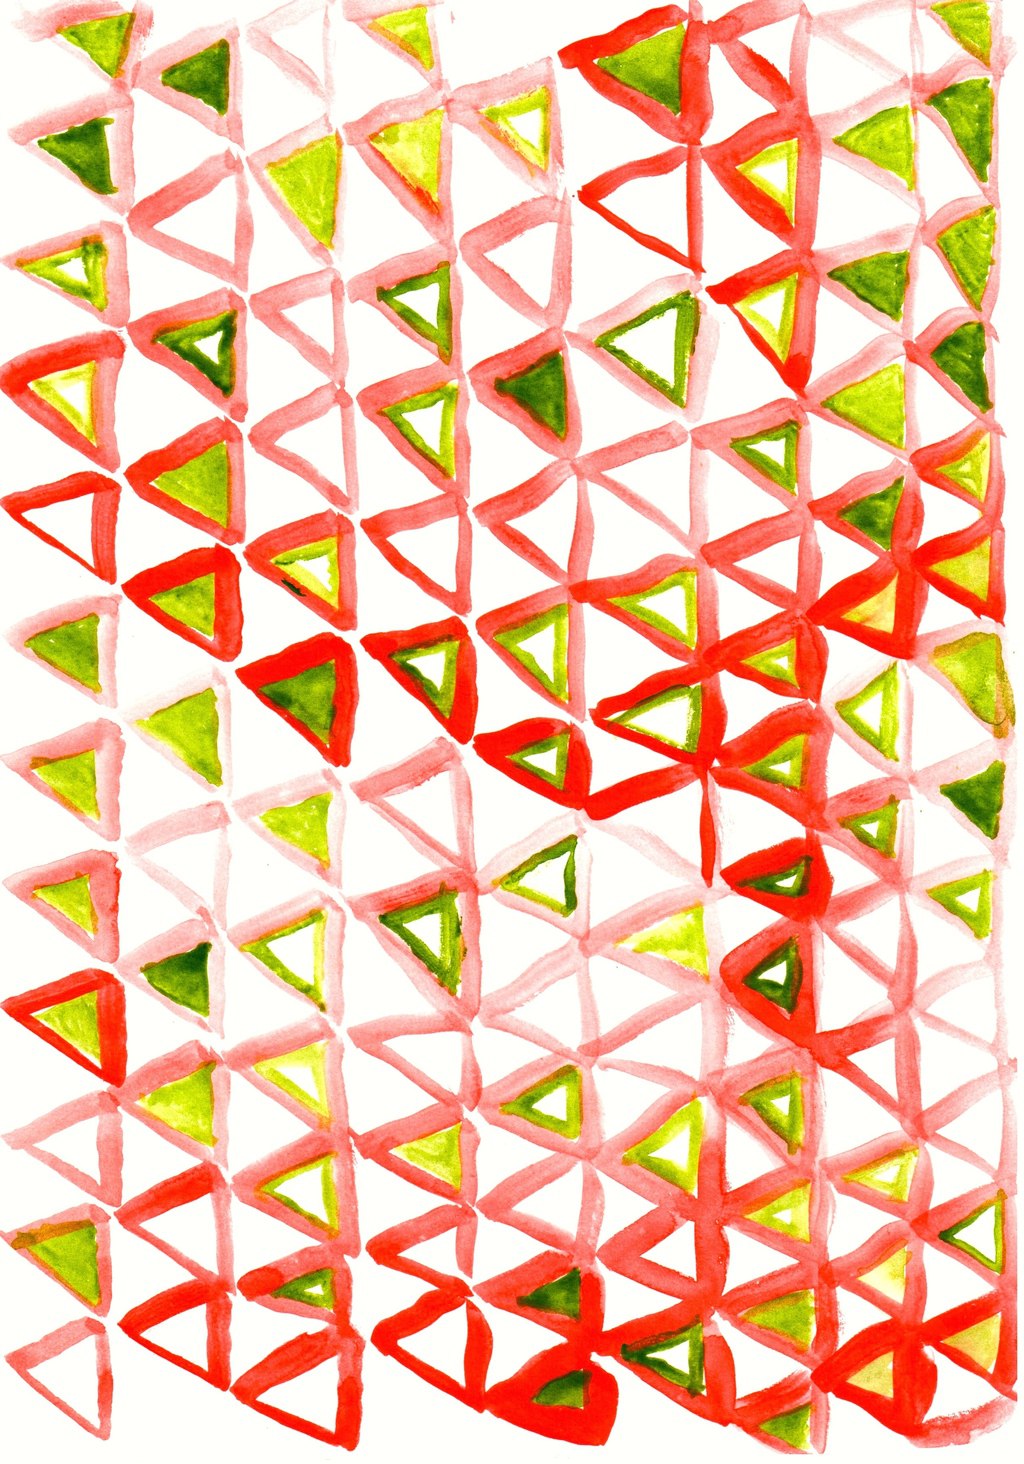
So here it is, our advent calendar for this year :). Very very simple to make and I have already received many compliments from friends! I simply used some pattern designs that I created for watercolour challenge few months ago and it brighten up our living room already. Yey!

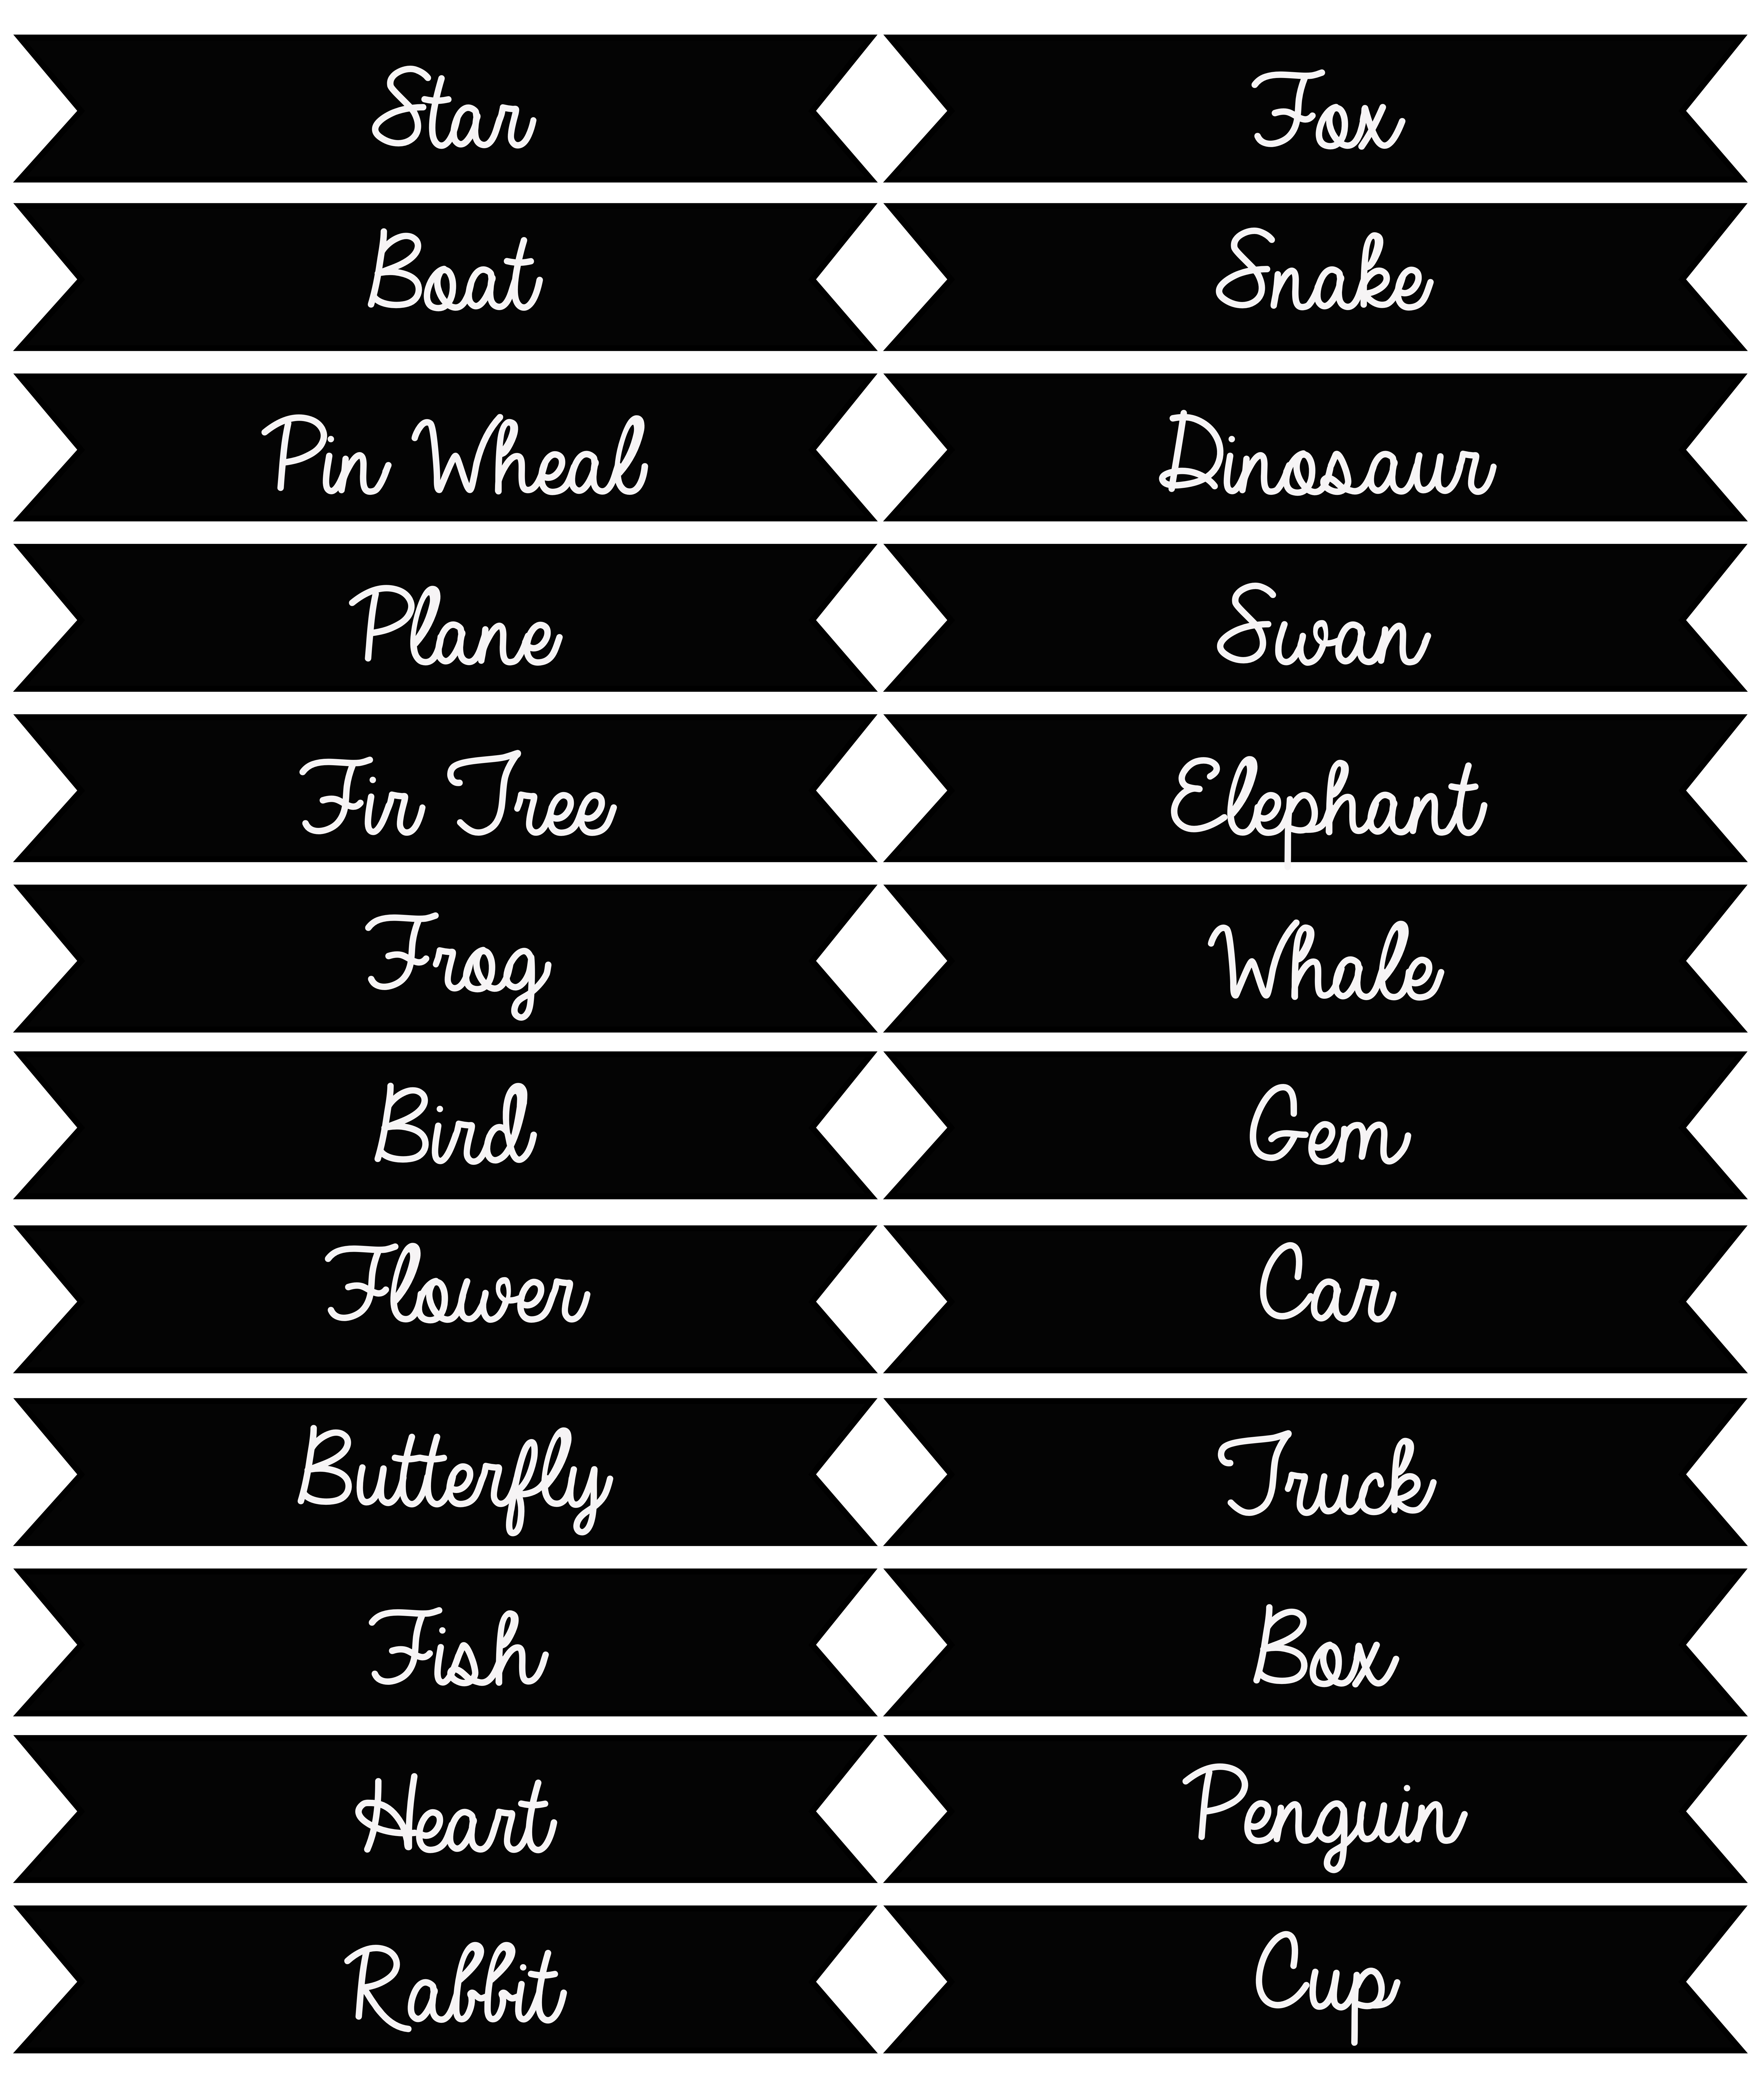
Each package contain origami idea which is great for me (I love learning something new!) and great with involving kids. I am planning to either teach Lukas how to make stuff by folding paper (for easy ones) or let him decorate completed origami item. I am also considering not to be stuck with using only paper. The possibilities are endless, regular blanket could turn into star for all you know. For those who are following me on social media be prepared for daily dosage of origami!Origami advent calendar DIY You ready to make your own origami advent for this year? Then let’s crack on!

You will need:

  • A4 or square size patterned paper, either printouts or shop bought gift wrapping paper
  • number tags
  • origami idea “ribbons”
  • scissors
  • treats to add into the packages (optional and we decided to go without this year)
  • a hanger
  • string or slim ribbon

First, cut out all the tags and origami idea “ribbons”.Origami advent calendar DIY
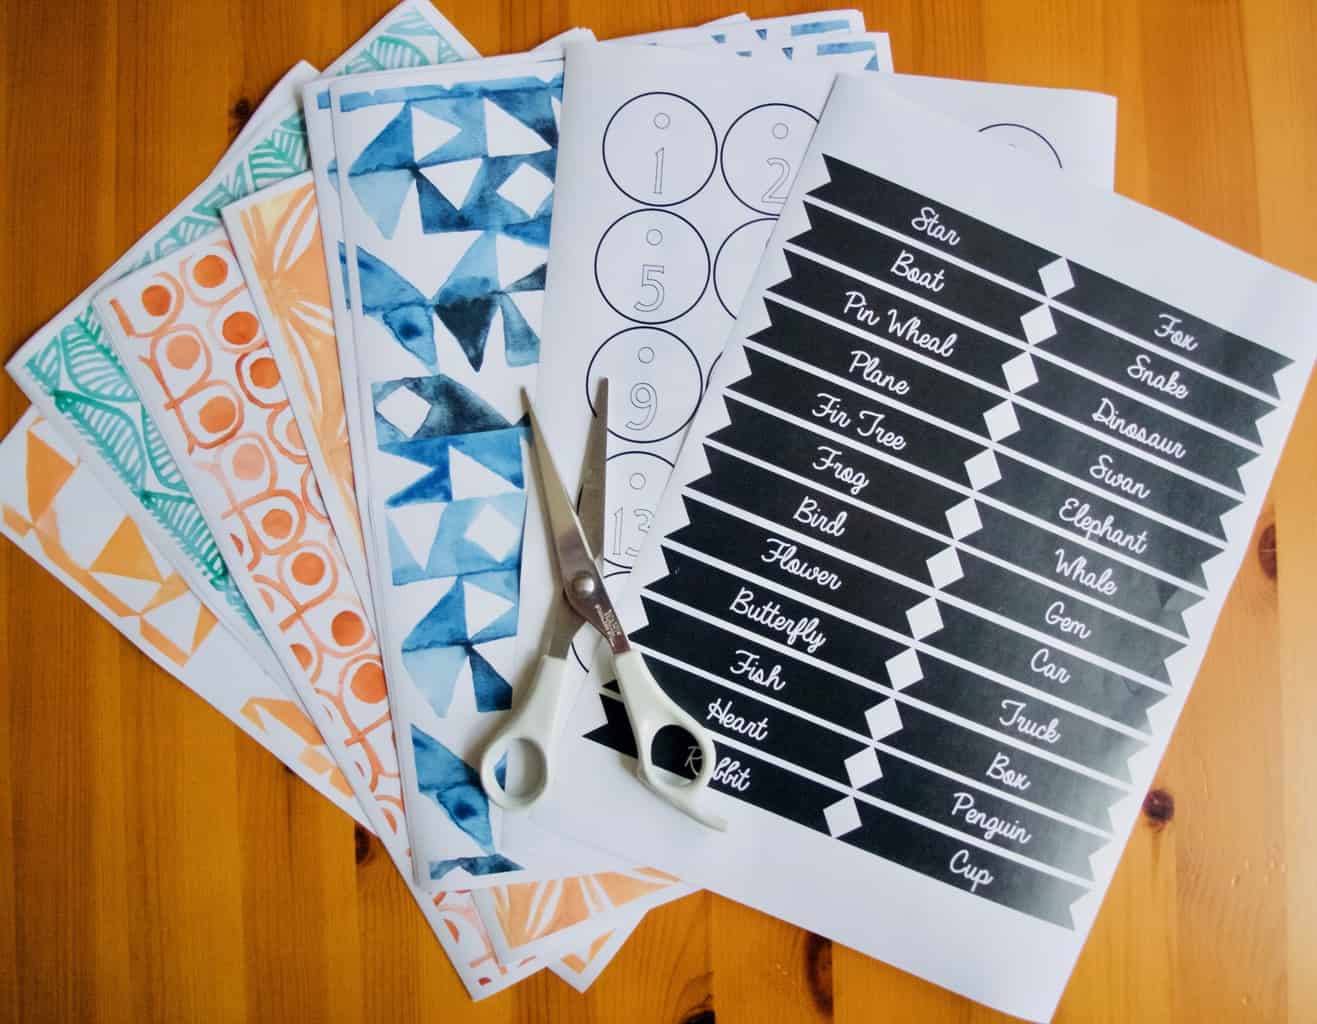
Make all the packages for every 24 days. Begin with folding in corners (1.), then fold in the sides and insert all the contents (2.). Finally fold in the pointy corners once again on both sides (3) and secure it using double sided tape. Use a string or a ribbon to wrap the package like a gift (4.). Don’t forget to insert the tag before tying the knot.How to fold an envelope from A4 
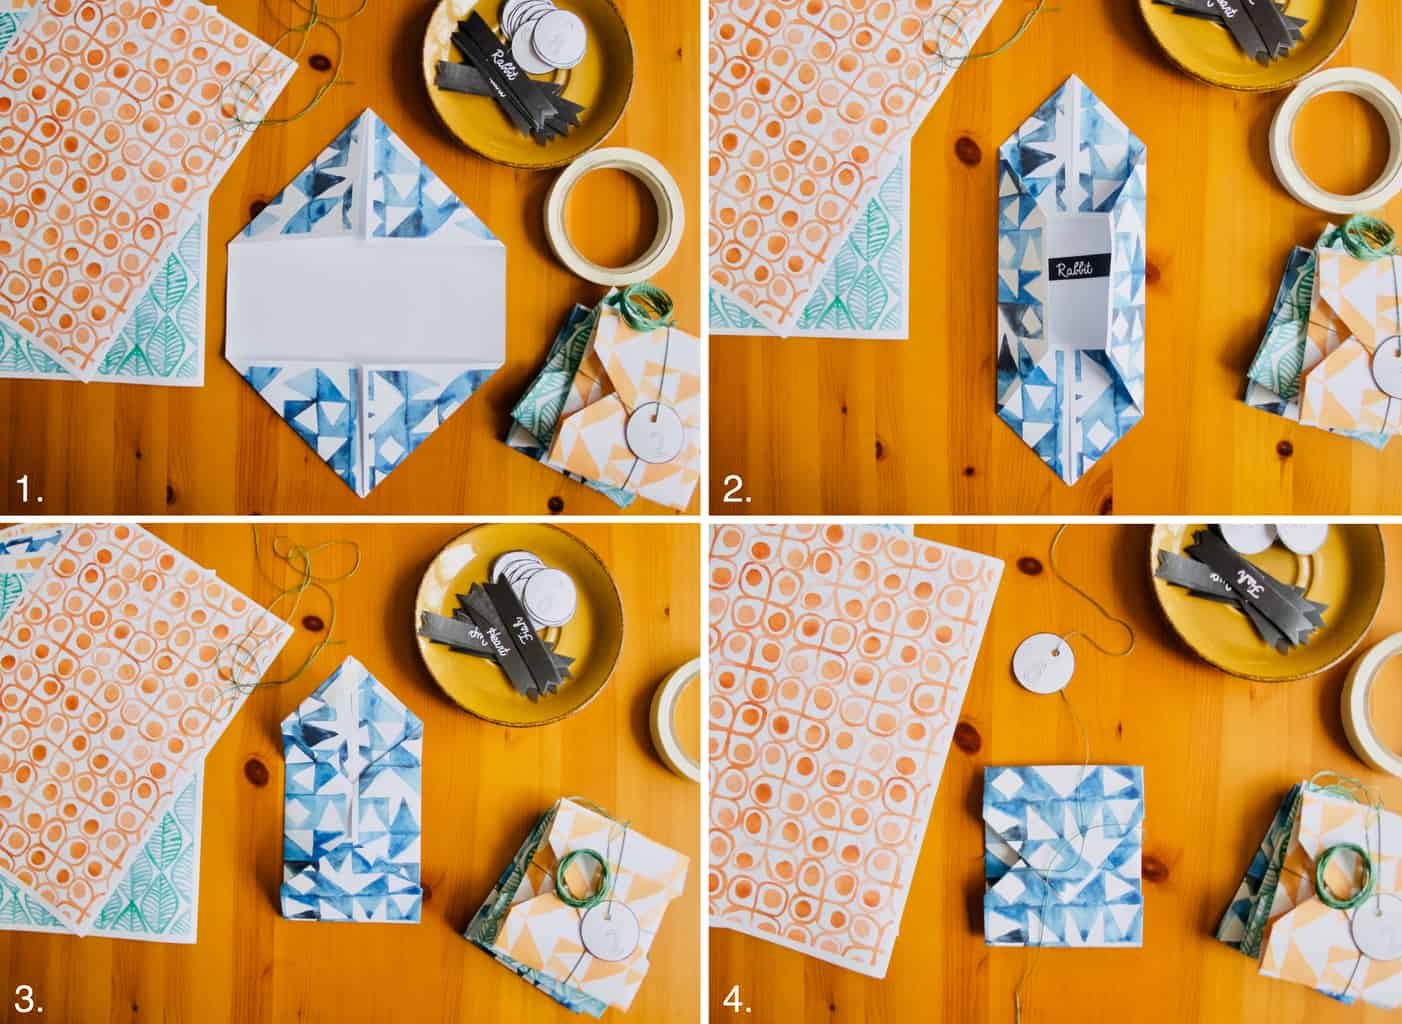
Once all the packages are complete, then all you need to do is tie them on the hanger and hang it on the wall.Origami advent calendar DIY Origami advent calendar DIYHappy Christmas waiting!

Rasa xoxo

0

Watercolour challenge: repeating patterns

Repeating patterns with watercolour This month I am doing something very exciting for my watercolour challenge. Yes, it’s patterns, my favourite art form! However it would be not very challenging if I did something I am good at already?! This is why I decided to perfect my skill of repeating patterns with some new methods.

When I used to create repeating patterns before it was mostly by drawing/painting/arranging different items/details in repeating order. But as you may all know this is not an accurate way to create repeating patterns. The objects I draw can differ in size as it is literally impossible to exactly replicate the same item/detail every time.

Alternatively I used to take a square of the drawing or paining and repeat it on the photoshop (or any other editing software), but this created very boring, common patterns. I always wondered how do you make repeating patterns that are seamless.

I was little inspired by this YouTube and other few videos on how to create drawn repeating patterns. This method is all about cutting a square shaped picture into four blocks and then swapping them around so the edges of the picture end up at the centre so you can draw on the seams to make it look like that those seams were never there (you really need to watch that video to really understand it). However, this method would not work with watercolour. As you can imagine, watercolour would probably leak at the cut edges.

This is when I came up with the idea to create repeating pattern using a grid. Although this is not a perfect way to create a repeating pattern, I realise the grid gives a good guideline. I started this by painting 7 different design blocks that flows into each other(tesselates) and creates a reasonably repeating pattern.    Repeating patterns with watercolour  This could then be coped and pasted on any editing software.Repeating patterns with watercolour Pattern seem to be more accurate when created on the computer, however it still has that hand painted look because of its origins.Repeating patterns with watercolour I created another pattern in a similar way, except this time round I painted enough of those 7 blocks in a row that created one huge block which was repeating itself naturally. This way all I needed to do is copy and paste this block few times.Repeating patterns with watercolour Repeating patterns with watercolour  Next I wanted to break away from the grid without actually leaving it. I painted leaves in repeating order. The grid allowed me to keep the leaves in similar shape and line. So when I repeated it on a computer this pattern repeated itself flawlessly. Repeating patterns with watercolour I tried the same technique on another design and this time round I realised the problem of the grid itself. The grid would not erase after it has been painted over. And with the light colour you can see the grid very clearly. I had to use the clone tool to hide those annoying lines that was never meant to be part of the pattern.Repeating patterns with watercolour After repeating the pattern the same way as the others I realised it does not match very easily with plain painted areas (it’s very difficult to get the same shade of colour every time). This also had to be corrected with the clone tool.Repeating patterns with watercolour Repeating patterns with watercolour  Finally instead of a grid I used a dot system. It guides you like a grid, but its not as visible in case you can’t erase it. Repeating patterns with watercolour As you can see, this creates almost perfect repeating patterns ;-).Repeating patterns with watercolourHope you are inspired

Rasa xoxo

1

Forest in patterns

Forest in patterns I have been so busy this year that I forgot when was the last time I have been creative. So no wonder when we went on holiday and walked around in the forest in Lithuania I was amazed once again how beautiful nature is! After taking detailed pictures of fern, moss, wild blueberry bushes and pine bark all I wanted is to create, create and create. So I did what I do best (I believe) is to make patters inspired by woodland of course!Forest in patterns First I used watercolour to make these backgrounds. It was hard to begin with (It’s been sooo long since I touched any paint), but the more relaxed I got I was able to produce decent textures. I used to dislike water colour when I was a kid as it is difficult to control the colour merging with each other accidentally.  But I fell in love with it when I went to art college as I realised you need to treat water colour completely differently. You need to be free with it. It is very therapeutic if you try ;-).Forest in patterns Once the water colour dried I cut it into shapes and mix and matched with the other backgrounds I created earlier.Forest in patterns Forest in patterns fern pattern I love how this bark pattern turned out, its not exactly like a bark, but it is very pretty to me :-).wood bark pattern Forest in patternsHope this post got you inspired, you are welcome to use these patterns I created anywhere you like (I am thinking to use it for my desktop if you ask me)

Rasa xoxo

0

Photography challenge: flower pattern arrangements

Photography challenge: flower pattern arrangements This month’s photography challenge have been the most enjoyable so far. It includes patterns and flowers, my two favourite things! Although I don’t feel like I learn anything other than what camera settings do not work and that I probably need to invest some money on lighting. Photography challenge: flower pattern arrangements Arranging patterns is something I enjoy and I believe it is what I am good at (heaving my big headed moment over here). However photographing it is quite a different story. When it came selecting camera settings I thought if I use highest f-stop (more about f-stop read here) I could select a large depth and therefore everything would look clear and focused. The outcome was not what I expected. The picture bellow looked blur with f22 which is why I ended up using the macro setting.Photography challenge: flower pattern arrangements The other thing I knew I needed to perfect is the lighting. Since the patterns need to be repetitive I thought even lighting would be the best. To do that I needed the light glowing from above, which why I decided to do my shoot outside. Because only outside the natural light is all around you unlike indoors it only comes from the windows. I chose the day that was cloudy rather than sunny as I certainly did not want any harsh light. The turnout again was not that great. I still had some shadowing on one side of the picture. I don’t know why…

The other problem I encountered when photographing is the wind. As you can see in the picture bellow it was hard to keep my arrangements stationary :-D.Photography challenge: flower pattern arrangements Photography challenge: flower pattern arrangements Photography challenge: flower pattern arrangements Photography challenge: flower pattern arrangements Photography challenge: flower pattern arrangements Photography challenge: flower pattern arrangements Photography challenge: flower pattern arrangements Although I did not have much success with this challenge, I really enjoyed picking all these flowers, all found in our garden :-).Photography challenge: flower pattern arrangementsHave a lovely weekend xx

Rasa

0

Seaworld in patterns

SeaworldOne of the ways to get inspired to be creative is to look around you (especially in nature). At least this works for me! When we were visiting Florida it was hard to find something cultural or a place in nature. All you could find in Kissimmee is a lot of Amusement parks (I might love them one day when we have kids, but I hate them now)! So I ended up visiting the one with the least rides and more nature. In Seaworld I focused on texture colour and shapes. And this is what I got!

Seaworld in abstract patternsSeaworld Seaworld Seaworld SeaworldSome patterns I have painted myself after being inspired by all those underwater colours!Seaworld in abstract patternSeaworld Seaworld SeaworldI hope you feel inspired today and look around you when you go outdoors! And you can find patterns everywhere, even better than the ones I found in Seaworld :-).

Rasa xoxo

0

Say it in 3D: make a pop up greeting card!

Say it in 3D: make a pop up greeting cardLet’s be honest, do you keep the greeting cards you receive for birthdays or Christmas? I don’t, although I try to reuse them in paper crafts. I know that majority of us would eventually bin them. And knowing this makes me sad :(. I don’t like the idea that we spend 2-5 pounds on the card for it to be binned. This is why I make every possible effort to make a handmade card. There are two major reasons for that. It cost practically nothing since I reuse or use up all the paper stash I have. Handmade cards have a better chance in surviving longer as it has a sentimental, caring value attached to it.

I like making my own patterns that are perfect for for making paper crafts, here is one of them ;-).Simple flower pattern for paper crafts

Say it in 3D: make a pop up greeting cardReady to make one now? Click HERE for the step by step pop-up card project.Say it in 3D: make a pop up greeting card Say it in 3D: make a pop up greeting cardHave fun!

Rasa xoxo

1

Things I look forward to in October

Autumn colours in the boxOctober may be uneventful, but there are plenty of things to look forward to… such as autumn itself! :)

1. AUTUMN is a beautiful season. Look at all the colours! And it’s not only orange, brown and yellow…. I love the combinations of pink, forest green, orange and cream. And lets not forget purple! I have been so inspired by it all that I have been painting last night like mad (and that does not happen very often). I love creating new patterns. New autumn pattern bellow is here for you to nick, use it to wrap a gift or put in on the wall ;-). Friendly Nettle autumn pattern2. KNITTING JUMPERS is almost my part time job. I took on three (yes, three) jumper knitting projects so far. But that’s quite enjoyable as I can do it while watching a movie or chatting with a friend! Here is my first cardigan in progress, can you guess what part it is? Yes, it’s a sleeve! Many more parts to go :-).Progress on my knitted cardigan3. DRINKING HOT DRINKS kind of goes with knitting. It’s important to keep yourself warm and all snuggled up while doing some crafty work! My favourite hot drink at the moment is spiced coffee (although I haven’t had any this year yet, but will make some soon!). It’s one of those drinks that is satisfying and not too fattening (minding my figure right now!). Click here for the recipe ;-).Spiced CoffeeHappy October!!!

Rasa xoxo


0

Happy 1st of September!

my school years1st of September has always been an official 1st day at school in Lithuania with celebration and parades. Don’t you think that celebration is a great way to start the school? To me this was something I looked forward to, although I was never a good student (except arts and biology). Free lovely pattern printouts Another thing I was looking forward to at school was catching up with my friends, shopping for new stationary, organising the books and getting ready to start. So I could say organisation has been my stronger point. I used to enjoy (still enjoying) putting things in order so it looks prettier and it’s easy to find stuff when you need them. I guess I should be able to give you some tips in this area of my expertise. But one thing I should point out that this won’t make you a better student and spending too much time on it will lose your focus on something else more important. I of course have learned that good balance is the key to almost everything! My school yearsFree lovely pattern printouts to cover your booksSo today I would just like to share a project on how to protect your books with pretty covers (extra printable patterns as well). Click here for full project walkthrough. protecttive book cover DIY protective book cover DIY


Good luck and have fun at school (or work)

Rasa x

0