Top

Archive | Blog

Mini passion fruit cheesecakes

Mini Passion Fruit Cheesecakes recipe
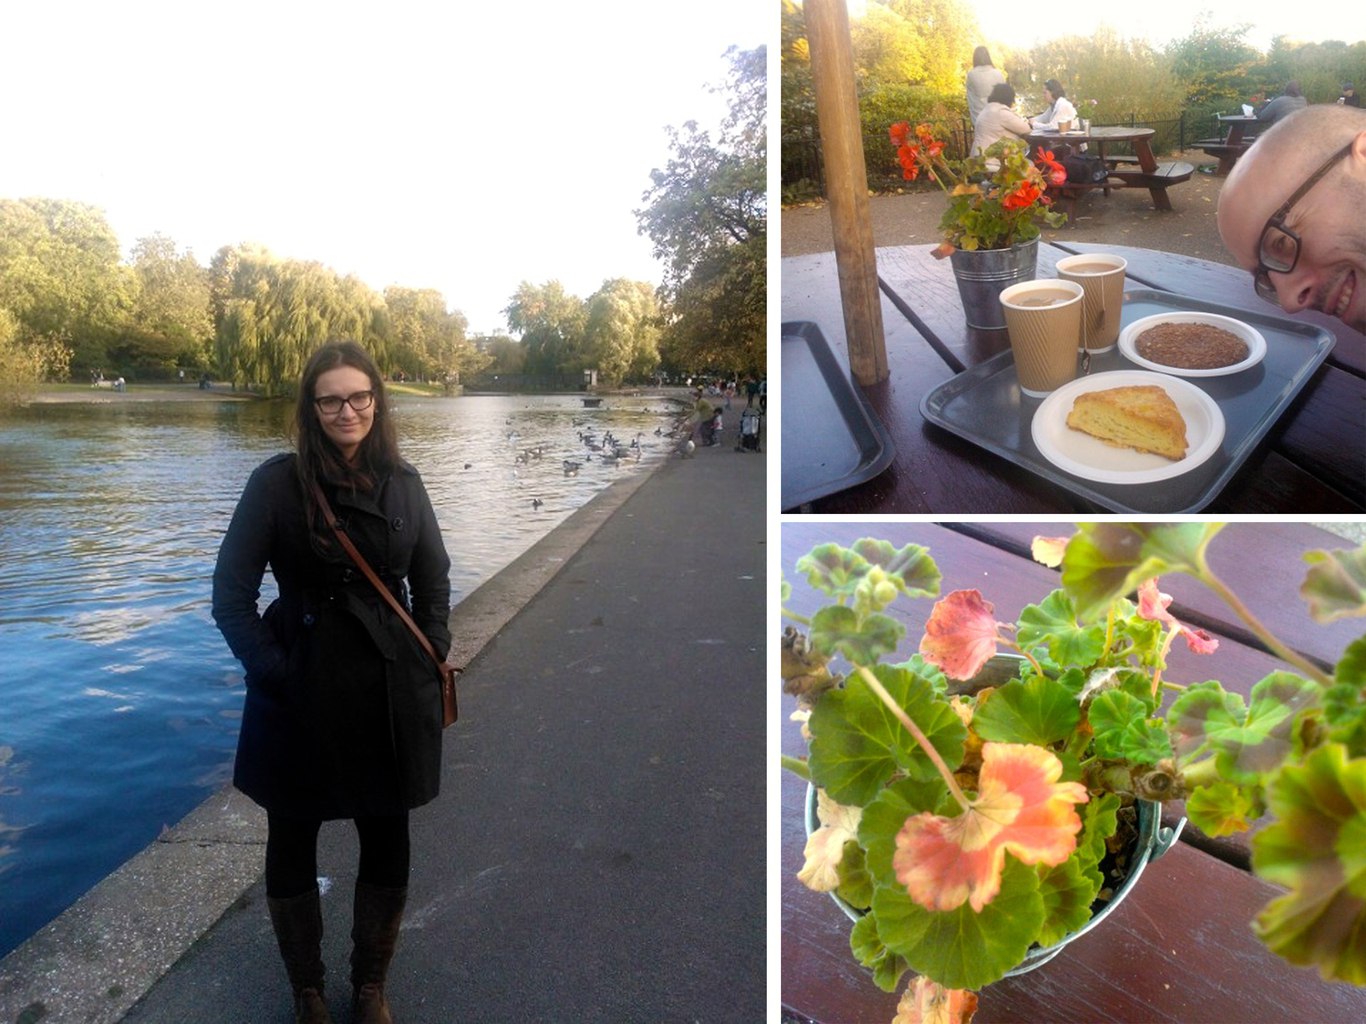
I made up this recipe when I was given a sample of passion fruit cheesecake by a restaurant in London. They wanted me to replicate it and deliver it together with other cakes that I baked for them. Although they loved the cheesecake I baked, the whole set up did not work out long term. I realised that doing wholesale  baking is not for me.  I felt more like a factory rather being a bakery. Doing that for almost a year made me feel like Friendly Nettle lost it’s face. I realised i preferred to create a variety of different bakes instead of the same thing day in day out.  I’m currently working on my bakery site to make it more accessible for you guys! But for now, I am pleased to share my passion fruit cheesecake recipe that I have now turned into a mini cheesecake recipe. I think they are super cute and perfect for individual portions at a dinner party. Mini Passion Fruit Cheesecakes recipe
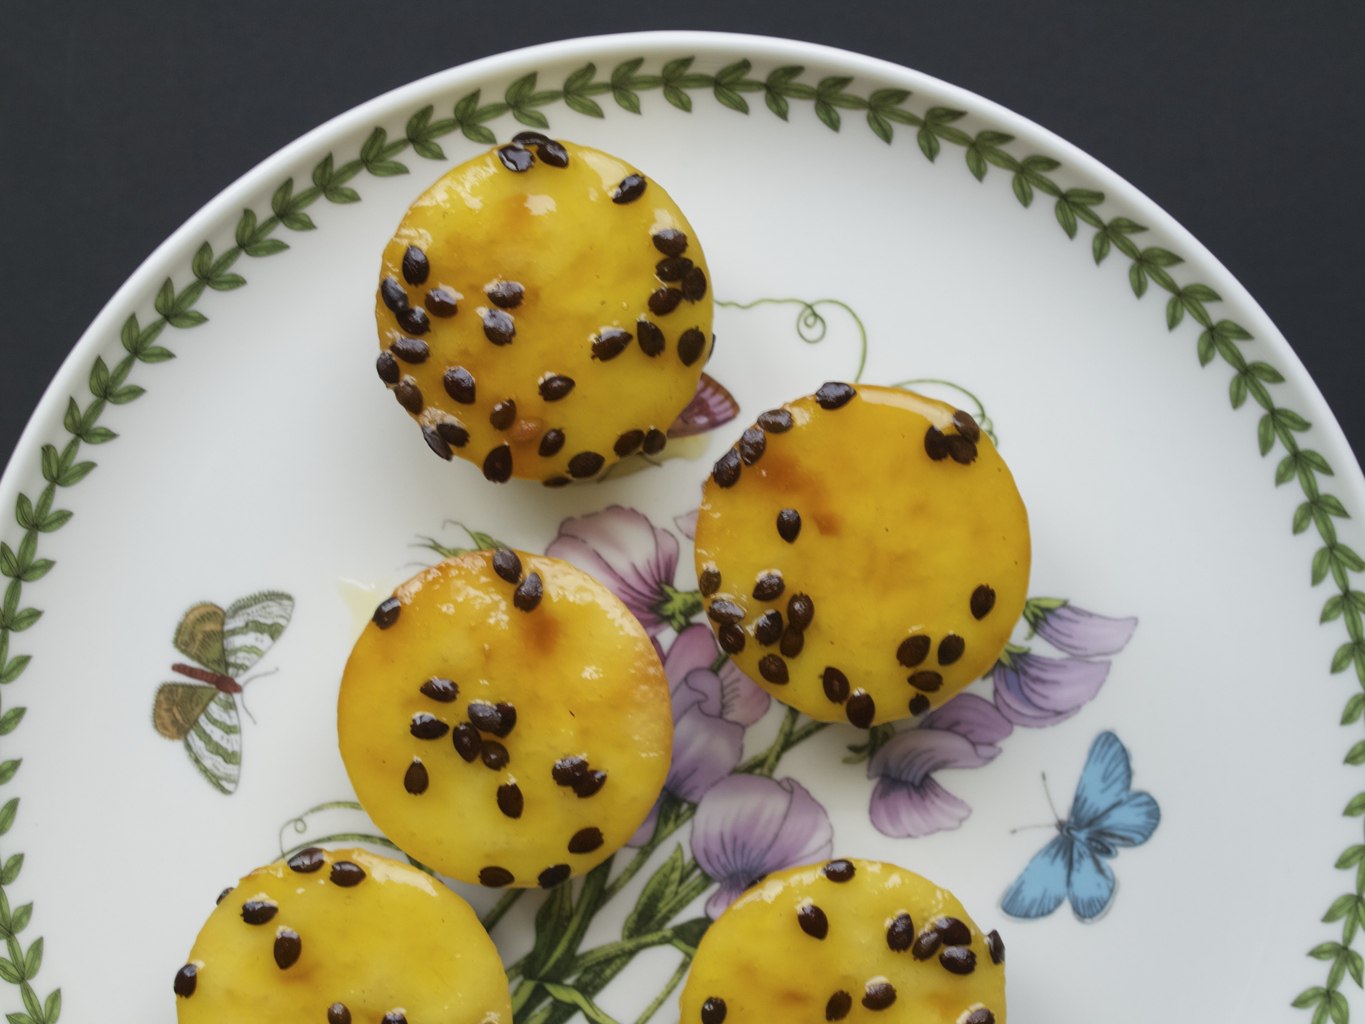
MINI PASSION FRUIT CHEESECAKES makes 12-20 mini cheesecakes (depending on size)

(for the base)

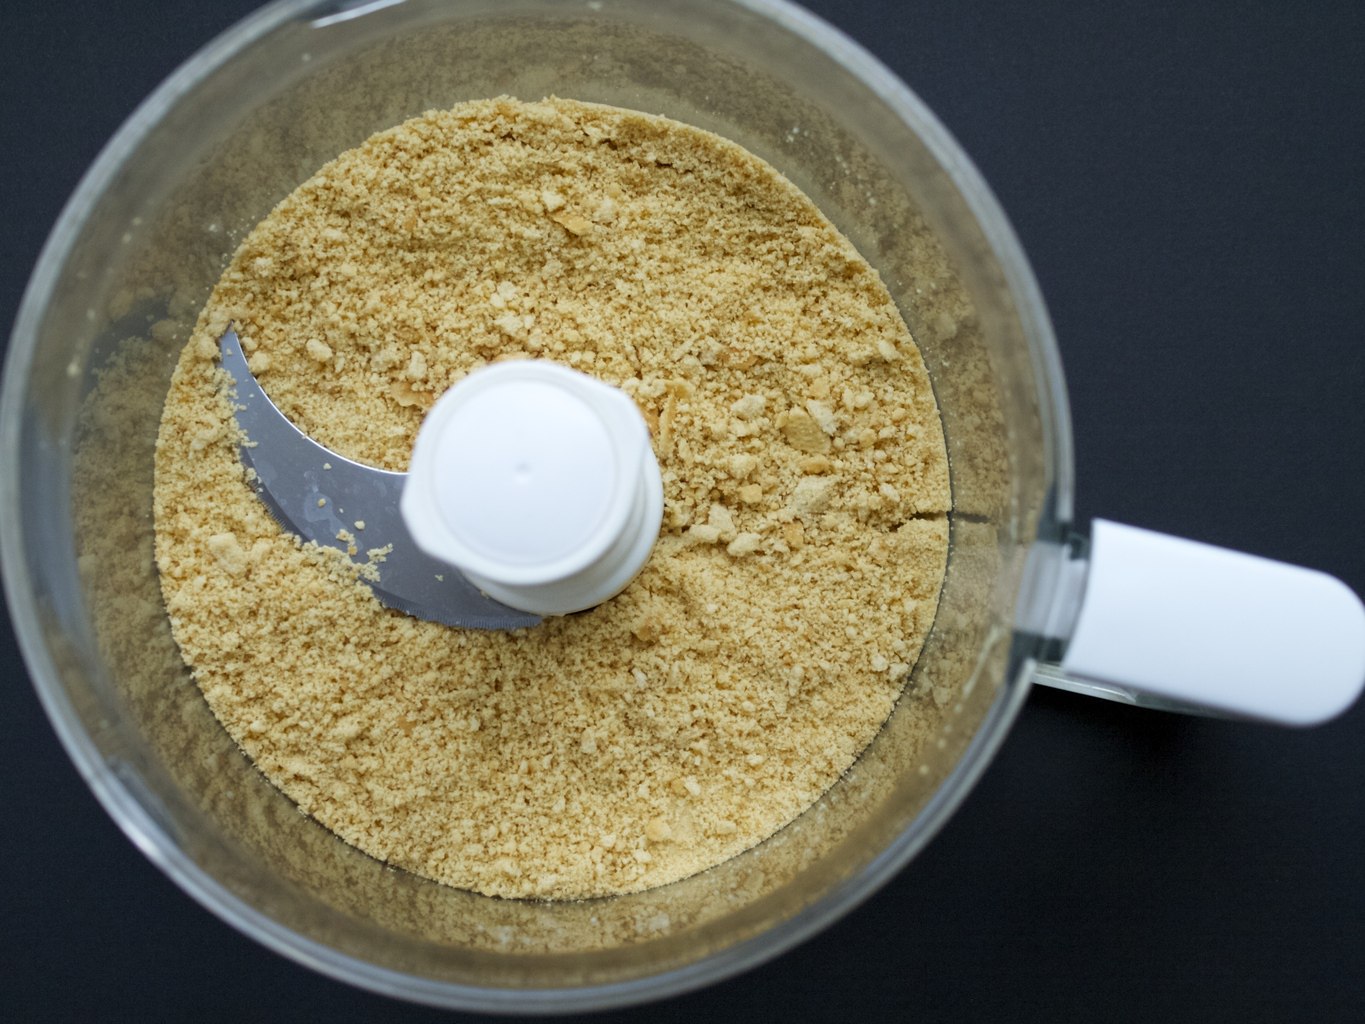
  • 200g digestives, finely crumbled
  • 75g butter, melted

(for the filling)

  • 600g soft cheese
  • 125ml passion fruit syrup (50g sugar+passion fruit juice)
  • 4 eggs
  • 150g caster sugar
  • 2 tbsp corn flour

(for the topping)

  • 170g passion fruit pulp (either from a can or from around 6 passion fruits)
  • 50g caster sugar
  • 1 gelatine leaf (about 1-2g), soaked in cold water

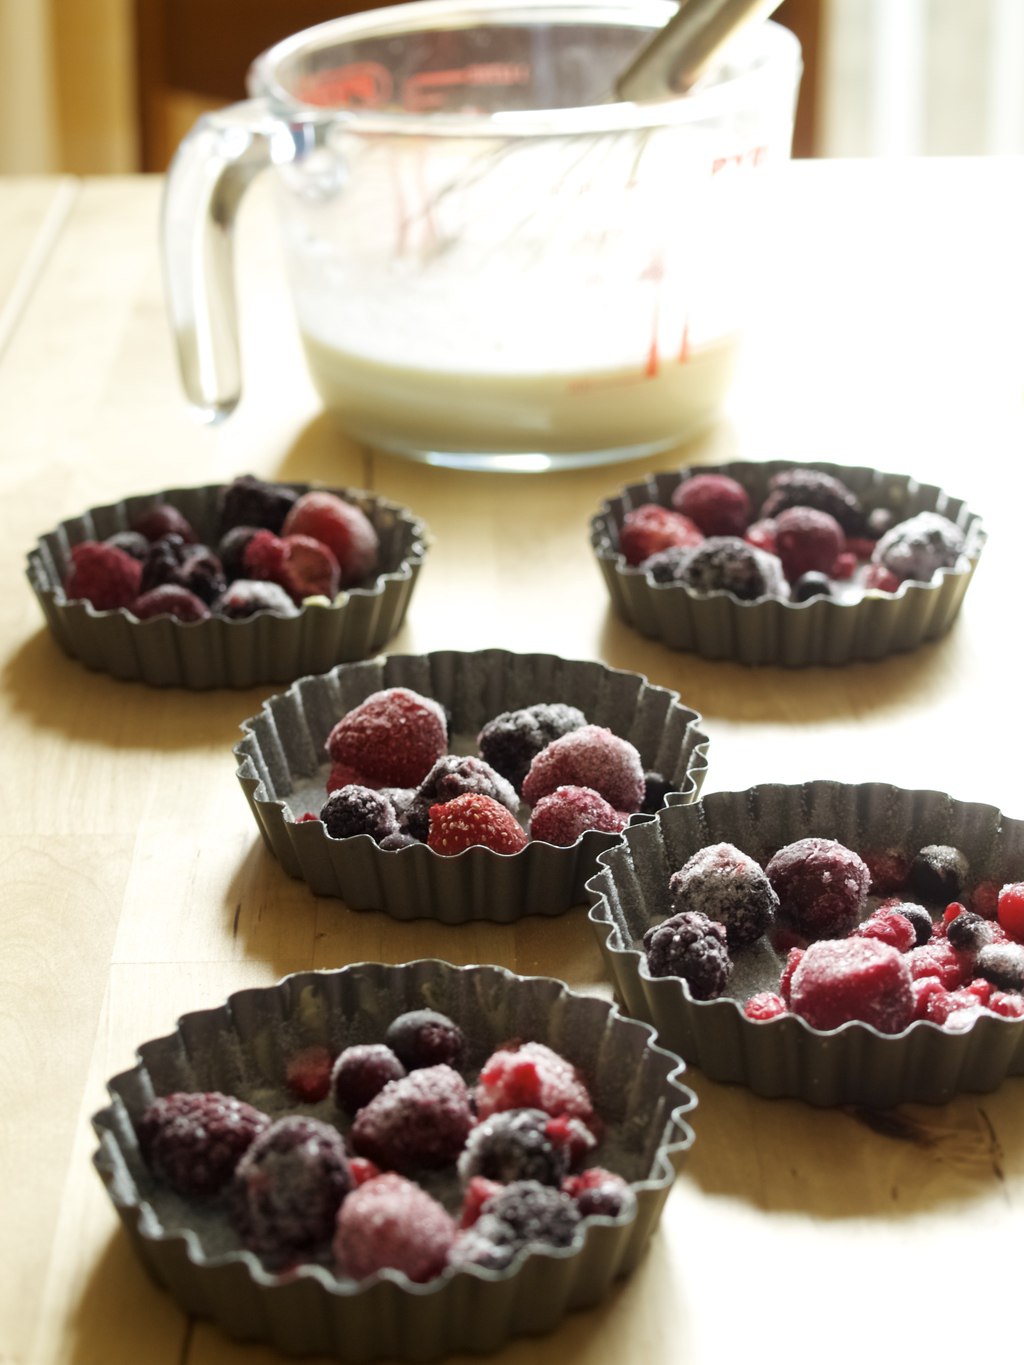
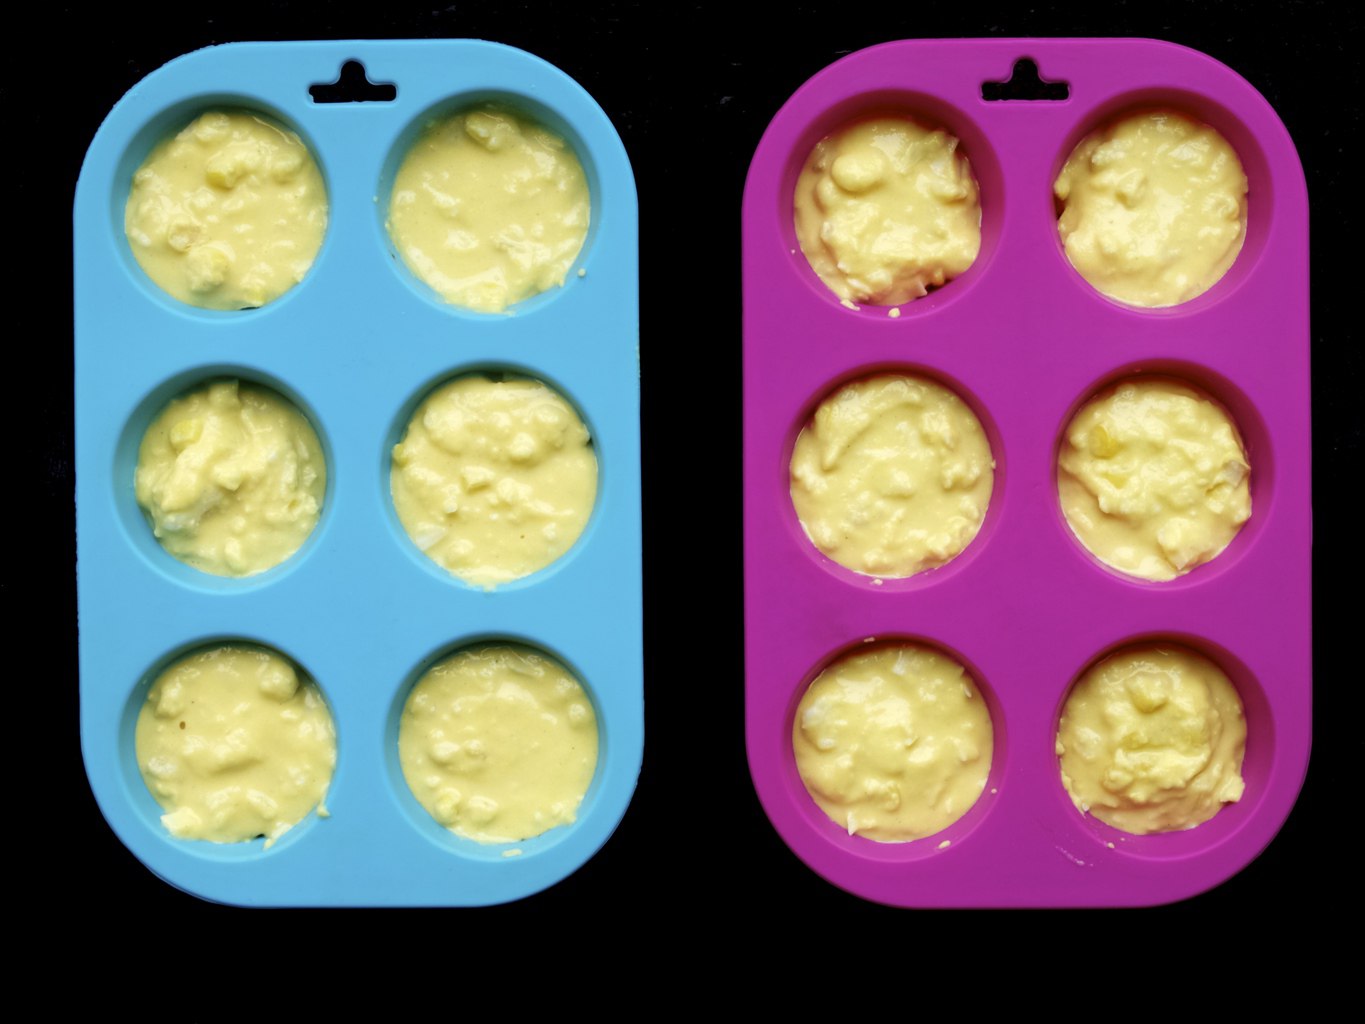
1. Combine biscuit crumbs with melted butter. Divide the mixture into the mini cake tins and press it down with the spoon. I used a silicon muffin baking pan because I don’t have any other baking tins suitable. What I really would like to have is this type of pan!

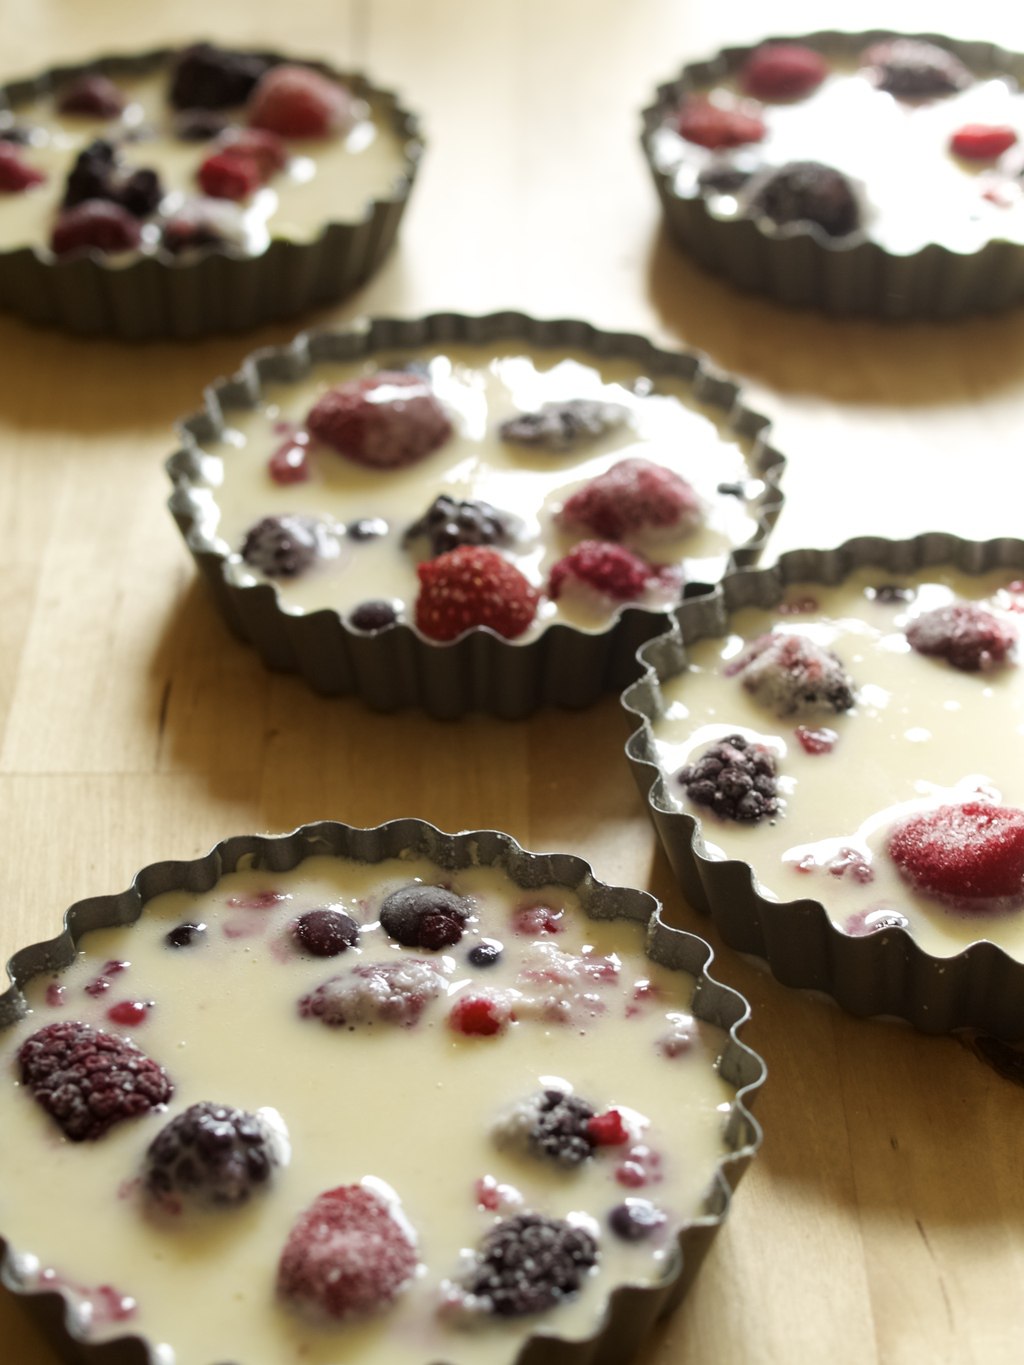
2. In the food processor mix the filling and pour it on top of the cheesecake bases. Bake the cheesecakes in preheated 180C oven for 45min. I usually bake cheesecakes in the a bath, all you need to do is fill the baking tray below the cheesecakes with some boiling water. Mini Passion Fruit Cheesecakes recipe
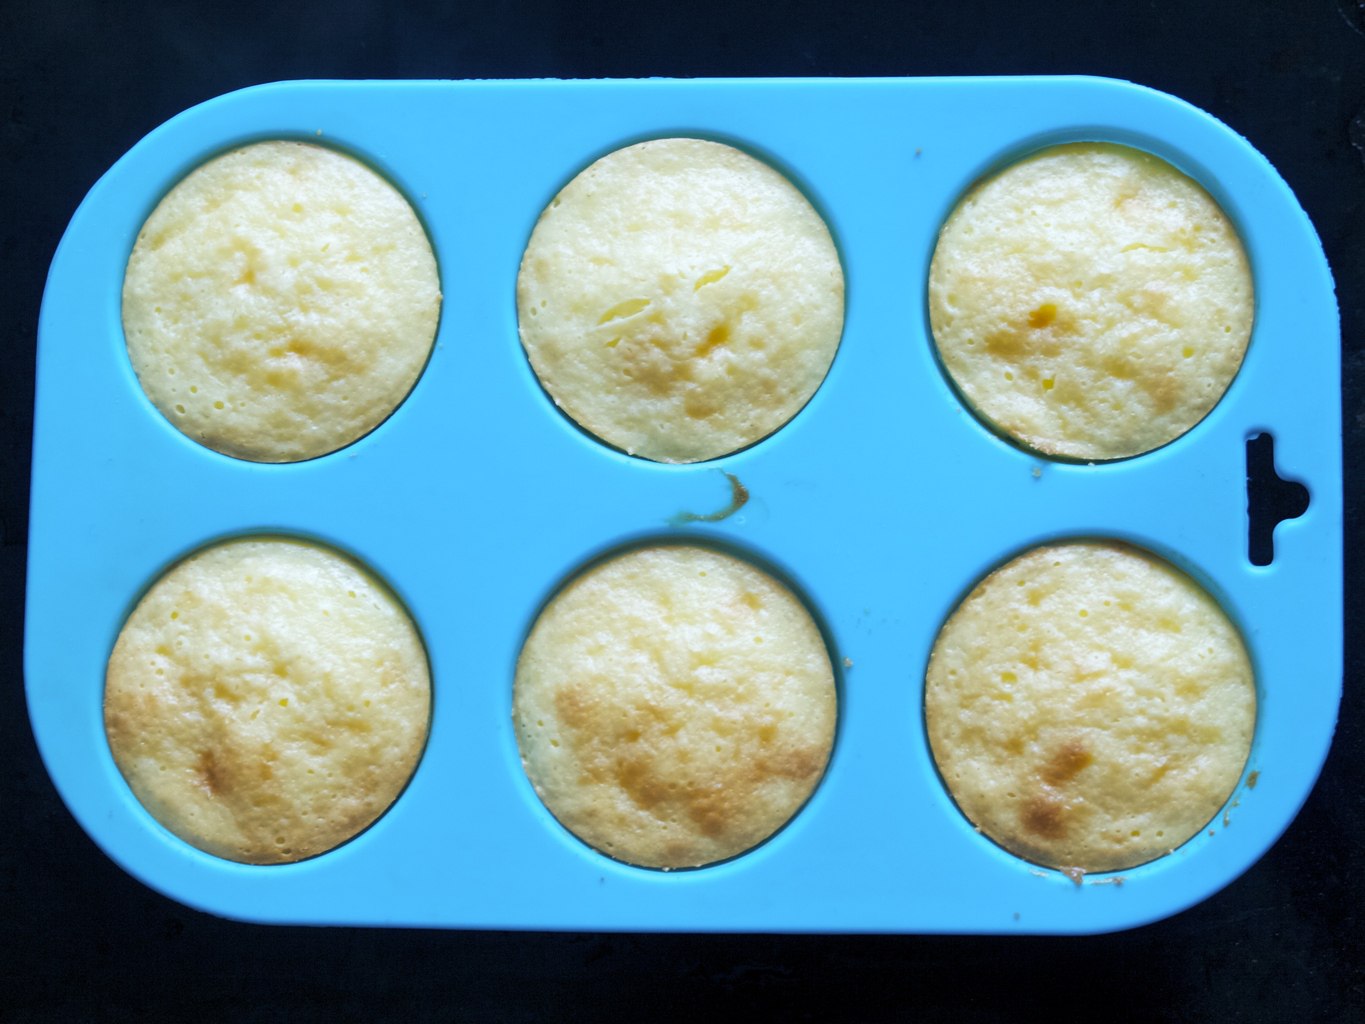
3. Meanwhile, heat the passion fruit pulp with sugar. Melt the gelatine leaf into the mixture and remove then from the heat. Pour the topping over the baked and cooled cheesecakes. Place the cheesecake tray in the fridge to set. Mini Passion Fruit Cheesecakes recipe
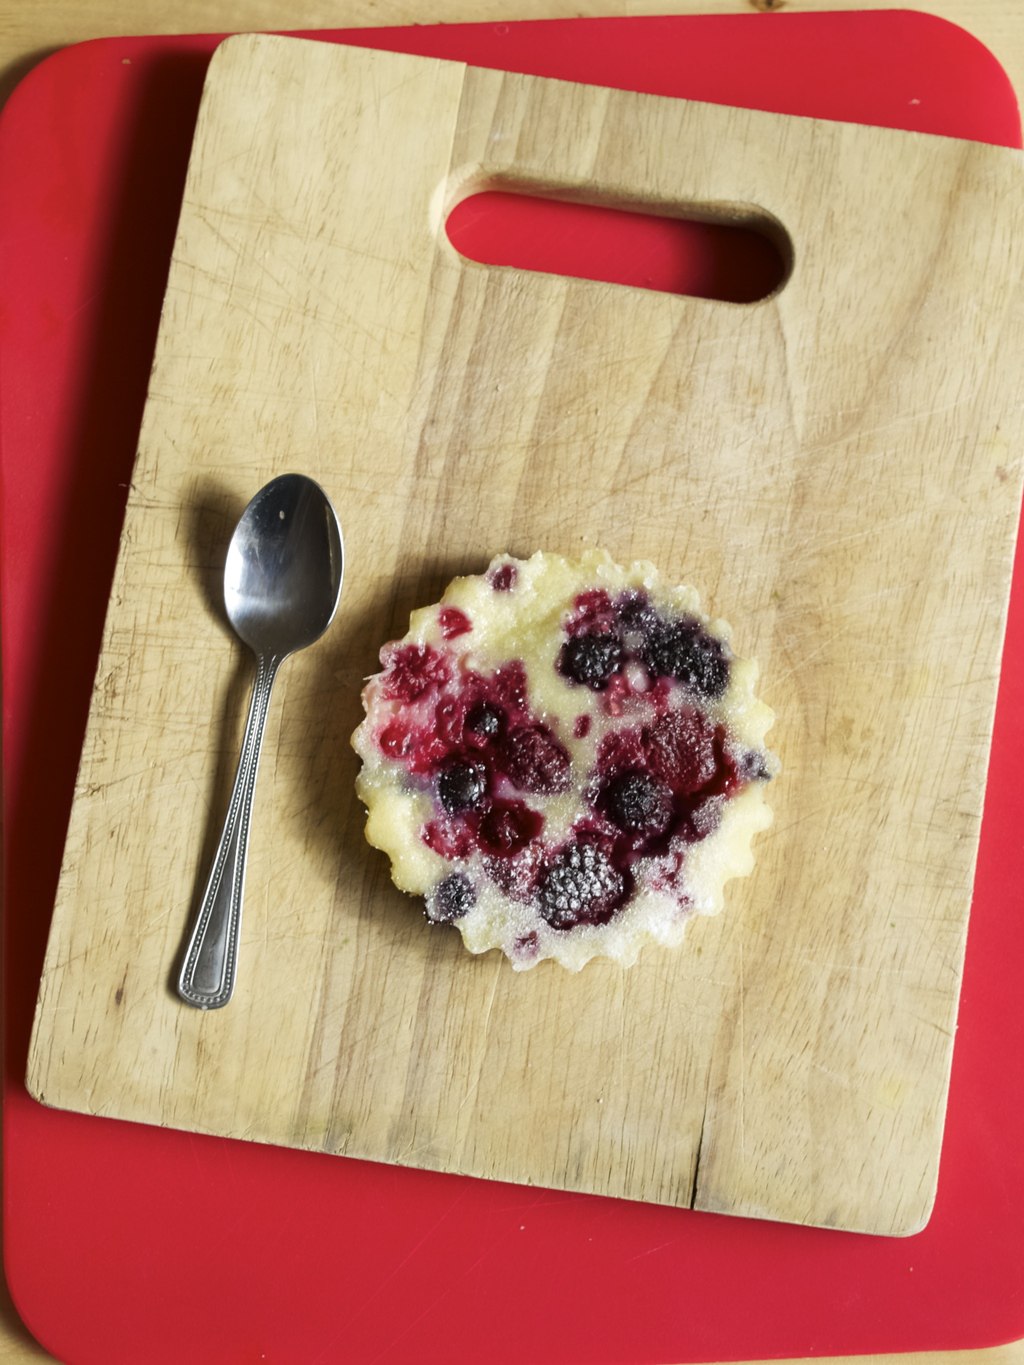
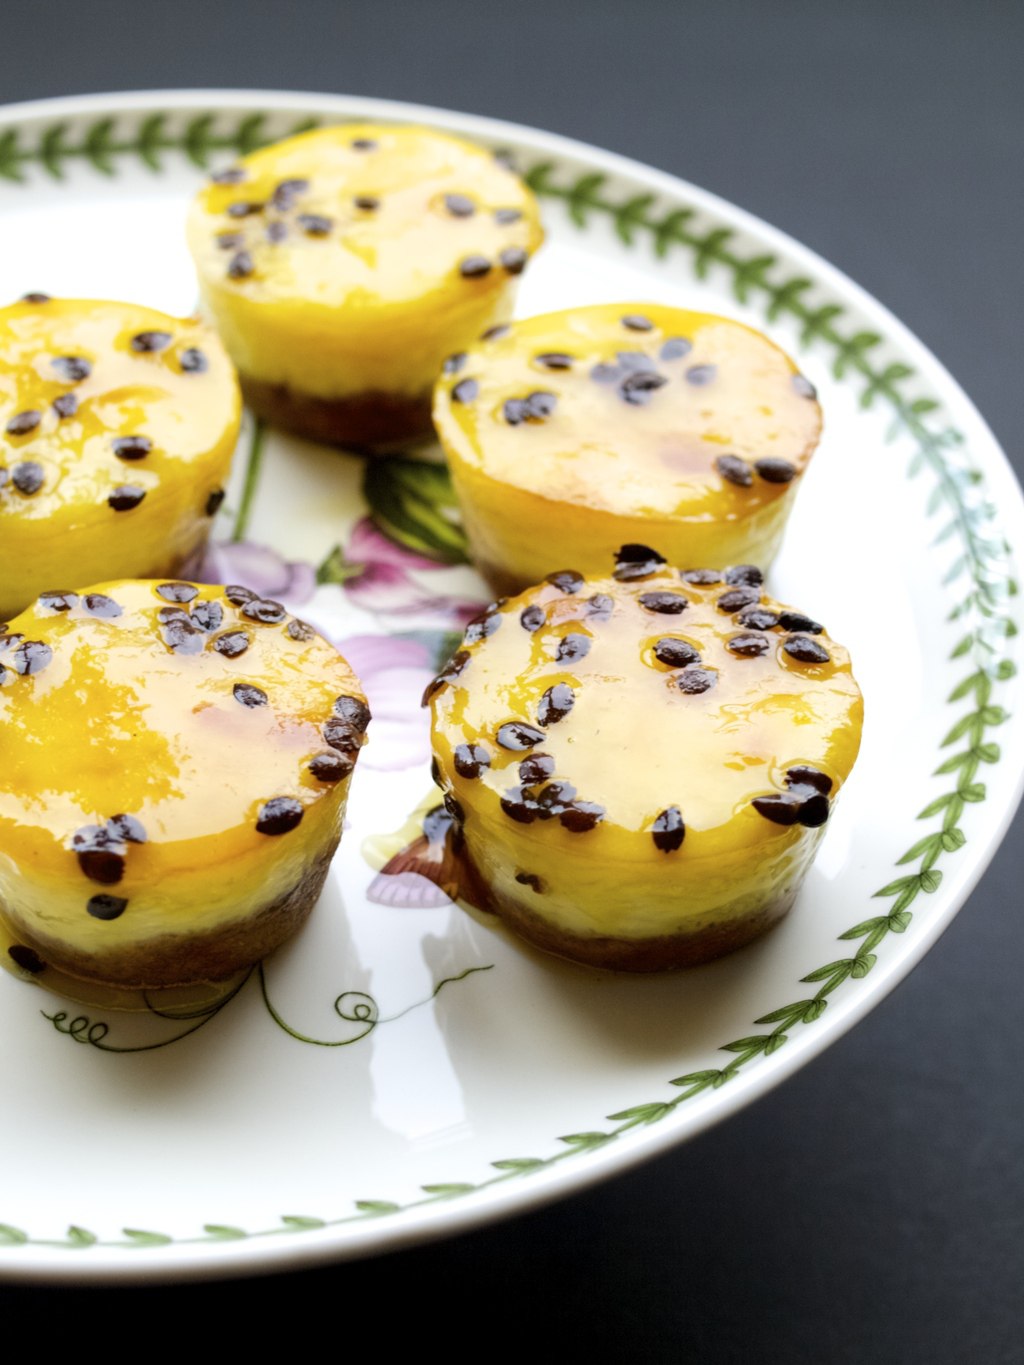
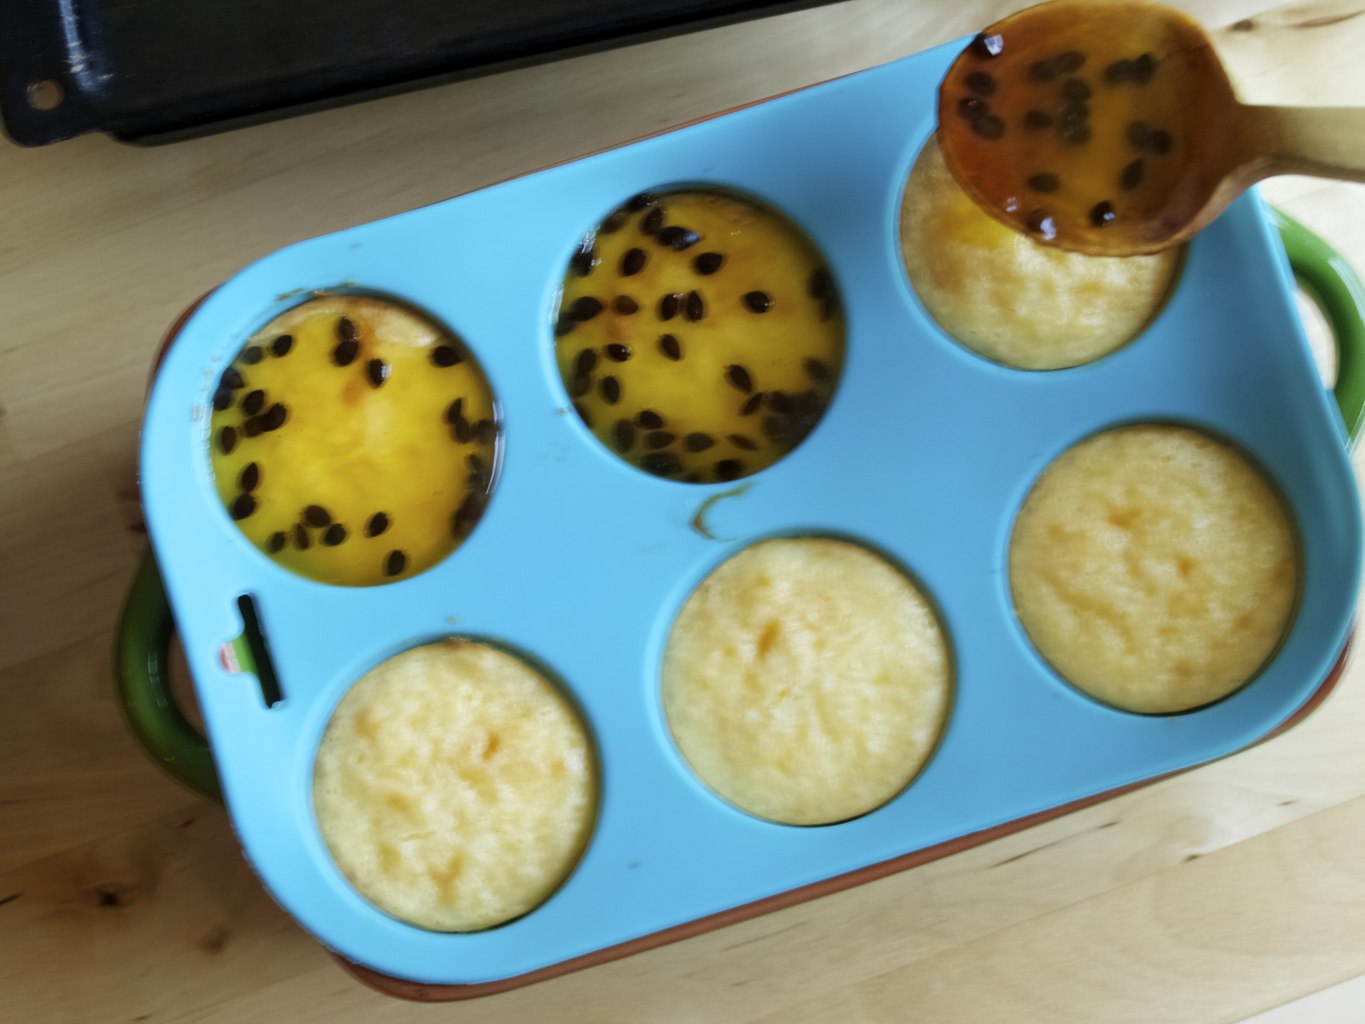
Once set, these mini cheesecakes should easily come out of their moulds/tins…. what ever you were baking them in!
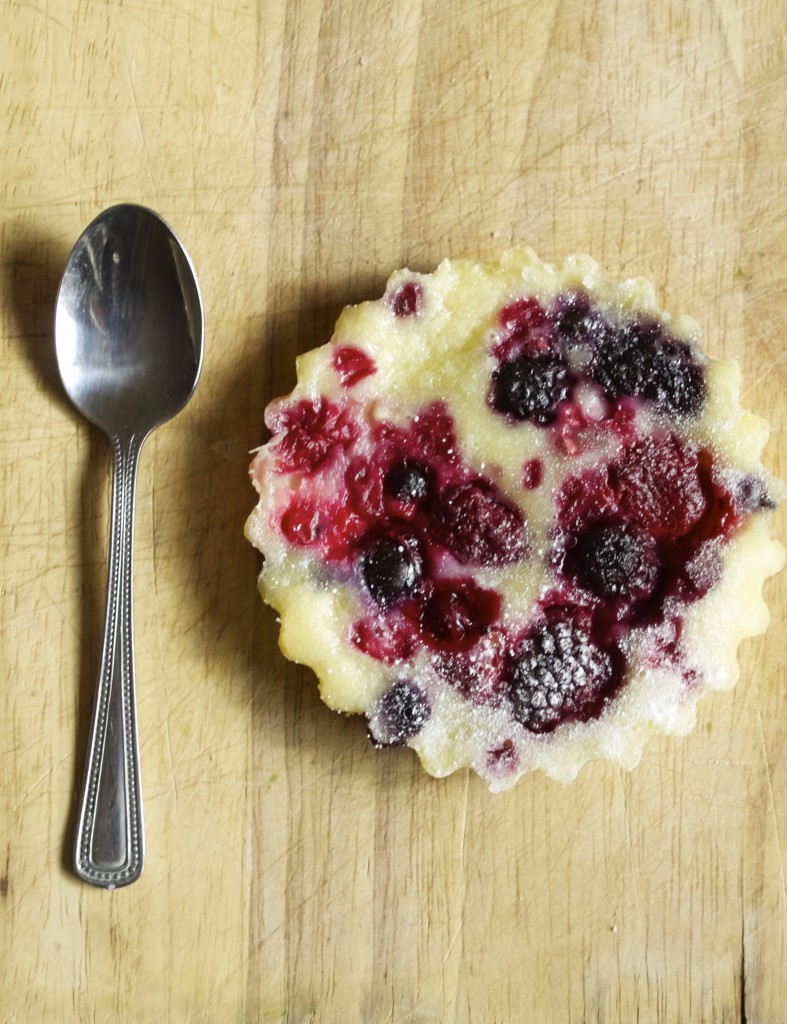
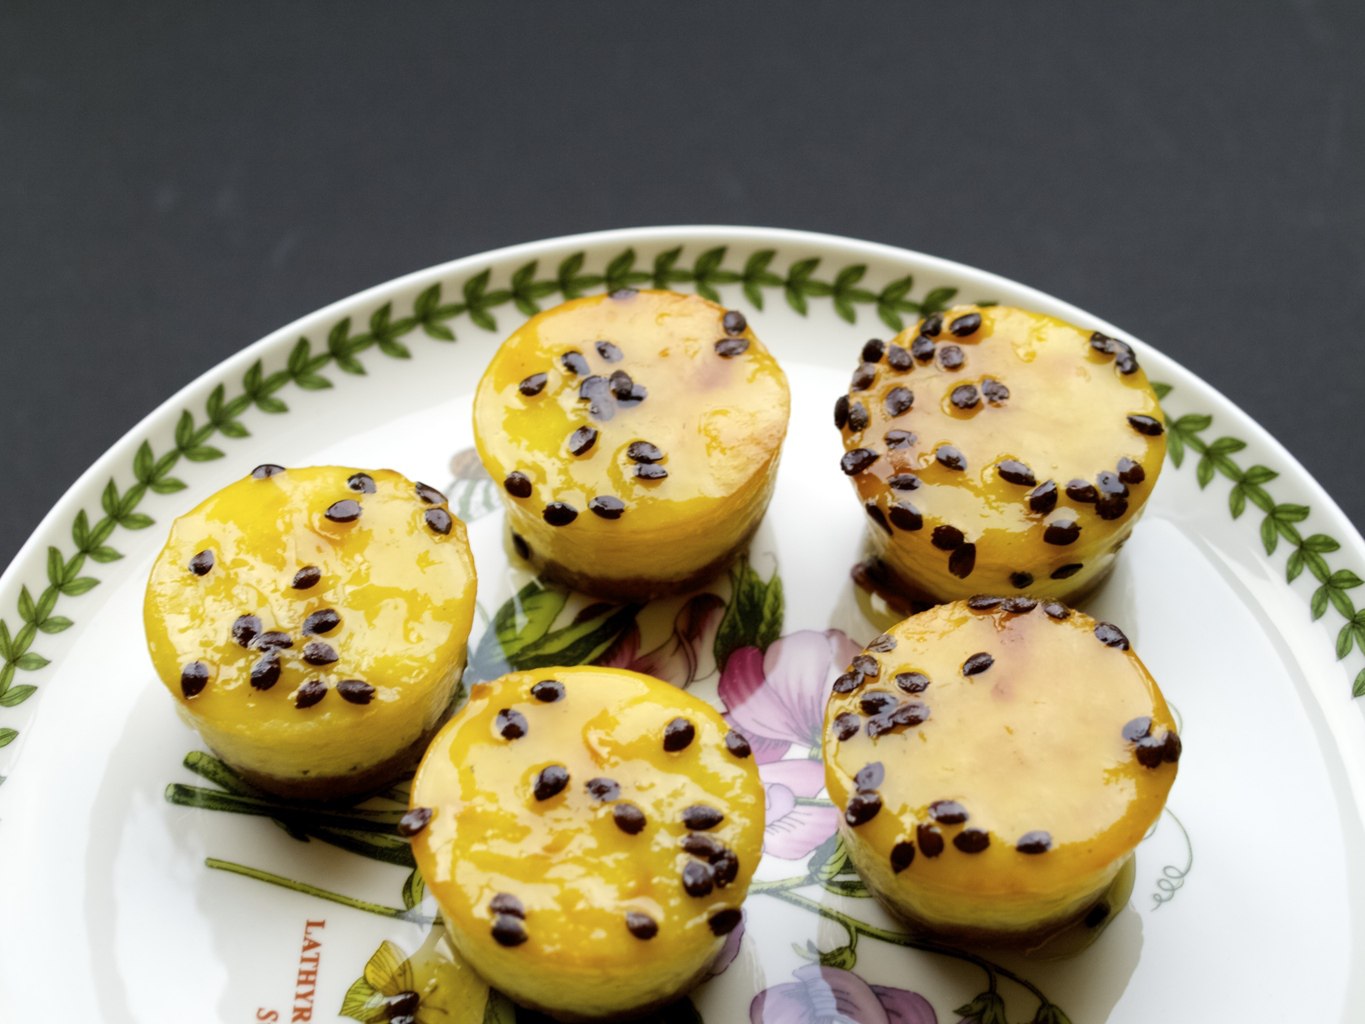
Mini Passion Fruit Cheesecakes recipeEnjoy!

Rasa xoxo

0

Savoury sweetcorn muffins

Savoury sweetcorn muffins: perfect for soup dippingI’ve wanted to make these since the first time I tasted them. Once while out with the girls we ordered them at this american style restaurant (don’t remember the name). Now when it’s getting wintery outside (almost), I thought these muffins would be perfect with soup. We dipped them in spicy Mexican soup and we absolutely loved them (especially Joni).Savoury sweetcorn muffins: perfect for soup dippingSAVOURY SWEETCORN MUFFINS makes 12 muffins

  • 245g superfine cornmeal
  • 3 tbsp caster sugar
  • 2 tsp baking powder
  • 0.5 tsp salt
  • 1 egg, beaten
  • 4 tbsp coconut oil
  • 250ml milk
  • 50g grated cheddar cheese
  • 100g sweetcorn kernels (used frozen ones)

1. Measure all the ingredients into the mixing bowl and combine everything well.

2. Spoon the mixture into lined cupcake tinned. I used silicon cupcake baking pan this time, so did not need to use any liners. Bake the muffins in preheated 180C oven for 20 min.Savoury sweetcorn muffins: perfect for soup dippingServe warm! Oh, did I mentioned that it tastes heavenly with soup? Should definitely try that out!Savoury sweetcorn muffins: perfect for soup dipping Savoury sweetcorn muffins: perfect for soup dippingEnjoy!

Rasa :)

0

Few ideas on how to survive Halloween at home

vanilla and peppercorn candyI don’t want to be a fun spoiler, but I really don’t like Halloween. I think I mentioned my reasons last year, one of them being the difficulty of making Halloween deco pretty. Anyway it’s fun for kids and you don’t want to stop that! Have you ever had one of those awkward moments when group of kids knocks on your door and say “trick or treat” when you have no single sweet treat in the house? To avoid this, here are few tips/ideas on how to avoid these unpleasant moments ;-).

1. Treats! Yes, stock up on treats! The best treats are candies and if you feel like making some here is the recipe that I made last year (it’s vanilla and black pepper BTW!). Or if you prefer, bake this ghost meringue cakeAutumn butternut squash cupcakes is another alternative if you want something sweet yourself while you wait ;-).Halloween treats2. Decorations, at least at the front of the house. Because you don’t want to bother and decorate the whole house! Garlands are grate for this. Here is one for you to try. Just make sure it’s all ready before 6pm this Friday!leaf garland3. Failed to do no. 1 and 2.? Just pretend you are not home and switch the lights off or something. Close the curtains and light the candle, that should be fun!

Happy Halloween!

Rasa xoxo

1

Lazy caramel and cranberry bites

Lazy caramel and cranberry bites recipeIn Lithuanian these lazy bites are called “Tinginys” which essentially means “The Lazy One’ (fancy some history about this? There we go!). Traditionally this easy to make treat is made with crumbled biscuits, coco powder, condensed milk and butter. But when I was little I experimented a lot (because there is no oven needed here) and I came up with this version (read on). I forgot about this for a while until I treated myself with my first cooking book “Cheap as Chips, Better Than Toast” just before my student years began (in year 2004, long time ago!). Oh, I learned so much from it, thanks you soooo much, Miranda Shearer. I probably would not be writing this blog if you have never written this wonderful book! But where art thou? I searched for you in twitter, no luck :(.

Anyway, I came across “Fridge Cake” recipe, which reminded me of my “The Lazy One” recipe. I used Miranda’s recipe to recover my childhood’s recipe and there we go! In all it’s glory!!!! You would be silly not to try it! Even better if you make it with kids (because that’s how simple it is!). Lazy caramel and cranberry bites recipeLAZY CARAMEL AND CRANBERRY BITES

  • 175g malted milk biscuits
  • 90g butter
  • 30g sugar
  • 60g caramel (I use the one that comes in the tin and can be found in condensed milk department)
  • 60g dried cranberries

1. Crumble the biscuits either by hand or by using food processor. It does not have to be crumbled so finely, roughly will work as fine!Lazy caramel and cranberry bites recipe2. In the pan melt the butter with sugar and caramel.Lazy caramel and cranberry bites recipeLazy caramel and cranberry bites recipe3. Add the biscuit crumbs and the cranberries into the melted butter. Combine everything well and let it cool slightly. Lazy caramel and cranberry bites recipe4. Wrap the mixture into the cling film and baking paper like the sausage. If you want even easer method, then put the mixture into cake tin and press down well. Leave it to harden in the fridge.Lazy caramel and cranberry bites recipe Lazy caramel and cranberry bites recipe Lazy caramel and cranberry bites recipe5. The cake is ready after few hours! Just unwrap it (or remove it from cake tin) and slice it to serve.Lazy caramel and cranberry bites recipe Lazy caramel and cranberry bites recipe Lazy caramel and cranberry bites recipe Lazy caramel and cranberry bites recipeEnjoy!!!! This is really yummy!

Rasa xoxo

0

Day out in London

day out in London


I am so thankful that I get opportunities to visit London from time to time! I miss London even more when I no longer live here. For this reason I think it’s good to live close to London, but maybe not in London itself.

So yesterday me and Joni visited my dear friends and also had a date in the Regents Park. I love finding a piece of nature in the centre of the city! Overall, very good day! Sorry for such bad quality phone pics (had no camera on me, but could not help but share this with you!).

day out in London

I hope you had a lovely weekend too!!

Rasa xoxo

0

Pinterest challenge: mini berry clafoutis

Mini berry clafoutis I wanted to try this berry clafoutis recipe for a while now. After counting how many calories it would have (for my diet, you know) I realised it’s not so bad. Only 148.60 calories for one portion (one 10th of the whole bake)! I have decided to go ahead and bake half of the recipe in little tartlet baking tins. The only problem was that only one mini clafoutis survived. The other ones literally leaked out while baking. You see, my tartlet tins have loose bottoms for easy removal. However the clafoutis mix is so thin that it managed to leak out through the small gaps. I am glad I placed the tartlet tins in a baking dish, so my oven did not get messed up by this!!!Mini berry clafoutis MINI BERRY CLAFOUTIS adopted from Julia’s Album

(makes 5 mini clafoutis)

  • 2 small eggs
  • 150ml single cream
  • 1tsp vanilla extract
  • 25g flour
  • 0.25 tsp baking powder
  • 65g icing sugar
  • butter for greasing
  • caster sugar for dusting
  • 170g mixed berries (I used frozen ones)

1. whisk eggs with cream and vanilla extract until the mixture becomes light and fluffy. Julia says: “Make sure this step is done properly so that in the end your dessert does not come out smelling too much like eggs”. Very true! This desert have a tendency to become ‘eggy’ 

2. Sift flour, baking powder and icing sugar into the egg mixture and mix to combine well.Mini berry clafoutis The batter will be very liquid, ‘thin’ as I mentioned earlier. Mini berry clafoutis 3. Grease mini tartlets (or mini ramekins) with butter (or spray oil) and dust them with caster sugar. Don’t make my mistake here, loose bottom tins are not suitable to make this desert!Mini berry clafoutis 4. Divide the berries between 5 tins.Mini berry clafoutis 5. pour the batter into the tins. Bake the clafoutis in 180C oven for 30min.Mini berry clafoutis Oooops! My mistake… The batter leaked out!! :(Mini berry clafoutis At least one survived! :)Mini berry clafoutis I enjoyed every bit of it… hmmmMini berry clafoutis Hopefully you have learned from my mistakes ;-)

Rasa

0

Guilt free (almost) chocolate orange cake

Guilt Free Chocolate Orange Cake recipeSince now I am on my diet (second week already!!!) I have decided to treat myself to a healthier cake. I am quite new to calorie counting (ok, ok, not so new… its been a year), so to my understanding if I remove as much as fat as possible and make it gluten free then it would become much much lighter! Oh boy I was wrong! A slice of cake (1/8 of the cake) has 430 calories in it!!!! Turns out that sugar is another major enemy, even in it’s most natural forms. And how can you make a cake with no sugar anyways? Anyhow I made this cake with no added fats.  I added whole oranges to make up for the moisture you would otherwise get from the fat and used ground almonds to replace the flour (as you can for a gluten free cake). Joni rated 7 out 10 for this cake, so I guess it does not taste too bad if you are actually avoiding gluten or dairy specifically.Guilt Free Chocolate Orange Cake recipeGUILT FREE CHOCOLATE ORANGE CAKE makes 8 slices

  • 2 oranges, pealed
  • 6 eggs
  • 250g golden caster sugar
  • 250g ground almonds
  • 50g cocoa powder
  • 1tsp baking powder

Guilt Free Chocolate Orange Cake recipe1. boil whole oranges for about 1 hour or so until soft. Drain, then puree them with the hand processor.Guilt Free Chocolate Orange Cake recipe2. Whisk the eggs with the sugar until pale and creamy.

3. Add all of the rest of the ingredients into the egg mixture, including the orange puree. Combine well.

4. Pour the contents into a 20cm round spring baking tin.

5. Bake in 150C for 1hour and half.Guilt Free Chocolate Orange Cake recipeIf you like you can serve it with a dollop of creme fraiche, this is if you don’t mind dairy of course… or added fat ;-). Guilt Free Chocolate Orange Cake recipeEnjoy!

Rasa xoxo

1

Pinterest challenge: green chickpea & chicken coconut curry

Green chickpea & chicken coconut curryI picked this recipe from The Crepes Of Wrath because I was yearning for something warm last weekend (really chilli here in Bedford!!!). It did came out great! We loved every bit of it and had some for lunch as well! I used kale leaves to substitute the swiss chard (did not have any in store) and made it a little bit creamer by substituting coconut milk with creamed coconut. Read on for my version of this recipe.Green chickpea & chicken coconut curryGREEN CHICKPEA & CHICKEN COCONUT CURRY adopted from The Crapes Of Wrath

  • 2 tablespoons coconut oil
  • 6 chicken thighs, cut into bite-sized pieces
  • 1 onion, thinly sliced
  • 3 tbsp green curry paste
  • 1tbsp chilli paste (should be more, but ooops… I guess I chickened out!)
  • salt to taste
  • ½ teaspoon ground ginger
  • 100g creamed coconut, grated and dissolved in warm water to make up 400ml
  • 2 cups water
  • 1 400g can chickpeas, rinsed and drained
  • 1 small bunch kale leaves, cleaned, trimmed and thinly sliced

Green chickpea & chicken coconut curry1. Heat the coconut oil in a large, heavy bottomed pot. Add in the cubed chicken and cook over medium heat until almost fully cooked, about 6-7 minutes.

2. Add in chopped onion and continue to cook until softened, about another 5-6 minutes.

3. Add in the curry paste, chilli paste, kosher salt, ginger, creamed coconut, and 1 cup of water. Stir to combine, then bring to a boil.

4. Add in the additional cup of water. Bring back up to a boil, then add in the drained and rinsed chickpeas and simmer for 20 minutes.

5. After simmering, add in the trimmed and sliced kale leaves. Simmer for an additional 10-15 minutes. Taste and adjust seasonings as desired.

Green chickpea & chicken coconut curry

We had it with poppadoms, but we thought plain basmati rice would go absolutely great!

Enjoy!!!

Rasa ;-)


0

Mexican Breakfast

Mexican BreakfastI got this breakfast idea from my old flatmate long time ago.  She was making lunch for her friend and I just watched (she was amazing cook, so I used to copy her a lot). The recipe have evolved since and I eat this not only for breakfast! I made this for lunch last weekend and Joni have confirmed that this is his favourite “breakfast” so far. I hope you will enjoy it too!Mexican BreakfastMEXICAN BREAKFAST

  • 1 tbsp coconut oil (I try to use only coconut oil for frying as I believe it’s healthier)
  • 1 onion, chopped
  • 3 garlic cloves, crushed and finely chopped
  • 3 slices of bacon
  • 1tsp chilli powder (can be fresh too)
  • 1 red or yellow pepper
  • 1 tin of chopped tomato
  • 1 tin of kidney beans
  • salt and pepper to taste
  • 5 eggs
  • sour cream
  • 5 tortillas

1. Gently fry onions with garlic and bacon until golden and then add chilli powder

2. Add pepper, chopped tomatoes and kidney beans and cook for further 10 min or so. Season to taste.

Mexican breakfast3. Transfer the contents into oven proof dish (unless you fried everything in the skillet like me) and crack in five eggs on top.

4. Bake in preheated 180C oven for 5-10min. Warm the tortillas in the oven as well for 1-2mins.Mexican breakfastServe everything together with sour cream!Mexican BreakfastEnjoy!

Rasa xx

0

Things I look forward to in October

Autumn colours in the boxOctober may be uneventful, but there are plenty of things to look forward to… such as autumn itself! :)

1. AUTUMN is a beautiful season. Look at all the colours! And it’s not only orange, brown and yellow…. I love the combinations of pink, forest green, orange and cream. And lets not forget purple! I have been so inspired by it all that I have been painting last night like mad (and that does not happen very often). I love creating new patterns. New autumn pattern bellow is here for you to nick, use it to wrap a gift or put in on the wall ;-). Friendly Nettle autumn pattern2. KNITTING JUMPERS is almost my part time job. I took on three (yes, three) jumper knitting projects so far. But that’s quite enjoyable as I can do it while watching a movie or chatting with a friend! Here is my first cardigan in progress, can you guess what part it is? Yes, it’s a sleeve! Many more parts to go :-).Progress on my knitted cardigan3. DRINKING HOT DRINKS kind of goes with knitting. It’s important to keep yourself warm and all snuggled up while doing some crafty work! My favourite hot drink at the moment is spiced coffee (although I haven’t had any this year yet, but will make some soon!). It’s one of those drinks that is satisfying and not too fattening (minding my figure right now!). Click here for the recipe ;-).Spiced CoffeeHappy October!!!

Rasa xoxo


0

Apple & berry crumble and ice cream dessert

Perfect autumn warm&hot dessert: apple&berry crumble and ice cream This year (especially in the summer) I was really addicted to ice cream! I have made few of my own such as Banoffee ice-cream sandwiches, super easy fresh strawberry ice cream and my favourite goat’s milk and roasted rhubarb ice-cream. While in Italy we both (me & Joni) tried many gelato flavours, on some occasions 5 flavours in one go! Have you ever tried red wine tasting ice-cream? Our newest finding is Kelly’s Clotted Cream & Honeycomb ice cream (actually Joni found it first), you should definitely try it ;-).

Although Ice cream may not be the most  suitable dessert for this weather, we have been enjoying this warm crumble and ice cream dessert. You see, I quite like a contrast in food and this combination is definitely contrasting. If you are like me you would understand what I mean!Perfect autumn warm&hot dessert: apple&berry crumble and ice creamAPPLE & BERRY CRUMBLE AND ICE CREAM DESSERT serves 2 generously

  • 2  granny smith apples
  • 1 handful of mixed berries (can be frozen ones)
  • 100g  brown sugar
  • 50 ground almonds
  • 20g oats
  • 50g flour
  • 60g coconut oil
  • 60g caster sugar
  • 2 tbsp poppy seeds (optional)
  • good quality vanilla ice cream (with vanilla seeds if you can find it)

1. First, make an apple and berry filling. Peel, core and chop apples into the saucepan together with berries and brown sugar. Cook it for 5 min until sugar dissolves and the mixture becomes jam-like. Spread the filling into the baking dish. Perfect autumn warm&hot dessert: apple&berry crumble and ice cream2. Mix coconut and caster sugar together with almonds, flour and oat. Combine everything well by working it with hands. If using, mix in poppyseed as well (it just makes everything look prettier!).

3. Cover the fruit filling with the crumble. I like the filling overflowing, therefore I make very little amount of topping. If that’s not the case for you, then double the amount of ingredients for the crumble.  Perfect autumn warm&hot dessert: apple&berry crumble and ice cream4. Bake the apple & berry crumble in 180C oven for 30min until the top is lightly golden. Serve it in the bowls with at least 3 scoops of vanilla ice cream on top of each.Perfect autumn warm&hot dessert: apple&berry crumble and ice creamEnjoy your weekend ;-)

Rasa xoxo

0

Joni’s green (not red) chilli jam

Green chilli jam recipe Joni is a big fan of chilli jam (now i’ve tried it and have become a fan as well!). He had a batch of red chilli jam that he finished a long time ago and he was enthusiastic (more like constantly reminding me) that we get some chillies so he could make a new batch (the previous batch was lovingly made by his mum) . I eventually got green chillies for our house warming party as I was making some Enchiladas. Luckily there were plenty leftover due to generous deals at Bedford market!

So we both agreed that green chillies are perfectly fine to make not so red chilli jam. We did hope however it would be bright green in colour the way red chilli jam is brightly red. However it turned out amber, I guess this is because we used darker cider vinegar.  We tried it with some enchiladas and loved the taste. This is how I got converted to be a chilli jam fan!Green chilli jam recipeJONI’S GREEN CHILLI JAM based on Nigella’s red chilli jam recipe

Joni made this last weekend. It took him a few hours to deseed and chop all those chillies. If you want to try this I really recommend you use gloves.  Even though these were not the hottest variety of chilli’s, it took about 12 hours for the burning effect to wear off. So make sure you wear some gloves to protect yourself from misery while making this very chilli jam (read Joni’s warnings and notes at the end of this recipe).

  • 150g green chilli peppers (deseeded and roughly chopped)
  • 150g yellow peppers (cored, deseeded and roughly chopped)
  • 1kg jam sugar (jam sugar has pectin which is needed to set the jam)
  • 600ml cider vinegar

1. Put the chillies and peppers into food processor and pulse until they are finely chopped.Green chilli jam recipe2. Dissolve the sugar in the vinegar in the sauce pan over a low heat without stirring.

3. Scrape the chilli-pepper mixture out of the bowl and add to the pan. Boil everything for 10 minutes.

4. Take the pan off the heat and allow it cool. The liquid will become more syrupy, then from syrup to viscous and from viscous to jelly-like as it cools.

5. To sterilise the jars heat them in preheated 100C oven for about 15 min. Pour the chilli jam into the jars and seal them tightly.

Joni’s notes:

De-seeding the peppers is rather straightforward.  Insert your knife on the top next to the stalk and cut around to remove.  Pull it out and then halve the pepper. Discard the stalk and the seeds from inside.  Trim back the seed structure to the inner wall of the pepper and then roughly chop the pepper flesh into segments ready to go into the food processor.

De-seeding the chilli’s is simple in practice but warrants caution.  Even relatively low Scoville scale chilli’s have capsaicin oil in them.  The more chilli’s you chop the more oil will be deposited on your hands and chopping board and this can be very nasty to deal with.  If you are not wearing gloves you will suffer some excruciating time until you can get the oil off.  Olive oil is supposed to help dissolve some of the oil so it can be washed off with soap.  I didn’t find this very effective.   I de-seeded the chilli’s by chopping off the stalk and then halving the chilli lengthwise.  This allowed me to scrape the seeds and seed structure from the inside of the chilli.  I then roughly chopped the remaining flesh ready for the food processor.

I’m sure you could play around with the relative proportions of peppers and chilli’s as well as choosing different types to alter the flavours.  It strikes me as very simple to do and could give you jam of strikingly different colours, texture’s, flavour, & all important chilli heat.

I dissolved the sugar in the cider vinegar as Nigella’s recipe required.  I have an electric hob so once it reaches a heat it can often overheat.  Heating up the sugar and adding the blended chilli and pepper mixture was easy but i think i overheated the sugar and some of it caramelised which i think led to the amber colouring rather than the jam taking it’s coloration from the chilli.  If you have a gas ring and better temperature control you may get a better result.  Do let us know how you get on.Green chilli jam recipeEnjoy!

Rasa + Joni

5

Autumn wardrobe inspiration

Good old days knitwear style First things first, happy happy first day of autumn! Aren’t you loving this? If you asked me this question 5 years ago I would ask what is there to like about autumn? I really disliked the cold wether (still do). But recently somehow I have learned to love autumn. I guess I have to thank my friend Vicki here, who claims to like all the seasons :-). I finally see what she means! Autumn brings rich amber colours, reminds you that there is Christmas to look forward to, inspires you with new wardrobe to wear and makes you to snuggle in comfortable chair with some knitting project + cup of hot chocolate. Yey, about the last bit! We (me, Vicki and her mum) are even thinking to knit together some day over Skype!

Anyhow, today I have been looking for some autumn wardrobe inspiration. This time I ditched Pinterest and browsed trough my old knitting books instead. I used to laugh at these old clothes styles thinking “who would actually wear these hideous looking sweaters?”. But now I have complete different outlook on them. I think the clothes can be quite wearable if only they were styled differently. I guess dieting were not an option those days ;-).

Good old days styleMy dream right now is to knit an autumn dress. But to be completely honest, this is one of my high sky dreams. To knit a dress in fine stitches would take forever considering I have three other jumper projects on the queue! Oh, well… I  still like dreaming about it and you never know what will happen in next few months… Good old days style knitted dressesOne thing I must note about old books, they are brilliant in explaining how to knit. There are so many things I have learned from them! They all have very clear illustrations and actual written pattern with no abbreviations! This is what I call straight forward knitting!good old days knitwear styleHope you enjoyed having a glimpse at my old (Lithuanian) kitting books ;-)

Rasa xoxo

0

Pinterest challenge: chocolate caramel and pecan turtle clusters

chocolate caramel and pecan turtle clustersI thought these mini sweat treats would be perfect for our house warming party, but never ended up making them. I eventually made them for a different reason, a serious need of chocolate fix! I found the recipe at Inspired Dreamer, but was quite disappointed with the missing instructions. It did not explain how to make the caramel! To be quite honest, I wanted a quick fix, so I was happy not to make any caramel, instead I used a shop bought. The only downside of that is that the shop bought caramel does not harden (unlike the homemade buttery caramel), therefore these clusters did not hold well (chocolate was holding everything). It was still very satisfying to eat, but if you made them with homemade caramel then they would be quite suitable to be wrapped like sweats or placed in the jar as a gift!chocolate caramel and pecan turtle clustersCHOCOLATE CARAMEL AND PECAN TURTLE CLUSTERS adopted from Inspired Dreamer 

  • 100g pecan nuts, toasted (whole)
  • 100g caramel
  • 200g milk chocolate, melted

chocolate caramel and pecan turtle clusters1. Simply arrange the pecans onto baking paper (although no baking needed here), spoon a small portion of caramel of each and cover it with melted milk chocolate. chocolate caramel and pecan turtle clusters2. Place the tray into the fridge (or freezer if you want a quick result) and it is ready in 15 min!chocolate caramel and pecan turtle clustersEat them quick, before it’s gone!chocolate caramel and pecan turtle clustersHave a nice week ;-)

Rasa xoxo

0

Bill’s Japanese Curry

Bill's Japanese Curry recipeTo be completely honest I am not big on oriental cuisine, but Joni loves it very much, so I have been quite eager to learn. This is why I was really happy to receive Bill’s Everyday Asian cook book as a gift from Amanda and Dan. I came across Bill’s restaurant over a year ago and tried one of their cook books almost straight away. Just sort of wondering how do they manage to make all these different types of food so amazing?!Bill's Japanese Curry recipeAnyhow, I have decided to go with Japanese Curry as I am quite familiar with the curry right now. I am actually really surprised that Japanese have a curry dish! However, it’s quite mild and heartwarming, perfect for cooling down weather ;-).Bill's Japanese Curry recipeBILL’S JAPANESE CURRY

  • 2 tbsp light-flavoured oil (I used coconut oil)
  • 800g pork, cubed
  • 30g butter
  • 1 onion, thinly sliced
  • 1 garlic clove, crushed
  • 1 tsp grated fresh ginger
  • 2 tbsp plain flour
  • 1 tbsp curry powder
  • 1l chicken stock
  • 2 carrots, pealed and sliced
  • 450g potatoes, pealed and cut into chunks
  • 1 green apple, pealed and grated (granny smith is perfect for this)

1. Heat half the oil in a large saucepan over medium-high heat. Cook the pork in two batches for 4-5min or until lightly browned all over. Repeat with the remaining oil. Repeat with the remaining oil and pork. Set aside.

2. Melt the butter in the same pan over low heat. Add the onion, garlic and ginger and cook, stirring occasionally, for 3-4 min or until soft.

3. Add the flour and curry powder and cook for 1-2 minutes, stirring frequently. Gradually add the stock, whisking constantly.

4. Add the pork, carrots, potatoes and apple and simmer for 2-2.15 hours (longer if using slow cooker) until the potatoes break down and meat is very tender. Serve with steamed rice.

Bill's Japanese Curry recipeEnjoy!

Rasa xoxo

0