Top

Croissants with poppy seed filling

Croissants with poppy seed filling recipe  In Lithuania we are big on poppy seed, especially when it comes to Christmas. This is why I feel that these croissants filled with poppy seed goodness is very appropriate for this season. I have been wanting to make this hundred leaves cake to begin with (It’s so traditional in Lithuania like fruit cake in England), but I felt it was too time consuming. This is when this croissant idea came around! You see the dough of hundred leaves cake is kind of similar to croissant dough so I decided to incorporate it with the shop bought dough. Everything went swimmingly well and the rest is history.

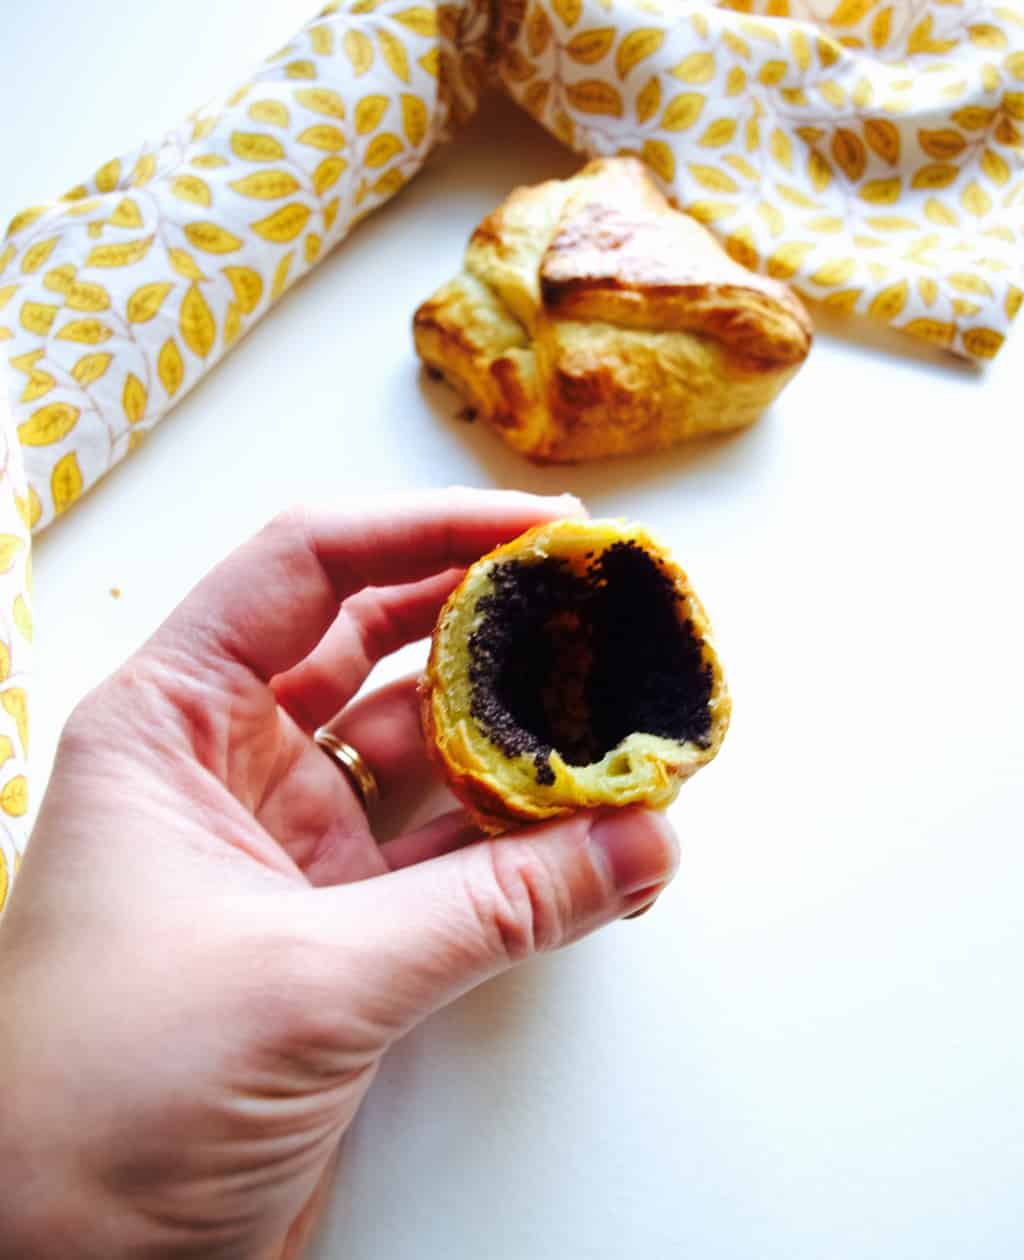
CROISSANTS WITH POPPY SEED FILLING

makes 6

  • 100g poppy seed
  • 50g raisins
  • 1tbsp honey (optional)
  • uncooked croissant dough ( I used Jus-Rol brand as it seem the only one available in the shops)
  • 1 egg, whisked for egg wash

1. Place poppy seeds and raisins into the bowl and pour over boiling water over it. Let it sit for an hour or so till it is well soaked and doubled in size.

2. Using the blender whizz poppy seeds and raisins till it becomes like a paste. Add honey if needed for the sweetness, otherwise it is quite sweet from the raisins.Croissants with poppy seed filling recipe  
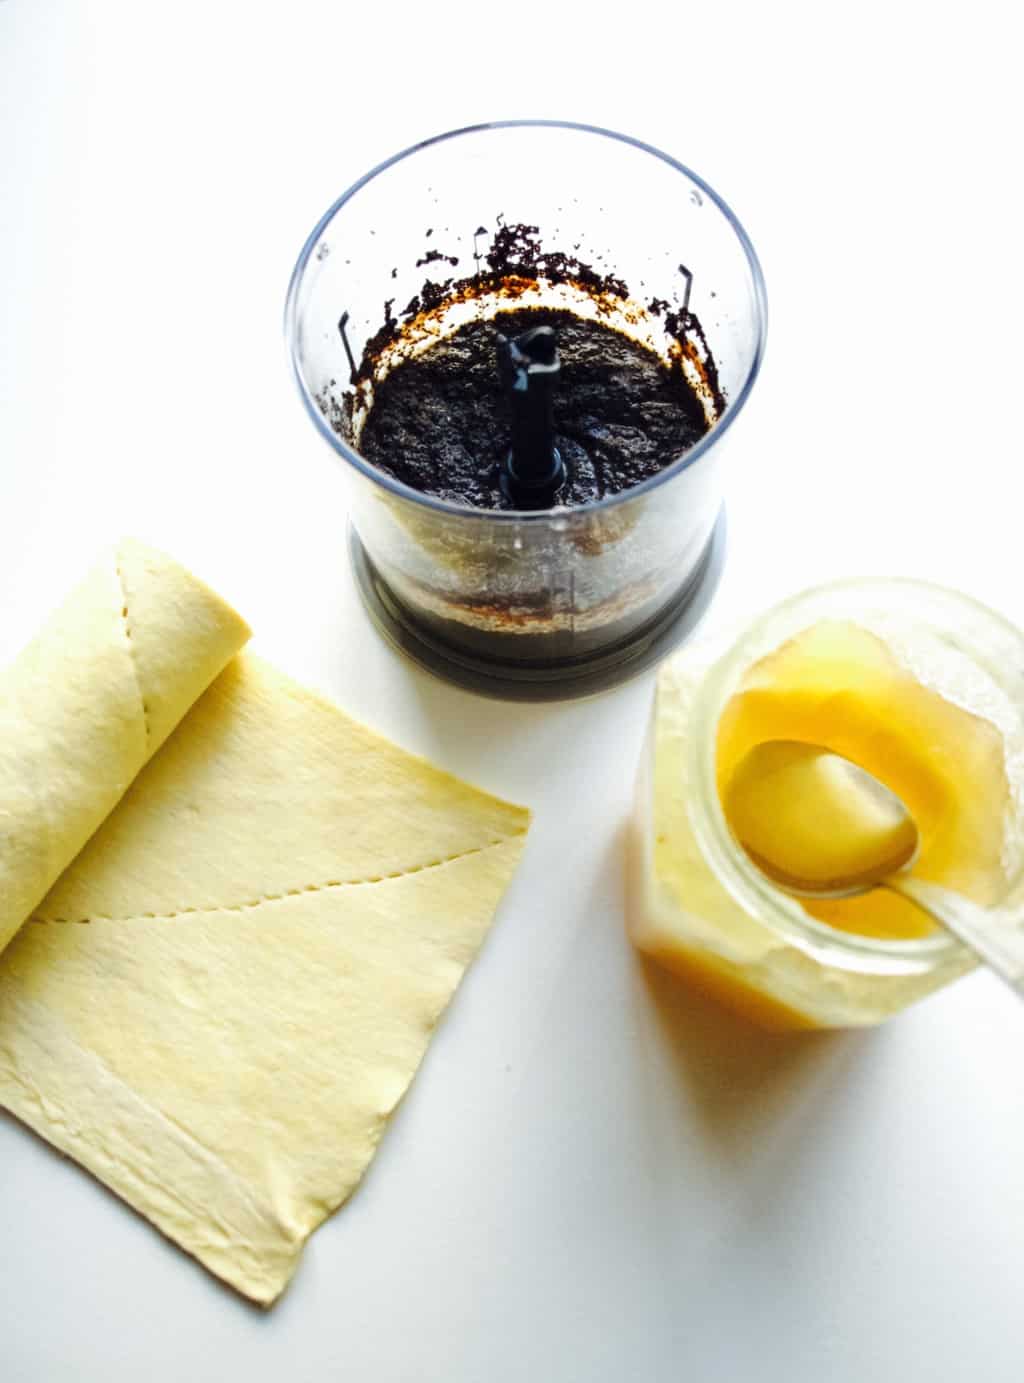
3. Roll out the dough and cut into triangles. Spoon some poppy seed mixture into each triangle and wrap it using the corners. Place croissants parcels into lined baking tray and brush it with egg wash. Bake the croissants in preheated 180C oven for 10-15min.Croissants with poppy seed filling recipe Croissants with poppy seed filling recipe Croissants with poppy seed filling recipe Happy Christmas waiting!

Rasa xoxo

0

Year three with books: “Anna Karenina”

My thoughts on Anna Karenina bookSo lately I been reading like mad, its that time of year when it is about to end and I have like few books to still read…Eek! I finally finished reading “Anna Karenina”  (that was quite a mission). It’s made out of two books people!!!

This book is considered a classic and I think its not only because it is old. It is set in 1873 when author himself was alive, which means his description of the lifestyle at that time is quite genuine (very interesting to read about that) . It covers lots of subjects such as philosophy, politics, women rights, culture and farming so I think it should cover everyone’s interest. I must admit some of these subjects bore me to death. But it’s ok, it included lots of psychology and thought process of the characters in the story, so I was quite entertained. Sadly the movie (newest 2012 edition) does not have the same impact. In return it is quite theatrical and visually appealing, so it was ok. I have a feeling you may not get the main point if you watch movie first, but at least is artistic and I really enjoyed it for that exact reason.

What I liked about it? Psychology of the characters in the story of course! I love to see what these characters think and the reason why they act like they do. I also found it fascinating to see what people did for entertainment and communications.  It sounds like telegrams were almost like texting in comparison to today’s communicating.

What I did not like about it? Well… some of the subjects and thought process of some of characters was very very boring to me, but I am sure somebody else would find this very interesting.

Is it worth buying? Yes, even if you are not going to read it. I think this book is worth your bookshelf, especially if you get a vintage looking version :-D.My thoughts on Anna Karenina bookHope you are convinced that this is a must read ;-)

Rasa xoxo

0

Christmas wreath chandelier

Christmas wreath chandelier DIY I don’t know how 2017 Christmas came round so quickly, but our house is still not there yet with all the DIY’s. Although I am glad with current progress on our new kitchen that might be functional this year (yey!), when it comes to Christmas decoration I realised we are still not ready for an actual Christmas tree. For starters, children would rip it apart in few seconds. So not worth the stress…

Unless I can hang it? And this is how Christmas chandelier idea came around :-).Make your own Christmas wreath chandelier To begin with I made the wreath. For this you will need some sort of hoop. I ripped our old lamp shade apart to get the hoop that turned out to be a bit rusted (never mind), but maybe you can use embroidery hoop instead (the inner part)?? Anyways, this is why I categorised this project as upcycled ;-).Make your own Christmas wreath chandelier Because I ripped our old lampshade I also got an attachment to connect the hoop to the lamp. I covered both (the attachment and the hoop) with some greenery (mostly parts of the tree in my friends garden). Make your own Christmas wreath chandelierI used three treads to connect the attachment with the hoop. Hope it’s visible in the picture bellow.Make your own Christmas wreath chandelier As for Christmas “tree” deco I chose baubles that I decided to customise myself. I thought to paint with the acrylic that I already have… very risky I know! But I have to be frugal sometimes. Turned out to be ok actually, not sure how long it would last. The black acrylic pain was a bit watery and run in places a bit, but created a nice sort of vintage look. Make your own Christmas wreath chandelierAfter hanging all there baubles on the wreath, there were few leftover. I mounted them above our mantelpiece so everything looks Christmas ready. If only we stayed at home for all the celebrations.Make your own Christmas wreath chandelierHope you feel inspired and ready ahead with Christmas decorating.

Rasa xoxo

0

Gingerbread advent calendar

How to make gingerbread cookie advent calendarI have not made an advent calendar for a while so this year I thought I better not miss out and count the days till Christmas in style . I thought I should at least try and make it for Lukas and I am glad that I did. I made it out of gingerbread which means it can be eaten day by day. The only problem is that I made it a little early, a whole two weeks before December! Now daily (sometimes hourly) Lukas asks me for “a bisc” which means biscuit in his language. It’s wonderful to see him so excited but hopefully the calendar will last till advent begins without too many tears!How to make gingerbread cookie advent calendar I used this recipe to make the dough for the gingerbread cookies. I made sure I made a hole in each cookie before baking it so I can feed a tread through it and that way cookie can be hanged. How to make gingerbread cookie advent calendar I used basic icing (icing sugar mixed with little bit of water) to write the number on each cookie. I originally was planning to use food colouring to make it black, but I am glad I stayed with basics. Sometimes easy and simple stuff look best!How to make gingerbread cookie advent calendar Last job was to arrange the cookies. I first arranged the cookies on white surface so I can find the nicest arrangement before actually hanging everything. I used a little bit of greenery as it brings out a lovely contrast that I love. Gingerbread cookie advent calendarI been very lucky that we have picture rails in our house. I only now discovered the real purpose of them. Before I used to think that it is just a nice trim! If you would like an alternative hanging solution then check out here. I used a wire hanger to make my last advent calendar three years ago.How to make gingerbread cookie advent calendar How to make gingerbread cookie advent calendar How to make gingerbread cookie advent calendar How to make gingerbread cookie advent calendarHope you have been inspired and I am wishing you all an exciting Christmas season!

Rasa xoxo

0

Ways to use up your yarn scraps

How to use up yarn scraps: projects and tips So the thing is that since I organised my yarn and saved it from moth infestation I realised I had lots and lots of scraps. If you been crafting for many years, than you will understand it’s never a good idea to let your small amounts of yarn just keep piling up. It takes up a lot of space and then you may worry about moths possibly attacking it again. No, thanks! So what do you do with all those little bits of yarn that are leftover after your knitting and crocheting projects? I thought of few ways…

1. Small projects, first comes to my mind. With winter coming over I have been knitting socks and hoping to knit some gloves and maybe hats. These are fit to become Christmas gift too!How to use up yarn scraps: projects and tips While there are plenty of small projects out there I find knitting socks is my favourite item to knit (that magical heal turn gets me every time!).  If you feel the same then click here for basic kids socks. Or if you prefer to knit this pretty baby hat then the tutorial for it hides here :D.How to use up yarn scraps: projects and tipsIf you are after for a very teeny weeny project then you should check out this crochet triangle pattern tutorial. It makes a very cute garland for Christmas tree perhaps??!How to use up yarn scraps: projects and tips 2. Making big multicolour rugs or blankets is another good way to use up yarn scraps. Few years ago I started making this never ending, upcycled crochet rug that sadly did not continue (because it did not fit our new home style). But the point I am trying to make here, this is very good project to do to use up all those itsy bitsy bits of yarn. How to use up yarn scraps: projects and tipsOr this giant blanket, very popular way to use up all that scrap yarn. I know, I know, I made it in one plain colour, but trust me, it looks good in multi colours too!How to use up yarn scraps: projects and tips3. Using up scrap yarn can mean using it in patterns or trims. Here is one example, but there are plenty projects out there with pretty patterns ;-).

How to use up yarn scraps: projects and tips 4. Did you know that you can use leftover yarn for embroidery and cross stitch? Here is my laptop cover that I made few years ago. It is still one of my favourite items that I made :).How to use up yarn scraps: projects and tips Finally, here are the socks I recently made for Lukas. I could not be more proud :).How to use up yarn scraps: projects and tips How to use up yarn scraps: projects and tipsHope you got inspired ;-)

Rasa xx

0

Devon in Autumn

Devon in Autumn We spend last week in Devon to celebrate Lukas birthday and I was blown away by a beautiful scenery once again. I was thinking yeah yeah, I been here before and blogged about it as well. Surely there is nothing new to see and share. But guess what? I changed my mind! Initially I was taking pictures with my phone not planing to post it and only on our last walk I took my DSLR with me when I realised this beauty needs to be captured properly. So forgive me for some pics that does not have such a great quality, I included some pics from my older walks when I was not prepared. Devon in AutumnYou would think Devon is coloured with Autumn colours right now, but thats not the case. It turns out the grass is still green (very very green in fact), then there are evergreen plants such as my beloved ferns ❤︎ ❤︎ ❤︎ . Devon in AutumnDevon in Autumn Even the pond is green in Autumn because of green algae, who could have thought!Devon in Autumn Lukas liked the muddy puddles the best and I decided to chillax and let him enjoy the Devon properly. He even took his cars to have a wash :D.Devon in Autumn Devon in Autumn Devon in Autumn Devon in Autumn Devon in Autumn And of course there were bees. Joni’s dad said I was brave to go and take pics of them so close so I could share these pics with you ;-). Luckily I did not get stung! I wonder what the bees are up to in Autumn.Devon in Autumn Devon in AutumnHope you are enjoying Autumn wherever you are :-).

Rasa xoxo

0

Woodland themed birthday cake

Woodland themed chocolate birthday cake (dairy and gluten free version) recipe Although we celebrated Lukas birthday together with Granny birthday last weekend he is officially turning 2 today (wow, where does the time go!). It was good to get together with the family in Devon, staying here a little longer with the kids while Joni is sorting out our new kitchen (hopefully will share about it more soon).

As for a birthday cake I am very very pleased that I was not asked to bake him a cake in Paw Patrol theme (or something along those lines), so I chose to make woodland themed one. Which is much prettier and tasteful in my opinion. I really dislike heavily iced cakes! I also decided to keep it simple as I am quite busy these days (bringing up baby and toddler at the same time is no joke).

DAIRY AND GLUTEN FREE CHOCOLATE BIRTHDAY CAKE

(for the cake)

  • 6 eggs
  • 300ml oil (I used olive oil)
  • 400g caster sugar
  • 300g ground almonds
  • 3tsp baking powder
  • 50g cocoa powder mixed with 125ml boiling water

(for the frosting)

  • 1 avocado
  • 85g dairy-free sunflower spread
  • 200g dairy-free chocolate, melted (do it carefully if doing in microwave)
  • 50g cocoa powder mixed with 125ml boiling water
  • 150g icing sugar, sifted (+100g extra for thicker frosting)

(for the decoration)

  • woodland themed gingerbread cookies
  • rosemary stalks

1. First bake a cake. Whisk the eggs with sugar and oil until you have custard like consistency. Add almonds, baking powder and cocoa powder liquid. Mix everything again to combine. Woodland themed chocolate birthday cake (dairy and gluten free version) recipe 2. Pour equal amount of cake mixture into two lined baking tins. Bake in 180C oven for 40-45min.Woodland themed chocolate birthday cake (dairy and gluten free version) recipe3. While waiting for the cake to bake, prep gingerbread cookies. You may be able to buy yours in store, but I needed dairy free ones at least so I ended up baking my own. I used this recipe and replaced butter with sunflower spread. Woodland themed chocolate birthday cake (dairy and gluten free version) recipe 4. Finally, time to make the frosting. Place all the ingredients (only 150g icing sugar at this stage) into electric mixer/processor and whizz. The mixture should turn into smooth frosting .Woodland themed chocolate birthday cake (dairy and gluten free version) recipe Spread half of the frosting in between the cake layers, top and sides.Woodland themed chocolate birthday cake (dairy and gluten free version) recipe Use pallet knife to smooth the frosting on the cake.Woodland themed chocolate birthday cake (dairy and gluten free version) recipe 5. To decorate add 100g more icing sugar into the remaining frosting to make it thicker. Pipe it on top to make a decorative texture. Top the cake with woodland themed cookies and rosemary stalks to represent trees/bushes. Woodland themed chocolate birthday cake (dairy and gluten free version) recipe Woodland themed chocolate birthday cake (dairy and gluten free version) recipeHope I inspired you ;-)

Rasa xoxo

0

Water colour and embroidery wall art idea

Embroidery and watercolour art DIY I love love love (and still falling in love further) with water colour! I did some watercolour last month and this month I decided to incorporate some embroidery in it. This is why I thought to try to paint on the fabric and let me tell you it totally works!!! It felt almost the same as painting on paper, if not easer. I think fabric soaks up more water, so the results can be even more dramatic for all those dreamy watercolour blurs… ahh. Will tell you more in the minute….

But first I would like to make a little confession. You see I am not 100% sure if this artwork I made goes where I intended to go over our bed (yes, it happens to me too when my vision don’t match with the results). Which makes me feel a little embarrassed that I did not think it through. I am now realising that the artwork over the bed should be more dramatic and definitely more geometric. When I was thinking what artwork I would like to put over our new refurbished headboard, I was imagining something round and thats when I thought of idea using an embroidery hook (and embroidery). Which works fine here, but my painting has to change. Will let you know what I come up with :-).

Embroidery and watercolour art DIY Although the artwork did not suit the interior of our room, I still liked it and I definitely enjoyed the process of making it! So I thought to share my experience of watercolour on fabric anyways.

To prepare I cut out some pieces of cotton fabric (I used old bed sheet) and stuck it onto large piece of paper. I used plain wallpaper roll and stuck few fabric pieces next to each other. That way I could practice and have few goes at it. I had a cup of water and paintbrushes lined up as you would normally when you use water colour paint. Embroidery and watercolour art DIY I started with the most common water colour technique. I brushed the whole fabric with water to achieve this classic blurry water colour look. Embroidery and watercolour art DIY I also tried watercolour with less water so I could paint in more detail. I loved that I could just add more water and make some parts more blurry then others.Embroidery and watercolour art DIY Embroidery and watercolour art DIY Once the painting dried I chose the colours for the embroidery. If you need more inspiration on embroidery stitches then you should definitely check out this tutorial.Embroidery and watercolour art DIY Embroidery and watercolour art DIY Embroidery and watercolour art DIY To tidy up your artwork simply stitch a round piece on the back so you can tuck in all the raw edges of the fabric. Embroidery and watercolour art DIY Embroidery and watercolour art DIYHope I inspired you ;-)

Rasa xoox

1

Pinterest challenge: apple and butternut squash soup

Apple and Butternut Squash soup recipe So the soup season is continuing here and I am trying to explore more and more flavours to stock up with (for the freezer). I find these soup portions very handy for lunches (super kid friendly too!!).

Apple and butternut squash seemed like a great match, was very eager to go and try it out as soon as I saw it on Pinterest. Made few changes, because I needed dairy free option as well as keeping it rich in flavour (I am talking about butter here). Hope you like it too as much as I did. Scroll down for the recipe ;-).Apple and Butternut Squash soup recipe APPLE AND BUTTERNUT SQUASH SOUP adopted from Foodess

serves 6 adults (you are welcome to double it up!)

  • 1 medium butternut squash, peeled and chopped
  • 1 large cooking apple, cored and chopped
  • 1tbsp fresh sage, or 1 tsp dried
  • olive oil for roasting and frying
  • 1 onion, diced
  • 1/2 tsp mixed spice
  • 1l chicken stock
  • double cream (optional)
  • salt and pepper to taste

1. Place butternut squash and apple into the baking tray, sprinkle with sage and drizzle with olive oil. Roast the veg for 25min.Apple and Butternut Squash soup recipe2. In large pot fry the onion for 5 min and add the mixed spice.Apple and Butternut Squash soup recipe 3. Add roasted veg (and fruit) together with chicken stock. Bring everything to boil and simmer for 20min.Apple and Butternut Squash soup recipe4. Puree soup using a blender. Stir in cream, if using, and return to a simmer (although it tastes totally wonderful without the cream as well). Season with salt and pepper. Apple and Butternut Squash soup recipeEnjoy!

Rasa xx

0

How we upholstered our bed

How we upholstered our bed You might be shocked to know that I have been planning this project for very very long time. It took me one whole year to choose the fabric and then three months to actually start the job after ordering the bits and bobs (including pretty pegs). The design changed millions of times (only joking), but thank goodness the choice of materials stayed the same. Interestingly, the project itself was quick and simple once I got it started.How we upholstered our bed So here is where it all started. I had this double bed (because it is IKEA so slightly bigger than standard double) since I bought my first house. When we moved to our current house, the bed needed to change. As you can imagine new building interior style no longer matched this plain looking bed. The bed of my dreams was out of my budget, so I did the next best thing and upholstered the one we had. How we upholstered our bed I am actually very glad we had to “renew” our bed. Look at all the corners, damaged by our cat :o. How we upholstered our bed The upholstery started with the bed base. I measured bed depth, length and width and then cut out 4X40cm wide strips (2X202cm long for the length and 2X142cm long for the width). I stitched them all together to make one long strip of fabric. How we upholstered our bedI applied this long strip of fabric all around the bed base.How we upholstered our bedI loooove my staple gun. Serious upholstery professionals would probably judge me for using it so much, but all I care about the convenience and the end of result. Never mind it is not considered a proper tool to attach the fabric to the furniture. In this case I used staple gun to secure the fabric on the bed base from inside as you can see here in the picture bellow. How we upholstered our bed How we upholstered our bed Next we turned the bed upside down so we could attach these pretty pegs. They were quite expensive, but it was worth it I think. Once the legs were on, I finished securing the base bed fabric at the bottom of the bed. How we upholstered our bed Next up is the headboard. I spend a lot of thought on how to upholster this! I liked all the curvy headboards and unfortunately I could not change the shape of it. Ikea headboards are made of honeycomb structure inside so it could not be cut in any way. The insides are hollow (well almost)! So I decided to add more interesting details by adding decorative nails (will speak about it more later).

So to begin with I used a spray glue to secure a piece of wadding onto the headboard where I wanted to be cushiony. How we upholstered our bedI added another layer of wadding and wrapped it around the headboard to make it look softer. I used the staple gun of course ;-).How we upholstered our bedFinally I used the fabric to wrap around the headboard(almost like a gift). Again, I secured the fabric at the back with more staples. How we upholstered our bed How we upholstered our bed As I mentioned before, I used these decorative nails to make the headboard pretty and “curvy”. I was risking here a bit, was not sure how the nails will hold as it is a hollow headboard (with honeycomb structure inside like I said). I ended up using staple gun to hold the fabric “dipped” where I liked and then applied strip of decorative nails on top. Why did I use a strip of nails rather than single nails? Because of the same issue (hollow headboard), did not want to hammer every single nail down in case it does not hold. Besides if one nail comes out at least the strip is going to be held by other nails. So far so good! Phew!How we upholstered our bed And here is the result, I am very very pleased :-).How we upholstered our bed How we upholstered our bed How we upholstered our bedHope you found my story inspirational ;-)

Rasa xoxo

2

Pinterest challenge: broccoli, cumin and yogurt soup

Broccoli, cumin and yogurt soup So the chill is on and I thought to better start the soup season (well… I have started it a while ago actually). Joni cooked this soup last year for Lukas dedication and I have been revisiting it ever since. Its my favourite soup at this moment! Whats not to like, its flavoursome (sorry to say it is better than stilton and broccoli soup), kids love it, packed with all the green veg and its freezable (lunches sorted in advance). It’s found on Pinterest but it is not challenging at all ;-).

BROCCOLI CUMIN AND YOGURT SOUP  adopted from Trois Fois Par Jour (thank goodness for Google Translator)

serves 12 adults or makes many many portions for kids lunches

  • 50g butter
  • 2 large onions, chopped
  • 2 large potatoes, sliced or cubed
  • 1-2 tsp cumin
  • 2 large handfulls spinach
  • 2 large broccoli heads, chopped
  • 5 garlic cloves, crushed and chopped
  • 2l vegetable stock
  • 2 tbsp maple syrup
  • salt and pepper to taste
  • 200ml yogurt

1. In the largest pot you can find, melt the butter and fry the onions for 3 to 4 minutes. Add potato and cumin, continue cooking for about 3 minutes.Broccoli, cumin and yogurt soup2. Add broccoli, spinach and garlic then mix well so that broccoli is soaked in spices and spinach has wilted. Cover everything with vegetable stock, then add maple syrup and simmer for 25 to 30 minutes.

Broccoli, cumin and yogurt soup3. Blend the soup and stir in the yogurt. Season and serve it while still hot! Broccoli, cumin and yogurt soupEnjoy xx

Rasa :)

0

Forest in patterns

Forest in patterns I have been so busy this year that I forgot when was the last time I have been creative. So no wonder when we went on holiday and walked around in the forest in Lithuania I was amazed once again how beautiful nature is! After taking detailed pictures of fern, moss, wild blueberry bushes and pine bark all I wanted is to create, create and create. So I did what I do best (I believe) is to make patters inspired by woodland of course!Forest in patterns First I used watercolour to make these backgrounds. It was hard to begin with (It’s been sooo long since I touched any paint), but the more relaxed I got I was able to produce decent textures. I used to dislike water colour when I was a kid as it is difficult to control the colour merging with each other accidentally.  But I fell in love with it when I went to art college as I realised you need to treat water colour completely differently. You need to be free with it. It is very therapeutic if you try ;-).Forest in patterns Once the water colour dried I cut it into shapes and mix and matched with the other backgrounds I created earlier.Forest in patterns Forest in patterns fern pattern I love how this bark pattern turned out, its not exactly like a bark, but it is very pretty to me :-).wood bark pattern Forest in patternsHope this post got you inspired, you are welcome to use these patterns I created anywhere you like (I am thinking to use it for my desktop if you ask me)

Rasa xoxo

0

How I saved my yarn stash from a moth infestation

How I saved my yarn stash from a moth infestationSo as you may know for me this year was all about organising. Because there are lots to tidy up after doing (still doing) so much DIY! Few months ago I started working on my craft supplies and sadly I came across a horrifying moth infestation which made things a little bit more complicated… arghhhh!  Not only did I have to untangle my very messy yarn I also had to get rid of these unwanted creatures… yuck! This is how my yarn basket looked like when I discovered the sad reality…How I saved my yarn stash from a moth infestationFirst I googled if it was really moths I was dealing with. Pictures online matched with mine which confirmed that it was indeed what I feared most.  I realised I had to just get on with it, quick! So I read and I read about different methods how to kill the moths, larvae and it’s eggs (this article was my favourite), but the only one that seemed practical to me was to freeze all my yarn. Hmm… that will need lot’s of freezer space! So I did it in batches which caused some problems with the yarn that was waiting in the queue. You see these evil moths are very quick to breed! I started with eggs and one moth and after just a day it turned into more eggs, moth and larvae…arghhhh!!! I ended up freeing up as much space as I can (that meant using up some of the frozen food) so I can stuff leftover yarn into freezer. Luckily we were going on holidays so I could just leave it there and forget it for a bit and deal with it later… phew!How I saved my yarn stash from a moth infestationHow I saved my yarn stash from a moth infestationOnce I was back from holiday (all relaxed and all) I went back to sorting out my precious yarn. I cleaned the basket where I store my yarn with vinegar. I ordered some moth cedar and distributed it around the house. I organised the yarn and I think is so far so good. I think I won!  How I saved my yarn stash from a moth infestationHow I saved my yarn stash from a moth infestationHope you found my story comforting if your yarn got infested (to be honest I just hope it does not happen to you).

Rasa xoxo

2

How I camped with a baby and toddler

How I camped with a baby and toddler (pics from Lithuanian camp trip) When I was little I had the most amazing memories from camping trips and sleeping in the tent is not the only one. I loved swimming in the lake when raining (because I am soaked in water anyways), exploring nature, finding wild strawberries and most importantly going for a walk at night in the woods and finding fireflies on the grass (magical!!!). Things are little different here in UK of course (mostly because of camping restrictions sadly), but I think there is still plenty of fun to be had. This is why I set out to camp with my boys, toddler and a baby (eeek!!!).

First we tried Lithuanian camping in the campsite near the a lake which turned out to be more equipped and modern to compare to my days camping. However I though that it will do for our first time experience with kids. My mum recommended not to do it but I held strong and did it anyways (now she wants to join me next year after I told it was actually pretty good). Luckily I had Joni to help me out so it turned out to be less stressful. We only did one night just in case I do not sleep at night and I become like a zombie next day. We were also very lucky with the company. Camping with my mum’s church felt like being part of community where everybody help each other by lending necessities to each other or keeping an eye on your children (which meant that me and Joni could go for some canoeing alone). The only negative part of camping with kids was that Lukas refused to sleep till around 11pm. In the pic bellow he is in his pj still playing outside! But I have been told by other campers that the kids usually go back to sleeping better after few days of camping. So I guess it is worth to camp for a week at least so you can properly enjoy it. Unlike us, we had to settle in the camp one day and pack up the next. How I camped with a baby and toddler (pics from Lithuanian camp trip) How I camped with a baby and toddler (pics from Lithuanian camp trip) How I camped with a baby and toddler (pics from Lithuanian camp trip) Few days ago we tried camping here in England as well. Mostly because we wanted to get out as we had building works happening in the house again (now we are working on new kitchen, yey!). So Joni was not with us to give a hand. Luckily the company was great and I received plenty of help. The sleep was ok, I managed to put both boys to bed at the same time (very impressed with myself and only one hour late). I had a relaxing evening, I only wished I picked up a book with me to read. However lots of chocolate consumed and some wine too! Overall it was a great trip. Lukas enjoyed exploring (as well as sitting in the mud) and running/screaming together with other kids. I think once Tomas grow older, camping will be even better fun!   How I camped with a baby and toddler (pics from Lithuanian camp trip) How I camped with a baby and toddler (pics from Lithuanian camp trip) When it comes to advice, I would say same applies as holidaying with a baby alone. Most importantly is to keep your expectations low and the rest of the advice you can read here, how to holiday with a baby.How I camped with a baby and toddler (pics from Lithuanian camp trip)Hope you enjoying the last days of summer!!

Rasa xoxo

0

Cheesecake for breakfast

Fit-for-breakfast cheesecake recipe When in Lithuania we were eating loads. No wonder I gained so much weight! Never the less I am missing Lithuanian food, especially the cheesecake (technically it’s a curd cake) that is fit to eat for breakfast. I was so eager to try and make one myself that as soon as I got home I tried making it using more available alternative, Ricotta (so it is a cheesecake after all!). I would personally say that I could not notice any difference between two. I love that it is not too sugary and can be dressed up as you like. I love it with cream fraiche and pureed strawberries. Next time I shall try with honey me thinks ;-).

FIT-FOR-BREAKFAST CHEESECAKE

makes a very small cheesecake that makes up breakfast for two (feel free to double up)

  • 2tbsp semolina
  • 4tbsp full fat milk
  • 50g butter
  • 2tbsp sugar
  • 2 eggs, separated
  • 250g ricotta cheese

1. soak semolina in milk for at least 30min or overnight in the fridge.

2. Cream butter with sugar than gradually add egg yolks, soaked semolina, ricotta cheese and mix everything to combine well. Carefully fold in whisked egg whites.Fit-for-breakfast cheesecake recipe3. Spoon the cake mixture into lined spring form. Bake in 180C preheated oven for 25-30min.Fit-for-breakfast cheesecake recipe4. Meanwhile prep your toppings. I pureed strawberries with a little sugar (you need it somewhere sometimes).Fit-for-breakfast cheesecake recipe5. Serve it warm or cold the next day. Fit-for-breakfast cheesecake recipe Fit-for-breakfast cheesecake recipeEnjoy!

Rasa xoxo

0