Top

Author Archive | Rasa Pelham

Handmade pasta (without pasta machine)

How to make handmade pasta at home without machine
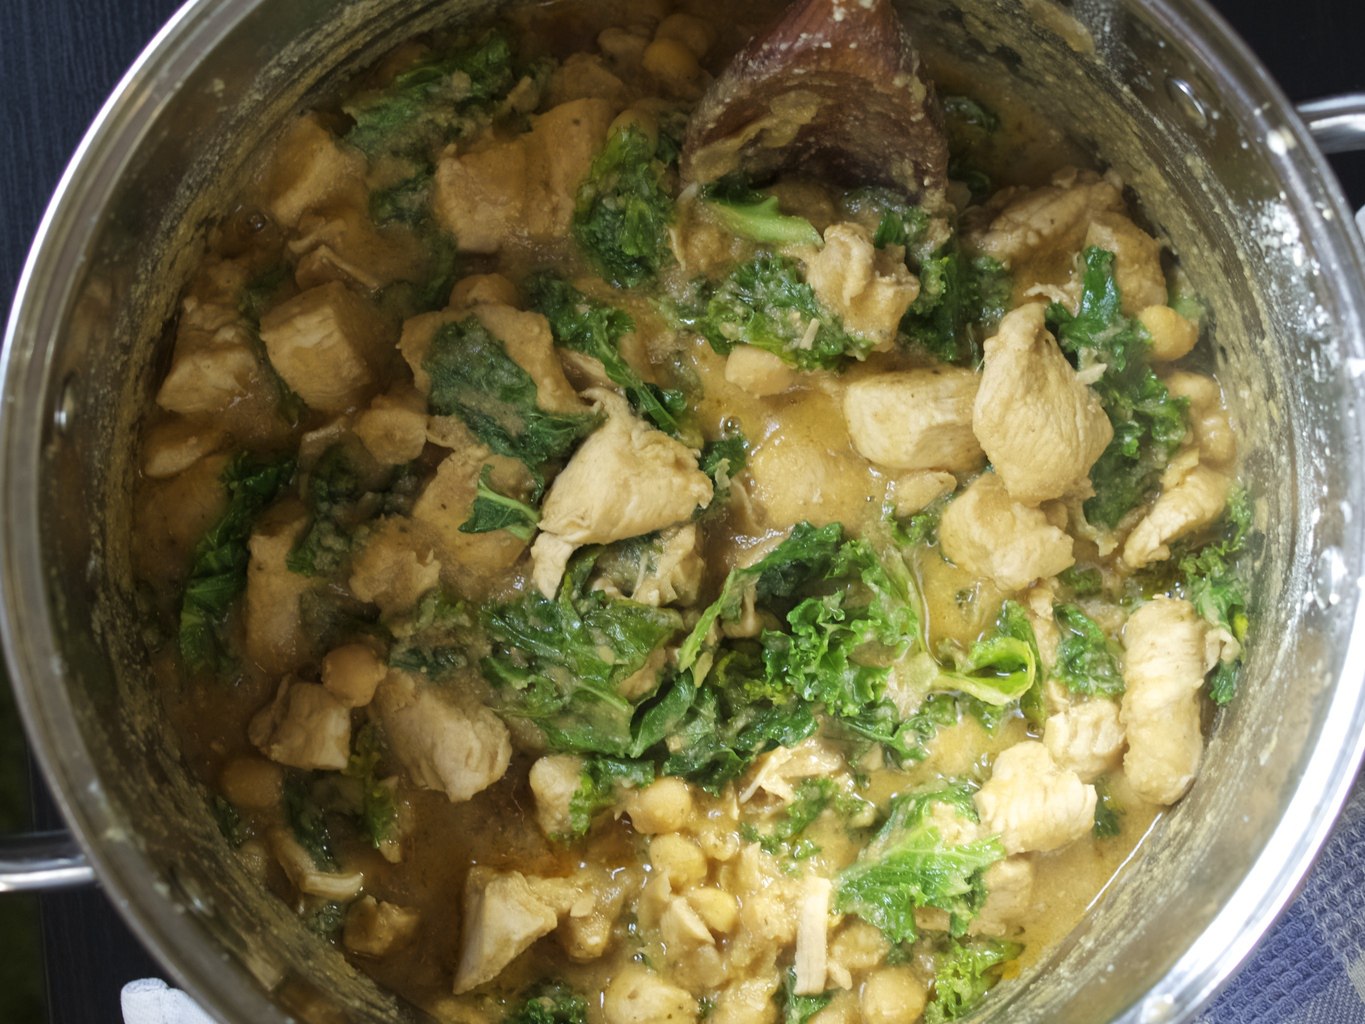
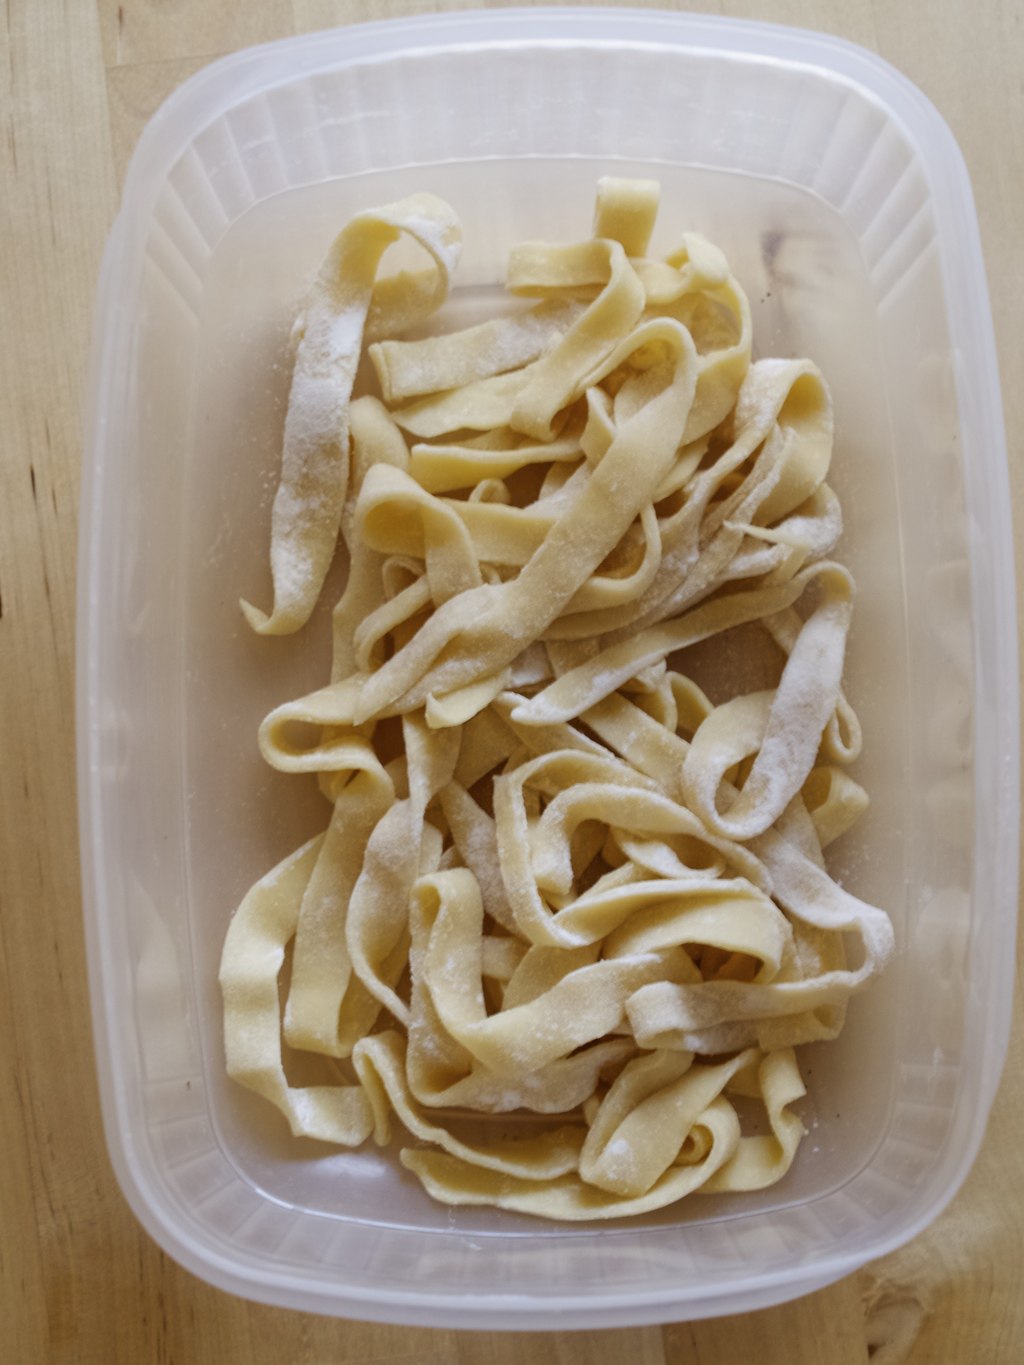
I will admit that making your own pasta is a lot of hassle! It takes long and it is soooo messy (with all that flour). But I still like making it as things made from scratch are the way of life for me. Like most of types of pasta such as gnocchi or skryliai (Lithuanian pasta) you can make lots of it over weekend and then freeze it for a quick lunch or dinner later in the week. I have not tried doing this with this pasta, but I believe it should work. Will let you know if I try that out! My favourite pasta is with cabbage (this one is with kale actually, but it is as good!). I know, I know this is a weird preference, but after trying out this recipe I just keep coming back to it!!!  How to make handmade pasta at home without machineI have learned making Italian fresh egg pasta while in Tuscany. Me and Joni took some cooking lessons while on honeymoon. Luckily Joni had some experience with pasta machine before, while I just stood and watched. “Dust the pasta machine with a lot of flour to avoid the dough sticking to it” apparently thats the most important tip! However today I will show you how I made pasta by hand. Same tip applies here as well (lot’s of dusting with flour indeed)!Making pasta in Italy
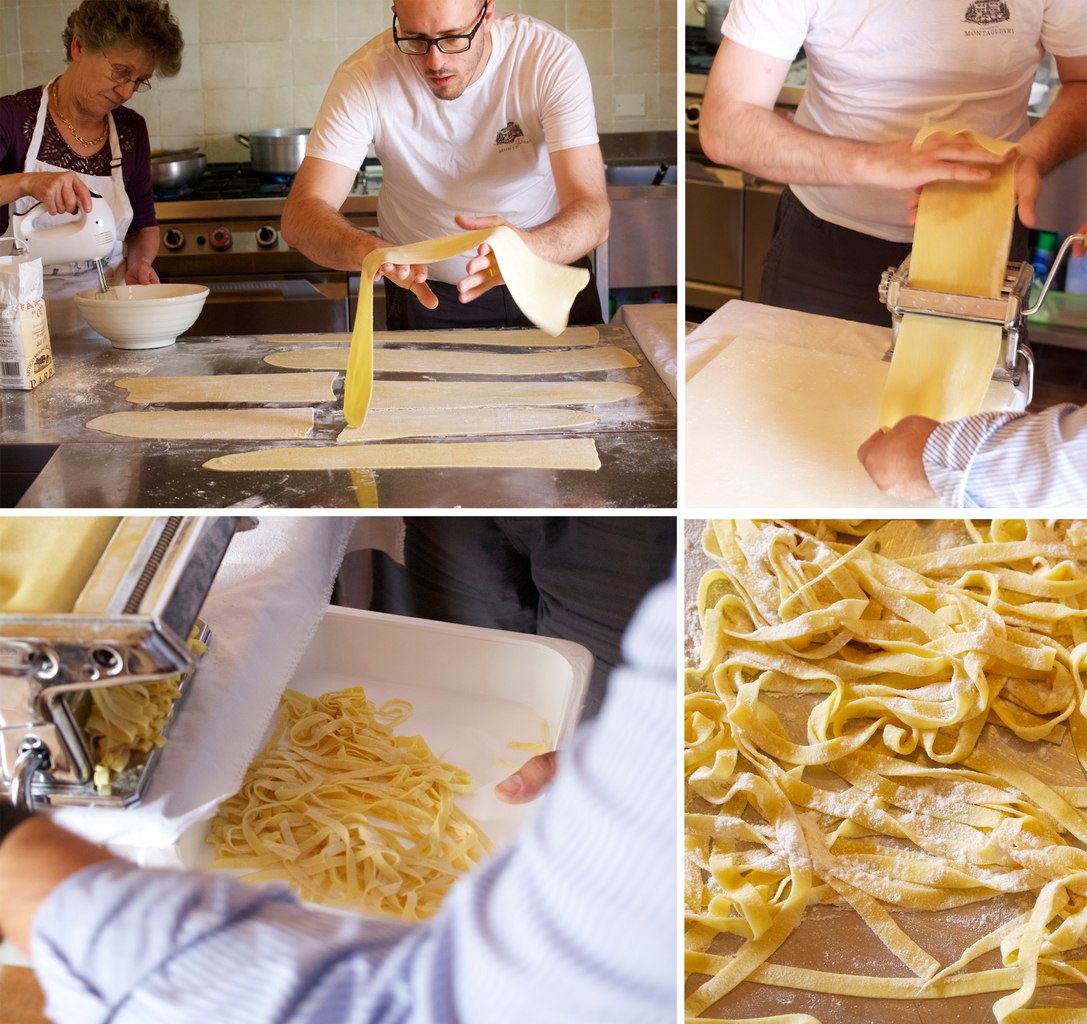
BASIC HANDMADE PASTA serves one, multiply as needed!

  • 1 medium egg
  • 95g ’00’ flour

1. In the food processor or by hand combine egg with flour. The dough will be crumbly at this stage.How to make handmade pasta at home without machine
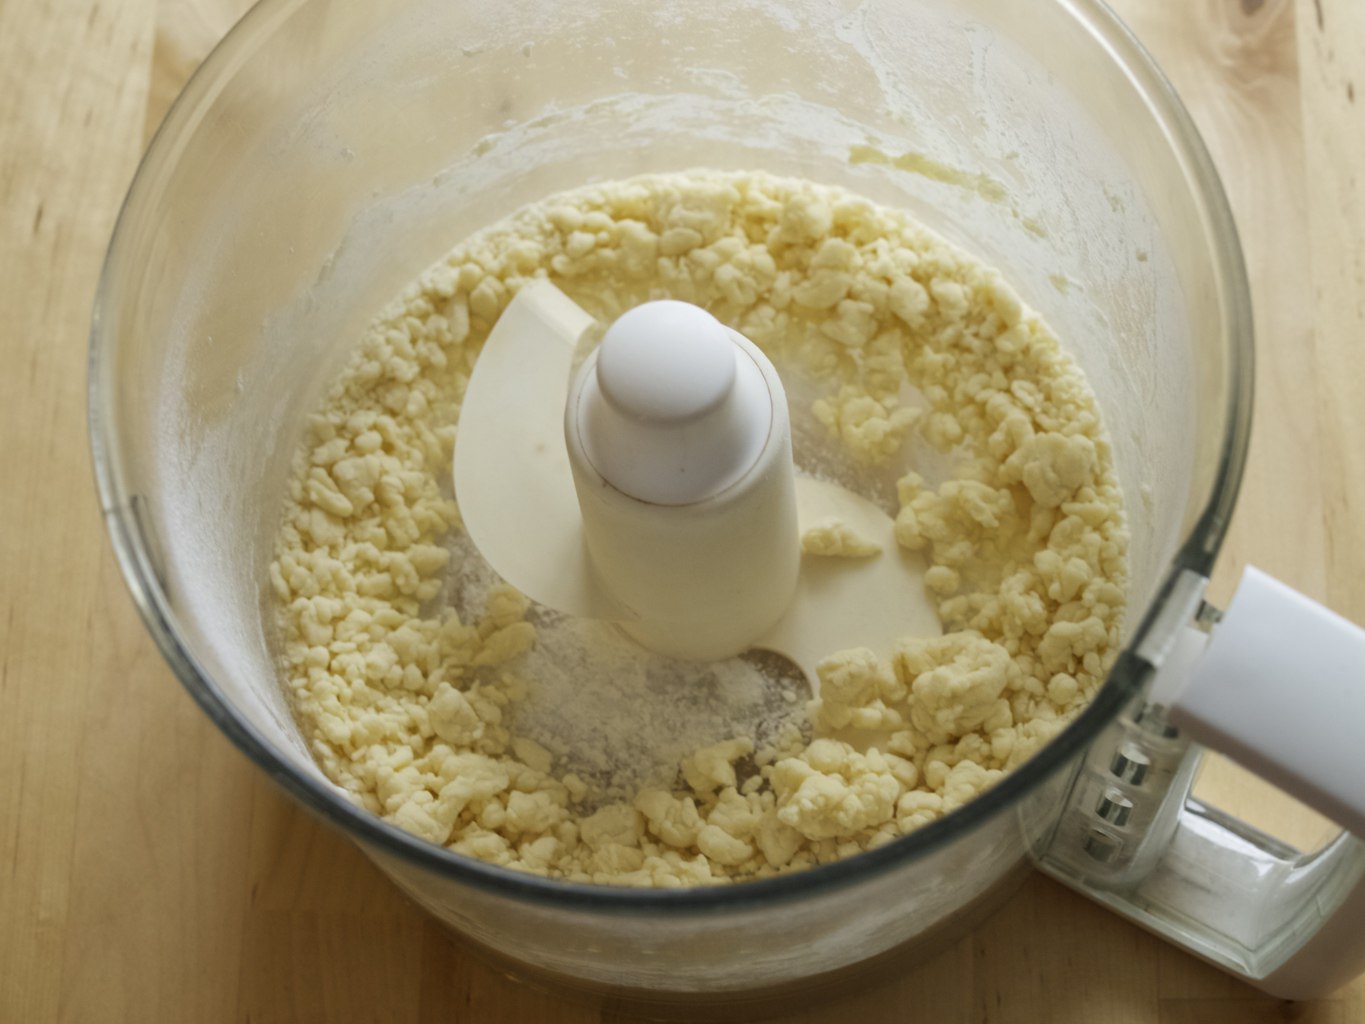
2. Kneed the dough into the ball and wrap it into cling film. Let it rest for 1 hour.How to make handmade pasta at home without machine
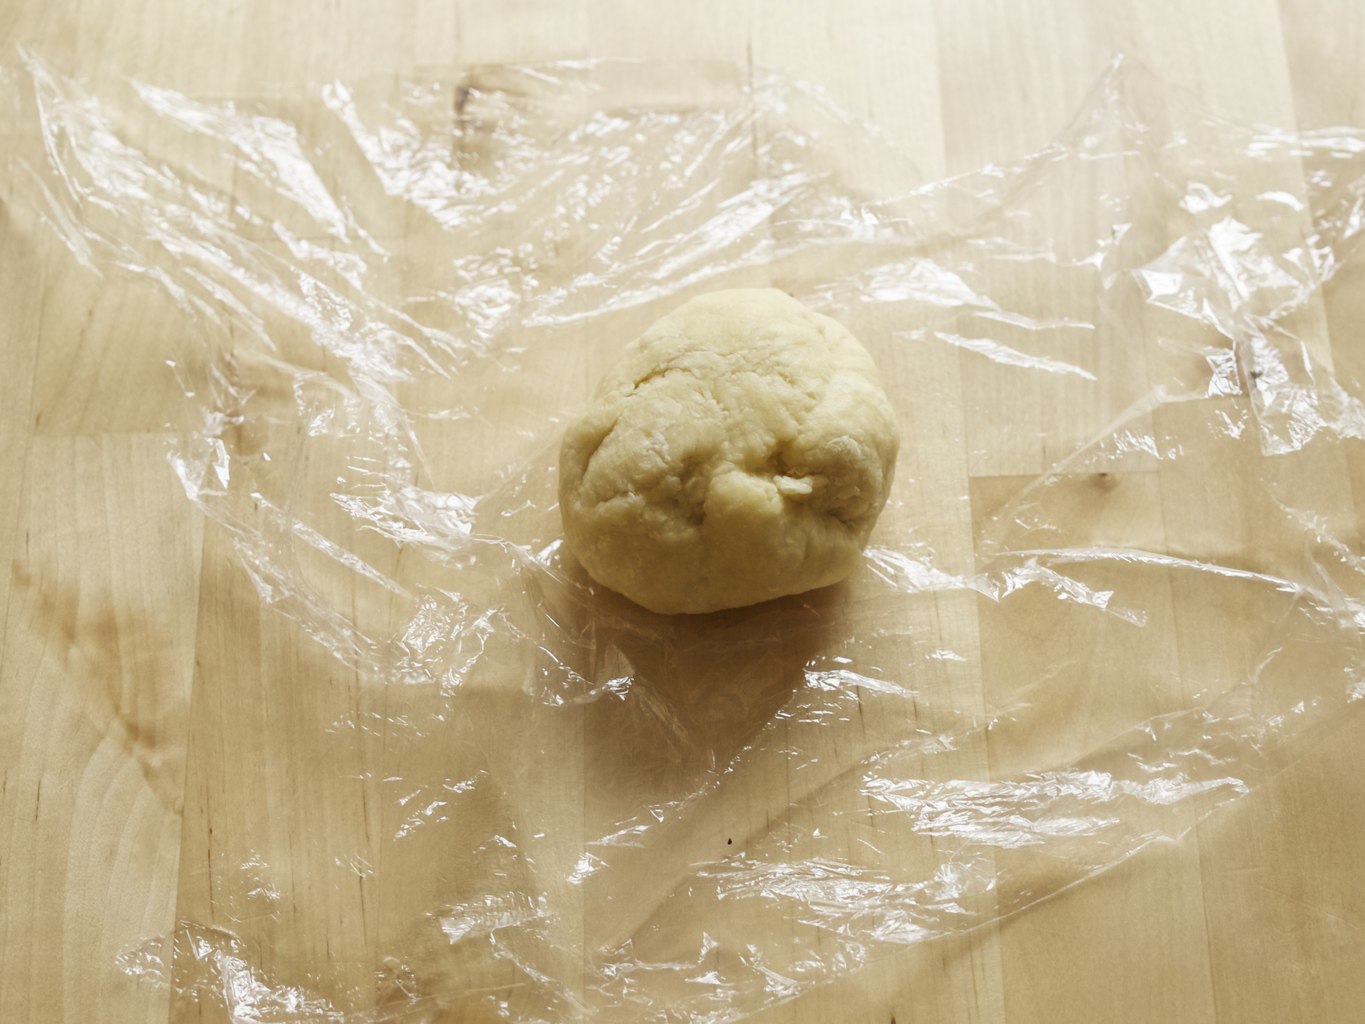
3. Flatten the dough ball with the rolling pin on the well floured surface (flour the rolling pin as well). Roll and lift the dough as many times as it needs. The dough should become as flat as a piece of fabric. How to make handmade pasta at home without machine
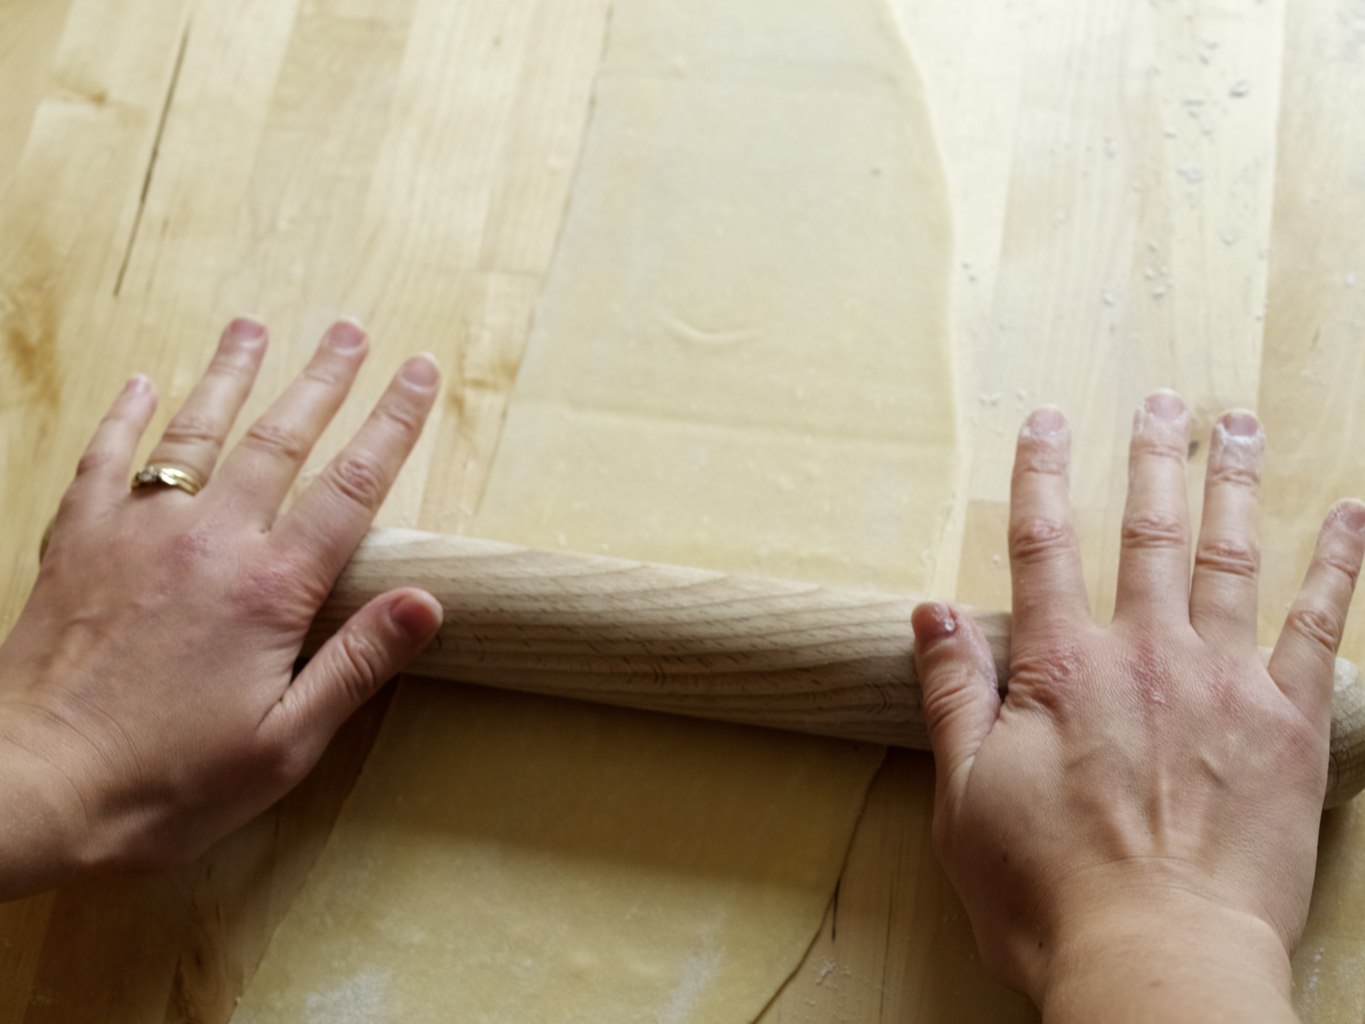
4. Roll the dough into the roll. If I did this stage again, I would have rolled it into looser roll. Would have been easer to unroll it later on!

How to make handmade pasta at home without machine5. Slice the roll into the 7mm slices. How to make handmade pasta at home without machine
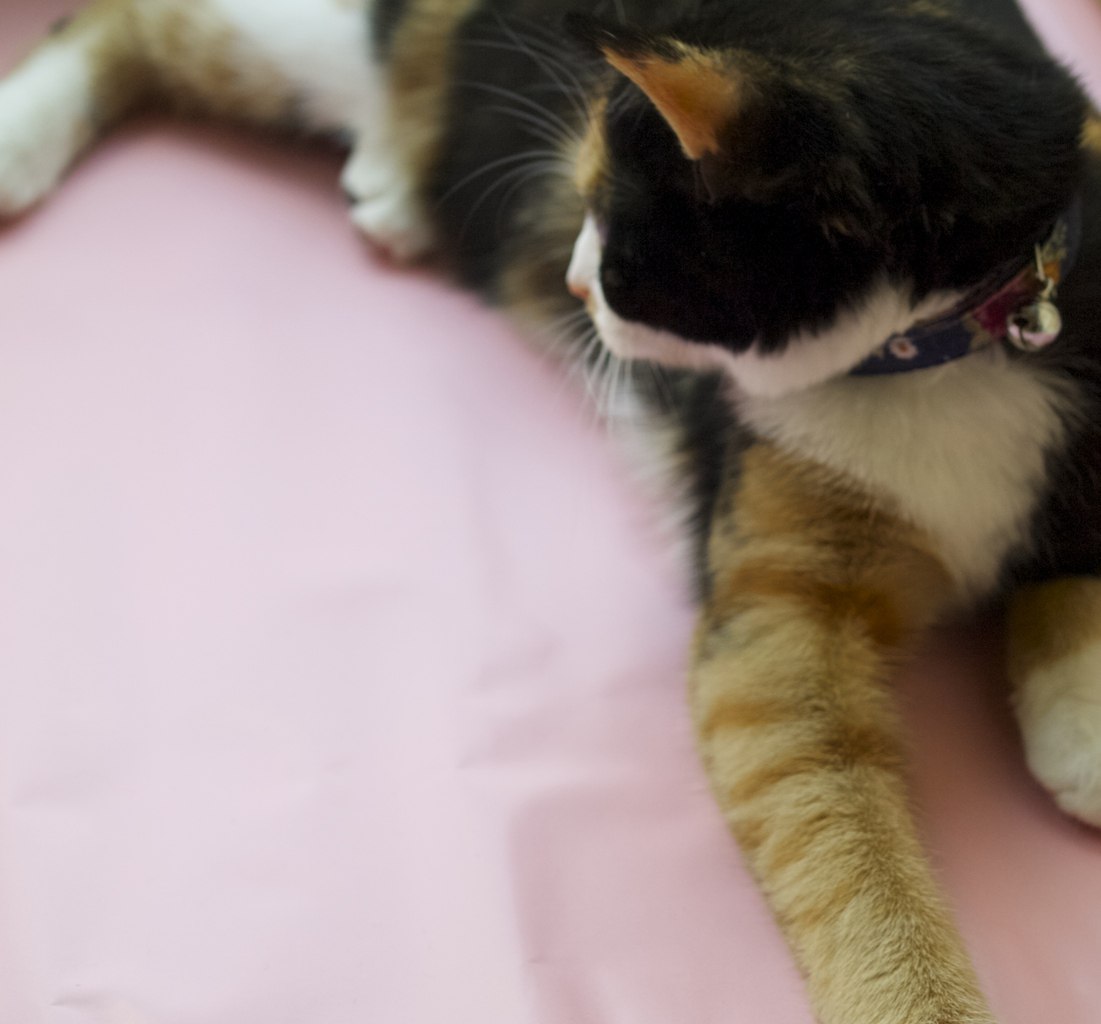
This has been observed by Leia of course :-)How to make handmade pasta at home without machine
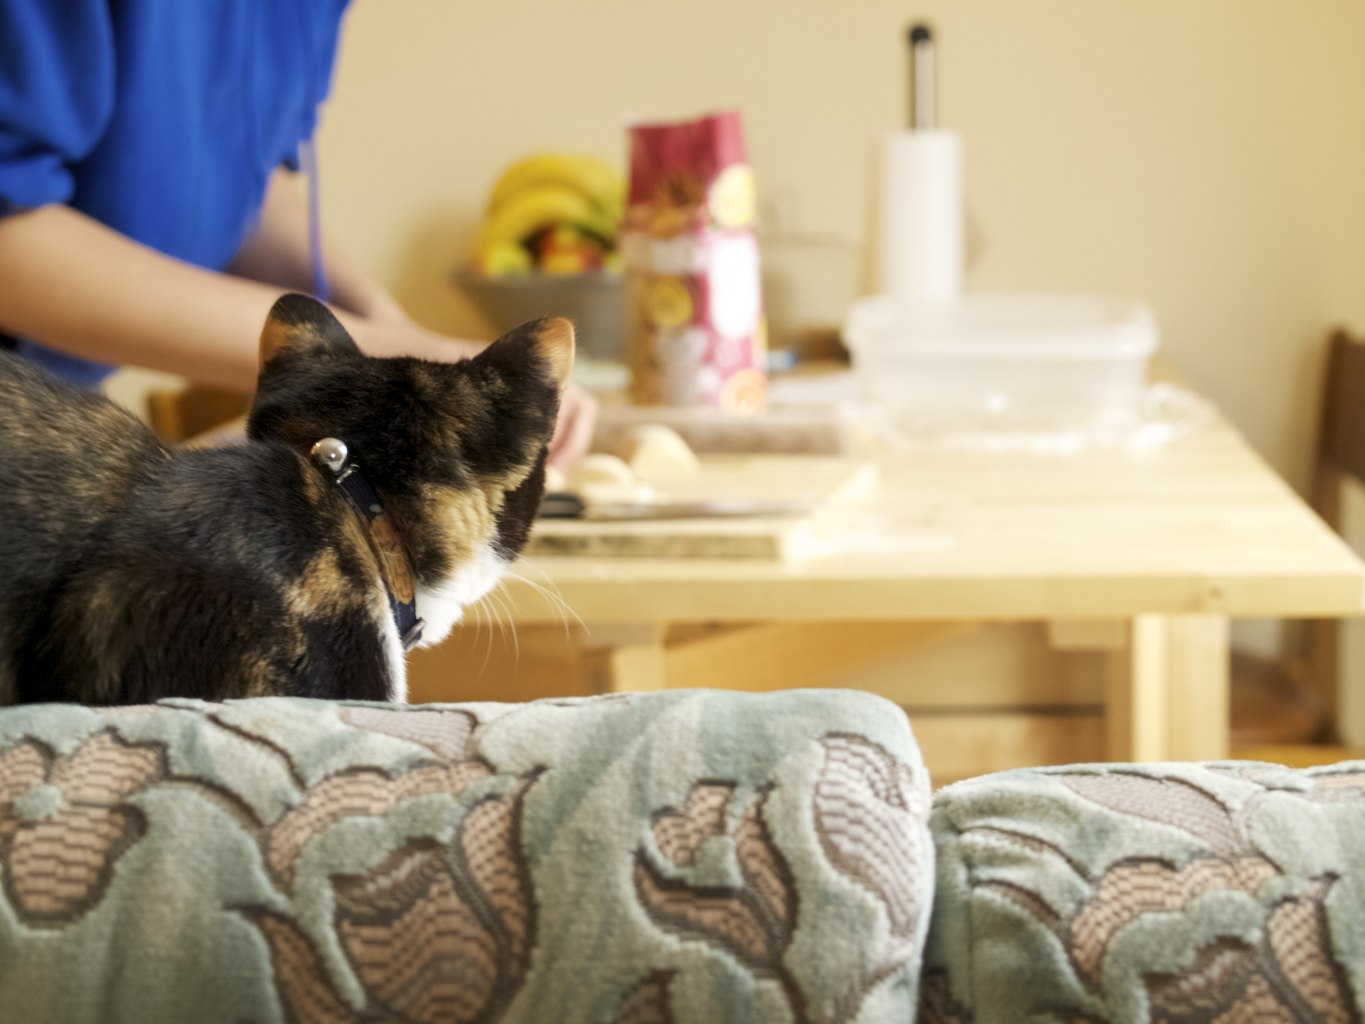
6. Unroll the pasta while keeping it well floured. And that’s how it is done!How to make handmade pasta at home without machine
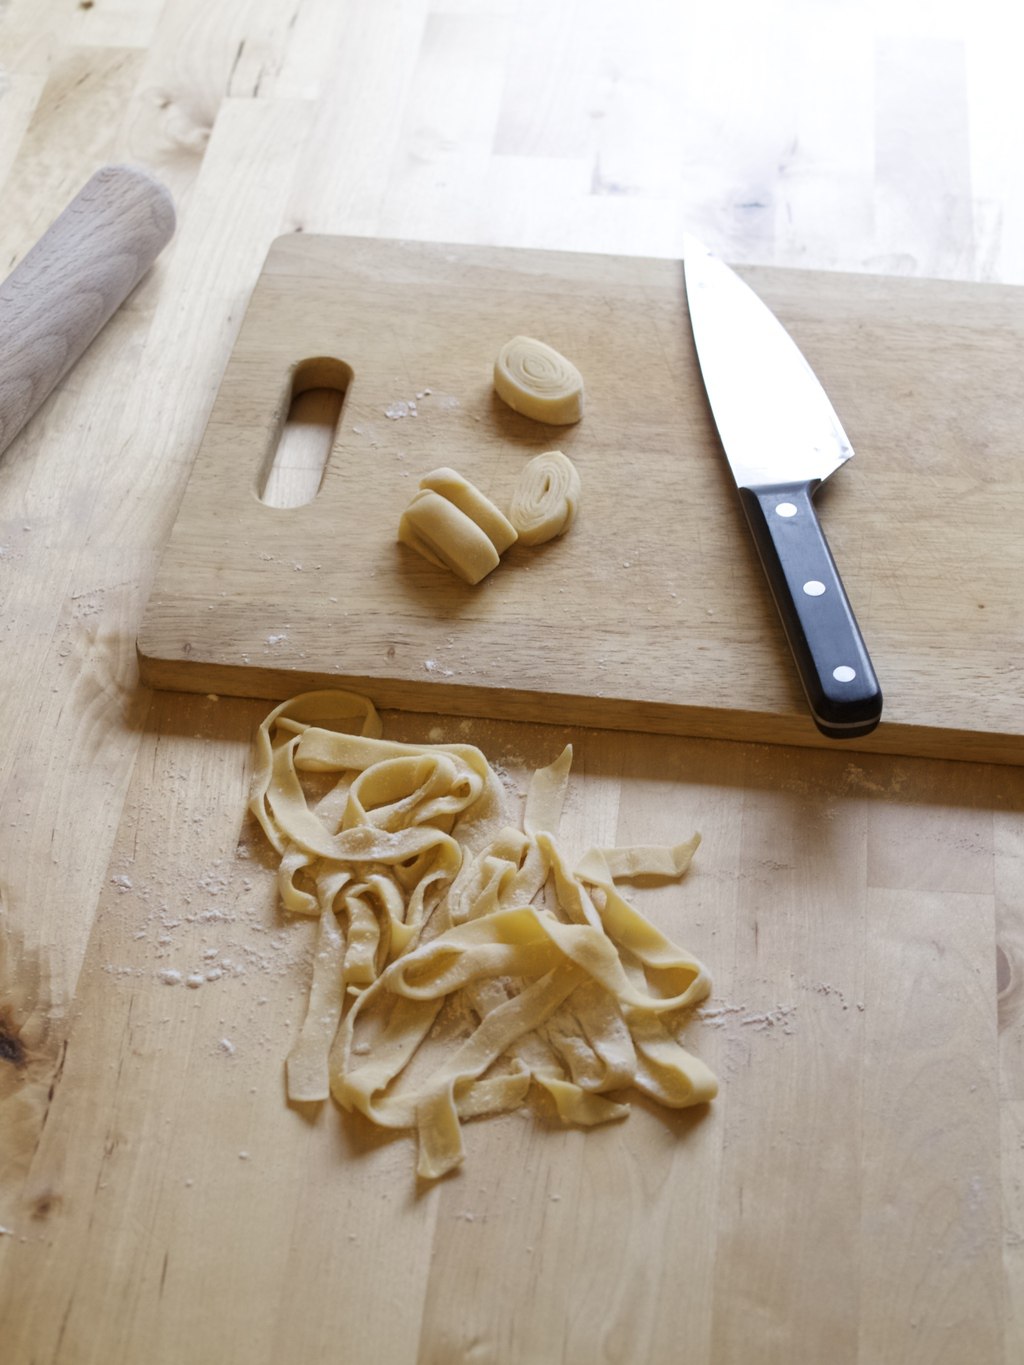
Cook pasta for 4 min in boiling water (longer from frozen) and serve it with your favourite sauce.How to make handmade pasta at home without machineEnjoy!

Rasa xoxo

0

Day out in London

day out in London


I am so thankful that I get opportunities to visit London from time to time! I miss London even more when I no longer live here. For this reason I think it’s good to live close to London, but maybe not in London itself.

So yesterday me and Joni visited my dear friends and also had a date in the Regents Park. I love finding a piece of nature in the centre of the city! Overall, very good day! Sorry for such bad quality phone pics (had no camera on me, but could not help but share this with you!).

day out in London

I hope you had a lovely weekend too!!

Rasa xoxo

0

Pinterest challenge: mini berry clafoutis

Mini berry clafoutis I wanted to try this berry clafoutis recipe for a while now. After counting how many calories it would have (for my diet, you know) I realised it’s not so bad. Only 148.60 calories for one portion (one 10th of the whole bake)! I have decided to go ahead and bake half of the recipe in little tartlet baking tins. The only problem was that only one mini clafoutis survived. The other ones literally leaked out while baking. You see, my tartlet tins have loose bottoms for easy removal. However the clafoutis mix is so thin that it managed to leak out through the small gaps. I am glad I placed the tartlet tins in a baking dish, so my oven did not get messed up by this!!!Mini berry clafoutis MINI BERRY CLAFOUTIS adopted from Julia’s Album

(makes 5 mini clafoutis)

  • 2 small eggs
  • 150ml single cream
  • 1tsp vanilla extract
  • 25g flour
  • 0.25 tsp baking powder
  • 65g icing sugar
  • butter for greasing
  • caster sugar for dusting
  • 170g mixed berries (I used frozen ones)

1. whisk eggs with cream and vanilla extract until the mixture becomes light and fluffy. Julia says: “Make sure this step is done properly so that in the end your dessert does not come out smelling too much like eggs”. Very true! This desert have a tendency to become ‘eggy’ 

2. Sift flour, baking powder and icing sugar into the egg mixture and mix to combine well.Mini berry clafoutis The batter will be very liquid, ‘thin’ as I mentioned earlier. Mini berry clafoutis 3. Grease mini tartlets (or mini ramekins) with butter (or spray oil) and dust them with caster sugar. Don’t make my mistake here, loose bottom tins are not suitable to make this desert!Mini berry clafoutis 4. Divide the berries between 5 tins.Mini berry clafoutis 5. pour the batter into the tins. Bake the clafoutis in 180C oven for 30min.Mini berry clafoutis Oooops! My mistake… The batter leaked out!! :(Mini berry clafoutis At least one survived! :)Mini berry clafoutis I enjoyed every bit of it… hmmmMini berry clafoutis Hopefully you have learned from my mistakes ;-)

Rasa

0

Learn how to bind books!

Learn to bind booksEvery time I want to start a journal or a diary I can’t find one that I like in the shops. Can you relate? They either are too expensive or the styles available don’t quite fit mine. So that is why I have decided to make my own book. There are so many pros to making your own hand bound book. There are unfortunately also cons as it takes sooooo long (it took me a day to make two books)! But I guess the pros weighs it down so this is totally worth it. Here are the pros:

1. Create your own cover design

2. Insert the paper type you like

3. Have fun making it

4. It will be much much cheaper!

The choice is yours ;-)Learn to bind booksI made two books completely from scratch. I planned it to be painted over with an oily sort of fabric paint. However the cover surface did not come out as I expected. I hoped for a neat looking cover, but it turned out to be a bit messy. I would still use this technique in the future, but maybe not in such big amounts. For now however, I do prefer my second book that I covered with embroidered fabric.Learn to bind booksReady to make your own hand bound book? Click HERE for the step by step instructions.Learn to bind books Learn to bind booksHappy book binding ;-)

Rasa xoxo

0

Healthier chicken and chips

Healthier chicken and chips recipe Since I made a mental decision to eat healthier I have started to look for the ways to make the food I crave healthier. One of them is using substitutes (worked best with the cakes) or changing the way the food is prepared. For this instance I thought baking is better that frying! No brainer right? Anyway, if you are the fast food chain fan, that this is for you ;-). Healthier chicken and chips recipeBAKED CHICKEN AND CHIPS serves two

  • 2 skinless chicken breasts, cut into strips
  • 1 cup crumbed tortilla chips (basic ones are the best!)
  • 1 egg whisked with some seasoning
  • 2 large potatoes, cut into chips (I like to leave the skin on)
  • 2 tbsp olive oil
  • salt and pepper to taste
  • lettuce and sliced tomato to serve (optional, but highly recommended)

Healthier chicken and chips recipe1. Start with the potato chips as that takes the longest. Toss the chips together with oil and salt&pepper in the large bowl. Lay them evenly (in single layer) on the baking tray. Bake them for about 45ming in 180C preheated oven turning now and then.Healthier chicken and chips recipe2. Meanwhile prepare the chicken. Dip the chicken strips into egg mixture and then into the crumbs. Lay the well coated chicken strips onto the baking tray. Bake the chicken for 30min.Healthier chicken and chips recipeHealthier chicken and chips recipeThen wait…. or prepare the side salad. Simply arrange sliced tomato and lettuce on the plate.Healthier chicken and chips recipeEnjoy!

Rasa xoxo


0

Guilt free (almost) chocolate orange cake

Guilt Free Chocolate Orange Cake recipeSince now I am on my diet (second week already!!!) I have decided to treat myself to a healthier cake. I am quite new to calorie counting (ok, ok, not so new… its been a year), so to my understanding if I remove as much as fat as possible and make it gluten free then it would become much much lighter! Oh boy I was wrong! A slice of cake (1/8 of the cake) has 430 calories in it!!!! Turns out that sugar is another major enemy, even in it’s most natural forms. And how can you make a cake with no sugar anyways? Anyhow I made this cake with no added fats.  I added whole oranges to make up for the moisture you would otherwise get from the fat and used ground almonds to replace the flour (as you can for a gluten free cake). Joni rated 7 out 10 for this cake, so I guess it does not taste too bad if you are actually avoiding gluten or dairy specifically.Guilt Free Chocolate Orange Cake recipeGUILT FREE CHOCOLATE ORANGE CAKE makes 8 slices

  • 2 oranges, pealed
  • 6 eggs
  • 250g golden caster sugar
  • 250g ground almonds
  • 50g cocoa powder
  • 1tsp baking powder

Guilt Free Chocolate Orange Cake recipe1. boil whole oranges for about 1 hour or so until soft. Drain, then puree them with the hand processor.Guilt Free Chocolate Orange Cake recipe2. Whisk the eggs with the sugar until pale and creamy.

3. Add all of the rest of the ingredients into the egg mixture, including the orange puree. Combine well.

4. Pour the contents into a 20cm round spring baking tin.

5. Bake in 150C for 1hour and half.Guilt Free Chocolate Orange Cake recipeIf you like you can serve it with a dollop of creme fraiche, this is if you don’t mind dairy of course… or added fat ;-). Guilt Free Chocolate Orange Cake recipeEnjoy!

Rasa xoxo

1

Make your own custom crocheted and cross stitched laptop cover

Crocheted and cross stitched laptop cover, DIY instructions incudedIt’s been almost a year since my old laptop got stolen (never mind, I am fully recovered now). Although I was very lucky to get a new one as a (last) christmas gift, the old laptop cover did not quite fit my new laptop. I like the type of laptop covers that are not a bag by itself, but the slip on ones that can fit in a handbag of your choice. So you can imagine, I have been planning to make a new laptop cover for quite a while! Up until now I have been traveling with the laptop in a plastic bag (not so classy) or a backpack (thanks to my new mum for it!). OLYMPUS DIGITAL CAMERAI don’t exactly remember the time when I came up with the idea to cross stitch on the crocheted laptop cover, but I did love all the ideas of cross stitch going anywhere random such as wall, fences and so on (thanks to Pinterest for the inspiration!). A crocheted surface makes a perfect canvas for cross stitch! I sourced different kind of yarns for this project, mainly because I wanted to use up some of my scrap yarn stash, but also because I like this rustic type of look that it created. Anyway… ready to make one of your own?OLYMPUS DIGITAL CAMERAHere you can access the full DIY instructions. I hope you will enjoy it as much as I did! You can of course pick a different cross stitch design for your laptop cover to make it custom. I personally picked the rose design on the black background because it reminds me of the Russian scarfs that my grandma wears. OLYMPUS DIGITAL CAMERAOLYMPUS DIGITAL CAMERAI hope this project helps your laptop to stay organised within your handbag ;-)

Rasa x

0

Pinterest challenge: green chickpea & chicken coconut curry

Green chickpea & chicken coconut curryI picked this recipe from The Crepes Of Wrath because I was yearning for something warm last weekend (really chilli here in Bedford!!!). It did came out great! We loved every bit of it and had some for lunch as well! I used kale leaves to substitute the swiss chard (did not have any in store) and made it a little bit creamer by substituting coconut milk with creamed coconut. Read on for my version of this recipe.Green chickpea & chicken coconut curryGREEN CHICKPEA & CHICKEN COCONUT CURRY adopted from The Crapes Of Wrath

  • 2 tablespoons coconut oil
  • 6 chicken thighs, cut into bite-sized pieces
  • 1 onion, thinly sliced
  • 3 tbsp green curry paste
  • 1tbsp chilli paste (should be more, but ooops… I guess I chickened out!)
  • salt to taste
  • ½ teaspoon ground ginger
  • 100g creamed coconut, grated and dissolved in warm water to make up 400ml
  • 2 cups water
  • 1 400g can chickpeas, rinsed and drained
  • 1 small bunch kale leaves, cleaned, trimmed and thinly sliced

Green chickpea & chicken coconut curry1. Heat the coconut oil in a large, heavy bottomed pot. Add in the cubed chicken and cook over medium heat until almost fully cooked, about 6-7 minutes.

2. Add in chopped onion and continue to cook until softened, about another 5-6 minutes.

3. Add in the curry paste, chilli paste, kosher salt, ginger, creamed coconut, and 1 cup of water. Stir to combine, then bring to a boil.

4. Add in the additional cup of water. Bring back up to a boil, then add in the drained and rinsed chickpeas and simmer for 20 minutes.

5. After simmering, add in the trimmed and sliced kale leaves. Simmer for an additional 10-15 minutes. Taste and adjust seasonings as desired.

Green chickpea & chicken coconut curry

We had it with poppadoms, but we thought plain basmati rice would go absolutely great!

Enjoy!!!

Rasa ;-)


0

Renew your clothes: Insert lace into the neckline

simple lace neckline inserts DIYMy challenge this month is to organise my wardrobe. It is too full and there are plenty of things I no longer wear. So my first step was to see if I could alter some of the garments to something I like. This week I picked some plain tops and matched them with lace inserts. I made a black crochet collar last year, but I never found anything to wear it with, so I thought I would use it as an insert for the top. I salvaged the lime lace insert from an old blouse which had ripped so many times that I could no longer repair it. At that time I thought I would at least save the lace as I planned to use it somewhere else (that was three years ago). So I finally did use it, and I am loving my new top!

So here is how I did it. For this quick alteration you will need a plain top, a lace insert, scissors, matching thread and needle (or sewing machine if you don’t want to be hand stitching it).Things you will need to make a lace insert1. First you need to pin down the lace on to the garment where you want it (make sure you try it on to make sure it sits nicely). Stitch the lace insert on the outside edge (not inside edge). I hand stitched because I love doing it this was, but you are welcome to use sewing machine for this step!How to attach a lace insert2. Once the lace has been stitched on, you can cut away the neck leaving 1-2cm space from the stitched edge. Lace insert step by step instructions3. Finally finish off the edge. If you have been using sewing machine you could use a zigzag stitch (or overlocker if you have the overlocking machine). Since I have been hand stitching I have used button-hole stitch to finish off. How to install lace insert Lace insert in the garment DIYLace insert in the garment DIYI hope you found this simple alteration technique useful.

Have a lovely weekend!

Rasa :-)

1

Mexican Breakfast

Mexican BreakfastI got this breakfast idea from my old flatmate long time ago.  She was making lunch for her friend and I just watched (she was amazing cook, so I used to copy her a lot). The recipe have evolved since and I eat this not only for breakfast! I made this for lunch last weekend and Joni have confirmed that this is his favourite “breakfast” so far. I hope you will enjoy it too!Mexican BreakfastMEXICAN BREAKFAST

  • 1 tbsp coconut oil (I try to use only coconut oil for frying as I believe it’s healthier)
  • 1 onion, chopped
  • 3 garlic cloves, crushed and finely chopped
  • 3 slices of bacon
  • 1tsp chilli powder (can be fresh too)
  • 1 red or yellow pepper
  • 1 tin of chopped tomato
  • 1 tin of kidney beans
  • salt and pepper to taste
  • 5 eggs
  • sour cream
  • 5 tortillas

1. Gently fry onions with garlic and bacon until golden and then add chilli powder

2. Add pepper, chopped tomatoes and kidney beans and cook for further 10 min or so. Season to taste.

Mexican breakfast3. Transfer the contents into oven proof dish (unless you fried everything in the skillet like me) and crack in five eggs on top.

4. Bake in preheated 180C oven for 5-10min. Warm the tortillas in the oven as well for 1-2mins.Mexican breakfastServe everything together with sour cream!Mexican BreakfastEnjoy!

Rasa xx

0

Things I look forward to in October

Autumn colours in the boxOctober may be uneventful, but there are plenty of things to look forward to… such as autumn itself! :)

1. AUTUMN is a beautiful season. Look at all the colours! And it’s not only orange, brown and yellow…. I love the combinations of pink, forest green, orange and cream. And lets not forget purple! I have been so inspired by it all that I have been painting last night like mad (and that does not happen very often). I love creating new patterns. New autumn pattern bellow is here for you to nick, use it to wrap a gift or put in on the wall ;-). Friendly Nettle autumn pattern2. KNITTING JUMPERS is almost my part time job. I took on three (yes, three) jumper knitting projects so far. But that’s quite enjoyable as I can do it while watching a movie or chatting with a friend! Here is my first cardigan in progress, can you guess what part it is? Yes, it’s a sleeve! Many more parts to go :-).Progress on my knitted cardigan3. DRINKING HOT DRINKS kind of goes with knitting. It’s important to keep yourself warm and all snuggled up while doing some crafty work! My favourite hot drink at the moment is spiced coffee (although I haven’t had any this year yet, but will make some soon!). It’s one of those drinks that is satisfying and not too fattening (minding my figure right now!). Click here for the recipe ;-).Spiced CoffeeHappy October!!!

Rasa xoxo


0

Pinterest challenge: ginger soy sessame fish in a pouch

ginger soy sesame fish in pouch by Table For TwoThese couple of months I have been desperate to start eating healthily. I have been tempted too many times by cakes and wine! My common excuse is to find something to celebrate. Every time I let myself eat pretty much everything I want I hear myself saying ‘Never mind, I will start new a diet next monday’. Why monday? Because I guess thats a start to a new week and there is likely to be less temptations to nibble on something naughty (you know, nothing is really happening on mondays).

Anyways, I came across this fish in a pouch recipe through Pinterest on Table for Two website and my first thought was ‘Great! A quick and healthy dinner idea!’. I have made fish in pouch before, but I liked the combination of ingredients in this recipe. The only thing I changed is that I sprinkled the fish with coriander instead of spring onion. Overall, good recipe, but don’t expect to indulge in this!

GINGER SOY SESSAME FISH IN A POUCH adopted from Table for Two

  • 2 fresh white fish filets (cod, halibut, your favourite)
  • 4 tsp. sesame oil, divided
  • 2 tbsp. soy sauce
  • 20 thin slices of ginger root
  • 1 tbsp chopped coriander
  • salt and pepper

1. Place each fish fillet on separate sheet of foil. Leave enough of space around it so it can be wrapped.

2. Drizzle 2 tsp. of sesame oil on top and gently rub it all over the fish with your fingertips then flip the filet over to coat the other side with the excess sesame oil that has dripped onto the foil. Drizzle 1 tbsp. of soy sauce on top then add 10 slices of ginger, half the chopped coriander and season with salt and pepper.ginger soy sesame fish in pouch by Table For Two3. Bring up the two long sides of the aluminum foil to a tent then together, roll them down while bringing the two other sides up so the liquid doesn’t drip out. You should get a nice little pouch/packet. Repeat with the other filet.

4. Place both foil packets on a baking sheet and bake fish in preheated 180C oven for 10-15 minutes or until fish is cooked through and flaky.

5. Carefully unwrap the fish from the package. There is HOT liquid that may come out from either side so be careful!ginger soy sesame fish in pouch by Table For Two6. Serve hot over a bed of rice, veggies, or a salad.ginger soy sesame fish in pouch by Table For TwoHappy, hopefully not so boring, Monday!

Rasa xoxo

1

Apple & berry crumble and ice cream dessert

Perfect autumn warm&hot dessert: apple&berry crumble and ice cream This year (especially in the summer) I was really addicted to ice cream! I have made few of my own such as Banoffee ice-cream sandwiches, super easy fresh strawberry ice cream and my favourite goat’s milk and roasted rhubarb ice-cream. While in Italy we both (me & Joni) tried many gelato flavours, on some occasions 5 flavours in one go! Have you ever tried red wine tasting ice-cream? Our newest finding is Kelly’s Clotted Cream & Honeycomb ice cream (actually Joni found it first), you should definitely try it ;-).

Although Ice cream may not be the most  suitable dessert for this weather, we have been enjoying this warm crumble and ice cream dessert. You see, I quite like a contrast in food and this combination is definitely contrasting. If you are like me you would understand what I mean!Perfect autumn warm&hot dessert: apple&berry crumble and ice creamAPPLE & BERRY CRUMBLE AND ICE CREAM DESSERT serves 2 generously

  • 2  granny smith apples
  • 1 handful of mixed berries (can be frozen ones)
  • 100g  brown sugar
  • 50 ground almonds
  • 20g oats
  • 50g flour
  • 60g coconut oil
  • 60g caster sugar
  • 2 tbsp poppy seeds (optional)
  • good quality vanilla ice cream (with vanilla seeds if you can find it)

1. First, make an apple and berry filling. Peel, core and chop apples into the saucepan together with berries and brown sugar. Cook it for 5 min until sugar dissolves and the mixture becomes jam-like. Spread the filling into the baking dish. Perfect autumn warm&hot dessert: apple&berry crumble and ice cream2. Mix coconut and caster sugar together with almonds, flour and oat. Combine everything well by working it with hands. If using, mix in poppyseed as well (it just makes everything look prettier!).

3. Cover the fruit filling with the crumble. I like the filling overflowing, therefore I make very little amount of topping. If that’s not the case for you, then double the amount of ingredients for the crumble.  Perfect autumn warm&hot dessert: apple&berry crumble and ice cream4. Bake the apple & berry crumble in 180C oven for 30min until the top is lightly golden. Serve it in the bowls with at least 3 scoops of vanilla ice cream on top of each.Perfect autumn warm&hot dessert: apple&berry crumble and ice creamEnjoy your weekend ;-)

Rasa xoxo

0

How to transform a stuffed toy into a door stop

How to transform a stuffed toy into a door stopper, step-by-step DIY guideSince we have moved to our new home we have been missing doors kept open everywhere. The issue is that it’s not easy to keep a heavy door open. The door stopper seems like the only solution. If only we had one door to stop! We have at least three doors that we would like to keep open and we have been stopping it with random stuff such as old laptops (the ones that no longer work, but Joni is keeping them for further experiments). Anyhow, only yesterday I thought of the idea to easily make a door stopper from a stuffed toy. I am thinking to make more door stoppers in the future of course (well… at least one more), but for now this seemed like a great idea! I used this stuffed bird toy that I made last year as a pillow initially, but then it became a shelve deco instead. The only other material/tools I needed to make this transformation is a seam ripper, matching tread & sewing needle and ceramic baking beans (general gravel stones, rice or beans can be used as well, although if you are using grains you probably would need it in bigger quantities). How to transform a stuffed toy into a door stopper, step-by-step DIY guideTransforming a stuffed toy into a door stopper is easy. All you need to do is open a seam at the bottom of the toy by using a seam ripper(1.), remove some of the stuffing (not all as you need some to keep a soft shape)(2.) and fill it with the heavy filling such as ceramic baking beans (3.). Don’t forget to stitch the seam back to how it was ;-) (4.).How to transform a stuffed toy into a door stopper, step-by-step DIY guideIt’s important to remember that you choose a stuffed toy that have a good/wide bottom base. This bird only managed to keep the lighter door open. This is because it has a very slim base with only one seam at the bottom.  In this case I would add more weight by inserting more of ceramic bean filling. I am sure you can play around with the different types of heavy fillings to make it work for you ;-). How to transform a stuffed toy into a door stopper, step-by-step DIY guideDoor stopper works the best when it is placed at the edge of the door. It also depends on what surface you are placing it on. It worked really well on the carpet, whilst on the tiles or wood floor the door stopper might slide. How to transform a stuffed toy into a door stopper, step-by-step DIY guideHope you found this helpful ;-)

Rasa xoxo

0

Joni’s green (not red) chilli jam

Green chilli jam recipe Joni is a big fan of chilli jam (now i’ve tried it and have become a fan as well!). He had a batch of red chilli jam that he finished a long time ago and he was enthusiastic (more like constantly reminding me) that we get some chillies so he could make a new batch (the previous batch was lovingly made by his mum) . I eventually got green chillies for our house warming party as I was making some Enchiladas. Luckily there were plenty leftover due to generous deals at Bedford market!

So we both agreed that green chillies are perfectly fine to make not so red chilli jam. We did hope however it would be bright green in colour the way red chilli jam is brightly red. However it turned out amber, I guess this is because we used darker cider vinegar.  We tried it with some enchiladas and loved the taste. This is how I got converted to be a chilli jam fan!Green chilli jam recipeJONI’S GREEN CHILLI JAM based on Nigella’s red chilli jam recipe

Joni made this last weekend. It took him a few hours to deseed and chop all those chillies. If you want to try this I really recommend you use gloves.  Even though these were not the hottest variety of chilli’s, it took about 12 hours for the burning effect to wear off. So make sure you wear some gloves to protect yourself from misery while making this very chilli jam (read Joni’s warnings and notes at the end of this recipe).

  • 150g green chilli peppers (deseeded and roughly chopped)
  • 150g yellow peppers (cored, deseeded and roughly chopped)
  • 1kg jam sugar (jam sugar has pectin which is needed to set the jam)
  • 600ml cider vinegar

1. Put the chillies and peppers into food processor and pulse until they are finely chopped.Green chilli jam recipe2. Dissolve the sugar in the vinegar in the sauce pan over a low heat without stirring.

3. Scrape the chilli-pepper mixture out of the bowl and add to the pan. Boil everything for 10 minutes.

4. Take the pan off the heat and allow it cool. The liquid will become more syrupy, then from syrup to viscous and from viscous to jelly-like as it cools.

5. To sterilise the jars heat them in preheated 100C oven for about 15 min. Pour the chilli jam into the jars and seal them tightly.

Joni’s notes:

De-seeding the peppers is rather straightforward.  Insert your knife on the top next to the stalk and cut around to remove.  Pull it out and then halve the pepper. Discard the stalk and the seeds from inside.  Trim back the seed structure to the inner wall of the pepper and then roughly chop the pepper flesh into segments ready to go into the food processor.

De-seeding the chilli’s is simple in practice but warrants caution.  Even relatively low Scoville scale chilli’s have capsaicin oil in them.  The more chilli’s you chop the more oil will be deposited on your hands and chopping board and this can be very nasty to deal with.  If you are not wearing gloves you will suffer some excruciating time until you can get the oil off.  Olive oil is supposed to help dissolve some of the oil so it can be washed off with soap.  I didn’t find this very effective.   I de-seeded the chilli’s by chopping off the stalk and then halving the chilli lengthwise.  This allowed me to scrape the seeds and seed structure from the inside of the chilli.  I then roughly chopped the remaining flesh ready for the food processor.

I’m sure you could play around with the relative proportions of peppers and chilli’s as well as choosing different types to alter the flavours.  It strikes me as very simple to do and could give you jam of strikingly different colours, texture’s, flavour, & all important chilli heat.

I dissolved the sugar in the cider vinegar as Nigella’s recipe required.  I have an electric hob so once it reaches a heat it can often overheat.  Heating up the sugar and adding the blended chilli and pepper mixture was easy but i think i overheated the sugar and some of it caramelised which i think led to the amber colouring rather than the jam taking it’s coloration from the chilli.  If you have a gas ring and better temperature control you may get a better result.  Do let us know how you get on.Green chilli jam recipeEnjoy!

Rasa + Joni

5